
Last spring, my best friend called me in a panic. Her sister’s baby shower was in three weeks, and she wanted to give something handmade. Something special. Something that would make everyone at the party gasp a little when the gift wrap came off.
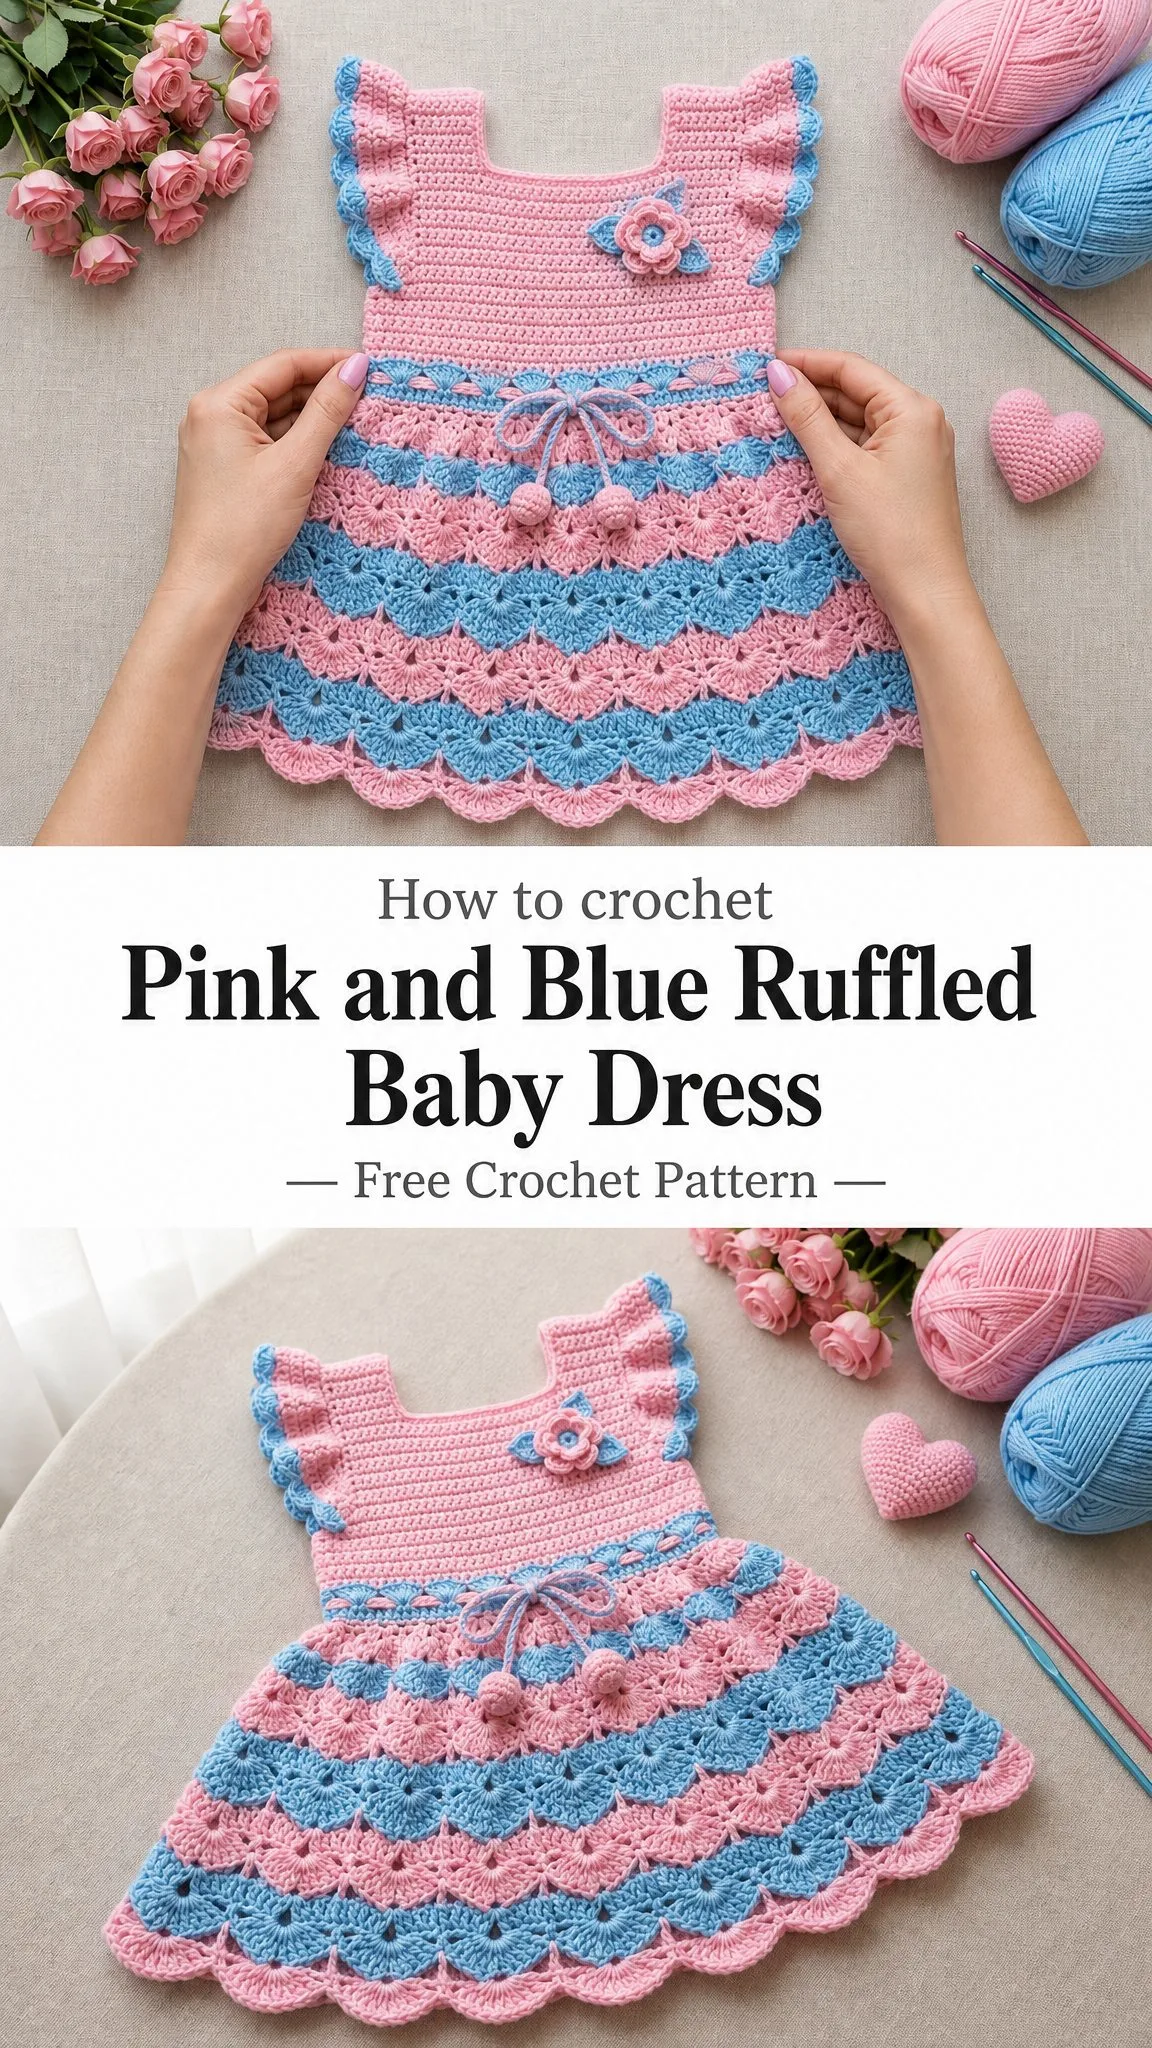
I pulled out my hooks that night and started sketching. What emerged was this dress, with its candy-colored stripes and fluttery sleeves and that gorgeous shell stitch skirt that swishes when a baby crawls. My friend cried when she saw it. The mom-to-be cried harder.
Now I’m sharing this pattern with you because every baby deserves something this sweet, and every crocheter deserves a project this satisfying to make.
About This Baby Dress Crochet Pattern
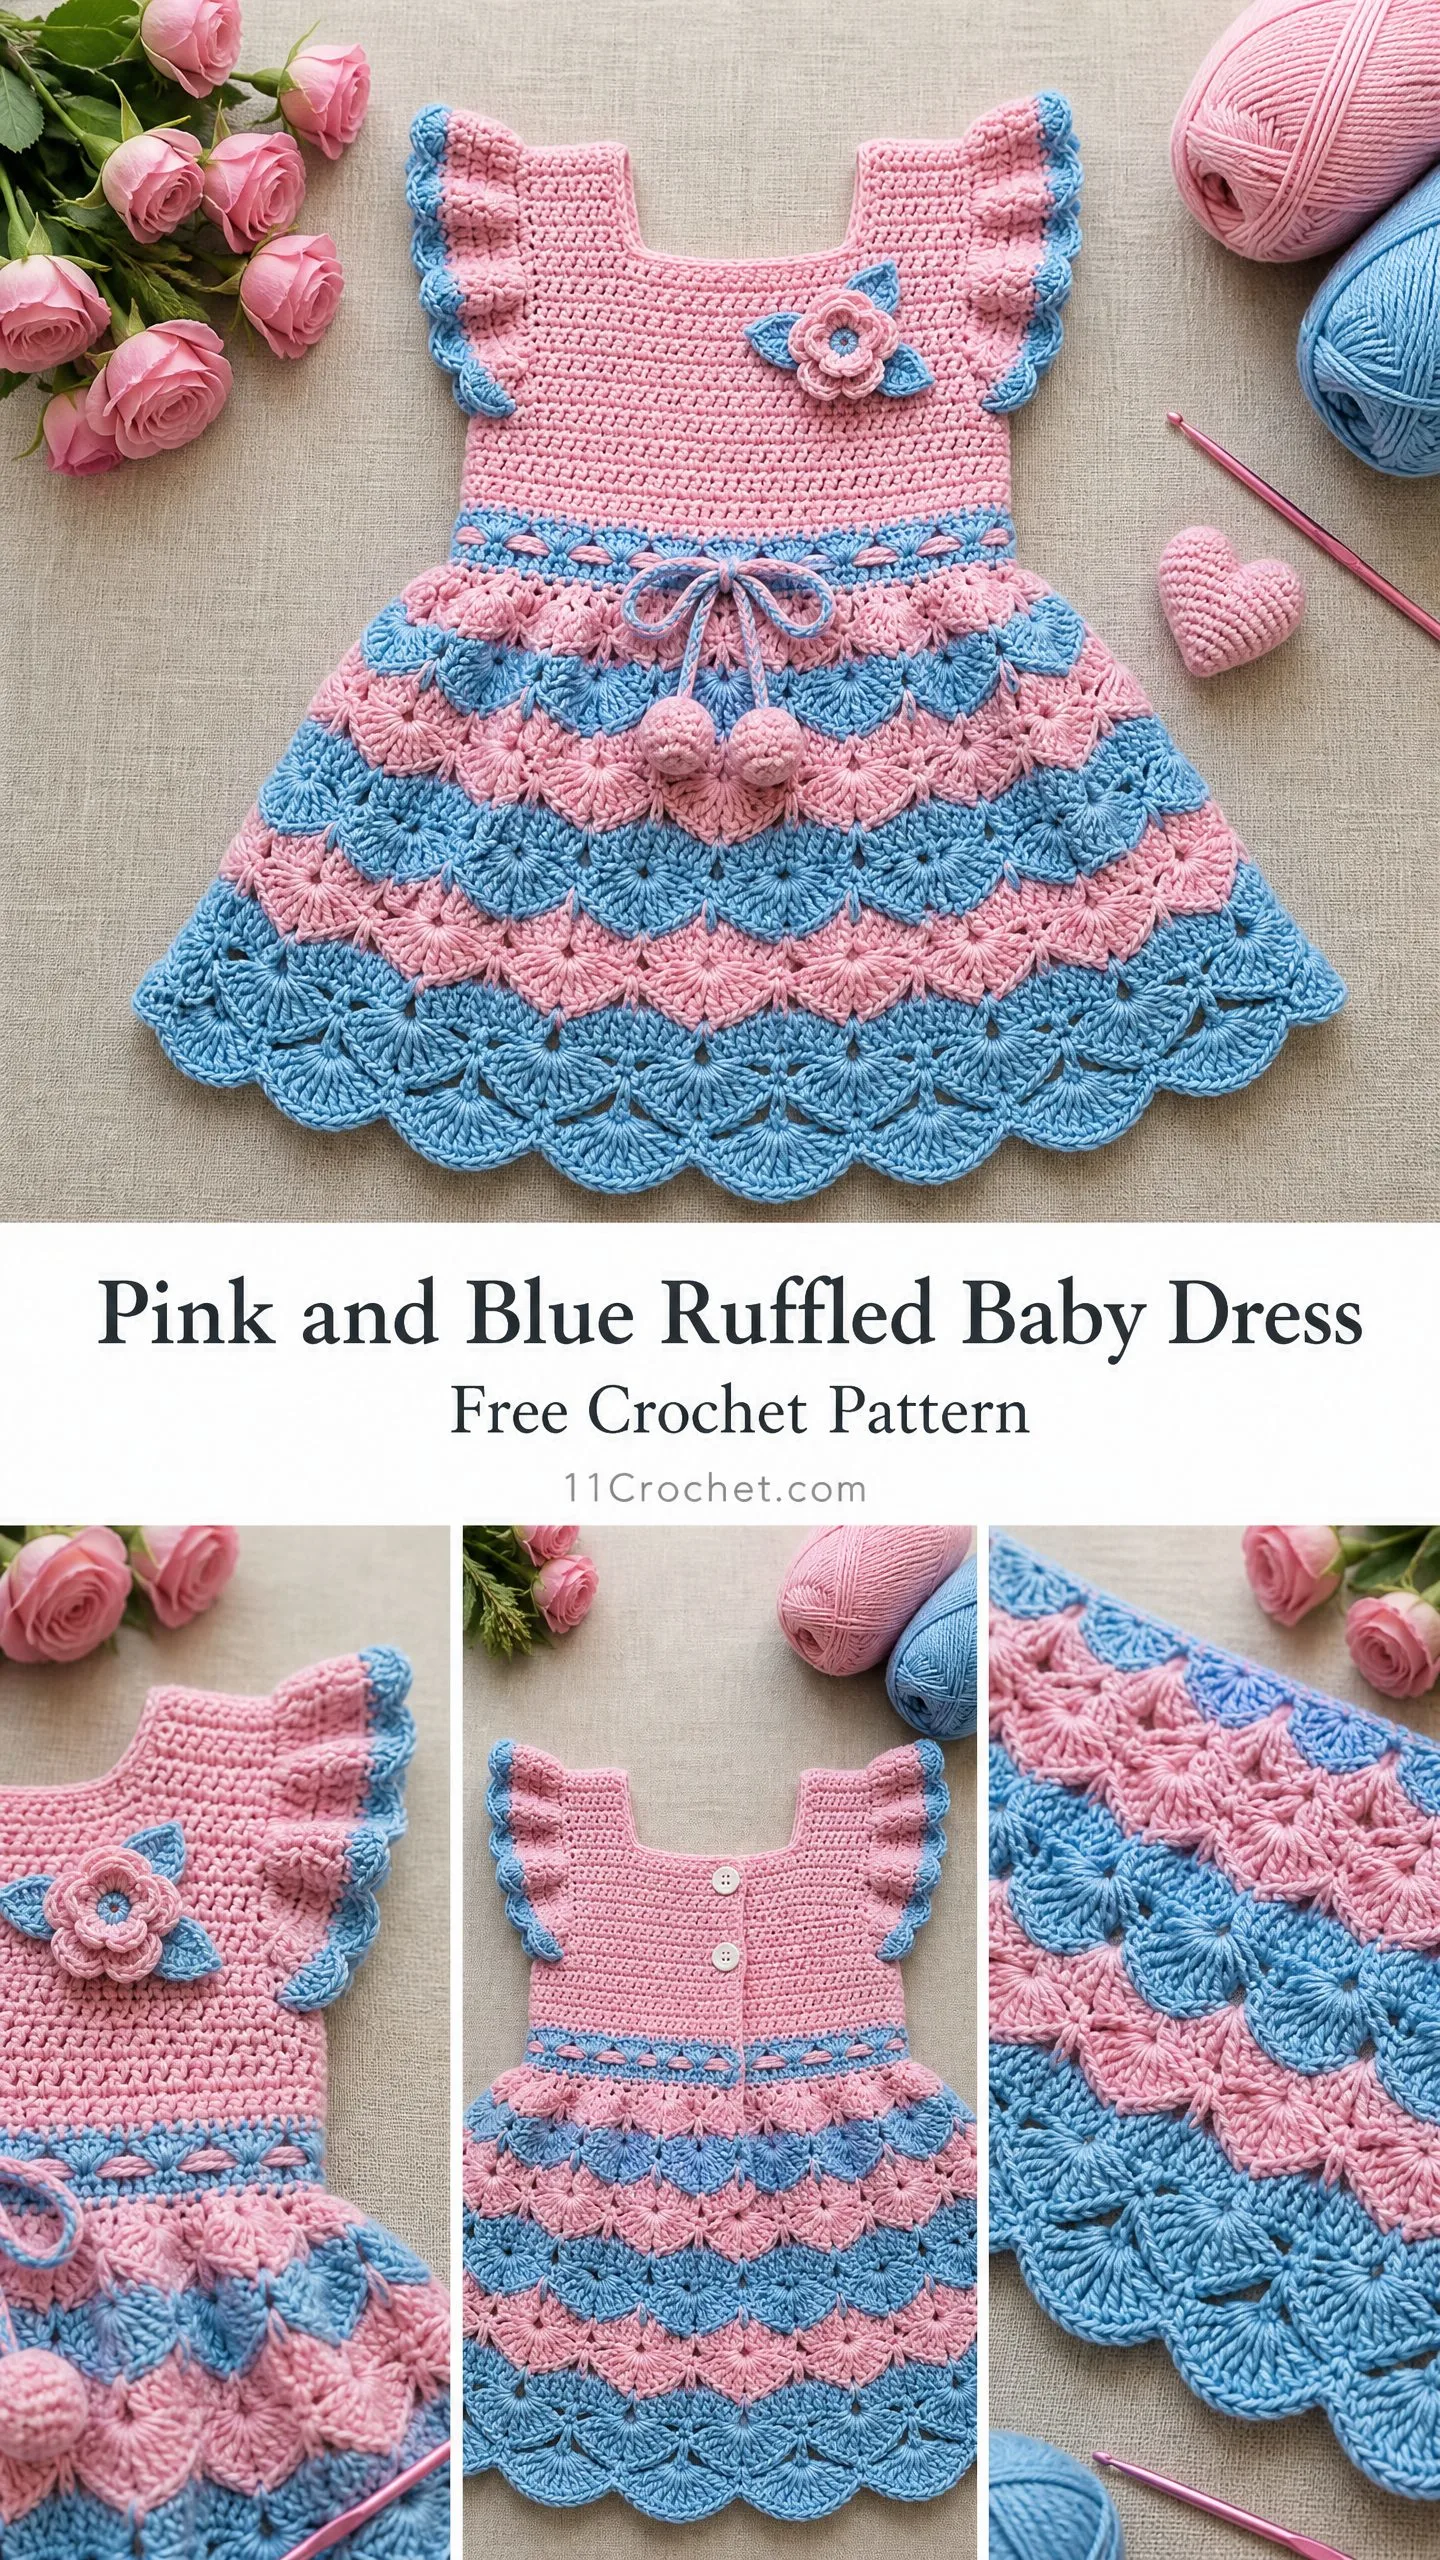
This ruffled baby dress combines a structured single crochet bodice with a flowing shell stitch skirt in alternating pink and blue stripes. The design features flutter sleeves edged with delicate scallops, a drawstring waist with adorable bobble ends, and a button back closure that makes dressing wiggly babies so much easier.
The silhouette is an A-line pinafore style that photographs beautifully and moves with the baby. Every element has been thought through for both aesthetics and practicality.
Skill Level: Intermediate
You should be comfortable working flat and in the round, changing colors cleanly, creating shell stitches, and basic garment construction including seaming. If you have made a few blankets and maybe a hat or two, you are ready for this dress.
Time Estimate: Approximately 12 to 18 hours for an experienced intermediate crocheter
Finished Sizes:
Size 6 to 12 months: chest 18 inches (46 cm), length 14 inches (35.5 cm)
Size 12 to 18 months: chest 20 inches (51 cm), length 15.5 inches (39.5 cm)
Throughout this pattern, the first number is for size 6 to 12 months. The number in parentheses is for size 12 to 18 months. Where only one number appears, it applies to both sizes.
Materials You Will Need
Yarn:
Recommended Yarns:
1. Paintbox Yarns Simply DK (100% acrylic, 276 yards per 100g skein). Pill-resistant with a wide color range including perfect dusty pinks and cornflower blues. Machine washable and ideal for baby garments.
2. Lion Brand Pound of Love (100% acrylic, 1020 yards per 454g skein). Extremely economical, soft, and machine washable. Available in the exact pastel shades needed.
3. Scheepjes Larra (100% acrylic, 380 yards per 100g skein). Slightly finer hand with a gentle sheen that gives the shells a crisp defined look.
Choose any DK weight yarn that is machine washable and soft against baby skin. Avoid yarns with a fuzzy or hairy texture as this will obscure the shell stitch pattern in the skirt.
Hooks:
Notions:
Gauge
Getting gauge right is mandatory for this garment. A difference of even half a stitch per inch will alter chest circumference by an inch or more over the full garment.
Bodice (E-4 / 3.5 mm hook, single crochet):
20 sc x 24 rows = 4 inches x 4 inches (10 cm x 10 cm)
Skirt (F-5 / 3.75 mm hook, shell stitch):
One complete shell repeat (5 dc) = 1 inch (2.5 cm) wide
4 rounds of shell pattern = 2 inches (5 cm) tall
Abbreviations and Stitch Definitions
Let me walk you through every abbreviation you will encounter in this pattern.
Special Stitches
Shell Stitch
Work 5 dc all into the same stitch or space. This creates one shell. Shell stitches are separated by a chain-1 space and a skip of 2 stitches on either side in the foundation row. In subsequent rounds, they are worked into the center dc of the previous round’s shell.
Scallop Edging (for flutter sleeves and hem)
1. Join yarn in any stitch along the edge.
2. Work 1 sc in the same stitch.
3. Skip 1 stitch.
4. Work 5 dc into the next stitch.
5. Skip 1 stitch.
6. Work 1 sc into the next stitch.
7. Repeat steps 3 through 6 across or around the edge, ending with a sl st to the first sc if working in the round.
Bobble (used on drawstring ends)
1. Make a slip knot and leave a 6 inch (15 cm) tail.
2. Work 2 ch.
3. Work 6 dc into the second chain from the hook (insert hook, pull up loop, yarn over, pull through 2 loops, leaving last loop on hook; repeat 5 more times so 7 loops are on hook).
4. Yarn over and draw through all 7 loops on hook.
5. Ch 1 to close.
6. Leave a long tail for attaching to drawstring end.
Crochet Flower (worked separately and sewn on)
1. With Yarn B, make a MR.
2. Ch 1, work 5 sc into the ring, pull ring closed, sl st to first sc. (5 sc)
3. For each petal: ch 2, work 3 dc into same stitch, ch 2, sl st into same stitch, sl st to move to next stitch. Repeat for all 5 stitches. (5 petals)
4. Fasten off, leaving a long tail for sewing.
Waist Chain Drawstring
With Yarn B and smaller hook, make a chain measuring approximately 12 inches (30.5 cm) long. Fasten off. Thread through the eyelet row at the waist. Attach one bobble to each end.
Pattern Notes Before You Begin
Read through these notes before starting. They will save you confusion later.
1. The bodice is worked in two flat panels (front and back) from the top down, then joined at the sides.
2. The skirt is worked in rounds from the waist down after the bodice pieces are joined.
3. The back has a center opening with three buttons and button loops.
4. The flutter sleeves are not true sleeves. They are a continuation of the armhole edge, worked as a short ruffled extension edged with the scallop stitch.
5. When changing from Yarn A to Yarn B at the beginning of a round in the skirt, carry Yarn A loosely up the inside of the work or cut and rejoin to minimize bulk.
6. Check your work at every checkpoint listed before proceeding. Ripping back a full shell round is time-consuming.
7. Right side is the outside of the dress. Left and right refer to the wearer’s left and right.
Step by Step Instructions
Section 1: Front Bodice Panel
With Yarn A and E-4 / 3.5 mm hook, chain 46 (52).
Row 1 (WS): Sc in 2nd ch from hook and in each ch across. Turn. (45 sc) (51 sc)
Row 2 (RS): Ch 1, sc in each st across. Turn. (45 sc) (51 sc)
Row 3: Ch 1, sc in each st across. Turn. (45 sc) (51 sc)
Row 4: Ch 1, sc in each st across. Turn. (45 sc) (51 sc)
Row 5: Ch 1, sc in each st across. Turn. (45 sc) (51 sc)
Row 6: Ch 1, sc in each st across. Turn. (45 sc) (51 sc)
Row 7: Ch 1, sc in each st across. Turn. (45 sc) (51 sc)
Row 8: Ch 1, sc in each st across. Turn. (45 sc) (51 sc)
Continue until the bodice panel measures 3.5 inches (9 cm) from the foundation chain for size 6 to 12 months, or 3.75 inches (9.5 cm) for size 12 to 18 months. This will be approximately 21 (23) rows total of sc. End with a WS row.
Armhole Shaping for Front Bodice
Row 1 of armhole shaping (RS): Ch 1, sl st across first 4 sts (these form the armhole edge and will later be the base for the flutter sleeve), sc in each st across to last 4 sts, sl st in next st, leave remaining 3 sts unworked. Turn. (37 sc) (43 sc)
Row 2: Ch 1, sc in each sc across (do not sc into sl sts). Turn. (37 sc) (43 sc)
Row 3: Ch 1, sc2tog, sc in each st across to last 2 sts, sc2tog. Turn. (35 sc) (41 sc)
Row 4: Ch 1, sc2tog, sc in each st across to last 2 sts, sc2tog. Turn. (33 sc) (39 sc)
Row 5: Ch 1, sc in each st across. Turn. (33 sc) (39 sc)
Row 6: Ch 1, sc in each st across. Turn. (33 sc) (39 sc)
Row 7: Ch 1, sc in each st across. Turn. (33 sc) (39 sc)
Row 8: Ch 1, sc in each st across. Turn. (33 sc) (39 sc)
Continue in sc without shaping until armhole measures 2 inches (5 cm) for size 6 to 12 months, or 2.25 inches (5.7 cm) for size 12 to 18 months. End on a WS row.
Front Neckline Shaping
Mark the center 13 (15) stitches with stitch markers.
Left shoulder (RS): Ch 1, sc across first 10 (12) sts. Turn. (10 sc) (12 sc)
Next row: Ch 1, sc2tog, sc to end. Turn. (9 sc) (11 sc)
Next row: Ch 1, sc2tog, sc to end. Turn. (8 sc) (10 sc)
Next row: Ch 1, sc in each st across. Turn. (8 sc) (10 sc)
Fasten off.
Skip center 13 (15) sts for neckline. Rejoin Yarn A in next st for right shoulder.
Right shoulder (WS): Ch 1, sc across 10 (12) sts. Turn. (10 sc) (12 sc)
Next row: Ch 1, sc to last 2 sts, sc2tog. Turn. (9 sc) (11 sc)
Next row: Ch 1, sc to last 2 sts, sc2tog. Turn. (8 sc) (10 sc)
Next row: Ch 1, sc in each st across. Turn. (8 sc) (10 sc)
Fasten off.
CHECKPOINT 1: The front bodice panel should measure approximately 5.5 inches (14 cm) from cast-on edge to shoulder. Shoulder stitches: 8 (10) on each side. Neckline opening: 13 (15) stitches wide.
Section 2: Back Bodice Panel
The back is worked in two separate halves to create the center button opening.
Left Back Half (as worn, on wearer’s left side)
With Yarn A and E-4 / 3.5 mm hook, chain 24 (27).
Row 1 (WS): Sc in 2nd ch from hook and in each ch across. Turn. (23 sc) (26 sc)
Work in sc for the same number of rows as the front bodice before armhole shaping, ending with a WS row.
Left Back Armhole Shaping
Row 1 (RS): Ch 1, sl st across first 4 sts, sc in each remaining st across. Turn. (19 sc) (22 sc)
Row 2: Ch 1, sc to last 2 sts, sc2tog. Turn. (18 sc) (21 sc)
Row 3: Ch 1, sc2tog, sc to end. Turn. (17 sc) (20 sc)
Row 4: Ch 1, sc in each st across. Turn. (17 sc) (20 sc)
Continue in sc until armhole depth matches front (2 inches / 5 cm for size 6 to 12 months, 2.25 inches / 5.7 cm for size 12 to 18 months), ending on a WS row.
Left Back Neckline Shaping
Row 1 (RS): Ch 1, sc across 8 (10) sts (shoulder stitches). Leave remaining 9 (10) sts unworked (neckline). Turn. (8 sc) (10 sc)
Row 2: Ch 1, sc2tog, sc to end. Turn. (7 sc) (9 sc)
Row 3: Ch 1, sc in each st across. Turn. (7 sc) (9 sc)
Fasten off.
Right Back Half (as worn, on wearer’s right side)
With Yarn A and E-4 / 3.5 mm hook, chain 24 (27).
Row 1 (WS): Sc in 2nd ch from hook and in each ch across. Turn. (23 sc) (26 sc)
Work in sc for the same number of rows as the front bodice before armhole shaping, ending with a WS row.
Right Back Armhole Shaping
Row 1 (RS): Ch 1, sc across to last 4 sts, sl st in next st, leave remaining 3 sts unworked. Turn. (19 sc) (22 sc)
Row 2: Ch 1, sc2tog, sc to end. Turn. (18 sc) (21 sc)
Row 3: Ch 1, sc to last 2 sts, sc2tog. Turn. (17 sc) (20 sc)
Row 4: Ch 1, sc in each st across. Turn. (17 sc) (20 sc)
Continue in sc until armhole depth matches front, ending on a WS row.
Right Back Neckline Shaping
Row 1 (RS): Skip first 9 (10) sts, rejoin yarn, ch 1, sc across rem 8 (10) sts. Turn. (8 sc) (10 sc)
Row 2: Ch 1, sc to last 2 sts, sc2tog. Turn. (7 sc) (9 sc)
Row 3: Ch 1, sc in each st across. Turn. (7 sc) (9 sc)
Fasten off.
Button Band on Left Back Center Edge
With RS facing and Yarn A, join yarn at the bottom corner of the left back center edge. Work 1 sc evenly in each row end up the center edge. Work 3 evenly spaced button loops as follows on the RS of the band: when you reach a button loop position, ch 3, skip 1 sc, sc in next sc. Space the three button loops evenly along the band. Fasten off.
Button Band on Right Back Center Edge (no loops)
With RS facing and Yarn A, join yarn at the top of the right back center edge. Work 1 sc evenly in each row end down the center edge. Fasten off.
Sew three buttons to the right back band to correspond to the button loops.
CHECKPOINT 2: Each back half shoulder measures 7 (9) sc wide. Each back half measures 5.5 inches (14 cm) from cast-on edge to shoulder. The two back halves together equal the same width as the front panel.
Section 3: Assembling the Bodice
Join shoulder seams: Hold front and left back together with right sides facing. Working through both layers with Yarn A and the smaller hook, sl st the 7 (9) shoulder stitches of the left back to the corresponding 8 (10) shoulder stitches of the front left shoulder. (The one-stitch difference is absorbed by the seam.) Fasten off.
Repeat for the right shoulder.
Join side seams: Hold front and back together with right sides facing. Working from the underarm down to the bottom edge of the bodice, sl st or sc through both layers to join the side seams. Leave the center 4 sts on each armhole edge open (these form the armhole base for the flutter sleeves). Fasten off.
CHECKPOINT 3: The assembled bodice should form a small dress top. The neckline should measure approximately 6 inches (15 cm) across. The total chest circumference at the bottom of the bodice should be approximately 18 (20) inches / 46 (51) cm. The bodice should measure approximately 5.5 inches (14 cm) from shoulder seam to bottom edge.
Section 4: Waist Eyelet Row
This round creates the channel through which the drawstring tie is threaded. It is worked in the round at the bottom edge of the assembled bodice.
With RS facing and Yarn B and F-5 / 3.75 mm hook, join at the right back button band edge.
Round 1: Ch 1, sc in each st around the bottom of the bodice, joining back seam as you go if it has not been seamed. At back opening, work along both button band edges. Sl st to first sc to join. (90 sc) (102 sc)
Round 2 (Eyelet Round): Ch 4 (counts as dc and ch 1), skip 1 st, dc in next st, (ch 1, skip 1 st, dc in next st) around. Sl st to 3rd ch of beg ch-4 to join. (45 ch-1 sps) (51 ch-1 sps)
Round 3: Ch 1, sc in first ch-sp, sc in next dc, (sc in next ch-sp, sc in next dc) around. Sl st to first sc to join. (90 sc) (102 sc)
CHECKPOINT 4: After Round 3 of the waist section, the piece should measure approximately 6.5 inches (16.5 cm) from shoulder to waist. The eyelet holes are clearly visible and evenly spaced all the way around.
Section 5: Skirt
The skirt is worked in rounds from the waist down, using the shell stitch in alternating color stripes. Each stripe consists of 2 rounds of shell pattern before the color switches.
Skirt Setup Round (Round 1 of skirt, using Yarn B)
With Yarn B and F-5 / 3.75 mm hook, with RS facing, join to any sc of Round 3.
Round 1: Ch 3 (counts as dc), work 2 dc in same st, (skip 2 sts, sc in next st, skip 2 sts, 5 dc shell in next st) 14 (16) times, skip 2 sts, sc in next st, skip 2 sts, 2 dc in same st as beg ch-3. Sl st to top of beg ch-3 to join. (15 shells) (17 shells)
Round 2 (continuing Yarn B): Ch 3 (counts as dc), work 2 more dc in same sp to complete a half shell. (Ch 1, sc in center dc of next shell, ch 1, 5 dc in next sc between shells) repeat 14 (16) times, ch 1, sc in center dc of last shell, ch 1. Sl st to top of beg ch-3. (15 shells) (17 shells)
Switch to Yarn A. Do not cut Yarn B; carry it loosely up the interior.
Round 3 (Yarn A): Ch 1, sc in same sp. (Ch 2, 5 dc shell in next sc between shells, ch 2, sc in center dc of next shell) repeat 14 (16) times, ch 2, 5 dc in next sc, ch 2. Sl st to first sc. (15 shells) (17 shells)
Round 4 (Yarn A): Ch 3 (counts as dc), 2 dc in same sc. (Ch 1, sc in center dc of next shell, ch 1, 5 dc in next sc) repeat 14 (16) times, ch 1, sc in center dc of last shell, ch 1. Sl st to top of beg ch-3. (15 shells) (17 shells)
Switch to Yarn B.
Increase Round (Round 5, Yarn B)
This round adds extra shells to increase the flare of the skirt.
Round 5 (Yarn B): Ch 1, sc in same sp. (Work the shell pattern as established for 4 shells, then at the 5th sc position work 2 shells into that sc instead of 1) repeat 3 times, then work remaining shells as established to end of round. Sl st to first sc. (18 shells) (20 shells)
Round 6 (Yarn B): Work even in shell pattern as established. (18 shells) (20 shells)
Switch to Yarn A.
Round 7 (Yarn A): Work even in shell pattern. (18 shells) (20 shells)
Round 8 (Yarn A): Work even in shell pattern. (18 shells) (20 shells)
Switch to Yarn B.
Second Increase Round (Round 9, Yarn B)
Increase 3 more shells evenly around. (21 shells) (23 shells)
Round 10 (Yarn B): Work even in shell pattern. (21 shells) (23 shells)
Switch to Yarn A.
Round 11 (Yarn A): Work even in shell pattern. (21 shells) (23 shells)
Round 12 (Yarn A): Work even in shell pattern. (21 shells) (23 shells)
Switch to Yarn B.
Third Increase Round (Round 13, Yarn B)
Increase 3 more shells evenly around. (24 shells) (26 shells)
Round 14 (Yarn B): Work even in shell pattern. (24 shells) (26 shells)
Switch to Yarn A.
Round 15 (Yarn A): Work even in shell pattern. (24 shells) (26 shells)
Round 16 (Yarn A): Work even in shell pattern. (24 shells) (26 shells)
Switch to Yarn B.
Round 17 (Yarn B): Work even in shell pattern. (24 shells) (26 shells)
Round 18 (Yarn B): Work even in shell pattern. (24 shells) (26 shells)
Do not fasten off.
CHECKPOINT 5: After Round 18 of the skirt, the skirt should measure approximately 8.5 inches (21.5 cm) from the waist eyelet row. The hem circumference should be approximately 24 (26) inches / 61 (66) cm. Count your shells; you should have 24 (26) complete shells around.
Section 6: Hem Scallop Edging
This edging creates the decorative scalloped hem seen at the bottom of the dress. It is worked in Yarn B.
Using Yarn B (already attached after Round 18) and F-5 / 3.75 mm hook:
Round 1: Ch 1, sc in same sp (the sc between two shells). (Skip 1 dc, 5 dc shell into next dc which is the center dc of shell below, skip 1 dc, sc in next ch-sp, skip next dc, 5 dc into center dc of next shell, skip 1 dc, sc in sc between shells) around. Sl st to first sc.
Round 2: Sl st into each of first 2 dc, ch 1, sc in same dc. (Ch 3, sc in next dc, ch 3, sc in center dc of shell, ch 3, sc in next dc, ch 3, sc in sc between shells) around, ending sl st to first sc. Fasten off.
If you prefer a simpler clean hem, omit Round 2 and simply fasten off after Round 1. Both versions are correct; Round 2 gives a lacier look.
Section 7: Flutter Sleeves
The flutter sleeves are worked along the armhole opening. They are decorative ruffled extensions that flare away from the arm.
With RS facing and Yarn B and F-5 / 3.75 mm hook, join at the underarm seam point.
Round 1: Ch 1, work 24 sc evenly around the armhole opening, picking up stitches from the edge of both the front and back bodice panels. Sl st to first sc to join. (24 sc)
Round 2: Ch 3 (counts as dc), 2 dc in same st, (skip 1 st, sc in next st, skip 1 st, 5 dc shell in next st) 5 times, skip 1, sc in next st, skip 1, 2 dc in last st. Sl st to top of beg ch-3. (6 shells)
Round 3: Sl st to center dc of first shell. Ch 1, sc in same dc. (Ch 2, skip to next sc between shells, sc in sc, ch 2, sc in center dc of next shell) 5 times, ch 2, sc in sc, ch 2. Sl st to first sc. Fasten off.
Repeat for the second armhole.
CHECKPOINT 6: Each flutter sleeve should measure approximately 1.5 inches (4 cm) from the armhole edge to the scalloped tip. The scallop points of the blue edging should mirror the hem edging.
Section 8: Neckline Edging
With RS facing and Yarn B and E-4 / 3.5 mm hook, join at the right back neckline edge.
Round 1: Ch 1, work sc evenly around the entire neckline opening, placing approximately 1 sc per row end along the sides and 1 sc per stitch along the top of the front neckline. Work 3 sc into the two front neckline corners to prevent pulling. Sl st to first sc.
Round 2: Work scallop edging as follows: (sc in next st, skip 1 st, 5 dc shell in next st, skip 1 st) around. Sl st to first sc. Fasten off.
Section 9: Finishing Touches
Crochet Flower: Make the flower applique following the special stitches instructions. Sew it to the bodice near the right shoulder using the long tail.
Drawstring: Chain approximately 12 inches (30.5 cm) with Yarn B and the smaller hook. Thread through the eyelet row at the waist. Make two bobbles and attach one to each end of the drawstring.
Weave in all ends securely with your tapestry needle.
Block the dress by pinning it to your blocking mat and lightly misting with water. Allow to dry completely before removing pins. This will even out your stitches and give the shells their beautiful definition.
Tips for Success with This Crochet Tutorial
Count your stitches. I know, I know. But seriously. The shell stitch pattern depends on having the right multiple of stitches, and catching a mistake early is so much easier than ripping back three rounds of shells.
Use stitch markers liberally. Mark the beginning of your rounds, mark where your increases go, mark anything that helps you keep track. There is no such thing as too many stitch markers.
Check your gauge with both hook sizes. The bodice uses the smaller hook for a tighter, more structured fabric. The skirt uses the larger hook so the shells have room to bloom.
When changing colors, complete the last stitch of the old color by pulling through with the new color. This gives you a cleaner color transition.
Do not stress about perfection. Handmade is supposed to look handmade. A wiggly shell or a slightly uneven increase will disappear in the overall charm of the finished dress.
Customization Ideas
Want to make this baby dress pattern your own? Here are some ideas:
Wrapping Up
This ruffled baby dress is one of those projects that looks far more complicated than it actually is. Yes, it takes some time. Yes, you need to pay attention to your stitch counts. But every single technique in this pattern is something you already know how to do. You are just combining them in a new way.
When you see that finished dress laid out, with its candy stripes and flutter sleeves and sweet little bobbles on the drawstring, you will understand why my friend cried. It is that kind of project.
Thank you so much for choosing this pattern. I genuinely hope you love making it as much as I loved designing it. If you have any questions along the way, do not hesitate to reach out.
If you make this dress, I would absolutely love to see it! Tag me on Instagram or share a photo in my Facebook group. Seeing your finished projects is honestly the best part of my day.
Go ahead and pin this pattern to your Pinterest boards so you can find it when you are ready to start. And if you do make it, please come back and leave a comment below. I read every single one,
