
This pattern is GORGEOUS and I am so excited to share it with you! If you have been searching for a statement piece that will genuinely stop people in their tracks, this is the one.
Get the Ad-Free PDF Pattern
You can find the free pattern below, or you can purchase the ad-free printable PDF from my shop.
Get the Printable PDF →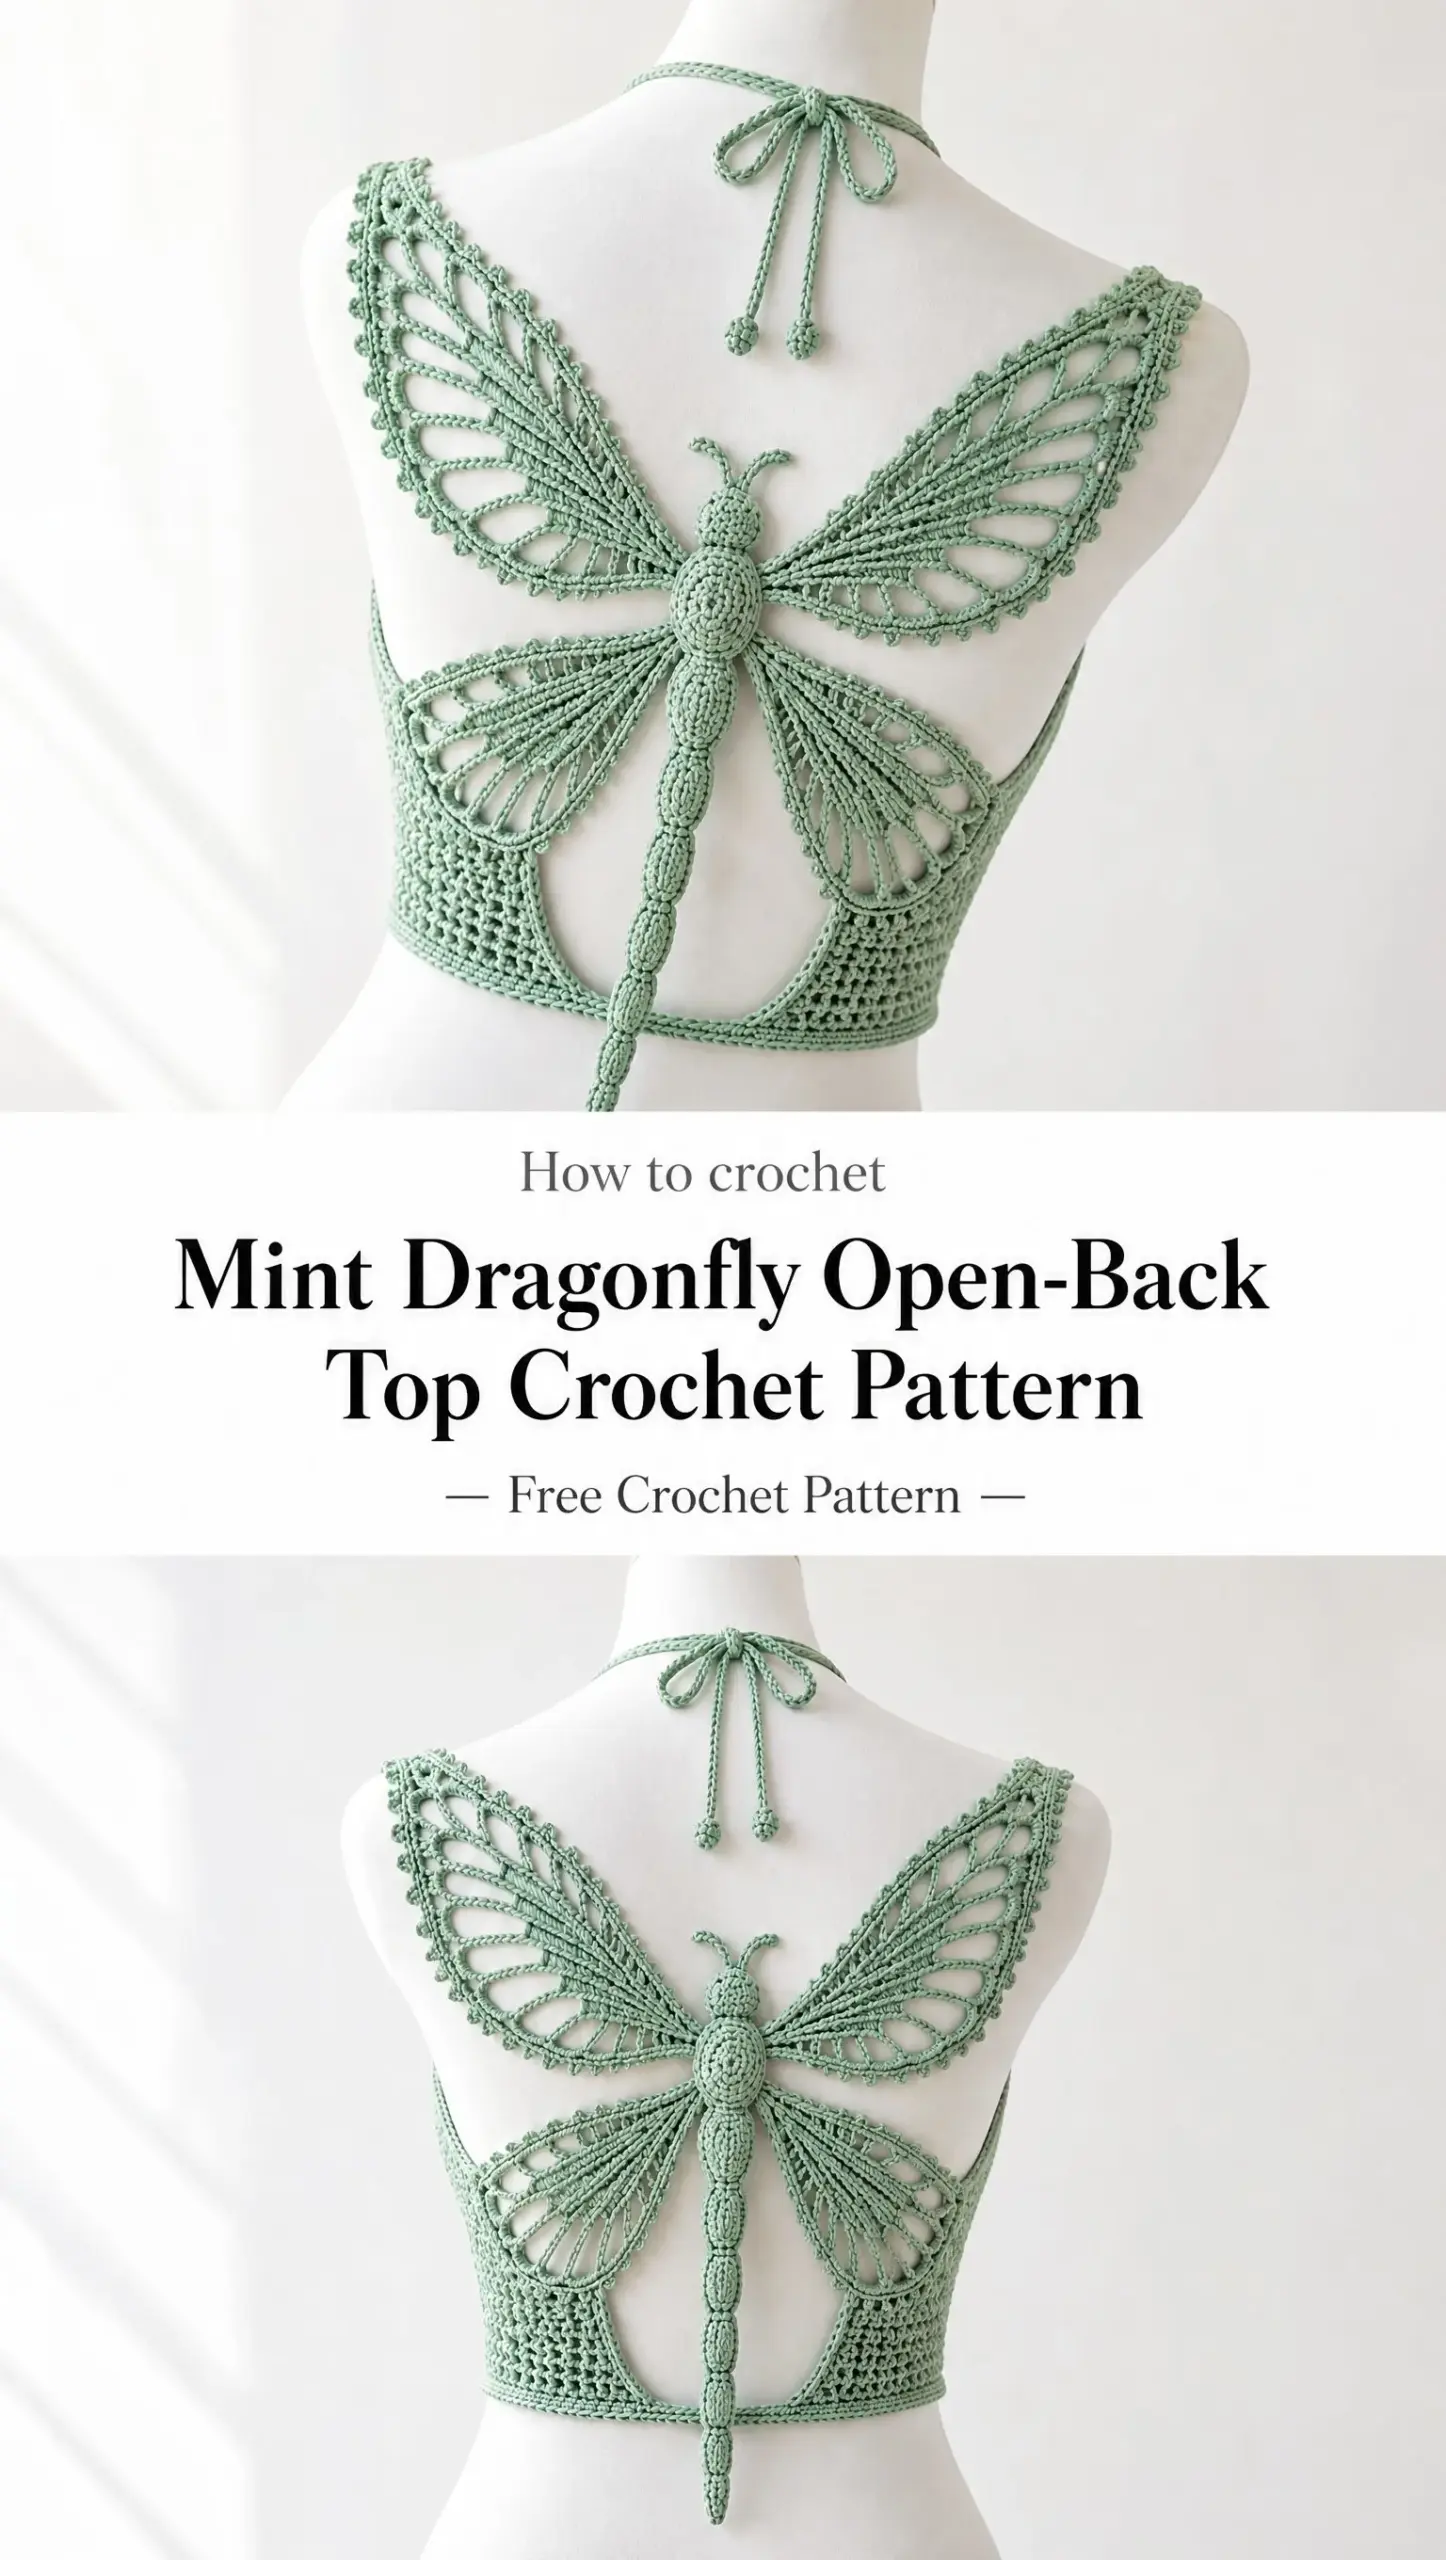
The Mint Dragonfly Open-Back Top features a sculptural four-wing dragonfly that forms the entire open back of a fitted crop top. Yes, you read that right. The dragonfly IS the back. It is one of those projects that looks impossibly intricate but breaks down into manageable pieces that you assemble at the end.
This intermediate to advanced pattern works up in sport weight cotton and spans sizes XS through 3XL. Whether you are making it for yourself or as a jaw-dropping gift, get ready for some serious compliments.
What Makes This Dragonfly Top So Special
Let me paint you a picture. You are at a summer gathering, you turn around, and everyone sees a delicate crocheted dragonfly spanning your entire back. The wings have open lacework that lets skin peek through. The body runs down your spine in raised, segmented ovals. The antennae curl gently at the nape of your neck.
This is wearable art.
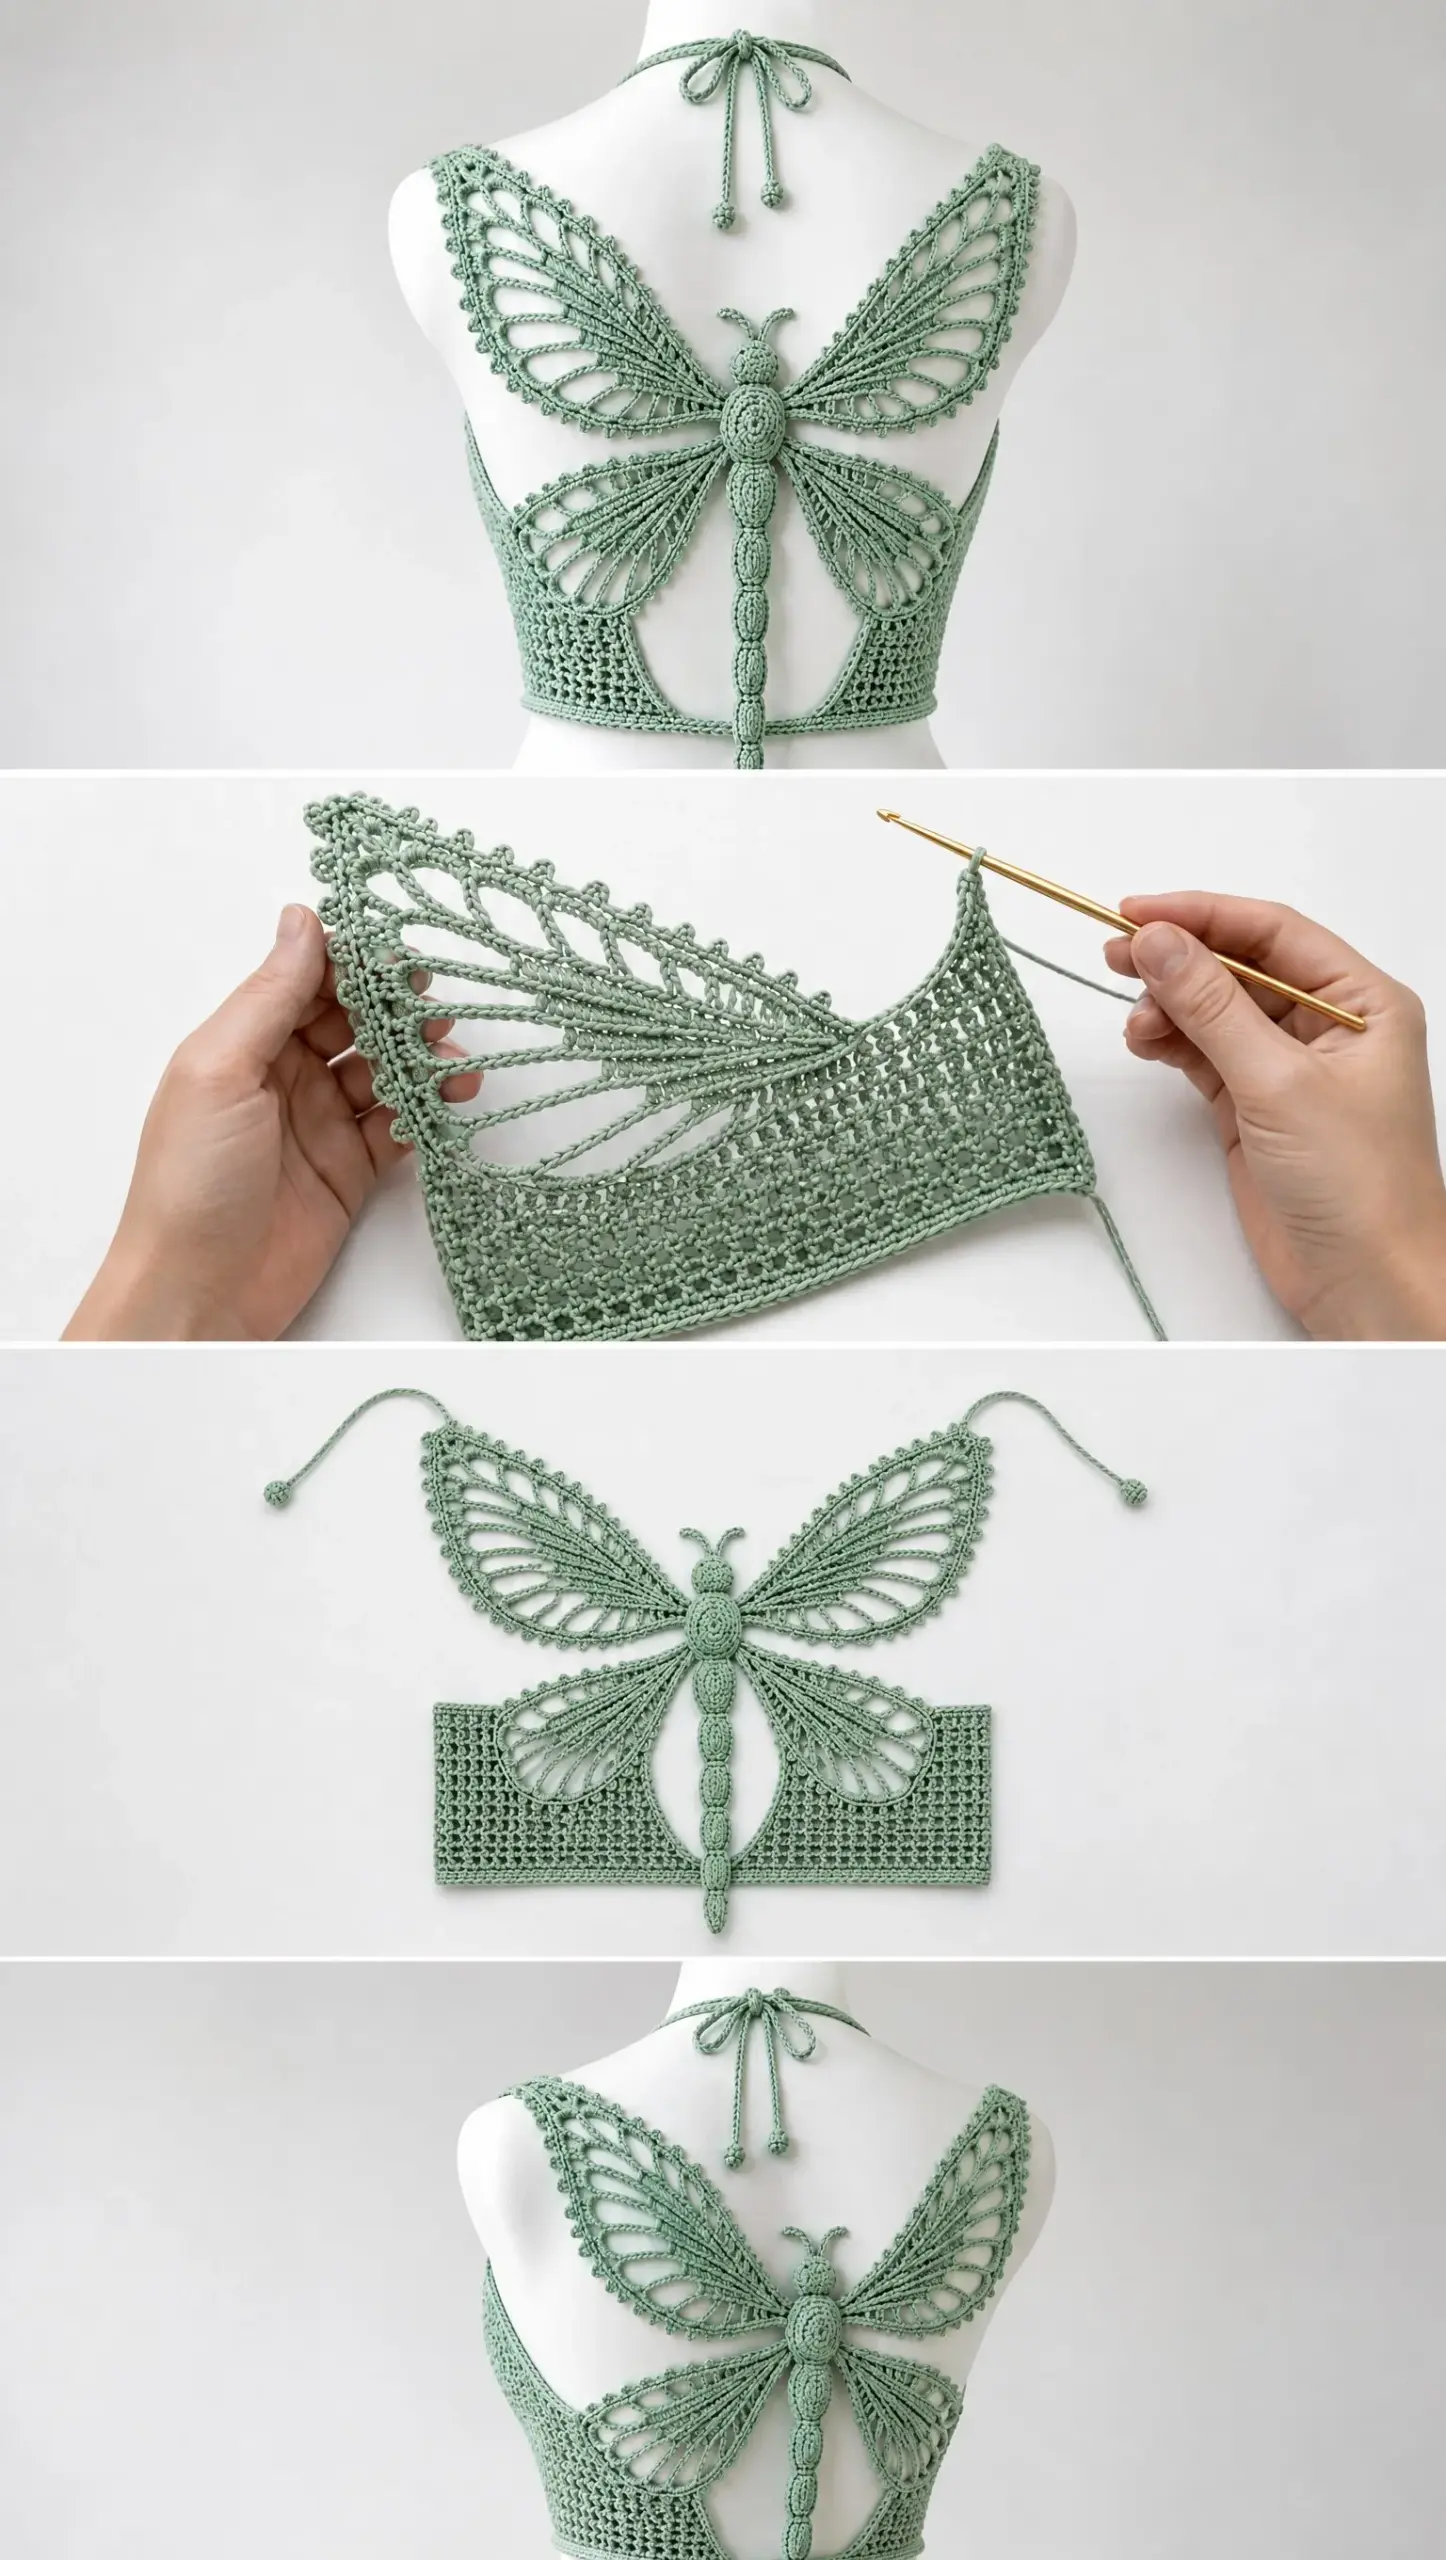
The construction is clever too. You are not crocheting one massive complicated piece. Instead, you make five main components: a fitted front panel, two side and waist bands, the central dragonfly body with tail, two upper wings, and two lower wings. Each piece gets blocked to shape, then everything comes together. It is like assembling a puzzle, and when you tie that neck cord and see it on your body, the payoff is incredible.
Materials You Will Need
Before diving into the pattern, gather your supplies. The PDF specifies everything precisely, so here is your shopping list:
Yarn: Sport weight or 5-ply mercerized or combed cotton, 125 to 140 meters per 50 grams. Yardage varies by size:
Buy 10 to 15 percent extra for swatching and adjustments. Trust me on this.
Hook: 3.25 mm (US D) for main fabric. Optional 2.75 to 3.0 mm hook for firmer edging and the neck cord.
Notions: Tapestry needle, locking stitch markers, rustproof pins, blocking mats, measuring tape, scissors. Optional: 1 to 2 mm clear elastic thread for stabilizing the upper front edge.
Gauge
Getting gauge matters here, especially for the fitted front panel. The pattern calls for:
22 double crochet (dc) and 11 rows = 10 cm x 10 cm (4 x 4 inches) in blocked double crochet.
Wing gauge is less critical, but your finished upper wing should match the span in the sizing table. If your dc gauge runs loose, drop down a hook size. If it runs tight, go up.
Sizing and Finished Measurements
Choose your size based on full bust measurement. The front panel provides most of the coverage while the back remains beautifully open. All measurements below are finished garment dimensions after blocking.
| Size | Bust to Fit | Front Width | Front Length | Waist Band Total | Upper Wing Span |
|---|---|---|---|---|---|
| XS | 76-81 cm / 30-32 in | 35 cm / 13.8 in | 31 cm / 12.2 in | 68 cm / 26.8 in | 36 cm / 14.2 in |
| S | 84-89 cm / 33-35 in | 38 cm / 15 in | 32 cm / 12.6 in | 73 cm / 28.7 in | 38 cm / 15 in |
| M | 91-97 cm / 36-38 in | 41 cm / 16.1 in | 33 cm / 13 in | 78 cm / 30.7 in | 40 cm / 15.7 in |
| L | 99-107 cm / 39-42 in | 45 cm / 17.7 in | 34 cm / 13.4 in | 86 cm / 33.9 in | 43 cm / 16.9 in |
| XL | 109-117 cm / 43-46 in | 49 cm / 19.3 in | 35 cm / 13.8 in | 94 cm / 37 in | 46 cm / 18.1 in |
| 2XL | 119-127 cm / 47-50 in | 53 cm / 20.9 in | 36 cm / 14.2 in | 102 cm / 40.2 in | 49 cm / 19.3 in |
| 3XL | 130-137 cm / 51-54 in | 57 cm / 22.4 in | 37 cm / 14.6 in | 110 cm / 43.3 in | 52 cm / 20.5 in |
Sizing tip: If you fall between sizes, use the smaller wing motif paired with the larger front and waist band. The motif should look airy rather than stretched.
Abbreviations and Stitch Definitions
Here are all the stitches you will use. If you are newer to crochet patterns, bookmark this section.
Construction Roadmap
Before we dive into the detailed instructions, here is the big picture of how this top comes together:
1. Crochet and block the fitted front panel
2. Add left and right side/waist bands directly to the front panel edges
3. Crochet the dragonfly thorax, head, antenna nubs, and long segmented tail as one central spine
4. Crochet two upper wings and two lower wings as mirror images
5. Block all motif pieces to exact measurements
6. Seam wings to the central body, then anchor upper wings to front panel shoulder corners and lower wings to waist bands
7. Add neck cord, waist edging, and final picot finish
8. Weave ends and steam or block lightly
Part 1: Front Panel Instructions
The front is a simple fitted rectangle with shallow arm shaping and a straight upper edge. Work bottom up in rows. All stitch counts are written as XS (S, M, L, XL, 2XL, 3XL). The turning ch 2 does NOT count as a stitch throughout.
Foundation
Ch 80 (86, 93, 102, 111, 120, 128).
Row 1: Dc in 3rd ch from hook and in each ch across = 78 (84, 91, 100, 109, 118, 126) dc.
If your chain draws in, use a hook 0.5 mm larger just for the foundation chain, then switch back.
Body Rows
Rows 2 through 24 (25, 26, 27, 28, 29, 30): Ch 2, turn, dc in each st across.
Check your width frequently against your body. Work fewer or more rows to achieve the front length in the sizing table, allowing approximately 2 cm (about 3/4 inch) for the final edging.
Arm Shaping
Next row: Sl st across first 4 (4, 5, 5, 6, 6, 7) sts, ch 2, dc across to last same number of sts, leave remaining sts unworked.
Next 3 rows: Ch 2, turn, dc2tog (decrease by working two dc together), dc to last 2 sts, dc2tog. This creates a gentle inward curve at each underarm.
Continue even in dc until the shaped section measures 6.5 (7, 7.5, 8, 8.5, 9, 9.5) cm or 2.5 to 3.75 inches.
Final row: Ch 1, turn, sc evenly across. Fasten off.
Mark both upper corners. These are your shoulder anchor points for the upper wings.
Coverage note: For more front coverage, add 4 to 8 stitches to your starting chain while keeping the same shaping logic. For less coverage, subtract 4 to 8 stitches.
Part 2: Side and Waist Bands
The side bands create the fitted lower torso and provide secure attachment points for the lower dragonfly wings. Work one band from each side edge of the front panel.
Step 1: With RS facing, join yarn at lower left corner of front panel. Work sc evenly up the side edge to the underarm marker, placing about 2 sc for every 3 dc row ends. Count and note your stitches.
Row 1: Ch 2, turn, dc in each sc across.
Rows 2 through 8 (8, 9, 9, 10, 10, 11): Ch 2, turn, dc in each st. Band depth should be 7 to 10 cm (2.75 to 4 inches) depending on size.
Final row: Work sc across. Fasten off.
Repeat on the opposite side, matching your row count exactly.
At the bottom edge of each band, mark a point approximately 3 to 4 cm (1.25 to 1.5 inches) from the center back edge. These marks become your lower wing anchor points.
Part 3: Central Dragonfly Body and Tail
Work the body as a series of lightly stuffed-looking oval crochet segments without actual stuffing. Each oval forms from increases around a short foundation chain, then joins end to end. Use a slightly tighter tension than you used for the wings.
Thorax
Ch 7.
Round 1: 2 sc in 2nd ch from hook, sc in next 4 ch, 4 sc in last ch. Rotate to work along opposite side of foundation. Sc in next 4 ch, 2 sc in final ch. Join with sl st = 16 sc.
Round 2: Ch 1, 2 sc in next 2 sts, sc in next 4, 2 sc in next 4 sts, sc in next 4, 2 sc in last 2 sts. Join = 24 sc.
Round 3: Ch 1, sc around, working 2 sc in each of the 4 end-most curve stitches only = approximately 28 sc. Join.
Round 4: Reverse sc (also called crab stitch) loosely around for a raised rim. Fasten off, leaving a 40 cm (16 inch) tail for assembly.
Head and Antenna Nubs
Head: Make a magic ring. 6 sc in ring.
Round 2: 2 sc in each st = 12 sc.
Round 3: (Sc, 2 sc in next) around = 18 sc.
Round 4: Sc around. Fasten off with long tail.
Antenna nub (make 2): Ch 5, sl st in 2nd ch and next 3 ch. Fasten off. Sew one nub to each upper side of head, curving slightly outward.
Segmented Tail
Make 5 (5, 6, 6, 6, 7, 7) oval segments.
First segment: Ch 5. 2 sc in 2nd ch, sc in next 2, 4 sc in last ch, rotate, sc in next 2, 2 sc in final ch. Join = 12 sc.
Round 2: Sc around, placing 2 sc in each of the two end curves = 16 sc. Fasten off.
For each following segment, reduce the foundation by one chain every second segment to create a tapered tail.
Join segments end to end with mattress stitch, overlapping edges by 2 to 3 mm so the body reads as a continuous raised spine.
Target central spine length (head through tail): 30 (31, 32, 33, 34, 35, 36) cm or 11.8 to 14.2 inches.
Part 4: Upper Wings (Make 2 Mirrored)
Each upper wing is built from a firm outer frame and 7 internal radiating ribs. Work the right wing as written. For the left wing, reverse the placement of joins so the shaping mirrors cleanly.
Outer spine: Ch 44 (47, 50, 54, 58, 62, 66). Beginning in 2nd ch, work sl st in 6 ch, sc in 8, hdc in 10, dc in 10, tr in remaining ch. This graded height creates the long tapered upper edge.
Turn work 90 degrees. Ch 3, then work back along the opposite side of the foundation using tr, dc, hdc, and sc in reverse order. At the wing tip, place 5 sc in the terminal chain to round the point. Continue to the base and join with sl st. You now have an elongated leaf-like frame.
Wing rib 1: Join at wing base, ch 8 (9, 10, 11, 12, 13, 14), anchor with sc to outer frame about one-sixth of the way toward the tip. Turn. Work sc back over the chain to base.
Wing ribs 2 through 7: Repeat, increasing each chain by 3 to 5 ch so ribs fan toward the tip. Space anchors evenly along the outer frame. Keep all ribs flat and untwisted.
Vein fill row: With RS facing, join at base. Work sc around rib, ch 3 to 5, sc around next rib across, varying chain length so each opening forms an elongated oval. Repeat a second pass closer to the outer frame using ch 2 to 4 bridges. The wing should remain mostly open.
Outer decorative row: Sc around entire wing perimeter. At every 3rd or 4th sc along the upper edge, work picot. At the pointed tip, work (sc, picot, sc) in same point.
Base reinforcement: Work 2 additional rows of sc over the first 4 to 5 cm (1.5 to 2 inches) of the wing base. This section gets sewn to the thorax and shoulder anchor.
Blocked upper wing length: 18 (19, 20, 21.5, 23, 24.5, 26) cm or 7.1 to 10.2 inches from thorax to shoulder tip.
Part 5: Lower Wings (Make 2 Mirrored)
Lower wings use the same architecture but are shorter, wider at the base, and more curved. Their lower edges blend into the waist bands.
Outer frame: Ch 30 (32, 34, 36, 39, 42, 45). Work sl st in 4 ch, sc in 6, hdc in 8, dc in 7, tr in remaining ch. Turn and work the opposite side in reverse height order, placing 5 sc at the tip.
Create 5 radiating ribs from base to outer frame. Chain lengths should increase gradually from about 7 ch at the lower edge to about 18 to 24 ch near the upper edge, scaled to size.
Fill between ribs with two staggered rows of ch 3 to ch 5 arches anchored by sc around each rib. Maintain elongated oval openings.
Work one round sc around the perimeter. Add picots every 3rd or 4th sc along the curved outer half only. Keep the band-facing edge plain for a tidy seam.
At the base, add 2 to 3 short rows of sc to create a 3 to 4 cm (1.25 to 1.5 inch) attachment tab.
Blocked lower wing length: 13 (14, 15, 16, 17, 18, 19) cm or 5.1 to 7.5 inches from thorax to waist anchor.
Part 6: Blocking the Motif Pieces
Do not skip this step. Cotton relaxes significantly after blocking, and your wings need to hold their shape.
1. Soak wings and body pieces in cool water for 10 minutes
2. Press out water in a towel without twisting
3. Pin each upper wing to its target measurement with the long edge rising diagonally. Pin every rib so the oval openings are symmetrical
4. Pin each lower wing with a broader, more horizontal sweep. Match left and right pieces against each other
5. Pin the body straight. Shape the thorax into a plump oval and the tail into a centered taper
6. Allow all pieces to dry completely before seaming
Part 7: Assembly
A. Build the Central Insect
Place thorax vertically on a flat surface. Sew head to top of thorax using whip stitch through back loops only.
Sew first tail segment to lower thorax, then remaining tail segments end to end. Keep the central line perfectly straight.
On the WS, reinforce each join with a second pass of yarn so the spine does not flop when worn.
B. Attach Upper Wings
Position the broad reinforced base of one upper wing behind the upper left third of the thorax. Sew through both layers for 3 to 4 cm (1.25 to 1.5 inches).
Repeat with opposite wing, checking that both wing tips sit at the same height and angle.
The inner upper wing edges may touch the thorax, but they should not overlap the head.
C. Attach Lower Wings
Position one lower wing behind the lower half of thorax so it fans down and outward. Sew its base tab securely to the thorax.
Repeat on the opposite side. Leave a visible open gap between upper and lower wings, approximately 2 to 4 cm (3/4 to 1.5 inches) depending on size.
D. Mount Motif to Garment
Lay the front and side band garment RS down. Center dragonfly over the open back.
Pin upper wing tips to the marked shoulder corners of the front panel. Pin lower wing tabs to marked waist band points. The thorax should float over the center back. Do not sew the tail to the trousers or hem.
With matching yarn, sew upper wing tips to shoulder corners across 2 to 3 cm (3/4 to 1.25 inches). Stitch through sturdy rib and frame stitches only.
Sew lower wing tabs to waist bands across 3 to 4 cm (1.25 to 1.5 inches). Reinforce each anchor twice.
Fit check: Try on carefully. If the motif pulls too tightly, move waist anchors 1 cm outward. If it sags, move them 1 cm inward or add one hidden chain bridge from thorax to each band.
Part 8: Neck Cord and Upper Stabilization
Join yarn to the left upper corner of front panel. Ch 75 to 90, depending on preferred tie length. Sl st back along entire chain for a firm cord. Fasten off.
Repeat from right upper corner.
Tie cords at back of neck in a bow. Finished cords should leave 12 to 18 cm (5 to 7 inches) tails below the bow.
Optional: With a smaller hook, work one row sc across the entire front neckline before making cords. For additional support, crochet over a strand of clear elastic thread.
Part 9: Hem, Edge Finish, and Final Picots
With RS facing, join yarn at one side of front hem. Work sc evenly across front hem, around side band lower edge, stop before the open back center, then repeat on the other side.
Work a second row of sc across front hem only for firmness.
Optional decorative hem: Sc in next 3 sts, picot across. Keep side band edges plain so they lie smoothly against the body.
Weave in all ends on the WS using at least 5 cm (2 inches) of weaving in two directions.
Fit Tuning and Customization Options
| Goal | Adjustment |
|---|---|
| More bust room | Add 4 to 12 stitches to front foundation chain. Keep the same arm shaping. Add extra rows only if more vertical length is needed. |
| Longer crop | Add dc rows before arm shaping. Keep dragonfly tail length unchanged or add one tail segment for every 4 cm (1.5 inches) added body length. |
| More modest back | Add a third chain-arch fill row inside each wing and make side bands 2 to 4 cm wider. |
| More dramatic wings | Increase upper wing foundation chains by 8 to 12 ch and add an 8th rib. Block to a sharper upward angle. |
| Stronger support | Use a cotton/linen blend, smaller hook for wing frame, and hidden clear elastic along front neckline and top of side bands. |
| Softer drape | Use unmercerized cotton or bamboo-cotton, but expect wings to relax more. Block carefully and reinforce ribs. |
Finishing Checklist
Before wearing, run through this list:
Care Instructions
Hand wash in cool water with mild detergent. Support the garment fully when wet. Roll in a towel to remove excess water, then reshape the wings and body on a flat surface. Dry away from direct heat. Do not hang while wet. Store folded to preserve the blocked dragonfly silhouette.
Final Thoughts on This Mint Dragonfly Open-Back Top Crochet Pattern
This project is ambitious, I am not going to lie. But it is also deeply satisfying. Each piece you complete brings you closer to something truly spectacular. When you slip it on and feel those wings against your back, you will understand why I love this design so much.
Take your time with the blocking. Double-check your measurements. And please, please send me photos when you finish because I genuinely want to see what you create.
Thank you so much for choosing this pattern. I hope it brings you hours of happy crocheting and years of compliments every time you wear it. You have got this!
If you loved this Mint Dragonfly Open-Back Top pattern, save it to your Pinterest boards so you can find it when you are ready to start. And if you make one, I would absolutely love to see it. Drop a comment below and tell me which size you are making or what color you chose. Happy hooking!
Want a Quick & Easy Printable Version?
Get a clean, beautifully formatted PDF of this pattern — easy to follow step by step, ready to print or save on any device. No scrolling, no distractions, just the pattern.
Get the Printable PDF →