Go dig through your yarn stash right now. I mean it. Find those bright, happy colors you’ve been saving for "someday" because today is that day. This Rainbow Flower Power Tote uses classic granny square construction with a modern twist, and it’s the perfect way to showcase all those single skeins you’ve been hoarding. The construction is simpler than it looks. You’ll make individual flower motifs, join them together, then add handles. If you can crochet a basic granny square, you can absolutely make this bag. Intermediate crocheters will breeze through it, and confident beginners can tackle it too with a little patience.
Why You’ll Love This Crochet Tote Bag Pattern
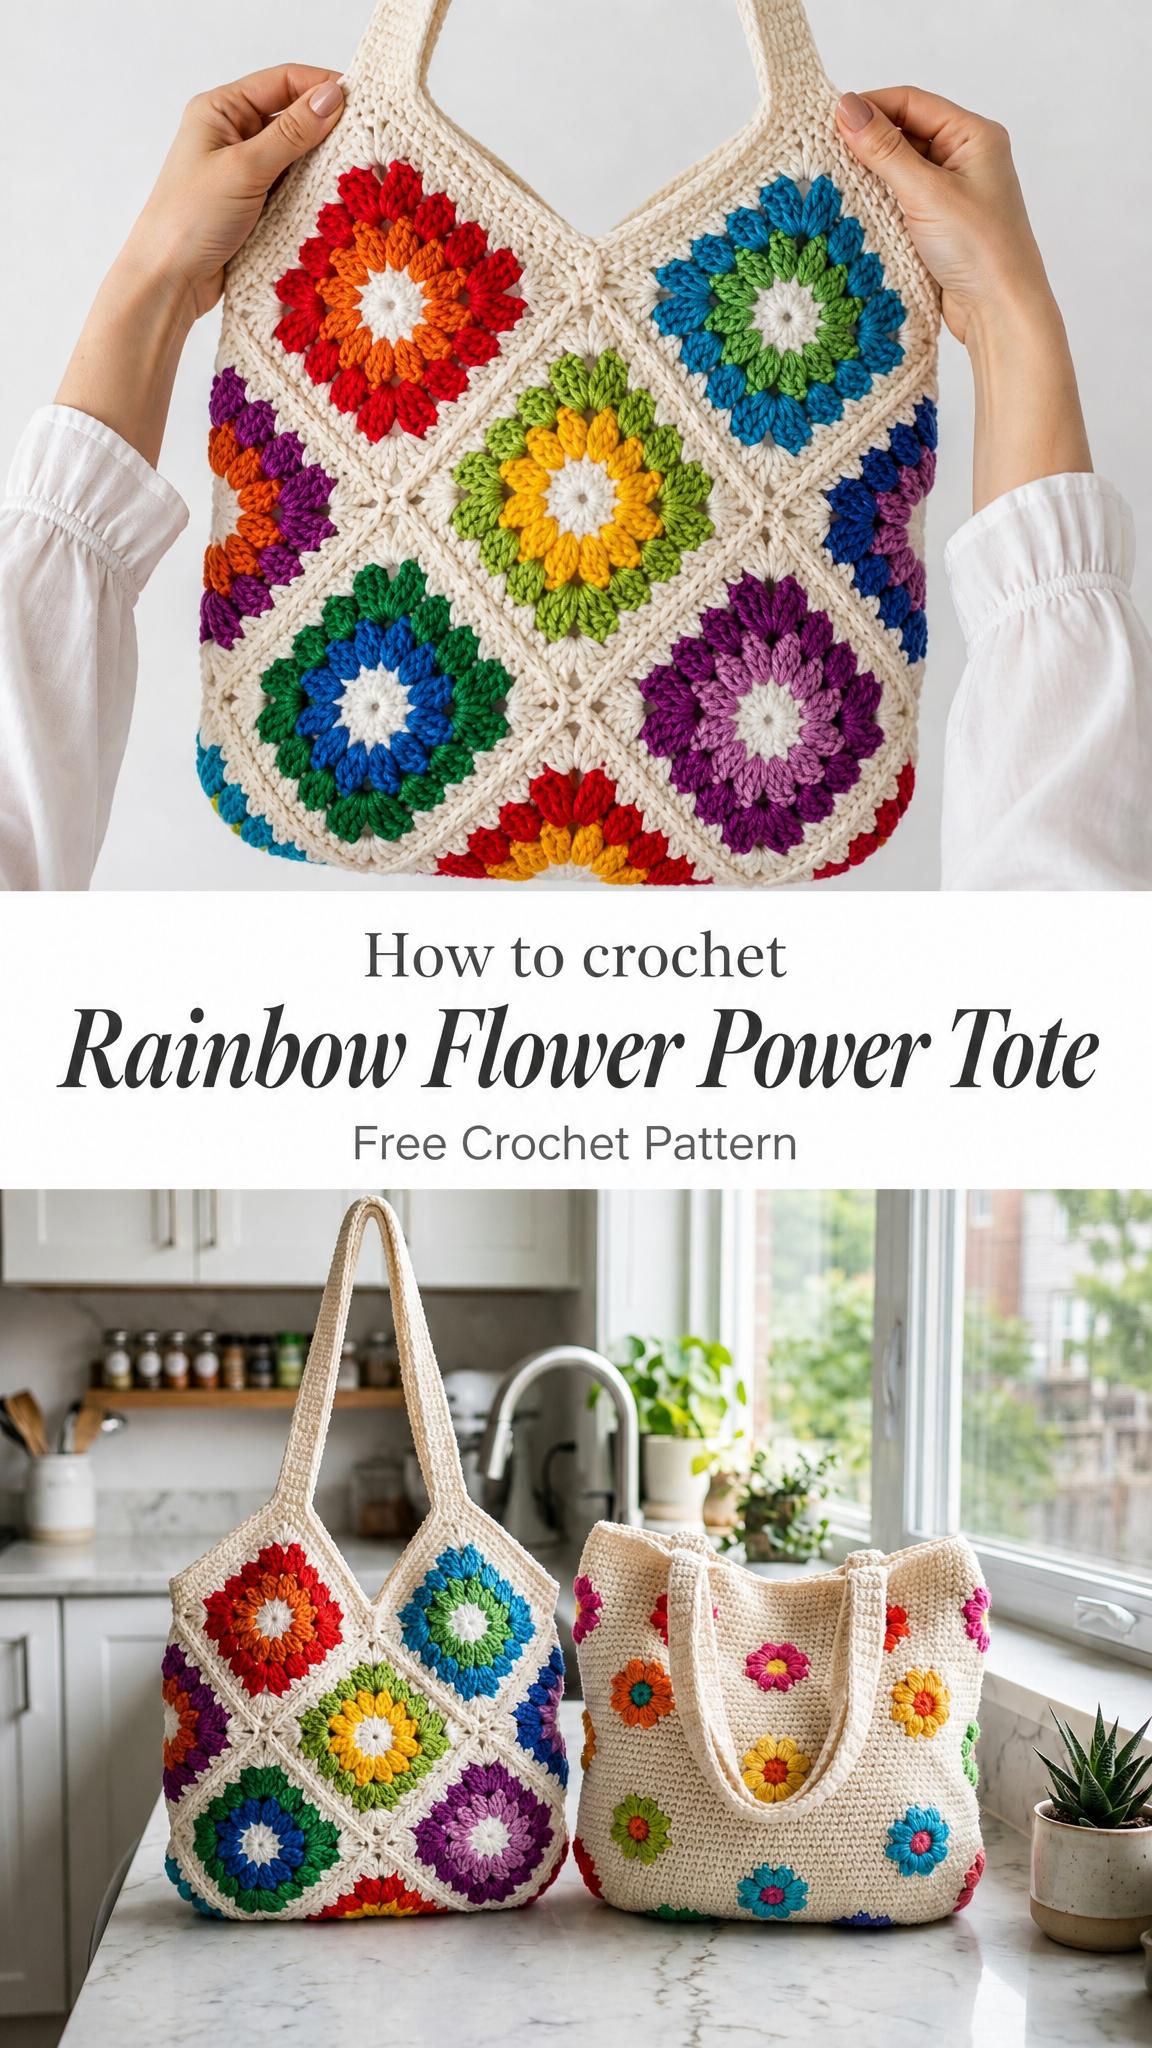
This cheerful tote brings together vintage granny square vibes with a fresh, boho aesthetic. The colorful flower motifs pop beautifully against the cream background, making it a real head-turner at farmers markets, beach trips, or just running errands around town.
What makes this crochet pattern special:
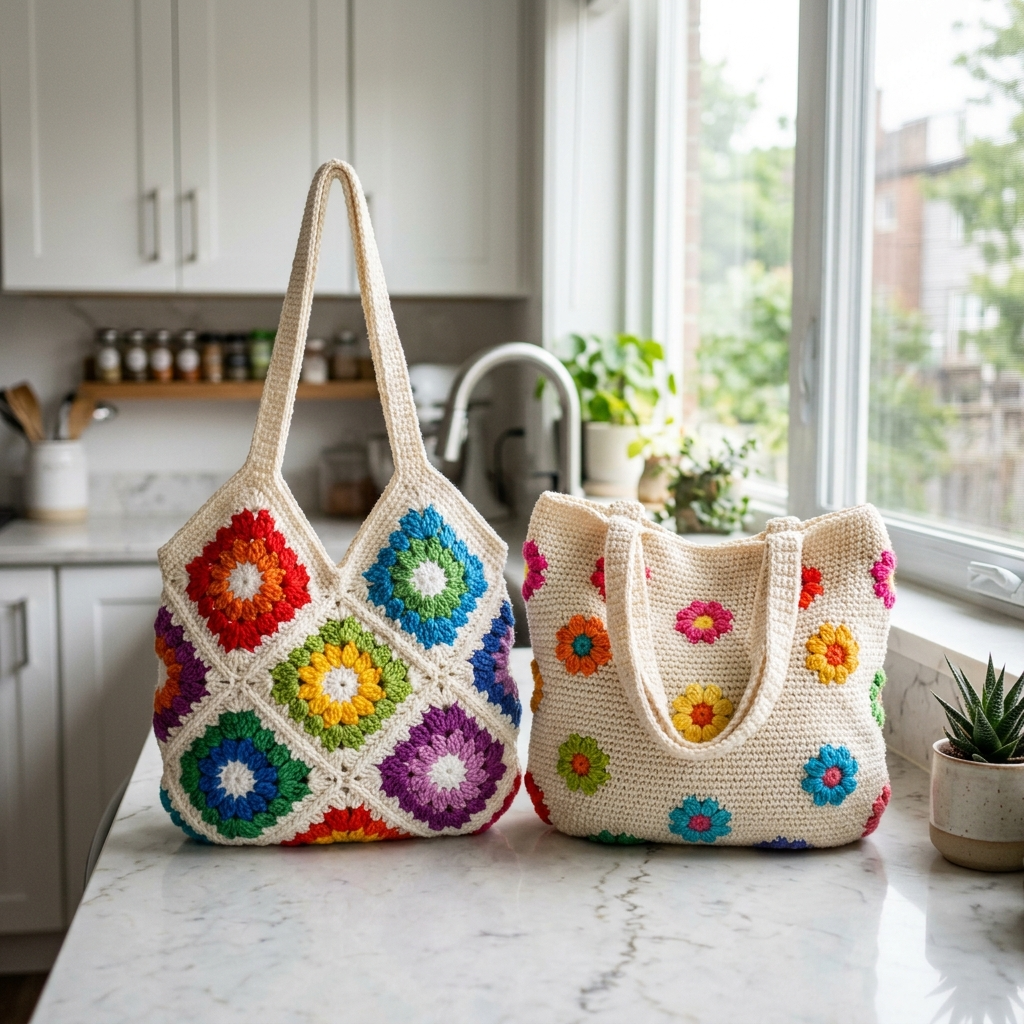
The photo shows two variations of this design. The larger bag on the left features bold granny squares set on point in a diamond arrangement. The smaller bag on the right uses the same flower motifs appliquéd onto a solid crocheted base. I’ll walk you through both versions so you can choose your favorite.
Materials Needed for Your Crochet Tote
Yarn:
I recommend a cotton or cotton blend yarn for this project. Cotton holds its shape beautifully for bags and gets softer with washing. Acrylic works too if you prefer, just know it may stretch a bit more over time.
Hook:
Notions:
Gauge:
Each completed flower motif should measure approximately 4.5 inches square after blocking. Your gauge doesn’t need to be exact, but keep it consistent throughout.
Stitch Abbreviations and Definitions
Before we dive into the step by step instructions, let’s go over the stitches you’ll need. Even if you know these already, a quick refresher never hurts.
Ch = Chain. Wrap yarn over hook, pull through loop on hook. This creates a foundation stitch.
Sl st = Slip stitch. Insert hook, yarn over, pull through both loops at once. Used for joining.
Sc = Single crochet. Insert hook, yarn over and pull up a loop (2 loops on hook), yarn over and pull through both loops.
Dc = Double crochet. Yarn over, insert hook, yarn over and pull up a loop (3 loops on hook), yarn over and pull through 2 loops, yarn over and pull through remaining 2 loops. This is your main stitch for the flower centers.
3-dc cluster = Three double crochets worked into the same stitch or space. This creates the puffy "petals" of each flower.
Magic ring = Also called magic circle or adjustable ring. A starting technique that lets you pull the center hole completely closed. If you’re not comfortable with magic rings, you can chain 4 and slip stitch to join instead.
How to Crochet the Flower Granny Square Motif
This is the building block for your entire tote. You’ll make 9 squares for the large version or 8 smaller flowers for the appliqué version.
Round 1: Flower Center
With your first accent color, make a magic ring.
Ch 3 (counts as first dc throughout), work 2 dc into ring, ch 2. *Work 3 dc into ring, ch 2.* Repeat from * two more times. Sl st to top of beginning ch-3 to join. (12 dc, 4 ch-2 spaces)
Pull the magic ring tail tight to close the center hole. Fasten off this color.
Round 2: Inner Petals
Join your second accent color in any ch-2 corner space.
Ch 3, 2 dc in same space, ch 1, 3 dc in same space (corner made). *Ch 1, work (3 dc, ch 2, 3 dc) in next ch-2 space.* Repeat from * around, ending with ch 1, sl st to top of beginning ch-3. (24 dc, 4 corner ch-2 spaces, 4 side ch-1 spaces)
Fasten off and weave in ends.
Round 3: Outer Petals
Join your third accent color in any corner ch-2 space.
Ch 3, 2 dc in same space, ch 2, 3 dc in same space. *Ch 1, 3 dc in next ch-1 space, ch 1, work (3 dc, ch 2, 3 dc) in corner space.* Repeat from * around. End with ch 1, 3 dc in last ch-1 space, ch 1, sl st to join. (36 dc total)
Fasten off. You should see the flower taking shape now with three rings of color.
Round 4: Background Border
This round creates the cream border that ties all your colorful flowers together.
Join cream yarn in any corner ch-2 space.
Ch 3, 2 dc in same space, ch 2, 3 dc in same space. *Ch 1, 3 dc in next ch-1 space, ch 1, 3 dc in next ch-1 space, ch 1, work (3 dc, ch 2, 3 dc) in corner.* Repeat from * around. End with sl st to join. (48 dc)
Fasten off and weave in ends.
Round 5: Final Border
Join cream in any corner.
Ch 3, 2 dc in same space, ch 2, 3 dc in same space. Work (ch 1, 3 dc in next ch-1 space) across each side, working (3 dc, ch 2, 3 dc) in each corner. Sl st to join. (60 dc)
Fasten off. Block your square gently by wetting it and pinning to measurements.
Make 9 squares total for the large granny square tote.
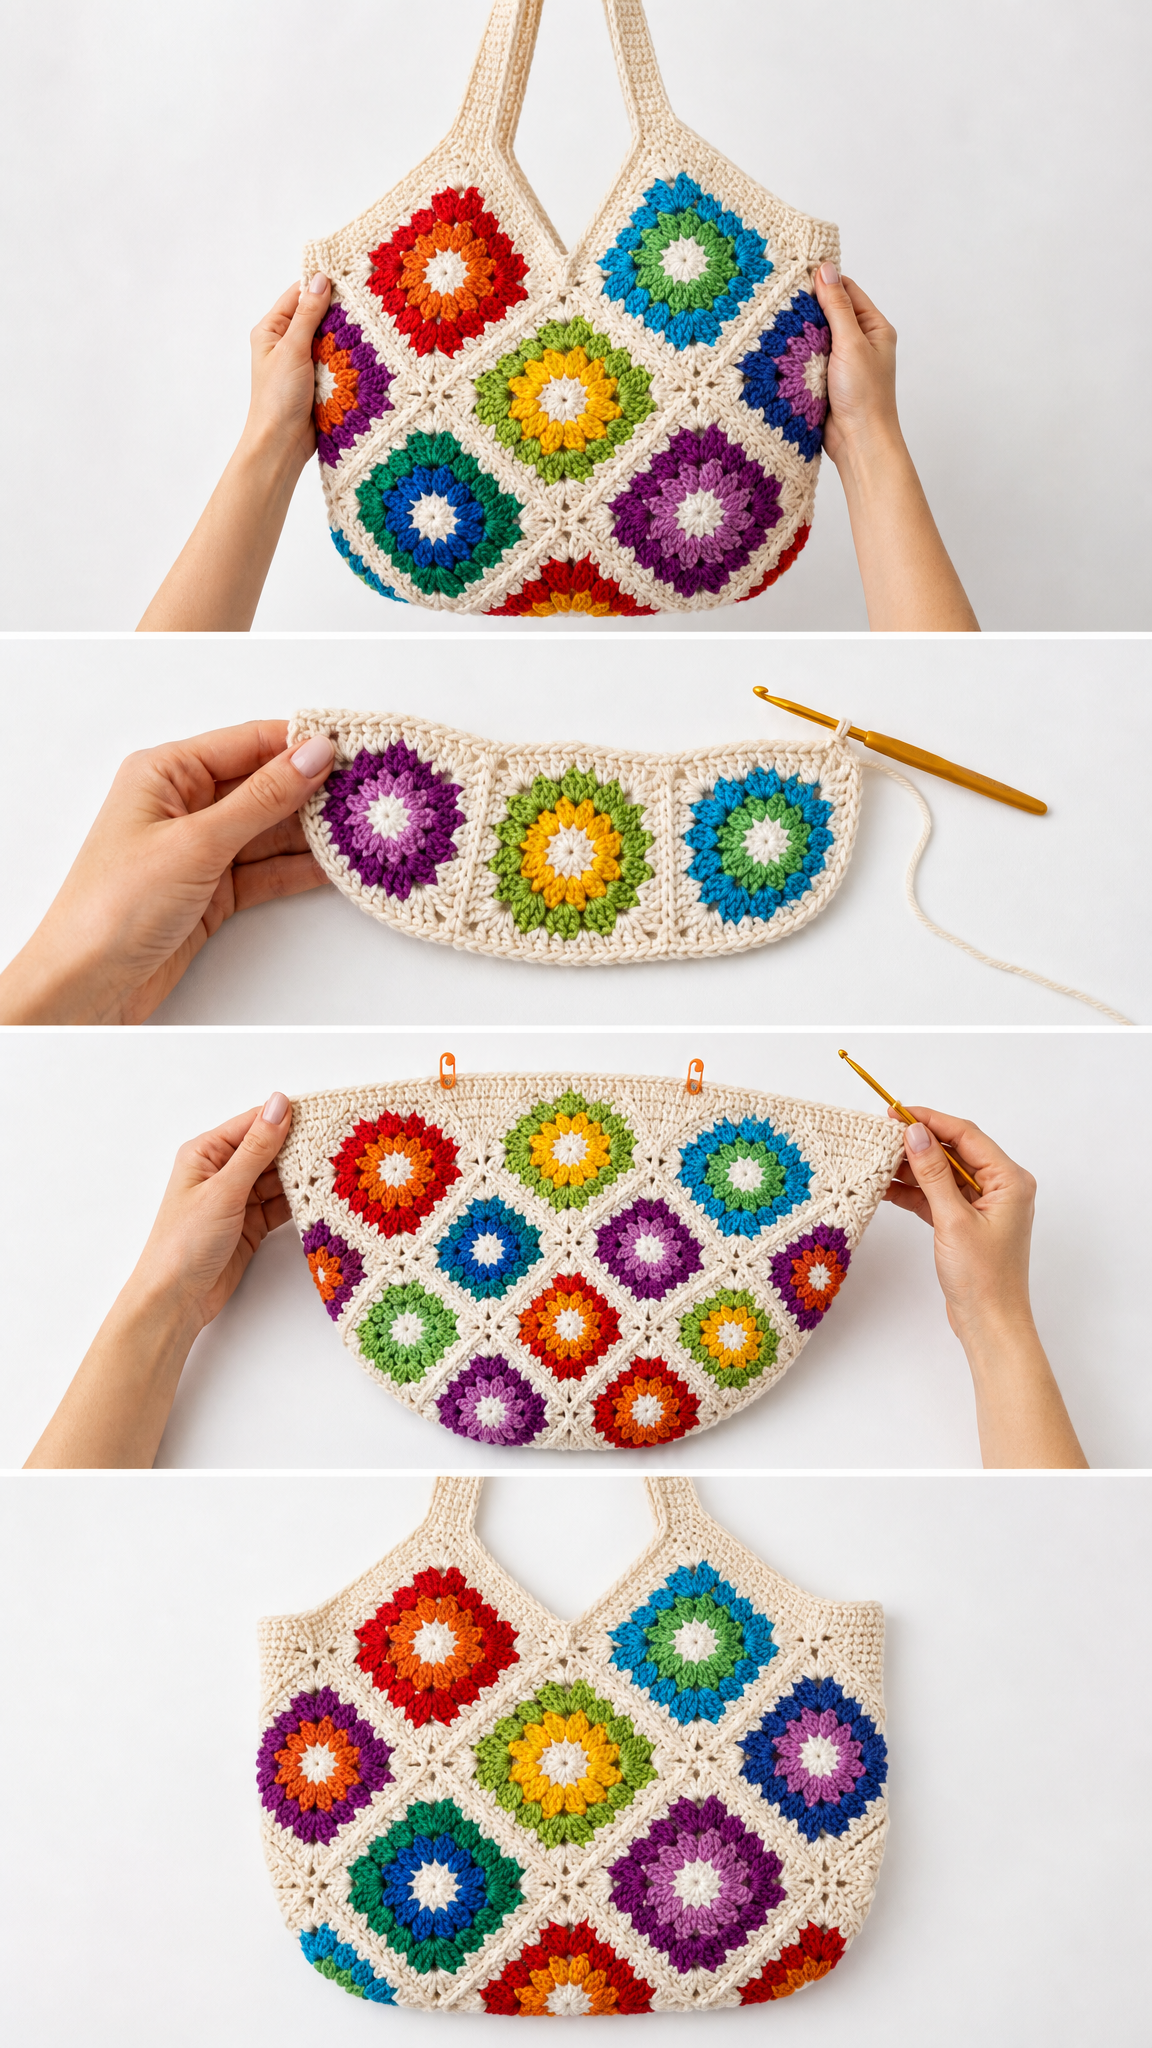
Assembling the Large Granny Square Tote
Joining the Squares
Lay out your 9 squares in a 3×3 grid. The tote in the photo shows them set "on point" as diamonds, which gives that striking diagonal look.
For the diamond arrangement:
You’ll actually set them rotated 45 degrees. Think of it as turning each square so the corners point up, down, left, and right instead of the sides.
Using cream yarn and your yarn needle, whip stitch the squares together through the back loops only. This creates a neat, flexible seam. Alternatively, you can slip stitch them together with your hook for a raised ridge detail.
Join squares into 3 rows of 3, then join the rows together.
Creating the Bag Body
Fold your joined panel in half with right sides together. The fold becomes the bottom of your bag. Seam up both sides using whip stitch or slip stitch.
Turn right side out.
Adding the Top Border
Join cream yarn at one side seam.
Round 1: Sc evenly around the top opening, working approximately 3 sc per granny square edge. Sl st to join. (aim for about 72 sc total, adjust as needed)
Rounds 2 to 4: Ch 1, sc in each sc around. Sl st to join. (72 sc)
Fasten off.
Crocheting the Handles
Strong handles make all the difference in a tote you’ll actually use. These are worked separately and sewn on.
Make 2.
With cream yarn, ch 8.
Row 1: Sc in second ch from hook and each ch across. Ch 1, turn. (7 sc)
Rows 2 to 80: Sc in each sc across. Ch 1, turn. (7 sc)
This creates a handle approximately 26 inches long. Adjust length by adding or removing rows.
Fasten off, leaving a long tail for sewing.
Attaching the Handles
Position handles about 2 to 3 inches from each side seam. Pin in place to make sure they’re even before sewing.
Using your yarn needle and matching yarn, whip stitch each handle end securely to the inside of the bag. Reinforce by stitching through multiple times. Nobody wants a handle giving out when the bag is full of farmers market goodies.
Alternative Version: Flower Appliqué Tote
The smaller bag on the right uses a different construction method that some crocheters find easier.
Crocheting the Bag Base
With cream yarn, ch 31.
Row 1: Sc in second ch from hook and each ch across. Ch 1, turn. (30 sc)
Rows 2 to 60: Sc in each sc across. Ch 1, turn. (30 sc)
This creates a rectangular panel approximately 10 inches wide by 12 inches tall.
Make 2 identical panels.
Making Mini Flower Motifs
Work Rounds 1 through 3 of the flower motif pattern above. Skip the cream border rounds. These smaller flowers become appliqués.
Make 8 to 10 flowers in various color combinations.
Attaching the Flowers
Lay your flowers on the bag panels in a scattered, organic arrangement. Pin them in place.
Using matching yarn colors and your yarn needle, stitch each flower to the bag panel with small, invisible stitches around the outer edge.
Assembling the Appliqué Tote
Hold both panels with wrong sides together. Using cream yarn and your hook, sc the panels together around both sides and the bottom edge. Work 3 sc in each corner to turn smoothly.
Add 3 to 4 rounds of sc around the top opening for stability.
Attach handles as described above, making them slightly shorter (about 60 rows) for the smaller bag.
Tips for Crochet Pattern Success
Color planning: Lay out all your colors before starting. I like to photograph my yarn together to see how they look as a group. The rainbow effect works best when you include warm colors (red, orange, yellow) and cool colors (blue, purple, green) in balance.
Weaving ends as you go: With this many color changes, you’ll have a lot of ends. Weave them in after each motif instead of saving them all for the end. Trust me on this one.
Blocking matters: Wet blocking your squares before joining makes assembly so much easier. Squared up edges join more neatly.
Lining optional: For extra durability, consider adding a fabric lining. Cut fabric slightly smaller than your finished bag and hand stitch it inside along the top edge.
Customization Ideas for Your Tote Bag
Make this crochet tote bag pattern your own with these variations:
You can also adjust the size easily. Make 6 squares (2×3) for a smaller purse, or 12 squares (3×4) for an oversized market bag.
Care Instructions
Hand wash your finished tote in cool water with mild soap. Reshape while damp and lay flat to dry. Avoid machine washing and drying, which can distort the shape and felt the fibers.
Cotton yarn may shrink slightly on first wash, so consider washing your finished bag before using it for the first time.
Thank you so much for choosing this pattern for your next crochet project. I genuinely hope you love making it as much as I loved designing it. When you finish your Rainbow Flower Power Tote, I would absolutely love to see it. Tag me on Instagram or share it in our Facebook group. Seeing your creations honestly makes my whole day.
If this pattern brightened your feed, save it to your Pinterest boards so you can find it whenever the mood strikes. And please drop a comment below when you make yours. I read every single one and love hearing which color combinations you chose.
