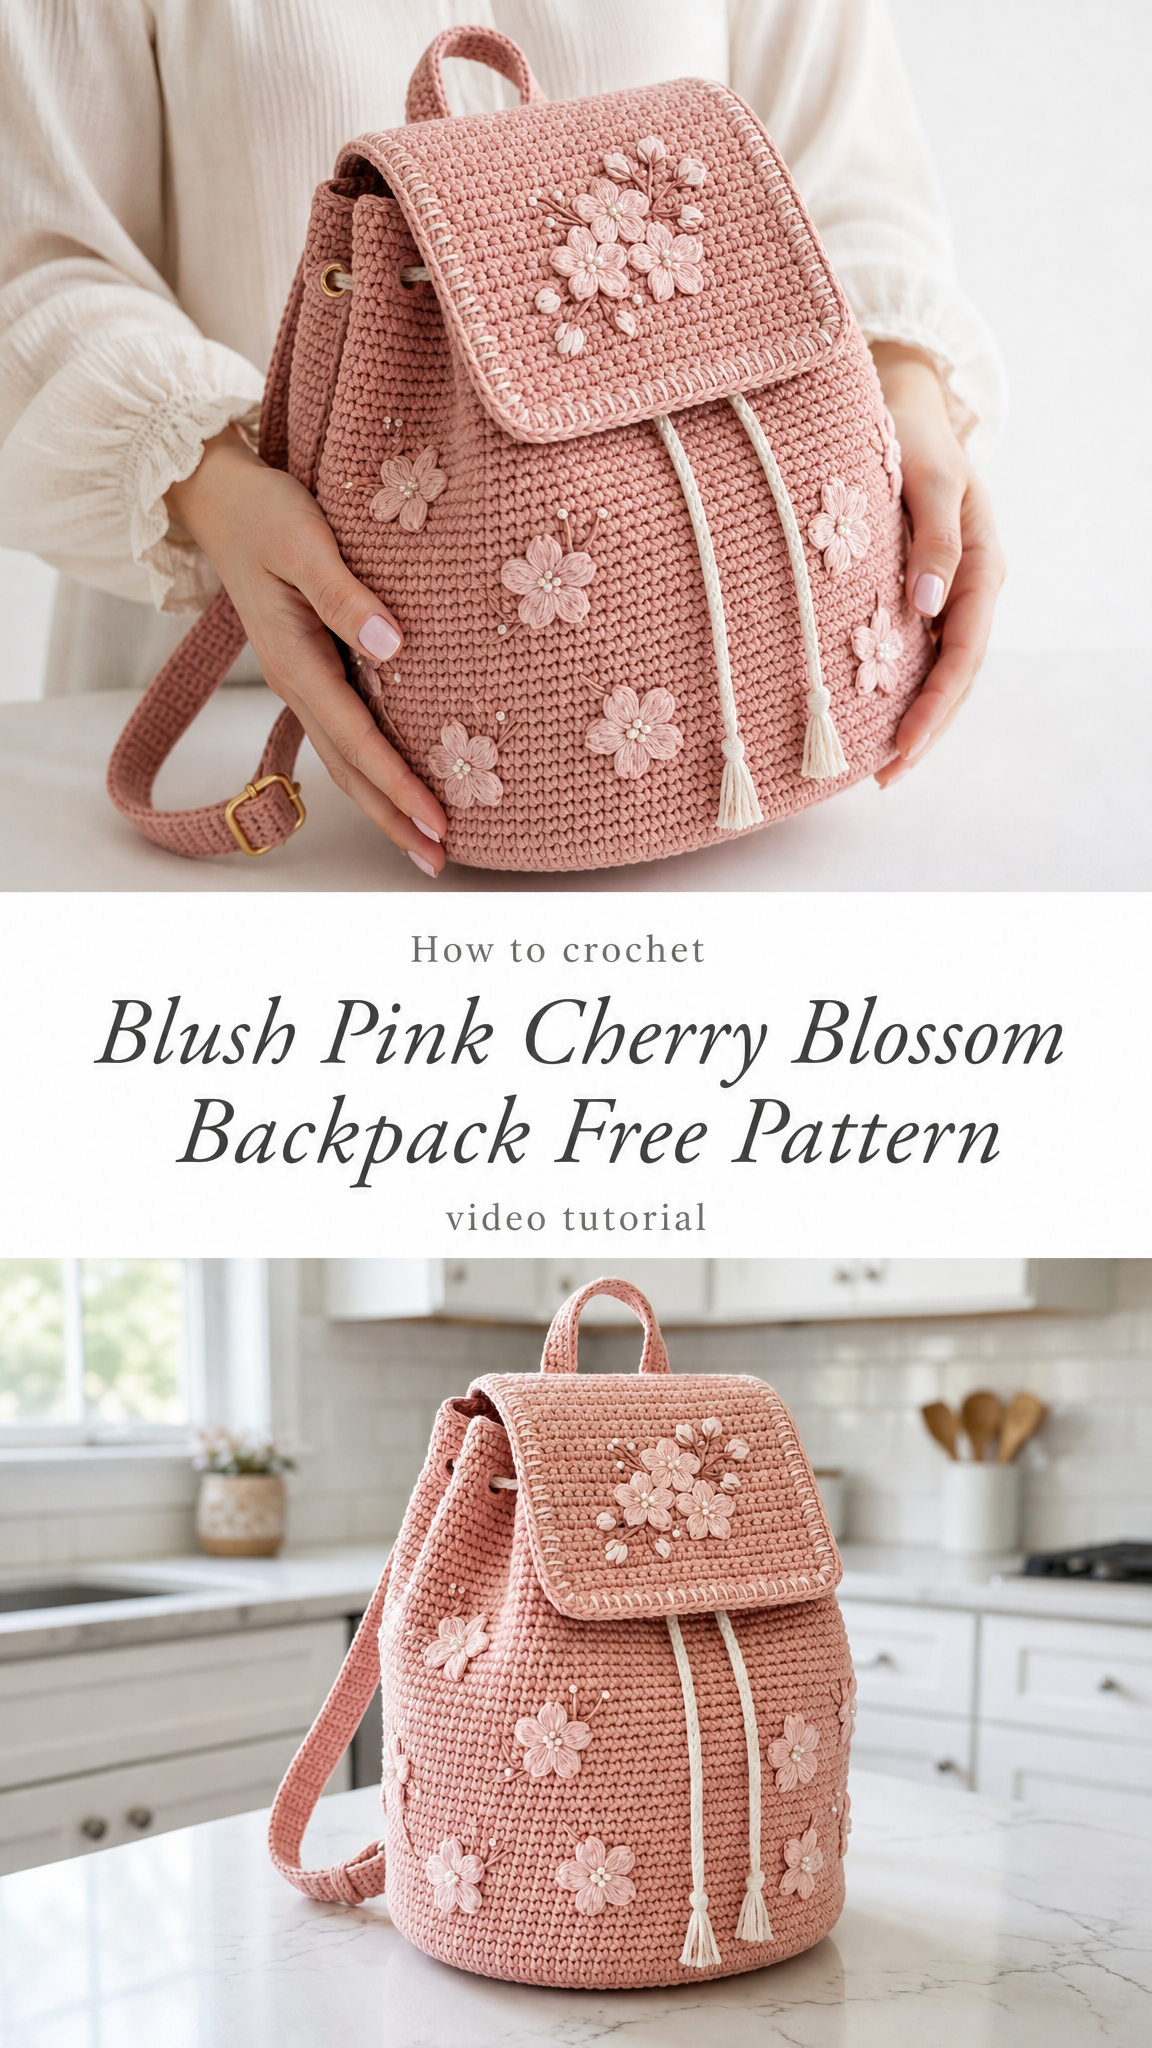
Looking for a thoughtful handmade gift that doubles as a practical everyday accessory? This blush pink cherry blossom backpack works up beautifully using basic crochet stitches, making it perfect for confident beginners ready to tackle their first bag project. The single crochet construction creates a sturdy fabric that holds its shape, while the delicate embroidered flowers add a touch of springtime elegance. Whether you’re making this for yourself, a teenager heading back to school, or a friend who appreciates handcrafted accessories, this backpack is sure to become a treasured piece.
Why You’ll Love This Crochet Backpack Pattern
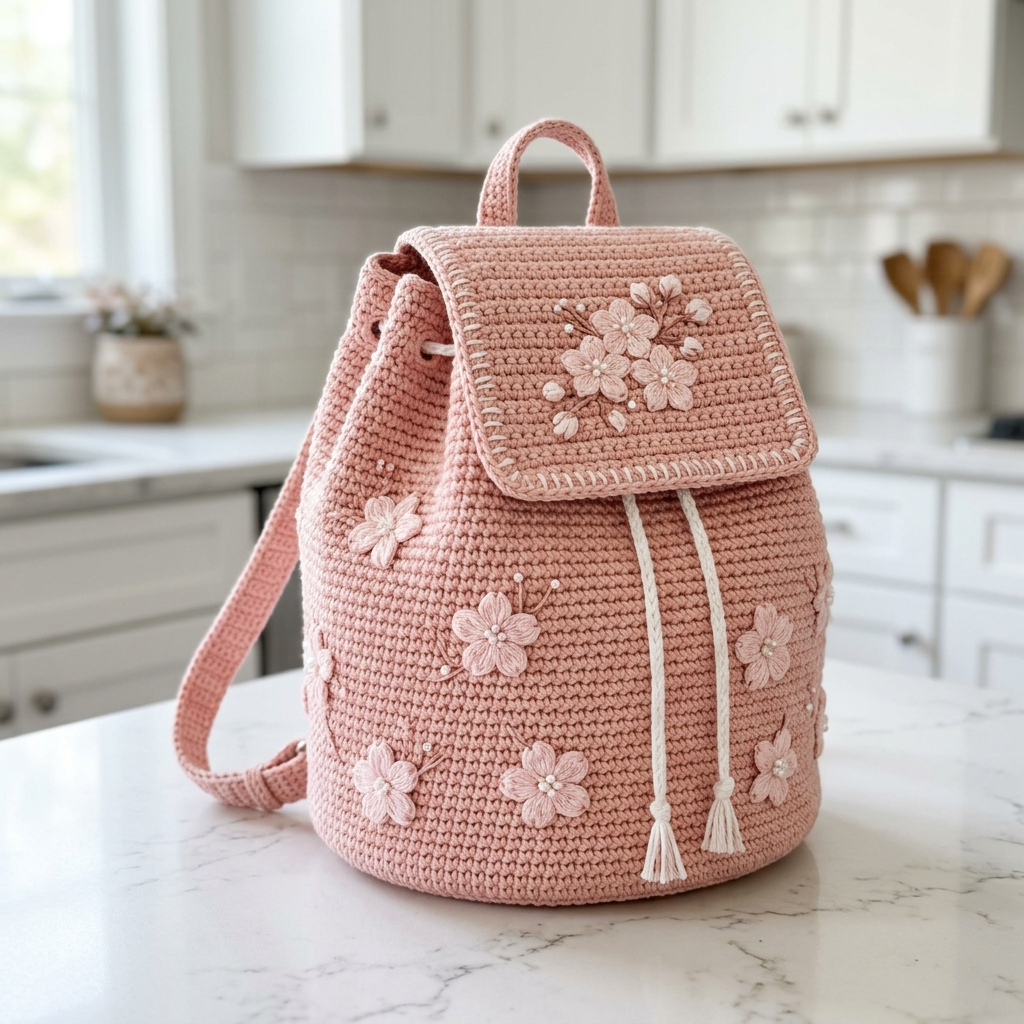
This cherry blossom backpack combines function with feminine charm. The cylindrical shape offers surprising storage space, fitting a water bottle, wallet, phone, keys, and even a small notebook with room to spare. I designed the flap closure with both a drawstring and fold-over top for double security, so nothing falls out when you’re on the move.
The cherry blossom appliqués scattered across the bag elevate it from simple to stunning. They’re crocheted separately and sewn on, which means you control the placement. Want more flowers? Add them. Prefer a minimalist look? Use fewer. It’s completely customizable.
What makes this beginner friendly:
Materials Needed
Gathering your supplies before you start makes the whole process smoother. Here’s everything you’ll need for this crochet tutorial.
Yarn:
Cotton yarn works best for bags because it doesn’t stretch like acrylic. Your backpack will hold its shape better and last longer. I recommend a sturdy mercerized cotton for extra durability and a slight sheen.
Hook:
Notions:
Gauge
Gauge matters for bags. Too loose and your items will poke through. Too tight and the fabric becomes stiff and difficult to work.
18 stitches x 20 rows = 4 inches in single crochet
Work a small swatch before starting. If your swatch is too big, go down a hook size. Too small? Go up a hook size. Trust me, checking gauge saves frustration later.
Finished Dimensions
Abbreviations and Stitch Definitions
Let me break down every stitch you’ll encounter. Even if you know these already, a quick refresher never hurts.
ch = chain: Yarn over, pull through loop on hook. This creates your foundation and is used for spacing.
sl st = slip stitch: Insert hook, yarn over, pull through both the stitch and the loop on your hook in one motion. Used for joining and invisible movement.
sc = single crochet: Insert hook into stitch, yarn over and pull up a loop (two loops on hook), yarn over and pull through both loops. This is your main stitch for the entire bag body.
sc2tog = single crochet two together: A decrease stitch. Insert hook into first stitch, pull up a loop, insert hook into next stitch, pull up a loop (three loops on hook), yarn over and pull through all three. This turns two stitches into one.
inc = increase: Work two single crochet stitches into the same stitch. This adds one stitch to your count.
BLO = back loop only: Instead of inserting your hook under both loops of the V at the top of the stitch, insert it only under the back loop. This creates a ridge on the front.
FLO = front loop only: Insert hook under only the front loop of the V.
Step by Step Crochet Pattern
Base of the Backpack
The base is worked in a flat circle using the magic ring method. If magic rings intimidate you, chain 4 and slip stitch to join instead.
Round 1: Make a magic ring, ch 1, work 6 sc into the ring, pull tight. Do not join. Place stitch marker in first sc. (6 sts)
Round 2: 2 sc in each st around. (12 sts)
Round 3: *Sc in next st, 2 sc in next st* repeat around. (18 sts)
Round 4: *Sc in next 2 sts, 2 sc in next st* repeat around. (24 sts)
Round 5: *Sc in next 3 sts, 2 sc in next st* repeat around. (30 sts)
Round 6: *Sc in next 4 sts, 2 sc in next st* repeat around. (36 sts)
Round 7: *Sc in next 5 sts, 2 sc in next st* repeat around. (42 sts)
Round 8: *Sc in next 6 sts, 2 sc in next st* repeat around. (48 sts)
Round 9: *Sc in next 7 sts, 2 sc in next st* repeat around. (54 sts)
Round 10: *Sc in next 8 sts, 2 sc in next st* repeat around. (60 sts)
Round 11: *Sc in next 9 sts, 2 sc in next st* repeat around. (66 sts)
Round 12: *Sc in next 10 sts, 2 sc in next st* repeat around. (72 sts)
Your base should measure approximately 5 inches across. If it’s significantly smaller or larger, check your gauge and adjust your hook size.
Body of the Backpack
Now we build the walls. This is where the magic happens.
Round 13: Working in BLO only for this round, sc in each st around. (72 sts)
This back loop only round creates a crisp edge where the base meets the walls. You’ll see a neat ridge form on the outside. This is normal and looks beautiful.
Rounds 14 to 65: Sc in each st around. (72 sts)
Yes, that’s 52 rounds of plain single crochet. Put on a podcast, settle into your favorite chair, and enjoy the meditative rhythm. Move your stitch marker up every few rounds so you don’t lose your place.
Pro tip: Count your stitches every 10 rounds. Accidentally adding or skipping stitches happens to everyone. Catching it early saves heartache.
Creating the Drawstring Holes
Round 66: *Sc in next 10 sts, ch 2, skip 2 sts* repeat 6 times around. (60 sc + 6 ch-2 spaces)
These chain spaces create the holes where your drawstring will weave through.
Round 67: Sc in each st and each ch around. (72 sts)
Rounds 68 to 70: Sc in each st around. (72 sts)
Fasten off and weave in ends.
Backpack Flap
The flap is worked flat in rows. It attaches to the back of the bag opening.
Row 1: Ch 31, sc in 2nd ch from hook and each ch across, turn. (30 sts)
Rows 2 to 24: Ch 1, sc in each st across, turn. (30 sts)
Shaping the flap curve:
Row 25: Ch 1, sc2tog, sc to last 2 sts, sc2tog, turn. (28 sts)
Row 26: Ch 1, sc in each st across, turn. (28 sts)
Row 27: Ch 1, sc2tog, sc to last 2 sts, sc2tog, turn. (26 sts)
Row 28: Ch 1, sc in each st across, turn. (26 sts)
Row 29: Ch 1, sc2tog, sc to last 2 sts, sc2tog, turn. (24 sts)
Row 30: Ch 1, sc in each st across. (24 sts)
Border: Ch 1, work sc evenly around entire flap, working 3 sc in each corner for smooth turning. Sl st to join. Fasten off.
For the cream contrast border visible in the design, attach cream yarn and work one more round of sc around the entire flap edge.
Top Handle
Ch 41.
Row 1: Sc in 2nd ch from hook and each ch across. (40 sts)
Rows 2 to 5: Ch 1, sc in each st across. (40 sts)
Fasten off, leaving a long tail for sewing.
Adjustable Shoulder Strap
Ch 121 (or longer for a crossbody length).
Row 1: Sc in 2nd ch from hook and each ch across. (120 sts)
Rows 2 to 6: Ch 1, sc in each st across. (120 sts)
Fasten off with long tails on both ends.
Drawstring Cord
Using cream yarn, ch 150. Sc in 2nd ch from hook and each ch across. (149 sts)
Fasten off. Add small tassels to each end by cutting 6 strands of yarn about 4 inches long, folding in half, and attaching with a lark’s head knot.
Cherry Blossom Flowers (Make 12 to 15)
These sweet flowers transform your backpack from simple to stunning.
Using cream or light pink yarn:
Make a magic ring.
Round 1: Ch 2 (counts as first dc), work 4 dc into ring, sl st to top of ch-2 to join. (5 dc)
Petal round: *Ch 3, sl st in same st, sl st in next st* repeat around. (5 petals)
Fasten off and leave a tail for sewing.
For flower centers, sew a small pearl bead in the middle of each flower. This adds dimension and catches the light beautifully.
Small Butterfly Accents (Make 2 to 3, Optional)
For added whimsy, create tiny butterflies using the same technique as flowers but with only 4 petals arranged in pairs.
Assembly Instructions
Take your time with assembly. Rushing this part can undo all your beautiful work.
1. Attach the base (optional stiffening): Cut a circle of plastic canvas slightly smaller than your crocheted base. Place inside before proceeding. This helps the bag stand upright.
2. Sew the flap: Position the straight edge of the flap along the back of the bag opening, about 2 inches down from the top edge. Whip stitch securely using matching yarn.
3. Attach top handle: Center the handle on the back of the bag, just above where the flap attaches. Sew both ends firmly.
4. Attach shoulder strap: Sew one end of the strap to each side of the bag, about 2 inches down from the top. Reinforce these points with extra stitches since they bear weight.
5. Thread the drawstring: Weave the drawstring cord in and out through the holes you created. Both ends should come out at the front center.
6. Position and sew flowers: Lay out your cherry blossoms on the bag and flap before sewing. I placed a cluster on the flap and scattered individual flowers across the body. Pin them first if that helps you visualize.
7. Add pearl centers: Using a regular sewing needle and thread, sew pearl beads to the center of each flower.
Care Instructions
Hand wash your backpack in cool water with mild detergent. Reshape while damp and lay flat to dry. Avoid wringing, which can distort the shape. If lined with fabric, spot clean or remove the lining before washing.
Customization Ideas
Make this pattern your own with these simple variations:

Troubleshooting Common Issues
Bag is too floppy: Use a smaller hook size or stiffen with fabric stiffener spray. Adding a fabric lining also helps structure.
Flowers look wonky: Block them before sewing. Wet the flowers, pin into shape on a blocking mat, and let dry completely.
Strap keeps twisting: Make sure you’re not accidentally working into a twisted foundation chain. Work slowly on row 1 and smooth the chain as you go.
Lost count of rounds: Use a row counter app or make tally marks on paper. Some crocheters place a safety pin every 10 rounds as a visual marker.
I hope this cherry blossom backpack pattern brings you as much joy to make as it did for me to design. The combination of simple stitches and sweet floral details makes it a satisfying project from start to finish.
Thank you so much for choosing this pattern. I genuinely appreciate you being here. If you make this backpack, I would absolutely love to see it. Tag me on Instagram or share a photo in my Facebook group. Seeing your creations is the best part of sharing patterns.
Before you go, save this cherry blossom backpack pattern to your Pinterest boards so you can find it when you’re ready to cast on. And please drop a comment below if you make one. I read every single comment and love hearing which color combinations you choose. Happy crocheting, friend!
