
Pineapple stitch looks intimidating. I get it. Those intricate lacy motifs with their perfectly tapered points seem like something only advanced crocheters with decades of experience could pull off. But here is the truth: if you can double crochet and count to seven, you can make this stunning halter top.
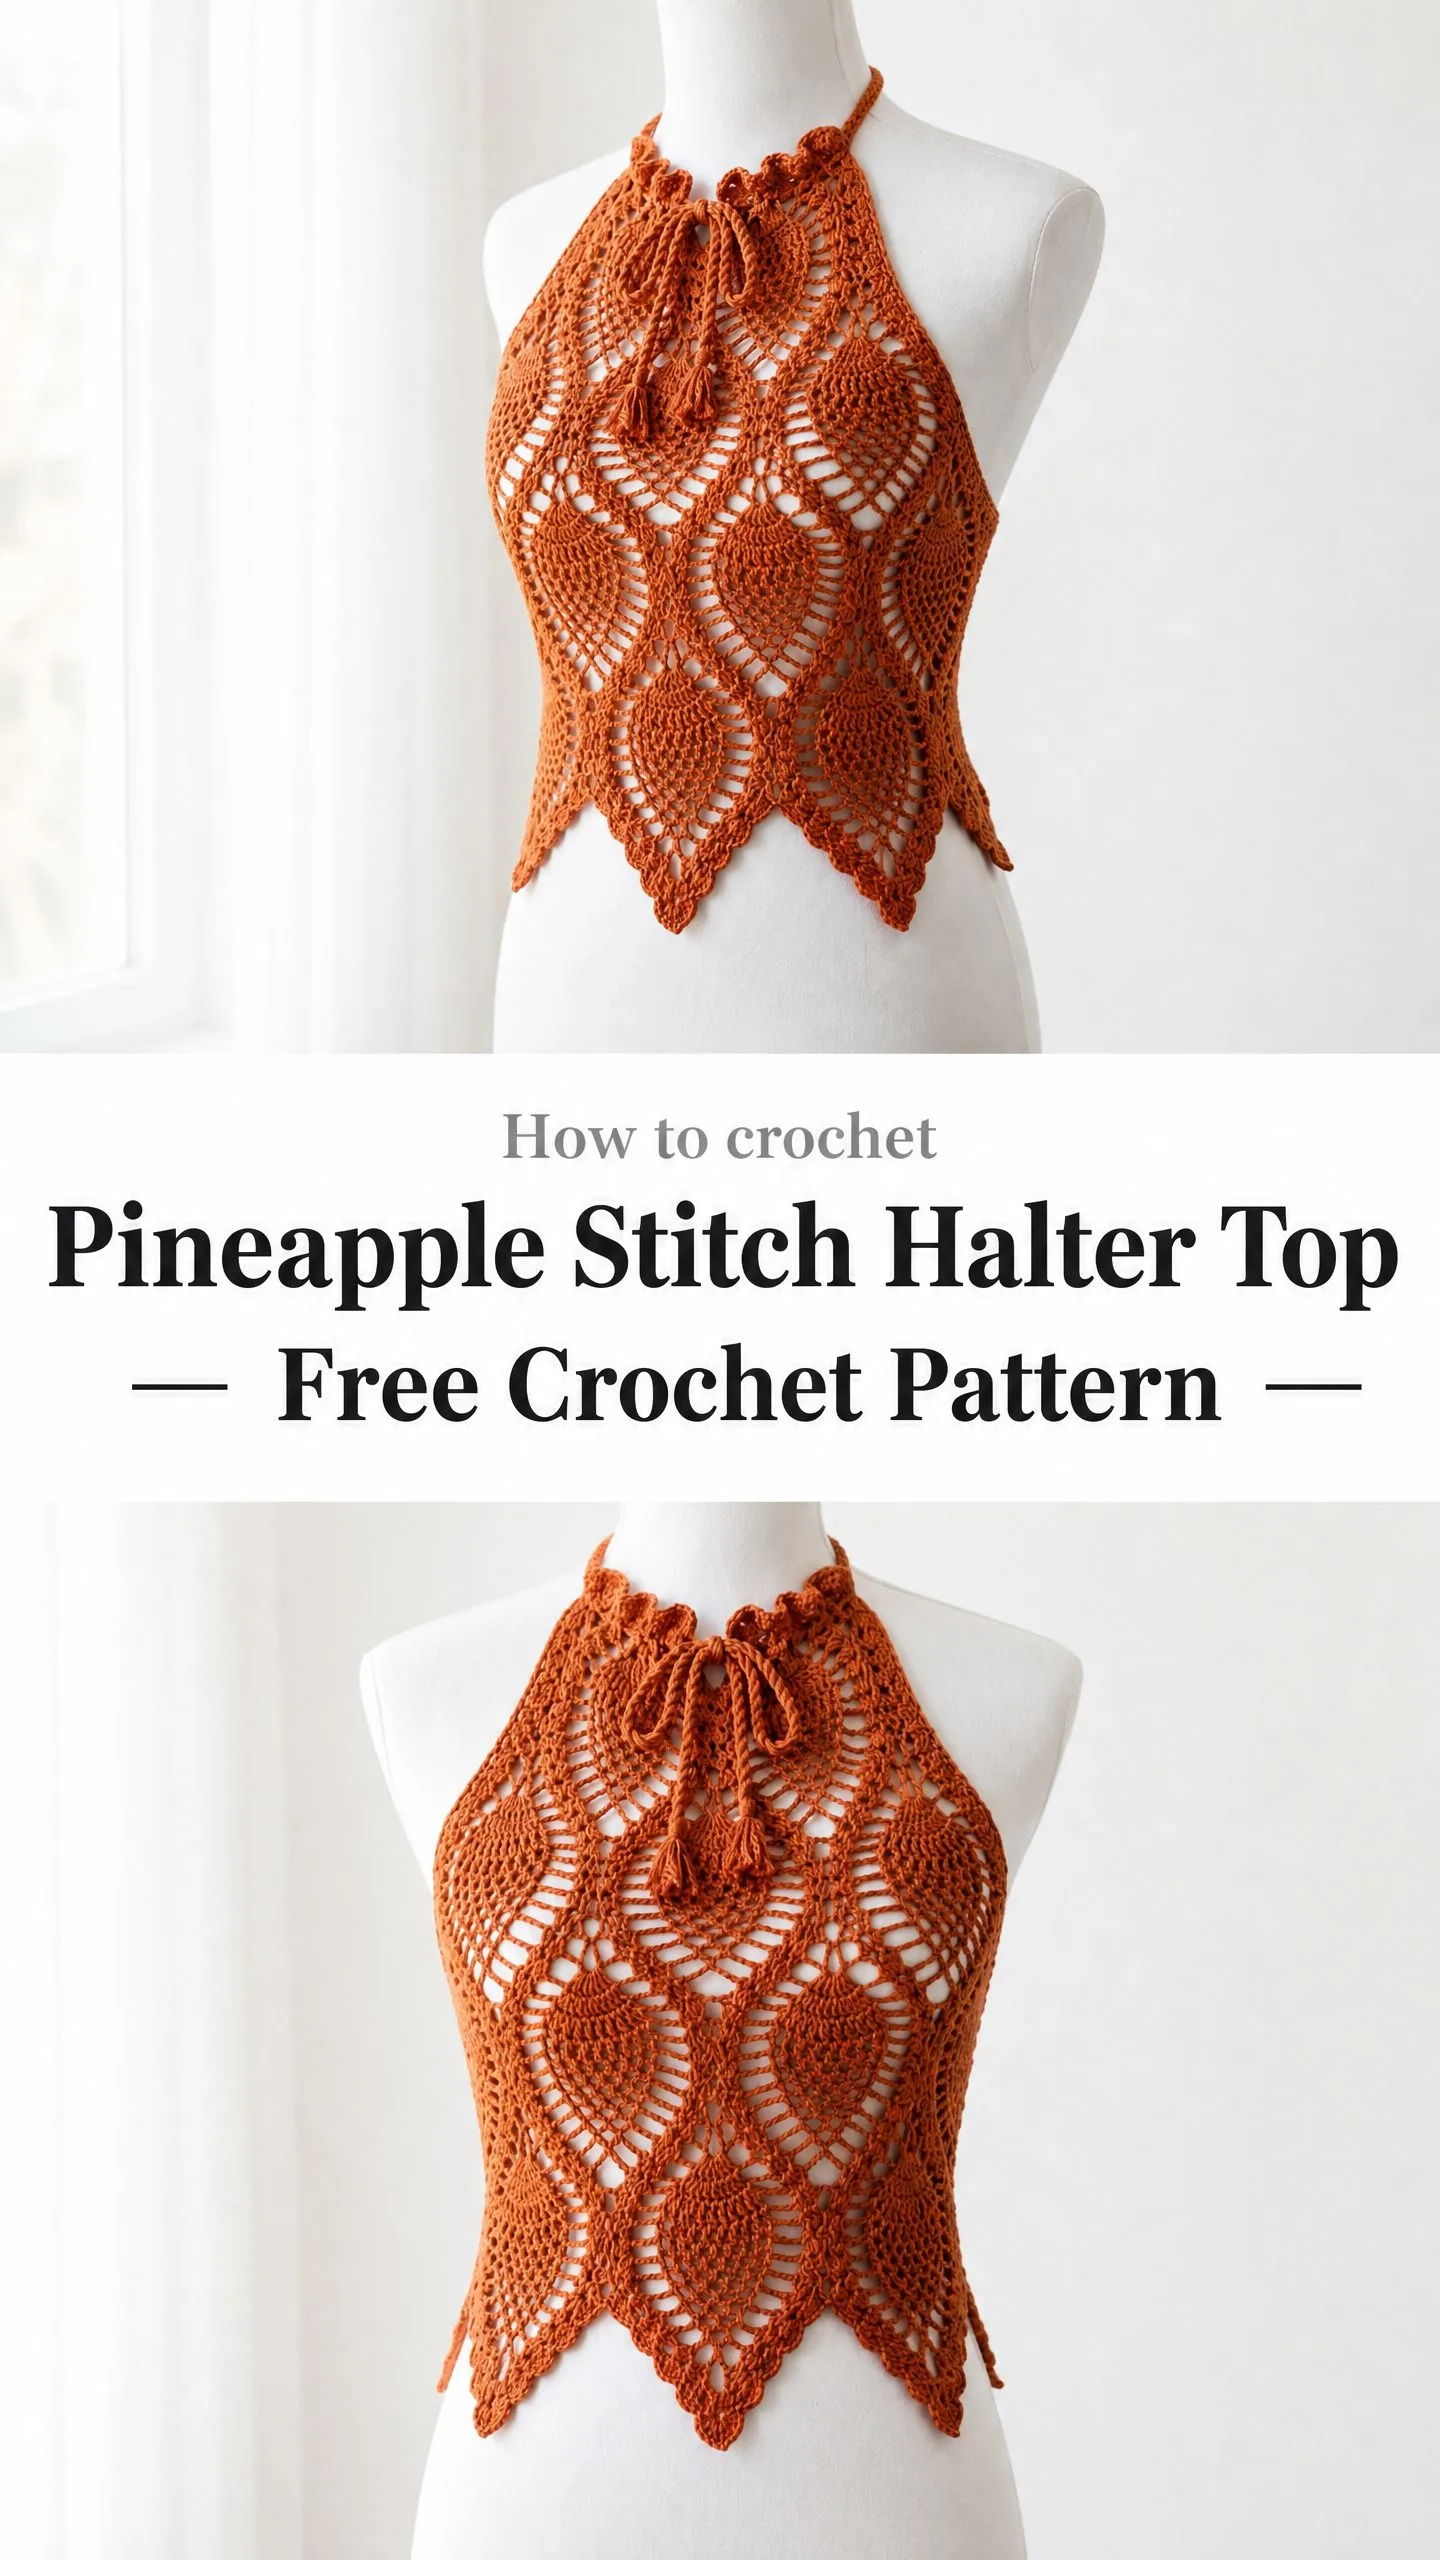
The pineapple stitch is really just the same basic moves repeated over and over, getting smaller each time. That is literally the whole secret. You start with seven double crochets in a cluster, then six, then five, working your way down to one. The pattern does all the thinking for you. Each row tells you exactly what to do next.
Whether you have been crocheting for years or you are an ambitious intermediate crafter ready to level up, this pineapple stitch halter top is more achievable than it appears. The lacy openwork, the elegant pointed hem, the beautiful drape of the cotton yarn. It all comes together into a garment that looks like it belongs in a boutique window. Let me walk you through every single step.
About This Crochet Pattern
This halter top features the classic pineapple stitch pattern worked in a gorgeous terracotta or rust-toned cotton yarn. The construction begins at the neck with a foundation chain, works downward through the bust and waist, and finishes at the hem with pointed scallop peaks formed naturally by the pineapple motifs.
The neckline ties at the back with a twisted cord and tassel closure. Both the front and back panels are worked separately, then joined at the sides with ties for a modern, airy silhouette. A crocheted ruffle trims the neckline, and the cord draws through it to secure the top at the back of the neck.
Skill Level: Advanced. This pattern requires confident handling of pineapple stitch clusters, shell stitches, and lacework spacing. You will track multiple stitch types simultaneously across wide rows and manage correct stitch counts through increases that build the pineapple motif. If you are newer to crochet, I strongly recommend practicing the pineapple motif as a swatch before beginning the full garment.
Time Estimate: Approximately 20 to 30 hours for an experienced crocheter. Add 4 to 6 hours if blocking and finishing are done carefully.
Finished Sizes
Size Small: Bust 32 to 34 in / 81 to 86 cm, length approximately 14 in / 35.5 cm from neck tie to lowest hem point.
Size Medium: Bust 34 to 36 in / 86 to 91 cm, length approximately 14.5 in / 37 cm from neck tie to lowest hem point.
Size Large: Bust 36 to 38 in / 91 to 96 cm, length approximately 15 in / 38 cm from neck tie to lowest hem point.
The garment is designed with zero to 1 in / 0 to 2.5 cm of ease at the bust. Size instructions are written for Small, with Medium and Large in parentheses throughout.
Materials Needed
Yarn: Approximately 700 (800, 900) yards / 640 (730, 823) meters of DK weight yarn, 100 percent mercerized cotton or cotton-linen blend, in a single color.
Hook: US size E-4 / 3.5 mm crochet hook.
Notions:
Yarn Suggestions
Paintbox Yarns Cotton DK: 100 percent cotton, 137 yards / 125 meters per 50 g skein. Purchase 6 (6, 7) skeins. This yarn has excellent stitch definition ideal for lacework.
Lion Brand 24/7 Cotton DK: 100 percent mercerized cotton, 186 yards / 170 meters per 100 g skein. Purchase 4 (5, 5) skeins. The mercerized finish enhances the sheen of the pineapple stitch.
Scheepjes Catona (held double): 100 percent mercerized cotton, 62 yards / 57 meters per 25 g ball. Hold two strands together throughout. Purchase 12 (13, 15) balls. This produces a slightly more drapey fabric with delicate stitch texture.
Substitution Note: Choose a smooth, tightly plied DK cotton or cotton-linen blend. Avoid textured, hairy, or loosely plied yarn as these obscure the lace structure of the pineapple motif. The yarn must hold a firm twist to maintain the chain-space architecture between clusters.
Gauge
In pineapple stitch pattern after blocking:
One full pineapple motif (including flanking chain spaces) measures 3.5 in / 9 cm wide and 3 in / 7.5 cm tall.
18 dc x 8 rows = 4 in / 10 cm in standard double crochet.
Gauge is mandatory for a fitted garment. Check your gauge swatch before beginning. Adjust hook size up or down as needed. A hook that is too small will produce a stiff fabric that does not drape. A hook that is too large will produce a fabric that is too open and does not hold its shape.
Abbreviations Used
Special Stitches for This Pattern
Shell Stitch
Insert hook into stitch or chain space indicated, work (2 dc, ch 2, 2 dc) all into that same stitch or space. This forms the base arch from which pineapple motifs grow. Think of shells as the scaffolding that holds everything together.
Pineapple Cluster (PC) Foundation Row
Step 1: Yo, insert hook into ch-5 space indicated, yo, pull up a loop, yo, pull through 2 loops on hook. You now have one incomplete dc.
Step 2: Repeat Step 1 six more times into the same ch-5 space. You now have 7 incomplete dc on your hook.
Step 3: Yo, pull through all 8 loops on hook.
Step 4: Ch 1 to close and secure the cluster.
This forms the first and widest row of the pineapple (7-dc cluster). It looks like a little fan gathered at the top.
Pineapple Decrease (PD)
Each successive row of the pineapple is worked with one fewer dc than the previous row. This is what creates the tapered shape.
Step 1: Yo, insert hook into ch-sp indicated, yo, pull up a loop, yo, pull through 2 loops. That is your first incomplete dc.
Step 2: Repeat Step 1 for the number of dc specified minus one. If working a 5-dc pineapple row, work 5 incomplete dc total.
Step 3: Yo, pull through all remaining loops on hook.
Step 4: Ch 1 to close.
Twisted Cord
Cut 6 strands of yarn, each approximately 60 in / 152 cm long. Fold in half and secure the looped end to a fixed point like a doorknob. Twist the strands tightly in one direction until they begin to kink on themselves. Fold the twisted length in half at the midpoint, allowing the two halves to twist around each other. Knot the loose ends together. This forms the neck tie cord.
Tassel
Wrap yarn around a 3 in / 7.5 cm piece of cardboard approximately 20 times. Slide off the cardboard. Tie a length of yarn tightly around the top of the bundle. Cut the loops at the bottom. Wrap another piece of yarn around the bundle approximately 0.5 in / 1.3 cm from the top several times and knot securely. Trim ends evenly.
Ruffle Edging
Into each stitch or chain space along the neckline edge, work (sc, ch 2, sc) to create a soft ruffle that frames the neckline.
DC2TOG (Double Crochet 2 Together)
Step 1: Yo, insert hook into first stitch, yo, pull up a loop, yo, pull through 2 loops. You have 2 loops remaining on hook.
Step 2: Yo, insert hook into next stitch, yo, pull up a loop, yo, pull through 2 loops. You have 3 loops remaining on hook.
Step 3: Yo, pull through all 3 loops on hook.
One stitch decreased.
Important Pattern Notes
Before you begin, read through these notes. They will save you confusion later.
1. The front panel and back panel are worked separately from the top down, then joined at the sides.
2. Both panels begin at the neck edge with a foundation chain. The pineapple motifs are set up on Row 1, growing downward toward the hem.
3. Each pineapple motif begins wide (7-dc cluster at top) and narrows to a point over 7 rows, creating the distinctive tapered pineapple shape.
4. Between pineapple motifs, shell stitches provide a structural arch that also serves as the base for the next pineapple in the row below.
5. The hem scallops are the natural pointed tips of the final pineapple row. No additional shaping is needed at the hem.
6. The garment is worked flat in rows, not in the round, to allow the open back design.
7. The neck ruffle is worked after both panels are assembled. The twisted cord is threaded through the ruffle and ties at the back of the neck.
8. Side ties are crocheted chains approximately 10 in / 25 cm long, one pair at the natural waist on each side, used to secure the two panels together at the body.
9. Turn at the end of every row unless otherwise specified.
10. Turning chains are counted as follows: ch 3 counts as dc, ch 4 counts as dc plus ch 1, ch 5 counts as dc plus ch 2.
11. Stitch counts at the end of each row reflect only the structural stitches, not chains within chain spaces.
12. When the pattern says "in ch-2 sp of shell," insert hook into the 2-chain space at the center of the shell stitch.
Front Panel Instructions
Each size begins with a different foundation chain count.
The foundation chain establishes 4 (4, 4) full pineapple motif sequences across the row plus edge stitches.
Note on sizing: The front panel for Small contains 4 full pineapple motifs plus 2 half-pineapple motifs at the edges. Medium and Large each add one additional shell between motifs, widening each repeat unit.
All sizes are written together below. When a number appears in parentheses it reads Small (Medium, Large). When all sizes are the same, a single number is given.
Foundation Chain
Ch 140 (154, 168). This is a multiple of 14 ch plus 14 for edge stitches.
Row 1 (RS, setup row)
Dc in 4th ch from hook (counts as 2 dc), ch 2, sk 2 ch, dc in next ch, ch 2, sk 2 ch, work 7 dc all into next ch (this forms the first 7-dc pineapple cluster start position), ch 2, sk 2 ch, dc in next ch, ch 2, sk 2 ch, (2 dc, ch 2, 2 dc) in next ch (shell made), ch 2, sk 2 ch, dc in next ch, ch 2, sk 2 ch.
Rep the sequence [7 dc in next ch, ch 2, sk 2, dc in next ch, ch 2, sk 2, shell in next ch, ch 2, sk 2, dc in next ch, ch 2, sk 2] across, ending with 7 dc in next ch, ch 2, sk 2, dc in next ch, ch 2, sk 2, 3 dc in last ch.
Turn.
Stitch count: 4 (5, 6) pineapple start groups of 7 dc, 3 (4, 5) shells, edge stitches. Structural dc count: 62 (76, 90) dc plus chain spaces.
Note: Row 1 establishes the skeleton of the pattern. The 7-dc groups are not yet formed into true clusters. They are worked as individual dc into single chain stitches of the foundation to set position.
Row 2 (WS, first pineapple cluster row)
Ch 3, turn. Dc in same st (half-shell start). Ch 2, sc into center of the 7-dc group below (insert hook between the 4th and 5th dc of the group, or into the chain space if using the ch-1 top), ch 2. Shell into ch-2 sp of shell below. Ch 2, sc into center of next 7-dc group, ch 2. (2 dc, ch 2, 2 dc) into next shell. Rep across. End with (dc, ch 2, dc) into top of turning ch. Turn.
Stitch count: 38 (46, 54) dc, 4 (5, 6) sc, multiple chain spaces.
Note: From Row 2 onward the pineapple body is built by working diminishing clusters directly into the chain spaces created between shells.
Row 3 (RS, 7-dc pineapple cluster row, first true cluster row)
Ch 5 (counts as dc, ch 2), turn. Into the first ch-2 sp of the row work 7 dc (PC, first and widest cluster of first pineapple). Ch 2, shell into ch-2 sp of shell below. Ch 2, into next ch-2 sp work 7-dc PC. Ch 2, shell into shell sp. Rep across, ending with ch 2, into last ch-2 sp work 7-dc PC, ch 2, dc into top of turning ch. Turn.
Stitch count: 4 (5, 6) PCs of 7 dc each, 3 (4, 5) shells, edge dc stitches. Structural dc count: 44 (55, 66) dc.
Row 4 (WS, 6-dc pineapple row)
Ch 3, turn. Dc in same st. Ch 2, sc into top of PC (into ch-1 closing loop), ch 2, shell into shell sp, ch 2, sc into top of next PC, ch 2, shell into shell sp. Rep across, ending dc into top of turning ch. Turn.
Stitch count: 38 (46, 54) dc, 4 (5, 6) sc, chain spaces.
Row 5 (RS, second cluster row, 6-dc clusters)
Ch 5, turn. Into first ch-2 sp work 6-dc PD. Ch 2, shell into shell sp. Ch 2, into next ch-2 sp work 6-dc PD. Rep across, ending 6-dc PD in last ch-2 sp, ch 2, dc in top of turning ch. Turn.
Stitch count: 4 (5, 6) PDs of 6 dc each, 3 (4, 5) shells. Structural dc count: 40 (50, 60) dc.
Row 6 (WS)
Ch 3, turn. Dc in same st. Ch 2, sc into top of PD, ch 2, shell into shell sp, ch 2, sc into top of PD, ch 2, shell. Rep across, ending dc into turning ch. Turn.
Row 7 (RS, 5-dc clusters)
Ch 5, turn. 5-dc PD into first ch-2 sp. Ch 2, shell into shell. Ch 2, 5-dc PD into next ch-2 sp. Rep across, ending 5-dc PD, ch 2, dc in top of turning ch. Turn.
Stitch count: 4 (5, 6) PDs of 5 dc each, 3 (4, 5) shells. Structural dc count: 36 (45, 54) dc.
Row 8 (WS)
Ch 3, turn. Dc in same st. Ch 2, sc into PD top, ch 2, shell, ch 2, sc into PD top, ch 2, shell. Rep across, ending dc in turning ch. Turn.
Row 9 (RS, 4-dc clusters)
Ch 5, turn. 4-dc PD into first ch-2 sp. Ch 2, shell. Ch 2, 4-dc PD. Rep across, ending 4-dc PD, ch 2, dc. Turn.
Stitch count: 4 (5, 6) PDs of 4 dc, 3 (4, 5) shells. Structural dc count: 32 (40, 48) dc.
Row 10 (WS)
Ch 3, turn. Dc in same st. Ch 2, sc into PD top, ch 2, shell, ch 2, sc into PD top, ch 2, shell. Rep across, ending dc in turning ch. Turn.
Row 11 (RS, 3-dc clusters)
Ch 5, turn. 3-dc PD into first ch-2 sp. Ch 2, shell. Ch 2, 3-dc PD. Rep across, ending 3-dc PD, ch 2, dc. Turn.
Stitch count: 4 (5, 6) PDs of 3 dc, 3 (4, 5) shells. Structural dc count: 28 (35, 42) dc.
Row 12 (WS)
Ch 3, turn. Dc in same st. Ch 2, sc into PD top, ch 2, shell, ch 2, sc into PD top, ch 2, shell. Rep across, ending dc in turning ch. Turn.
Row 13 (RS, 2-dc clusters, near tip of pineapple)
Ch 5, turn. 2-dc PD into first ch-2 sp. Ch 2, shell. Ch 2, 2-dc PD. Rep across, ending 2-dc PD, ch 2, dc. Turn.
Stitch count: 4 (5, 6) PDs of 2 dc, 3 (4, 5) shells. Structural dc count: 24 (30, 36) dc.
Row 14 (WS)
Ch 3, turn. Dc in same st. Ch 2, sc into PD top, ch 2, shell, ch 2, sc into PD top, ch 2, shell. Rep across, ending dc in turning ch. Turn.
Row 15 (RS, 1-dc tip, completing the first pineapple series)
Ch 5, turn. Dc into first ch-2 sp (single dc closes the pineapple tip). Ch 2, shell. Ch 2, dc into next ch-2 sp. Rep across, ending dc into last ch-2 sp, ch 2, dc. Turn.
Stitch count: 4 (5, 6) single tip dc, 3 (4, 5) shells. Structural dc count: 20 (25, 30) dc.
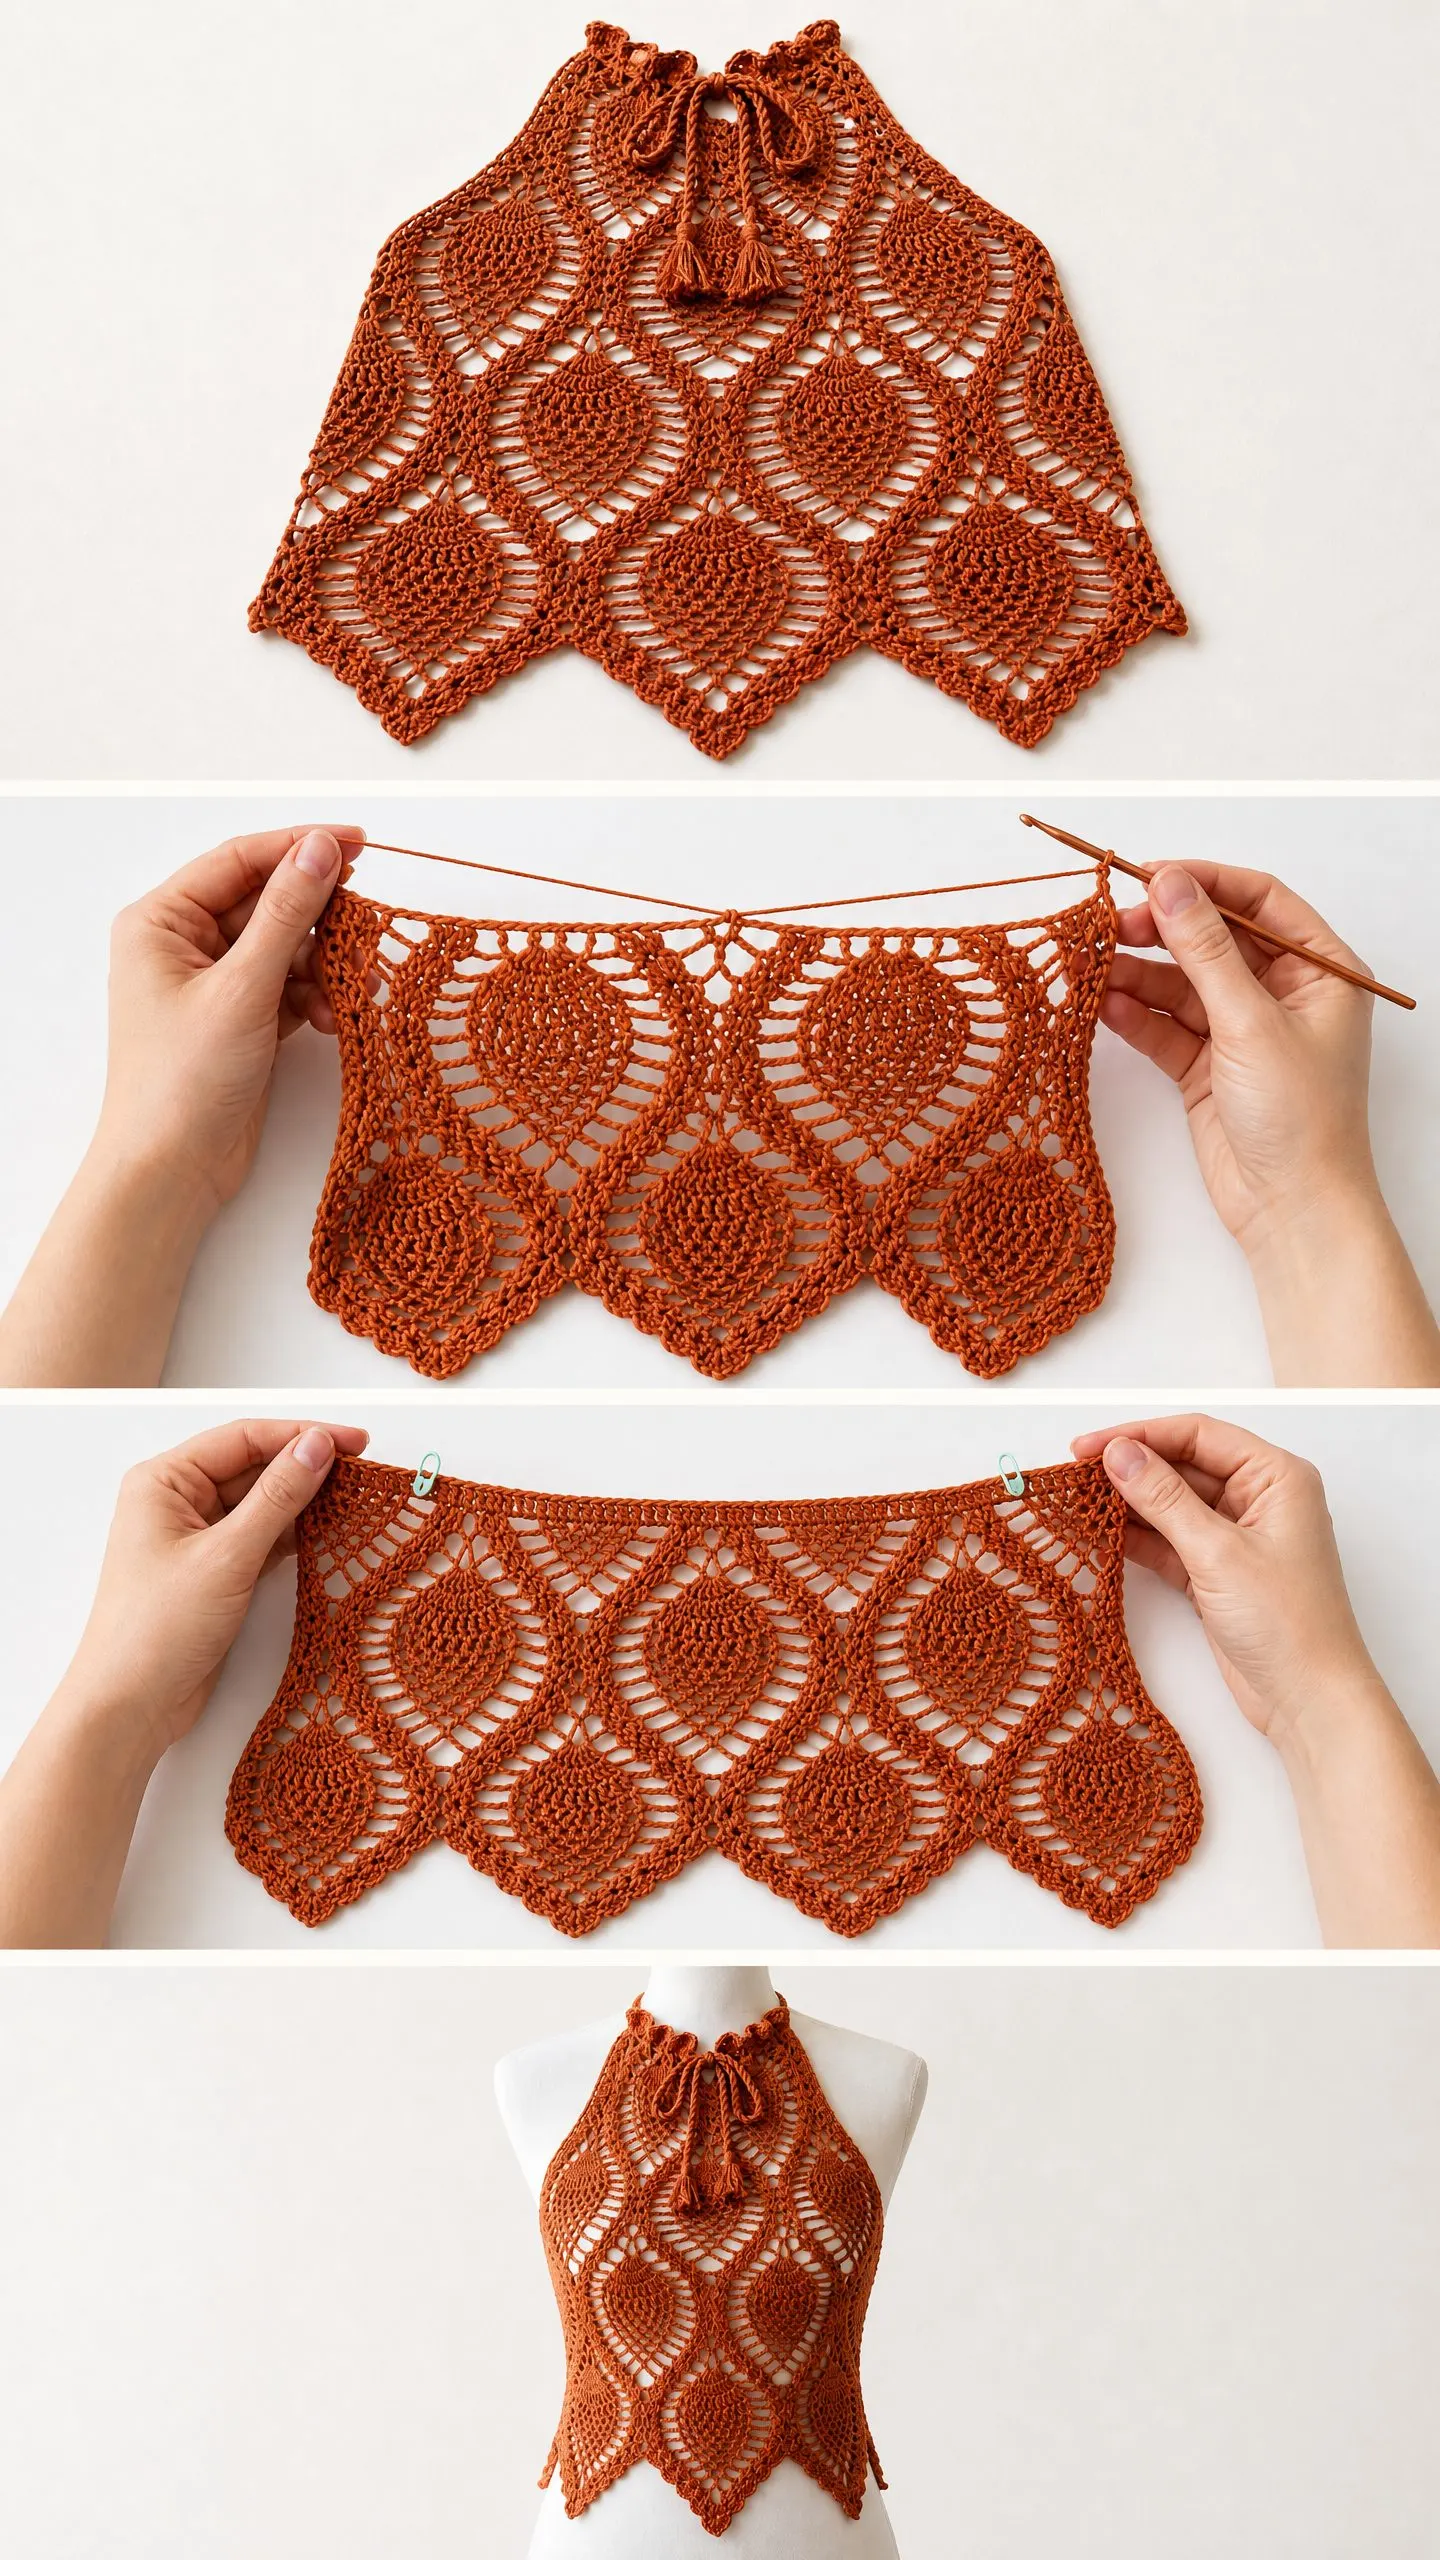
CHECKPOINT 1: After Row 15 your front panel should measure approximately 6 in / 15.5 cm from the top edge (Row 1) to the current working row. The shells form clean arches and the pineapple shapes taper from wide at the top to pointed at the bottom.
Row 16 (WS, beginning second tier of pineapples)
Ch 3, turn. Dc in same st. Work (ch 5, sc into ch-2 sp of shell, ch 5) for each shell across, working (dc, ch 2, dc) over each pineapple tip dc. Turn.
Note: Row 16 resets the chain-space architecture to start the second pineapple tier. The ch-5 arches created here become the foundation for new 7-dc clusters in Row 17.
Row 17 (RS, second tier 7-dc cluster row)
Ch 5, turn. 7-dc PC into first ch-5 sp. Ch 2, shell into next ch-2 sp of previous panel architecture. Ch 2, 7-dc PC into next ch-5 sp. Rep across, ending 7-dc PC, ch 2, dc. Turn.
Stitch count: 4 (5, 6) PCs of 7 dc, 3 (4, 5) shells. Structural dc count: 44 (55, 66) dc.
Rows 18 through 29 (second pineapple tier)
Repeat Rows 4 through 15 of the first tier exactly. The second pineapple tier completes at the natural hem line of the garment. The pointed tips of the pineapples form the hem scallops.
CHECKPOINT 2: After completing Rows 17 through 29 the front panel should measure approximately 13 to 14 in / 33 to 35.5 cm from the neck foundation chain to the lowest point of the pineapple tip. The hem should show 4 (5, 6) full pointed scallop peaks separated by shell arches.
Fasten off. Weave in ends.
Back Panel Instructions
The back panel is identical to the front panel through Row 15. After Row 15 the back panel continues with the same construction.
Work Foundation Chain through Row 15 exactly as for the front panel.
After Row 15 (back panel lower section)
Row 16 (WS): Ch 3, turn. Dc in same st. Ch 2, sc into shell sp, ch 2. Cont across in pattern. Turn.
Rows 17 through 29: Repeat as for front panel.
Note: The back panel is a mirror of the front panel in stitch architecture. Both panels are identical in construction. The difference in appearance between front and back is created during assembly: the front panel faces outward and the back panel’s upper edge is held open, exposing the back.
CHECKPOINT 3: Both panels are now complete. Each should measure the same dimensions. Lay them flat together and confirm they match in width and length before proceeding to assembly.
Neck Ruffle Instructions
Hold the front panel with RS facing. Join yarn at the top right corner of the foundation chain edge.
Row 1 (ruffle setup)
Ch 1, sc evenly across the top edge of the front panel, working 1 sc into each foundation chain stitch, 1 sc into each edge dc, and 2 sc into each corner or curved space. Aim for 70 (77, 84) sc across the neck edge of the front panel. Do not turn.
Continue immediately to the back panel, joining it with 1 sl st to the top right corner of the back panel neck edge and working 70 (77, 84) sc across. You now have 140 (154, 168) sc total across both panels joined at the neck edge.
Row 2 (ruffle)
Ch 1, turn. Into each sc along the neck edge work (sc, ch 2, sc). This creates a gathered ruffle along the entire neckline. Sl st to first sc of row to close. Fasten off.
Stitch count: 280 (308, 336) sc total in ruffle row, not counting ch-2 spaces.
Neck Cord Channel
The neck cord is not threaded through a channel in the traditional sense. After the ruffle is complete, use your yarn needle to weave the twisted cord through the base row of the ruffle (Row 1 sc stitches), pulling it in from the right side and out at the left. The cord exits both ends at the center back position and ties at the nape of the neck.
Twisted Cord for Neck Tie
Cut 12 strands of yarn each 80 in / 203 cm long. Make the twisted cord as described in Special Stitches. Finished cord should be approximately 20 in / 51 cm long after twisting and folding. Attach one tassel to each end as described in Special Stitches.
Thread the cord through the ruffle base row starting and ending at the center back position. The cord draws the neckline closed and the tassels hang at the back of the neck.
Side Ties
At the natural waistline (approximately 8 to 9 in / 20 to 23 cm below the neck foundation chain row, measured along the side edge of each panel), join yarn at the side edge of the front panel.
Work a chain of 50 sts. Sl st back along the chain to form a firm cord. Fasten off.
Repeat at the same position on the opposite side of the front panel and at both corresponding side positions on the back panel.
Tie front and back side ties together on each side of the body to secure the garment.
Finishing Your Halter Top
Step 1: Weave in all yarn ends securely on the WS using the yarn needle.
Step 2: Wet block both panels before assembling. Submerge each panel in cool water for 10 to 15 minutes. Gently squeeze out excess water (do not wring). Lay flat on blocking mat and pin each pineapple point and shell arch to the correct position. Allow to dry completely, which takes 12 to 24 hours depending on humidity.
Step 3: After both panels are dry and blocked, work the neck ruffle as described above.
Step 4: Make twisted cord and tassels. Attach to garment.
Step 5: Work side ties. Thread neck cord through ruffle.
Blocking Notes
Wet blocking is essential for this garment. The pineapple stitch lace will not open to its full beauty without blocking. Pay special attention to:
Care Instructions
Machine wash on gentle cycle in a mesh laundry bag with cool water. Use mild detergent formulated for delicates or wool. Lay flat to dry. Do not tumble dry. Do not iron directly on the lace. If pressing is needed, use a pressing cloth and low steam.
Size Customization Tips
To make the garment wider: Add one full pineapple repeat unit (14 chains) to the foundation chain. Each additional repeat adds approximately 3.5 in / 9 cm of width.
To make the garment longer: Add a third pineapple tier by repeating Rows 16 through 29 a second time after completing the second tier.
To raise the neckline: After working Row 1 of the foundation, add 2 to 4 additional rows of sc or dc across the top before beginning the pineapple setup. This creates a higher neckline band.
To adjust for a larger bust with a shorter torso: Add pineapple width repeats to the foundation chain but stop after one and a half pineapple tiers (stopping at approximately Row 21 to 22 of the second tier) to shorten the body length.
Gauge adjustment note: If your gauge is slightly looser, the garment will be wider and longer. Check your pineapple motif swatch against the gauge measurement before beginning and adjust hook size accordingly.
Final Thoughts
Thank you so much for choosing this pineapple stitch halter top crochet pattern. I know it looks complicated at first glance, but once you get into the rhythm of the pineapple clusters, it becomes almost meditative. The way each motif tapers down to a perfect point is incredibly satisfying.
I would absolutely love to see your finished tops. Tag me on Instagram or share in my Facebook group so I can admire your work. There is nothing better than seeing these patterns come to life in different colors and yarn choices.
If you loved this pattern, go ahead and save it to your Pinterest boards so you can find it again later. And please drop a comment below if you make this top. I read every single one, and hearing about your projects truly makes my day. Happy crocheting!
