
I’ve been searching for the perfect summer tote pattern for ages, and this sage green floral stripe design stopped me in my tracks. The dimensional flowers against those crisp stripes create something truly eye-catching, and I knew I had to share it with you.
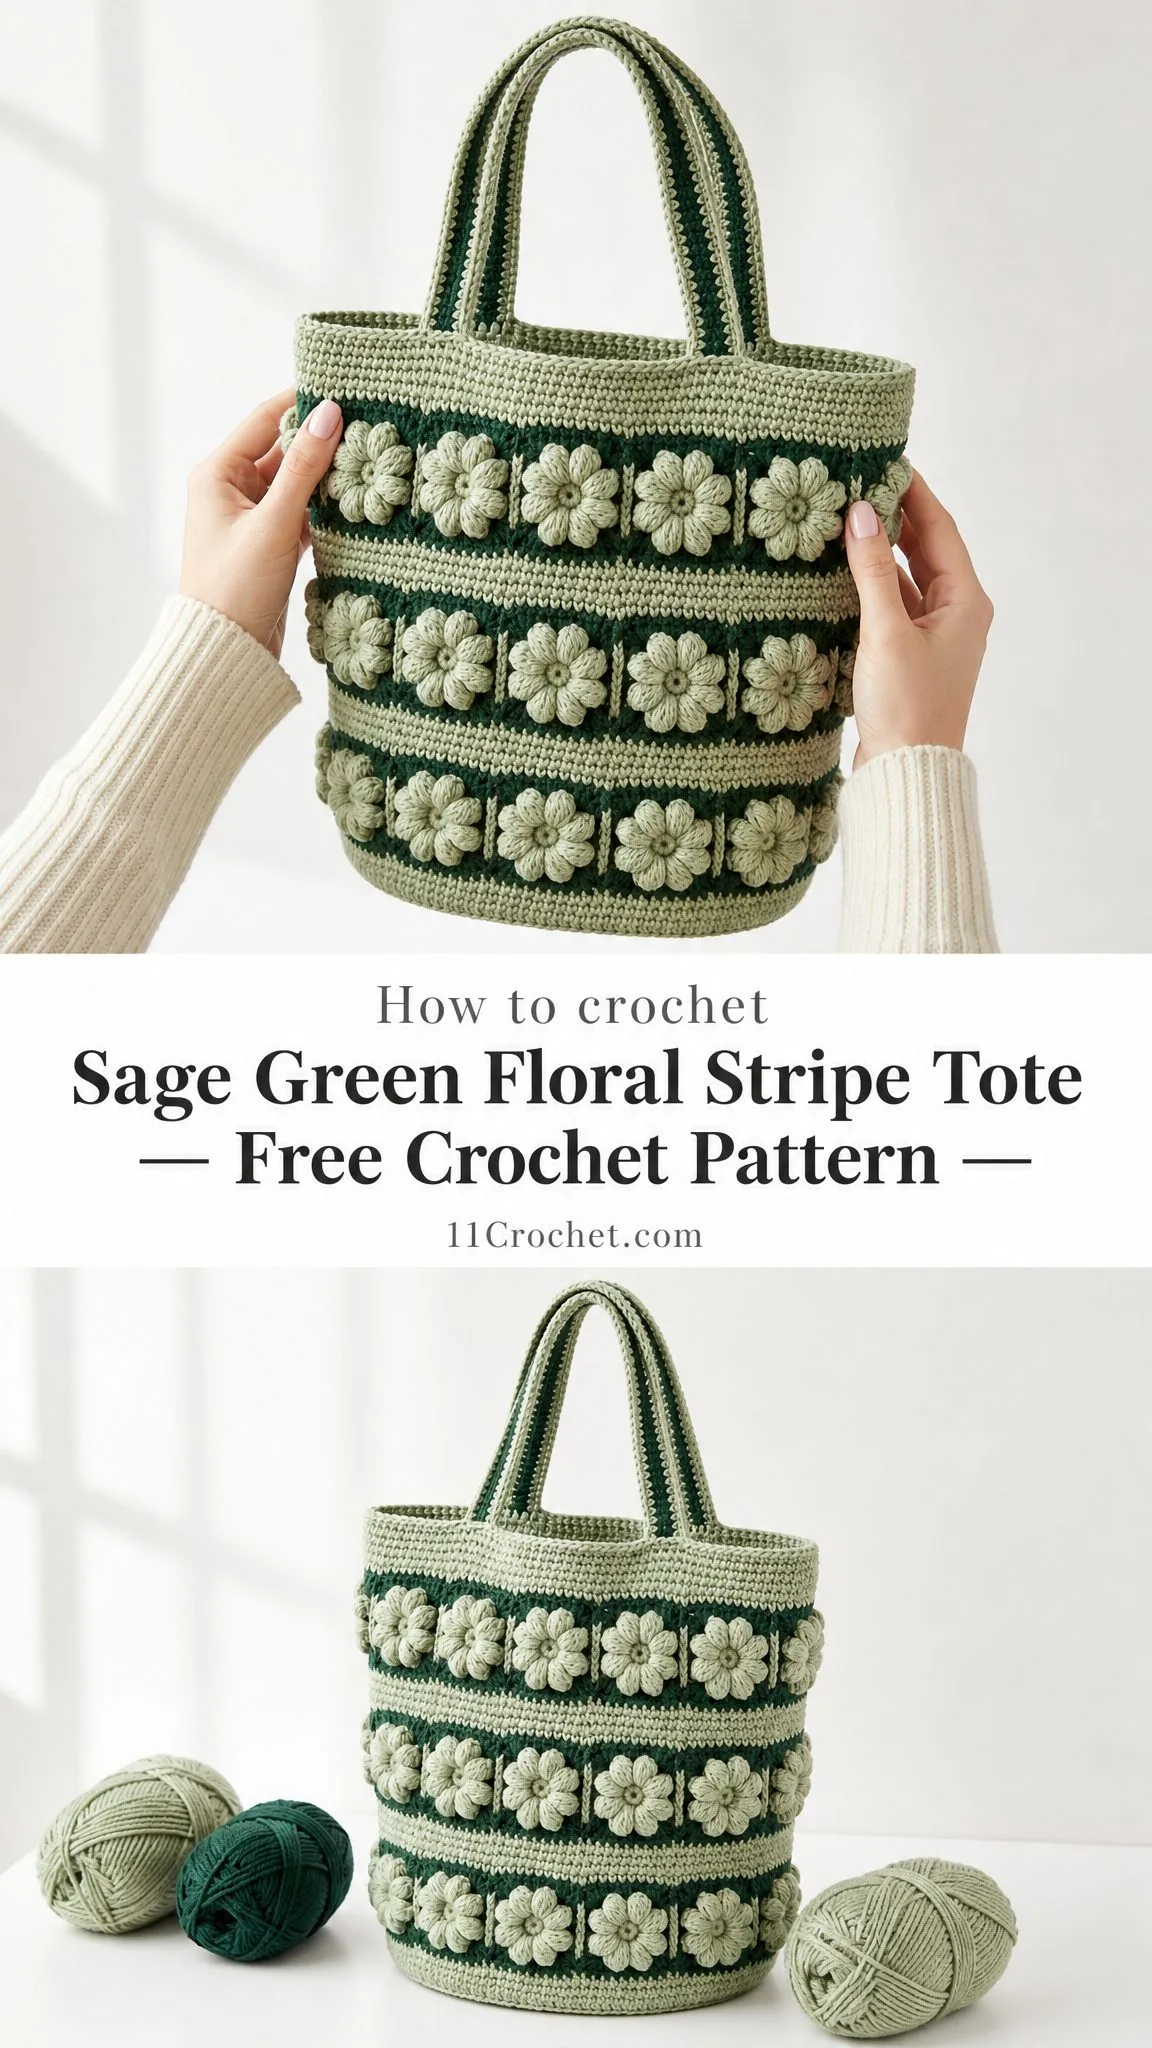
This tote bag combines structured stripes with sweet appliqué flowers in a color palette that works with everything. Whether you’re heading to the farmers market, the beach, or just need a pretty project bag, this one delivers.
The construction is straightforward enough for confident beginners, but the finished result looks far more complex than it actually is. Let’s dive into everything you need to make your own.
Why You’ll Love This Floral Stripe Tote Crochet Pattern
This tote has that perfect balance of pretty and practical. The sturdy cotton construction means it can handle your everyday essentials without stretching out of shape. Those raised flowers add beautiful texture and dimension that catches the light and draws compliments wherever you go.
The stripe pattern keeps your hands busy without being complicated. You’ll work in simple stitches, changing colors at predictable intervals. The flowers are crocheted separately and sewn on at the end, so you can make them while watching your favorite show.
Finished dimensions come out to approximately 12 inches wide by 14 inches tall, not including the handles. The handle drop sits around 9 inches, making it comfortable for shoulder carrying.
Materials You’ll Need
Gathering your supplies before you start makes the whole project flow smoothly. Here’s what to have on hand:
Yarn:
Cotton or a cotton blend gives the best stitch definition and creates a sturdy, structured bag that holds its shape beautifully.
Suggested Yarn Brands:
Hook and Notions:
Gauge
Work one gauge swatch before starting. Your gauge should measure 4 inches (10 cm) square using a 4.0 mm hook in worsted cotton, working in single crochet.
Gauge isn’t critical for fit since this is a bag, but it does change your finished size and yarn usage. If your swatch runs large, go down a hook size. If it runs small, go up a hook size.
Abbreviations and Special Stitches
Let me walk you through every stitch abbreviation you’ll encounter. Even if you know these by heart, a quick refresher never hurts.
ch = chain: wrap yarn over hook and pull through the loop on your hook
sl st = slip stitch: insert hook, yarn over, pull through both loops at once
sc = single crochet (US term): insert hook, yarn over, pull up a loop (2 loops on hook), yarn over, pull through both loops
dc = double crochet (US term): yarn over, insert hook, yarn over, pull up a loop (3 loops on hook), yarn over, pull through 2 loops, yarn over, pull through remaining 2 loops
st(s) = stitch(es)
sp = space
rep = repeat
rnd = round
beg = beginning
RS = right side
UK Conversion Note: If you’re following UK terminology, US single crochet (sc) equals UK double crochet (dc). US double crochet (dc) equals UK treble crochet (tr).
Special Stitches:
Magic Ring: An adjustable loop used to start circular motifs. Pull it tight to close the center hole completely. If you’re not comfortable with magic rings, you can chain 4 and slip stitch to join instead.
2-dc increase: Work 2 double crochet stitches into the same stitch to widen your round.
Corner: Work (3 dc, ch 2, 3 dc) into one space to create a square corner.
Pattern Notes Before You Begin
Read through these tips before picking up your hook. They’ll save you time and frustration later.
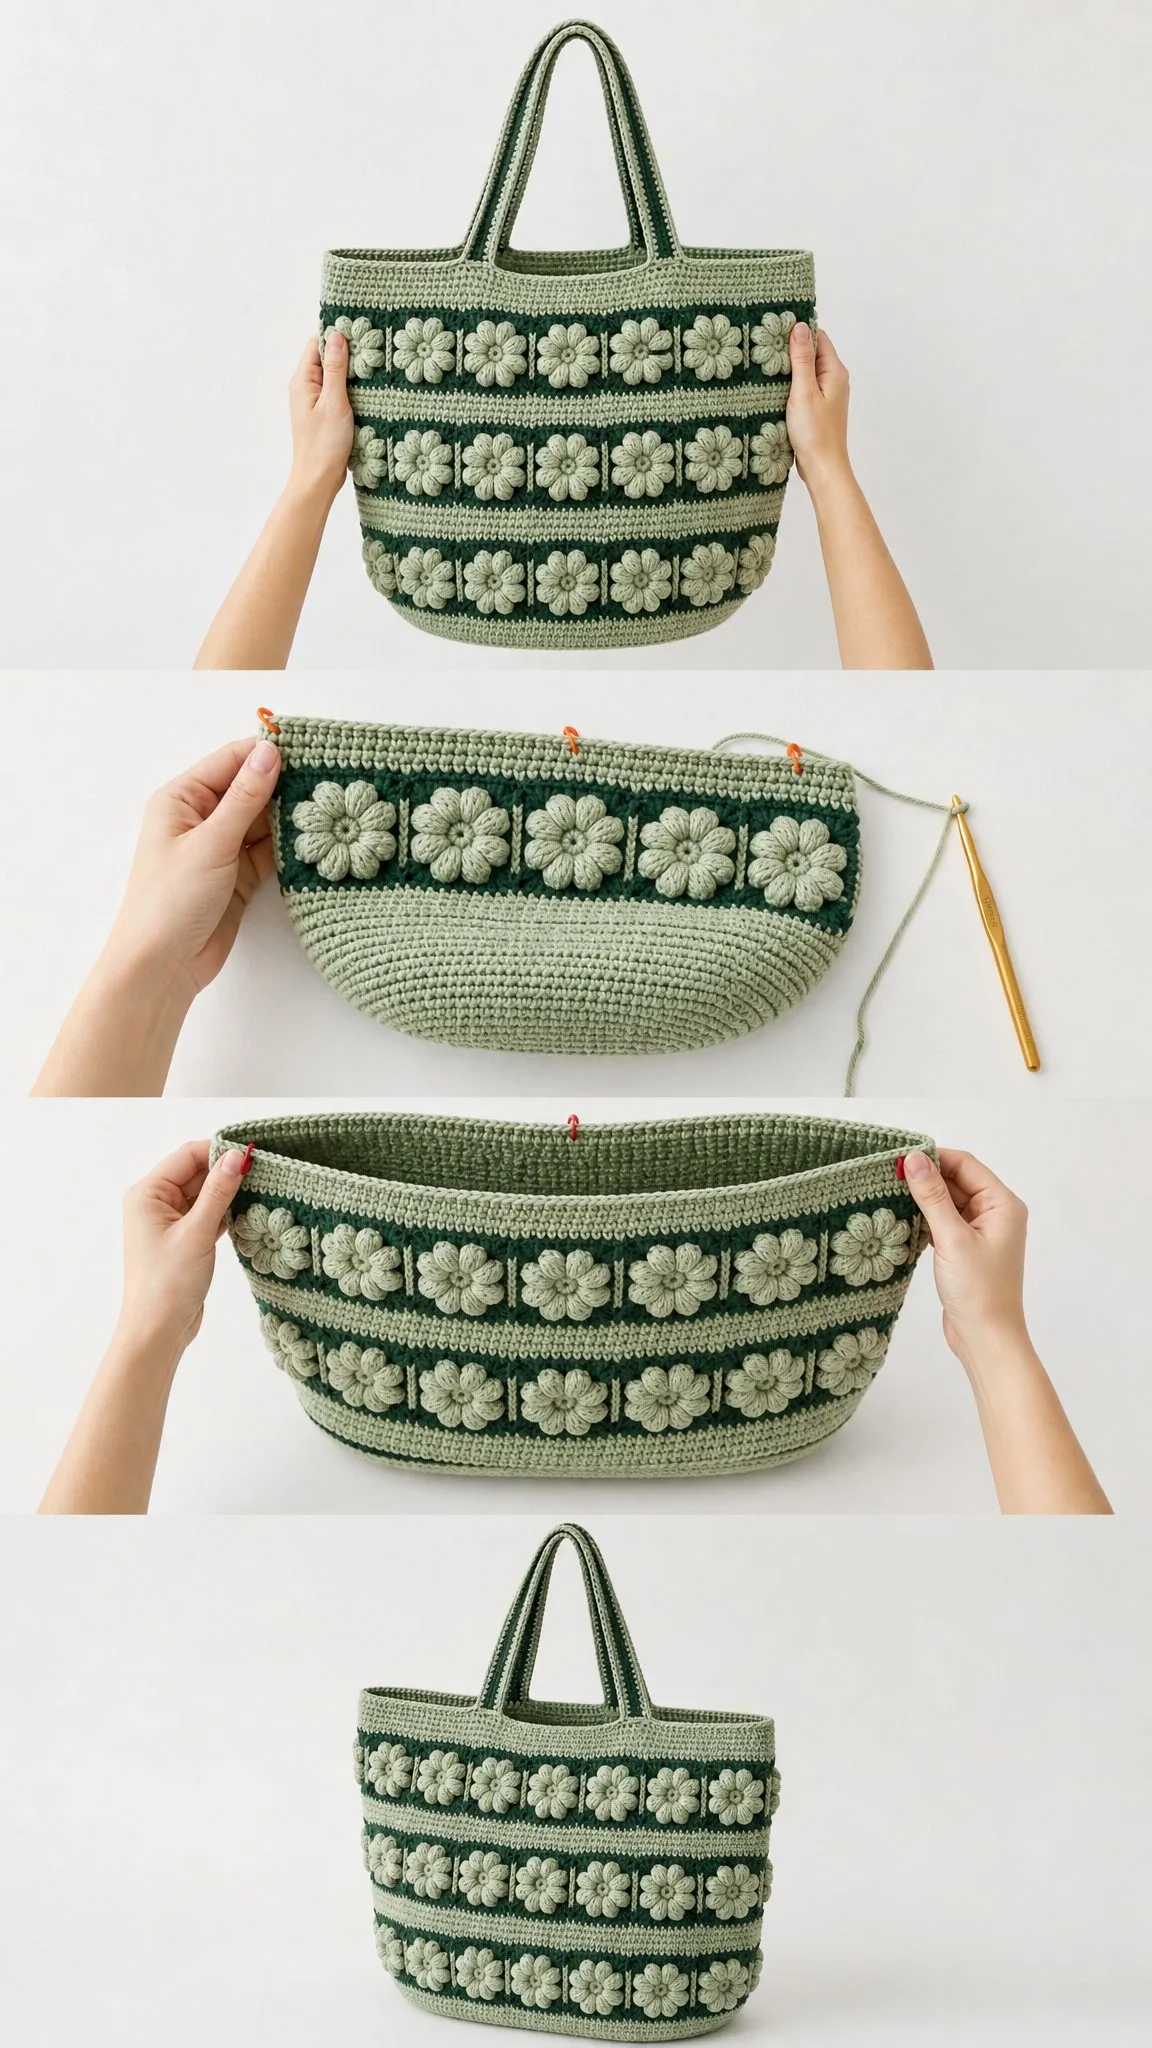
The bag body is worked in joined rounds from the bottom up. You’ll create a flat circular base, then work straight up for the sides.
The beginning ch-3 counts as the first dc throughout unless noted otherwise.
Join each round with a slip stitch to the top of the beginning ch-3 (or first sc) unless told otherwise.
Weave in your ends as you go. This means fewer tails to chase at the finish line. Trust me on this one.
Blocking your finished pieces to their true measurements before assembly makes everything dramatically easier and neater.
Stitch counts appear in parentheses at the end of every round, like this: (48 dc)
The Flower Motif Pattern
These dimensional flowers are what make this bag special. You’ll make approximately 18 to 24 flowers depending on your desired coverage.
Using Cream (Color B) and a 4.0 mm hook:
Round 1: Into a magic ring: ch 3 (counts as first dc), work 11 dc into the ring. Join with sl st to top of beg ch-3. Pull the ring closed tightly. (12 dc)
Round 2: Ch 3 (counts as first dc), dc in same st, then 2 dc in each st around. Join to top of beg ch-3. (24 dc)
Round 3: Ch 1, sc in same st, ch 3, skip next st; sc in next st, ch 3, skip next st repeat from * around (12 times total). Join with sl st to first sc. Fasten off Cream. (12 sc, 12 ch-3 spaces)
This creates a small flower with 12 petals radiating from the center. Your finished flower should measure approximately 2.5 inches across.
Tip: Make one flower first to check your gauge and get comfortable with the pattern before making the rest.
Bag Base Pattern
The base is worked flat in rounds, creating a sturdy oval bottom.
Using Forest Green (Color C):
Round 1: Ch 16. Sc in 2nd ch from hook and in each of next 13 ch, 3 sc in last ch. Working along the opposite side of the foundation chain: sc in each of next 13 ch, 2 sc in last ch. Join with sl st to first sc. (32 sc)
Round 2: Ch 1, sc in same st and in next 13 sts, 2 sc in each of next 3 sts, sc in next 13 sts, 2 sc in each of next 2 sts. Join. (38 sc)
Round 3: Ch 1, sc in same st and in next 14 sts, (2 sc in next st, sc in next st) 3 times, sc in next 13 sts, (2 sc in next st, sc in next st) twice. Join. (44 sc)
Round 4: Ch 1, sc in same st and in next 15 sts, (2 sc in next st, sc in next 2 sts) 3 times, sc in next 13 sts, (2 sc in next st, sc in next 2 sts) twice. Join. (50 sc)
Continue increasing in this manner until your base measures approximately 4 inches wide by 10 inches long, or desired size. Fasten off Forest Green.
Bag Body Pattern
Now we work upward from the base to create the sides.
Stripe Sequence: Work 4 rounds Sage Green, 2 rounds Forest Green, 4 rounds Sage Green, 2 rounds Forest Green. Repeat this sequence for the body height.
Round 1 (Sage Green): Join Sage in any st of the last base round. Ch 1, working in back loops only for this round, sc in each st around. Join.
Working in back loops only creates a nice defined edge where the base meets the sides.
Rounds 2-4 (Sage Green): Ch 1, sc in each st around. Join.
Rounds 5-6 (Forest Green): Change to Forest Green. Ch 1, sc in each st around. Join.
Rounds 7-10 (Sage Green): Change to Sage Green. Ch 1, sc in each st around. Join.
Continue the stripe sequence until your bag body measures approximately 12 inches from the base, or your desired height. End with a Sage Green section.
Top Edging:
Work 2 more rounds of sc in Sage Green, then fasten off. This creates a clean finished edge at the top.
Handle Pattern
Make 2 handles.
Using Sage Green:
Foundation: Ch 13. Row 1: sc in 2nd ch from hook and in each ch across. Turn. (12 sc)
Row 2 and all following rows: Ch 1, sc in each st across. Turn. (12 sc each row)
Repeat until the strap measures about 22 inches (56 cm). Fasten off.
Forest Green Edging:
Join Forest Green at one long edge and sc evenly along each long side of the strap to frame it with a contrasting border. Fasten off. (approximately 88 sc per side)
Strap Comfort Tip: For extra body and durability, fold the strap in half lengthwise and whip stitch the long edges together before attaching. This doubles the thickness and prevents stretching.
Assembly and Finishing
Attaching Flowers:
Lay out your flowers on the bag body in horizontal rows, spacing them evenly within the Sage Green stripe sections. Pin them in place first to make sure you’re happy with the arrangement.
Using Cream yarn and your tapestry needle, whip stitch each flower securely to the bag body. Stitch through the back of the flower center and catch the bag stitches underneath. Weave in ends on the inside.
Attaching Handles:
Position one handle on the front of the bag, centering it across the top edge. The handle ends should sit about 3 inches from each side seam. Pin in place.
Whip stitch each handle end firmly to the inside of the top edging. Stitch twice around for strength since the handle carries the bag’s weight.
Repeat for the second handle on the back of the bag, making sure it aligns with the front handle.
Final Finishing:
Weave in all remaining ends. Give the finished bag a final light steam or mist with water to settle the seams and even out the stitches. Shape the bag with your hands while damp and let it dry flat.
Optional Additions
Lining: Cut cotton lining fabric 0.5 inches (1.5 cm) larger than the flattened bag on all sides. Sew the fabric into a pouch shape, then hand-stitch it inside the top edge of the bag. A lining gives structure, hides any inside seams, and makes the bag lovely for gifting.
Closure: Add a magnetic snap at center top, or crochet a button loop and sew on a decorative button if you’d like your bag to close securely.
Care Instructions
Hand wash your finished bag in cool water with a gentle detergent. Avoid wringing or twisting, which can distort the stitches and stretch the handles.
Press out water gently between clean towels. Never lift a wet bag by the handle, as the weight of the water can stretch it out permanently.
Dry flat, reshaping to its true measurements while damp. Do not tumble dry, as heat can shrink cotton and pull the seams.
Store loosely stuffed with tissue paper to help the bag hold its shape between uses. Spot clean small marks promptly with a damp cloth rather than washing the whole bag.
Tips for Success
Color Confidence: If sage green isn’t your thing, this pattern works beautifully in any color combination. Try navy and white for a nautical look, or dusty rose and cream for something softer.
Flower Placement: I recommend making all your flowers first, then playing with arrangement before sewing anything down. Take a photo of your layout so you can recreate it exactly.
Handle Length: The 22-inch handle creates about a 9-inch drop when attached. If you prefer a longer shoulder strap, simply work more rows on your handles before adding the edging.
Tension Matters: Keep your tension consistent throughout, especially on the handles. Tight, even stitches create sturdy straps that won’t stretch under load.
This sage green floral stripe tote crochet pattern creates a bag you’ll reach for again and again. The combination of simple stripes and sweet dimensional flowers hits that perfect spot between handmade charm and everyday practicality.
I hope you love making this tote as much as I enjoyed designing it! If you found this pattern helpful, please save it to your Pinterest boards so you can find it easily when you’re ready to start. And I would absolutely love to see your finished bags, so drop a comment below or tag me on social media when you make yours. Happy crocheting!
