
I call this one the "Desert Sunset Tote," and it has been living in my design notebook for nearly three years now. The original sketch came to me during a road trip through Arizona when I kept noticing those gorgeous terracotta and cream patterns on handwoven bags at every artisan market we stopped at. I knew I had to create a crochet version that captured that same bold, earthy energy.
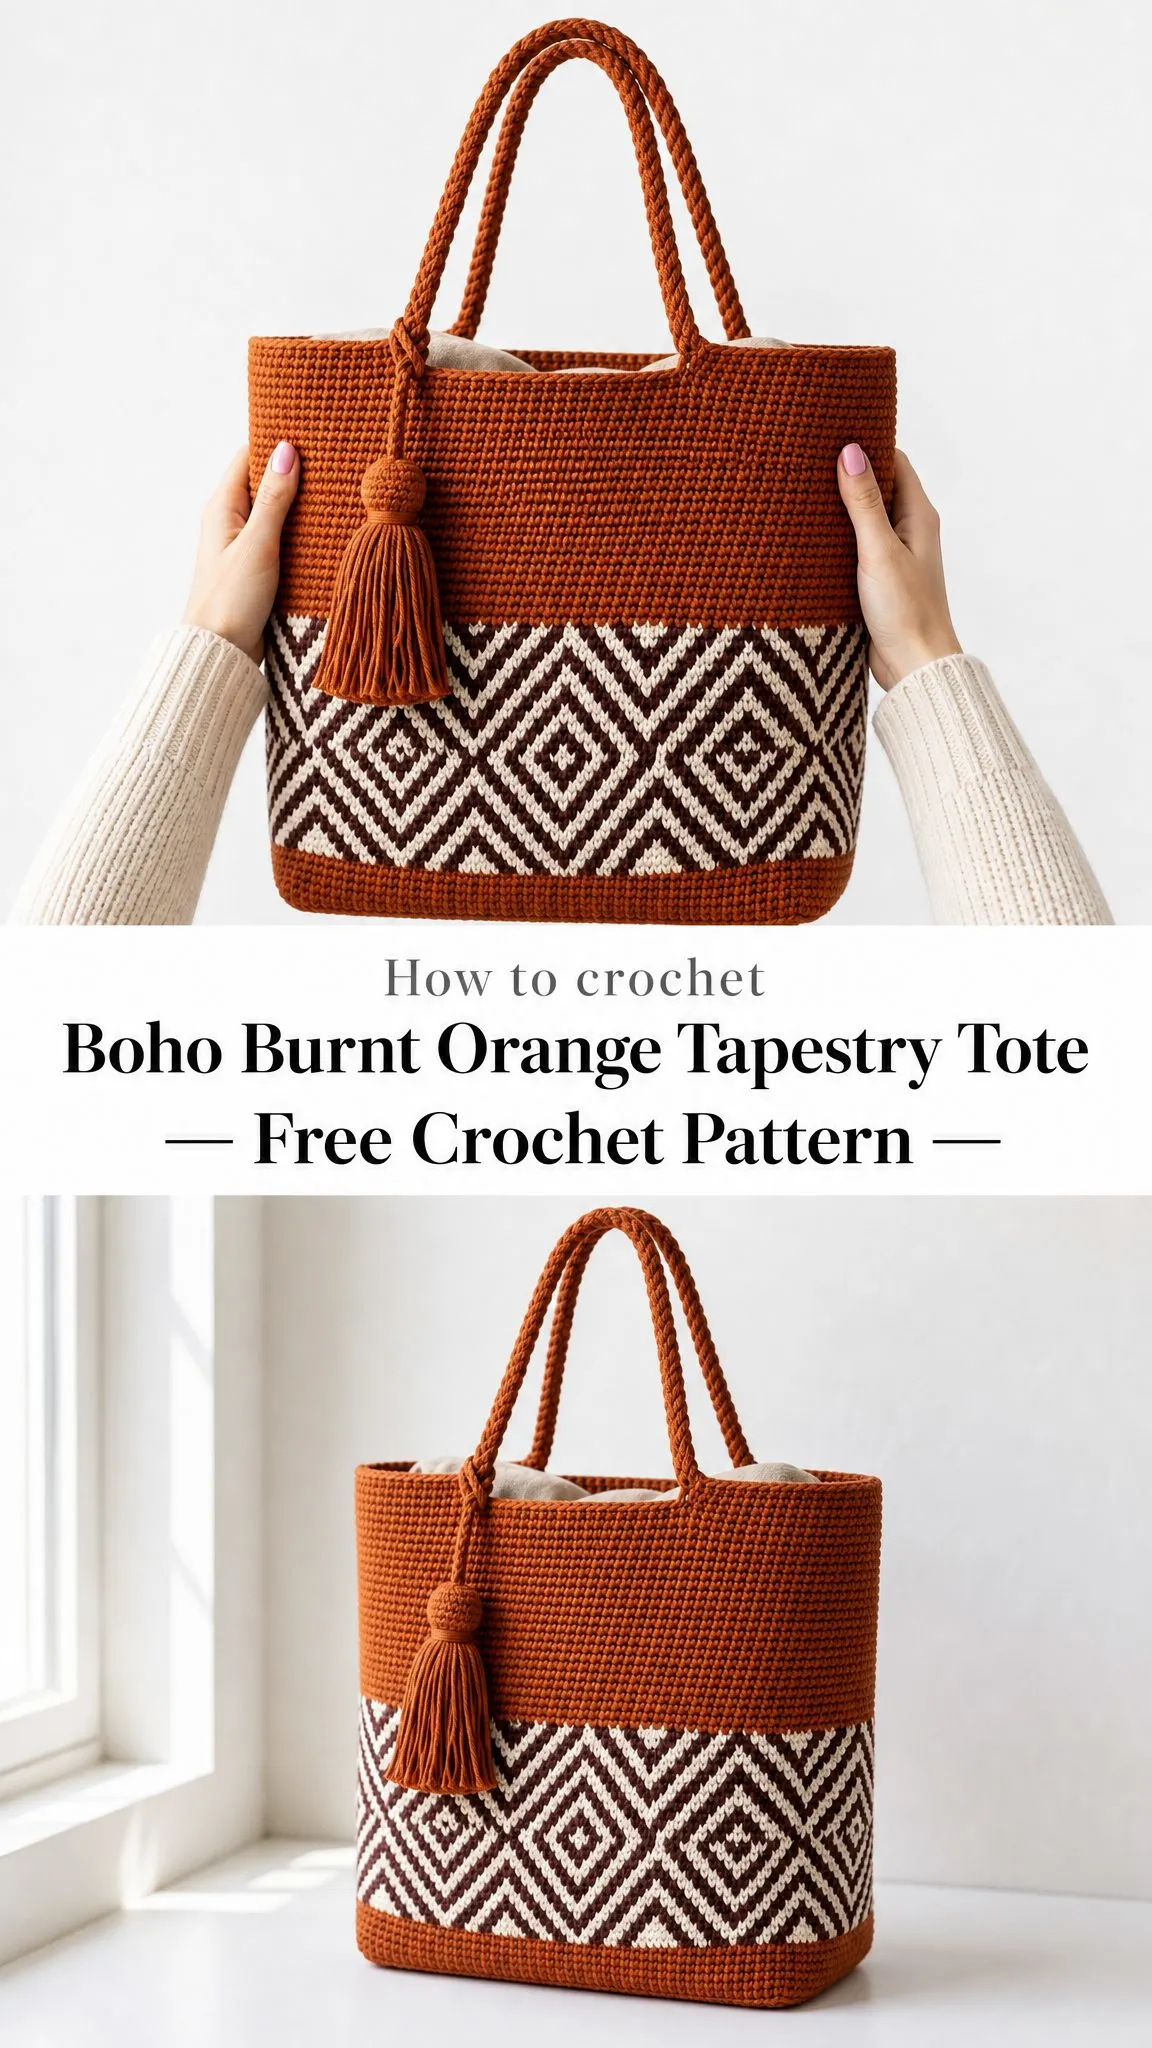
The design sat waiting until I finally found the perfect burnt orange cotton yarn that matched the color in my head. Then everything clicked into place. The concentric diamonds, the rich burgundy against cream, the structured silhouette that actually stands up on its own.
This is absolutely one of my proudest creations, and I cannot wait for you to make it your own.
About This Boho Tapestry Tote Crochet Pattern
This structured tote bag combines several techniques into one stunning finished piece. The upper portion features a solid burnt orange body worked in simple single crochet, while the lower section showcases a bold tapestry crochet diamond motif in dark burgundy and cream. The bag sits on a flat rectangular base, and the entire project is worked in the round from the bottom up.
What makes this tote special is its ability to hold its shape without any stiffeners. The density of tapestry crochet combined with the weight of cotton yarn creates a sturdy fabric that stands upright on its own. The finished bag includes twisted rope handles, a decorative tassel, and a fabric lining for a polished, professional look.
Quick Facts:
Materials You Will Need
Having the right materials makes all the difference with tapestry crochet. The yarn choice is especially important here because you need something that produces crisp stitch definition and holds its structure.
Yarn
Recommended Brands:
Important: Stick with 100% cotton for this project. Acrylic will not produce the required stiffness, and the bag will end up floppy instead of structured. Choose a smooth, tightly plied yarn for the best tapestry stitch definition.
Hook and Notions
Gauge (Please Check This!)
I know gauge swatches are not the most exciting part of crochet, but they really matter here. This bag needs to be dense enough to stand upright.
Solid Section Gauge: 18 single crochet x 20 rows = 4 inches, worked in the round
Tapestry Section Gauge: 16 single crochet x 18 rows = 4 inches
The tapestry band naturally works at a slightly looser gauge because you are carrying an extra strand inside every stitch. If your solid section gauge is correct but the tapestry band pulls too tight, go up a half hook size (US 7 / 4.5 mm) for just the tapestry rounds.
Abbreviations and Stitch Definitions
Let me walk you through each term you will encounter. If you are newer to crochet patterns, bookmark this section.
Special Techniques
Tapestry Single Crochet (TSC)
This is the heart of the colorwork band. Both the working color and the carried color are in use at all times. The carried yarn sits along the top of the previous round and gets trapped inside each new stitch. This hides all the yarn floats and creates a beautiful, reversible fabric.
Here is how it works:
1. Hold your working yarn normally.
2. Lay the carried (inactive) yarn horizontally across the tops of the stitches from the previous round.
3. Insert hook into next stitch.
4. Bring the carried yarn up and over the hook alongside the working yarn.
5. Pull through using only the working yarn. The carried yarn is just trapped inside.
6. Yarn over with working yarn only, pull through both loops to complete the single crochet.
To switch colors: Work until two loops remain on hook, drop the current color (it becomes your new carried yarn), pick up the new color, and pull through both loops.
Twisted Rope Handle
1. Cut 6 strands of Yarn A, each 3 yards long.
2. Fold all strands in half (now you have 12 strands, each about 54 inches).
3. Anchor one end and twist clockwise very firmly until the length starts kinking back on itself.
4. Fold the twisted length in half while keeping tension, then let the two halves twist together counterclockwise.
5. Knot both ends. Each finished handle should measure about 20 inches. Make 2.
Tassel
1. Wrap Yarn A around a 4-inch piece of cardboard about 40 times.
2. Thread a 12-inch strand under the loops at the top and tie firmly.
3. Cut the loops at the bottom.
4. Wrap another strand tightly around the bundle about 0.75 inch below the top knot to form the neck.
5. Trim ends evenly to about 3 inches below the neck.
Pattern Instructions
Section 1: Flat Rectangular Base
With Yarn A and G-6 hook, chain 65.
Row 1 (RS): Sc in 2nd ch from hook and in each ch across. Turn. (64 sc)
Row 2: Ch 1, sc in each st across. Turn. (64 sc)
Rows 3 through 22: Repeat Row 2. Turn at end of each row. (64 sc per row)
After Row 22, do not fasten off. Do not turn.
Checkpoint: Your base rectangle should measure approximately 14 inches long by 4.5 inches wide.
Section 2: Perimeter Round
Now you will work around the entire base to set up the side walls.
Rnd 1 (Perimeter Setup): Ch 1. Sc in each of the 64 sts across the top edge. At the corner, work 1 sc in the corner stitch. Working down the long side, work 1 sc per row end for 22 row ends (22 sc). At next corner, work 1 sc. Across the foundation chain edge, sc in each of the 64 sts. At next corner, work 1 sc. Up the remaining short side, sc in each of 22 row ends. At final corner, work 1 sc. Sl st to first sc to join. PM in first stitch. (176 sc)
Rnd 2 (Corner Establishment): Ch 1, sc in first 64 sts, 3 sc in corner st (PM center st), sc in next 22 sts, 3 sc in corner st (PM center st), sc in next 64 sts, 3 sc in corner st (PM center st), sc in next 22 sts, 3 sc in corner st (PM center st), sl st to join. (184 sc)
Rnd 3: Ch 1, sc in each st around, working 3 sc into each marked corner center stitch. Sl st to join. (192 sc)
Checkpoint: Count your stitches. You should have exactly 192 stitches. This is your permanent stitch count for all side wall rounds.
Section 3: Lower Solid Burnt Orange Border
Rnds 4 through 6: Ch 1, sc in each st around. Sl st to join. (192 sc per rnd)
These 3 rounds form the small solid orange strip at the very bottom of the side walls.
Section 4: Tapestry Diamond Band
Now for the fun part! You will switch to Yarn B and Yarn C while setting Yarn A aside. Remember to carry the unused color inside your stitches at all times.
The diamond motif uses a 16-stitch repeat, worked 12 times per round (12 x 16 = 192 stitches). B = Burgundy, C = Cream.
Rnd 7 (Band Rnd 1): [C,B,B,B,B,B,B,C,C,B,B,B,B,B,B,C] rep 12 times. (192 sc)
Rnd 8 (Band Rnd 2): [B,C,B,B,B,B,C,B,B,C,B,B,B,B,C,B] rep 12 times. (192 sc)
Rnd 9 (Band Rnd 3): [B,B,C,B,B,C,B,B,B,B,C,B,B,C,B,B] rep 12 times. (192 sc)
Rnd 10 (Band Rnd 4): [B,B,B,C,C,B,B,B,B,B,B,C,C,B,B,B] rep 12 times. (192 sc)
Rnd 11 (Band Rnd 5): [B,B,C,B,B,C,B,B,B,B,C,B,B,C,B,B] rep 12 times. (192 sc)
Rnd 12 (Band Rnd 6): [B,C,B,B,B,B,C,B,B,C,B,B,B,B,C,B] rep 12 times. (192 sc)
Rnd 13 (Band Rnd 7): [C,B,B,B,B,B,B,C,C,B,B,B,B,B,B,C] rep 12 times. (192 sc)
Rnd 14 (Band Rnd 8): [B,C,B,B,B,B,C,B,B,C,B,B,B,B,C,B] rep 12 times. (192 sc)
Rnd 15 (Band Rnd 9): [C,B,B,B,B,B,B,C,C,B,B,B,B,B,B,C] rep 12 times. (192 sc)
Rnd 16 (Band Rnd 10): [B,C,C,B,B,C,C,B,B,C,C,B,B,C,C,B] rep 12 times. (192 sc)
Rnd 17 (Band Rnd 11): [B,B,C,C,C,C,B,B,B,B,C,C,C,C,B,B] rep 12 times. (192 sc)
Rnd 18 (Band Rnd 12): [B,C,C,B,B,C,C,B,B,C,C,B,B,C,C,B] rep 12 times. (192 sc)
Rnd 19 (Band Rnd 13): [C,B,B,B,B,B,B,C,C,B,B,B,B,B,B,C] rep 12 times. (192 sc)
Rnd 20 (Band Rnd 14): [B,C,B,B,B,B,C,B,B,C,B,B,B,B,C,B] rep 12 times. (192 sc)
Rnd 21 (Band Rnd 15): [B,B,C,B,B,C,B,B,B,B,C,B,B,C,B,B] rep 12 times. (192 sc)
Rnd 22 (Band Rnd 16): [B,B,B,C,C,B,B,B,B,B,B,C,C,B,B,B] rep 12 times. (192 sc)
Cut Yarn B and Yarn C, leaving 6-inch tails. Rejoin Yarn A.
Checkpoint: The tapestry band should measure approximately 3.5 inches tall. Total bag height at this point should be about 6.5 inches.
Section 5: Upper Body in Burnt Orange
Rnds 23 through 48 (26 rounds): Ch 1, sc in each st around. Sl st to join. (192 sc per rnd)
Fasten off. Weave in all ends.
Finishing
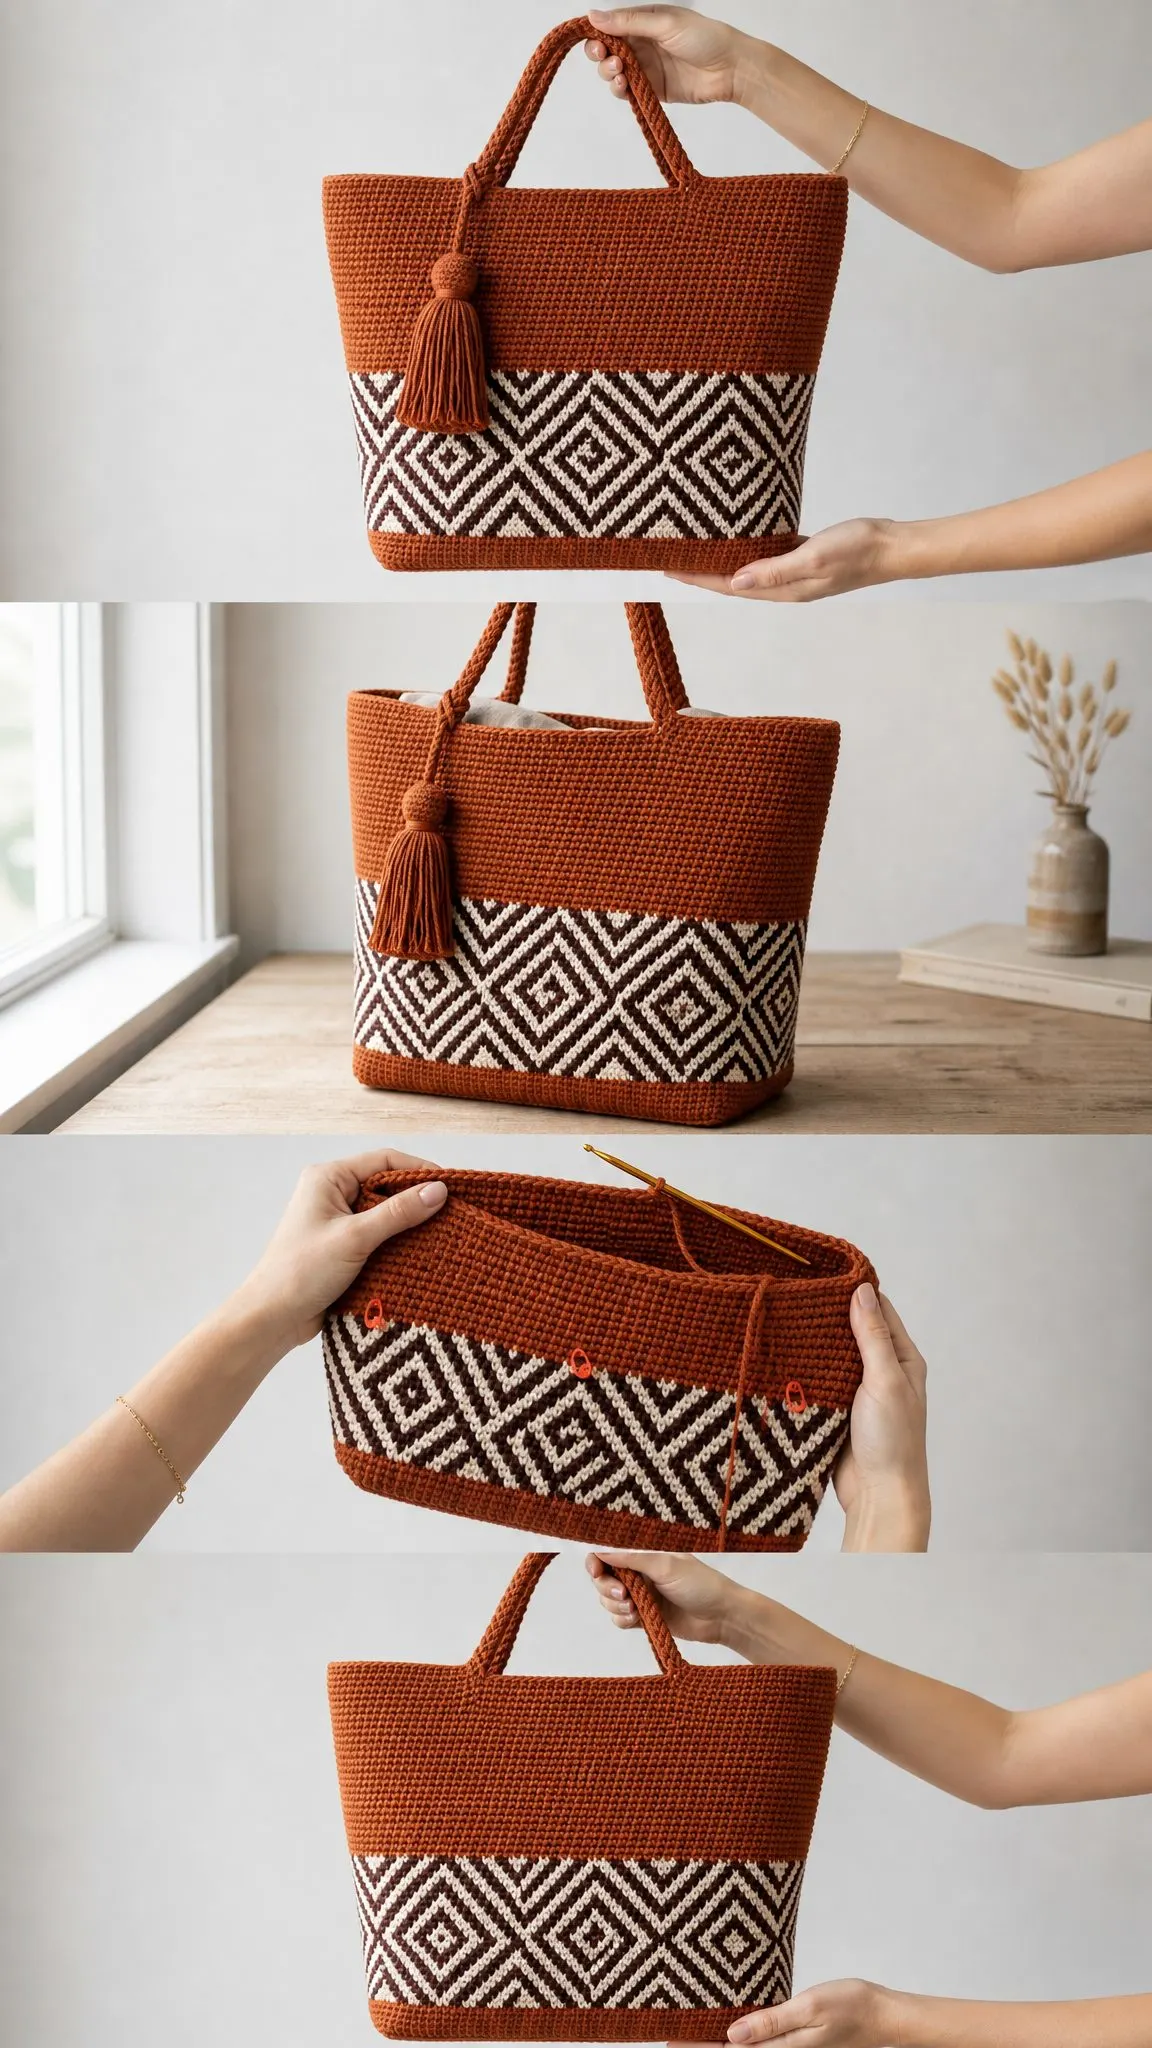
Handle Attachment: Position handles approximately 3 inches in from each side edge on the front and back panels. Stitch securely using Yarn A and a yarn needle, reinforcing several times.
Tassel: Attach the tassel to one handle join at the front of the bag using the top tie.
Fabric Lining: Cut your lining fabric to fit the interior of the bag with a 0.5 inch seam allowance. Sew the lining into a rectangular tube with a flat bottom, then insert into the bag wrong sides together. Fold the top edge under and whip stitch to the inside of the bag about 0.5 inch below the top edge.
Tips for Tapestry Crochet Success
Tapestry crochet can feel tricky at first, but here are a few things that helped me:
Keep your tension consistent. The biggest challenge is maintaining even stitches while carrying that extra yarn. Take breaks if you feel yourself tensing up.
Never carry a color for more than 4 stitches without encasing it. This prevents puckering and keeps your fabric smooth.
Count obsessively for the first few rounds of the diamond motif. Once you can see the pattern emerging, it becomes much easier to spot mistakes quickly.
Take photos of your progress. Looking at the fabric from a distance helps you see if your diamonds are forming correctly.
I really hope you love making this Boho Burnt Orange Tapestry Tote as much as I loved designing it. The feeling of watching those diamonds appear round after round is genuinely magical, and the finished bag is something you will reach for again and again.
If you make one, please save this pattern to your Pinterest boards so you can find it easily later. And I would absolutely love to see your finished tote! Drop a comment below or tag me on social media. Seeing your creations truly makes my day.
