
Crocheting a full baby dress sounds intimidating, right? All those tiny stitches, the shaping, the lacy bits that look impossibly delicate. I get it. I used to scroll past dress patterns thinking they were way beyond my skill level. But here is the truth: if you can work a double crochet and count your stitches, you can absolutely make this stunning white and pink floral baby dress. The construction is actually quite logical once you break it down. You start at the neckline and work your way down, which means you can try it on a doll or stuffed animal as you go to check the fit. The fancy diamond mesh skirt? It is just a simple four row repeat. The flutter sleeves? Picked up and worked in just a few rounds. I am going to walk you through every single step, and by the end, you will have an heirloom quality garment that looks like it came from a boutique.
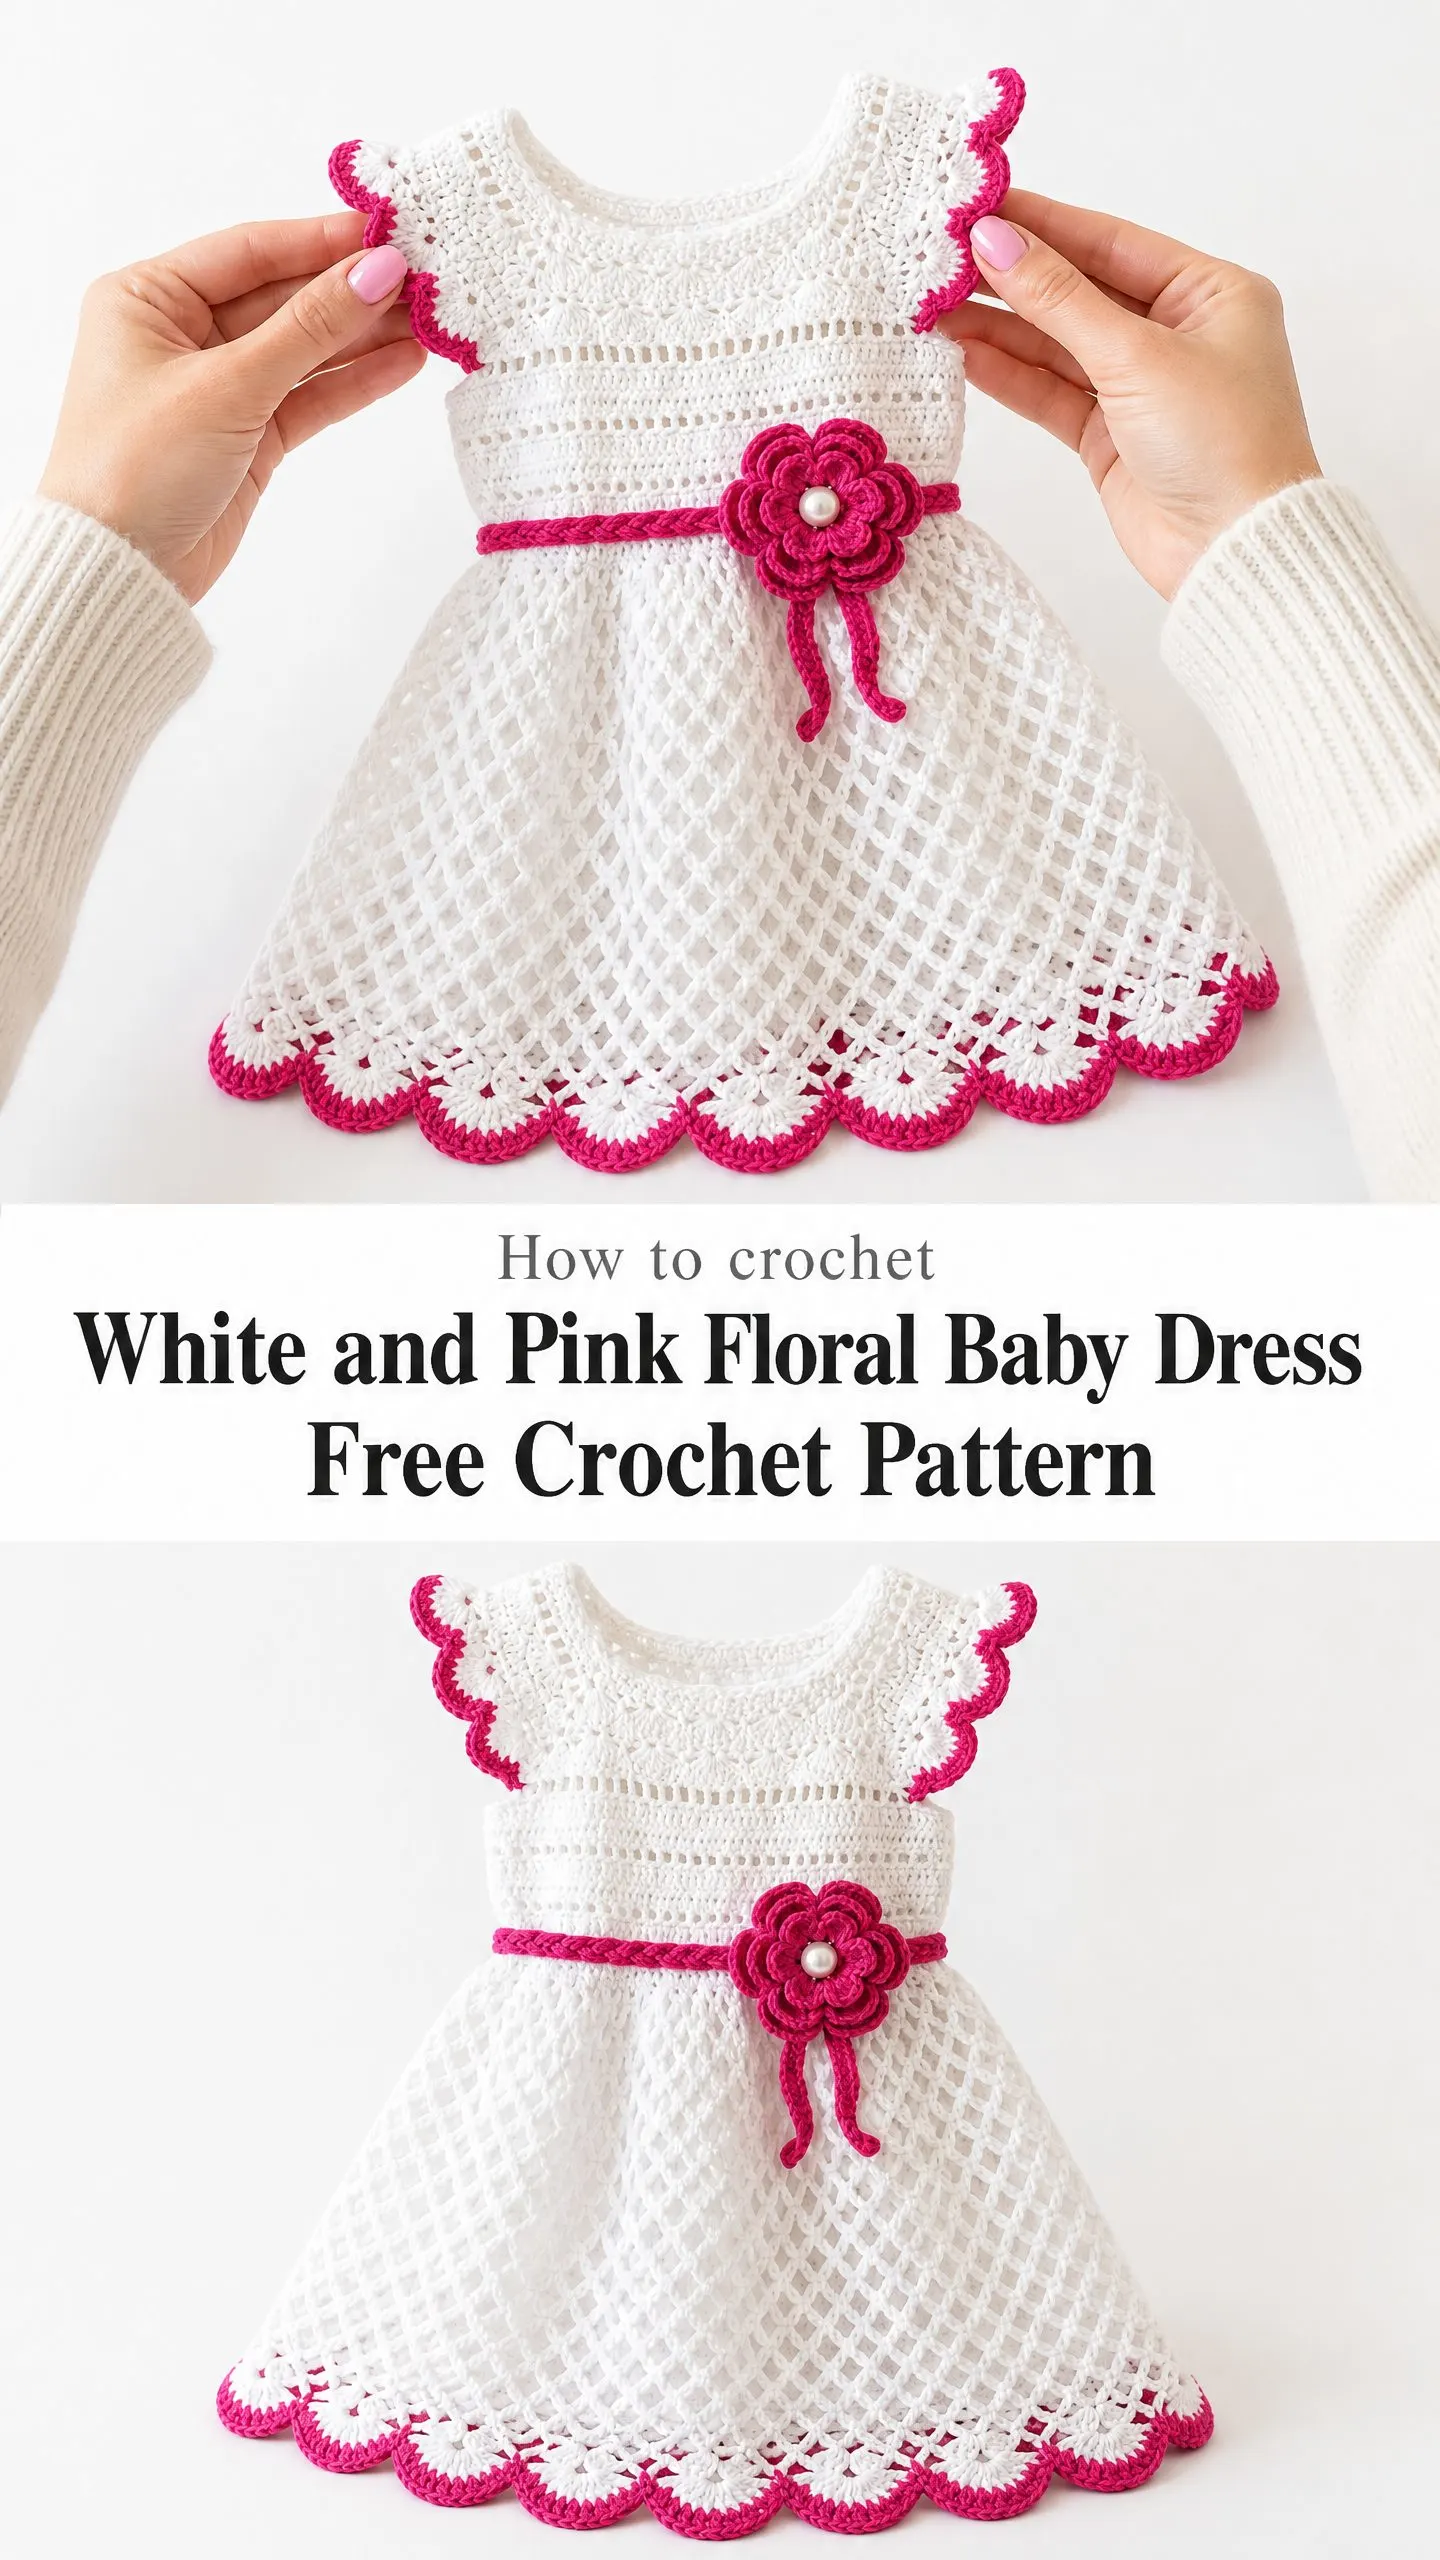
This pattern is perfect for baby showers, christenings, first birthdays, or just because your favorite little one deserves something beautiful. The combination of crisp white cotton and hot pink accents creates a classic look that photographs beautifully and washes well. Whether you have been crocheting for years or you are ready to tackle your first garment project, this tutorial has you covered.
Let me show you how to make something truly special.
About This Baby Dress Crochet Pattern
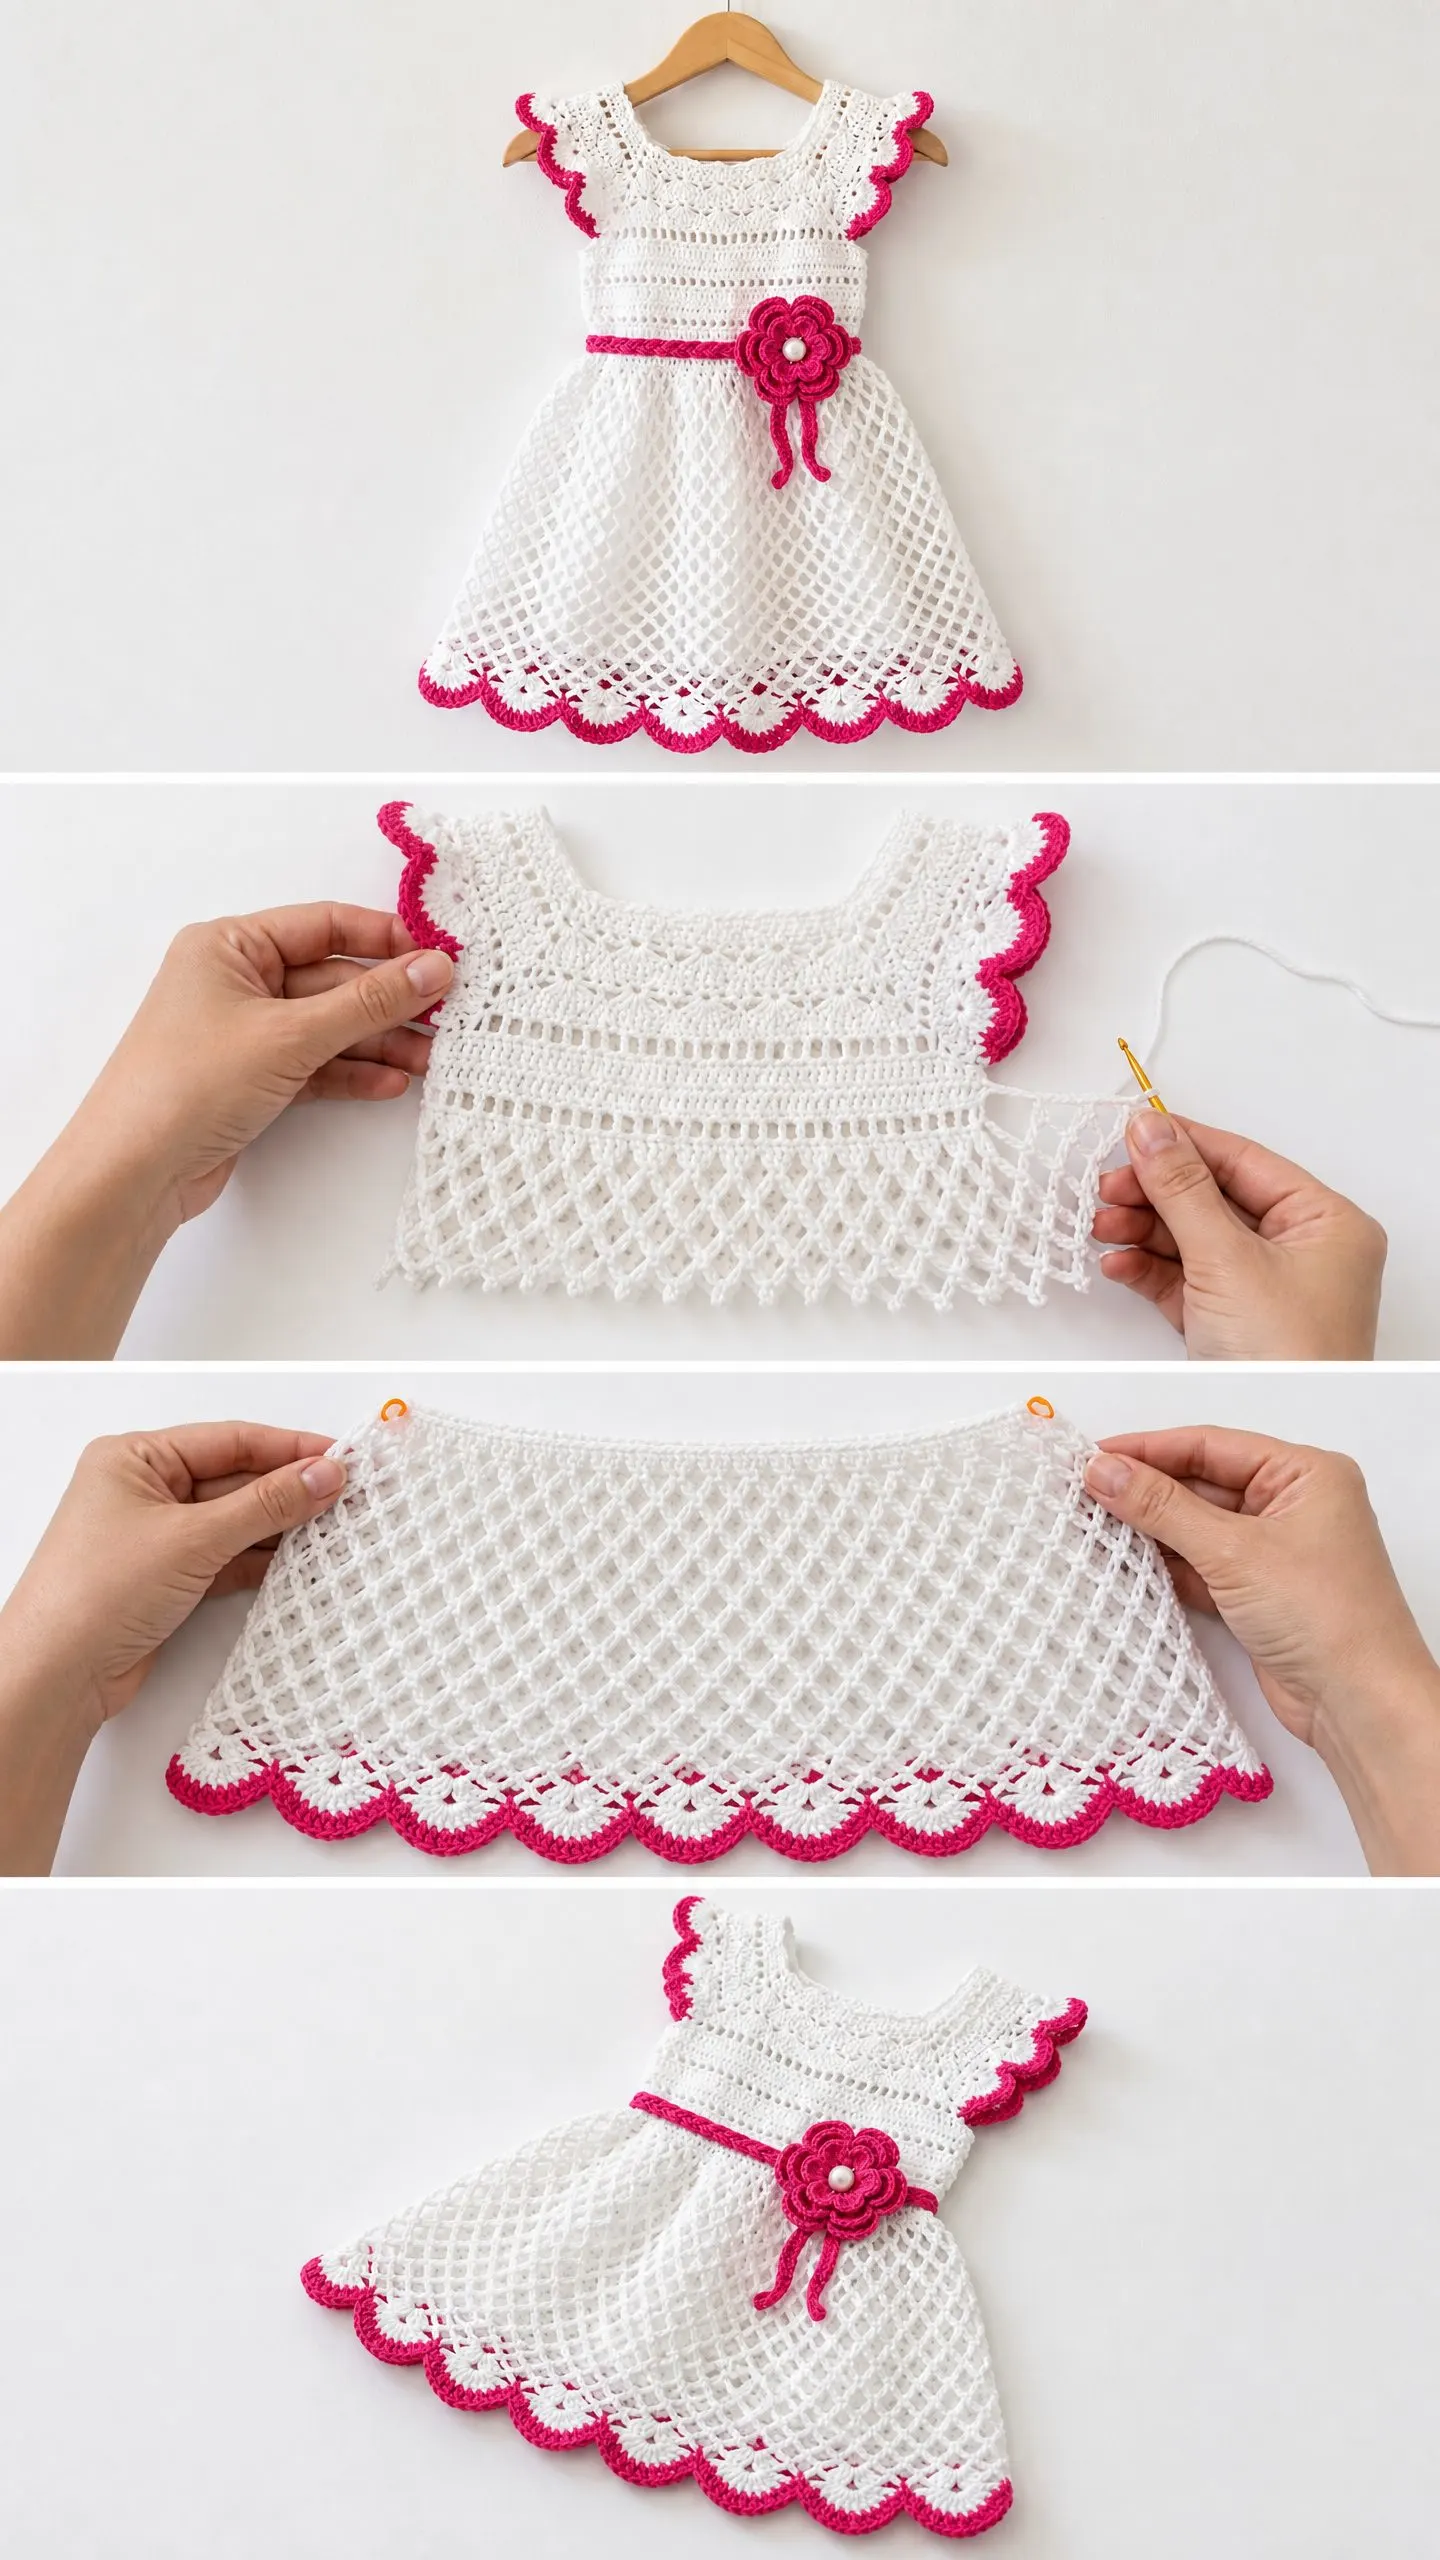
This charming crochet baby dress features a fitted yoke bodice worked in rounds from the top down. The bodice transitions into a gorgeous flared skirt using a classic diamond lattice stitch that creates an open, airy mesh. Flutter sleeves trimmed in hot pink frame the neckline beautifully. A scalloped hem border in white and pink finishes the skirt with elegant detail. The showstopper is definitely the braided belt threaded through the waist, accented with a separately crocheted flower embellishment centered with a pearl button.
The dress combines solid, lace, and mesh construction techniques into one cohesive garment. It reads as elegant and heirloom quality, but the techniques themselves are very approachable when taken step by step.
Skill Level: Intermediate to Advanced
This pattern requires comfort with working in rounds, seamless top down yoke construction, stitch pattern changes, and joining multiple separately crocheted elements. If you have completed at least one garment project before, you will find this manageable with careful attention to stitch counts.
Time Estimate: Approximately 20 to 30 hours depending on your experience level. The yoke and bodice take roughly 8 to 10 hours, the skirt 8 to 12 hours, and the finishing details like sleeves, border, belt, and flower take 4 to 6 hours.
Finished Measurements
This pattern is written for a 12 month size.
Size Customization Tips
To size up or down, add or subtract stitches in multiples of 6 in the foundation chain. This represents one full pattern repeat. The diamond mesh repeat is 4 stitches wide, so any skirt stitch count must be divisible by 4 for the mesh and by 6 for the yoke shaping.
For each size step up (approximately 2 in / 5 cm in chest circumference), add 12 stitches to the starting chain and adjust increase rounds proportionally. For length adjustments, add or subtract full diamond mesh rows. Every 2 rows adds approximately 0.75 in / 2 cm to skirt length. The belt and flower scale independently and do not require adjustment for small size changes.
Materials Needed
Yarn A (main color): Approximately 400 yards / 366 m of white sport weight (CYCA 2) yarn in a smooth cotton or cotton blend
Yarn B (contrast color): Approximately 100 yards / 91 m of hot pink sport weight (CYCA 2) yarn in a smooth cotton or cotton blend
Hook: US size C-2 / 2.75 mm, or size needed to obtain gauge
Notions:
Yarn Suggestions
Option 1: Paintbox Yarns Cotton DK used at sport weight tension on a smaller hook. This 100 percent cotton yarn gives crisp stitch definition ideal for lace and mesh work. It washes well and is available in both white and a vivid hot pink colorway.
Option 2: Drops Safran (sport weight cotton) in color 17 white and color 07 pink. This Egyptian cotton yarn has a slight sheen that enhances the heirloom appearance of the dress and blocks beautifully.
Option 3: Lion Brand 24/7 Cotton in White and Raspberry. A widely available, affordable option with good stitch clarity and machine washable properties that are practical for baby garments.
Substitution note: Choose a yarn with minimal halo or texture so the diamond mesh and lace stitches read clearly. Avoid acrylic only yarns for this project as they do not block to shape as predictably as cotton or cotton blends. The finished fabric should drape softly without being limp.
Gauge
22 sc = 4 in / 10 cm
24 rows of sc = 4 in / 10 cm
In diamond mesh stitch pattern: 4 mesh repeats (16 sts) = 4 in / 10 cm; 4 mesh rows = 3 in / 7.5 cm
Gauge swatch: Work 24 ch, then follow the diamond mesh stitch pattern for 8 rows. Block lightly before measuring.
Gauge is critical for fit. Adjust hook size as needed before beginning. Taking the time to check gauge will save you from heartbreak later.
Abbreviations (US Terms)
Before we dive into the pattern, let me define every abbreviation you will encounter:
Special Stitches and Techniques
Shell Stitch (shell)
Work 5 dc all into the same stitch or chain space. This creates a fan shape used in the yoke lace panel and hem border. Think of it as a little decorative burst of stitches.
V-stitch (V-st)
Work (dc, ch 2, dc) all into the same stitch or chain space. The name comes from the V shape it creates.
Picot
Chain 3, slip stitch into the first chain made (the chain closest to the hook). This creates a small decorative loop used in the yoke edging and sleeve trim.
Scallop Border Stitch
Step 1: Skip 2 stitches, work 6 dc into the next stitch, skip 2 stitches, slip stitch into the next stitch. This is one full scallop repeat and consumes 6 stitches per repeat.
Diamond Mesh Stitch
This is worked over a multiple of 4 stitches plus 2. Here is the four row repeat:
Row/Rnd A: Chain 4 (counts as dc plus ch 1), skip 1 st, dc in next st, (ch 1, skip 1 st, dc in next st) across. Turn.
Row/Rnd B: Chain 1, sc in first dc, (ch 3, sc in next dc) across, ending sc in 3rd ch of turning ch. Turn.
Row/Rnd C: Chain 4 (counts as dc plus ch 1), dc in first ch-3 sp, (ch 1, dc in next ch-3 sp) across, dc in last sc. Turn.
Row/Rnd D: Same as Row B but working sc into the dc posts and ch-3 into each ch-sp.
These 4 rows form the diamond mesh pattern when repeated. It looks complex but becomes rhythmic quickly.
Crochet Flower (worked separately)
Rnd 1: With Yarn B, make a magic ring, work 6 sc into ring, sl st to join. (6 sc)
Rnd 2: Ch 1, work 2 sc in each st around, sl st to join. (12 sc)
Rnd 3: Ch 1, (sc in next st, 2 sc in next st) 6 times, sl st to join. (18 sc)
Rnd 4: (Ch 3, sk 2 sts, sl st in next st) 6 times to form 6 petal loops. (6 loops)
Rnd 5: For each loop, work (sc, hdc, 3 dc, hdc, sc) into the ch-3 space. Sl st to close each petal. (6 petals)
Fasten off leaving a long tail. Sew pearl button to center.
Braided Belt
Cut 9 lengths of Yarn B each measuring 60 in / 152 cm. Divide into 3 groups of 3 strands. Braid evenly for approximately 24 in / 61 cm. Knot ends and trim fringe to 1 in / 2.5 cm.
Pattern Notes
Read these before starting. They will save you confusion later.
The dress is worked from the top down in a continuous construction. The yoke is worked flat (back and forth) to allow for the back button closure, then joined and worked in rounds for the body.
Stitch markers are essential. Place them at the 4 raglan points and move them up each round.
All chain 3 turning chains at the start of double crochet rows count as the first double crochet unless otherwise stated.
The yoke lace panel is a set row section that transitions the solid yoke into the open work bodice. Read through the entire yoke section before beginning.
Yarn B is used only for edging elements: sleeve flutter trim, waist belt, flower, and hem border. All structural crochet is worked in Yarn A.
When working the diamond mesh in rounds, join each round with a slip stitch and chain up as described. Do not turn unless instructed.
The flutter sleeves are picked up and worked outward from the armhole edge after the body is complete.
Block the finished dress before attaching embellishments.
Step by Step Instructions
Section 1: Yoke (worked flat, top down)
The yoke begins at the neckline and is shaped with 4 raglan increase points to form front, back, and sleeve sections.
Foundation Row: With Yarn A, ch 61. (61 ch)
Row 1 (RS): Sc in 2nd ch from hook and in each ch across. Turn. (60 sc)
Place stitch markers in the following positions to define raglan seams:
This divides the 60 sts as: 8 right back, 12 right sleeve, 20 front, 12 left sleeve, 8 left back.
Row 2 (WS): Ch 1, sc in each st to 1 st before first marker, 2 sc in next 2 sts (inc at seam), sm, 2 sc in next 2 sts, sc to 1 st before next marker, 2 sc in next 2 sts, sm, 2 sc in next 2 sts, sc to 1 st before next marker, 2 sc in next 2 sts, sm, 2 sc in next 2 sts, sc to end. Turn. (68 sc)
Each Row 2 style increase row adds 8 sts total (2 sts at each of 4 raglan points).
Row 3: Ch 1, sc in each st across, moving markers as you pass them. Turn. (68 sc)
Row 4: Work raglan increase row same as Row 2. (76 sc)
Row 5: Ch 1, sc across. Turn. (76 sc)
Row 6: Raglan increase row. (84 sc)
Row 7: Ch 1, sc across. Turn. (84 sc)
Row 8: Raglan increase row. (92 sc)
Row 9: Ch 1, sc across. Turn. (92 sc)
Row 10: Raglan increase row. (100 sc)
Row 11: Ch 1, sc across. Turn. (100 sc)
Row 12: Raglan increase row. (108 sc)
Row 13: Ch 1, sc across. Turn. (108 sc)
Row 14: Raglan increase row. (116 sc)
Row 15: Ch 1, sc across. Turn. (116 sc)
Row 16: Raglan increase row. (124 sc)
After Row 16, stitch counts per section:
CHECKPOINT: After Row 16 of the yoke, the piece should measure approximately 4 in / 10 cm from the foundation chain, and span approximately 22 in / 56 cm across.
Section 2: Joining and Separating Sleeves
Row 17 (joining row, RS): Ch 1, sc across 16 right back sts, ch 2 (underarm bridge), skip 28 right sleeve sts, sc across 36 front sts, ch 2 (underarm bridge), skip 28 left sleeve sts, sc across 8 left back sts. Turn. (60 sc plus 4 ch = 64 working sts)
The sleeve sts are set aside and will be picked up later for flutter sleeves.
Section 3: Yoke Lace Panel (worked flat before joining)
Row 18: Ch 3 (counts as dc), dc in next st, (ch 1, sk 1 st, dc in next st) across working dc also into each ch of the 2-ch underarm bridges. Turn.
Row 18 adjusted: Ch 3, (dc in next st, ch 1, sk 1) across, dc in last st. Turn. (33 dc and 31 ch-1 sps = 64 loop positions)
Row 19: Ch 1, sc in first dc, (ch 3, sc in next dc) 31 times, sc in top of ch-3. Turn. (32 ch-3 sps)
Row 20: Ch 3, dc in first ch-3 sp, (ch 1, dc in next ch-3 sp) 30 times, ch 1, dc in last sc. Turn. (32 dc and 31 ch-1 sps)
Row 21: Rep Row 19. (32 ch-3 sps)
Section 4: Joining Body and Working in Rounds
At the end of Row 21, join the back seam: sl st the last stitch of Row 21 to the first stitch of Row 21, creating a tube. From this point, work in rounds.
Rnd 22: Ch 1, work 80 sc evenly around the Row 21 edge, picking up sts evenly across all ch-sps and dc posts. Join with sl st to first sc. (80 sc)
To achieve 80 sc evenly, work approximately 1 sc per dc post and 1 sc per ch-sp across the 64 active positions, adding approximately 16 additional sc at intervals to reach 80 total.
Rnd 23: Ch 1, sc in each st around. Join. (80 sc)
Rnd 24: Ch 1, sc in each st around. Join. (80 sc)
CHECKPOINT: After Rnd 24, the bodice tube below the yoke should measure approximately 3 in / 7.5 cm from the joining row. The circumference should be approximately 14.5 in / 37 cm.
Section 5: Waist Eyelet Round (belt channel)
Rnd 25: Ch 4 (counts as dc plus ch 1), sk 1 st, (dc in next st, ch 1, sk 1 st) 39 times. Join with sl st to 3rd ch of beg ch-4. (40 dc, 40 ch-1 sps = 80 positions)
Rnd 26: Ch 1, sc in each dc and each ch-sp around. Join. (80 sc)
The braided belt will be threaded through the ch-1 sps of Rnd 25 after blocking.
Section 6: Skirt (diamond mesh, worked in rounds)
The skirt begins with an increase round to expand the silhouette, then works diamond mesh rounds to the desired length.
Rnd 27 (increase round): Ch 1, (sc in next 4 sts, 2 sc in next st) 16 times, sc in rem 10 sts. Join. (96 sc)
96 is divisible by 4 (96 / 4 = 24 repeats) and by 6, which works perfectly for the skirt.
Rnd 28 (skirt mesh setup): Ch 4 (counts as dc plus ch 1), sk 1 st, (dc in next st, ch 1, sk 1 st) 47 times. Join to 3rd ch of beg ch-4. (48 dc, 48 ch-1 sps = 96 positions)
Rnd 29: Ch 1, sc in first dc, (ch 3, sc in next dc) 47 times, ch 3. Join to first sc. (48 ch-3 sps)
Rnd 30: Ch 4, dc in first ch-3 sp, (ch 1, dc in next ch-3 sp) 47 times. Join to 3rd ch of beg ch-4. (48 dc and 48 ch-1 sps = 96 positions)
Rnd 31: Ch 1, sc in first dc, (ch 3, sc in next dc) 47 times, ch 3. Join to first sc. (48 ch-3 sps)
Rnds 32-43: Repeat Rnds 30 and 31 six more times. (48 ch-3 sps on each odd rnd; 96 positions on each even rnd)
After Rnd 43, the skirt section (excluding border) should measure approximately 8 in / 20 cm from the waist.
CHECKPOINT: After Rnd 43, hold the dress up from the shoulders. The skirt should flare gently from the waist and the hem opening should measure approximately 24 in / 61 cm in circumference when the mesh is gently stretched to its natural blocked width.
Section 7: Hem Border Preparation Row
Rnd 44: Ch 1, work 1 sc into each dc and 2 sc into each ch-3 sp around. Join. (144 sc)
48 dc x 1 sc = 48, plus 48 ch-3 sps x 2 sc = 96. Total: 144 sc. 144 / 6 = 24 scallop repeats. This works perfectly for the scallop border.
Section 8: Hem Border (worked in Yarn B and Yarn A)
Rnd 45: Join Yarn B with sl st to any st. Ch 1, sc in each st around. Join. (144 sc)
Rnd 46 (scallop foundation): With Yarn B, ch 1, (sk 2 sts, 5 dc in next st, sk 2 sts, sl st in next st) 24 times. Join. (24 scallops; 144 sts consumed)
Rnd 47 (scallop detail): Working into the tops of the scallops from the previous rnd, join Yarn A with sl st to first sl-st of previous rnd. Ch 1, (sc in sl-st, ch 1, sc in first dc of scallop, ch 2, sc in 3rd dc, ch 2, sc in 5th dc, ch 1) 24 times. Join. (24 scallop outlines)
Rnd 48 (pink scallop edge): Join Yarn B with sl st to any sc between scallops. Ch 1, (sc in sc, 5 dc in ch-2 sp, sc in 3rd dc of previous round, 5 dc in next ch-2 sp) 24 times. Join with sl st. Fasten off Yarn B.
The border creates the layered pink and white scalloped hem shown at the bottom of the skirt.
Section 9: Flutter Sleeves
Return to the 28 held sleeve sts on each arm. Join Yarn A with sl st to the first held st at the underarm bridge.
Setup Rnd: Ch 1, sc in each of 28 held sts, then pick up and sc 2 sts from the underarm ch-2 bridge. Join. (30 sc)
Rnd 1 of sleeve: Ch 1, sc in each st around. Join. (30 sc)
Rnd 2 of sleeve (flutter flare): Ch 3 (counts as dc), 2 dc in next st, (dc in next st, 2 dc in next st) 14 times, dc in last st. Join. (45 dc)
Rnd 3: Join Yarn B with sl st. Ch 1, sc in each st around. Join. (45 sc)
Rnd 4 (pink picot trim): Ch 1, (sc in next st, ch 2, sl st back in first ch of ch-2, sc in next 2 sts) 15 times. Join. Fasten off Yarn B. (15 picot points)
Repeat for the second sleeve.
Back neck edging: Join Yarn B at top right back corner. Ch 1, sc evenly down right back edge, ch 6 at bottom right for button loop, sc evenly up left back edge. Fasten off. Sew pearl button at corresponding position on left back edge opposite the button loop.
Section 10: Belt and Flower Assembly
Thread the braided belt through the ch-1 sps of Rnd 25. Bring both ends to the front center of the dress. Tie or adjust belt to desired waist definition.
Sew the completed flower to the belt at the front center, catching the belt and the dress fabric to secure. The stem tails of the flower (the remaining Yarn B yarn ends from the flower base) hang down in a decorative ribbon shape approximately 2 in / 5 cm below the flower. Secure these tails with a small stitch at the base of the flower only, allowing the ends to hang freely.
Finishing and Blocking Your Baby Dress
Weave in all yarn ends securely using a yarn needle. Do not trim ends until after blocking as the fabric may shift.
To block: Soak the finished dress in cool water with a small amount of no rinse wool wash (or gentle baby soap if using cotton). Gently squeeze out excess water without wringing. Lay flat on a blocking mat. Shape the yoke smoothly, pin the scalloped hem border to even out the scallop points, and pin the flutter sleeves in a gentle wing shape. Allow to dry completely (12 to 24 hours) before removing pins.
Attach all embellishments (belt, flower, buttons) after blocking is complete.
Care Instructions
Hand wash in cool water with a mild detergent. Press gently to remove excess water; do not wring. Lay flat to dry away from direct sunlight to prevent yellowing of white yarn. Do not tumble dry or iron directly on crochet unless the yarn manufacturer specifically allows it. If using a cotton or cotton blend yarn that permits machine washing, use the delicate cycle in a mesh laundry bag with cool water.
Final Thoughts on This Crochet Baby Dress Pattern
You did it! Or you are about to do it. Either way, I am so proud of you for taking on this beautiful project. This white and pink floral baby dress crochet pattern combines everything I love about heirloom crochet: delicate lacework, thoughtful construction, and details that make people ask where did you buy that? The answer, of course, is that you made it with your own two hands.
This dress makes an unforgettable baby shower gift, a stunning christening outfit, or a special first birthday dress that will be treasured and photographed for years to come. The skills you build working through this pattern, top down construction, diamond mesh, scalloped borders, three dimensional flowers, will serve you in countless future projects.
If you make this dress, I would absolutely love to see your finished piece! Tag me on Instagram or share in our Facebook group. Seeing your creations is genuinely the best part of sharing patterns.
Save this pattern to your Pinterest boards so you can find it when you are ready to start, and please leave a comment below if you make it. I love hearing about your color choices, any modifications you tried, and who the lucky little one is who gets to wear your beautiful handmade dress. Happy crocheting!
