
Last spring, my best friend called me in a panic. Her daughter’s first birthday party was three weeks away, and she wanted something handmade for the photos. Not just any outfit. Something heirloom quality. Something that would make the grandparents gasp and reach for their cameras.
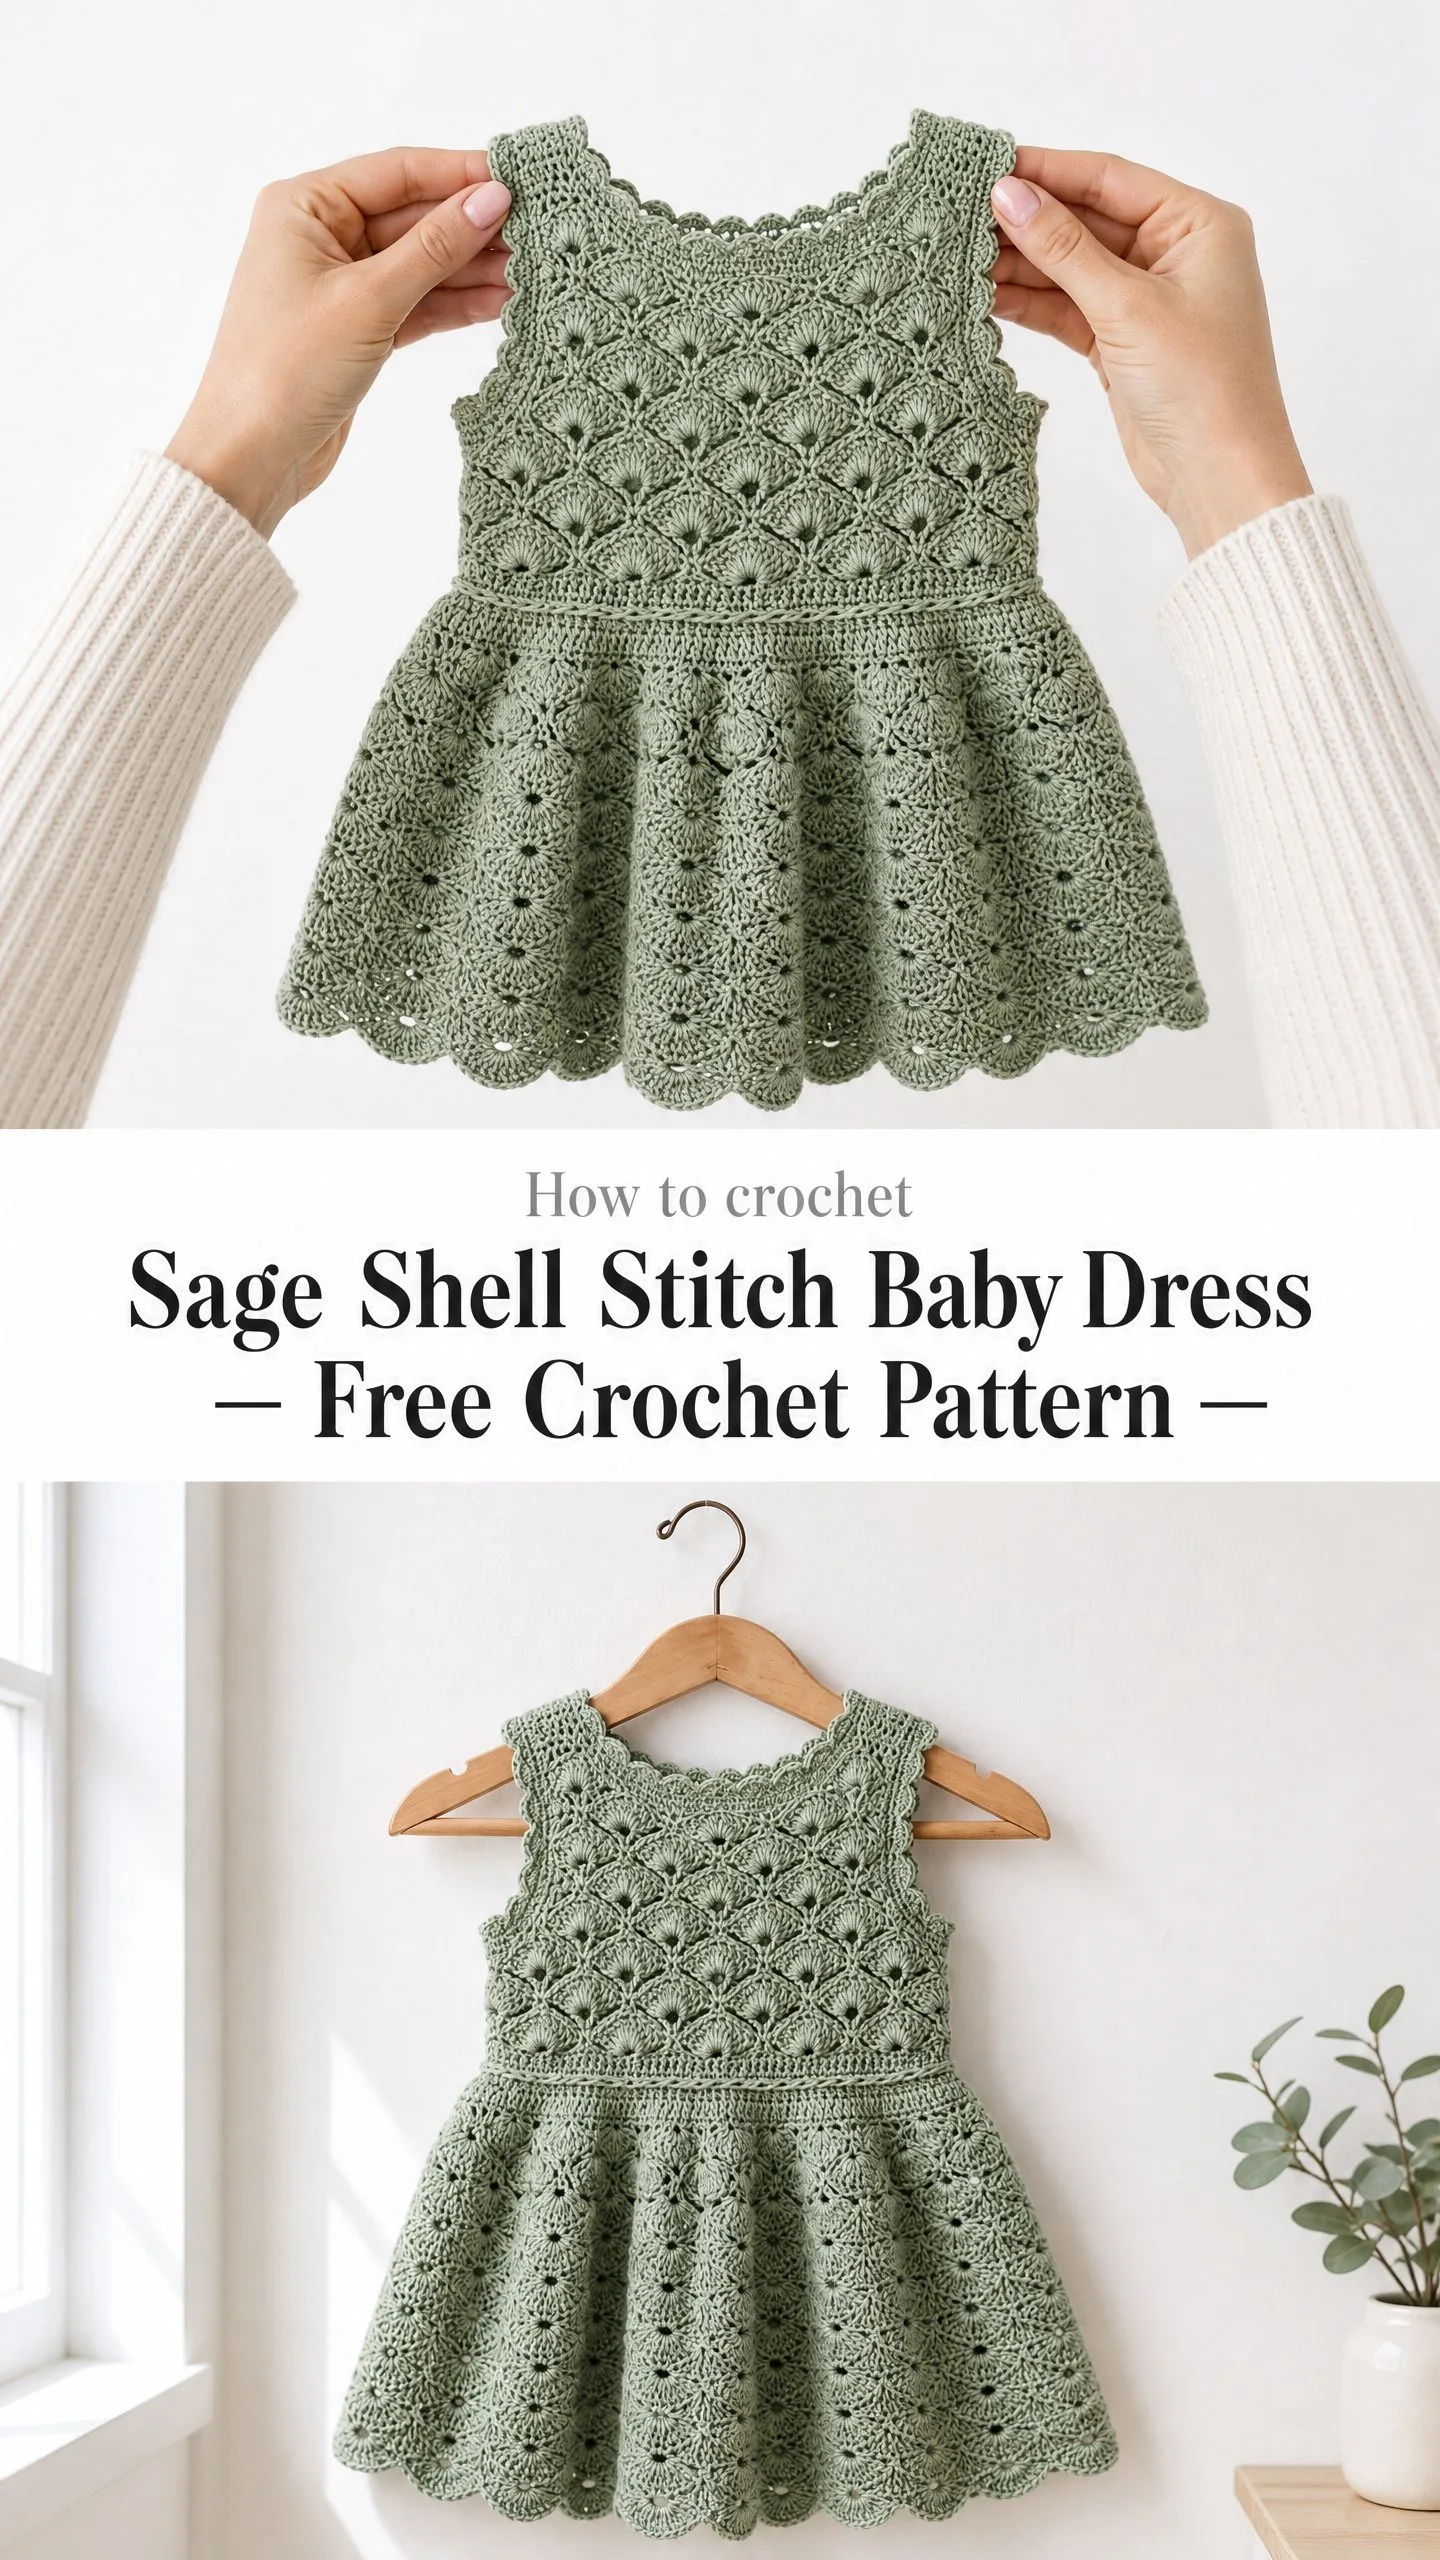
I stayed up way too late that night sketching shell stitch swatches and doing math on napkins. The result was this dress, and honestly? I ugly cried a little when I saw it on her baby girl. The sage green against her rosy cheeks, those perfect scalloped edges catching the light. Pure magic.
Now I am sharing this pattern with you because every baby deserves at least one dress that makes people stop and stare. Fair warning though. You might need tissues when you see the finished piece on your own little one.
About This Crochet Pattern
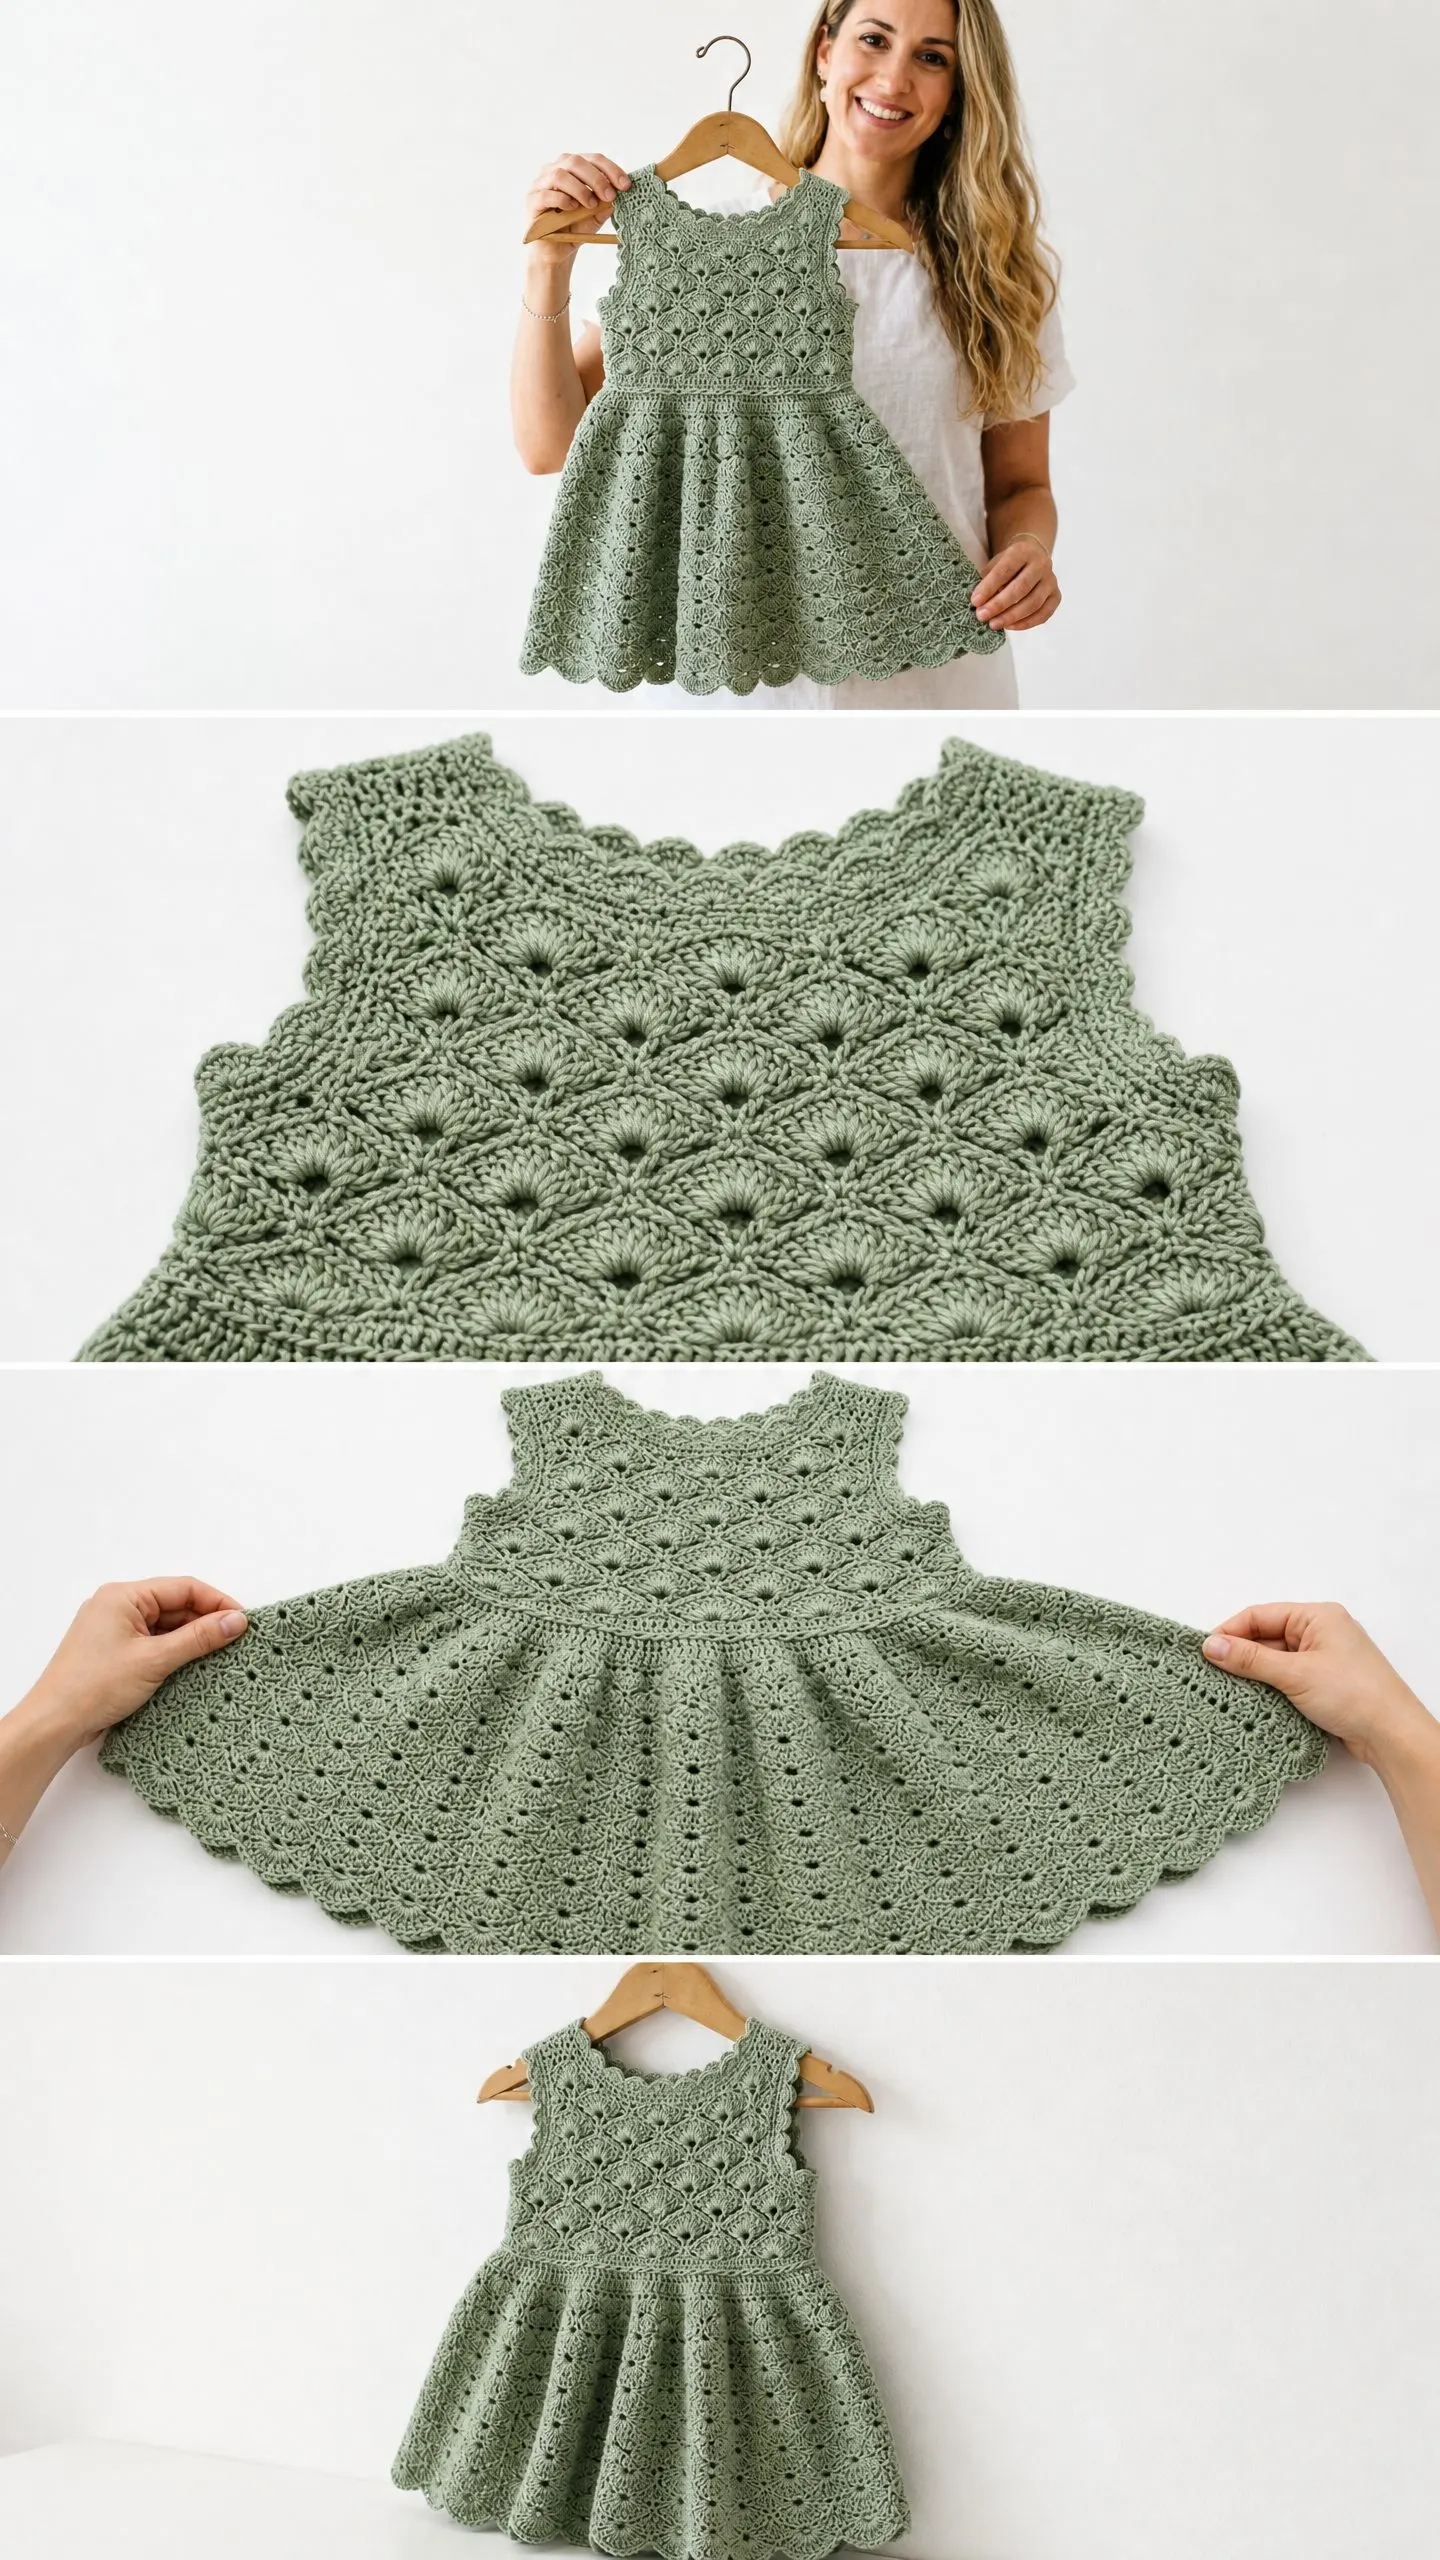
This baby dress is an absolute showstopper. The bodice features an all-over shell stitch texture that creates a beautiful fan-like pattern across the fabric. The defined waistband gives structure and shape, while the flared A-line skirt drapes perfectly for that classic silhouette. Delicate scallop edging finishes the neckline, armholes, and hem with a cohesive lace-like detail.
The construction is clever but not complicated. You will work the bodice flat from the top down, seam the shoulders, then join everything in the round for the skirt. The keyhole opening at the back with two small buttons makes dressing a squirmy baby so much easier. Trust me on this one.
Skill level: Intermediate. If you have completed two or three projects using shell stitches or lace patterns, you can absolutely handle this. The key is counting carefully and staying patient with the shaping.
Time estimate: Plan for 12 to 18 hours of stitching. Pour yourself some tea, put on a good podcast, and enjoy the process.
Finished Measurements
This pattern is written for size 12 months, fitting babies approximately 18 to 22 pounds.
Materials You Will Need
Yarn: Approximately 350 to 400 yards (320 to 365 meters) of DK weight (CYCA 3) cotton or cotton-blend yarn in sage green.
Recommended yarns:
Hook: US Size D-3 / 3.25 mm crochet hook, or size needed to achieve gauge.
Notions:
Important: Cotton is essential for this project. It provides the drape and stitch definition that makes the shell pattern look crisp and beautiful. Avoid acrylic for this dress.
Gauge
18 stitches and 10 rows = 4 inches (10 cm) in single crochet worked flat with a 3.25 mm hook, after blocking.
Shell gauge: One complete 6-stitch shell repeat measures approximately 1.25 inches (3.2 cm) wide. Four rows of shell pattern measure approximately 2 inches (5 cm) tall.
Please swatch. I know swatching feels tedious, but gauge is critical for fit with baby garments. Block your swatch before measuring. Your future self will thank you.
Abbreviations and Stitch Definitions
Let me walk you through every stitch abbreviation you will encounter. Even if you know these by heart, a quick refresher never hurts.
Special Stitches for This Baby Dress Pattern
These special stitches create the gorgeous texture throughout the dress. Take a moment to practice each one before diving in.
Shell Stitch (used in bodice)
Work 5 double crochet stitches all into the same stitch or space. This creates the fan shape that forms the main bodice texture. Picture a seashell opening up, and you have got the idea.
V-Stitch (used in skirt)
Work (1 dc, ch 1, 1 dc) all into the same stitch or space. The chain-1 space forms the center of the V and serves as the anchor point for the next round.
Open Shell (used in skirt)
Work (2 dc, ch 1, 2 dc) all into the same stitch or space. Similar to a regular shell but with a chain space in the center.
Scallop Edging
Work (sl st into next st, ch 3, 4 dc into same st as the sl st, sl st into next st). This creates the rounded scallop border you see at the neckline, armholes, and hem.
Pattern Notes Before You Begin
Read through these notes first. They will save you confusion later.
1. The bodice front and back are worked separately and flat, from the top down. After completion, join the shoulder seams using a slip stitch seam on the wrong side.
2. The back bodice has two separate panels with a center-back keyhole opening. Button loops are worked on one panel, and buttons are sewn to the other.
3. The ch-3 turning chain counts as the first double crochet throughout the pattern.
4. The ch-1 at the beginning of single crochet rows does NOT count as a stitch.
5. All shaping happens on right side rows unless noted otherwise.
6. When working the shell bodice flat, the stitch pattern mirrors on wrong side rows. Shells are worked into the spaces between shells of the previous row.
7. Block the finished dress after assembly. Cotton opens up beautifully with wet blocking, and you will see the lace details really pop.
Step-by-Step Pattern Instructions
Bodice Front
The front bodice is worked flat, from the neckline down to the waist.
Foundation: Ch 44. Sc in 2nd ch from hook and in each ch across. Turn. (43 sc)
Row 1 (WS): Ch 1, sc in each st across. Turn. (43 sc)
Row 2 (RS): Ch 3 (counts as dc here and throughout), sk next 2 sts, 5 dc in next st, sk 2 sts, dc in next st, (sk 2 sts, 5 dc in next st, sk 2 sts, dc in next st) 6 times. Turn. (7 shells, 43 sts engaged)
Row 3 (WS): Ch 3, sk 2 dc of first shell, 5 dc in next dc (center of shell), sk 2 dc, dc in next dc (the inter-shell post), (sk 2, 5 dc in next dc, sk 2, dc in next dc) 5 times, sk 2, 5 dc in next dc, sk 2, dc in top of t-ch. Turn. (7 shells, 43 sts)
Rows 4 through 12: Repeat Rows 2 and 3 alternately. Maintain 7 shells per row. (43 sts each row, 7 shells)
Checkpoint: After Row 12, the bodice front should measure approximately 6 inches (15 cm) from the foundation chain. If your piece is shorter, work additional rows in pattern to reach 6 inches before proceeding.
Final Bodice Front Row (RS): Ch 1, sc evenly across the bottom of the bodice front, working 1 sc per dc and 1 sc per dc-post. Work 43 sc across. Fasten off. (43 sc)
Bodice Back Left Panel
Foundation: Ch 23. Sc in 2nd ch from hook and in each ch across. Turn. (22 sc)
Row 1 (WS): Ch 1, sc in each st across. Turn. (22 sc)
Row 2 (RS): Ch 3, sk 2, 5 dc in next st, sk 2, dc in next st, sk 2, 5 dc in next st, sk 2, dc in next st, sk 2, 5 dc in next st, sk 2, dc in next st, sc in last 2 sts. Turn. (3 shells; 20 shell-pattern sts + 2 sc band = 22 sts)
Row 3 (WS): Ch 1, sc in first 2 sts (button band), ch 3, sk 2 dc of first shell, 5 dc in center dc of shell, sk 2 dc, dc in inter-shell dc, sk 2 dc of next shell, 5 dc in center dc, sk 2 dc, dc in inter-shell dc, sk 2 dc of last shell, 5 dc in center dc, sk 2 dc, dc in top of t-ch. Turn. (3 shells, 22 sts)
Rows 4 through 12: Repeat Rows 2 and 3. Maintain button band in sc at center-back edge. (22 sts each row)
Final Back Panel Row (RS): Ch 1, sc across all 22 sts. Fasten off. (22 sc)
Bodice Back Right Panel
Work exactly as Left Panel through Row 6.
Row 7 (RS, first buttonhole row): Ch 3, sk 2, 5 dc in next st, sk 2, dc in next st, sk 2, 5 dc in next st, sk 2, dc in next st, sk 2, 5 dc in next st, sk 2, dc in next st, sc in next st, ch 2, sk 1 st, sc in last st. Turn. (1 buttonhole created in button band; 22 sts)
Row 8 (WS): Ch 1, sc in first st, 2 sc in ch-2 sp, sc in next st (button band restored), continue shell pattern as established across. Turn. (22 sts)
Continue in pattern through Row 11.
Row 12 (RS, second buttonhole row): Work as Row 7, creating a second buttonhole in the button band. Turn. (22 sts)
Row 13 (WS): Work as Row 8, restoring the button band. Turn. (22 sts)
Final Back Panel Row: Ch 1, sc across all 22 sts. Fasten off. (22 sc)
Shoulder Seams
The front measures 43 sc across the top. Each back panel is 22 sc across the top. The shoulder region on the front equals approximately 11 stitches on each side. The center 21 stitches of the front form the neckline opening.
Mark the front by placing a stitch marker after stitch 11 from the right edge and another after stitch 32 from the right edge. Stitches 12 through 32 (21 sts) mark the neckline.
Right shoulder seam: With wrong sides together, sl st through both layers across the first 11 sts of the front and the 11 sts at the outer edge of the right back panel.
Left shoulder seam: With wrong sides together, sl st through both layers across the last 11 sts of the front and the 11 sts at the outer edge of the left back panel.
The neckline (21 sts) remains open. After joining, the two back panels overlap at center back to close the keyhole.
Neckline Edging
With RS facing, join yarn at right back corner of neckline opening.
Rnd 1: Ch 1, sc evenly around the neckline opening, working approximately 1 sc per st across the front neckline (21 sc) and 1 sc per row-end along each back neck edge (approximately 6 sc per side). Join with sl st to first sc. (approximately 33 sc)
Adjust count so it is divisible by 2. If needed, work 34 sc total by adding 1 sc along a back edge.
Rnd 2 (Scallop Edging): (Sl st in next st, ch 3, 4 dc in same st as sl st, sk 1 st) around. Join with sl st to first sl st. Fasten off. (17 scallops)
Armhole Edging
Work on each armhole separately.
With RS facing, join yarn at underarm edge.
Rnd 1: Ch 1, sc evenly around armhole opening, working approximately 1 sc per row-end along each side. Aim for approximately 24 sc. Adjust to nearest even number. (24 sc)
Rnd 2 (Scallop): (Sl st in next st, ch 3, 4 dc in same st, sk 1 st) around. Join with sl st. Fasten off. (12 scallops)
Repeat for second armhole.
Side Seams
With wrong sides together, slip stitch or whip stitch the left side seam from underarm down to the waist edge. Repeat for right side seam. The dress is now joined and the waist edge is open for the waistband.
Waistband
Join yarn at right side seam at the waist edge with RS facing.
Rnd 1: Ch 1, sc evenly around the entire waist opening, working into the final sc row of the bodice front (43 sc) and the final sc rows of both back panels (22 sc each). Total = 87 sc. Adjust to 84 sc (divisible by 6 for skirt pattern) by decreasing 3 sts evenly spaced across this round. Work (sc2tog, sc across to next decrease point) 3 times as needed. Join with sl st to first sc. (84 sc)
Rnd 2: Ch 1, sc in BLO of each st around. Join with sl st. (84 sc)
Rnd 3: Ch 1, sc in each st around. Join with sl st. (84 sc)
Rnd 4: Ch 1, sc in each st around. Join with sl st. (84 sc)
Checkpoint: The waistband should measure approximately 0.75 inches (2 cm) tall and sit snugly at the waist. (84 sc)
Skirt
The skirt is worked in the round from the waistband down. The pattern repeat is 6 stitches. You will have 14 repeats around.
Set-up Rnd: Join yarn to first sc of waistband. Ch 4 (counts as dc, ch 1). Dc in same st (V-st made at join). Sk 2 sts, (2 dc, ch 1, 2 dc) in next st (open shell), sk 2 sts, (dc, ch 1, dc) in next st (V-st), (sk 2 sts, open shell in next st, sk 2 sts, V-st in next st) 12 more times, sk 2 sts, open shell in next st, sk 2 sts. Join with sl st to 3rd ch of ch-4. (14 open shells, 14 V-sts)
Rnd 2: Sl st into ch-1 sp of first V-st, ch 3 (counts as dc), 4 dc in same sp (shell in V-sp), ch 1, (5 dc in ch-1 sp of next open shell, ch 1, 5 dc in ch-1 sp of next V-st, ch 1) 13 times, 5 dc in ch-1 sp of last open shell, ch 1. Join with sl st to top of beg ch-3. (28 shells of 5 dc, separated by ch-1 sps)
Rnd 3: Sl st to center dc of first 5-dc shell, ch 4 (counts as dc, ch 1), dc in same st (V-st in center of shell), ch 1, (dc, ch 1, dc) in center dc of next shell, ch 1, rep around. Join with sl st to 3rd ch of beg ch-4. (28 V-sts, each separated by ch-1)
Rnd 4: Sl st into first ch-1 sp, ch 3, 4 dc in same sp, (ch 1, 5 dc in next ch-1 sp) around, ch 1. Join with sl st to beg ch-3. (28 shells of 5 dc)
Rnds 5 through 8: Repeat Rnds 3 and 4 twice more. (28 shells each shell rnd, 28 V-sts each V rnd)
Increase Round for Skirt Flare
This increase round expands from 28 repeating groups to 42 groups, creating the beautiful A-line flare.
Increase Rnd (worked after Rnd 8, on a V-stitch round): Sl st to center dc of first shell, ch 4, dc in same st (V-st made), ch 1, V-st in ch-1 sp between shells (added V-st), ch 1, rep (V-st in center of next shell, ch 1, V-st in ch-sp, ch 1) around. Join with sl st to 3rd ch of beg ch-4. (42 V-sts)
Rnd 9: Sl st into first ch-1 sp, ch 3, 4 dc in same sp, (ch 1, 5 dc in next ch-1 sp) around, ch 1. Join. (42 shells of 5 dc)
Rnds 10 through 16: Repeat Rnds 3 and 4 using 42 groups. Work V-st rounds into center dc of each shell, and shell rounds into each V-sp. (42 groups each round)
Checkpoint: After Rnd 16, the skirt should measure approximately 7 inches (18 cm) from the waistband. The hem circumference should be approximately 42 inches (107 cm). If you need more length, work additional rounds in pattern.
Skirt Hem Scallop Edging
Final Shell Rnd: Work Rnd 4 pattern (shells into all V-sps). (42 shells of 5 dc)
Scallop Rnd: Ch 1. (Sl st into first dc of shell, ch 3, 4 dc in same dc, sl st into 5th dc of same shell, sl st into ch-1 sp between shells) around. Join with sl st to first sl st. Fasten off. (42 scallops)
Finishing Your Baby Dress
Weaving in Ends
Weave in all ends using a yarn needle. Draw tails through the backs of stitches in multiple directions to prevent unraveling. Take your time here. Nothing ruins a beautiful garment faster than ends poking out after the first wash.
Attaching Buttons
Sew buttons to the left back panel button band, aligning with the buttonholes on the right back panel. Use the yarn tail or a length of matching yarn. Stitch through the button holes 4 to 6 times and finish with a secure knot on the wrong side.
Blocking Instructions
Wet blocking is strongly recommended for this dress. Cotton relaxes beautifully and your shell stitches will really open up.
1. Fill a basin with cool water and a small amount of gentle soap or wool wash.
2. Submerge the dress and gently press out air bubbles. Let soak for 15 to 20 minutes.
3. Remove without wringing. Roll in a clean towel and press gently to absorb excess water.
4. Lay flat on a blocking mat. Pin the neckline, armholes, and hem scallops to the desired shape. Open each scallop point gently as you pin.
5. Smooth the bodice flat and pin the side seams straight.
6. Allow to dry completely before unpinning. This usually takes 12 to 24 hours depending on humidity.
Tips for Crochet Pattern Success
If your gauge is off: Go up a hook size if your fabric feels too tight, or down a hook size if it feels loose and floppy. Even a 0.25 mm difference can make an impact.
If counting gets confusing: Place a stitch marker at the center dc of every shell as you work. It sounds tedious but saves so much frustration.
For size adjustments: Add or remove shell repeats to change the chest circumference. Each shell repeat adds approximately 1.25 inches to the width. Adjust the skirt length by adding or removing rounds before the hem edging.
For gifting: Make the next size up. Babies grow fast, and parents always appreciate clothing they can grow into rather than out of immediately.
You Did It!
This sage shell stitch baby dress is truly something special. Every scallop, every shell, every careful stitch comes together to create an heirloom piece that families will treasure for generations. Whether it is for a birthday celebration, a christening, family photos, or just because, this dress is worth every hour you put into it.
Thank you so much for choosing this crochet pattern for your next project. I genuinely hope you love making it as much as I loved designing it. When you finish, I would absolutely love to see your creation! Tag me on Instagram or share a photo in our Facebook group. Seeing your versions brings me so much joy.
If this pattern is calling to you, go ahead and pin it to your Pinterest boards so you can find it easily when you are ready to start. And please drop a comment below if you make one. I love hearing about your yarn choices, any modifications you made, and of course seeing photos of the lucky little ones wearing your handmade creations!
