
Last summer, I found myself standing in front of my closet with absolutely nothing to wear. You know that feeling? Plenty of clothes, but nothing that felt like me. I wanted something feminine and bold. Something that would make me feel put together without overheating in the July humidity. That’s when I sketched out this top on the back of a grocery receipt while drinking my morning coffee.
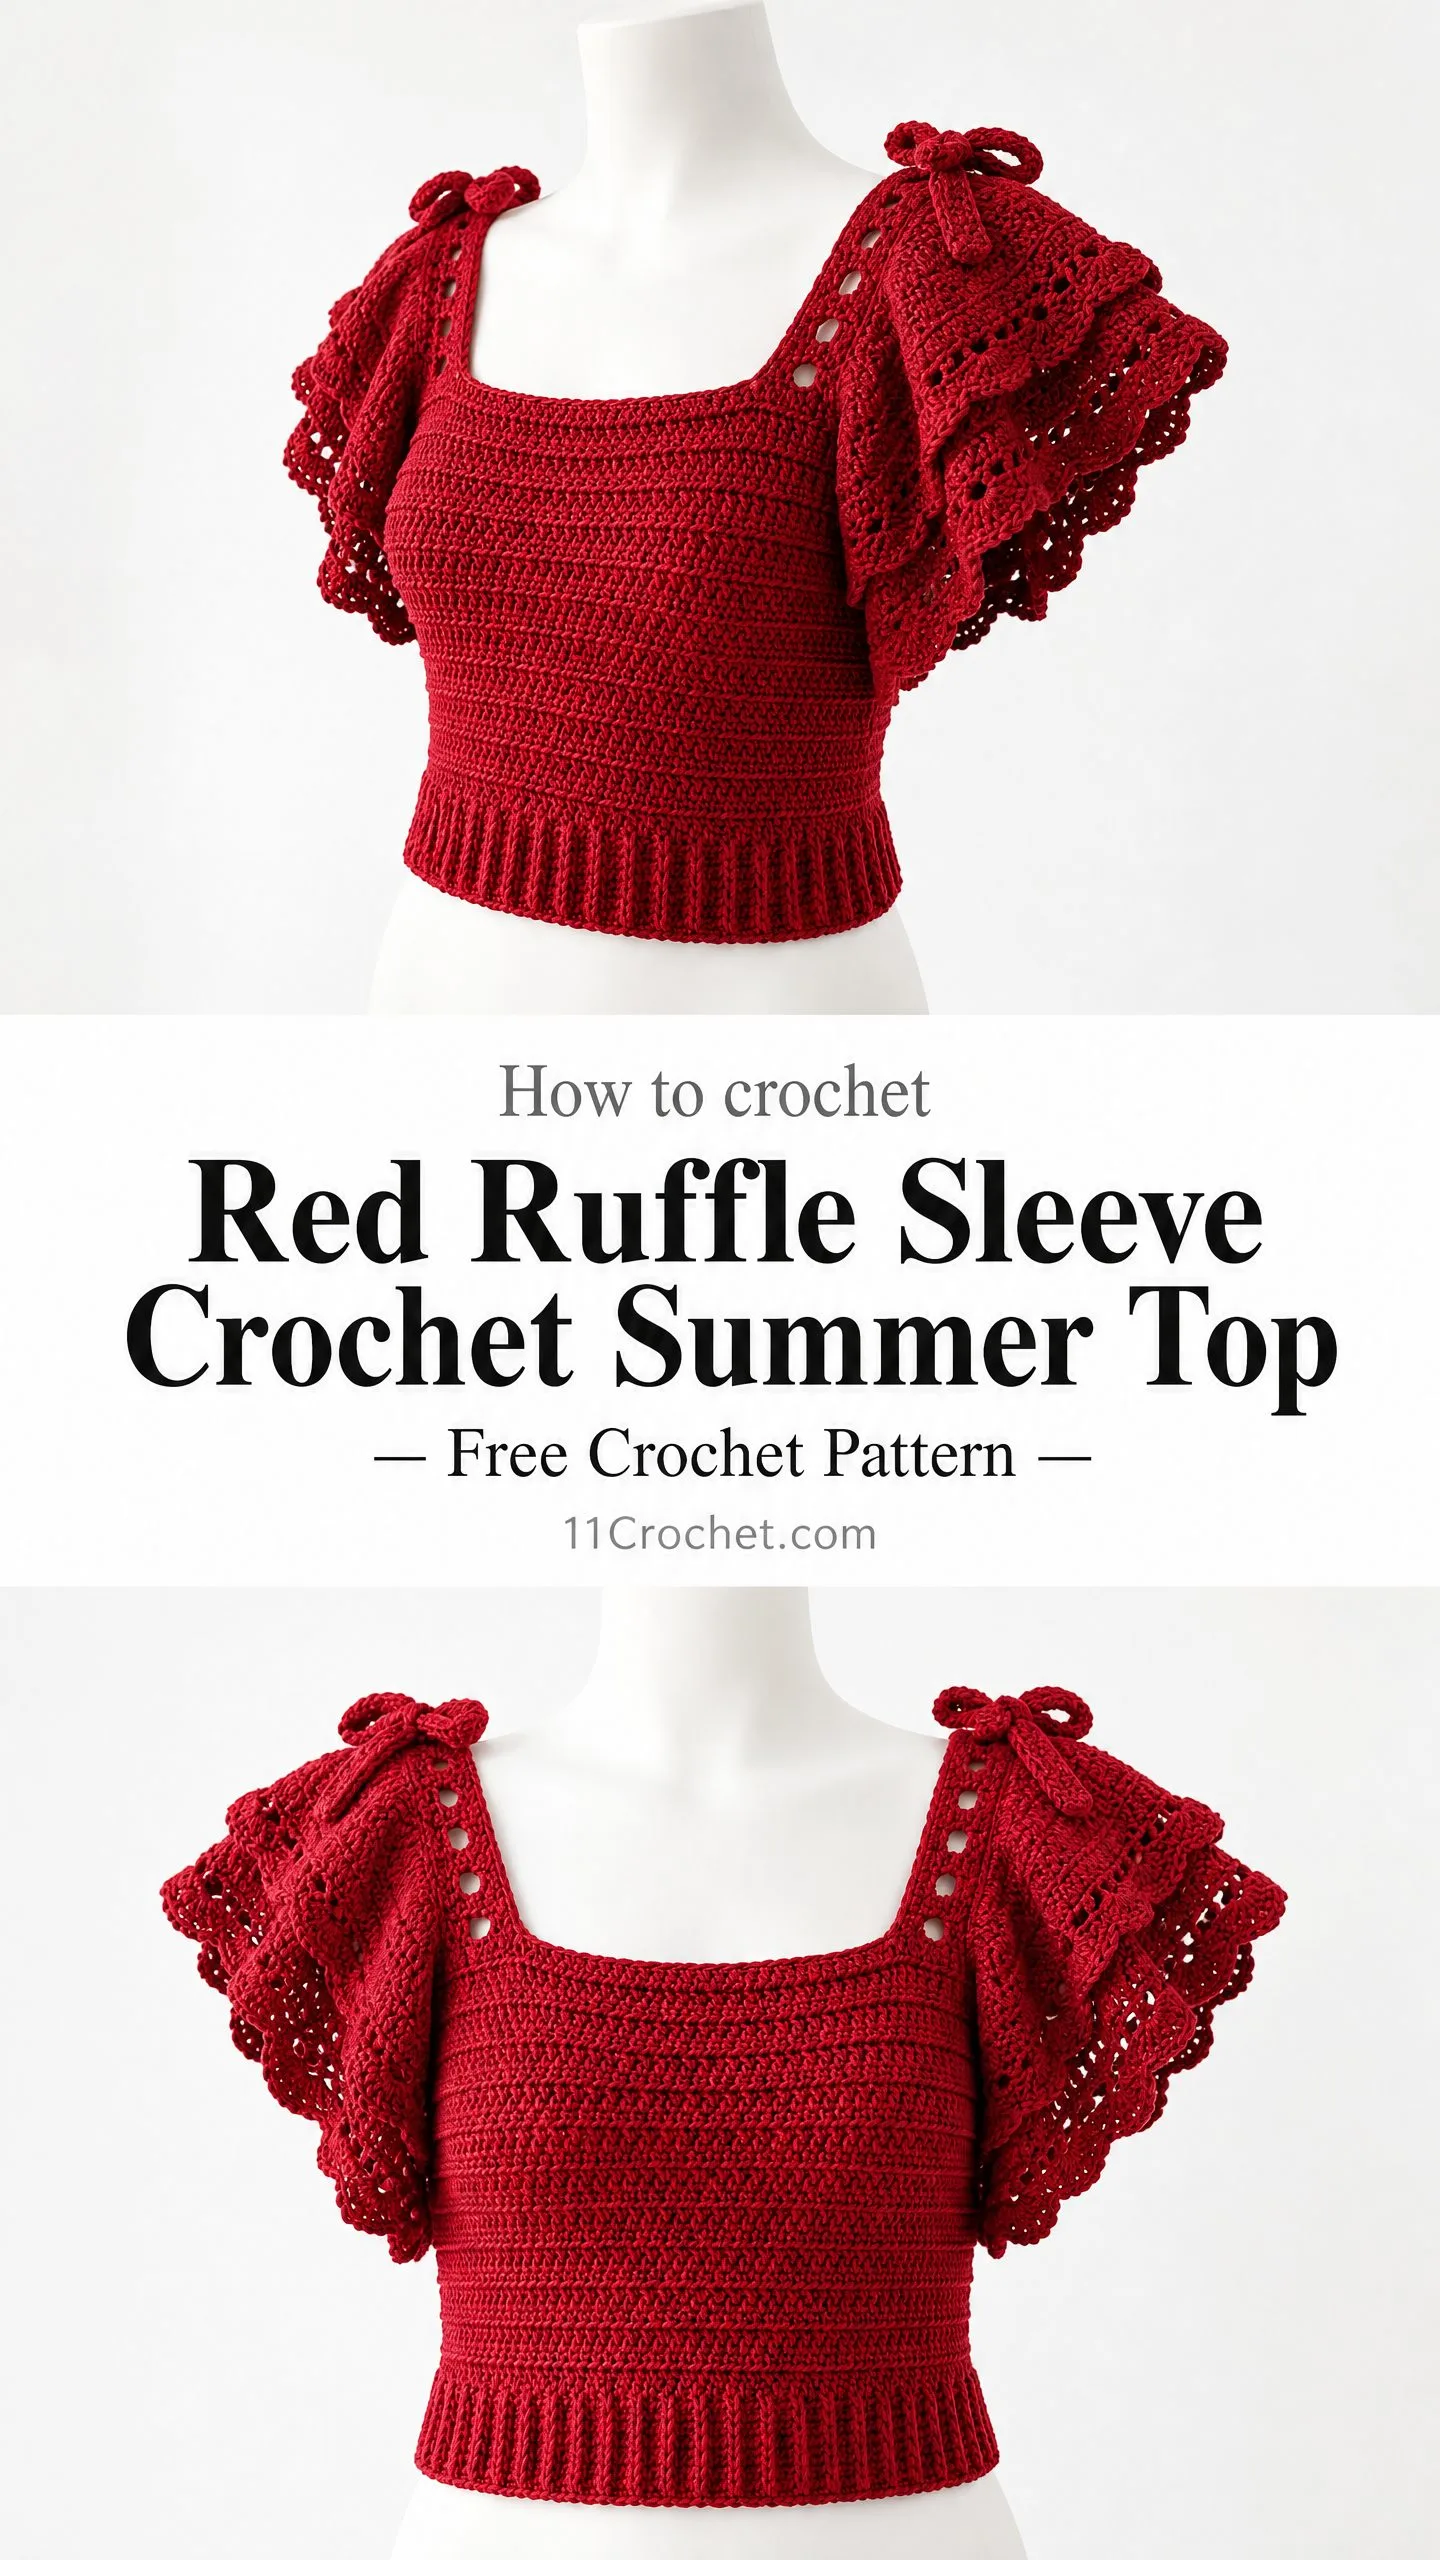
This red ruffle sleeve crochet summer top has become my go-to piece for everything from farmer’s market runs to dinner dates. The dramatic tiered sleeves make a statement, but the simple single crochet bodice keeps the construction manageable. It’s the kind of project that looks incredibly impressive hanging on the hanger but won’t make you want to throw your hook across the room.
I’m so excited to finally share this pattern with you. The square neckline flatters everyone, the ribbed hem hugs in all the right places, and those cascading ruffle sleeves with their scalloped lace edges? Pure drama in the best possible way.
About This Crochet Summer Top Pattern
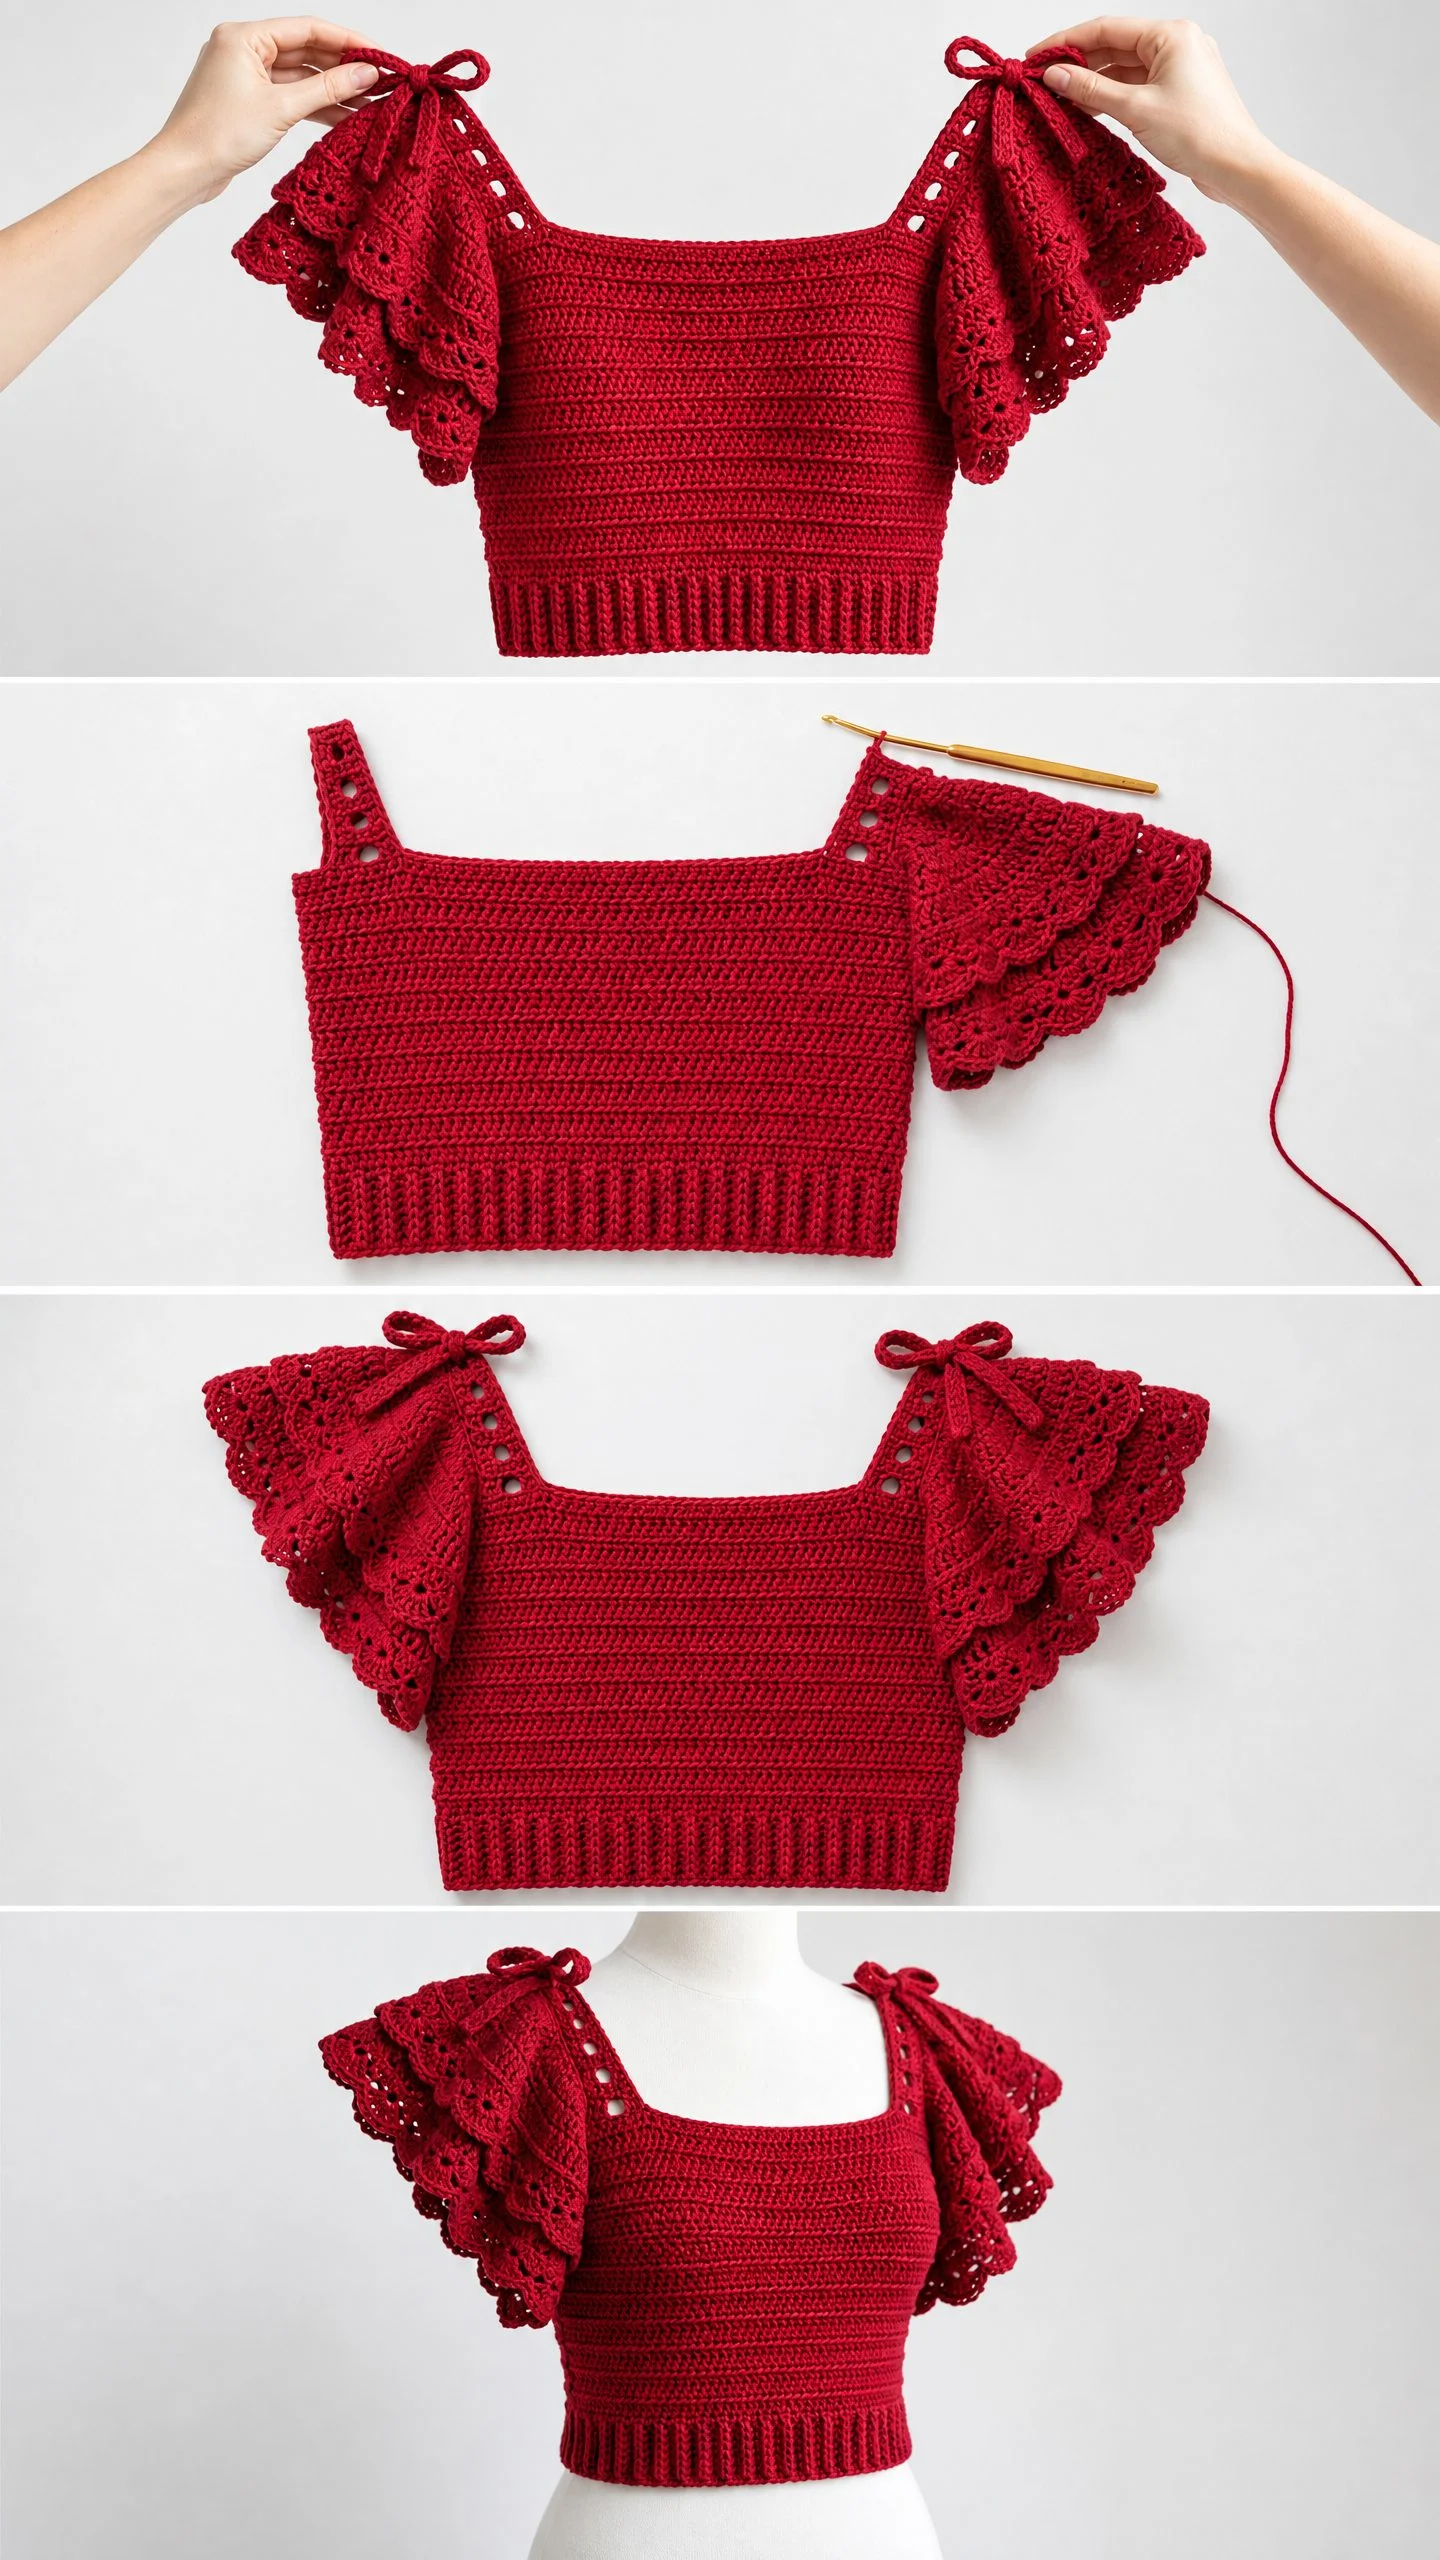
This cropped top features a clean square neckline, a fitted bodice worked in rows and rounds, tiered ruffle sleeves with decorative scalloped edging, sweet shoulder bow ties, and a stretchy ribbed waistband. The construction is seamless from the top down for the bodice, with the sleeves worked separately and seamed into the armholes.
The finished piece hits right at or just above your natural waist, making it perfect for pairing with high-waisted skirts, jeans, or wide-leg pants. I designed it with about 2 inches of positive ease for a comfortable but flattering fit.
Skill level: Intermediate to advanced. You’ll need to be comfortable working in both rows and rounds, seaming pieces together, understanding stitch counts through increases and decreases, and following multi-row ruffle construction. If you’ve made a few garments before, you’re ready for this one.
Time estimate: Plan for approximately 15 to 25 hours depending on your experience level. I like to think of this as a weekend project that spills into the following week.
Materials You Will Need
Yarn: Approximately 600 to 700 yards of DK weight yarn, which is also called CYCA category 3. I strongly recommend 100% cotton or a cotton blend for the best drape and stitch definition. Cotton also keeps you cool when the temperatures climb.
Yarn suggestions I love:
Lion Brand 24/7 Cotton in Cranberry or Red works beautifully here. It’s a smooth, mercerized cotton with excellent stitch definition. Machine washable and holds its shape well. You’ll need approximately 4 skeins at 186 yards per skein.
Paintbox Yarns Cotton DK in Pillar Box Red gives you gorgeous color saturation with a matte finish. The tight twist shows off the lace stitches in the ruffle edging perfectly. Grab approximately 5 skeins at 137 yards per skein.
WeCrochet Comfy DK in Red is a cotton-acrylic blend that adds slight elasticity for a better body fit. If you’re newer to garment making, this forgiving fabric will be your friend. You’ll need approximately 3 skeins at 230 yards per skein.
Substitution note: Choose any DK weight yarn with good stitch definition. Avoid fuzzy or halo yarns because they’ll obscure the ruffle texture and lace eyelets.
Hooks:
Notions:
Gauge Information
Getting gauge right is mandatory for this garment. Even a small deviation will substantially change your finished dimensions. Please don’t skip this step.
With G-6 / 4.0 mm hook: 18 single crochet stitches and 22 rows equals 4 inches in single crochet, blocked.
With F-5 / 3.75 mm hook: 20 single crochet stitches and 26 rows equals 4 inches in back loop only ribbing pattern, blocked.
Make a swatch of at least 6 inches square. Wash and block it exactly as you plan to treat the finished garment. Adjust your hook size as needed before casting on.
Finished Measurements for Size Small
Abbreviations and Stitch Definitions
Before diving into the step by step instructions, let me walk you through every abbreviation you’ll encounter. I’ll give you the full name, the abbreviation, and a plain-English explanation of what you’re actually doing.
blo (back loop only): Instead of inserting your hook under both loops at the top of a stitch, you only go through the back loop. This creates a ribbed texture.
ch (chain): Yarn over, pull through the loop on your hook. The most basic crochet move.
dc (double crochet): Yarn over, insert hook into stitch, yarn over and pull up a loop (3 loops on hook), yarn over and pull through 2 loops (2 loops remain), yarn over and pull through remaining 2 loops. Creates a taller stitch.
flo (front loop only): Insert your hook through only the front loop of the stitch.
hdc (half double crochet): Yarn over, insert hook, yarn over and pull up a loop (3 loops on hook), yarn over and pull through all 3 loops at once.
lp(s) (loop/loops): The loops sitting on your hook or the loops that make up the top of a stitch.
pm (place marker): Put a stitch marker in the indicated spot.
rep (repeat): Do the sequence again.
rnd (round): One complete trip around when working in the round.
RS (right side): The side of the fabric that faces outward when worn.
sc (single crochet): Insert hook into stitch, yarn over and pull up a loop (2 loops on hook), yarn over and pull through both loops. The shortest and most basic crochet stitch.
sc2tog (single crochet two together): A decrease. Insert hook in first stitch, pull up loop, insert hook in next stitch, pull up loop (3 loops on hook), yarn over and pull through all 3 loops. Two stitches become one.
sk (skip): Pass over the indicated stitch without working into it.
sl st (slip stitch): Insert hook, yarn over, pull through both the stitch and the loop on your hook in one motion.
sm (slip marker): Move your stitch marker from the old round to the new round.
sp (space): A gap created by chain stitches, like a ch-1 space or ch-2 space.
st(s) (stitch/stitches): Individual stitches.
tch (turning chain): The chain(s) worked at the beginning of a row to bring your yarn up to the correct height.
tr (treble crochet): Yarn over twice, insert hook, yarn over and pull up loop (4 loops), yarn over and pull through 2 (3 loops), yarn over and pull through 2 (2 loops), yarn over and pull through 2 (done).
WS (wrong side): The side of the fabric that faces your body when worn.
yo (yarn over): Wrap the yarn over your hook from back to front.
Special Stitches for This Pattern
Shell Stitch: Work 5 double crochet stitches all into the same stitch or space. This creates a fan shape.
Scallop Shell: Work (3 dc, ch 2, 3 dc) all into the same stitch or space. This creates a larger decorative shell with a chain space at the center.
Picot: Chain 3, then slip stitch into the first chain you just made. This creates a small decorative bump that looks like a little point along the edge.
V-Stitch: Work (dc, ch 1, dc) all into the same stitch or space.
Eyelet Row: Chain 1, then work sc in next st, ch 1, skip 1 st across, ending with sc in the last stitch. On the return row, work sc into each sc and each ch-1 space. This creates small holes for threading ribbon or ties.
Ruffle Increase Row: Work 2 dc into each stitch across. This doubles your stitch count and creates that gorgeous ruffled fullness.
Back Loop Ribbing: Work sc through back loop only across. This creates the stretchy ribbed texture for your hem band.
Important Pattern Notes
Before you begin, here are some things to keep in mind:
1. The bodice is worked flat in rows from the top of the front panel, then flat for the back panel. The two panels are joined at the sides using a slip stitch seam, leaving armhole openings. The body below the underarm is then worked in joined rounds.
2. Use stitch markers to denote the four corners of the square neckline and the beginning of each round.
3. The ruffle sleeves are constructed entirely separately and seamed into the armhole after the bodice is complete.
4. The ribbed waistband is worked in turned rows and attached to the lower hem as you go.
5. Turning chains do not count as stitches in this pattern unless specifically stated.
6. The bow ties at each shoulder are made with a simple crocheted chain cord or ribbon threaded through eyelets at the top of each sleeve cap.
7. Right side (RS) is always the side facing you when wearing the garment.
8. When working in rounds, join each round with a slip stitch to the first stitch, then chain 1 (this chain does not count as a stitch).
Crochet Top Pattern Instructions
Front Bodice Panel
The front panel begins at the top edge (neckline) and is worked downward in rows of single crochet. The square neckline is achieved by working the foundation chain across the full neckline width.
Foundation Chain: Ch 77. (This creates 76 working stitches plus 1 turning chain.)
Row 1 (WS): Starting in the 2nd ch from hook, sc across. (76 sc)
Row 2 (RS): Ch 1, turn. Sc across. (76 sc)
Rows 3 through 10: Ch 1, turn. Sc across. (76 sc each row)
Checkpoint: After Row 10, the front neckline panel should measure approximately 2 inches from the foundation chain edge.
Row 11: Ch 1, turn. Sc in first 12 sts. Ch 8 (this creates a shoulder strap bridge). Sk 8 sts. Sc in next 36 sts (center front). Ch 8. Sk 8 sts. Sc in last 12 sts. (60 sc + 2 ch-8 bridges)
Note: These ch-8 bridges form the shoulder straps above the ruffle sleeves. Eyelets for bow ties are incorporated in the sleeve construction.
Row 12: Ch 1, turn. Sc in first 12 sts. Sc in each of the 8 ch of the first bridge (8 sc). Sc in next 36 sts. Sc in each of the 8 ch of the second bridge (8 sc). Sc in last 12 sts. (76 sc)
Rows 13 through 40: Ch 1, turn. Sc across. (76 sc each row)
After Row 40, fasten off. The front panel from Row 1 through Row 40 should measure approximately 7.5 inches in height.
Place stitch markers at stitch 1 and stitch 76 of Row 40 (side edge markers, lower corners of front panel).
Back Bodice Panel
Work exactly as the Front Bodice Panel (Rows 1 through 40). Do not fasten off after Row 40 on the Back panel.
Side Seams and Joining
After Row 40 of the Back panel, with RS facing, hold Front and Back panels together with wrong sides facing each other.
Using the working yarn from the Back panel, join the two panels at each side seam using a slip stitch seam worked through both layers. Seam the first 22 rows from the lower edge up each side, leaving an armhole opening of 18 rows on each side (approximately 3.25 inches of armhole depth per side).
Note on armhole: Mark the top 18 rows (approximately rows 23 through 40 from the base) as the armhole opening on each side before seaming to confirm placement.
After seaming both sides, the bodice is now a tube open at the top (neckline) and at the armholes.
Checkpoint: At this point the bodice tube should measure approximately 6 inches in circumference body height (below the armhole join), and the side-by-side stitch count around the lower opening is 152 sts total (76 front + 76 back).
Body in the Round
Join yarn at one side seam at the lower edge of the joined bodice. Work in joined rounds.
Rnd 1: Ch 1. Sc in each st around. Join with sl st to first sc. (152 sc)
Rnd 2: Ch 1. Sc in next 17 sts, sc2tog. Rep from to around (8 decreases total). Join. (144 sc)
Note: Rnd 2 creates gentle waist shaping. If you prefer no waist shaping, continue even for 2 more rounds of plain sc.
Rnds 3 through 8: Ch 1. Sc in each st around. Join. (144 sc each round)
Rnd 9: Ch 1. Sc in next 16 sts, sc2tog. Rep from to around (9 decreases total). Join. (135 sc)
Note: At this point try on or measure for length. The body in the round should now measure approximately 3 inches below the underarm.
Rnds 10 through 16: Ch 1. Sc in each st around. Join. (135 sc each round)
After Rnd 16 the body in the round should measure approximately 5.5 inches from the underarm.
Do not fasten off. Transition to Ribbed Band.
Ribbed Hem Band
The ribbed band is worked in turned rows of blo sc, perpendicular to the lower edge of the body. The band is worked flat and attached to the lower edge with a slip stitch join at the end of each row.
Switch to F-5 / 3.75 mm hook. Ch 11.
Row 1: Starting in 2nd ch from hook, sc in each ch across. (10 sc)
Row 2: Ch 1, turn. Working in blo, sc in each st across. At the end of this row, sl st into the next available stitch along the lower body edge to attach. (10 sc blo + 1 joining sl st)
Rep Row 2 continuously, attaching one lower body stitch per row, until all 135 lower body stitches have been joined (135 ribbing rows worked). At the end of the final row, seam the short ends of the ribbing together using a whipstitch or slip stitch seam. Fasten off and weave in ends.
Checkpoint: The ribbed band should be 2 inches tall and approximately 30 inches in circumference. The ribbing will stretch comfortably to fit the body.
Ruffle Sleeves (Make 2)
Each sleeve is constructed in flat rows and then seamed into the armhole. The sleeve is worked from the shoulder (top) downward through multiple tiers of ruffles with scalloped lace edging.
Switch back to G-6 / 4.0 mm hook.
Shoulder Strap Section
Ch 17.
Row 1 (WS): Starting in 2nd ch from hook, sc across. (16 sc)
Row 2 (RS): Ch 1, turn. Sc across. (16 sc)
Row 3: Ch 1, turn. Sc across. (16 sc)
Row 4 (Eyelet Row for bow tie): Ch 1, turn. Sc in first st. Ch 1, sk 1 st, sc in next st. Rep from to across, ending sc in last st. (8 sc + 7 ch-1 spaces + 1 sc = 16 pattern positions)
Row 5: Ch 1, turn. Sc in each sc and in each ch-1 sp across. (16 sc)
Rows 6 through 8: Ch 1, turn. Sc across. (16 sc each row)
The shoulder strap is now 8 rows tall (approximately 1.5 inches).
First Ruffle Tier Setup
Row 9 (Ruffle Increase Row): Ch 1, turn. Work 2 dc into each st across. (32 dc)
Row 10: Ch 3 (counts as first dc here only in this row), turn. Dc in each st across. (32 dc)
Row 11: Ch 1, turn. Sc in each st across. (32 sc)
Row 12 (Second Ruffle Increase Row): Ch 1, turn. Work 2 dc into each st across. (64 dc)
Row 13: Ch 3 (counts as first dc), turn. Dc in each st across. (64 dc)
Row 14: Ch 1, turn. Sc in each st across. (64 sc)
First Ruffle Tier Scallop Edging
Do not turn after Row 14. Work the scallop edging across Row 14 sts as follows:
Edging Row A: Ch 1. Sk 1 st, scallop-shell in next st, sk 1 st, sc in next st. Rep from to across. (16 scallop-shells + 16 sc = 64 stitches consumed)
Edging Row B: Ch 1. Working into the ch-2 space of each scallop-shell, sc in ch-2 sp, picot. Rep across. (16 picots)
Fasten off edging yarn. Rejoin yarn to the top of Row 14 to begin the second tier.
Second Ruffle Tier
Rejoin yarn to Row 14 with RS facing.
Setup Row: Ch 1. Working into the back loops of Row 14 sts (to create a clean fold line between tiers), sc in each st across. (64 sc)
Second Tier Row 1 (Ruffle Increase Row): Ch 1, turn. Work 2 dc into each st across. (128 dc)
Second Tier Row 2: Ch 3 (counts as first dc), turn. Dc in each st across. (128 dc)
Second Tier Row 3: Ch 1, turn. Sc in each st across. (128 sc)
Second Ruffle Tier Scallop Edging
Edging Row A: Ch 1. Sk 1 st, scallop-shell in next st, sk 1 st, sc in next st. Rep from to across. (32 scallop-shells + 32 sc = 128 sts consumed)
Edging Row B: Ch 1. Working into ch-2 sp of each scallop-shell, sc in ch-2 sp, picot. Rep across. (32 picots)
Fasten off.
Bow Tie Cord (Make 2)
Ch 60. Sl st in each ch back to start for a firm cord. Fasten off. Leave 6-inch tails at each end. Thread through the eyelet row (Row 4 of the shoulder strap) and tie in a bow.
Alternatively, cut two lengths of quarter-inch ribbon to 20 inches each and thread through the eyelets and tie in a bow.
Seaming Sleeves into Armholes
Fold each sleeve so that the shoulder strap center aligns with the top of the armhole (the shoulder seam area). The shoulder strap portion (Rows 1 through 8) will span the top of the armhole and the ruffle tiers will fall down over the arm openings.
With RS facing, using a whipstitch or sl st seam through both layers, seam each sleeve into its corresponding armhole along the side edges of the shoulder strap section. The armhole perimeter is approximately 18 rows per side panel x 2 panels = 36 row-end stitches to seam against (approximately 6.5 inches per armhole). Distribute the strap evenly and seam securely. Fasten off and weave in all ends.
Checkpoint: After seaming the sleeves, try on the top. The ruffle tiers should cascade over the shoulders and upper arm. The bodice should sit smoothly below the armhole. The ribbed band should hold the hem in place with gentle tension.
Size Customization Tips
To go up or down in size, adjust the foundation chain for the front and back panels. Each 2 stitches added or removed equals approximately 0.44 inches in width per panel, or approximately 0.88 inches in total finished circumference.
Size XS (30 inch bust): Start with Ch 69 (68 sc). Adjust strap bridge to sk 6 sts and ch 6.
Size S (34 inch bust): As written (Ch 77, 76 sc).
Size M (38 inch bust): Start with Ch 85 (84 sc). Adjust center front to 40 sts.
Size L (42 inch bust): Start with Ch 93 (92 sc). Adjust center front to 44 sts.
Size XL (46 inch bust): Start with Ch 101 (100 sc). Adjust center front to 48 sts.
For all sizes, maintain the 12-st side sections. Adjust center front and back width by increasing or decreasing in 4-stitch increments for consistent geometry.
To lengthen the bodice, add additional rounds in the body-in-the-round section before transitioning to the ribbed band. Each additional round adds approximately 0.18 inches to the body length.
To lengthen the ribbed band, add stitches to the ch foundation of the ribbing. Each additional 2 stitches in the ribbing foundation adds approximately 0.4 inches to the band height.
To increase sleeve ruffle volume, add a third ruffle tier following the same Ruffle Increase Row and Scallop Edging sequence used for Tier 2.
Finishing and Blocking Your Crochet Top
After all seaming and weaving in ends, wet block the completed top. Soak in cool water with a small amount of wool wash or gentle soap for 15 minutes. Gently press out excess water without wringing. Lay flat on blocking mats. Shape the neckline square, smooth the bodice, and pin the ruffle layers out flat to encourage the scalloped edges to open fully. Allow to dry completely before wearing (may take 24 to 48 hours for cotton).
The ruffle tiers will relax and open beautifully after blocking, and the ribbed band will recover its stretch.
Care Instructions
Machine wash on gentle or delicate cycle in cool water. Lay flat to dry. Do not tumble dry, iron directly, or wring. If using a cotton-acrylic blend yarn, follow the most delicate fiber’s care instructions. Store folded rather than hung to prevent stretching.
You Did It!
Thank you so much for making this red ruffle sleeve crochet summer top with me. I really hope you love wearing it as much as I loved designing it. Those dramatic sleeves are going to turn heads wherever you go.
If you make this top, I would absolutely love to see it! Tag me on Instagram or share a photo in our Facebook group. Seeing your finished projects genuinely makes my day.
If you loved this pattern, go ahead and save it to your Pinterest boards so you can find it easily when you’re ready to cast on. And please drop a comment below if you make it. I’d love to hear which color you chose and how it turned out for you!
