
This bag is SERIOUSLY impressive, and I promise you can make it! If you have been wanting to try a granny square project that actually goes somewhere fabulous, this bamboo handle handbag is THE one. It looks like a boutique purchase, works up in about 12 to 16 hours total, and makes the most incredible gift.
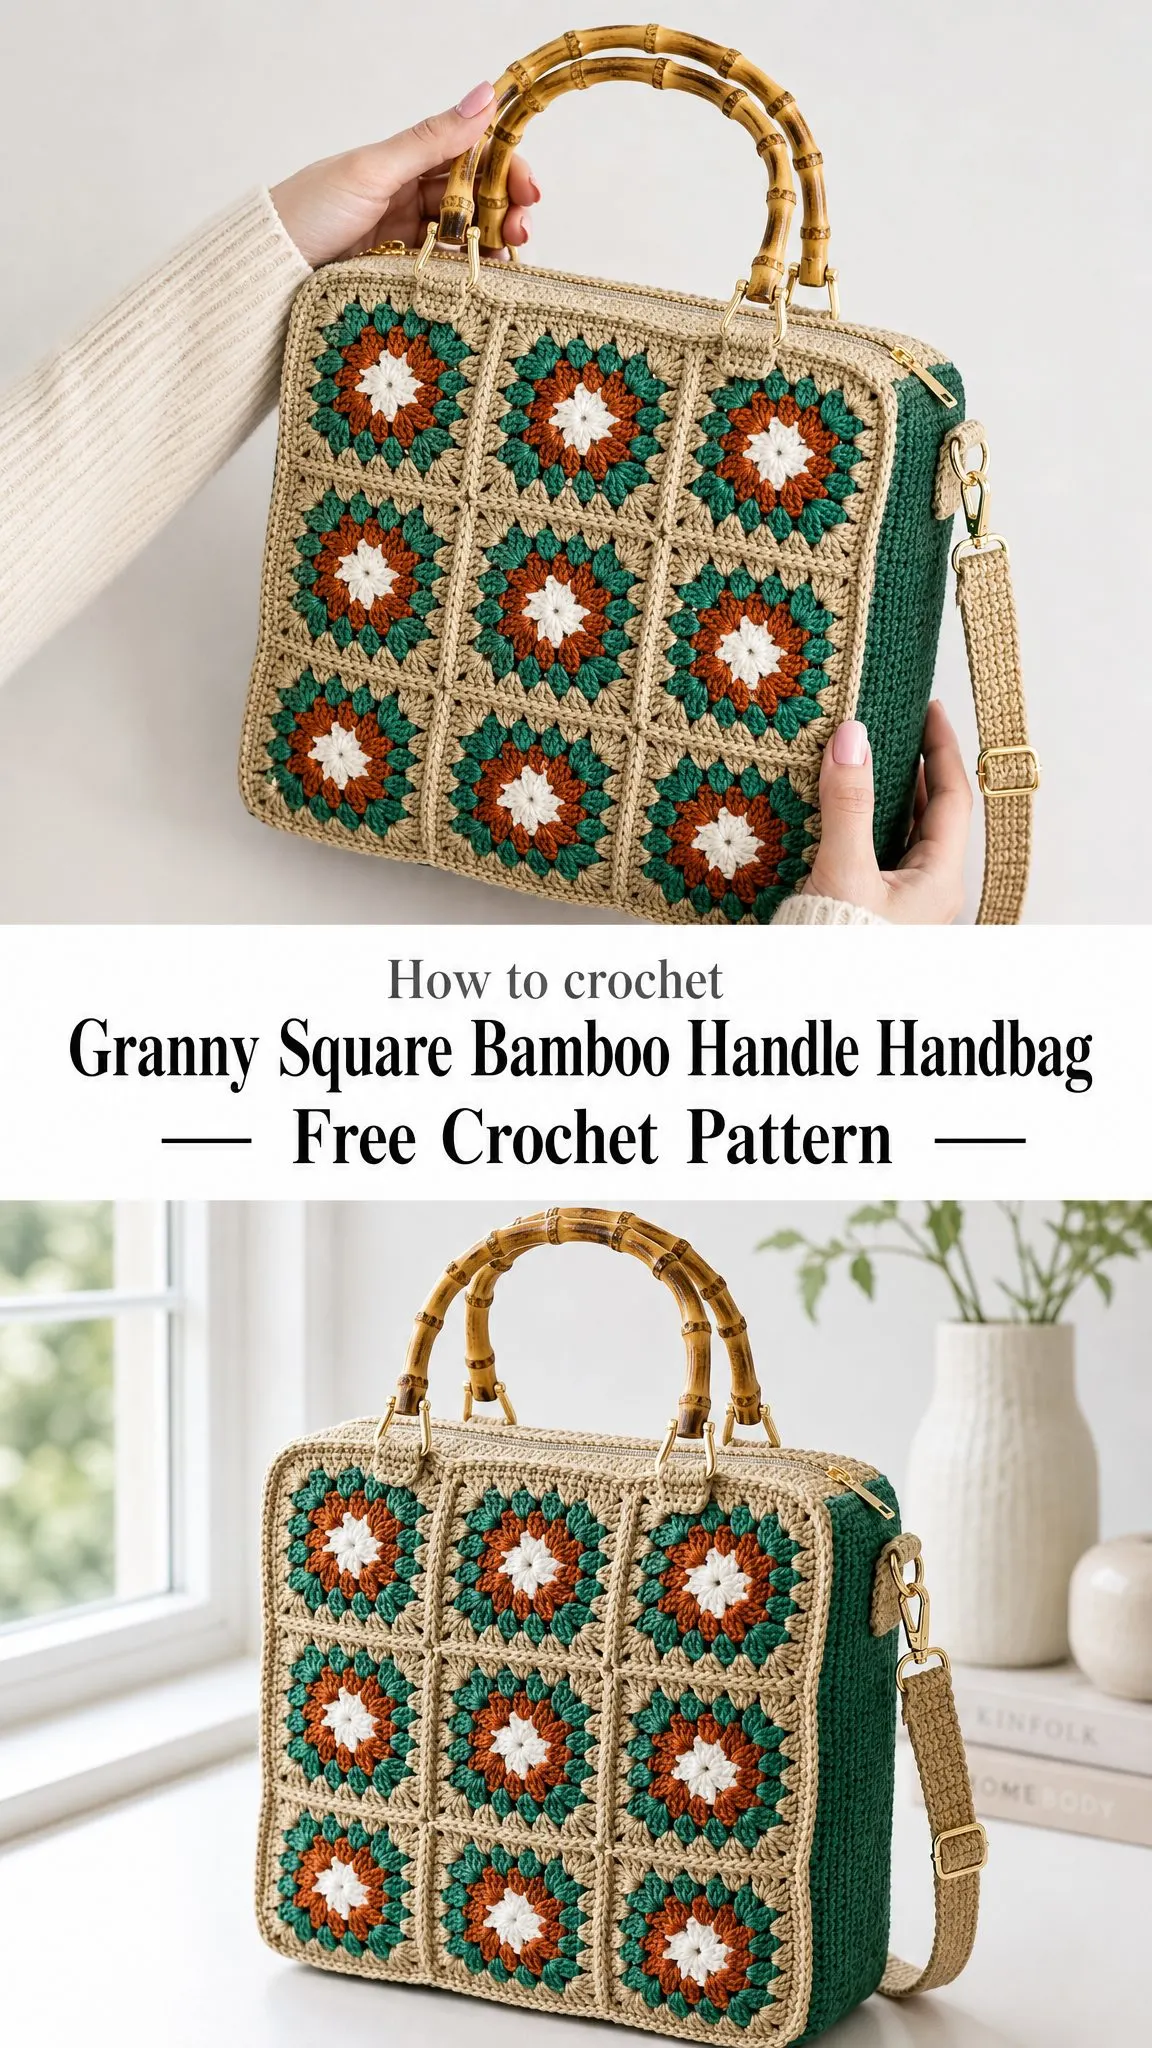
I am absolutely obsessed with how the retro floral squares pop against that teal gusset. The whole thing screams vintage charm with a modern twist, and honestly, carrying this around feels like wearing art on your shoulder.
The best part? Once you get into the rhythm of those granny squares, your hands just know what to do. You will make 18 of them, and by square number three, you will be crocheting on autopilot while binge watching your favorite show.
Why You Will Love This Handbag Pattern
This granny square handbag combines everything I adore about crochet. You get the meditative repetition of making identical motifs, the satisfaction of watching a structured bag come together, and the joy of adding those gorgeous bamboo handles at the end.
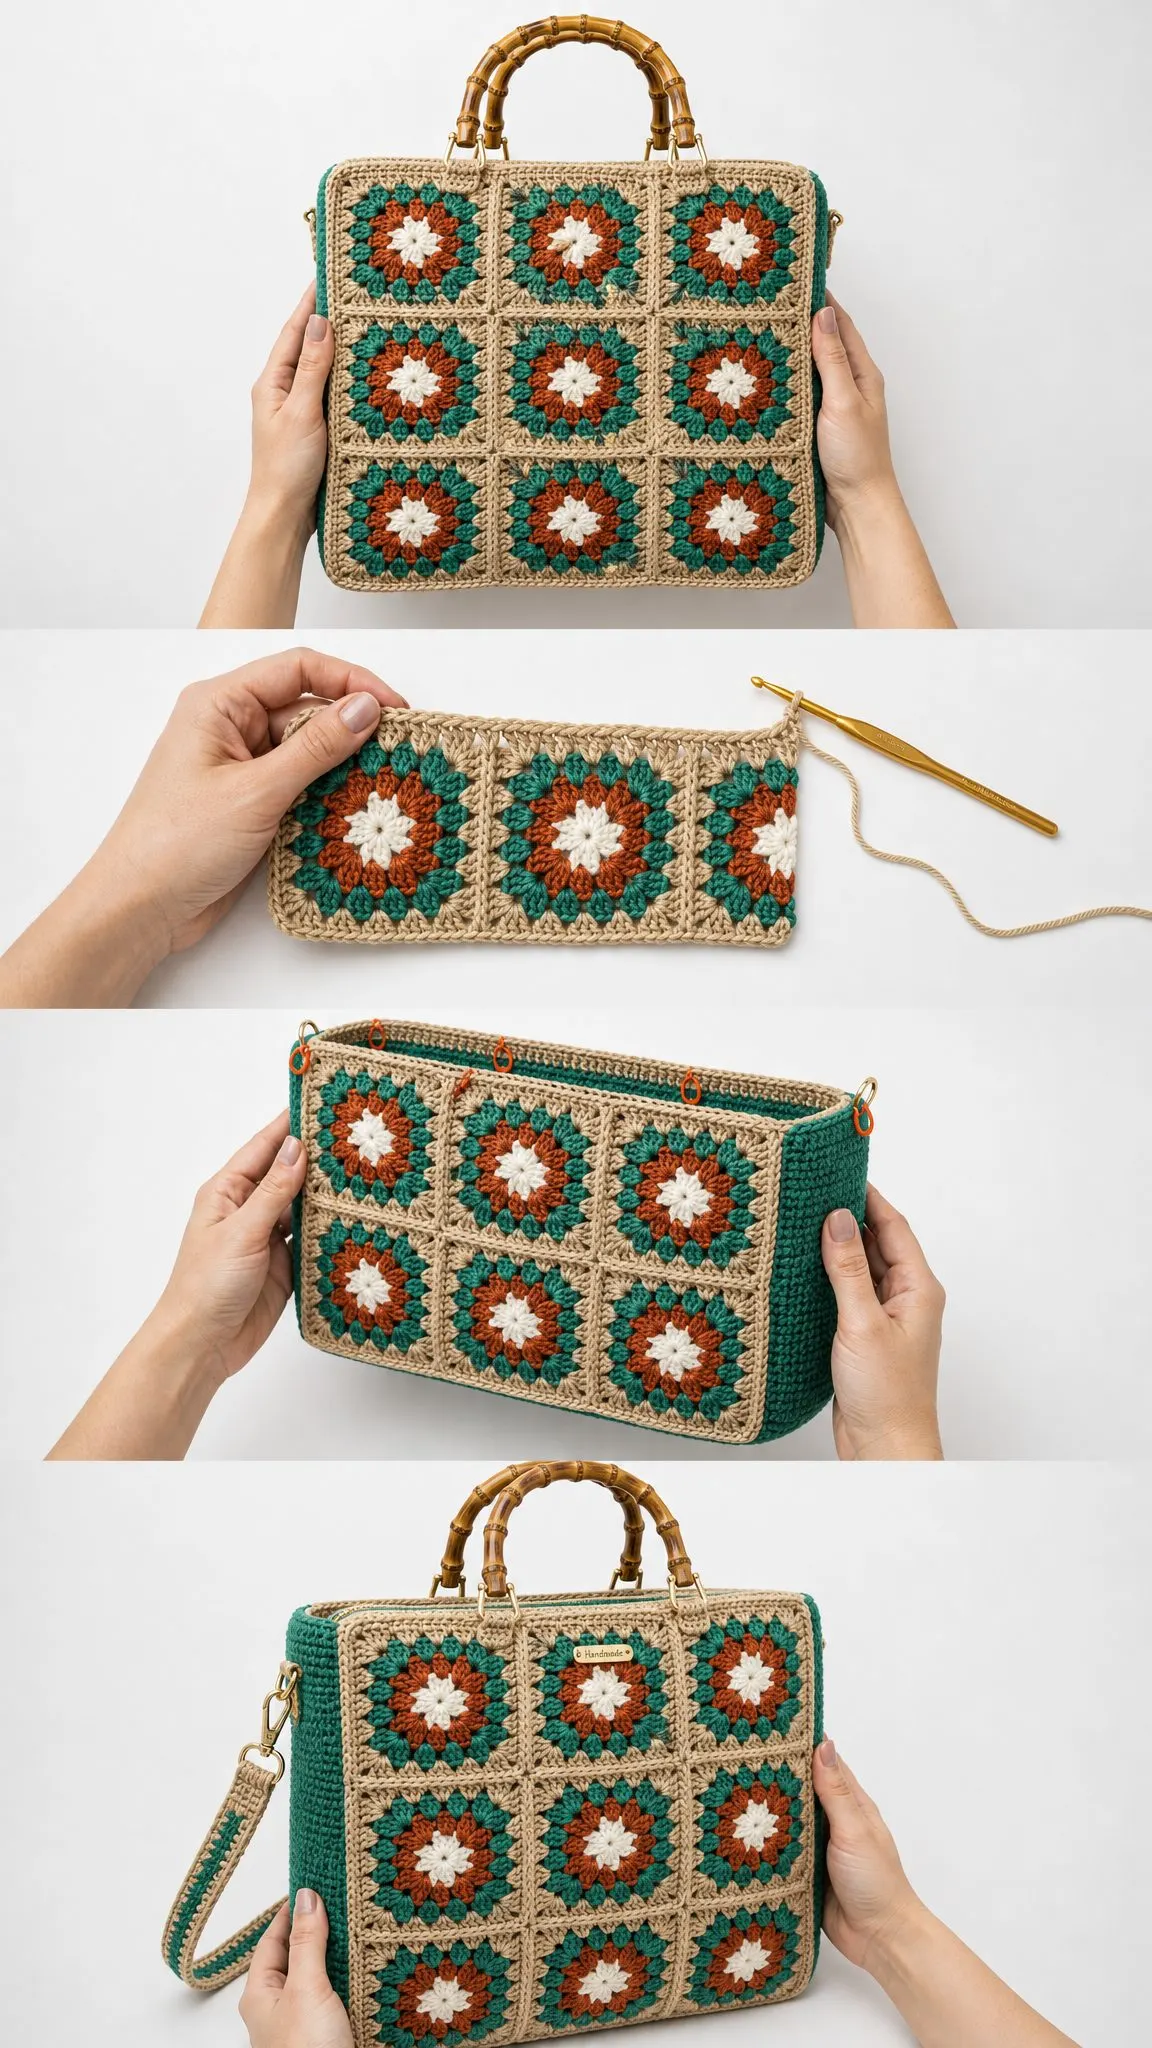
The construction is straightforward once you understand the pieces. You are making two panels of nine squares each, one wrap around gusset, a crossbody strap, and some small tabs for the hardware. Each component is simple on its own, and the assembly is where the magic happens.
Cotton yarn gives this bag its crisp, structured shape. Unlike acrylic, cotton holds its form beautifully and shows off those stitch definitions perfectly. Your granny clusters will look sharp and professional.
Materials You Will Need
Before diving into this crochet tutorial, gather everything so you can work without interruptions. The pattern uses worsted weight cotton yarn in four colors, which creates those stunning floral motifs.
Yarn Requirements:
Tools and Hardware:
Suggested Yarn Brands:
Paintbox Yarns Cotton Aran works beautifully with its matte finish and extensive color range. Lily Sugar’n Cream is sturdy and widely available. DROPS Paris offers a soft aran cotton with a smooth finish. Really, any matte cotton in a similar weight will work perfectly.
Gauge and Finished Size
Getting your gauge right matters for this project because you need all 18 squares to match perfectly.
Gauge: One floral granny square measures 3.25 inches or 8.25 centimeters square after completing Round 4. In single crochet (sc), 15 stitches by 17 rows equals 4 inches or 10 centimeters.
Finished Dimensions: 9.5 by 9.5 by 3.25 inches, or 24 by 24 by 8 centimeters, excluding handles. The crossbody strap measures approximately 45 inches or 114 centimeters.
A slightly tighter fabric keeps the bag shape crisp, so do not worry if your tension runs a bit firm.
Abbreviations and Special Stitches
This pattern uses US crochet terms throughout. If you typically work in UK terms, remember that US single crochet (sc) equals UK double crochet, and US double crochet (dc) equals UK treble.
Standard Abbreviations:
Special Stitches Explained:
The magic ring (MR) is an adjustable loop that pulls closed for a tidy, hole free center. If you have never made one, it looks intimidating but becomes second nature quickly. You create a loop with your yarn tail, work your stitches into that loop, then pull the tail to close the center completely.
A granny cluster is simply 3 double crochet stitches worked together into one space. This is the building block of every round in your squares.
The corner is worked as 3 double crochet, chain 2, 3 double crochet all into one chain 2 space. This creates the turn at each corner of your square.
How to Crochet the Floral Granny Square
You will make 18 identical squares total. Nine form the front panel and nine form the back panel. The color sequence is the same for every square: Round 1 in white, Round 2 in rust, Round 3 in teal, and Round 4 in cream.
Each finished square has four sides with four clusters each, plus the corners.
Round 1 (White):
Make a magic ring. Chain 3, which counts as your first double crochet. Work 2 double crochet into the ring, chain 2. Then work 3 double crochet in ring, chain 2, three more times. Join with a slip stitch to the top of the beginning chain 3. Fasten off. (12 dc, 4 corner spaces)
Round 2 (Rust):
Join rust yarn in any corner space. Chain 3, then work 2 double crochet, chain 2, 3 double crochet all in the same corner space. This creates your first corner. Chain 1, then work 3 double crochet, chain 2, 3 double crochet in the next corner space. Repeat this corner pattern twice more, then chain 1. Join with a slip stitch. Fasten off. (24 dc, 4 corner spaces, 4 chain 1 spaces)
Round 3 (Teal):
Join teal yarn in any corner space. Chain 3, then work 2 double crochet, chain 2, 3 double crochet in the same corner space. Now chain 1, work 3 double crochet in the chain 1 space from the previous round, chain 1, then work your corner in the next corner space. Repeat this sequence around, working a cluster in each chain 1 space between corners. Join and fasten off. (36 dc, 4 corner spaces, 8 chain 1 spaces)
Round 4 (Cream):
Join cream yarn in any corner space. Chain 3, then work 2 double crochet, chain 2, 3 double crochet in the same corner space. Chain 1, work 3 double crochet in the next chain 1 space, chain 1, work 3 double crochet in the following chain 1 space, chain 1, then work your corner in the corner space. Continue this pattern around the entire square. Join and fasten off. (48 dc, 4 corner spaces, 12 chain 1 spaces)
Blocking Your Squares:
Wet block or steam each finished square to exactly 3.25 inches. Even, perfectly square motifs make joining painless and give your panels that professional, crisp grid appearance. Trust me, taking time to block now saves frustration later.
Joining the Front and Back Panels
Arrange nine blocked squares in a 3 by 3 grid for the front panel. Keep a consistent right side facing up so the cream frames line up cleanly. Repeat this layout for your back panel.
Step 1: Join Into Rows
Using cream yarn and a tapestry needle, whip stitch squares side to side through the back loops only. Match stitch for stitch across each shared edge. This creates a nearly invisible seam. You will join along approximately 48 stitches per seam, which works out to about 16 stitches per side after the edging eases in.
Step 2: Join the Rows Together
Whip stitch your three joined rows together using the same technique. Carefully align every corner so your grid stays perfectly square.
Step 3: Edge Each Panel
With cream yarn, work 1 round of single crochet evenly around the entire panel. Place 1 single crochet in each double crochet, 1 single crochet in each chain space, and 3 single crochet in each outer corner. You will have approximately 160 single crochet with 4 corners.
Step 4: Complete the Second Panel
Repeat all steps for your back panel so both faces match exactly.
Creating the Teal Gusset
One long teal strip wraps around the two sides and bottom of your bag, creating depth and a firm base. Working in single crochet creates a dense, sturdy fabric.
Set Up: With teal yarn, chain 13.
Row 1: Single crochet in the second chain from the hook and in each chain across, turn. (12 sc)
Row 2 and Beyond: Chain 1, single crochet in each stitch across, turn. (12 sc)
Continue: Work Row 2 until your strip measures 27.5 inches or 70 centimeters. This is approximately 117 rows. Fasten off.
The gusset should equal your bottom edge, which is 9.5 inches, plus both side edges at approximately 9 inches each. Lay it against a finished panel before fastening off and adjust your row count to fit your exact panels if needed.
Making the Top Zipper Bands
A short cream band tops each panel and provides a clean edge for sewing on your zipper.
Row 1: With cream yarn, join at the top edge of a panel. Single crochet evenly across the top. (approximately 36 sc)
Rows 2 through 4: Chain 1, single crochet in each stitch across, turn. (approximately 36 sc)
Fasten off. Repeat on your second panel so you have 2 zipper bands total.
Crocheting the Crossbody Strap
This slim, sturdy cream strip clips on with swivel clasps, making it completely removable for handle only carrying.
Set Up: With cream yarn, chain 8.
Row 1: Single crochet in the second chain from the hook and across, turn. (7 sc)
Row 2 and Beyond: Chain 1, single crochet in each stitch across, turn. (7 sc)
Continue: Repeat until your strap measures 45 inches or 114 centimeters. Fasten off.
Fold 1 inch or 2.5 centimeters of each strap end over a swivel clasp and sew down firmly using your tapestry needle and a length of cream yarn.
Creating Handle and Ring Tabs
Short cream tabs wrap your bamboo handles and hold the D rings for attaching the crossbody strap.
Handle Tabs (Make 4):
With cream yarn, chain 7. Single crochet in the second chain and across to create 6 single crochet. Work 8 rows of single crochet total. Fasten off, leaving a long tail for sewing. (6 sc per row)
Ring Tabs (Make 4):
Work exactly like the handle tabs but only for 5 rows instead of 8. Fasten off with a long tail. (6 sc per row)
Each handle tab loops through a bamboo handle ring. Each ring tab holds a D ring at the top side seams for your strap clasps.
Assembly and Finishing Your Handbag
Now comes the exciting part where everything comes together!
Step 1: Attach the Gusset
With wrong sides together and teal facing out, pin your teal gusset around the bottom and both sides of the front panel. Whip stitch or single crochet the seam through both layers. You will create 2 side seams and 1 bottom seam.
Step 2: Add the Back Panel
Pin and seam your back panel to the free edge of the gusset using the same method. Keep your corners square. Your bag body is now closed on 3 sides.
Step 3: Set the Zipper
Pin your 10 inch gold zipper between the two cream top bands with the right side facing up. Hand sew with backstitch close to the zipper teeth, easing evenly so the top lies flat.
Step 4: Mount the Bamboo Handles
Loop each handle tab through a handle ring, fold it over the top band, and sew the tail down securely. Use two tabs per handle for a total of 4 handle tabs fixed.
Step 5: Fit the Strap Hardware
Sew a ring tab holding a D ring at each top side seam. Clip your strap’s swivel clasps to these D rings.
Step 6: Optional Lining
If desired, cut cotton lining fabric to your bag’s inside dimensions plus seam allowance. Sew it into a pouch shape and hand stitch it just below the zipper for a polished interior.
Step 7: Final Press
Weave in all remaining ends and give your finished bag a light steam to settle the seams and sharpen that boxy shape.
Care Instructions for Your Finished Bag
Spot clean with cool water and mild soap, pressing out rather than wringing the area. For a full wash, hand wash gently in cool water and lay flat to dry while reshaping to size.
Keep your bamboo handles out of prolonged water to prevent splitting. Store your bag stuffed lightly with tissue to maintain that beautiful boxy shape between uses. Avoid hanging by the crochet strap when heavily loaded to protect your stitches.
Resizing Tips
Want a bigger bag? Use a 4 by 4 grid with 16 squares per panel and lengthen your gusset to match.
For a slimmer bag, drop your gusset width to 9 single crochet for approximately 2.4 inches or 6 centimeters of depth.
To make larger squares, add a Round 5 in cream by working 3 double crochet in each chain 1 space with corners as established, creating approximately 4 inch motifs.
For a mini version, stop each square at Round 3 and use a 3 by 3 grid for an adorable pouch.
Remember, whatever grid you choose, your gusset length equals your bottom edge plus both side edges.
I really hope you love making this granny square bamboo handle handbag as much as I enjoyed putting this pattern together for you! If you try it, please tag me on Instagram or share a photo on Facebook. I would absolutely love to see your color combinations and how your bag turns out.
Save this pattern to your Pinterest boards so you can find it whenever inspiration strikes, and drop a comment below if you make one. Happy crocheting!
