
You know that gorgeous skein you’ve been saving for the perfect project? The one that’s too nice for just any old thing? This is the pattern that deserves it.
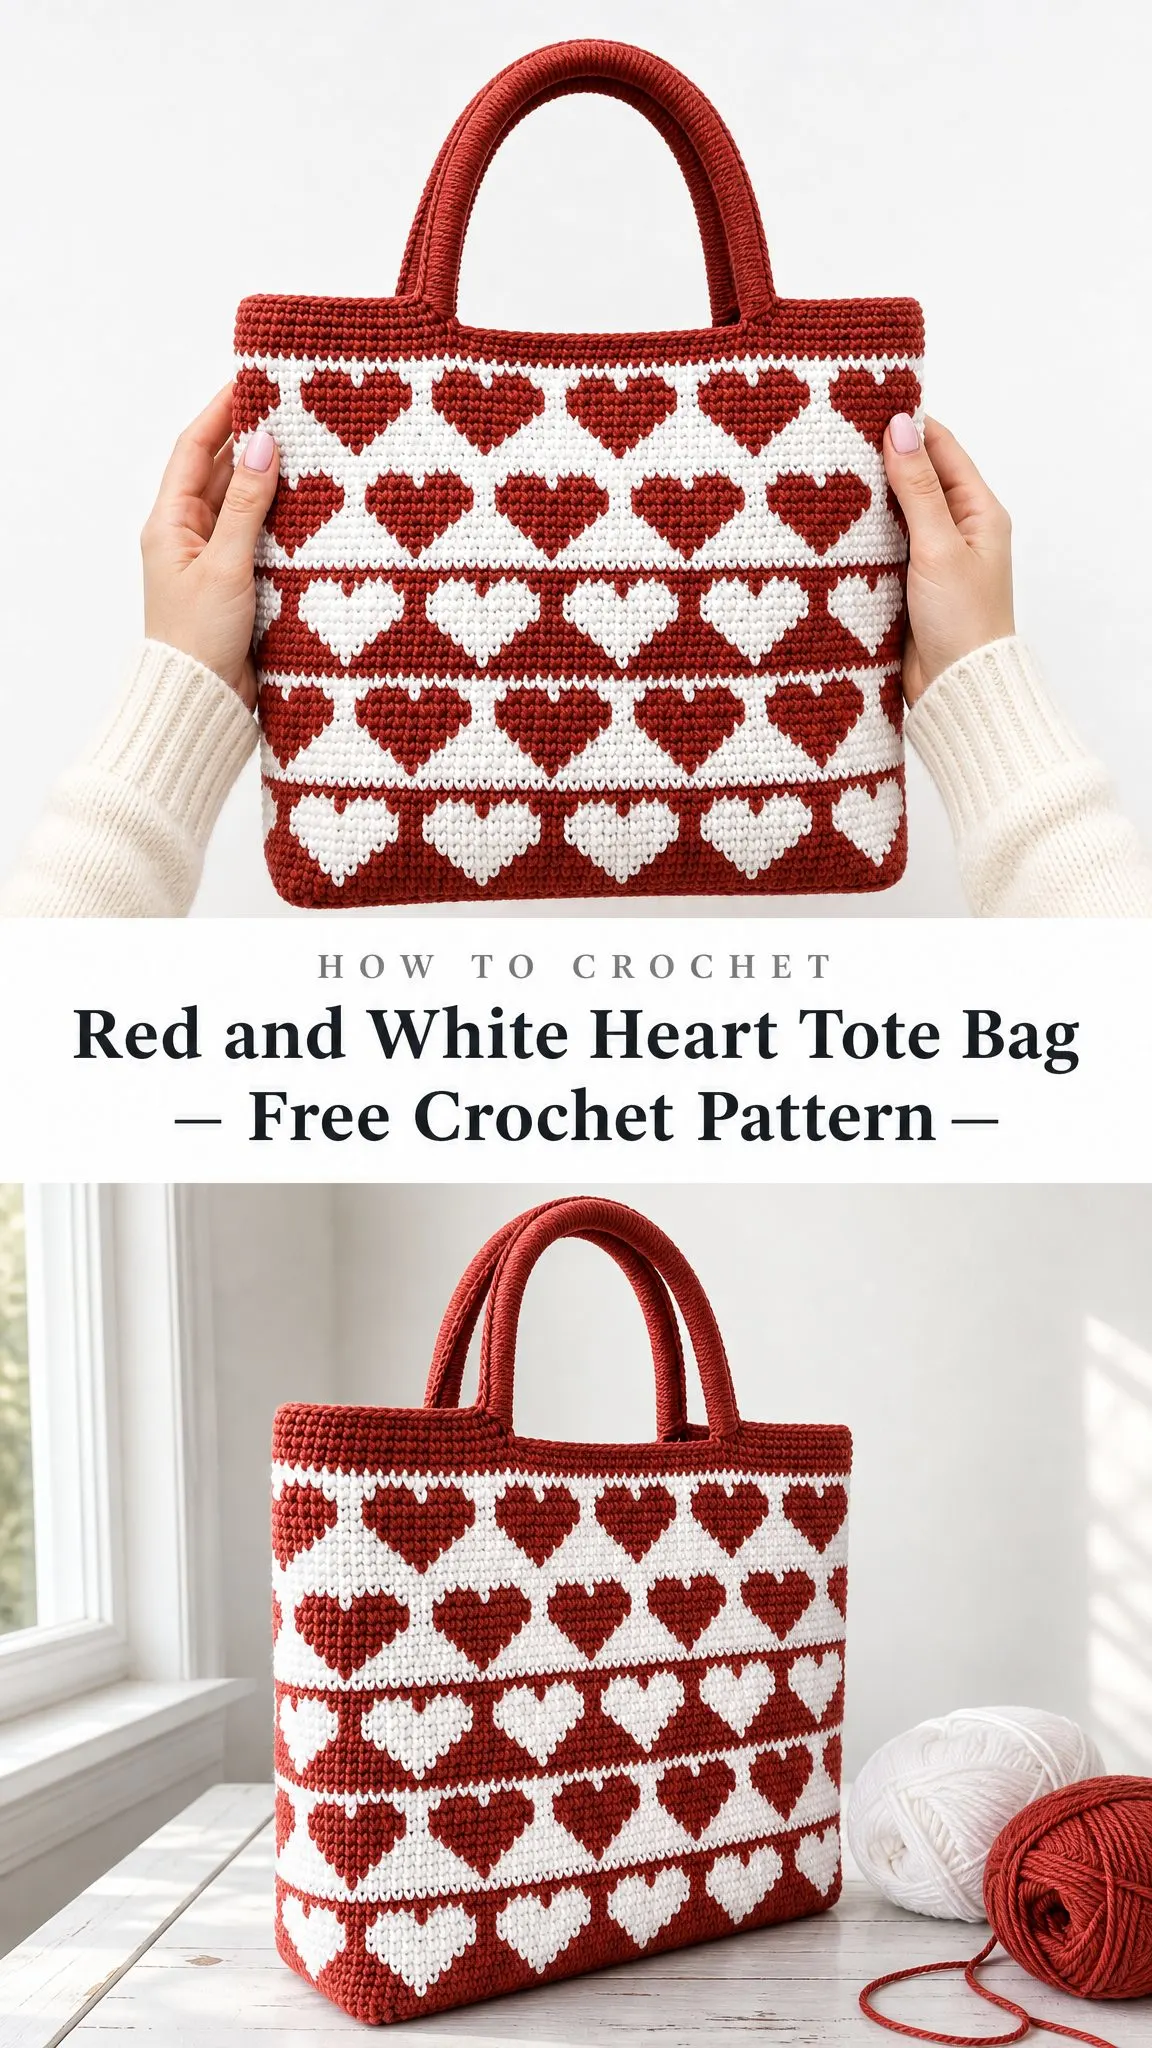
This Red and White Heart Tote Bag uses tapestry crochet to create a stunning all-over heart motif that wraps seamlessly around the entire bag. Both colors travel together as you stitch, so the design appears as you work with no sewing on or duplicate stitch required afterward. If you’ve been curious about colorwork but felt intimidated, this is a wonderful place to start because the technique is surprisingly straightforward once you get the rhythm down.
The finished tote is firm enough to stand on its own, the cotton softens beautifully with use, and it makes an absolutely showstopping gift. Fair warning: it does require some focus to follow the chart, so I’d call this one confident beginner level. But don’t let that scare you off because I’ll walk you through everything step by step.
Why You’ll Love This Tapestry Crochet Tote
This bag caught my attention immediately because of how the heart pattern creates such a striking visual impact. The alternating bands of rust hearts on cream and cream hearts on rust give it that tumbling two-tone effect that looks far more complicated than it actually is.
Tapestry crochet is a technique where you carry both yarn colors throughout your work, crocheting over the unused color so it stays hidden inside your stitches. When you need to switch colors, the other yarn is right there waiting for you. It creates a dense, sturdy fabric that’s perfect for bags.
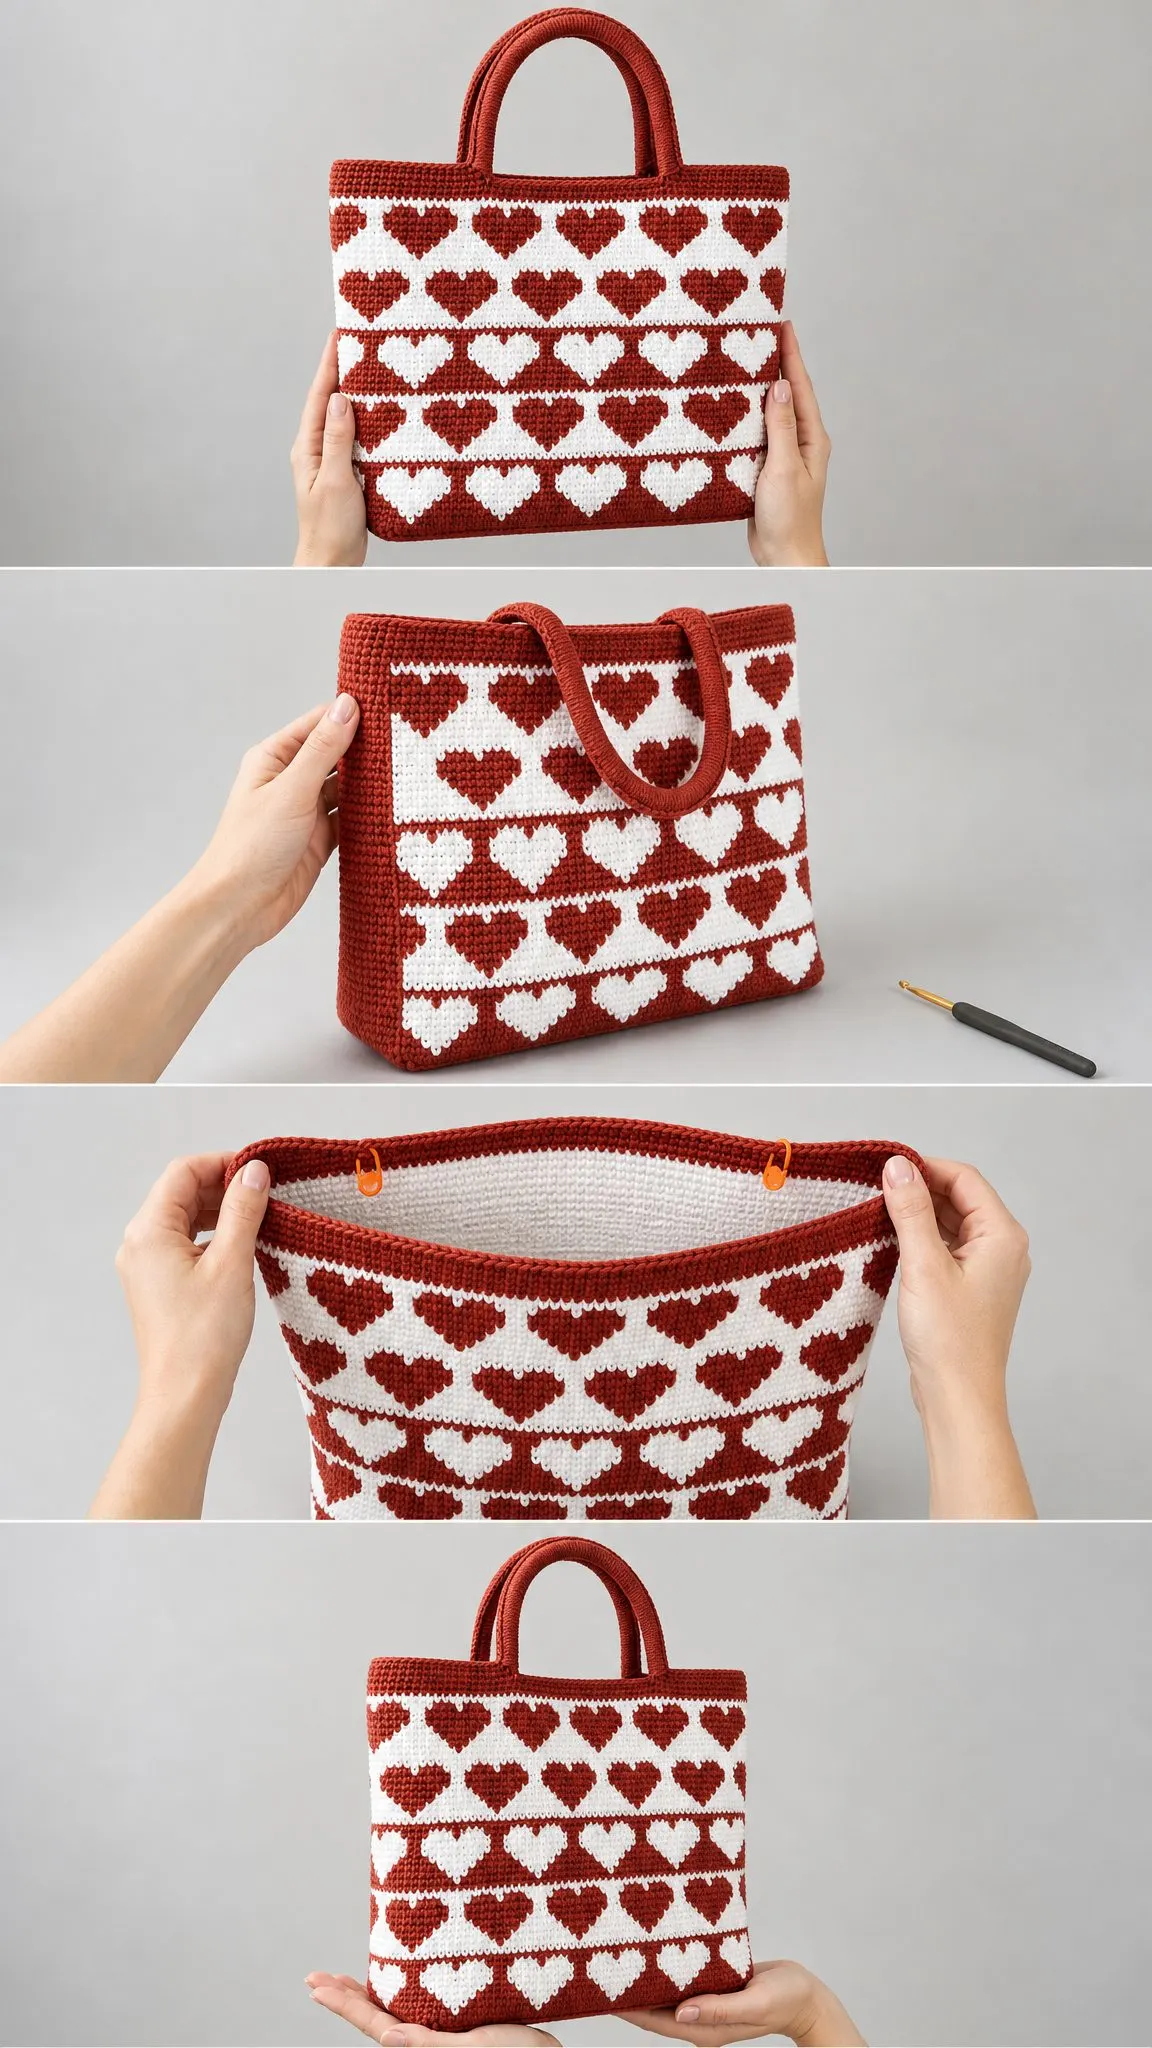
The construction is clever too. You start with a flat rectangular base, then work around the edges to build the body in continuous rounds. This means no seaming the sides, and the heart motif flows uninterrupted around every surface.
Materials You’ll Need
Before you dive in, gather these supplies. Having everything ready makes the project so much more enjoyable.
Yarn
You’ll need worsted weight or aran (#4) cotton yarn in two colors: one deep rust and one warm cream. Plan for approximately 220 yards (200 meters) of each color.
Yarn Suggestions:
Cotton works best for this project because it holds shape well and the colors stay vibrant.
Hook and Notions
Finished Size
Your completed tote will measure:
Gauge
18 stitches and 19 rounds = 4 inches (10 cm) in tapestry single crochet, worked in the round while carrying the unused color.
Here’s something important: tapestry fabric should feel firm so the bag holds its shape. If your fabric feels loose or floppy, go down a hook size. This is one project where a tighter gauge actually works in your favor.
Abbreviations and Special Stitches
Let me break down every abbreviation you’ll encounter. Even if you’re experienced, it helps to review these since tapestry crochet has a few unique elements.
Standard Abbreviations:
Color Abbreviations:
UK crocheters: US single crochet (sc) equals UK double crochet (dc). This pattern uses US terms throughout.
Special Stitches Explained
Tapestry Single Crochet: Work your single crochet as usual, but lay the unused color yarn along the top of the previous round and stitch over it. This traps the carried yarn inside your stitches so it stays hidden and ready when you need it.
Tapestry Color Change: Work the last single crochet of your current color until you have 2 loops remaining on your hook. Then yarn over with the NEW color and pull through both loops. Your next stitch will now be the new color.
The key to beautiful tapestry work is keeping that carried strand relaxed but not loose. If you pull it tight, your fabric will pucker. If you leave it too slack, the color will peek through gaps. Aim for tension that matches your working stitches.
Pattern Notes Before You Begin
A few things to keep in mind as you work:
1. The body is worked in continuous rounds (a spiral), not joined rounds. Place a marker in the first stitch of each round and move it up as you go.
2. Carry both colors for the entire body, even through solid-color rounds. This keeps your fabric even and your tension consistent.
3. Read the heart chart from right to left, bottom to top, the same direction you crochet each round.
4. Every body round totals 120 single crochet stitches regardless of the color pattern. The numbers in brackets confirm this.
The Heart Chart
The heart motif repeats over 10 stitches and stands 7 rounds tall, with one plain separator round worked after each band. Since the bag has 120 stitches around, you’ll fit exactly 12 hearts circling the bag (10 × 12 = 120).
One square on the chart equals one single crochet. Where you see the heart color, change colors as described and carry the background shade behind your work.
The chart rows are numbered 1 through 7 from the bottom, with "S" marking the separator round worked after each heart band.
Step-by-Step Pattern Instructions
Now let’s make this beautiful bag. I’ll walk you through each section.
Section 1: The Base
The base is worked flat in rust to form a firm rectangle, then edged all around to set up the 120 stitches for the body. Use rust (CC) for the entire base.
Foundation: With rust, ch 49.
Row 1: Sc in 2nd ch from hook and in each ch across, turn. (48 sc)
Rows 2–12: Ch 1 (does not count as a stitch), sc in each st across, turn. (48 sc)
Shaping: Do not fasten off. You now have a firm 48 × 12 stitch rectangle. Rotate your work to crochet around the outer edge.
Set-Up Round
Joining Round (rust): Working around the rectangle, sc evenly into the edge. Work 48 sc along one long side, 12 sc across the short end, 48 sc along the other long side, and 12 sc across the final end. Ease 1-2 extra stitches into each corner so it lies flat. Join with sl st to the first sc. Do not turn. (120 sc)
Tip: From here, the body spirals upward. Drop the join and simply work in continuous rounds, marking the first stitch of each round.
Section 2: The Body
Continue from the set-up round, now carrying both colors. Begin with the lower border, then work five heart bands, swapping colors band to band.
Lower Border
Rounds 1–3: With rust only, sc in each st around. (120 sc each round)
Remember to still carry the cream yarn even though you’re not using it yet. This keeps your tension consistent.
Heart Band Pattern
Each round below repeats the 10-stitch sequence 12 times around. Change to HC and back to BG exactly where shown. Carry the resting color throughout.
Round 1: [4 BG, 1 HC, 5 BG] × 12. (120 sc)
Round 2: [3 BG, 3 HC, 4 BG] × 12. (120 sc)
Round 3: [2 BG, 5 HC, 3 BG] × 12. (120 sc)
Round 4: [1 BG, 7 HC, 2 BG] × 12. (120 sc)
Round 5: [1 BG, 7 HC, 2 BG] × 12. (120 sc)
Round 6: [1 BG, 3 HC, 1 BG, 3 HC, 2 BG] × 12. (120 sc)
Round 7: [1 BG, 2 HC, 3 BG, 2 HC, 2 BG] × 12. (120 sc)
Separator Round: With BG only, sc in each st around. (120 sc)
Read the brackets like this: work the sequence once, then repeat it around the entire round. Twelve hearts will emerge across each round.
Band Color Map
Work the 8-round heart band five times total, swapping the heart and background shades each time for that beautiful tumbling two-tone effect.
| Band | Rounds | Heart Color (HC) | Background (BG) |
|---|---|---|---|
| 1 | 4–11 | Rust | Cream |
| 2 | 12–19 | Cream | Rust |
| 3 | 20–27 | Rust | Cream |
| 4 | 28–35 | Cream | Rust |
| 5 | 36–43 | Rust | Cream |
After the Bands
Rounds 44–47: With rust only, sc in each st around. (120 sc each round)
Finish: Sl st in next st, fasten off rust and cream, weave in ends inside the bag.
Want a deeper bag? Add complete 8-round bands in the same alternating order. Each band adds about 1.7 inches (4.3 cm) of height.
Section 3: Top Edge
If you fastened off, rejoin rust at any stitch.
Work 1 round of sc, then 1 round of sl st for a clean, firm rim. Fasten off. (120 sc / 120 sl st)
Section 4: Handles (Make 2)
Foundation: With rust, ch 8.
Row 1: Sc in 2nd ch from hook and across, turn. (7 sc)
Rows 2 and onward: Ch 1, sc in each st, turn. Repeat until the strip measures 24 inches (61 cm). (7 sc per row)
Form the Strap: Fold the strip lengthwise and whipstitch the long edges together to make a rounded cord. Fasten off, leaving a long tail for sewing.
Handle Placement
On the front top edge, count in about 14 stitches from each side seam and mark. The handle ends sit at those points, roughly 4 inches (10 cm) apart. Mirror the same placement on the back.
Assembly and Finishing
You’re almost there! These finishing touches make all the difference.
1. Pin both handles to the inside of the top edge at the marked points. Tuck the ends about 1 inch (2.5 cm) below the rim.
2. Stitch each end down securely with the long tail, working a small reinforcing square or X through all layers. This ensures the handles can take weight without sagging.
3. Weave in every remaining tail along the wrong side, splitting the plies for an invisible finish.
4. Gently steam-block the body over a rolled towel to even out the tapestry stitches and sharpen the hearts.
5. Stand the bag up and shape the base with your hands while it’s still warm from blocking.
Optional lining: For extra structure and a clean interior, cut fabric to the finished panel sizes plus 0.5 inch (1.3 cm) seam allowance. Sew into a pouch and slip-stitch it just below the rim.
Caring for Your Finished Tote
Your handmade bag deserves gentle care to keep it looking beautiful.
Customization Ideas
Make It Wider or Narrower
Change the starting stitch count in multiples of 10 (one heart). Each 10 stitches adds or removes about 2.2 inches (5.6 cm) of circumference.
Make It Taller or Shorter
Add or remove whole 8-round bands. Each band is about 1.7 inches (4.3 cm) tall.
Create a Deeper Base
Lengthen the base rectangle before the set-up round. Keep the total perimeter a multiple of 10 so the hearts still divide evenly.
Mini Version
Use DK weight yarn and a 3.5 mm hook with the same stitch counts for a sweet half-scale pouch.
Troubleshooting Tips
My carried yarn keeps showing through. You might be leaving it too loose. Try laying it more firmly against the previous round as you stitch over it.
My fabric is puckering. Your carried yarn is too tight. Relax your tension and let it flow naturally.
I lost my place in the pattern. This happens to everyone! Count your stitches and look at where the hearts are forming. The visual cues from your work can help you figure out which round you’re on.
My hearts look lopsided. Make sure you’re changing colors at exactly the right stitch. Even being off by one creates a noticeable shift.
Final Thoughts on This Heart Tote Crochet Pattern
This Red and White Heart Tote Bag is the kind of project that looks incredibly impressive but is built on simple single crochet stitches. The tapestry technique does require concentration, especially for your first few rounds, but once you establish the rhythm it becomes almost meditative.
I love that this bag works up in around 12 to 16 hours, making it a realistic weekend project or a satisfying week-long evening project. The cotton yarn means it’s practical for everyday use, and that bold heart pattern makes it unmistakably handmade in the best possible way.
Whether you’re making this for yourself or as a gift, I hope you enjoy every stitch. There’s something deeply satisfying about watching those hearts appear as you work your way around the bag.
Thank you so much for choosing this pattern! I’d absolutely love to see your finished tote, so please tag me on Instagram or share in our Facebook group when you complete yours. Seeing your creations genuinely makes my day.
If this pattern caught your eye, go ahead and save it to your Pinterest boards so you can find it when you’re ready to start. And if you make this sweet heart tote, I’d love to hear how it turned out for you in the comments below!
