Alright, yarn lovers. This is your sign to dig into that stash and pull out those gorgeous pink cotton skeins you’ve been saving for "the perfect project." This striped crochet backpack is it.
Get the Ad-Free PDF Pattern
You can find the free pattern below, or you can purchase the ad-free printable PDF from my shop.
Get the Printable PDF →
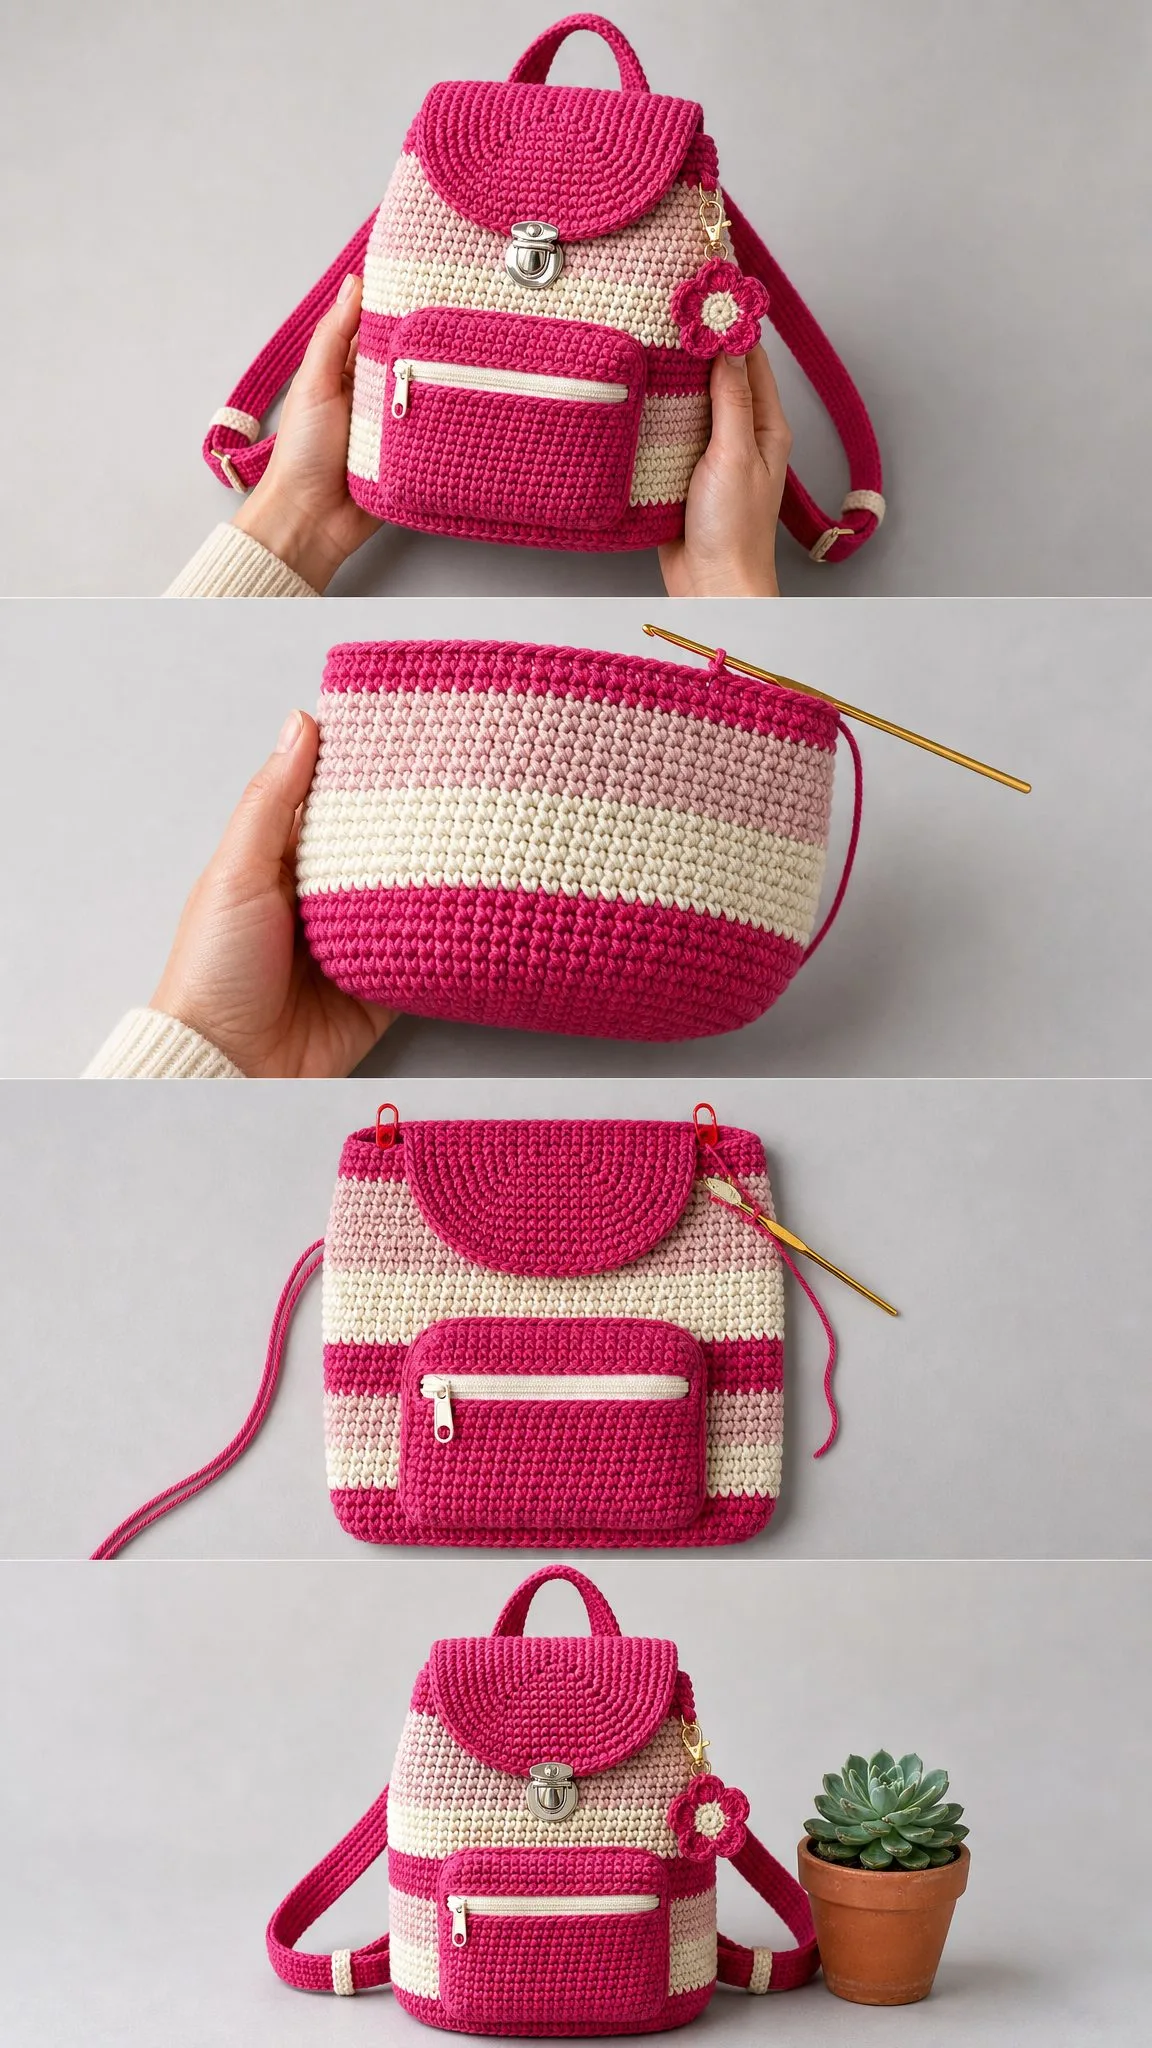
The construction is genuinely interesting. You’ll start with an oval base, work upward in continuous spiral rounds, then add a separate rounded flap, a functional front pocket with a zipper, adjustable shoulder straps, and an adorable flower charm. It’s an intermediate project that will challenge you just enough to keep things exciting.
I won’t sugarcoat it. You’ll need to count stitches carefully, change colors cleanly, and do some sewing at the end. But if you’ve conquered amigurumi or made a few bags before, you’ve absolutely got this.
About This Crochet Backpack Pattern
This structured mini backpack features candy pink stripes in three coordinating colors: hot pink, blush pink, and cream. The dense single crochet (sc) fabric gives the bag excellent body while keeping those stripe lines crisp and clean.
What I love most about this design is how functional it is. You get a rounded flap with a turn lock clasp, a front zipper pocket for quick access items, two comfortable shoulder straps, a top handle for grabbing on the go, and a sweet five petal flower charm clipped to the side. It’s not just cute. It’s actually useful.
The finished backpack measures approximately 8 inches wide by 10 inches tall by 4 inches deep (20.5 x 25.5 x 10 cm). The straps are about 17 inches (43 cm) before attachment. Plan for 10 to 14 hours of crochet time depending on your pace.
Skill Level
This pattern is rated intermediate. You’ll work an oval base with increases, count continuous rounds without joining, change colors cleanly, sew in a zipper, attach hardware, and assemble multiple pieces at the end.
That said, a confident advanced beginner can absolutely make this backpack. The key is checking your stitch counts at the end of every round. If you stay on top of your numbers, you’ll do great.
Materials Needed
Yarn:
Recommended yarns: Lily Sugar’n Cream Solids, Paintbox Yarns Cotton Aran, or Lion Brand 24/7 Cotton. Choose a firm cotton or cotton blend that holds its shape well. Avoid soft drapey yarns for this project.
Hook: 4 mm (US G-6)
Notions:
Gauge
20 sc and 22 rounds = 4 inches (10 cm) in continuous single crochet after light blocking.
Match both stitch gauge and row gauge before starting. This matters for getting the right finished size.
Checkpoint after body Round 62: Your bag should measure about 10 inches (25.5 cm) tall from the base edge and approximately 19 inches (48 cm) around.
Abbreviations and Stitch Guide
UK crocheters: US sc equals UK dc.
Special Techniques
Color change in sc: Insert your hook into the stitch and pull up a loop with the old color. Then yarn over with the new color and pull through both loops. Carry unused yarn for only 1 to 2 stitches. Otherwise, cut and weave in your ends.
Invisible join: Cut the yarn, pull the tail through the final stitch, thread your needle under both loops of the first stitch, then back down through the final stitch to mimic a regular stitch.
Pattern Notes
Work the base and body in a spiral unless a join is specifically stated. Place a stitch marker in the first stitch of each round and move it up as you go. This is essential for keeping track of your rounds.
Keep your fabric firm. Loose tension can make the backpack collapse and lose its structure.
The stripe color joins are placed at the back center where the flap and straps will hide them. Left handed crocheters can follow the same instructions. Your spiral will travel in the opposite direction, so just make sure to place the stripe jog at the back center before assembly.
Base and Striped Body
Oval Base (Hot Pink)
Ch 23.
Rnd 1: 2 sc in 2nd ch from hook, sc in next 20 ch, 4 sc in last ch; rotate to work on the underside, sc in next 20 loops, 2 sc in same ch as first 2 sc. (48 sc)
Rnd 2: Inc in next 2 sts, sc 20, inc in next 4 sts, sc 20, inc in next 2 sts. (56 sc)
Rnd 3: [Sc 1, inc] 2 times, sc 20, [sc 1, inc] 4 times, sc 20, [sc 1, inc] 2 times. (64 sc)
Rnd 4: [Sc 2, inc] 2 times, sc 20, [sc 2, inc] 4 times, sc 20, [sc 2, inc] 2 times. (72 sc)
Rnd 5: [Sc 3, inc] 2 times, sc 20, [sc 3, inc] 4 times, sc 20, [sc 3, inc] 2 times. (80 sc)
Rnd 6: [Sc 4, inc] 2 times, sc 20, [sc 4, inc] 4 times, sc 20, [sc 4, inc] 2 times. (88 sc)
Rnd 7: [Sc 5, inc] 2 times, sc 20, [sc 5, inc] 4 times, sc 20, [sc 5, inc] 2 times. (96 sc)
Body
Rnd 8: Working in BLO (back loop only), sc around. (96 sc)
This BLO round creates a crisp edge where your base meets the body.
Rnds 9-12: Sc around in hot pink. (96 sc each rnd)
Rnds 13-20: Change to cream; sc around. (96 sc each rnd)
Rnds 21-28: Change to blush; sc around. (96 sc each rnd)
Rnds 29-32: Change to cream; sc around. (96 sc each rnd)
Rnds 33-38: Change to hot pink; sc around. (96 sc each rnd)
Rnds 39-46: Change to cream; sc around. (96 sc each rnd)
Rnds 47-54: Change to blush; sc around. (96 sc each rnd)
Rnds 55-58: Change to hot pink; sc around. (96 sc each rnd)
Rnd 59 (Drawstring Eyelets): [Sc 7, ch 1, sk 1] 12 times. (84 sc + 12 ch-1 spaces = 96 sts)
Rnds 60-62: Sc in each sc and ch-1 space around. Invisible join after Rnd 62. (96 sc each rnd)
Checkpoint: Your oval base should measure about 6.5 x 4 inches (16.5 x 10 cm). The body should be about 10 inches (25.5 cm) tall from the base edge.
Rounded Flap (Hot Pink)
Ch 37.
Row 1: Sc in 2nd ch from hook and across, turn. (36 sc)
Rows 2-4: Ch 1, sc across, turn. (36 sc)
Row 5: Ch 1, sc2tog, sc 32, sc2tog, turn. (34 sc)
Row 6: Ch 1, sc2tog, sc 30, sc2tog, turn. (32 sc)
Row 7: Ch 1, sc2tog, sc 28, sc2tog, turn. (30 sc)
Row 8: Ch 1, sc2tog, sc 26, sc2tog, turn. (28 sc)
Row 9: Ch 1, sc2tog, sc 24, sc2tog, turn. (26 sc)
Row 10: Ch 1, sc2tog, sc 22, sc2tog, turn. (24 sc)
Row 11: Ch 1, sc2tog, sc 20, sc2tog, turn. (22 sc)
Row 12: Ch 1, sc2tog, sc 18, sc2tog, turn. (20 sc)
Row 13: Ch 1, sc2tog, sc 16, sc2tog, turn. (18 sc)
Row 14: Ch 1, sc2tog, sc 14, sc2tog, turn. (16 sc)
Row 15: Ch 1, sc2tog, sc 12, sc2tog, turn. (14 sc)
Row 16: Ch 1, sc2tog, sc 10, sc2tog. (12 sc)
Border: Ch 1, work sc evenly around the curved edge, placing 2 sc at the two upper corners; invisible join.
Set aside. You’ll sew the straight edge to the back top across 36 stitches later.
Front Pocket (Hot Pink)
Ch 34.
Row 1: Sc in 2nd ch from hook and across. (33 sc)
Rows 2-14: Ch 1, sc across. (33 sc each row)
Border: Sc around the entire pocket, placing 2 sc in each corner.
Sew the zipper to the top edge of the pocket. Then sew the pocket to the front center of the bag over Rounds 25-38, leaving the zipper functional. Add the lower clasp half under the flap point.
Side Tabs (Hot Pink) – Make 2
Ch 13.
Row 1: Sc in 2nd ch from hook and across. (12 sc)
Rows 2-3: Ch 1, sc across. (12 sc each row)
Fold each tab through a D-ring and sew to the lower side of the bag at Rounds 12-15.
Cream Strap Keepers – Make 2
Ch 11. Sc in 2nd ch from hook and across. (10 sc)
Sew these into small loops around the straps for a polished look.
Shoulder Straps (Hot Pink) – Make 2
Ch 86.
Row 1: Sc in 2nd ch from hook and across, turn. (85 sc)
Rows 2-4: Ch 1, sc across. (85 sc each row)
Border: Sc around the entire strap; add 2 sc in each corner. Fasten off.
Each strap measures about 17 inches (43 cm) before attachment.
Top Handle (Hot Pink)
Ch 45.
Row 1: Sc in 2nd ch from hook and across, turn. (44 sc)
Rows 2-4: Ch 1, sc across. (44 sc each row)
Border: Work the same border as for the straps.
Sew the ends to the back top, about 2 inches (5 cm) apart, under the flap line.
Drawstring Cord (Hot Pink)
Ch 125, then sl st in the back bump of each chain.
Thread the cord through the Round 59 eyelets, entering and exiting at the back center. Knot the ends inside the bag.
Flower Charm
Center (Cream): MR, ch 1, 10 sc in ring, sl st to first sc. (10 sc)
Petals (Hot Pink): Join in any stitch. [Sl st in next st, in next st work hdc, dc, hdc] 5 times, sl st to first sl st. (5 petals)
Edging (optional): Sl st around each petal curve for a finished look.
Attach the flower to a small ring or swivel clip and clip it to the upper side of the backpack.
Assembly and Finishing
1. Weave in all ends, keeping color change tails on the inside of the bag.
2. Steam or wet block lightly over a towel-wrapped form. Do not flatten the bag body.
3. Sew the flap: Attach the straight edge to the back top across 36 body stitches, centered over the back seam.
4. Attach upper strap ends: Sew them beneath the flap attachment line, about 1.5 inches (4 cm) apart on either side of center back.
5. Attach lower strap ends to the D-rings. Test fit for comfort, then secure firmly with multiple passes of matching yarn.
6. Install the clasp: Place the upper half on the flap tip and the lower half centered above the pocket zipper. Follow your hardware instructions.
7. Optional lining: Cut lining fabric to match bag circumference plus seam allowance; sew in by hand just below the top rim.
Size Customization Tips
To make the backpack wider: Add one extra oval increase round before starting the body. Each extra round adds 8 stitches and about 1.6 inches (4 cm) circumference. Keep the eyelet round divisible by 8. For 104 stitches, work [sc 7, ch 1, sk 1] 13 times.
To make the bag taller: Add plain sc rounds before Round 59.
To lengthen the straps: Add more chains before Row 1.
Troubleshooting Common Issues
Base cups up: Your increases are too few or your tension is too tight. Block the base flat before continuing.
Body leans to one side: Continuous sc naturally spirals. Keep the color jog at back center and block the bag upright.
Flap ripples: Work fewer border stitches along the curve, or block the flap flat.
Zipper waves: Baste the zipper first, then sew without stretching the pocket edge.
Care Instructions
Spot clean when possible. Hand wash in cool water, reshape over a towel wrapped form, and air dry flat. Remove or protect metal hardware before washing if it is not rust resistant.
You Did It!
This pink striped crochet backpack is such a satisfying project to complete. Every time you grab it and head out the door, you’ll remember every round, every color change, and every careful stitch.
Thank you so much for making this pattern with me. I genuinely appreciate you being here.
If you make this backpack, I would absolutely love to see it! Save this pattern to your Pinterest boards so you can find it whenever you’re ready to start, and please leave a comment below if you give it a try. Seeing your finished projects makes my whole day.
Want a Quick & Easy Printable Version?
Get a clean, beautifully formatted PDF of this pattern — easy to follow step by step, ready to print or save on any device. No scrolling, no distractions, just the pattern.
Get the Printable PDF →