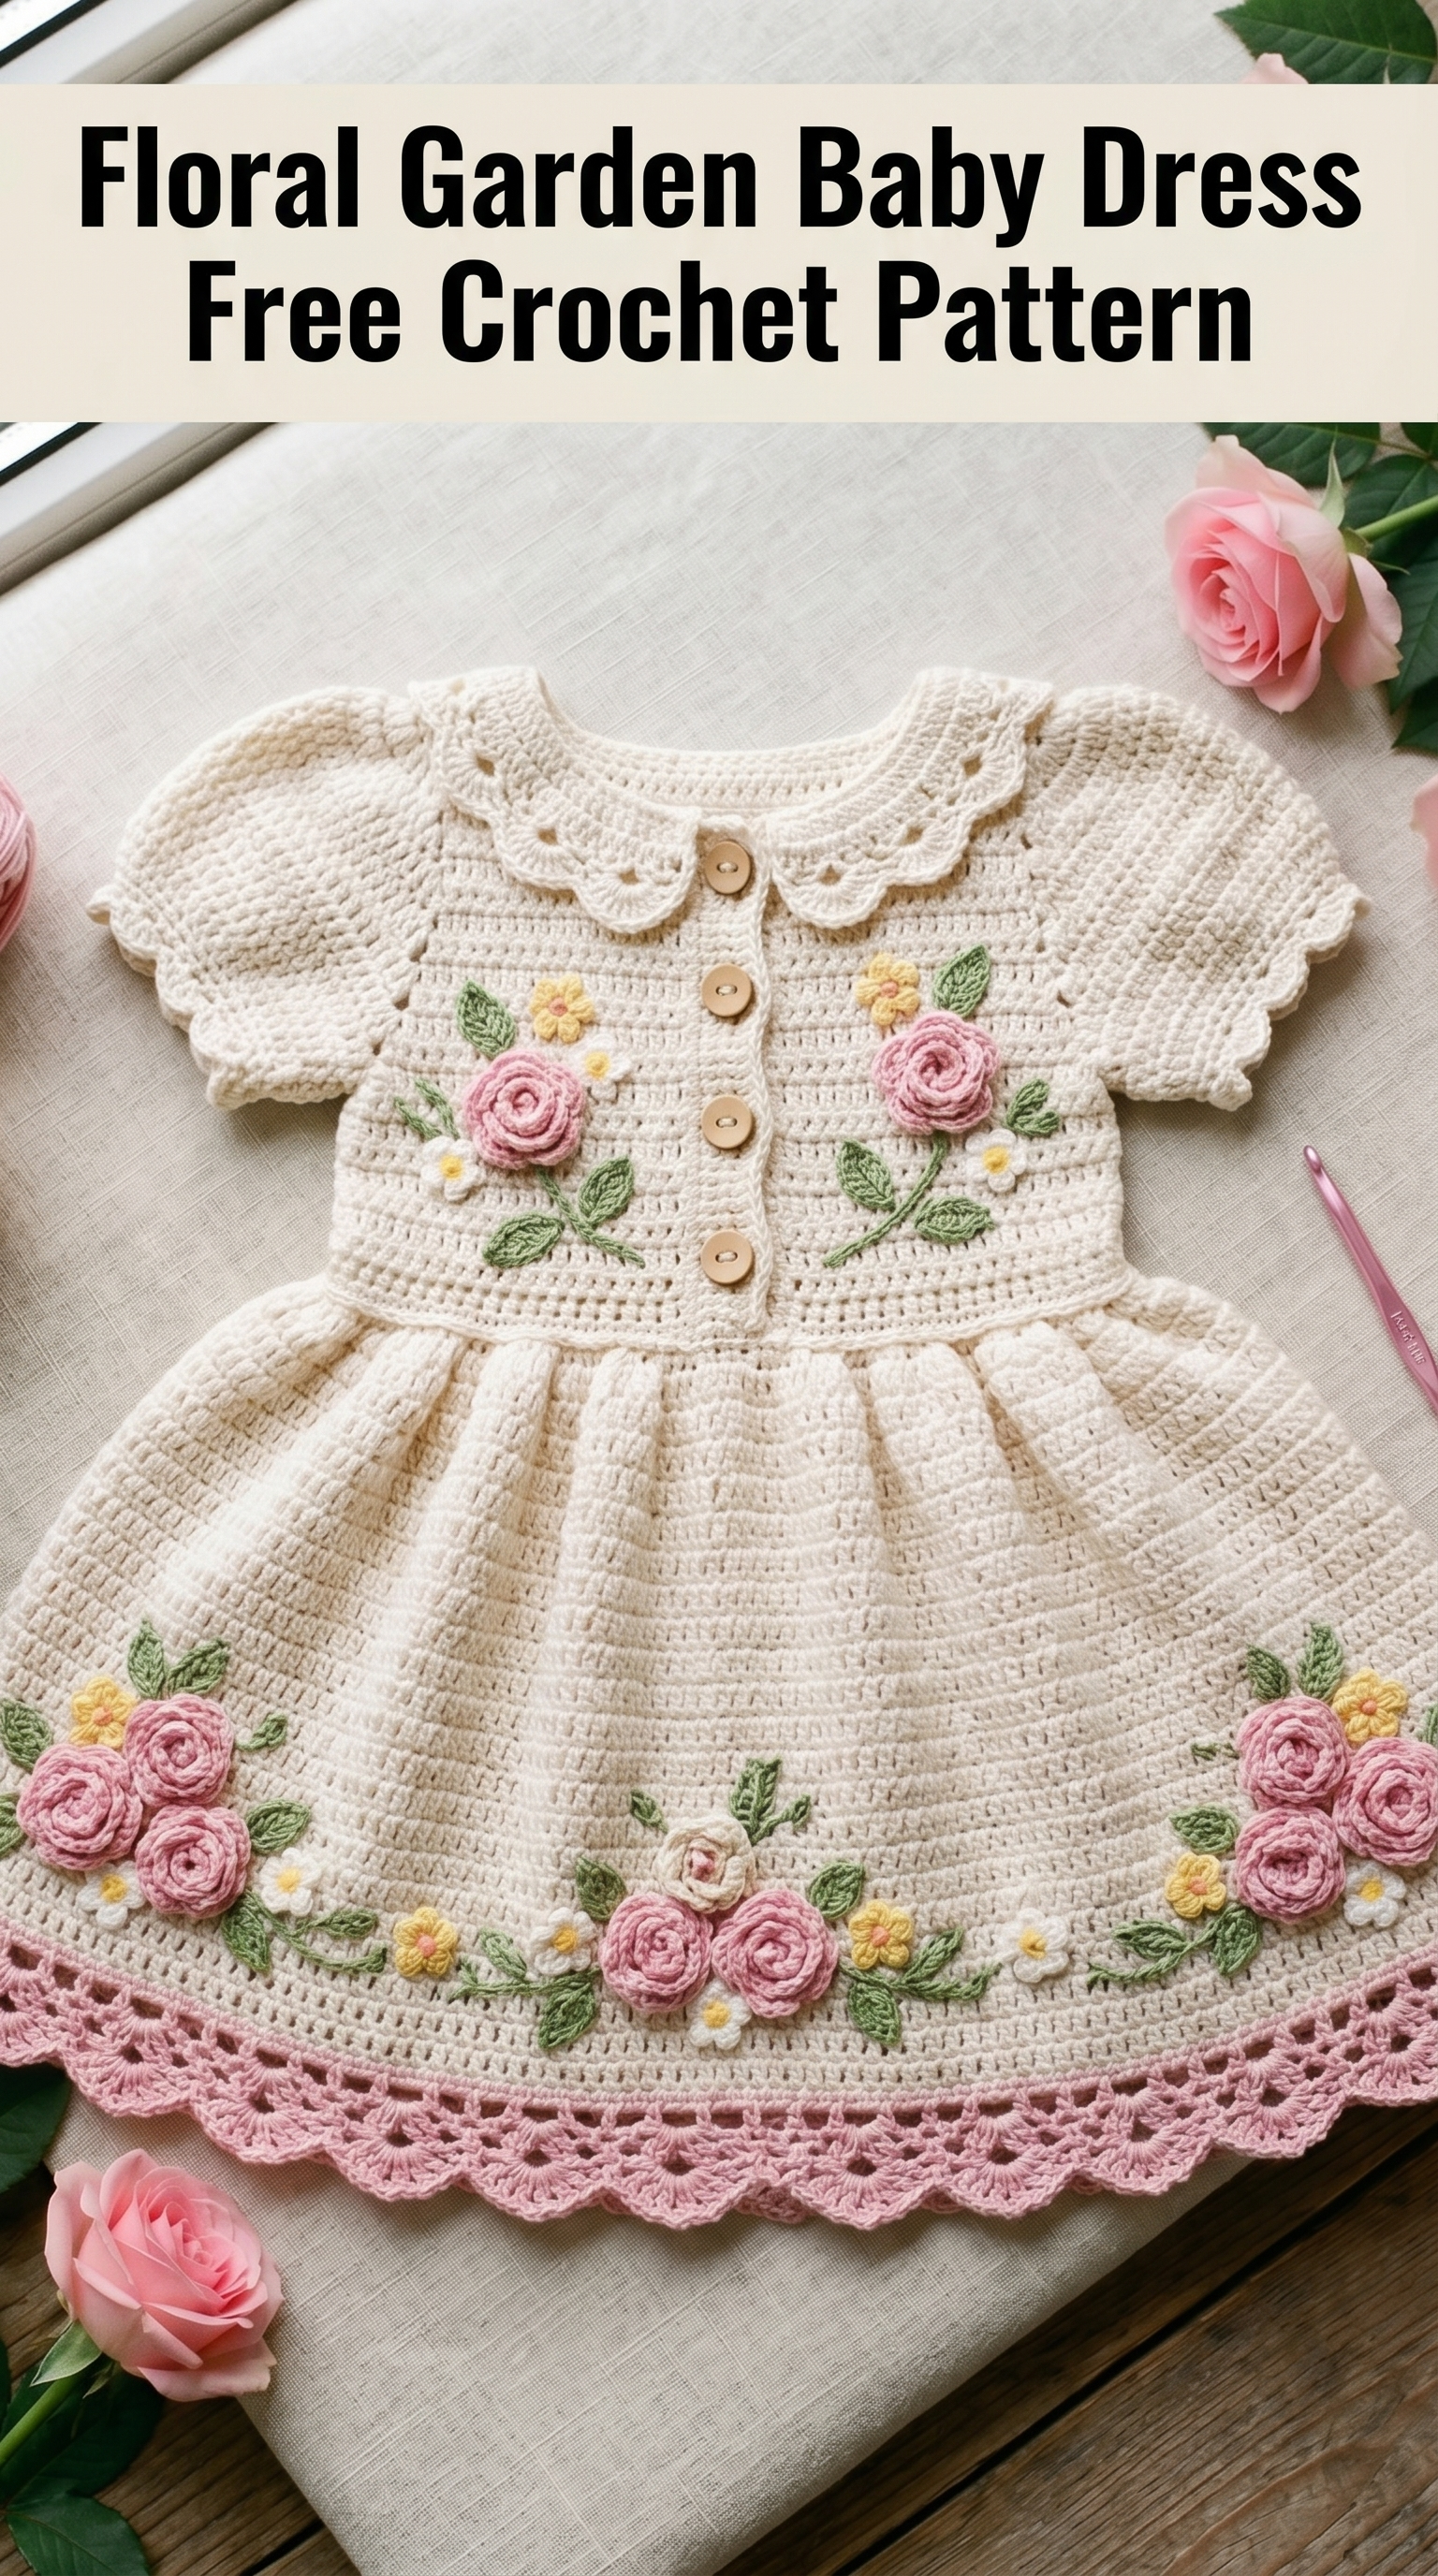
There is something magical about creating a tiny dress covered in delicate roses and flowers for a little one. This Floral Garden Baby Dress crochet pattern combines classic construction with sweet dimensional embellishments that transform a simple garment into a keepsake treasure. Whether you are making this for a baby shower gift or your own little girl, I promise the finished piece will steal hearts.
Do not let the beautiful details intimidate you. If you can work basic stitches in rows and rounds, you can absolutely make this dress. I will walk you through every step, including those gorgeous appliqué flowers that look far more complicated than they actually are.
Why This Baby Dress Pattern Is Worth Your Time
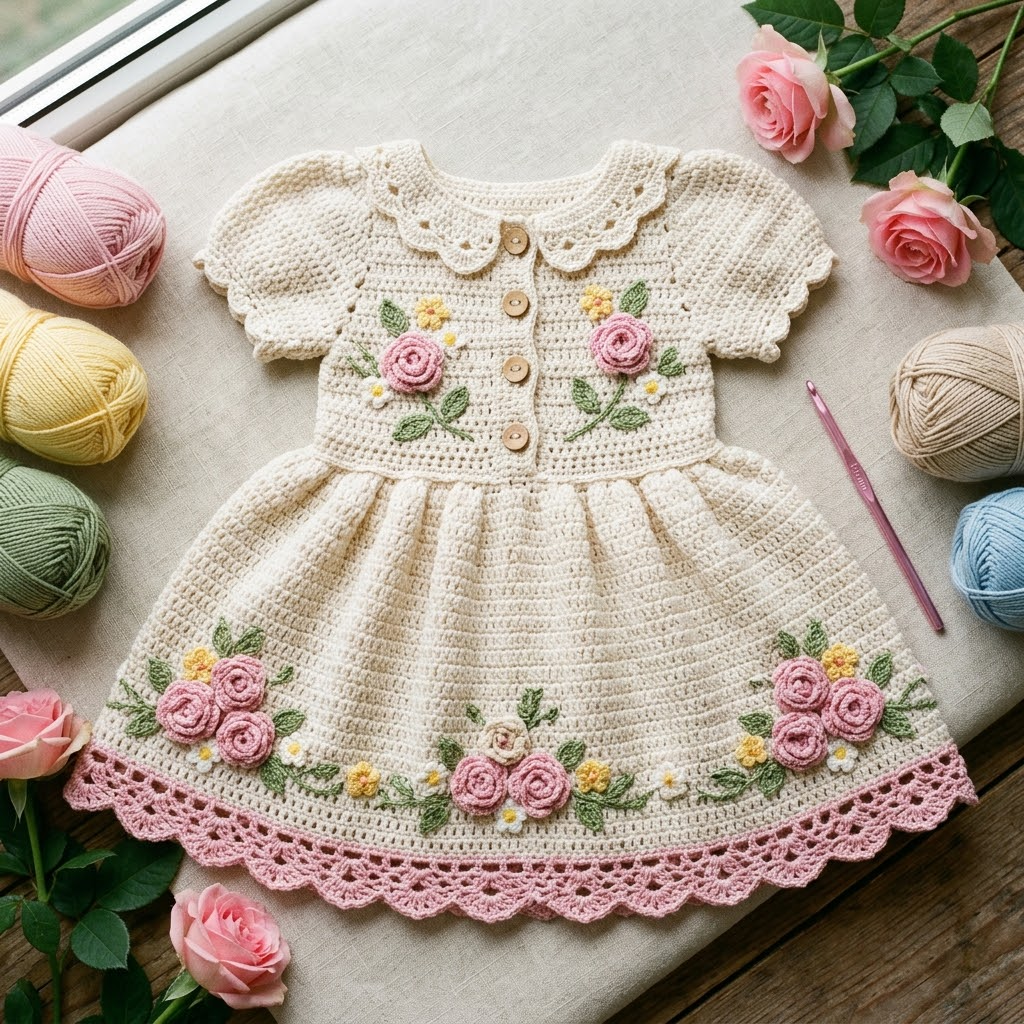
This crochet baby dress pattern brings together everything I love about handmade baby garments. The cream colored body provides a perfect canvas for the floral embellishments. The peter pan collar adds vintage charm. The gathered skirt creates that dreamy silhouette we all picture when we imagine a little girl twirling.
The construction is surprisingly straightforward. You will work the bodice flat, then join to work the skirt in the round. The flowers and leaves are made separately and sewn on at the end, so you can customize placement however you like.
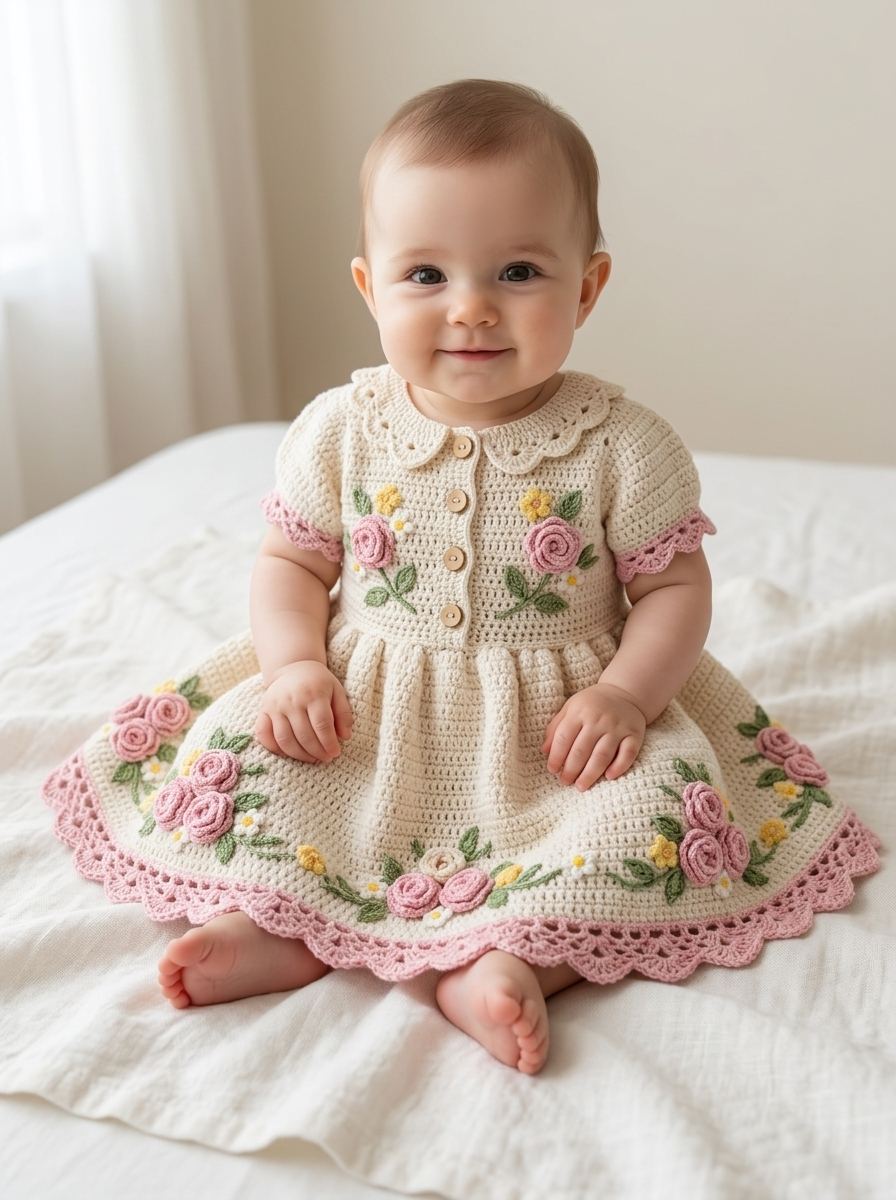
I designed this with worsted weight cotton yarn because it washes beautifully and holds up to active babies. The finished dress fits approximately 6 to 12 months, but I will include notes for adjusting size.
Materials You Will Need
Gather these supplies before you begin. Having everything ready makes the process so much smoother.
Yarn:
Hook:
Notions:
Gauge:
16 stitches and 18 rows = 4 inches in single crochet with 4.0mm hook
Always check your gauge. A dress that does not fit is heartbreaking after all that work.
Stitch Abbreviations and Definitions
Let me define every stitch before we begin so you never feel lost.
ch = chain: Yarn over, pull through loop on hook. This creates your foundation.
sl st = slip stitch: Insert hook, yarn over, pull through both loops at once. Used for joining rounds.
sc = single crochet: Insert hook, yarn over, pull up loop (2 loops on hook), yarn over, pull through both loops. Your most basic stitch.
hdc = half double crochet: Yarn over, insert hook, yarn over, pull up loop (3 loops on hook), yarn over, pull through all 3 loops. Slightly taller than sc.
dc = double crochet: Yarn over, insert hook, yarn over, pull up loop (3 loops on hook), yarn over, pull through 2 loops, yarn over, pull through remaining 2 loops. Creates nice drape.
tr = treble crochet: Yarn over twice, insert hook, yarn over, pull up loop, (yarn over, pull through 2 loops) three times. Tall stitch for lacy effects.
inc = increase: Work 2 stitches into the same stitch.
dec = decrease: Single crochet two together (sc2tog) to join 2 stitches into 1.
sk = skip: Pass over the indicated stitch without working into it.
sp = space: The gap created by chains in previous row.
BLO = back loop only: Insert hook under just the back loop of the stitch.
FLO = front loop only: Insert hook under just the front loop of the stitch.
Bodice Instructions
The bodice is worked flat from the top down, then joined for the skirt. This construction makes fitting easier and creates that lovely gathered waist.
Back Panel (Make 2, one left and one right)
With MC and 4.0mm hook, ch 22.
Row 1: Sc in 2nd ch from hook and in each ch across. Turn. (21 sts)
Row 2: Ch 1, sc in each st across. Turn. (21 sts)
Rows 3 to 6: Repeat Row 2.
Row 7 (Buttonhole Row, right panel only): Ch 1, sc in first 2 sts, ch 2, sk 2, sc in next 13 sts, ch 2, sk 2, sc in last 2 sts. Turn. (17 sc, 4 ch)
Row 8: Ch 1, sc in each st and ch sp across. Turn. (21 sts)
Rows 9 to 14: Ch 1, sc in each st across. Turn. (21 sts)
For the left panel, work Rows 7 and 8 as plain sc rows without buttonholes.
Armhole Shaping (both panels):
Row 15: Ch 1, sl st in first 3 sts, sc in next 15 sts, leave last 3 sts unworked. Turn. (15 sts)
Row 16: Ch 1, dec, sc to last 2 sts, dec. Turn. (13 sts)
Rows 17 to 20: Ch 1, sc in each st across. Turn. (13 sts)
Shoulder Shaping:
Row 21: Ch 1, sc in first 4 sts. Fasten off. (4 sts)
Skip center 5 sts. Rejoin yarn and sc in last 4 sts. Fasten off. (4 sts)
Front Panel
With MC and 4.0mm hook, ch 42.
Row 1: Sc in 2nd ch from hook and in each ch across. Turn. (41 sts)
Rows 2 to 14: Ch 1, sc in each st across. Turn. (41 sts)
Armhole Shaping:
Row 15: Ch 1, sl st in first 3 sts, sc in next 35 sts, leave last 3 sts unworked. Turn. (35 sts)
Row 16: Ch 1, dec, sc to last 2 sts, dec. Turn. (33 sts)
Rows 17 to 18: Ch 1, sc in each st across. Turn. (33 sts)
Neckline Shaping:
Row 19: Ch 1, sc in first 12 sts. Turn. Leave remaining sts unworked. (12 sts)
Row 20: Ch 1, dec, sc to end. Turn. (11 sts)
Row 21: Ch 1, sc to last 2 sts, dec. Turn. (10 sts)
Continue decreasing at neck edge every row until 4 sts remain.
Work 1 row even. Fasten off.
Skip center 9 sts for neckline. Rejoin yarn and work opposite shoulder to match, reversing shaping.
Sleeve Instructions (Make 2)
The sleeves feature a sweet scalloped edge that coordinates with the skirt border.
With MC and 4.0mm hook, ch 36.
Row 1: Sc in 2nd ch from hook and in each ch across. Turn. (35 sts)
Row 2: Ch 1, sc in each st across. Turn. (35 sts)
Rows 3 to 8: Repeat Row 2.
Row 9 (Sleeve Cap Shaping): Ch 1, sl st in first 3 sts, sc to last 3 sts, leave unworked. Turn. (29 sts)
Row 10: Ch 1, dec, sc to last 2 sts, dec. Turn. (27 sts)
Rows 11 to 14: Repeat Row 10. (19 sts after Row 14)
Row 15: Ch 1, (dec) across, sc in last st. Fasten off. (10 sts)
Scalloped Edge:
With right side facing, join MC at corner of foundation chain.
Round 1: Sc evenly around sleeve opening. Join with sl st.
Round 2: *Sk 1 st, 5 dc in next st, sk 1 st, sl st in next st.* Repeat around. Fasten off.
Peter Pan Collar
This collar adds that vintage charm. It is worked in two pieces, then attached.
With MC and 4.0mm hook, ch 30.
Row 1: Sc in 2nd ch from hook and in each ch across. Turn. (29 sts)
Row 2: Ch 1, 2 sc in first st, sc to last st, 2 sc in last st. Turn. (31 sts)
Rows 3 to 6: Repeat Row 2, increasing at each end. (39 sts after Row 6)
Row 7: Ch 1, sc in each st across. Turn. (39 sts)
Scalloped Edging:
Ch 1, *sk 1 st, 5 dc in next st, sk 1 st, sl st in next st.* Repeat across curved edge. Fasten off.
Make a second collar piece to match.
Skirt Instructions
Here is where the magic happens. That beautiful gathered fullness comes from increasing significantly when joining the bodice.
First, sew shoulder seams. Sew side seams, leaving back open above waist for button closure.
With right side facing, join MC at center back opening at waist edge.
Round 1: Ch 1, sc evenly around entire waist edge. Work approximately 80 sc total. Join with sl st. (80 sts)
Round 2 (Increase Round): Ch 1, *sc in next st, 2 sc in next st.* Repeat around. Join. (120 sts)
Round 3: Ch 1, sc in BLO of each st around. Join. (120 sts)
This creates a nice ridge at the waistline.
Rounds 4 to 35: Ch 1, sc in each st around. Join. (120 sts)
Your skirt should measure approximately 7 inches from waist.
Pink Lace Border
Switch to Color A (dusty pink) for the gorgeous border.
Round 1: With Color A, ch 1, sc in each st around. Join. (120 sts)
Round 2: Ch 3 (counts as dc), dc in each st around. Join to top of ch 3. (120 dc)
Round 3: Ch 4 (counts as dc plus ch 1), *sk 1 st, dc in next st, ch 1.* Repeat around. Join. (60 dc, 60 ch 1 sp)
Round 4: Ch 4, dc in next dc, ch 1. Repeat around. Join. (60 dc, 60 ch 1 sp)
Round 5: Ch 1, sc in each dc and ch sp around. Join. (120 sts)
Round 6 (Scallop Round): *Sk 2 sts, 5 dc in next st, sk 2 sts, sl st in next st.* Repeat around. Join. Fasten off.
Rose Appliqué (Make 8)
These rolled roses are easier than they look. Trust the process.
With Color A and 3.5mm hook, ch 30.
Row 1: Dc in 4th ch from hook, *3 dc in next ch.* Repeat across. Fasten off, leaving a long tail.
The fabric will naturally spiral. Roll from one end to create the rose shape. Use the tail to stitch through the base, securing layers as you go. Do not overthink this step. The roses look beautiful even when imperfect.
Small Accent Flowers (Make 6)
With Color C (yellow) and 3.5mm hook, make a magic ring.
Round 1: Ch 1, 5 sc into ring. Join with sl st. Pull ring tight. (5 sts)
Round 2: *Ch 3, sl st in next st.* Repeat around. (5 petals)
Fasten off. These tiny flowers fill gaps beautifully.
Daisy Appliqué (Make 4)
With Color D (white) and 3.5mm hook, make a magic ring.
Round 1: Ch 1, 6 sc into ring. Join. (6 sts)
Round 2: *Ch 4, sl st in 2nd ch from hook, sc in next ch, hdc in next ch, sl st in same st as beginning ch.* Repeat in each st around. (6 petals)
Fasten off. Add a French knot in yellow at center if desired.
Leaf Appliqué (Make 16)
With Color B (sage green) and 3.5mm hook, ch 8.
Row 1: Sl st in 2nd ch from hook, sc in next ch, hdc in next ch, dc in next 2 ch, hdc in next ch, (sc, ch 2, sl st) in last ch.
Working along opposite side of foundation chain: hdc in next ch, dc in next 2 ch, hdc in next ch, sc in next ch, sl st in last ch.
Fasten off. The leaf has a nice pointed tip and symmetrical shape.
Assembly and Finishing
Take your time with assembly. This is where your dress truly comes together.
1. Sew sleeves into armholes. Match sleeve cap to armhole curve. Use mattress stitch for invisible seams.
2. Attach collar pieces. Position collar sections at front neckline, overlapping slightly at center front. Stitch securely along neck edge.
3. Sew on buttons. Align buttons with buttonholes on back opening. Sew through both fabric and button shank.
4. Arrange floral appliqués. Lay dress flat. Position roses in clusters with leaves tucked behind. Add small flowers and daisies to fill spaces. Pin everything before sewing.
5. Attach appliqués. Use matching thread and small whip stitches around edges. Hide stitches under petals when possible.
6. Weave in all ends. Take extra care on baby garments. Loose ends are uncomfortable against delicate skin.
7. Block gently. Mist with water and shape on a flat surface. Allow to dry completely.
Sizing Adjustments
For 0 to 3 months: Reduce foundation chains by 6 stitches on each bodice piece. Work skirt for 25 rounds instead of 35.
For 12 to 18 months: Add 6 stitches to each bodice foundation chain. Work skirt for 45 rounds. Add one additional button.
Always check finished measurements against the baby or standard size charts.
Tips for Success
Yarn choice matters. Cotton holds up to washing and does not stretch out. Avoid acrylic for baby clothes that will be worn frequently.
Count your stitches. Especially in the bodice, stitch counts affect fit significantly. Count at the end of every row until you feel confident.
Make flowers as you go. I like working a few appliqués between bodice and skirt construction. It breaks up the monotony and lets you see progress.
Press gently. Cotton can take some heat, but press from the wrong side to avoid flattening texture.
Final Thoughts
Creating this Floral Garden Baby Dress crochet pattern has been such a joy. There is something deeply satisfying about working those tiny roses and watching them transform a simple dress into a garden of sweetness.
I hope this step by step crochet tutorial gives you everything you need to make this beginner friendly project with confidence. Even if you have never made a garment before, the construction is forgiving and the results are stunning.
Thank you so much for choosing to make this pattern. Your time and creativity mean the world to me.
I would absolutely love to see your finished dress. Please share your photos on Instagram or Facebook and tag me. Seeing your versions of this design brings me so much happiness. Every dress tells a different story, and I cannot wait to see yours.
Happy crocheting, friend. You have got this.
