
I pulled this design from my old notebook last spring, and honestly, I had almost forgotten about it. I originally sketched it out for my niece’s first birthday, wanting something that felt like a garden party in dress form. The soft lilac base with those dreamy pastel stripes reminded me of spring mornings, and I called it the "Lavender Rainbow" because it just fit perfectly.
Get the Ad-Free PDF Pattern
You can find the free pattern below, or you can purchase the ad-free printable PDF from my shop.
Get the Printable PDF →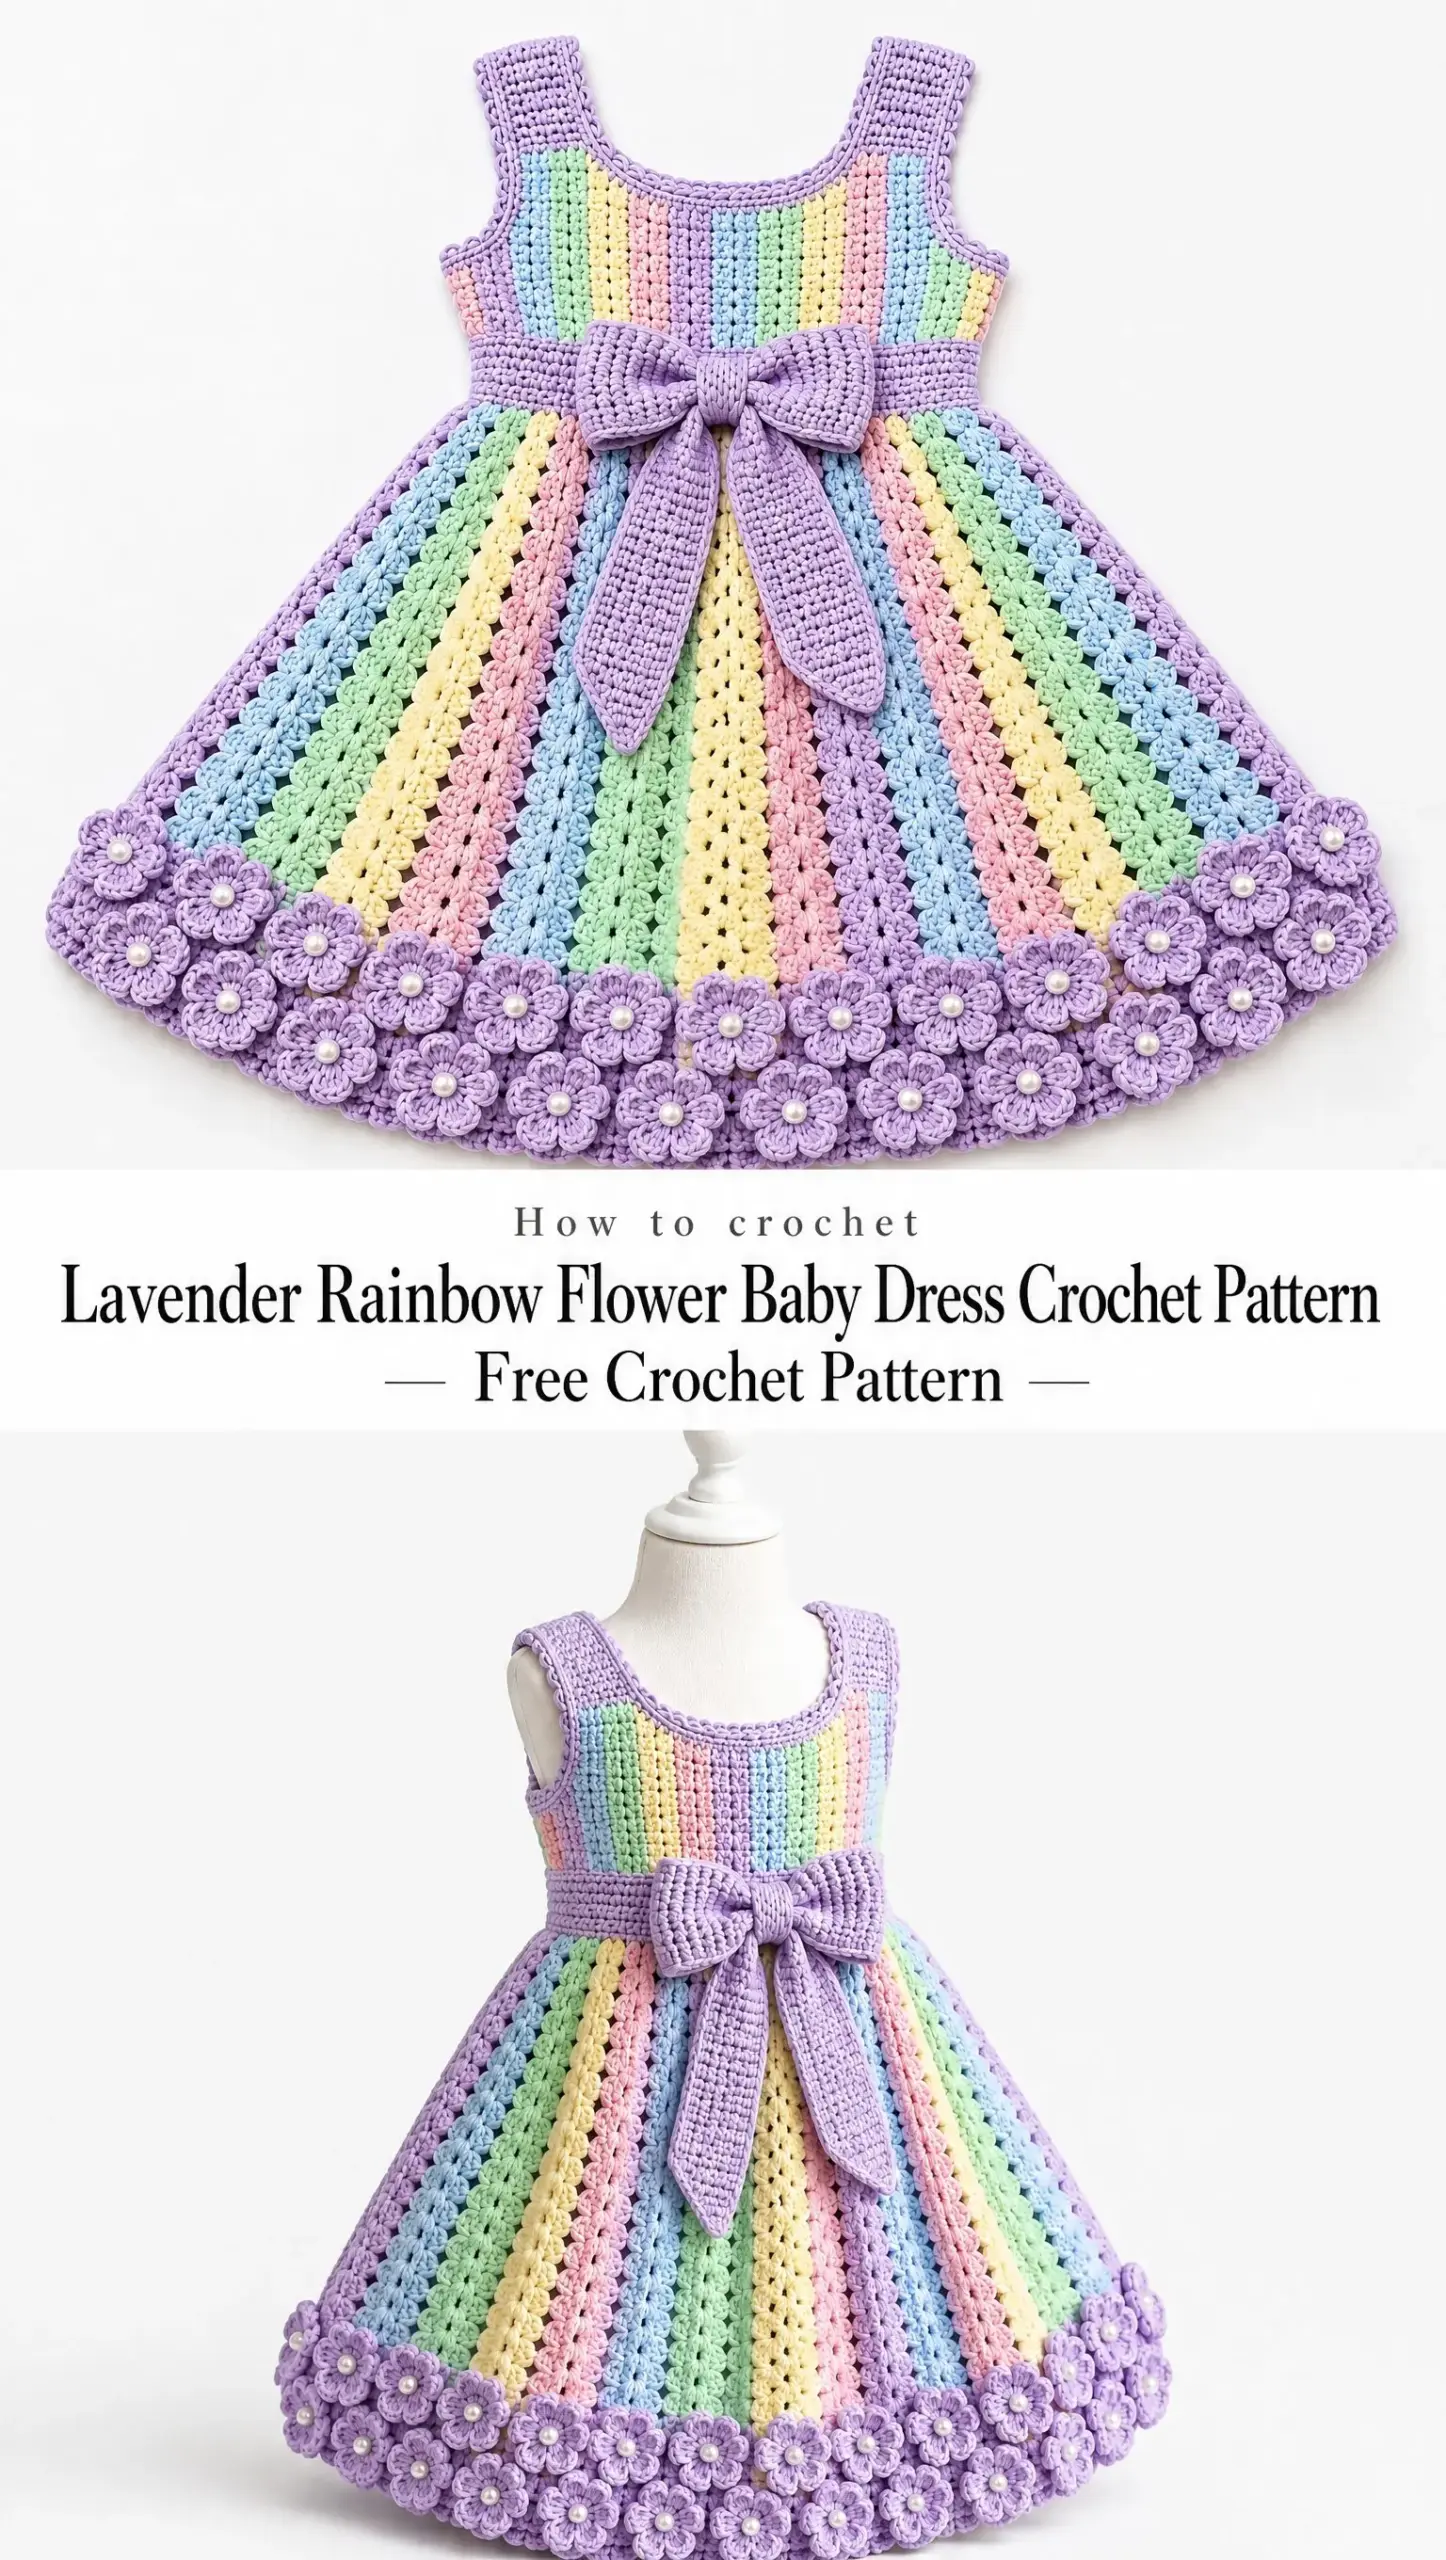
When I finally sat down to write out the full pattern, I realized how much I still loved every detail. The dimensional flowers along the hem, that sweet bow at the waist, the way the A-line skirt twirls. It all came together exactly how I had imagined years ago.
So here it is, finally ready to share with you. Whether you are making this for a baby shower gift, a special occasion, or just because you have been eyeing that lavender yarn in your stash, I think you are going to love creating this little dress as much as I did.
About This Baby Dress Pattern
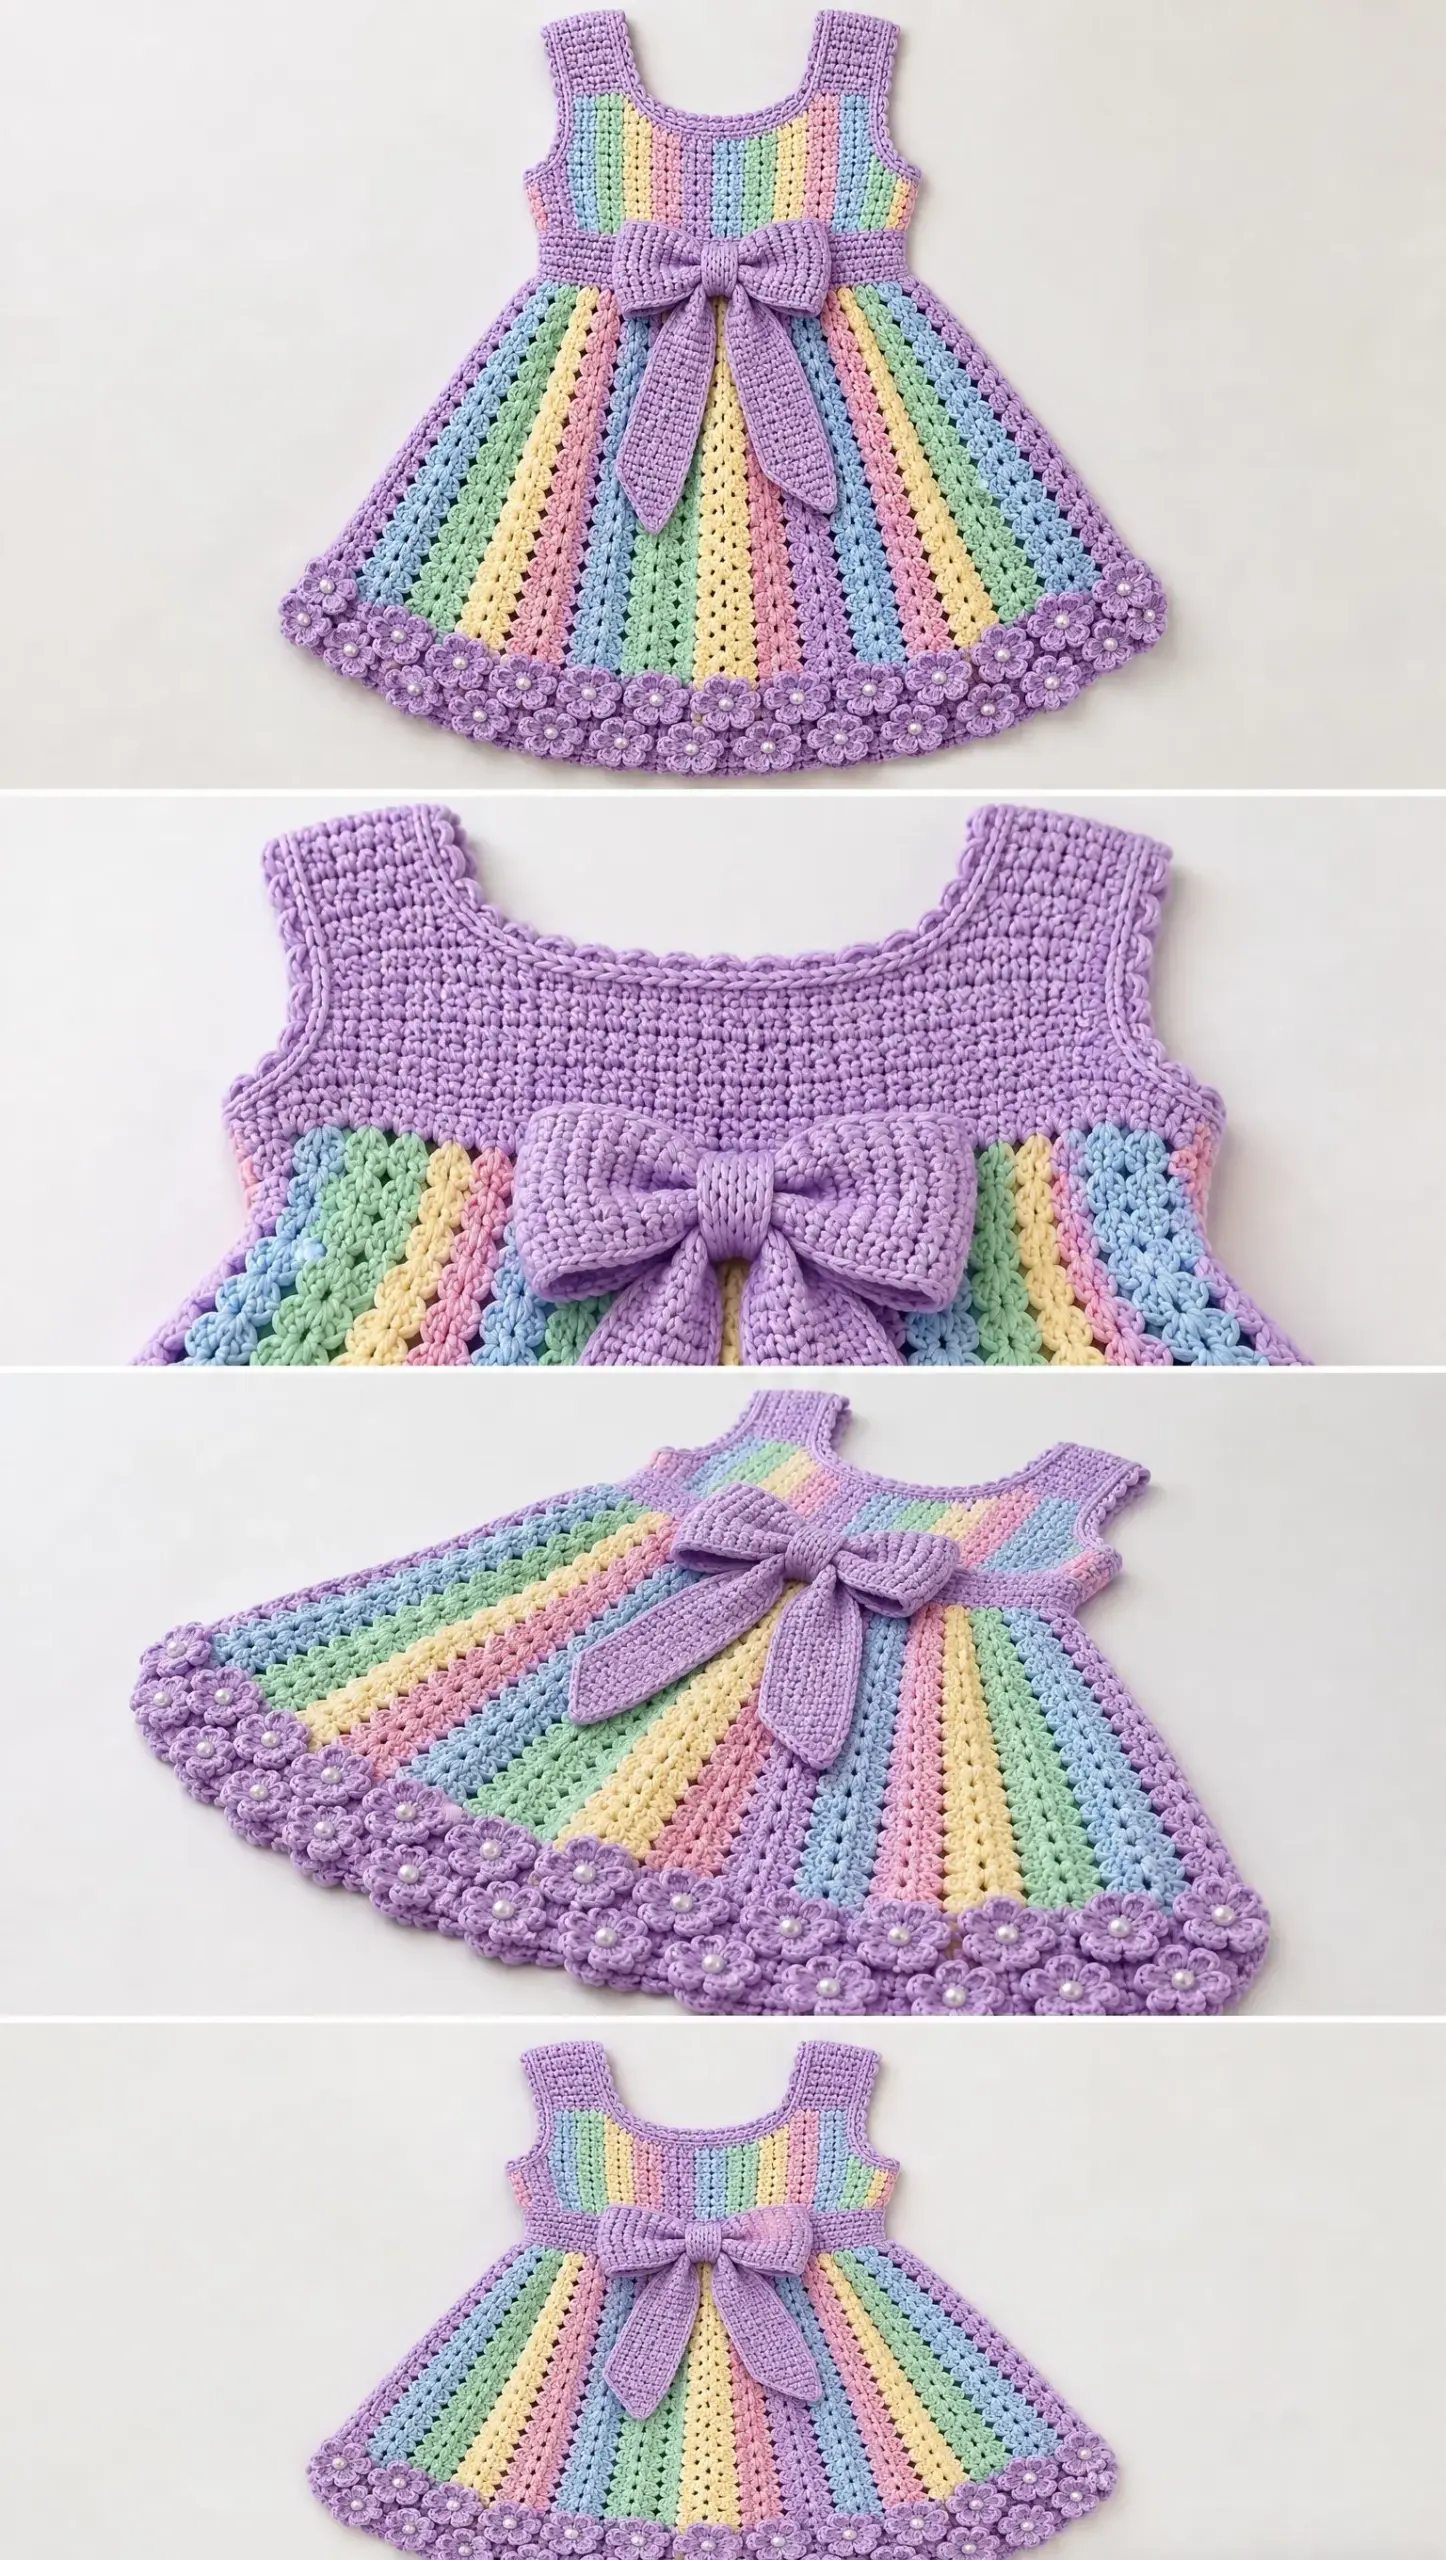
This handmade baby dress features a soft lilac crochet base with pastel rainbow vertical stripes, a fitted yoke, an A-line skirt, a waist bow, and a dimensional floral hem. The construction moves from top to bottom, starting with the yoke and working down through the bodice, waistband, and skirt. Each section builds on the last, making it a satisfying project to watch come together.
The pattern is designed for baby and toddler sizes, with instructions that can be adjusted by changing the yoke circumference and skirt length. This gives you flexibility if you need to size up for an older toddler or keep it smaller for a newborn gift.
Skill level: Intermediate. You should be comfortable with basic crochet stitches, working in the round, color changes, and simple shaping. If you have made a baby blanket and a simple garment before, you are ready for this project.
Finished Measurements
These measurements are approximate and can vary based on your gauge and any adjustments you make:
Materials You Will Need
Gather these supplies before you start. Having everything ready makes the process so much smoother.
Yarn:
Tools:
I recommend cotton yarn for baby garments because it is breathable, soft against sensitive skin, and easy to wash. Plus, cotton holds the stitch definition beautifully, which really shows off those vertical stripes.
Gauge
Approximately 20 single crochet stitches and 22 rows equals 4 inches using the recommended hook size.
Take time to check your gauge before starting. If your stitches are too tight, go up a hook size. If they are too loose, go down. Getting gauge right ensures your dress fits properly and all the sections align correctly.
Stitches Used
Here are all the stitches you will need for this pattern. I have included plain English definitions so you know exactly what each one means.
Step by Step Instructions
Now let us get into the actual construction. I have broken this down into seven parts, just like the original pattern, so you can work through it section by section without feeling overwhelmed.
Part 1: Crochet Yoke
The yoke is the upper portion of the dress that sits across the chest and back. You will work this in the round.
1. With lavender yarn, chain a foundation length that comfortably fits around the baby’s chest. For the 18 to 20 inch chest measurement, this will be approximately 90 to 100 chains, but always measure against your gauge.
2. Join carefully with a slip stitch, keeping the chain untwisted. This is important. Take a moment to lay your chain flat and make sure it is not spiraling before you join.
3. Work rows of single crochet around the yoke. Keep your tension even and consistent.
4. Add evenly spaced increases at the front, back, and side sections to create a gentle rounded shape. Place your stitch markers at these four points to help you keep track of where to increase.
5. Continue until the yoke reaches the underarm depth. For a 6 to 18 month size, this is typically about 3 to 4 inches.
6. Finish the neckline and armholes with a neat lavender single crochet edging. This gives everything a polished look and prevents stretching.
Part 2: Shoulder Straps
The straps are worked separately and then attached. This gives you more control over the fit.
1. Mark the shoulder positions on your completed yoke. Measure to ensure they are evenly placed.
2. Crochet wide rectangular straps using lavender single crochet rows. Work back and forth in rows until each strap is the desired length, typically 3 to 4 inches for this size.
3. Attach straps securely with invisible whip stitches. Thread your tapestry needle with matching yarn and sew along the inside edge so the stitches do not show on the outside.
4. Add a clean edging row around each strap. Work single crochet around the entire strap to give it a finished border.
Part 3: Rainbow Striped Bodice
This is where the magic happens. Those gorgeous vertical stripes really make this dress special.
1. Divide the bodice into vertical stripe sections. Count your stitches and divide evenly so each stripe is the same width.
2. Alternate colors in the following order: Lavender, mint, butter yellow, pink, light blue, lavender. Repeat this sequence around the entire bodice.
3. Work dense single crochet rows to create a fitted bodice. The tight stitches give structure and support.
4. Keep color joins on the inside for a clean finish. When changing colors, complete the last yarn over of your single crochet with the new color, and carry the old color loosely along the inside until you need it again.
A quick tip here: If vertical colorwork feels intimidating, just take it one stripe at a time. You can even work each stripe separately and seam them together if that feels more manageable.
Part 4: Waistband
The waistband creates definition between the bodice and skirt. It also adds a little structure.
1. Crochet a lavender waistband around the waist using firm single crochet stitches. Work about 3 to 4 rounds.
2. Make the band slightly tighter than the skirt section to create shaping. You can achieve this by using a smaller hook or simply maintaining tighter tension.
3. Add a decorative finishing row. A simple shell or picot edging works beautifully here.
Part 5: A-Line Skirt
The skirt is where this dress really starts to feel like a special occasion garment. The openwork columns and gradual flare give it beautiful movement.
1. Begin skirt stitches directly from the waistband. Join your yarn to any stitch along the bottom edge of the waistband.
2. Work alternating pastel panels using the same color sequence as the bodice.
3. Create radiating openwork columns using the following techniques:
4. Increase evenly each round to create the A-line flare. The skirt should gradually widen from waist to hem.
5. Continue until desired baby dress length is reached. For the 15 to 17 inch total length, the skirt portion will be approximately 10 to 12 inches.
6. Finish with a lavender border. Work 2 to 3 rounds of single crochet in lavender around the entire hem.
Part 6: Crochet Bow
The bow is my favorite detail. It sits right at the waist and adds such a sweet, finished look.
1. Make two large lavender bow panels using rows of single crochet. Each panel should be roughly 4 inches wide and 6 inches long, but adjust based on the dress size.
2. Shape each panel by decreasing slightly toward the outer edges. This creates a subtle hourglass shape.
3. Create two long pointed tails. Work separate strips that taper to a point at the end.
4. Crochet a center wrap by making a small rectangle of single crochet. Pinch the two bow panels together in the middle and wrap this piece around them. Sew the bow securely at the waist.
Part 7: Flower Hem Border
The dimensional flowers with pearl centers are what really set this dress apart. Plan to make between 20 and 30 flowers depending on your hem circumference.
1. Crochet multiple five-petal lavender flowers:
2. Sew pearl-like beads into each flower center. Use matching thread and a sewing needle for this step.
3. Attach flowers in two rows around the entire hem. Stagger them so the second row fills the gaps between the first row.
4. Secure all ends neatly on the inside. Weave in each tail for at least 2 inches before trimming.
Finishing Instructions
You are so close to done. These final steps make all the difference.
Customization Ideas
This pattern is a wonderful starting point. Here are some ways to make it your own:
Care Instructions
Because this is a handmade cotton garment, it needs gentle care.
Hand wash in cool water with a mild detergent. Avoid wringing or twisting. Reshape while damp and lay flat to dry on a clean towel. Store flat or on a padded hanger to prevent stretching.
Final Thoughts on This Lavender Rainbow Baby Dress Crochet Pattern
This dress takes time. I will not pretend otherwise. Between the colorwork, the shaping, and those adorable flowers, you are looking at a project that unfolds over several crafting sessions. But the result is absolutely worth it. When you see that little A-line skirt twirl, those pearl-centered flowers catching the light, and those soft pastel stripes all coming together, you will understand why this design has stayed in my notebook for so long.
It is the kind of piece that gets passed down, photographed dozens of times, and remembered. Whether you are making it for your own little one, a friend’s baby shower, or a special occasion you want to mark with something handmade, this dress delivers.
Thank you so much for choosing this pattern. I genuinely hope you enjoy every stitch of it. If you make one, I would absolutely love to see it. Tag me on Instagram or share it in our Facebook group. Seeing your finished projects is honestly the best part of sharing patterns.
If this pattern caught your eye, go ahead and save it to your Pinterest boards so you can find it when you are ready to start. And if you do make this sweet little dress, please drop a comment below. I love hearing how your projects turn out and seeing the color combinations you choose. Happy crocheting!
Want a Quick & Easy Printable Version?
Get a clean, beautifully formatted PDF of this pattern — easy to follow step by step, ready to print or save on any device. No scrolling, no distractions, just the pattern.
Get the Printable PDF →