
Looking for a special occasion outfit that will make everyone stop and stare? This elegant baby dress and bolero set is perfect for christenings, photo shoots, or any celebration where you want your little one to shine. The classic white and black color combination gives it a timeless, almost Chanel-inspired look that photographs beautifully.
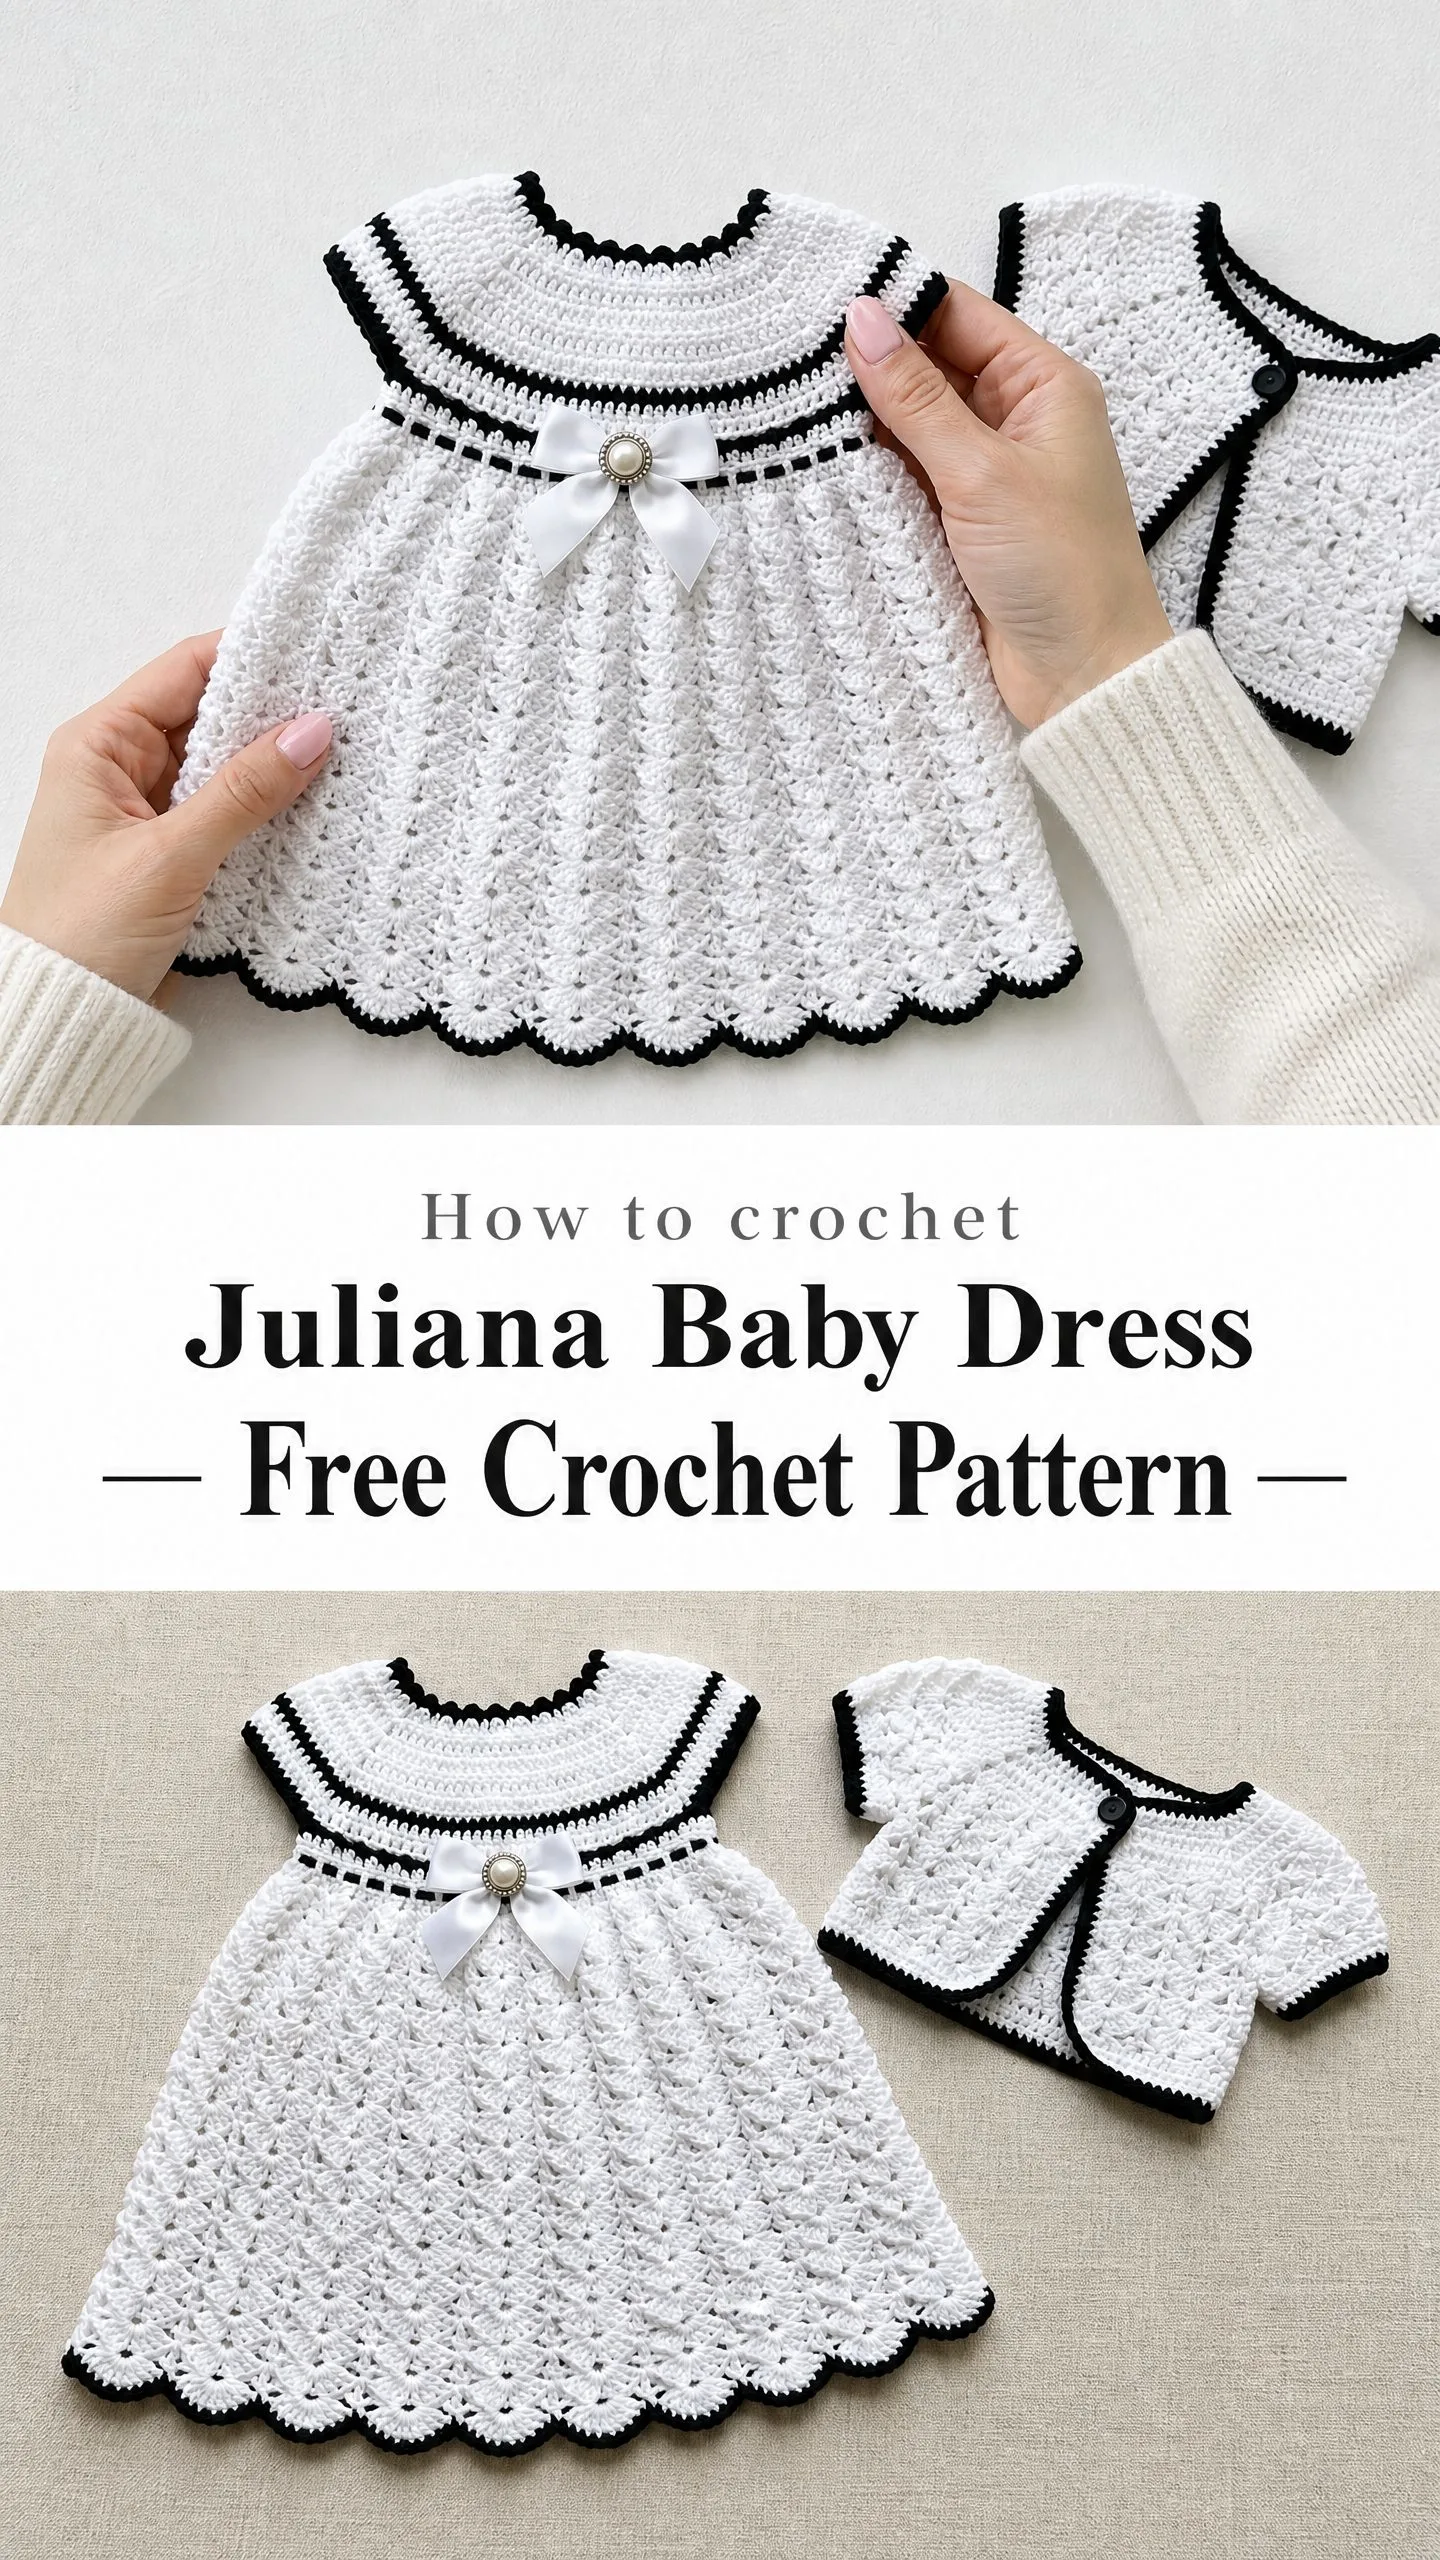
This pattern uses basic stitches like single crochet and double crochet, arranged in a gorgeous shell fan pattern that creates all that lovely texture you see in the skirt. The set is sized for 3 to 6 months, works up in about 12 to 18 hours total, and makes an incredible handmade gift for new parents. Trust me, this is the kind of heirloom piece that gets passed down through generations.
I have broken everything down into manageable sections so you can work through it step by step without feeling overwhelmed. Let me walk you through exactly how to create this stunning set from start to finish.
What Makes This Baby Dress Pattern Special
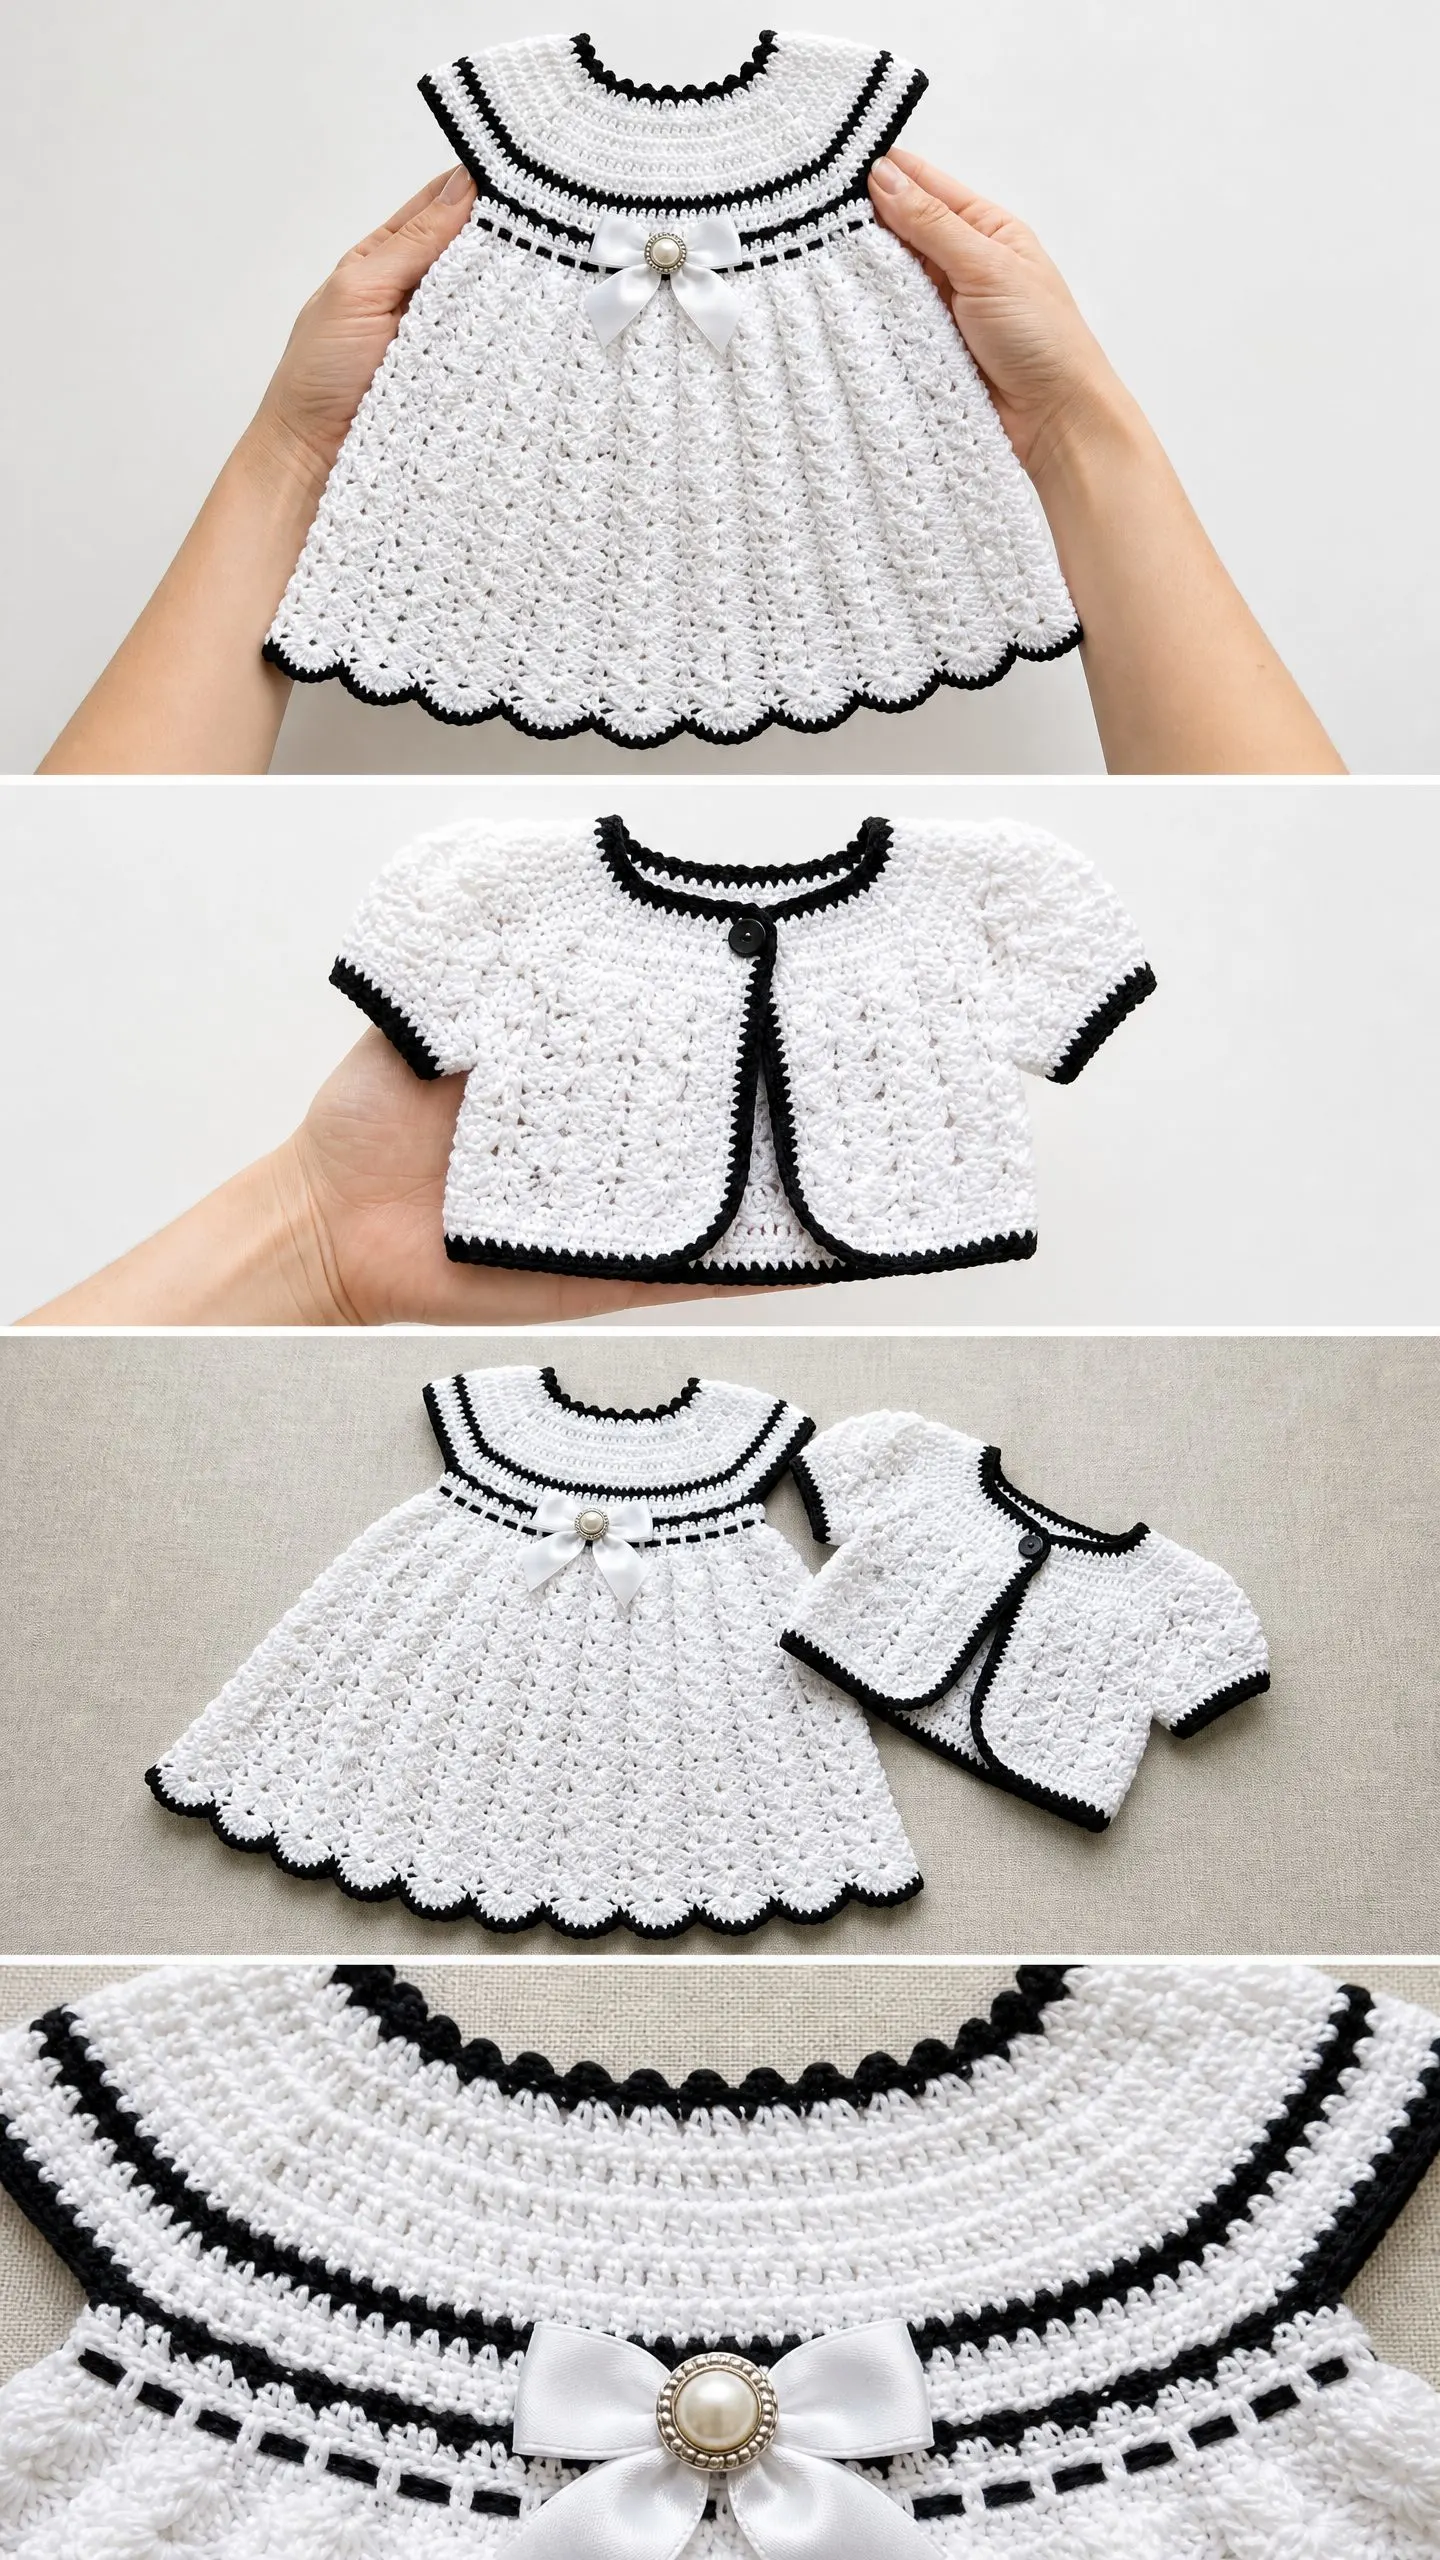
The Juliana set includes two pieces that work beautifully together or separately. The dress features a seamless top-down construction, which means you start at the neckline and work your way down to the hem with no seaming required for the main body. The empire waistline sits just below the chest and includes an eyelet round where you will thread a satin ribbon for that perfect finishing touch.
The matching bolero jacket adds versatility to the outfit. It is perfect for cooler weather or air-conditioned venues. Both pieces feature the same shell fan stitch pattern and black contrast edging, so they coordinate perfectly.
The black trim throughout is not just decorative. It defines the edges beautifully and gives the set a polished, professional look that elevates it beyond a simple baby dress.
Skill Level and Time Commitment
This pattern is rated intermediate. You should feel comfortable with basic stitches and have completed at least one garment project before tackling this set. The construction involves working in rounds, managing color changes, and following stitch counts carefully.
Time estimate: The dress takes approximately 8 to 12 hours. The bolero adds another 4 to 6 hours. Your actual time will depend on your experience level and how quickly you work.
Finished Measurements
Dress:
Bolero:
Materials You Will Need
Yarn:
Recommended Yarn Options:
Hook: US size E-4 (3.5 mm) crochet hook
Notions:
Gauge
With MC and E-4 (3.5 mm) hook, in shell fan stitch pattern:
In single crochet (sc):
Gauge is critical for correct sizing. Please take the time to make a swatch before you begin. Adjust your hook size up or down as needed to match gauge.
Abbreviations and Stitch Definitions
Understanding the abbreviations will make following this crochet pattern much easier. Here is everything you need to know:
Special Stitches for This Pattern
Shell Fan Stitch
A shell fan consists of 5 double crochet stitches worked into the same stitch or space. This is what creates the beautiful scalloped texture throughout the skirt and bolero body.
To work a shell: Yarn over, insert hook into designated stitch, yarn over and pull up a loop, yarn over and pull through 2 loops on hook. Repeat 4 more times into the same stitch. You now have 5 dc in that point.
Picot Scallop (Edging)
1. Work 3 sc into the designated stitch or space
2. Chain 3
3. Slip stitch into the first of those 3 ch to form a picot loop
4. Continue to the next designated point and repeat
Reverse Single Crochet (Crab Stitch)
This creates a lovely corded edge. Work it without turning your work.
1. With RS facing, do not turn your work
2. Insert hook from front to back into the stitch to the RIGHT (working backward)
3. Yarn over and draw up a loop
4. Yarn over and pull through both loops on hook
5. Move one stitch further to the right and repeat
Important Pattern Notes
Before you begin, please read through these notes carefully:
1. The dress is worked in joined rounds from the neckline downward. The right side always faces you.
2. Join each round with a slip stitch to the first stitch unless otherwise instructed.
3. When changing colors, complete the last yarn over of the final stitch in the old color with the new color.
4. Chain 3 at the beginning of a double crochet round counts as the first dc throughout, unless stated otherwise.
5. Stitch counts at the end of each round appear in parentheses and reflect only working stitches, not turning chains.
6. Block the dress before attaching ribbon and brooch to avoid warping.
DRESS INSTRUCTIONS
Section 1: Neckline Foundation
With MC and E-4 hook, chain 72 and join with sl st to form a ring, being careful not to twist.
Round 1: Ch 1 (does not count as st), work 72 sc evenly around the ring, sl st to first sc to join. (72 sc)
Round 2: Ch 1, sc in each st around, sl st to join. (72 sc)
Place a stitch marker in the first stitch to track round beginnings throughout the yoke.
Section 2: Black Contrast Neckline Trim
Round 3: Drop MC to wrong side (do not cut), join CC. Ch 1, sc in each st around, sl st to first sc. (72 sc)
Round 4: With CC, ch 1, working in back loop only, sc in each st around, sl st to first sc. (72 sc)
Working Round 4 in the back loop creates a fold ridge that helps the neckline lay flat.
Round 5: With CC, ch 1, reverse sc (crab stitch) in each st around, sl st to join. (72 sc)
Cut CC, leaving a 6-inch tail. Pick up MC.
Section 3: Yoke Shaping
The yoke is worked in MC with increase rounds to shape the chest.
Round 6: With MC, ch 3 (counts as first dc), dc in next 6 sts, 2 dc in next st, (dc in next 7 sts, 2 dc in next st) 8 times, sl st to top of beg ch-3. (81 dc)
Round 7: Ch 3, dc in each st around, sl st to top of ch-3. (81 dc)
Round 8 (increase round): Ch 3, dc in next 8 sts, 2 dc in next st, (dc in next 8 sts, 2 dc in next st) 8 times, sl st to top of ch-3. (90 dc)
Round 9: Ch 3, dc in each st around, sl st to top of ch-3. (90 dc)
Round 10 (increase round): Ch 3, dc in next 8 sts, 2 dc in next st, (dc in next 8 sts, 2 dc in next st) 9 times, sl st to top of ch-3. (100 dc)
Round 11: Ch 3, dc in each st around, sl st to top of ch-3. (100 dc)
Round 12 (increase round): Ch 3, dc in next 9 sts, 2 dc in next st, (dc in next 9 sts, 2 dc in next st) 9 times, sl st to top of ch-3. (110 dc)
Round 13: Ch 3, dc in each st around, sl st to top of ch-3. (110 dc)
Section 4: Black Stripe Detail on Yoke
Round 14: Drop MC to WS (do not cut). Join CC. Ch 1, sc in each st around, sl st to first sc. (110 sc)
Round 15: With CC, ch 3 (counts as dc), dc in each st around, sl st to top of ch-3. (110 dc)
Round 16: With CC, ch 1, sc in each st around, sl st to first sc. (110 sc)
Cut CC. Pick up MC.
Section 5: Empire Waist Division and Ribbon Channel
Round 17: With MC, ch 1, sc in each st around, sl st to first sc. (110 sc)
Round 18 (eyelet round for ribbon): Ch 3, sk 1 st, dc in next st, (ch 1, sk 1 st, dc in next st) to last st, ch 1, sl st to top of ch-3. (55 dc, 55 ch-1 sps)
This creates the ribbon channel where you will thread the satin ribbon later.
Round 19: With MC, ch 1, sc in each dc and each ch-1 sp around, sl st to first sc. (110 sc)
Round 20: With MC, ch 3, dc in each st around, sl st to top of ch-3. (110 dc)
Section 6: Armhole Division
Now you will divide the work into front and back for armhole openings. The front and back each have 45 stitches, and 10 stitches on each side are skipped for armholes.
Mark stitch 1 as beginning of right back. Count 45 sts for the back, place marker. Count 10 sts for the right armhole, place marker. Count 45 sts for the front, place marker. Remaining 10 sts equal the left armhole.
Round 21 (armhole bridge round): Ch 3 (counts as dc), dc in next 44 sts (45 sts total for back including ch-3), ch 10 (bridge over right armhole), sk 10 sts, dc in next 45 sts (front), ch 10 (bridge over left armhole), sk 10 sts, sl st to top of beg ch-3. (90 dc + 20 ch = 110 total sts)
Round 22: Ch 3, dc across 45 back sts, dc in each of 10 ch of right armhole bridge, dc across 45 front sts, dc in each of 10 ch of left armhole bridge, sl st to top of ch-3. (110 dc)
Checkpoint: After completing Round 22, the yoke should measure approximately 5 to 5.5 inches (12.5 to 14 cm) from the top of the neckline. The circumference should be approximately 17 inches (43 cm).
Section 7: Skirt Preparation
The skirt uses a shell fan stitch on a multiple of 6 stitches. The current stitch count of 110 must be adjusted to 114.
Round 23 (skirt setup, increase round): Ch 1, sc in first 28 sts, 2 sc in next st, sc in next 27 sts, 2 sc in next st, sc in next 27 sts, 2 sc in next st, sc in next 26 sts, 2 sc in next st, sl st to first sc. (114 sc)
Section 8: Skirt Shell Fan Pattern
Now comes the beautiful shell stitch pattern that creates all that gorgeous texture.
Round A (shell round): Ch 3, sk 2 sts, 5 dc in next st (shell made), sk 2 sts, sc in next st, (sk 2 sts, 5 dc in next st, sk 2 sts, sc in next st) to end, sl st to top of beg ch-3. (19 shells, 19 sc)
Round B (offset round): Ch 3, 2 dc in same st (half shell start), sc in 3rd dc of next shell (center dc), (5 dc in sc of previous round, sc in 3rd dc of next shell) 18 times, 2 dc in first sc of round, sl st to top of beg ch-3. (19 shells, 19 sc)
This offset creates the brick-lay texture visible in the skirt.
Rounds 24-36: Alternate Round A and Round B as follows:
Checkpoint: After Round 36, the skirt section should measure approximately 6.5 to 7 inches (16.5 to 18 cm).
Section 9: Hem Scallop Edging
Round 37 (hem base, MC): Ch 1, sc in the sc between shells, ch 2, sc in center dc of next shell, ch 2, (sc in sc between shells, ch 2, sc in center dc of shell, ch 2) rep to end, sl st to first sc. (38 sc, 38 ch-2 sps)
Round 38 (scallop edging, CC): Join CC in any sc. Ch 1. Working into the ch-2 spaces and sc: (sc, hdc, 3 dc, hdc, sc) in each ch-2 sp across, sl st in sc between groups, sl st to first sc of round. (19 large scallops)
Round 39 (picot accent, CC): Working across the top arch of each scallop, sl st to center dc of each scallop, ch 3, sl st back into same dc (picot made), continue to next scallop center. (19 picots)
Cut CC, fasten off. Weave in end.
Section 10: Armhole Trim
Work around each armhole opening.
Round 1: Join CC at underarm center, ch 1, work 36 sc evenly around the armhole opening, sl st to first sc. (36 sc)
Round 2: Ch 1, reverse sc in each st around, sl st to join. (36 sc)
Fasten off. Weave in ends. Repeat for second armhole.
Section 11: Ribbon and Brooch
Thread the 18-inch satin ribbon through the eyelet round (Round 18) by weaving it in and out of the ch-1 spaces all the way around. Center the bow at the front of the dress. Tie a bow and trim the ribbon ends at a slight diagonal to prevent fraying.
Attach the pearl bow brooch to the center front just below the bow, securing it through the crochet fabric with the brooch backing.
BOLERO JACKET INSTRUCTIONS
Section 1: Back Panel
With MC, ch 45.
Foundation row: Sc in 2nd ch from hook, sc in each ch to end. Turn. (44 sc)
Row 1: Ch 3 (counts as first edge dc), sk 2, 5 dc in next st (shell), sk 2, sc in next st, (sk 2, 5 dc in next st, sk 2, sc in next st) 6 times, dc in last st. Turn. (7 shells, 7 sc, 2 edge dc)
Row 2: Ch 1, sc in first dc, sc in each dc of the first shell and in each sc and each dc of every shell across, sc in top of ch-3. Turn. (44 sc)
Row 3: Ch 1, sc in first st, (sk 2, 5 dc in next st, sk 2, sc in next st) 7 times, sc in last st. Turn. (7 shells, 9 sc)
Row 4: Ch 1, sc in each st across. Turn. (44 sc)
Work Rows 1 through 4 a total of 3 times (12 rows total from foundation).
Row 13: Ch 1, sc in each st across. Turn. (44 sc)
Row 14: Ch 1, sc in each st across. (44 sc)
Fasten off. Mark center 16 sts for back neckline. Mark 14 sts on each side for shoulder attachment.
Section 2: Front Panels (Make 2)
With MC, ch 21.
Foundation row: Sc in 2nd ch from hook to end. Turn. (20 sc)
Row 1: Ch 3 (edge dc), sk 2, 5 dc in next st (shell), sk 2, sc in next, (sk 2, 5 dc in next st, sk 2, sc in next) 2 times, dc in last st. Turn. (3 shells, 7 sc, 2 edge dc)
Row 2: Ch 1, sc across all sts. Turn. (20 sc)
Row 3: Ch 1, sc in first st, (sk 2, 5 dc in next st, sk 2, sc in next st) 3 times, sc in last st. Turn. (3 shells, 7 sc)
Row 4: Ch 1, sc across. Turn. (20 sc)
Work Rows 1 through 4 a total of 3 times (12 rows total).
Row 13: Ch 1, sc across. Turn. (20 sc)
Row 14: Ch 1, sc across. (20 sc)
Fasten off. Make second front panel identically.
Section 3: Join Shoulders
Place back panel WS up on a flat surface. Place one front panel RS down on the left shoulder of the back, aligning the 14 shoulder sts of the back with the 14 sts of the front panel outer edge. Using MC and a yarn needle, whipstitch or sl st the 14 shoulder sts together. Repeat on the right side.
Section 4: Sleeves (Make 2)
With MC, join yarn at underarm point of one armhole opening.
Round 1: Ch 1, work 30 sc evenly around the armhole opening, sl st to first sc. (30 sc)
Round 2: Ch 3, dc in each st around, sl st to top of ch-3. (30 dc)
Round 3 (shell round): Ch 3, sk 2, 5 dc in next, sk 2, sc in next, (sk 2, 5 dc in next, sk 2, sc in next) 4 times, sl st to top of ch-3. (5 shells, 5 sc)
Round 4: Ch 1, sc in each st around, sl st to first sc. (30 sc)
Round 5 (edging, CC): Join CC, ch 1, reverse sc in each st around, sl st to join. (30 sc)
Fasten off. Repeat for second sleeve.
Section 5: Bolero Edging
Join CC at bottom right front corner. Work 1 round of sc evenly around entire bolero edge (bottom, up right front, around neckline, down left front, across bottom). Join with sl st.
Work 1 round of reverse sc around entire edge. Fasten off.
Attach button at center top of right front. The button passes through a natural ch-sp in the edging on the left front.
Finishing Your Baby Dress Set
Blocking: Wet block both pieces by soaking them in lukewarm water, gently squeezing out excess water, and pinning them to a blocking mat. Shape the shells and scallops with your fingers. Allow to dry completely before adding the ribbon and brooch.
Weaving Ends: Use your yarn needle to weave all tails securely through the wrong side of the fabric, especially at color changes.
Size Customization Tips
To adjust for different sizes:
You Did It!
I hope you have as much fun making this beautiful baby dress and bolero set as I did designing it. The combination of the elegant shell stitch pattern, the crisp black and white color scheme, and all those lovely finishing details creates a truly special outfit that any baby would be lucky to wear.
Thank you so much for choosing this pattern for your next project. I would absolutely love to see your finished set! Tag me on Instagram or share a photo in my Facebook group. Seeing your creations honestly makes my day.
If you found this baby dress crochet pattern helpful, I would be so grateful if you saved it to your Pinterest boards so you can find it easily later and so other crocheters can discover it too. And please drop a comment below if you make this set. I read every single one and love hearing about your projects!
