
Crochet lace dresses look intimidating. I get it. All those intricate pineapple motifs, the fitted bodice, the structured bust cups. Your brain is probably screaming "nope, not for me" right now.
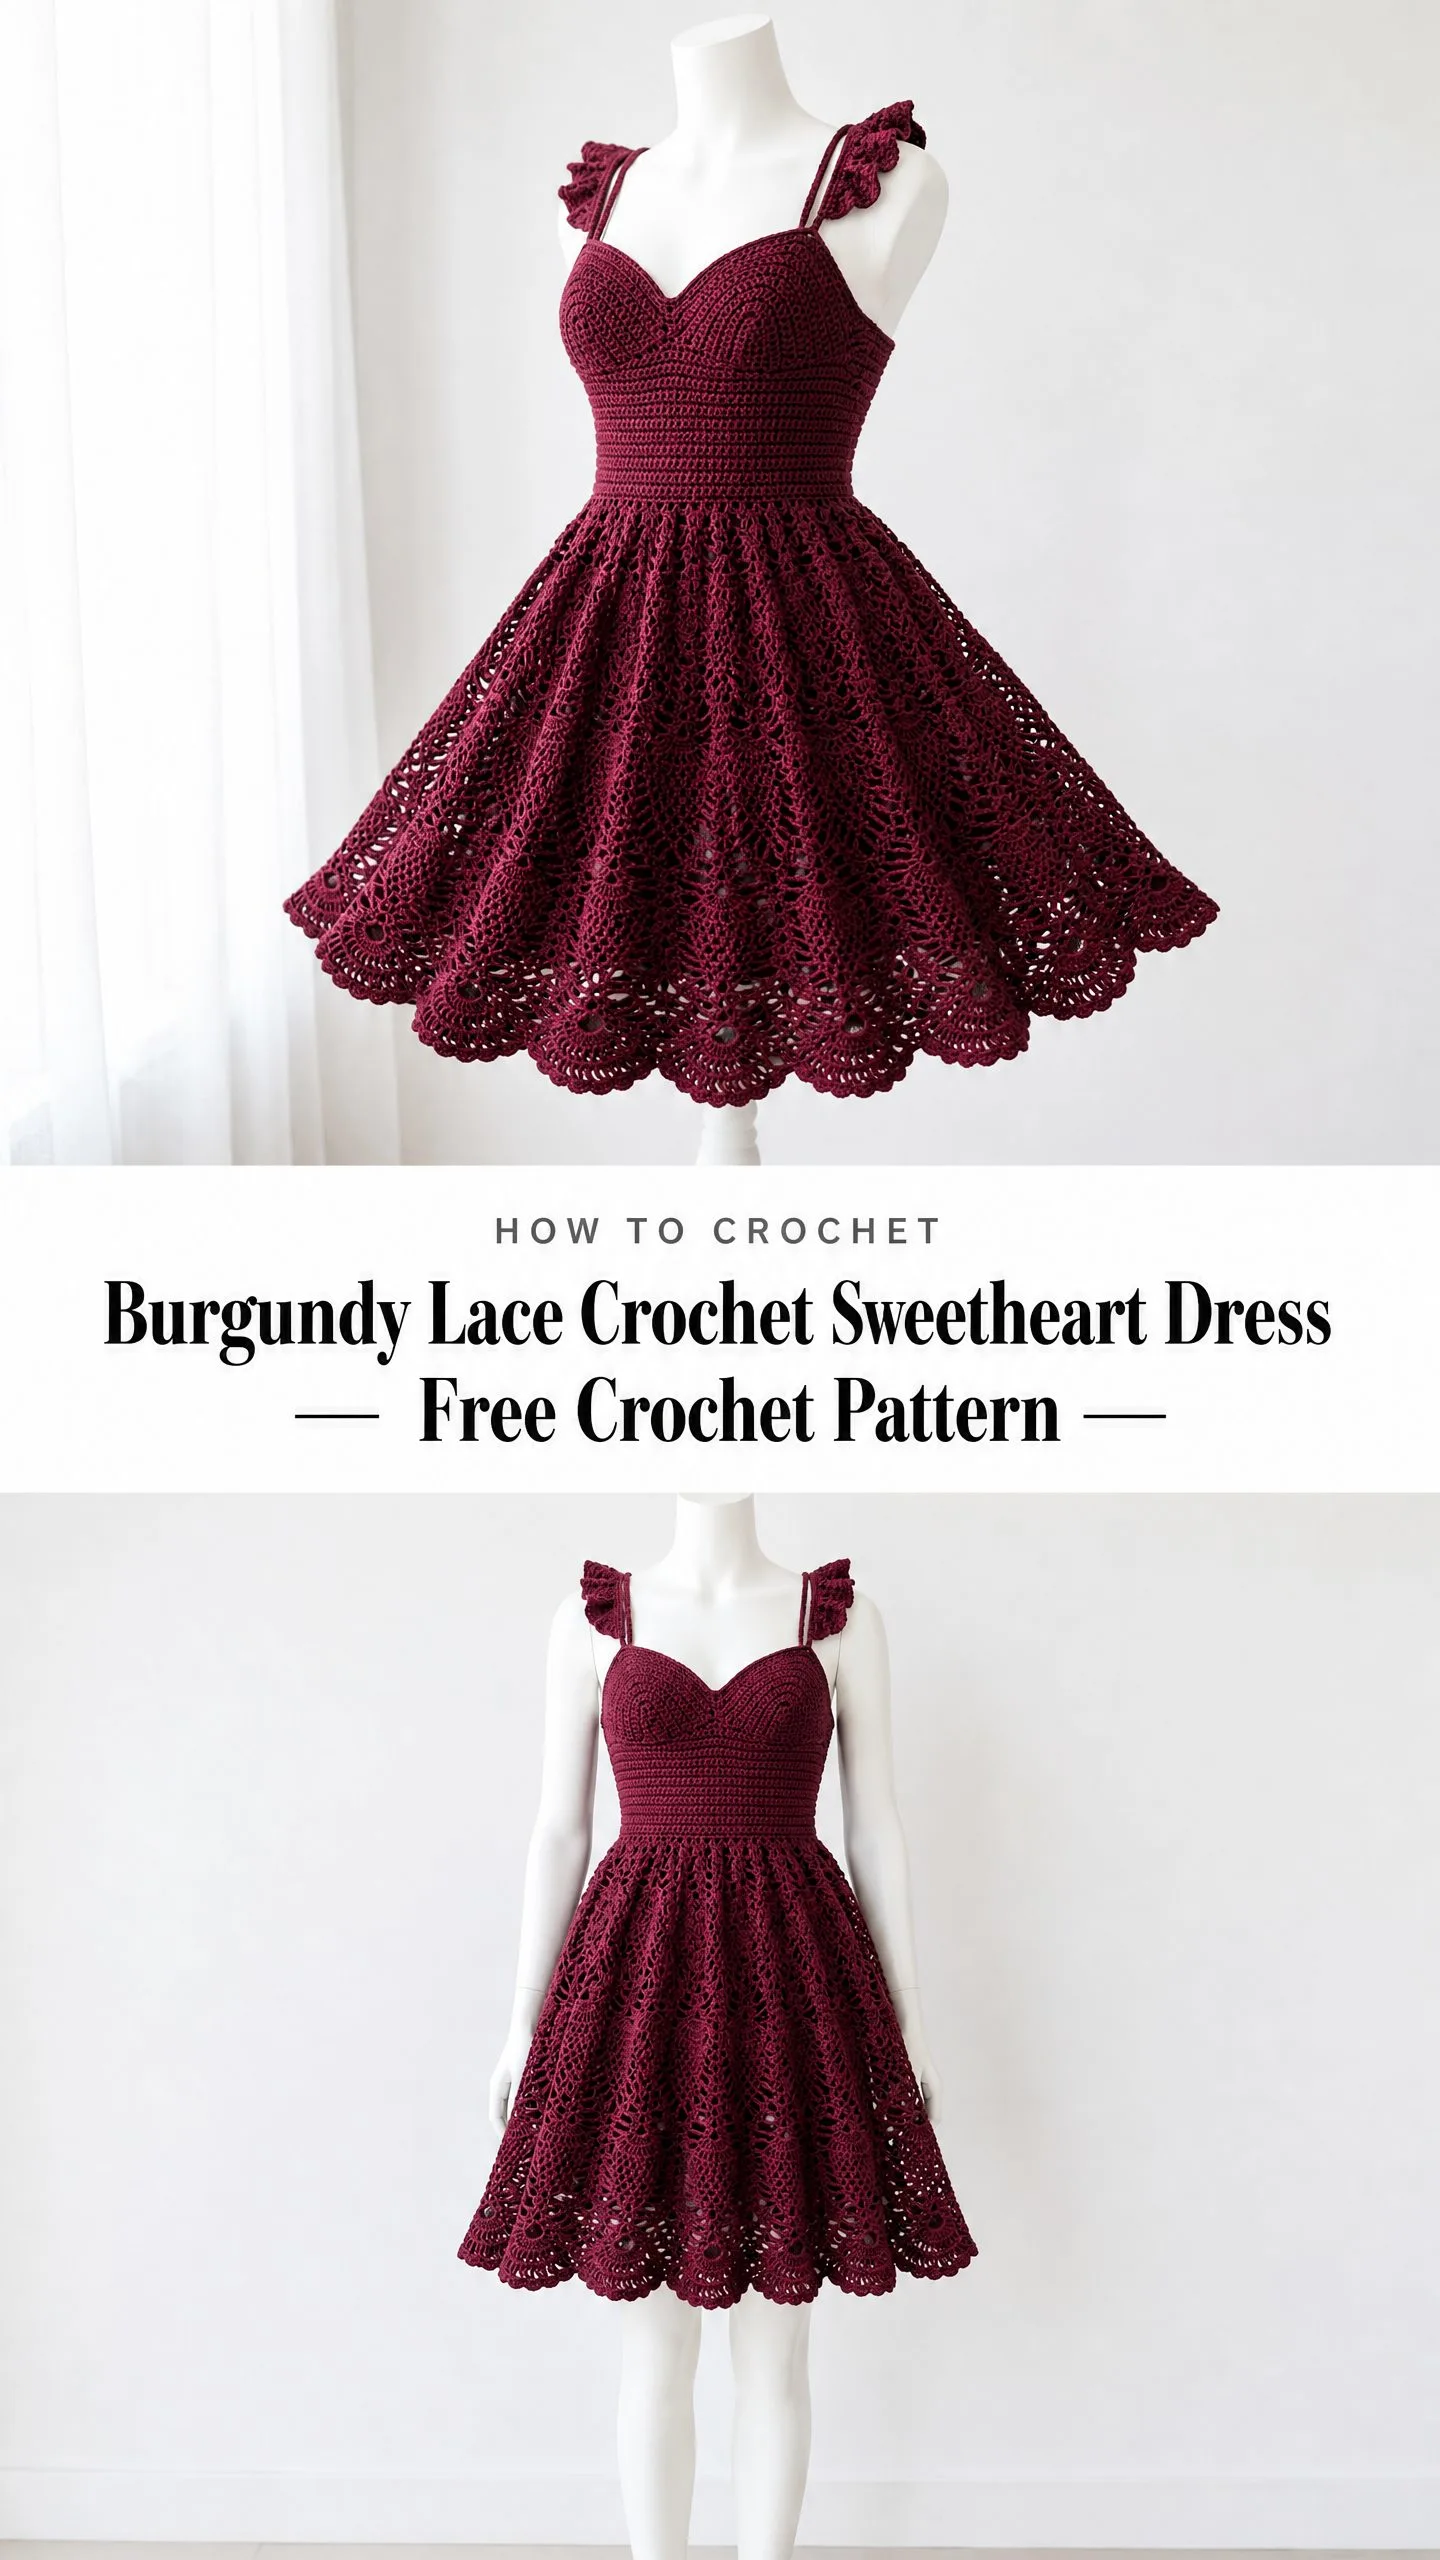
But here’s the truth. If you break this dress down into its individual components, each section uses stitches you already know. Single crochet for the bodice. Double crochet for the shells. Chain spaces for the lace. That’s genuinely it. The magic happens when these simple stitches combine into something that looks like it belongs on a runway.
This burgundy sweetheart dress is absolutely an advanced project. I won’t pretend otherwise. But advanced doesn’t mean impossible. It means you need patience, you need to trust the process, and you need to check your stitch counts religiously. If you’ve completed a couple of fitted garments and tackled at least one lace project before, you can absolutely make this dress. Let me walk you through every single step.
About This Stunning Crochet Dress Pattern
This dress features everything you’d want in a statement piece. A structured sweetheart bodice with built-in bust cups gives you that romantic neckline. A fitted ribbed waistband cinches everything in beautifully. Flutter ruffle straps add a playful feminine touch. And that voluminous A-line skirt? It’s worked in an expanding pineapple lace motif that opens up gorgeously after blocking.
The entire dress is worked in a single deep burgundy or wine color. The construction flows from top to bottom, starting with the bust cups worked flat, then joining everything to work the bodice, waistband, and skirt continuously in the round. The straps are made separately and attached at the end.
Skill Level: Advanced
Time Estimate: Approximately 40 to 60 hours for an experienced crocheter. Allow extra time for blocking, which is essential for the lace skirt to reach its full potential.
Finished Measurements
This pattern is written for a size Small/Medium, fitting US dress sizes 4 to 8.
Materials You’ll Need
Yarn: Approximately 1,400 to 1,600 yards (1,280 to 1,460 meters) of DK weight (CYCA 3) cotton or cotton-blend yarn in deep burgundy or wine.
Recommended Yarn Options:
Hooks:
Notions:
Substitution Note: Choose a smooth, plied cotton or cotton-blend DK yarn with good stitch definition. Avoid fuzzy, bouclé, or highly stretchy yarns. The lace skirt relies on the yarn releasing with blocking, and cotton fibers block beautifully.
Gauge (Please Don’t Skip This)
I know checking gauge feels tedious. But for a fitted garment like this, it’s absolutely essential. A difference of even half a stitch per inch will change your finished bust circumference by 1 to 2 inches.
With E-4 hook in single crochet:
20 stitches and 24 rows = 4 inches (10 cm)
With F-5 hook in pineapple lace pattern:
One pineapple repeat (approximately 18 stitches wide and 12 rows tall after blocking) = approximately 3.5 inches (9 cm) wide and 4.5 inches (11.5 cm) tall
Work a swatch of at least 5 inches by 5 inches in both stitch patterns. Wash and block your swatch as you will the finished piece, then measure before proceeding.
Abbreviations for This Crochet Pattern
Special Stitches Explained
Shell Stitch: Work 5 double crochet (dc) stitches into the same stitch or space. This creates a fan-shaped cluster that’s prominent throughout the skirt.
V-Stitch: Work (dc, ch 2, dc) all into the same stitch or space. Creates a V shape that allows the fabric to expand.
Picot: Chain 3, then slip stitch into the third chain from hook (the first chain you made). This creates a decorative point along the hem.
Ruffle Stitch: Work (sc, hdc, dc, hdc, sc) all into the same stitch. Creates a small petal used on the flutter straps.
Pattern Instructions
Part 1: Bust Cups (Make 2, Worked Flat)
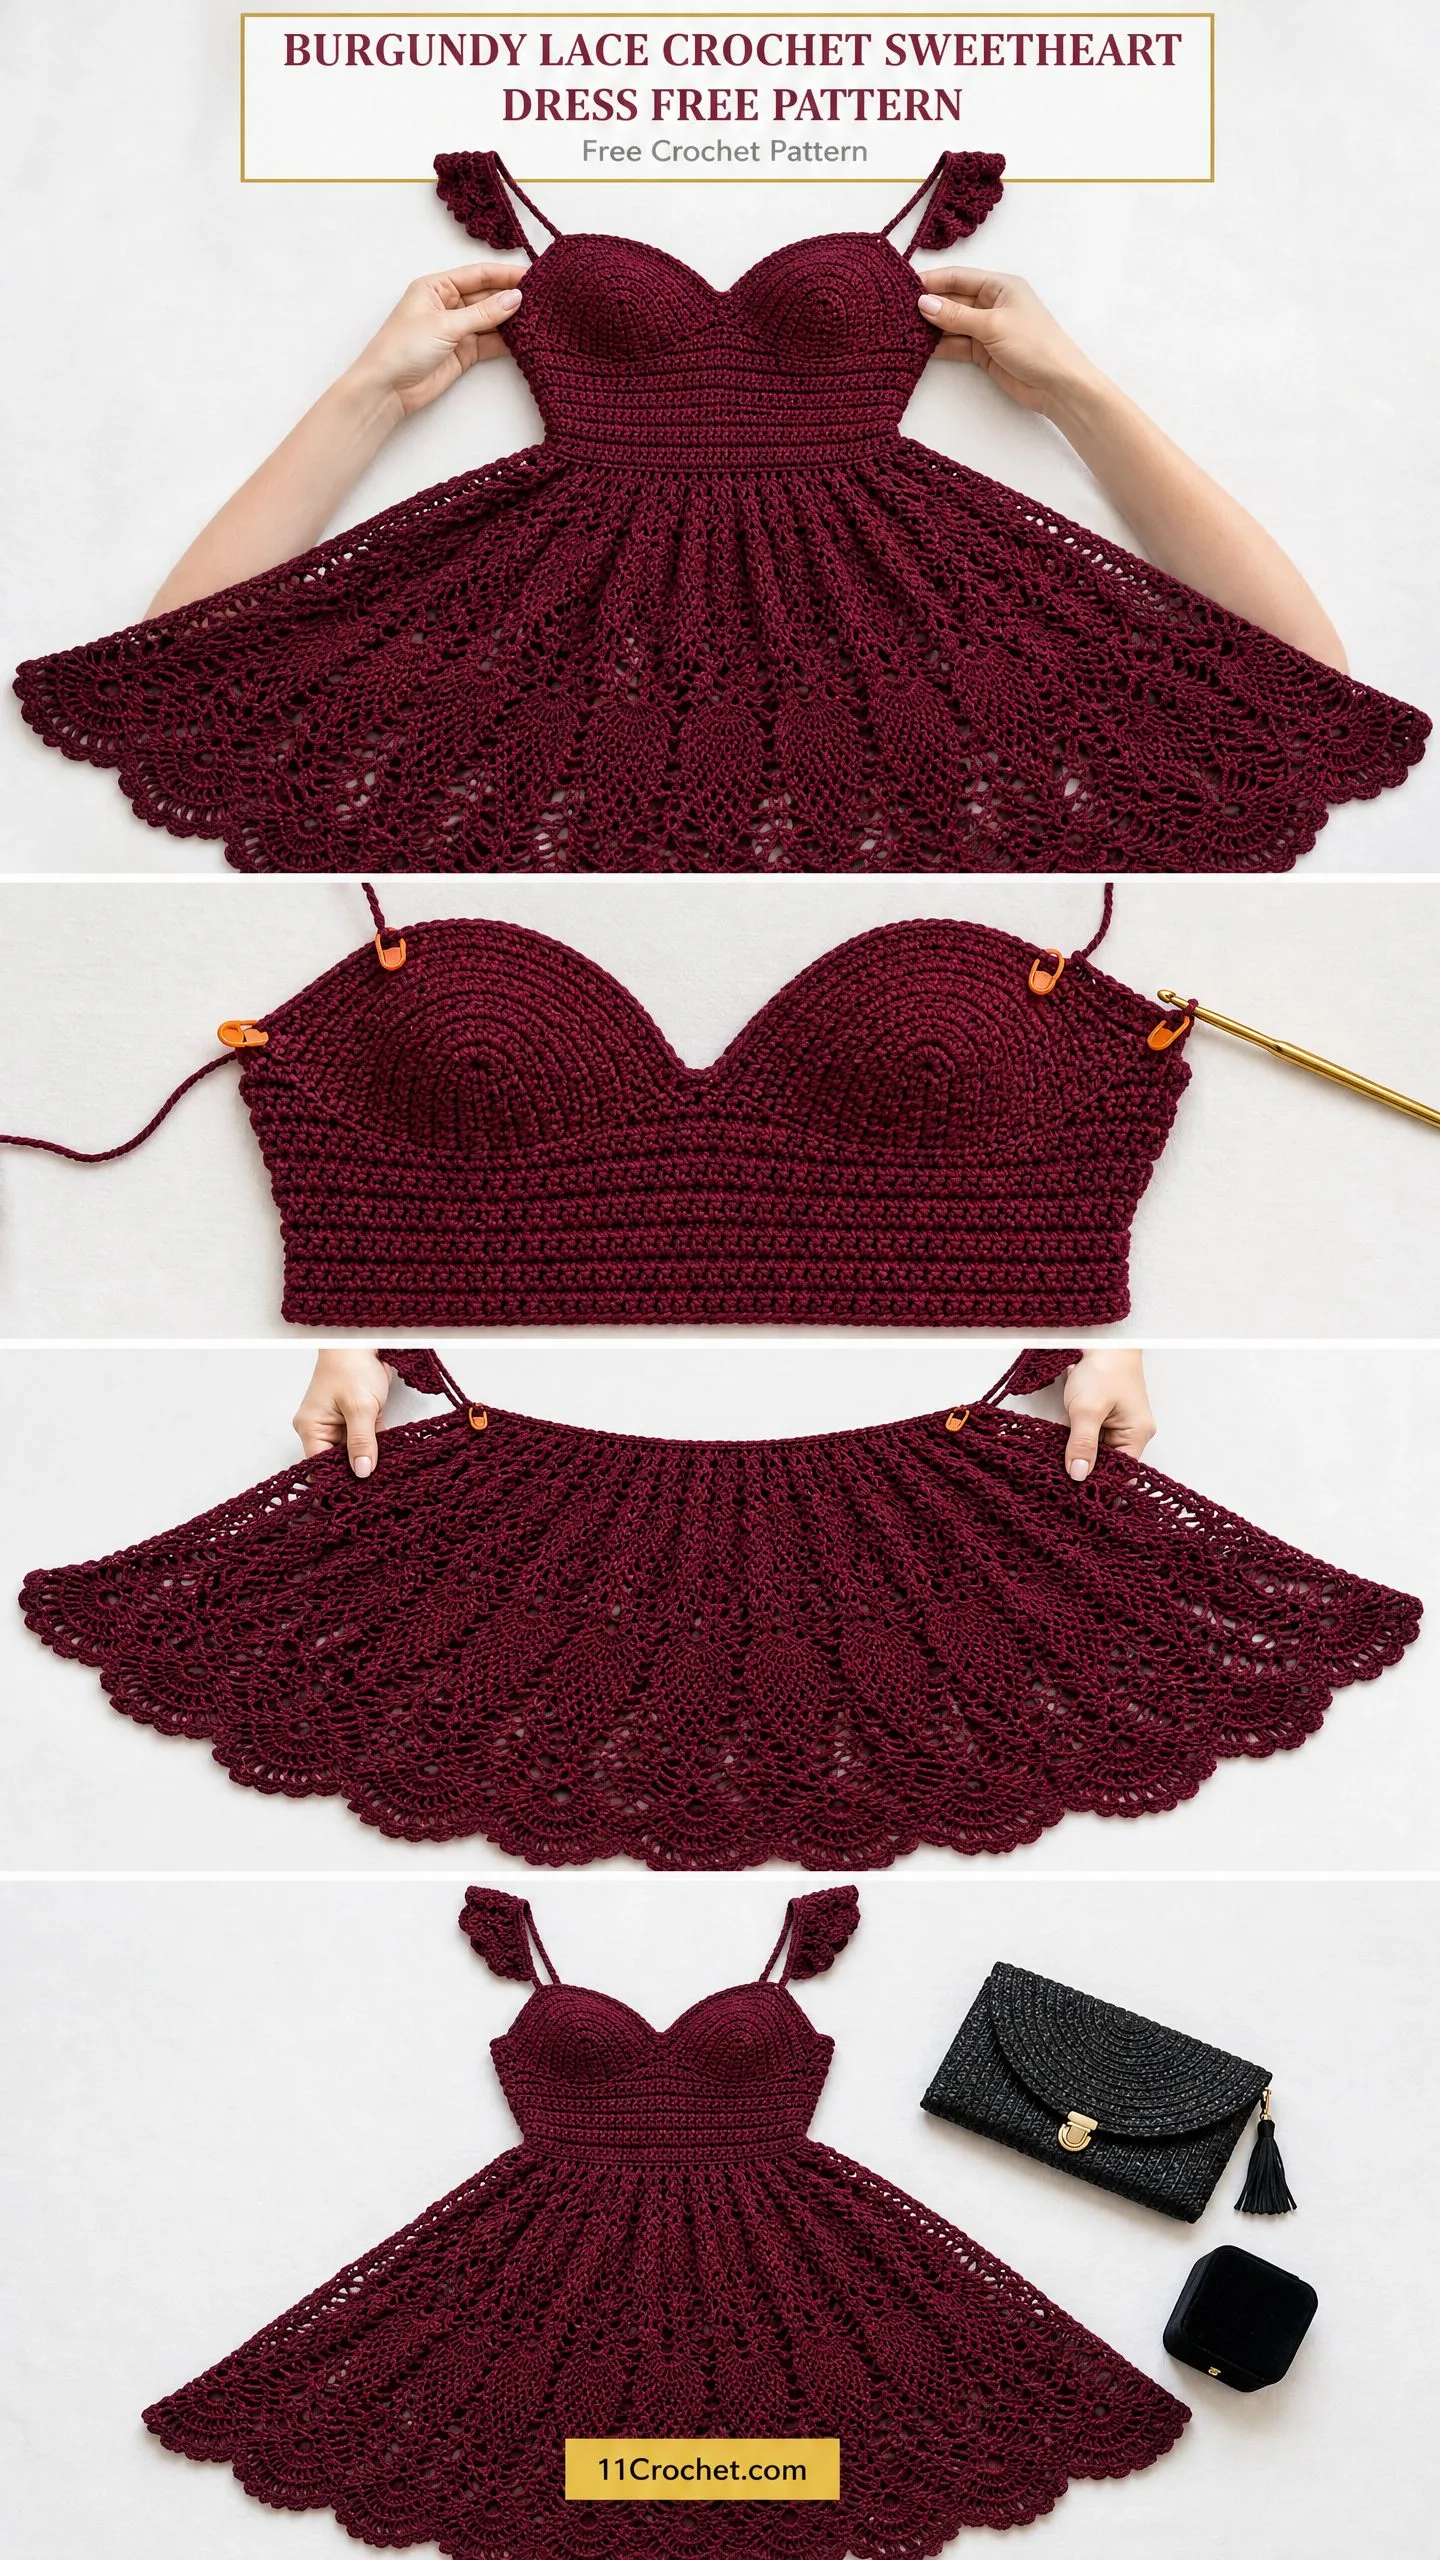
The bust cups create the sweetheart shape. Each cup is a half-oval worked in increasing rows. You’ll make two identical cups, then join them to form the V point of the sweetheart neckline.
Using your E-4 hook, chain 14.
Row 1 (WS): Sc in 2nd ch from hook and in each ch across. Turn. (13 sc)
Row 2 (RS): Ch 1, 2 sc in first st, sc in each st to last st, 2 sc in last st. Turn. (15 sc)
Row 3: Ch 1, 2 sc in first st, sc in each st to last st, 2 sc in last st. Turn. (17 sc)
Row 4: Ch 1, 2 sc in first st, sc in each st to last st, 2 sc in last st. Turn. (19 sc)
Row 5: Ch 1, sc in each st across. Turn. (19 sc)
Row 6: Ch 1, 2 sc in first st, sc in each st to last st, 2 sc in last st. Turn. (21 sc)
Row 7: Ch 1, sc in each st across. Turn. (21 sc)
Row 8: Ch 1, 2 sc in first st, sc in each st to last st, 2 sc in last st. Turn. (23 sc)
Row 9: Ch 1, sc in each st across. Turn. (23 sc)
Row 10: Ch 1, 2 sc in first st, sc in each st to last st, 2 sc in last st. Turn. (25 sc)
Row 11: Ch 1, sc in each st across. Turn. (25 sc)
Row 12: Ch 1, 2 sc in first st, sc in each st to last st, 2 sc in last st. Turn. (27 sc)
Row 13: Ch 1, sc in each st across. Turn. (27 sc)
Row 14: Ch 1, 2 sc in first st, sc in each st to last st, 2 sc in last st. Turn. (29 sc)
Row 15: Ch 1, sc in each st across. Turn. (29 sc)
Row 16: Ch 1, sc2tog, sc in each st to last 2 sts, sc2tog. Turn. (27 sc)
Row 17: Ch 1, sc2tog, sc in each st to last 2 sts, sc2tog. Turn. (25 sc)
Row 18: Ch 1, sc in each st across. Do not turn. Do not fasten off.
Cup Edging: Work 1 round of sc evenly around the entire perimeter of the cup, working approximately 1 sc per row along the side edges and 1 sc per st along the top and bottom. Join with sl st to first sc. Fasten off and leave a long tail for seaming.
Make a second cup identically.
Cup Joining: Hold both cups with right sides facing you and the flat bottom edges pointing down. Using a yarn needle and the long tail, whip stitch the two inner straight edges together for approximately 6 rows from the bottom, creating the V point of the sweetheart. Leave the upper 8 to 10 rows open so the cups flare outward and upward.
Part 2: Bodice (Worked in the Round)
After joining the cups, you’ll work in continuous rounds around the full perimeter.
Setup Round: Using E-4 hook, join yarn at the right side seam point. Work sc evenly around the entire perimeter of the joined cup structure. The goal is 160 sc total around the perimeter. Pm in first st of this round. (160 sc)
Rounds 1 to 4: Sc in each st around. (160 sc each round)
Round 5 (decrease round): (Sc in 18 sts, sc2tog) 8 times around. (152 sc)
Rounds 6 and 7: Sc in each st around. (152 sc)
Round 8 (decrease): (Sc in 17 sts, sc2tog) 8 times around. (144 sc)
Rounds 9 and 10: Sc in each st around. (144 sc)
Round 11 (decrease): (Sc in 16 sts, sc2tog) 8 times around. (136 sc)
Round 12: Sc in each st around. (136 sc)
Round 13 (decrease): (Sc in 15 sts, sc2tog) 8 times around. (128 sc)
Round 14: Sc in each st around. (128 sc)
Round 15 (decrease): (Sc in 14 sts, sc2tog) 8 times around. (120 sc)
Rounds 16 and 17: Sc in each st around. (120 sc)
Round 18 (decrease): (Sc in 13 sts, sc2tog) 8 times around. (112 sc)
Round 19: Sc in each st around. (112 sc)
Round 20 (decrease): (Sc in 12 sts, sc2tog) 8 times around. (104 sc)
Checkpoint: After Round 20, the bodice should measure approximately 4.5 to 5 inches from the top of the cup setup round. The circumference should be approximately 21 inches unstretched.
Rounds 21 and 22: Sc in each st around. (104 sc)
Round 23 (decrease): (Sc in 11 sts, sc2tog) 8 times around. (96 sc)
Round 24: Sc in each st around. (96 sc)
Round 25 (decrease): (Sc in 10 sts, sc2tog) 8 times around. (88 sc)
Rounds 26 to 28: Sc in each st around. (88 sc)
Do not fasten off. Continue to waistband.
Part 3: Waistband (Worked in the Round)
The waistband uses back loop only (BLO) single crochet to create horizontal ridges.
Rounds 1 to 3: Ch 1, BLO sc in each st around. (88 sc each round)
Round 4 (eyelet round): Ch 1, (sc in 2 sts, ch 2, sk 2 sts) 22 times around. Join with sl st to first sc. (22 ch-2 sps plus 44 sc)
Round 5: Ch 1, sc in each sc and 2 sc in each ch-2 sp around. (88 sc)
Rounds 6 to 8: Ch 1, BLO sc in each st around. (88 sc each round)
Checkpoint: After the waistband, the piece from cup top to end of waistband should measure approximately 9.5 to 10 inches.
Do not fasten off. Sl st to join, then begin skirt.
Part 4: Skirt Increase Foundation
Switch to your F-5 hook.
Increase Round: Ch 3 (counts as first dc), dc in same st, (dc in 5 sts, 2 dc in next st) 14 times, dc in each remaining st to end, adjusting to reach exactly 216 dc total. Join with sl st to top of ch-3. (216 dc)
Skirt Mesh Setup Round: Ch 4 (counts as dc plus ch 1), (sk 1 dc, dc in next dc, ch 1) around, ending sl st to 3rd ch of beg ch-4. (108 dc plus 108 ch-1 sps)
Part 5: Pineapple Lace Skirt
This is where the magic happens. The pineapple motif creates the beautiful lace pattern that fans out dramatically. Each round builds on the last.
Pineapple Round 1: Ch 1. Working into the ch-1 mesh: (sc in first dc, ch 5, sk 2 mesh units, shell of 5 dc in next dc, ch 5, sk 2 mesh units, sc in next dc, ch 7, sk 2 mesh units, sc in next dc, ch 5, sk 2 mesh units, shell of 5 dc in next dc, ch 5, sk 2 mesh units, sc in next dc) rep 12 times around. Join with sl st to first sc. (12 ch-7 arches established)
Pineapple Round 2: Ch 4 (counts as dc plus ch 1). (Dc in first sc, ch 1, shell in 3rd dc of first shell, ch 1, dc in last sc of that shell unit, ch 5, 9 dc in ch-7 arch, ch 5, dc in sc, ch 1, shell in 3rd dc of second shell, ch 1) rep 12 times. Join.
Pineapple Round 3: Ch 3. (Shell in 3rd dc of first shell, ch 2, dc in ch-5 sp, ch 2, sc in first dc of pineapple, (ch 1, sc in next dc) 8 times, ch 2, dc in ch-5 sp, ch 2, shell in 3rd dc of second shell, ch 2, dc in sp between repeats, ch 2) rep 12 times. Join.
Continue working Pineapple Rounds 4 through 12 following the established pattern, with each round decreasing the pineapple body by working into fewer chain spaces while the shells expand outward.
After Round 12 Checkpoint: The skirt from the waistband should measure approximately 13 to 14 inches.
Pineapple Round 13: Begin the second tier of pineapples between the original positions. Ch 1. (Sc in 3rd dc of first shell, ch 5, shell in dc, ch 5, sc in 3rd dc of second shell, ch 7, sc in center dc, ch 5, shell in dc, ch 5) rep 12 times. Join.
Pineapple Rounds 14 to 24: Work Rounds 2 through 12 again into the new arch positions.
Final Checkpoint: After the second pineapple tier, the skirt should measure approximately 20 to 21 inches from the waistband.
Part 6: Hem Scallop Border
Border Round 1: Ch 1. Sc evenly across the final pineapple round, working into each stitch and chain space to achieve 288 sc. Join with sl st to first sc. (288 sc)
Border Round 2: Ch 1. (Sk 2 sc, shell of 5 dc in next sc, sk 2 sc, sc in next sc) 48 times around. Join. (48 shells plus 48 sc)
Border Round 3: Sl st into first 2 dc of first shell. Ch 3. (4 dc in same center dc, ch 2, sc in sc between shells, ch 2) 48 times. Join.
Border Round 4: Sl st to center dc of first shell. Ch 3. (4 dc in same center dc, ch 3, sc in ch-2 sp, picot, sc in next ch-2 sp, ch 3) 48 times. Join.
Border Round 5 (final hem scallop): Sl st to center dc of first shell. Ch 3. (4 dc in same dc, ch 1, picot, ch 1, sc in sc between shells) 48 times. Join. Fasten off.
Part 7: Flutter Straps (Make 2)
Strap Cord: Using E-4 hook, chain 80.
Row 1: Sc in 2nd ch from hook and in each ch across. (79 sc)
Row 2: Ch 1, turn. Sc in each sc across. (79 sc)
Fasten off, leaving long tails for attachment. Make a second cord identically.
Strap Flutter: Using E-4 hook, chain 16.
Row 1: Sc in 2nd ch from hook and in each ch across. Turn. (15 sc)
Row 2: Ch 1. Work ruffle stitch (sc, hdc, dc, hdc, sc) in each sc across. Turn.
Row 3: Ch 1. Working into the back loops of Row 1, sc in each of the 15 BLO sts. Turn. (15 sc)
Row 4: Rep Row 2.
Fasten off. Make a second flutter piece identically.
Assembly: Fold each cord in half lengthwise and whip stitch the long edges together to form a narrow double cord. Attach the flutter pieces to the shoulder area. Sew straps securely to the bodice at both front and back.
Finishing and Blocking
Weave in all ends securely. For the lace skirt to reach its full potential, wet blocking is essential. Soak your finished dress in lukewarm water with a small amount of wool wash or gentle detergent. Gently squeeze out excess water without wringing. Lay flat on blocking mats and pin out the hem scallops, stretching the lace to open up the pineapple motifs. Allow to dry completely before unpinning.
If using the optional ribbon, thread it through the eyelet round at the waistband and tie at the back for an adjustable fit.
Tips for Success
Take your time with this crochet tutorial. The pineapple lace section is much harder to frog once several rounds are complete, so check your stitch count at every checkpoint. When in doubt, count again.
The bodice is intentionally snug before finishing because the waistband and skirt add stretch. Trust the measurements.
If you’re nervous about starting the lace section, practice one pineapple repeat on scrap yarn first. Once you understand how the motif builds, the full skirt becomes rhythmic and almost meditative.
I really hope you love making this burgundy lace sweetheart dress as much as I loved designing it. It’s a project that takes time and attention, but the finished result is absolutely worth every stitch. If you make this dress, I would genuinely love to see it. Share your photos on Instagram or in our Facebook group.
Save this pattern to your Pinterest boards so you can find it when you’re ready to start. And please drop a comment below if you give it a try. I love hearing about your projects and seeing how you make each pattern your own.
