
THIS is the statement piece you have been waiting to make. I am not exaggerating when I say this blue sunburst granny square maxi dress is one of the most STUNNING crochet garments you will ever create with your own two hands. Yes, it takes time. Yes, it requires patience. But the result? A head-turning, floor-length masterpiece that looks like it belongs on a runway.
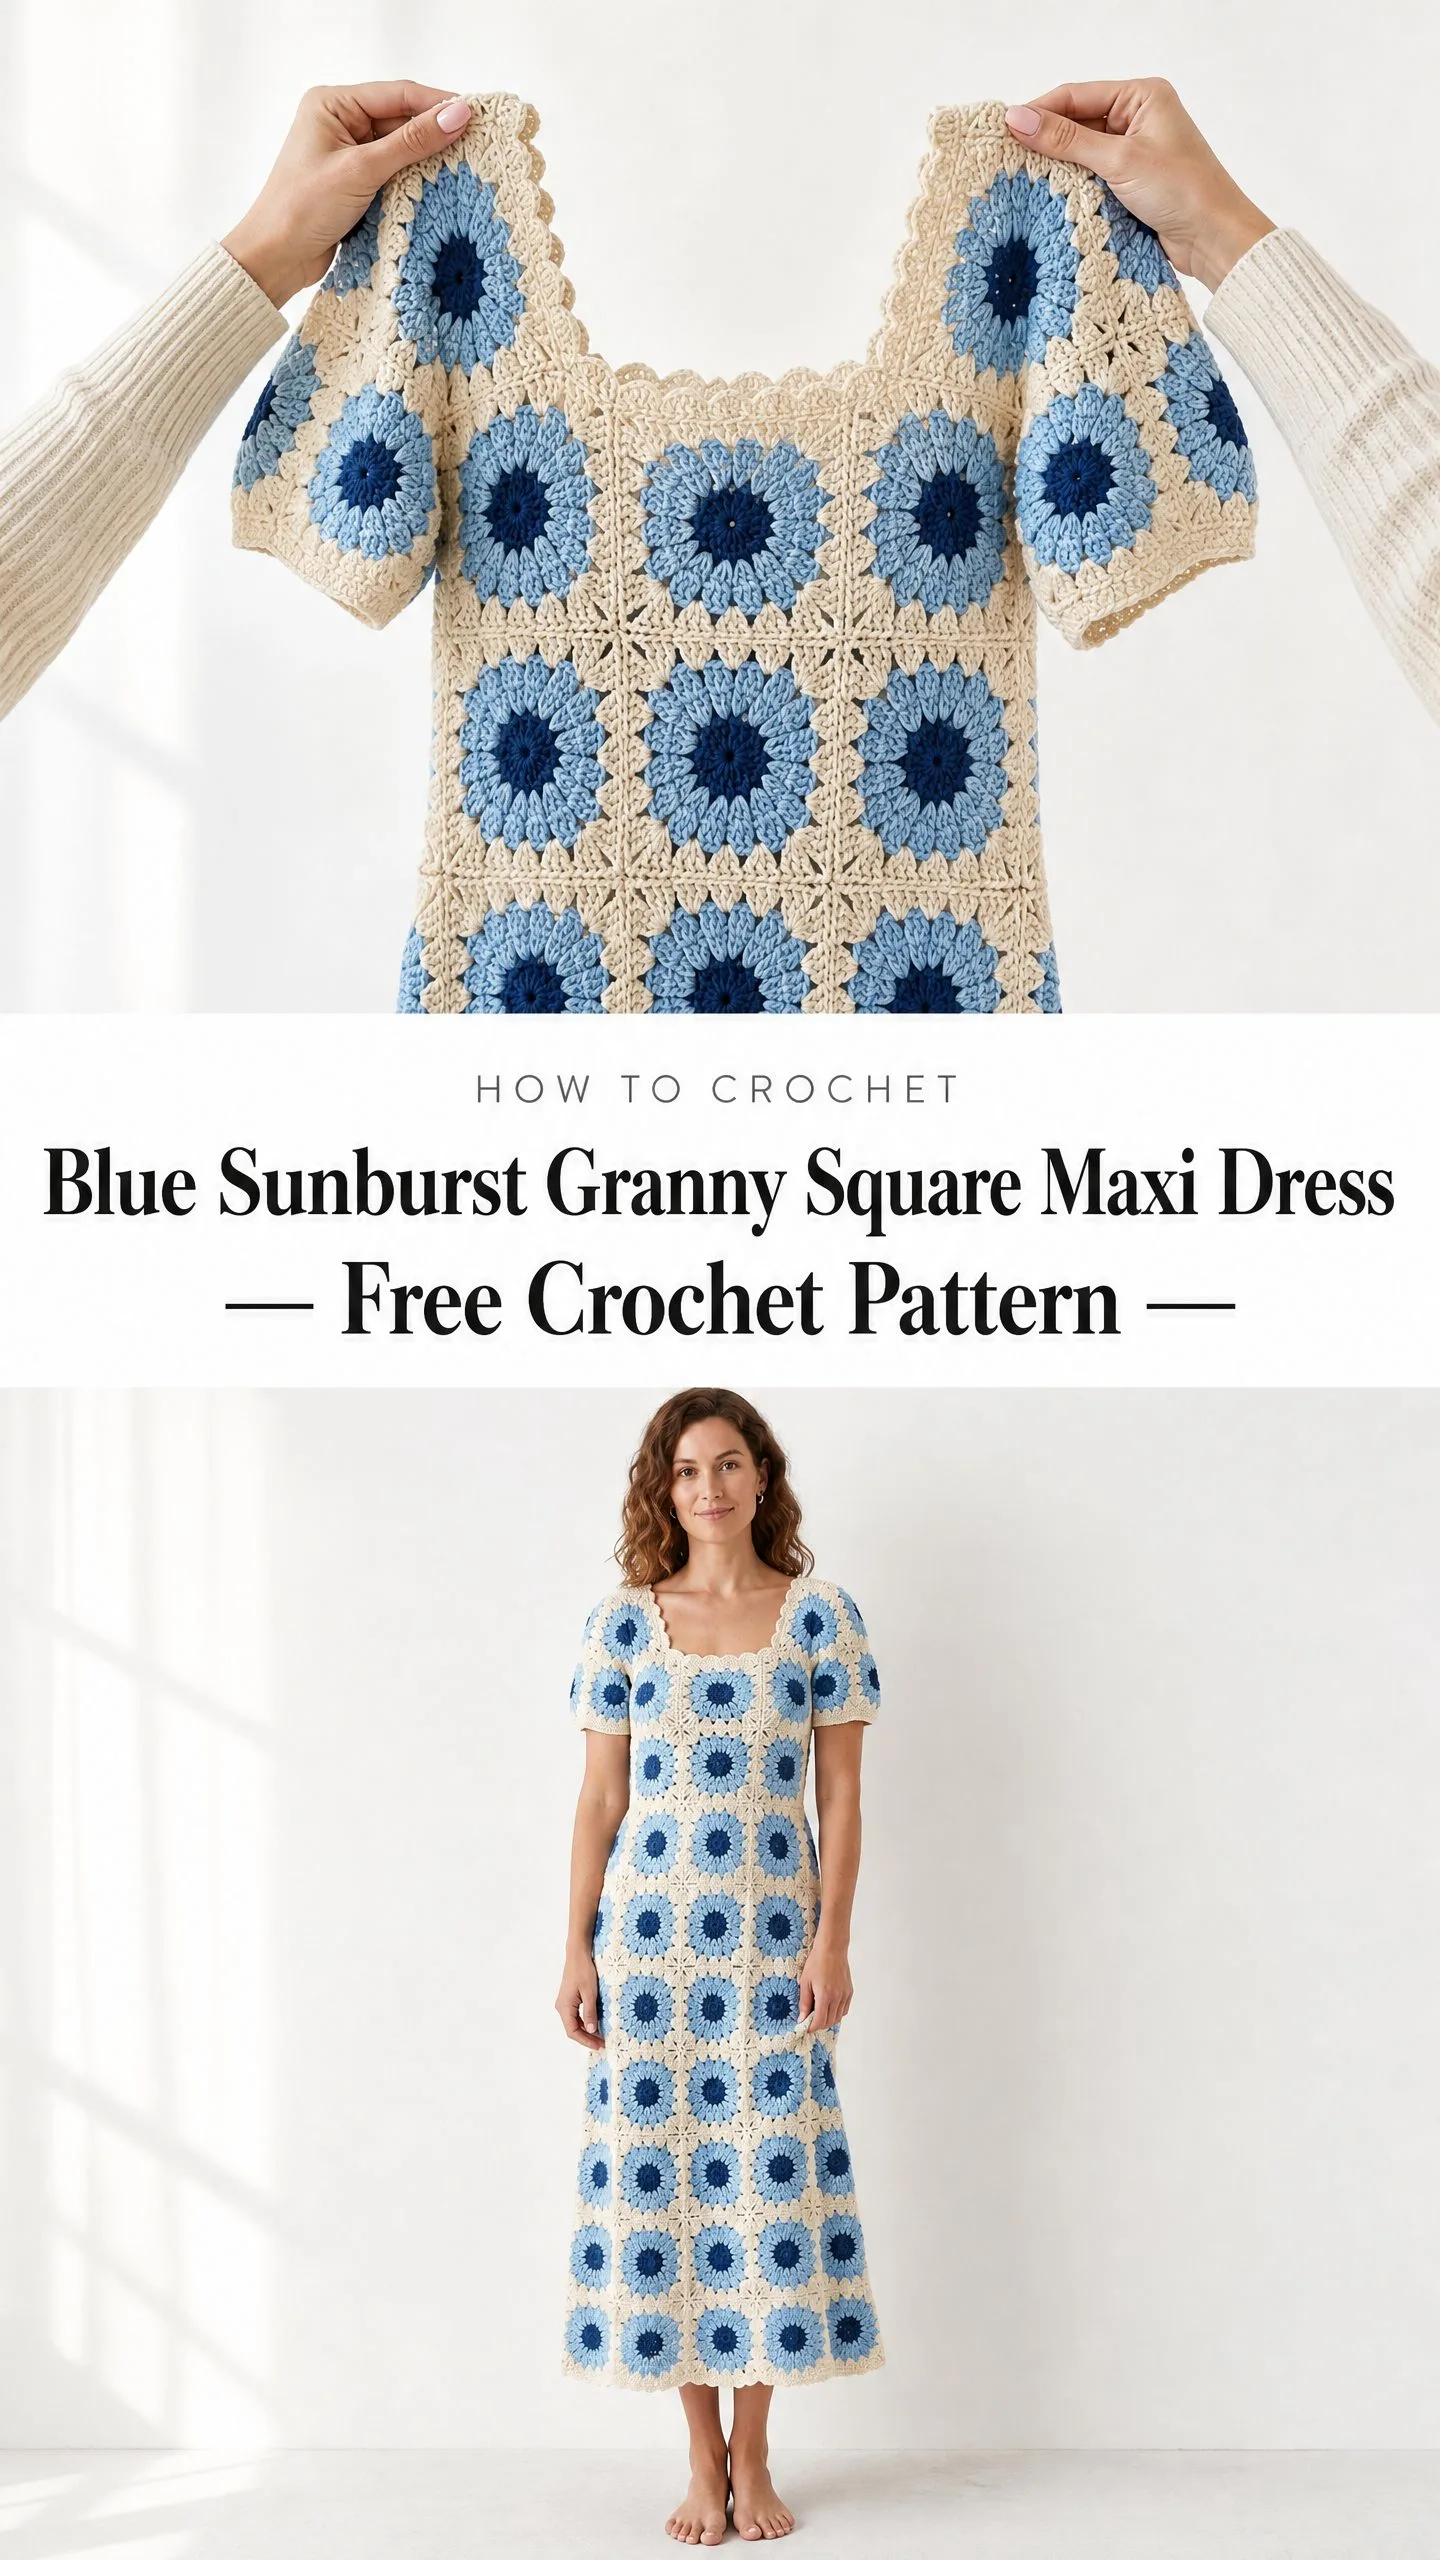
If you have ever wanted to prove that handmade can be high fashion, this crochet pattern is your moment. The construction is surprisingly straightforward once you understand the process. You are essentially making a collection of identical granny squares, joining them into panels, and seaming those panels into a dress. That is it. No complicated shaping within the squares themselves, no confusing decreases mid-row.
Plan for 80 to 120 hours of work for a size Medium, and trust me when I say every single hour is worth it. This dress makes an unforgettable gift, a showstopping wedding guest outfit, or the ultimate "I made this" flex. Let me walk you through exactly how to bring this beauty to life.
Why This Sunburst Granny Square Dress Works So Well
The magic of this crochet maxi dress lies in its construction method. Instead of working the entire garment in one piece with complicated shaping, you create individual sunburst-style granny squares and join them using a flat join-as-you-go technique. Each square features a bold circular motif worked in two shades of blue set against a cream lattice frame.
The silhouette flatters almost every body type. A fitted bodice gently flares from the hip down to a floor-length hem, creating that classic A-line shape that moves beautifully when you walk. Short puff-effect sleeves add a romantic touch without overwhelming the design. The square neckline is characteristic of the grid construction and gets finished with delicate scalloped edging.
No zipper required here. The dress relies on negative ease in the bodice and the natural stretch of crochet fabric to create a comfortable, flattering fit.
Skill Level and Time Commitment
I would classify this as an advanced intermediate project. The individual motifs themselves are not difficult. If you can make a basic granny square, you can make these sunburst squares. The challenge comes from the precision required during the join-as-you-go construction. Every square needs to be blocked to exactly the same size, and every join needs to be consistent to keep the grid flat.
You will also need experience with garment seaming and reading schematics. The waist shaping uses partial squares at strategic points, which requires some planning ahead.
Estimated time: 80 to 120 hours for a size Medium. Joining and finishing account for roughly 20 to 25 percent of that total time. This is not a weekend project. Think of it as a labor of love that you work on over several weeks or months.
Finished Measurements
The pattern is written for size Small with changes for Medium, Large, and Extra Large in parentheses.
Bust: 34 (36, 38, 40) inches / 86 (91, 97, 102) cm
Waist: 28 (30, 32, 34) inches / 71 (76, 81, 86) cm
Hip: 36 (38, 40, 42) inches / 91 (97, 102, 107) cm
Total length (shoulder to hem): 52 (52.5, 53, 53.5) inches / 132 (133, 135, 136) cm
Sleeve length: 3 (3, 3.5, 3.5) inches / 7.5 (7.5, 9, 9) cm
Important sizing note: This dress is designed for approximately 2 inches of negative ease at the bust. That means you should choose your size based on your actual bust measurement minus 2 inches. If your bust measures 38 inches, you would make the size Medium (36 inch bust).
Materials You Will Need
Yarn
You need 100% cotton DK weight yarn (also called light worsted or weight category 3).
Color A (Cream/Off-White): 1,400 (1,550, 1,700, 1,850) yards / 1,280 (1,418, 1,555, 1,692) meters
Color B (Medium Cornflower Blue): 900 (1,000, 1,100, 1,200) yards / 823 (914, 1,006, 1,097) meters
Color C (Navy/Dark Blue): 600 (680, 750, 820) yards / 549 (622, 686, 750) meters
Recommended yarn brands:
1. Paintbox Yarns Simply DK (100% cotton, 137 yards per 50g ball). Excellent stitch definition that showcases the sunburst texture beautifully.
2. Lion Brand 24/7 Cotton DK (100% mercerized cotton, 186 yards per 100g ball). The mercerized finish gives extra sheen and the yarn holds its shape well.
3. Scheepjes Catona (100% mercerized cotton, 62 yards per 25g ball). A finer gauge cotton that gives a refined drape on larger projects.
Substitution tip: Use any smooth DK weight cotton or cotton-blend that achieves gauge. Avoid textured or fuzzy yarns because they will obscure the sunburst detail.
Hooks
Primary hook: US size E-4 / 3.5 mm
Edging hook: US size D-3 / 3.25 mm (slightly smaller to keep edging snug)
Notions
Gauge
One completed Sunburst Granny Square after blocking = 4 inches x 4 inches / 10 cm x 10 cm
This gauge is critical. Make three squares, block them flat, and measure across the center from flat edge to flat edge (not corner to corner). The entire garment construction is based on square count, so if your squares are the wrong size, your dress will not fit.
If your squares measure larger than 4 inches, try a smaller hook. If your squares measure smaller than 4 inches, try a larger hook.
Abbreviations Used in This Crochet Pattern
Let me break down every abbreviation you will encounter. I am defining each one in plain English so there is no confusion.
beg = beginning
ch = chain (wrap yarn over hook and pull through the loop on your hook)
ch-sp = chain space (the hole created by a chain in the previous row or round)
dc = double crochet (yarn over, insert hook, pull up loop, yarn over and pull through 2 loops, yarn over and pull through remaining 2 loops)
hdc = half double crochet (yarn over, insert hook, pull up loop, yarn over and pull through all 3 loops at once)
rnd = round
RS = right side (the "public" side of your work)
sc = single crochet (insert hook, pull up loop, yarn over and pull through both loops)
sk = skip (pass over the indicated stitch without working into it)
sl st = slip stitch (insert hook, yarn over and pull through both the stitch and the loop on hook in one motion)
sp = space
st(s) = stitch(es)
WS = wrong side (the "private" or inside of your work)
yo = yarn over (wrap the yarn over your hook from back to front)
Special Stitches Explained
Sunburst Petal
This creates the distinctive raised petals in Rounds 3 and 4 of each square.
Step 1: Insert your hook into the designated stitch or chain space from Round 2.
Step 2: Yarn over and draw up a loop, elongating it slightly taller than a standard double crochet (about 1.25 times the height).
Step 3: Yarn over and pull through both loops on hook.
Work each petal firmly so it stands up from the fabric. This is essentially an elongated single crochet.
Joining Double Crochet
This is how you connect squares during the join-as-you-go method.
Step 1: Work the double crochet to the last yarn over step, leaving two loops on hook.
Step 2: Insert hook into the corresponding chain space of the adjacent square already on your work.
Step 3: Yarn over and pull through both loops on hook. This completes the double crochet while simultaneously attaching the new square to the previous one.
Scallop Edging
This finishes the neckline, sleeve openings, and hem.
Step 1: Attach yarn and chain 1, single crochet in same stitch.
Step 2: Skip 2 stitches, work 5 double crochet all into the next stitch.
Step 3: Skip 2 stitches, single crochet in next stitch.
Step 4: Repeat Steps 2 and 3 around entire edge.
Step 5: Slip stitch to first single crochet to close.
Each scallop repeat uses 6 stitches total on the working edge.
How to Crochet the Sunburst Granny Square
Make the required number of squares for your size (I will give you the exact count in the Construction section below). All squares are made identically.
Color placement reminder: Color C (Navy) for Rounds 1 and 2, Color B (Cornflower) for Rounds 3 and 4, Color A (Cream) for Rounds 5 and 6.
Round 1
With Color C (Navy), make a magic ring. Alternatively, chain 4 and slip stitch to first chain to form a ring.
Chain 3 (this counts as your first double crochet). Work 11 double crochet into the ring. Slip stitch to top of beginning chain-3 to join.
Stitch count: 12 dc total
Round 2
Chain 1, single crochet in same stitch, chain 2. Single crochet in next stitch, chain 2. Repeat from to 11 more times. Slip stitch to first single crochet to join. Fasten off Color C.
Stitch count: 12 sc and 12 ch-2 spaces
Round 3
Attach Color B (Cornflower Blue) to any chain-2 space.
Chain 1. Work 3 Sunburst Petals into each chain-2 space around. Slip stitch to first petal to join.
Stitch count: 36 petals
Round 4
Chain 1, single crochet in same petal. Chain 2, skip 2 petals, single crochet in next petal. Repeat from to 11 more times. Chain 2, slip stitch to first single crochet. Fasten off Color B.
Stitch count: 12 sc and 12 ch-2 spaces
Round 5
Attach Color A (Cream) to any chain-2 space.
Chain 3 (counts as double crochet), 2 double crochet in same chain-2 space. Chain 1, 3 double crochet in next chain-2 space. Repeat from to 11 more times. Chain 1, slip stitch to top of beginning chain-3.
Stitch count: 12 groups of 3-dc, 12 ch-1 spaces
Round 6 (The Square Frame Round)
Chain 3, 2 double crochet in same space, chain 1, 3 double crochet in same space. This is your first corner.
Chain 1, 3 double crochet in next chain-1 space, chain 1, 3 double crochet in next chain-1 space, chain 1. In next chain-1 space work (3 double crochet, chain 2, 3 double crochet) for corner. Repeat from to two more times.
Chain 1, 3 double crochet in next chain-1 space, chain 1, 3 double crochet in next chain-1 space, chain 1. Slip stitch to top of beginning chain-3. Fasten off Color A.
Final stitch count: 4 corners each containing (3 dc, ch-2, 3 dc) plus 3 groups of 3-dc along each side. Total: 60 dc plus 4 corner ch-2 spaces and 16 side ch-1 spaces.
Weave in all ends. Block each square to 4 x 4 inches before joining.
How to Make the Half Squares for Waist Shaping
These rectangles measure approximately 2 inches tall x 4 inches wide and create the waist shaping.
You need 2 (2, 4, 4) half squares for the front panel waist edges and the same count for the back panel.
Row 1
With Color C, chain 5. Double crochet in 4th chain from hook and in next chain.
Stitch count: 3 dc
Row 2
Chain 3, turn. 2 double crochet in same stitch, chain 1, skip 1, 3 double crochet in last stitch.
Stitch count: 2 clusters of 3 dc
Row 3
Change to Color B. Chain 1, turn. Single crochet in first double crochet. Work 3 Sunburst Petals into chain-1 space. Single crochet in last double crochet.
Stitch count: 2 sc, 3 petals
Row 4
Chain 3, turn. Double crochet in each petal and single crochet across.
Stitch count: 5 dc
Fasten off leaving a long tail for seaming. Block to 2 inches x 4 inches.
Construction Schematic and Square Counts
The dress consists of two identical panels (front and back) plus two sleeve strips. Each square measures 4 inches x 4 inches after blocking.
Total Full Square Count by Size
Size S: 120 full squares + 4 half squares
Size M: 146 full squares + 4 half squares
Size L: 148 full squares + 4 half squares
Size XL: 168 full squares + 4 half squares
I recommend making 5 extra test squares for gauge swatching and any last-minute adjustments.
Front Panel Grid Layout
Size S:
Size M:
Size L:
Size XL:
The back panel is identical to the front panel for all sizes.
Sleeve Strips
Sizes S and M: Each sleeve is 2 squares joined side by side. Make 2 strips total.
Sizes L and XL: Each sleeve is 3 squares joined side by side. Make 2 strips total.
Neckline Shaping
The square neckline opening is formed by leaving the center top row of squares unjoined.
For all sizes, the neckline opening is 2 squares wide x 1 square deep (8 inches wide x 4 inches deep), centered on both the front and back top edges.
When assembling the top row of each panel, simply leave the center 2 square positions unjoined. The squares on either side of this opening become your shoulder squares.
Step by Step Assembly Instructions
Step 1: Layout
Lay all blocked squares on a flat surface, arranging them into the front panel grid according to your size schematic. Take a photo for reference before you start joining.
Step 2: Join First Row
Place two adjacent squares with wrong sides together. Using Color A and the Joining Double Crochet method, work across the shared edge from corner chain-2 space to corner chain-2 space. At corner chain-2 spaces, work (slip stitch, chain 2, slip stitch) to join.
Continue joining squares in horizontal rows first, then join rows to each other vertically.
Step 3: Complete Front Panel
Work from top (neckline edge) to bottom (hem edge), leaving the neckline opening as directed.
Step 4: Complete Back Panel
Repeat the same process for the back panel.
Step 5: Join Shoulder Seams
Place front and back panels with wrong sides facing. Using Color A and the Joining Double Crochet method, join the top edge of the front to the top edge of the back at each shoulder (the 1-square-wide sections flanking the neckline opening).
Step 6: Attach Sleeves
Position each sleeve strip at the armhole opening (the side edges of the top 2 rows of squares on both front and back). Join the long edge of the sleeve strip to the armhole edge, easing slightly around the opening.
Step 7: Join Side and Underarm Seams
Join the side seams from hem up to underarm. Continue joining the sleeve underarm seam closed. Leave the sleeve strip end open for the sleeve opening.
First Checkpoint
After joining both panels but before edging, measure from shoulder join to the bottom of the hip zone (through Row 6). This should measure approximately 24 inches for all sizes. The skirt zone adds approximately 28 more inches for a total length of about 52 inches.
If you need to adjust for your height, add or remove squares from the skirt rows now.
How to Work the Edging
All edging uses Color A and the smaller hook (D-3 / 3.25 mm).
Neckline Edging
Attach Color A to any corner chain-2 space at the center front neckline.
Round 1: Chain 1. Single crochet evenly around the neckline opening, working 1 single crochet into each double crochet and each chain-1 space, and 3 single crochet into each corner chain-2 space. Adjust your count so the total is a multiple of 6 plus 1. Slip stitch to first single crochet.
Round 2: Work Scallop Edging around entire neckline. Slip stitch to close. Fasten off.
Sleeve Opening Edging
Attach Color A to any point on the sleeve opening.
Round 1: Chain 1. Single crochet evenly around, ensuring total is a multiple of 6. Slip stitch to join.
Round 2: Work Scallop Edging around. Slip stitch to close. Fasten off.
Hem Edging
Attach Color A to any point on the hem edge.
Round 1: Chain 1. Single crochet evenly around bottom hem, ensuring total is a multiple of 6. Slip stitch to join.
Round 2: Work Scallop Edging around entire hem. Slip stitch to close. Fasten off.
Final Checkpoint
After all edging, verify that the neckline lies flat without gaping, the scallops are consistent in size, and the sleeve edging creates a gentle gathered appearance. Blocked measurements should match the finished size chart within half an inch.
Size Customization Tips
Length adjustment: Add or remove complete square rows from the skirt zone. Each row adds or removes approximately 4 inches of length.
Width adjustment: Each additional square column adds approximately 4 inches to overall circumference. For an in-between size, add one column to the skirt zone only for extra hip room.
Neckline depth: Increase the opening to 2 squares deep instead of 1 for a lower neckline.
Sleeveless version: Omit sleeve strips entirely and work armhole edging directly around the openings.
Blocking and Finishing
Before assembly: Wet block every individual square. Soak in cool water for 10 to 15 minutes, gently squeeze (do not wring), roll in a towel, then pin to blocking mats at exactly 4 x 4 inches. Allow to dry completely. This step is not optional.
After assembly: Wet block the completed dress on a dress form or laid flat. Pin the hem to correct length, shape neckline and sleeve openings gently, and allow to dry fully before wearing.
Weave in all ends on the wrong side, working each tail in two different directions for at least 1 inch each way.
Care Instructions
Machine wash on delicate or hand wash in cool water below 86°F / 30°C. Use gentle detergent.
Do not tumble dry. Lay flat to dry away from direct sunlight or heat.
Do not hang wet, as the weight will stretch the garment.
Store folded, not hung, to prevent stretching at shoulder joins.
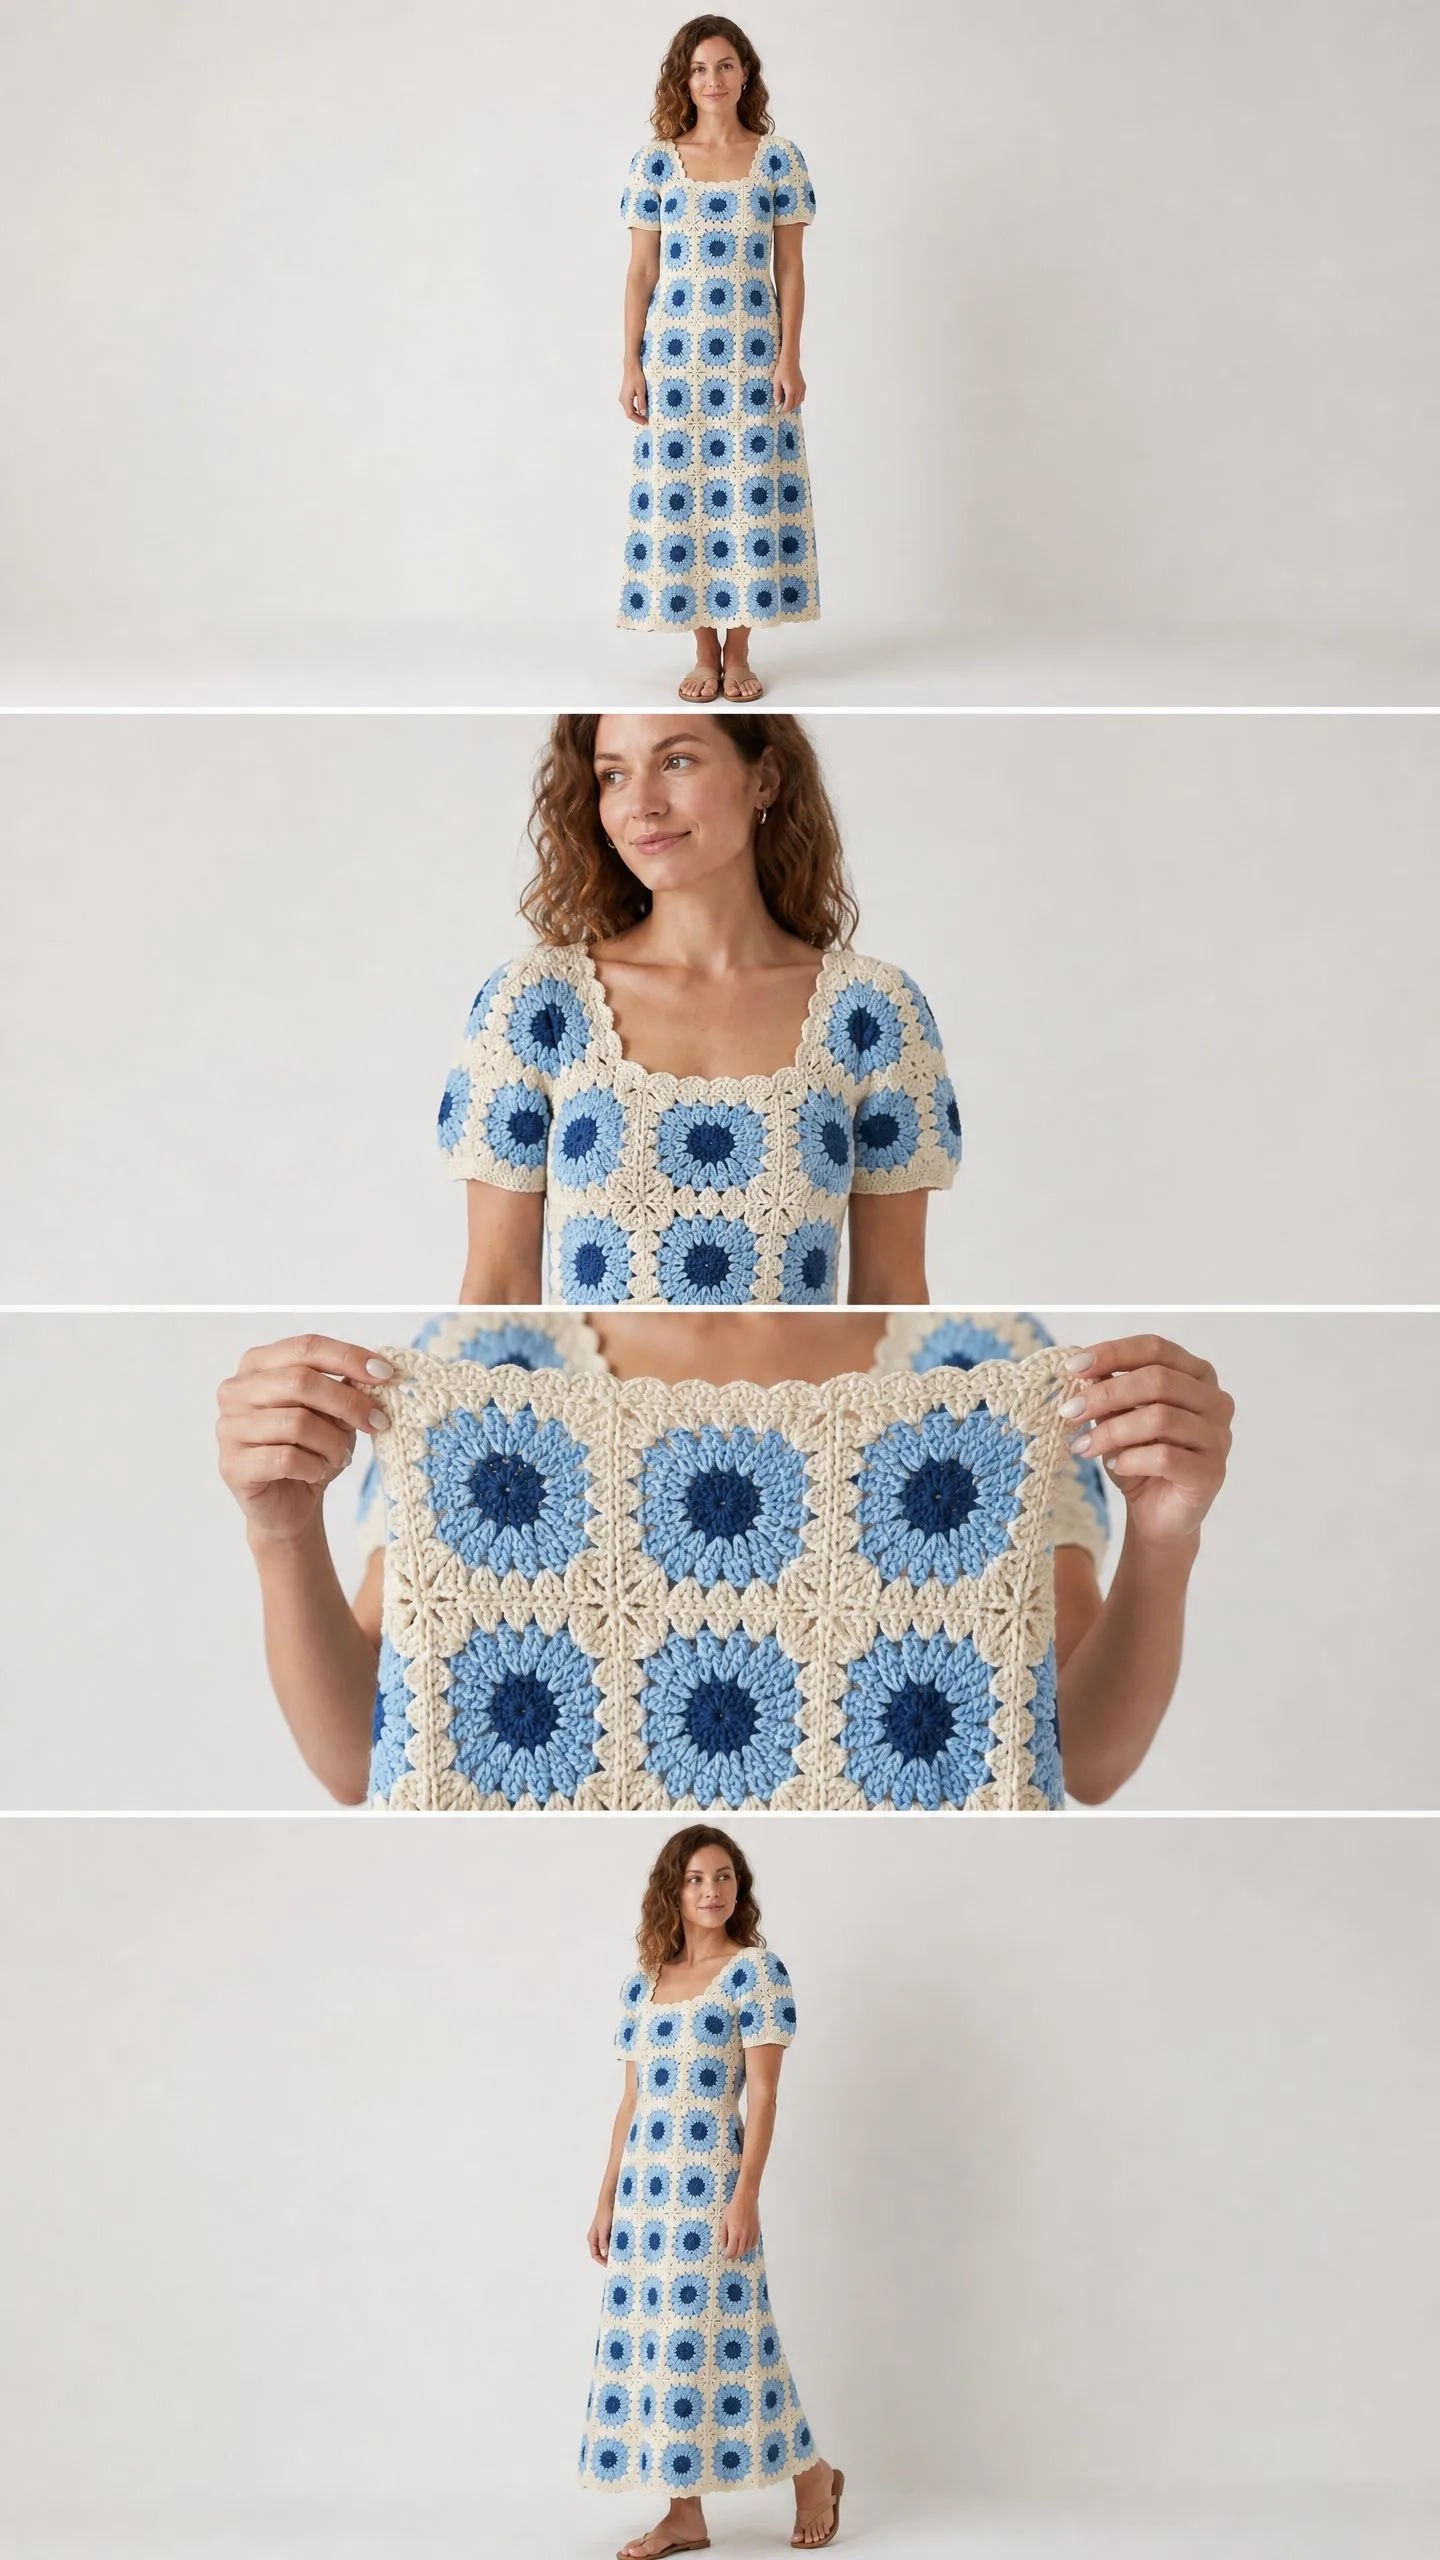
You Did It!
Thank you so much for choosing this crochet pattern for your next big project. Creating a garment like this sunburst granny square maxi dress is a true accomplishment, and I cannot wait to see your finished piece. Tag me on Instagram or share in our Facebook group so I can cheer you on!
If this pattern spoke to you, go ahead and save it to your Pinterest boards so you can find it when you are ready to start. And please drop a comment below once you make yours. I would love to hear which color combination you chose and how the fit turned out for you. Happy crocheting!
