I don’t know about you, but I love a good poncho. All the cozy warmth of a sweater with none of the fitted fuss. You just throw it on and suddenly look like you have your life together. This Monochrome Gray Granny Square Poncho hits that sweet spot perfectly. Classic granny squares arranged on point, three gorgeous shades of gray working together, and those dramatic pointed hems that make the whole thing feel modern and chic. If you’ve been looking for a project that’s impressive without being impossibly complicated, this is the one.
Get the Ad-Free PDF Pattern
You can find the free pattern below, or you can purchase the ad-free printable PDF from my shop.
Get the Printable PDF →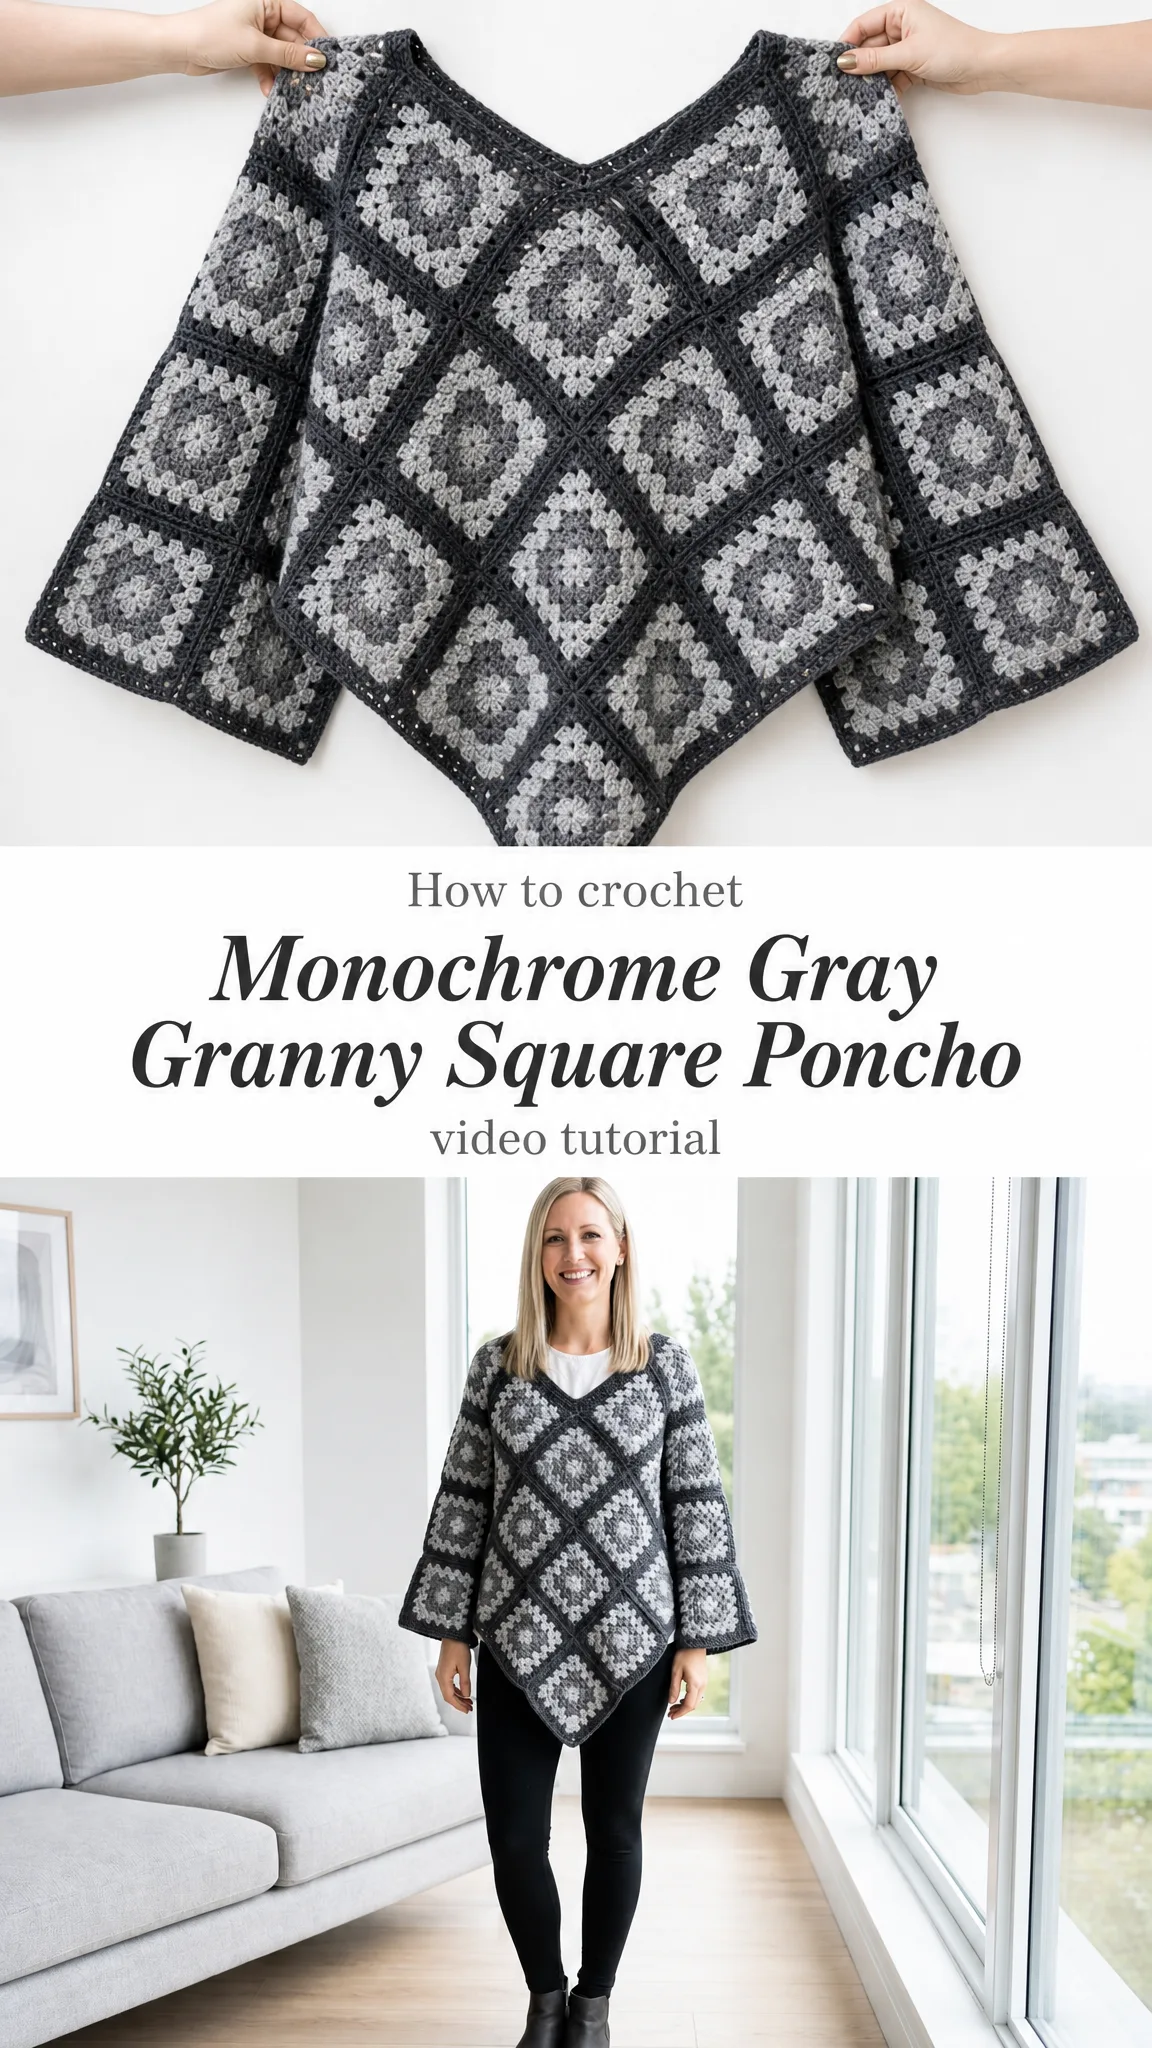
Why This Granny Square Poncho Works So Well
The beauty of this crochet poncho lies in its construction. You’re not wrestling with complicated shaping or tricky decreases. Instead, you make 26 individual granny square motifs, block them, and then join them together in a diamond layout. The pointed front and back? That’s not fancy row shaping. It’s simply how the squares line up when you arrange them on point. Clever, right?
The three-color gray palette gives this piece a sophisticated, almost architectural feel. The charcoal border on each motif creates those bold dark lines you see in the finished piece, while the medium gray and pale gray alternate through the rounds to build that classic granny square look. It’s monochromatic but far from boring.
This pattern is rated as confident intermediate. The motifs themselves are simple. If you can make a basic granny square, you can make these. But the assembly requires careful placement, and the neckline finishing needs attention to keep everything lying flat and looking polished. Don’t let that intimidate you though. Take your time, follow the assembly map, and you’ll be fine.
Materials You’ll Need
Yarn:
Suggested Yarn Brands:
Any #4 weight yarn that blocks to gauge and gives a soft, sweater-like drape will work beautifully here.
Tools:

Finished Measurements
This poncho is designed as one relaxed adult size, fitting bust/chest measurements of 34 to 44 inches (86 to 112 cm) with generous positive ease. Here are the key measurements after blocking:
Gauge
Getting gauge right matters here because you’re joining 26 motifs together. If they’re all slightly off, those small differences add up fast.
Target Gauge: One completed, bordered motif should measure 4.5 x 4.5 inches / 11.5 x 11.5 cm after blocking.
In the granny pattern before the border: 13 double crochet (dc) stitches and 7 rows/rounds equals 4 inches / 10 cm.
Checkpoint: After Round 5, your motif should be about 4.1 inches / 10.5 cm square. After the single crochet (sc) border and blocking, it should reach the full 4.5 inches / 11.5 cm square.
Make a test motif first. Block it. Measure it. Adjust your hook size if needed. This step saves heartache later.
Abbreviations and Special Stitches
Let me walk you through all the terms you’ll see in this pattern:
Special Stitches:
Granny Corner: Work (3 dc, ch 2, 3 dc) into the indicated corner ch-2 space. This creates that characteristic corner bump and the chain space you’ll work into on the next round.
Granny Side Group: Work 3 dc into the indicated side ch-1 space.
sc2tog (single crochet two together): Insert hook in next stitch, yarn over and pull up a loop. Insert hook in the following stitch, yarn over and pull up a loop. Yarn over and pull through all 3 loops on hook. You’ve just turned 2 stitches into 1.
Join-as-you-go option: On the charcoal border round, replace the center sc of a corner or the matching edge sc with a slip stitch into the corresponding stitch of the neighboring motif, keeping edges flat. This joins motifs as you complete them rather than seaming afterward.
A note for left-handed crocheters: Work rounds in your natural direction. The motif count and color order don’t change. When following the assembly map, mirror it horizontally so the sleeve tabs and center points land in the same positions on your body.
Body Motif Pattern (Make 26)
Color Order:
Fasten off each color neatly and weave in ends as you go. Trust me, dealing with 26 motifs worth of ends at the end is no fun.
Round 1: With C2, make a magic ring. Ch 3 (counts as dc), 2 dc in ring, [ch 2, 3 dc in ring] 3 times, ch 2, join to top of ch-3 with sl st. (12 dc; 4 corner spaces)
Round 2: Sl st to corner space. Work Granny Corner in same corner, ch 1; rep Granny Corner in each remaining corner with ch 1 between, join. (24 dc; 8 groups)
Round 3: Corner in each corner; work 1 side group in each ch-1 sp between corners, ch 1 between groups, join. (36 dc; 12 groups)
Round 4: Corner in each corner; work 2 side groups per side, ch 1 between groups, join. (48 dc; 16 groups)
Round 5: Corner in each corner; work 3 side groups per side, ch 1 between groups, join. (60 dc; 20 groups)
Round 6: With C1, join in any corner. Ch 1, 3 sc in corner; sc in each dc and ch-1 sp to next corner; rep around, join. (88 sc; 22 per side)
Fasten off. Weave in ends.
Make List:
Block all motifs to the same 4.5 inch / 11.5 cm square before joining them together.
Assembly Instructions
This is where the magic happens. You’re turning 26 individual squares into a wearable garment.
Front Panel Assembly:
Arrange 9 motifs on point in a diamond configuration:
Join touching sides with mattress stitch through the charcoal border, or use the join-as-you-go method. Each joined side uses 22 sc stitches, matching stitch for stitch.
Back Panel Assembly:
Repeat the same layout for the back panel. You’ll use another 9 motifs arranged identically.
Joining Front to Back:
Join front to back at both shoulders, leaving the V neck open. The shoulder join connects 1 motif side per shoulder, 22 sc per side.
Adding Sleeve Tabs:
Join 4 motifs in a 2 x 2 block for each side. Center this block on the side seam where front meets back. The lower edge of each sleeve tab remains open and drapes like a wide, flowing sleeve.
Assembly Checkpoints:
Before joining to back, your front panel should measure approximately 25.5 inches / 65 cm from top shoulder point to lower center point.
The neckline is formed from 6 exposed motif sides, giving you 132 border stitches total before edging.
Each sleeve opening is formed from 4 exposed motif sides, giving you 88 border stitches before edging.
Edging Instructions
The edging pulls everything together and gives the poncho a polished, finished look.
Neck Edging
Join C1 at the front V point.
Round 1: Ch 1, sc evenly around neckline by working 1 sc in each border st along the 6 exposed motif sides; join. (132 sc)
Round 2: Ch 1, sc to 2 sts before each V point, sc2tog, sc in V point, sc2tog, then continue; repeat at front and back V points; join. (128 sc)
Round 3: Rep Round 2. (124 sc) Fasten off.
Lower Edge
Join C1 at one side point.
Round 1: Ch 1, sc evenly around the lower body edge, working 1 sc in each border st along 18 exposed motif sides; join. (396 sc)
Round 2: Ch 1, sc in each st around, working 3 sc in each lower front and lower back point to keep the points crisp; join. (400 sc)
Round 3: Ch 1, sc in each st around; join and fasten off. (400 sc)
Sleeve Openings (Make 2)
Round 1: Join C1 at underarm edge, ch 1, sc around 4 exposed motif sides; join. (88 sc)
Round 2: Ch 1, sc in each st around; join. (88 sc) Fasten off.
Size Customization Options
Want to tweak the fit? Here are some easy modifications:
For a shorter poncho: Omit the lowest center-point motif from both front and back. Edge the new lower points evenly.
For more width: Add one extra 2-motif sleeve tab to each side. You’ll need approximately 360 yards / 329 meters additional yarn for two extra tabs.
For a smaller neckline: Work one extra neck edging round and decrease at front and back V points again. This takes you from 124 sc down to 120 sc.
Finishing and Blocking
Weaving in Ends: Work on the wrong side, splitting yarn plies only when needed so the ends don’t show through the pale rounds. Those light-colored sections will reveal dark ends if you’re not careful.
Blocking: Wet block or steam block lightly. Pin the lower front and back points sharply. Pin sleeve edges straight. Your target is 4.5 inches / 11.5 cm square per motif. Don’t stretch the neckline wider while drying or it may stay stretched.
Troubleshooting Common Issues
Motif cups or bowls: Your corners are too tight. Keep those ch-2 corners open and relaxed. Block aggressively to square.
Motif ruffles or waves: Your ch-1 side spaces are too loose. Try going down a hook size for the motif rounds.
Neckline waves: Remove one neck edging round, or decrease 4 more stitches evenly on the next round.
Seams pucker: Make sure you’re joining through matching charcoal border stitches, 22 stitches to 22 stitches, without skipping any.
Care Instructions
Hand wash or machine wash on gentle cycle according to your yarn label. Lay flat to dry, reshaping the V points and sleeve edges while the fabric is still damp. Store folded rather than hung to protect the neckline from stretching over time.

Skill Level and Time Estimate
This pattern is rated confident intermediate. The individual granny square motifs are straightforward, but the assembly, neckline finishing, and even blocking require careful attention to placement and detail.
Expected completion time: 18 to 24 hours of work. This is a satisfying project to work on over several evenings, watching the stack of beautiful motifs grow before the exciting assembly phase.
I really hope you enjoy making this Monochrome Gray Granny Square Poncho as much as I enjoyed designing it. It’s one of those projects that looks impressively complex but breaks down into very manageable pieces. Plus, there’s something so satisfying about watching those granny squares transform into a wearable garment.
If you found this crochet pattern helpful, I’d love it if you saved it to your Pinterest boards so you can find it easily when you’re ready to cast on. And please, if you make this poncho, drop a comment below or tag me on social media. Seeing your finished projects absolutely makes my day!
Want a Quick & Easy Printable Version?
Get a clean, beautifully formatted PDF of this pattern — easy to follow step by step, ready to print or save on any device. No scrolling, no distractions, just the pattern.
Get the Printable PDF →