Crocheting a wearable garment sounds intimidating, right? The shaping, the seaming, the math. I get it. But here’s the truth: this Sunflower Garden Crochet Hoodie is way more approachable than it looks. The body is just two rectangles. The sleeves are simple tubes. There’s no fitted sleeve cap to wrestle with, no complicated increases to track. If you can make a double crochet and sew a straight seam, you can absolutely make this hoodie. Whether you’re a confident beginner ready to level up or an experienced crocheter looking for a satisfying project, this pattern meets you where you are.
Get the Ad-Free PDF Pattern
You can find the free pattern below, or you can purchase the ad-free printable PDF from my shop.
Get the Printable PDF →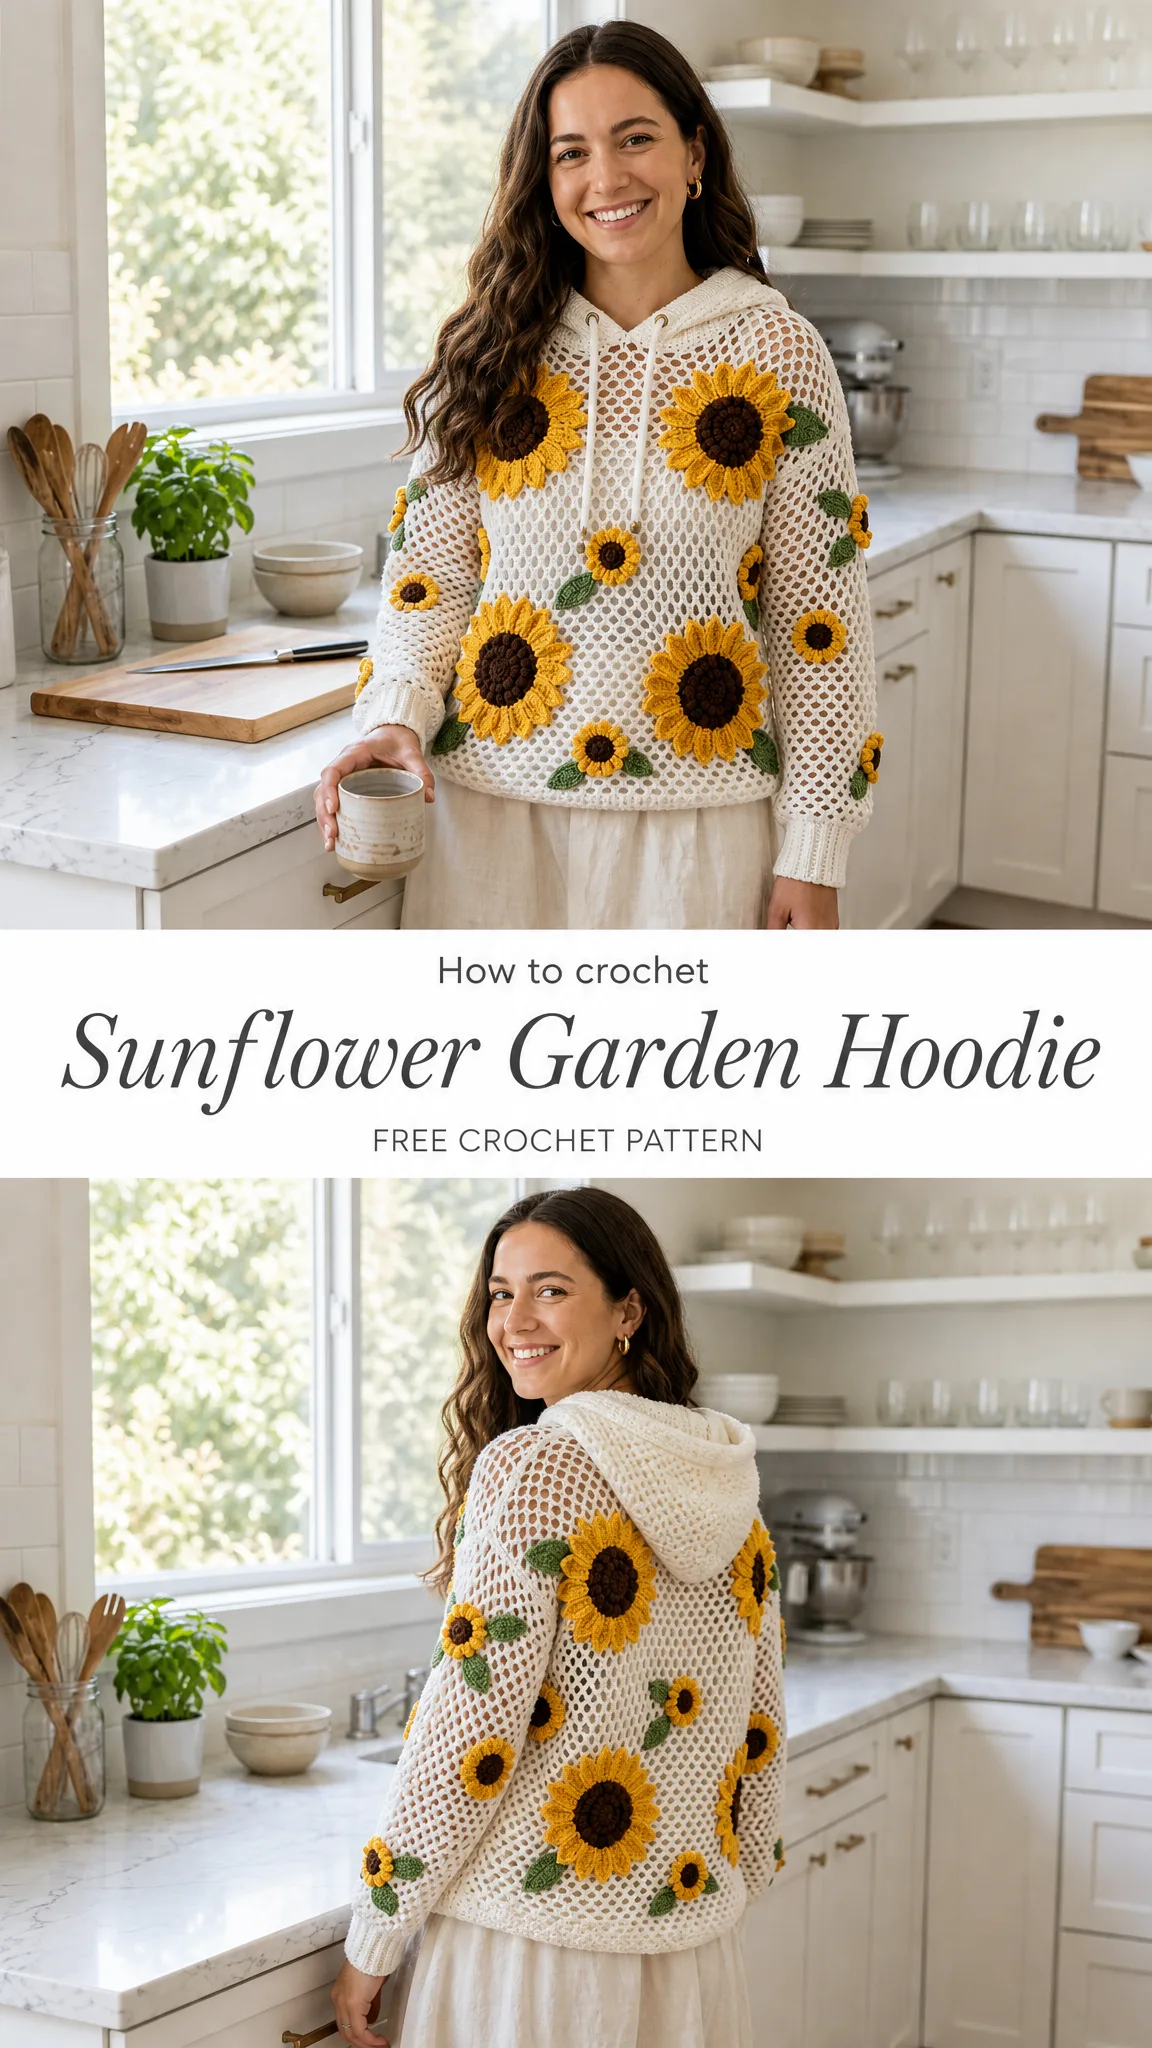
The gorgeous sunflower appliques are what make this piece a showstopper, but they’re worked separately and sewn on at the end. So you can take your time with those cheerful blooms without worrying about messing up your garment. Let’s break it all down together.
About This Sunflower Hoodie Crochet Pattern
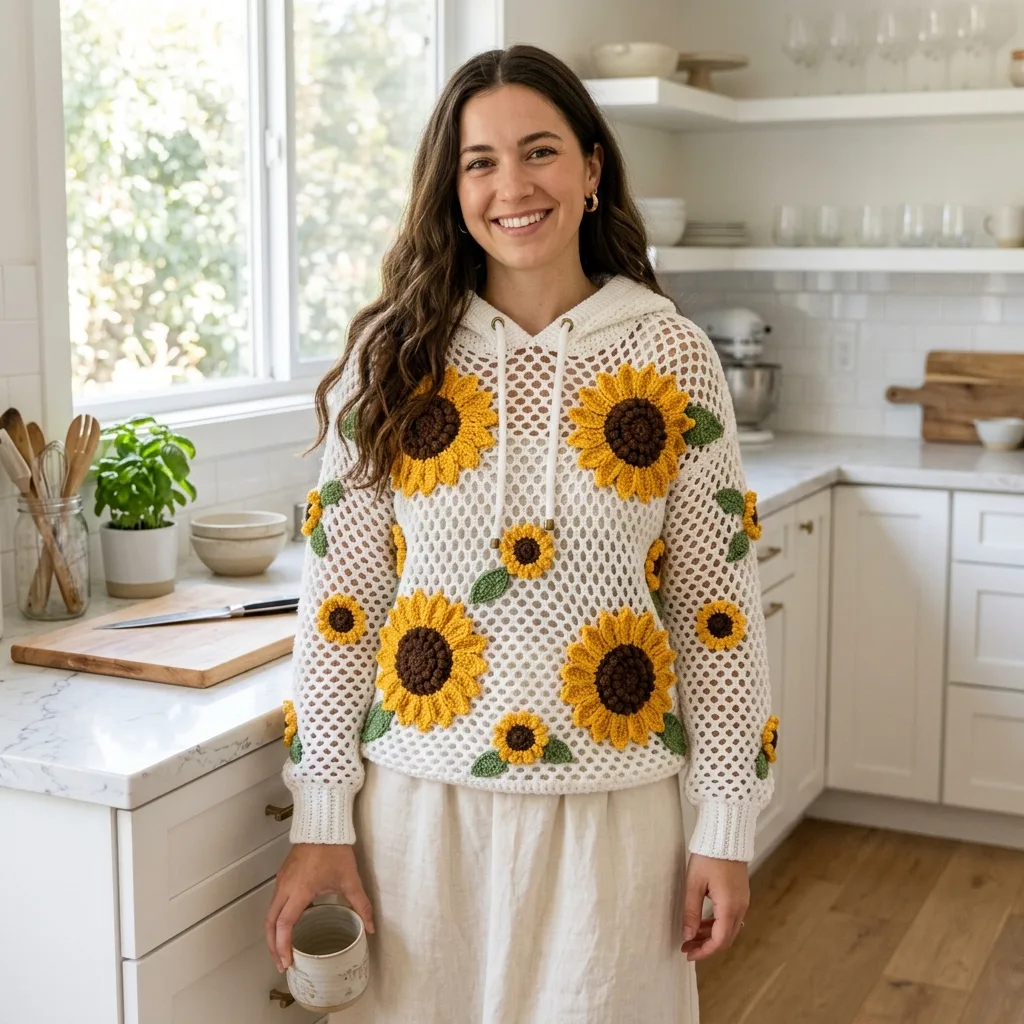
This breezy mesh pullover features a relaxed drop shoulder silhouette, a folded hood with a drawcord, ribbed cuffs and hem, and raised sunflower appliques scattered across the front, back, and sleeves. The open mesh fabric makes it perfect for layering in spring, summer evenings, or early fall.
Skill Level: Intermediate. You’ll work open mesh fabric, seamed garment rectangles, ribbed bands, a folded hood, a drawcord, and layered floral appliques. The drop shoulder construction keeps everything approachable.
Finished Measurements:
Time Estimate: 18 to 24 hours
Materials You’ll Need
Yarn: DK weight / light worsted cotton or cotton blend
| Color | Amount |
|---|---|
| Main color (ivory) | 1,150 yd / 1,052 m |
| Golden yellow | 170 yd / 155 m |
| Dark brown | 90 yd / 82 m |
| Leaf green | 75 yd / 69 m |
Yarn Suggestions: Paintbox Cotton DK, Lion Brand 24/7 Cotton DK, or WeCrochet CotLin DK. Substitute any yarn that matches gauge and gives a soft drape.
Hooks:
Notions: Removable markers, tapestry needle, scissors, tape measure, blocking pins
Gauge
Gauge after blocking: 8 mesh spaces x 8 mesh rows = 4 in / 10 cm in open mesh with larger hook.
Large sunflower = about 4.5 in / 11.5 cm across.
Small sunflower = about 2.25 in / 5.5 cm across.
Swatch and match gauge before starting. This step really matters for garments!
Abbreviations and Special Stitches
US Terms Used:
UK Note: US sc = UK dc, US dc = UK tr
Special Stitches:
Mesh row: Ch 4 counts as first dc plus ch-1 sp, dc in next dc, then ch 1, dc in each dc across.
Ribbing: Sc in BLO across each row. This creates that stretchy, knit-look texture.
Picot: Ch 2, sl st in first ch made.
Left-Handed Note: Work the same counts. Your fabric and motif placement will mirror naturally. Pin flowers while the hoodie is flat before sewing.
Body Panels
Make 2 identical panels. Use larger hook and MC.
Foundation: Ch 84.
Row 1: Dc in 6th ch from hook, *ch 1, sk 1 ch, dc in next ch; rep from * across. (41 dc posts, 40 mesh spaces)
Row 2: Ch 4, turn, dc in next dc, *ch 1, dc in next dc; rep from * across. (41 dc posts, 40 mesh spaces)
Rows 3-42: Rep Row 2. (41 dc posts, 40 mesh spaces per row)
Checkpoint: Each panel measures about 20 in / 51 cm wide and 21 in / 53.5 cm tall after blocking.
Assembling the Body
Shoulders: With RS together, seam 12 mesh spaces at each shoulder. Leave center 16 mesh spaces open for neck. Front and back shoulder counts match: 12 + 16 + 12 = 40 spaces.
Side seams: Seam from lower edge upward for 26 rows on each side. Leave upper 16 rows unseamed for each armhole.
Body circumference after side seams: about 40 in / 101.5 cm before ribbing.
Hem Ribbing
Use smaller hook and MC.
Ch 10.
Row 1: Sc in 2nd ch and across. (9 sc)
Rows 2-82: Ch 1, turn, sc BLO across. (9 sc)
Seam short ends to form a ring. Sew one rib row to each lower body mesh row/edge segment, easing evenly.
Finished depth: about 2 in / 5 cm.
Sleeves and Cuffs
Make 2. Use larger hook and MC.
Foundation: Ch 68.
Row 1: Dc in 6th ch from hook, *ch 1, sk 1 ch, dc in next ch; rep from * across. (33 dc posts, 32 mesh spaces)
Row 2: Ch 4, turn, dc in next dc, *ch 1, dc in next dc; rep from * across. (33 dc posts, 32 mesh spaces)
Rows 3-38: Rep Row 2. (33 dc posts, 32 mesh spaces per row)
Checkpoint: Sleeve panel measures about 16 in / 40.5 cm around by 19 in / 48 cm long before cuff.
Seam sleeve lengthwise into a tube. Sew upper sleeve edge into armhole, matching 32 sleeve mesh spaces to the 32-row armhole opening. Pin center sleeve to shoulder seam and underarm to side seam, then sew 1-to-1 around.
Cuffs (Make 2)
Use smaller hook and MC.
Ch 11.
Row 1: Sc in 2nd ch and across. (10 sc)
Rows 2-34: Ch 1, turn, sc BLO across. (10 sc)
Seam short ends. Sew cuff ring to sleeve opening, stretching cuff evenly to gather the mesh sleeve.
Finished cuff depth: about 2.25 in / 5.5 cm. Cuff circumference is intentionally smaller than the sleeve opening for a soft gathered wrist.
Fit Note: For longer sleeves, add mesh rows before seaming. For a slimmer sleeve, begin with 28 mesh spaces: ch 60 and work the same row count.
Hood, Neck, and Drawcord
Hood Panel
Use larger hook and MC.
Foundation: Ch 76.
Row 1: Dc in 6th ch from hook, *ch 1, sk 1 ch, dc in next ch; rep from * across. (37 dc posts, 36 mesh spaces)
Row 2: Ch 4, turn, dc in next dc, *ch 1, dc in next dc; rep from * across. (37 dc posts, 36 mesh spaces)
Rows 3-36: Rep Row 2. (37 dc posts, 36 mesh spaces per row)
Fold the panel in half so short edges meet. Seam 18 rows along the top/back edge. Leave the lower edge open.
Attaching the Hood
Pin the lower hood edge around neckline, centering hood seam at back neck. Pick up 72 sc evenly around neckline and hood base: 16 sc across front neck, 16 sc across back neck, 20 sc along each hood side. Join. (72 sc)
Neck Edging
Rnd 1: Ch 1, sc in each sc around, join. (72 sc)
Rnd 2 (eyelet round): Ch 1, sc in first 2 sc, *ch 1, sk 1 sc, sc in next 3 sc; rep from * around, ending sc as needed to join. (54 sc, 18 ch-1 spaces)
Rnd 3: Ch 1, sc in each sc and ch-1 sp around, join. (72 sc) Fasten off.
Drawcord
Ch 145, sl st in 2nd ch and each ch across. Thread through eyelets. Add one small sunflower to each cord end if desired.
Checkpoint: Hood should measure about 18 in / 45.5 cm from neckline to crown and about 18 in / 45.5 cm across before folding. It should sit loosely and softly over the shoulders.
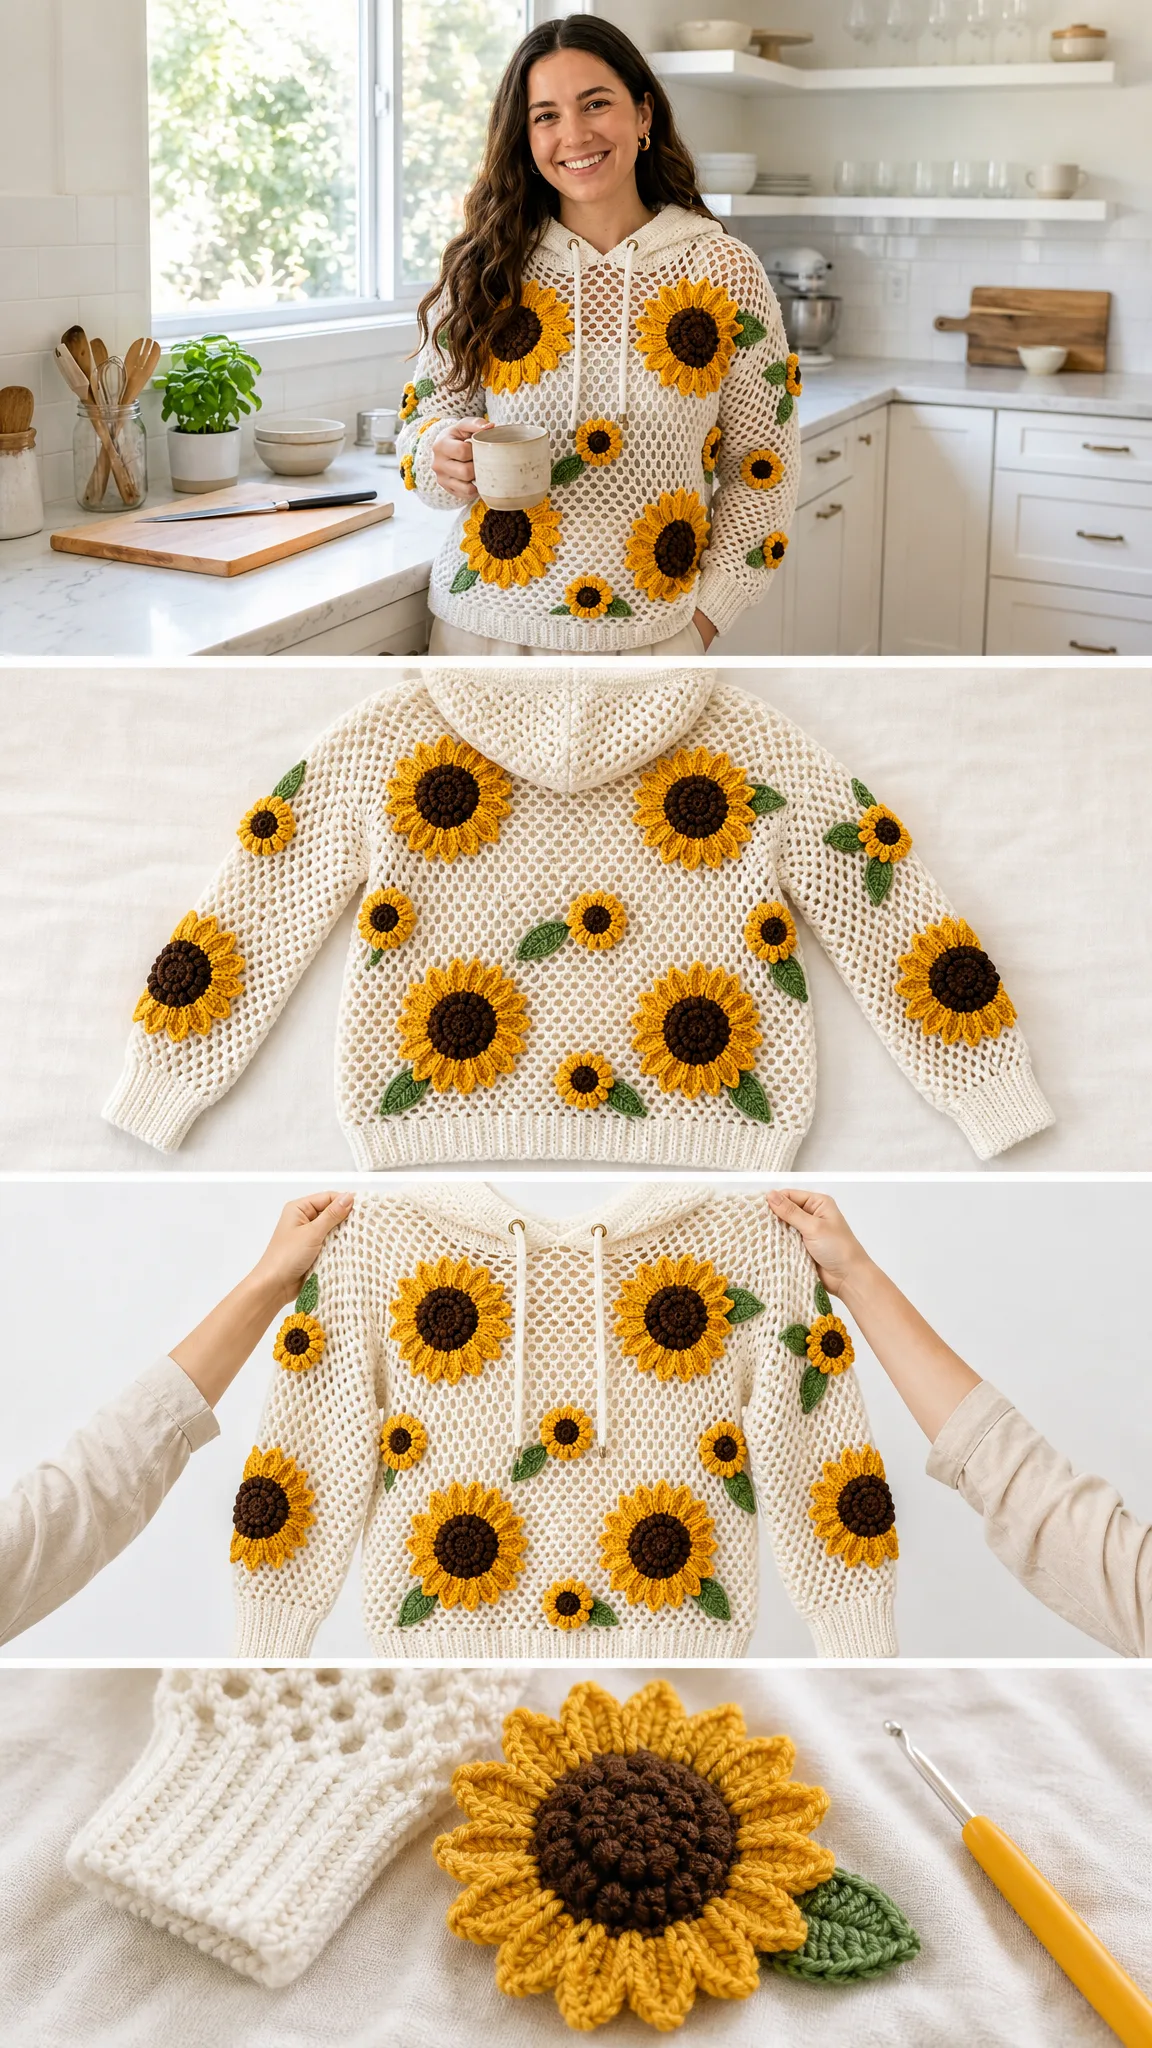
Sunflower Appliques
These cheerful sunflowers are worked flat and sewn on after the hoodie is assembled. Make them while watching your favorite show!
Large Sunflower (Make 8)
Use smaller hook.
Center Rnd 1 (brown): 8 sc in magic ring, join. (8 sc)
Rnd 2: Ch 1, 2 sc in each st around, join. (16 sc)
Rnd 3: Ch 1, *sc in next st, 2 sc in next st; rep from * around, join. (24 sc)
Petals (yellow): *Sl st in next st, in next st work (hdc, dc, tr, dc, hdc); rep from * 12 times. (12 petals) Fasten off.
Small Sunflower (Make 10)
Use smaller hook.
Center Rnd 1 (brown): 6 sc in magic ring, join. (6 sc)
Rnd 2: Ch 1, 2 sc in each st around, join. (12 sc)
Petals (yellow): *Sl st in next st, in next st work (hdc, dc, picot, dc, hdc); rep from * 6 times. (6 petals) Fasten off.
Leaf (Make 20-24)
Use smaller hook and green yarn.
Ch 8. Working down one side: sc in 2nd ch, hdc, dc in next 3 ch, hdc, 3 sc in last ch. Working up opposite side: hdc, dc in next 3 ch, hdc, sc, sl st to first sc. (16 edge sts) Fasten off, leaving a sewing tail.
Textured Center Option: For a raised look, surface slip stitch a spiral over each brown center, or sew a few loose French knots with the same yarn.
Motif Placement Guide
Lay the hoodie flat before sewing. Pin every flower first, then try on carefully or compare both sides for balance.
Front: 4 large sunflowers placed at upper left chest, upper right chest, lower left body, and lower right body. Add 3 small flowers: center drawcord/neck area and two near lower hem.
Back: 4 large sunflowers spaced in a garden cluster with two upper back and two lower back. Add 3 small flowers between large flowers.
Sleeves: Add 2 small flowers to each sleeve, one above the elbow and one near the outer forearm. Add leaves beside several flowers, angled like vines.
Sewing Tips: Use matching yarn tails. Tack each petal tip lightly so the applique stays dimensional but secure. Weave ends inside the hoodie.
Placement Checkpoint: Leave at least 1 mesh space between flower edges and seam lines so motifs do not bunch at the underarm, cuff, or hood seam.
Finishing, Blocking, and Care
1. Weave in garment ends before attaching flowers.
2. Steam or wet block body panels, sleeves, and hood to measurements. Do not overstretch the mesh.
3. Seam with mattress stitch or whipstitch through outer loops, keeping seams flat.
4. Attach appliques after blocking so the flowers stay rounded and dimensional.
5. Thread drawcord through the eyelet round and knot ends securely.
Care Instructions: Hand wash cool with mild soap. Press out water in a towel. Lay flat to dry, reshaping the hood, cuffs, and flowers. Store folded rather than hanging to protect the mesh shoulders.
Troubleshooting Tips
Size Customization
The mesh is built from spaces. Here’s the formula:
Width formula: Foundation chain = (desired mesh spaces x 2) + 4. Each added 2 chains adds 1 mesh space, about 0.5 in / 1.25 cm at gauge.
Body Width Guide Per Panel:
Keep shoulder math symmetrical: shoulder spaces + neck spaces + shoulder spaces = total panel spaces. For 44 spaces, use 13 shoulder + 18 neck + 13 shoulder. For 48 spaces, use 15 shoulder + 18 neck + 15 shoulder.
Length: Add or remove mesh rows. At gauge, 2 rows = about 1 in / 2.5 cm.
Sleeves: Use the same chain formula. A 28-space sleeve begins with ch 60; a 36-space sleeve begins with ch 76. Keep both sleeves identical.
Motifs: Add flowers after the hoodie is assembled. Larger sizes usually look best with 1 to 2 extra small flowers or leaves rather than crowding the large flowers.
You’ve Got This!
I hope this step by step crochet tutorial gives you the confidence to tackle this beautiful Sunflower Garden Crochet Hoodie. It’s the kind of project that looks impressive hanging in your closet but is actually built from simple shapes and basic stitches. The mesh works up quickly, the sunflowers are meditative to make, and the finished piece is absolutely stunning.
Thank you so much for choosing this pattern. I truly appreciate you being here! If you make this hoodie, I would absolutely love to see it. Tag me on Instagram or share a photo on Facebook. Seeing your creations makes my day.
If this pattern caught your eye, go ahead and save it to your Pinterest boards so you can find it when you’re ready to cast on. And if you do make your own Sunflower Garden Hoodie, drop a comment below. I’d love to hear how it turned out for you!
Want a Quick & Easy Printable Version?
Get a clean, beautifully formatted PDF of this pattern — easy to follow step by step, ready to print or save on any device. No scrolling, no distractions, just the pattern.
Get the Printable PDF →