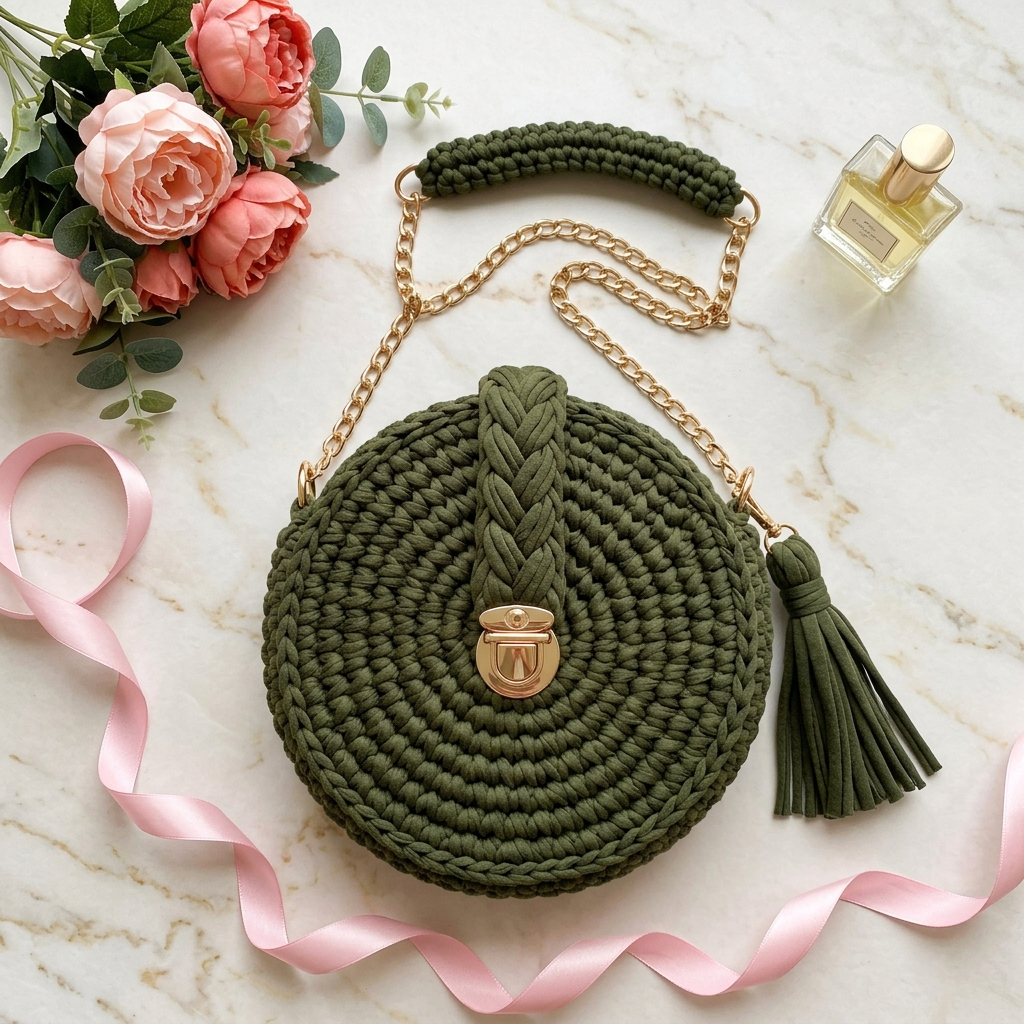
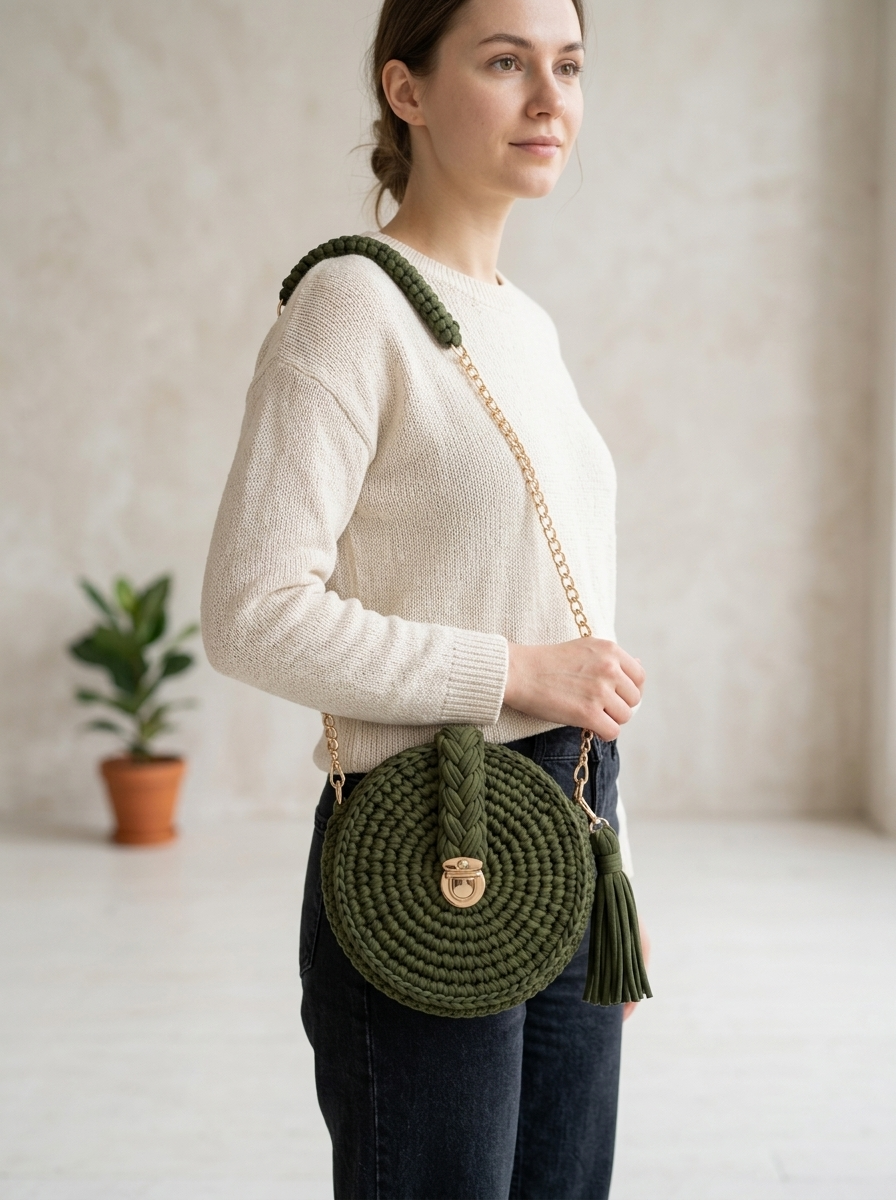
I made this bag and I cannot stop carrying it everywhere. This olive round crossbody bag combines chunky t-shirt yarn with gold hardware for a look that feels designer but costs a fraction of the price. The best part? You can crochet this entire bag in an afternoon.

This crochet pattern works up quickly because you are using super bulky yarn and a large hook. If you can crochet in the round and know your basic stitches, you have everything you need. I will walk you through every single step, including that gorgeous braided flap detail and.the matching tassel.
Let me show you exactly how to recreate this step by step crochet tutorial from start to finish.
Why This Round Crossbody Bag Pattern Works So Well
Round bags are having a major moment right now. They photograph beautifully, hold more than you would expect, and make any outfit look intentional. This particular design uses single crochet stitches worked in continuous rounds to create that smooth, tightly woven texture you see in the photo.
The olive green color is incredibly versatile. It pairs with neutrals, denim, florals, and earth tones. But honestly? This pattern works in any color of t-shirt yarn you love.
What makes this bag special is the combination of elements. You have the crocheted body with its satisfying spiral construction. You have that chunky braided flap sitting right above the clasp. And then you have the finishing touches: a gold chain strap with a crocheted handle cover, a push lock clasp, and a matching tassel hanging from the side.
It looks complicated. It is not.
Materials You Will Need
Before we start, gather everything so you can work without interruption.
Yarn:
Hook:
Hardware:
Tools:
Finished Dimensions:
Skill Level and Stitches Used
This is an intermediate beginner project. You should be comfortable working in the round and increasing evenly.
Abbreviations and Definitions:
Ch (chain): Wrap yarn over hook, pull through loop on hook. This creates the foundation loops.
Sl st (slip stitch): Insert hook, yarn over, pull through stitch AND loop on hook in one motion. Used for joining or invisible movement.
Sc (single crochet): Insert hook into stitch, yarn over, pull up a loop (two loops on hook), yarn over, pull through both loops. This is your main stitch for the entire bag.
Inc (increase): Work 2 single crochet stitches into the same stitch. This makes your circle grow outward.
Magic ring (also called magic circle or adjustable ring): A technique that creates a tightened center with no hole. If you prefer, you can chain 2 and work your first round into the second chain from the hook instead.
Pattern Notes Before You Begin
This bag is worked in continuous rounds. You will not join at the end of each round. Instead, you will place a stitch marker in your first stitch and move it up each round to keep track of where you are.
T-shirt yarn can be tricky because it stretches. Keep your tension firm but not so tight that you struggle to insert your hook. The finished fabric should be dense with no gaps between stitches.
You will make two identical circles for the front and back of the bag, then join them together with a side panel. This construction gives the bag its shape and depth.
Crochet Pattern for the Olive Round Crossbody Bag
Front Circle Panel
Round 1: Create a magic ring. Work 6 sc into the ring. Pull the tail to close. Place a stitch marker in your first sc. (6 sts)
Round 2: Inc in each st around. (12 sts)
Round 3: *Sc in next st, inc in next st* repeat around. (18 sts)
Round 4: *Sc in next 2 sts, inc in next st* repeat around. (24 sts)
Round 5: *Sc in next 3 sts, inc in next st* repeat around. (30 sts)
Round 6: *Sc in next 4 sts, inc in next st* repeat around. (36 sts)
Round 7: *Sc in next 5 sts, inc in next st* repeat around. (42 sts)
Round 8: *Sc in next 6 sts, inc in next st* repeat around. (48 sts)
Round 9: *Sc in next 7 sts, inc in next st* repeat around. (54 sts)
Round 10: *Sc in next 8 sts, inc in next st* repeat around. (60 sts)
Sl st to next st to even out the edge. Fasten off and weave in your end.
Your circle should measure approximately 8 inches across. If it is smaller, your tension may be too tight. If it is larger, your tension may be loose. Either way, as long as both circles match, you will be fine.
Back Circle Panel
Repeat Rounds 1 through 10 exactly as written for the front panel. You now have two matching circles.
Side Panel (Gusset)
This strip creates the depth of your bag and connects the front to the back.
Row 1: Ch 7. Sc in 2nd ch from hook and in each ch across. (6 sts)
Rows 2 through 95: Ch 1, turn. Sc in each st across. (6 sts)
Your strip should be long enough to wrap around the entire circumference of your circle panels, leaving a gap at the top for the opening. Measure against your circle. The opening should be approximately 5 to 6 inches wide at the top of the bag.
If your strip is too short, continue adding rows. If too long, unravel a few rows. T-shirt yarn has some stretch, so slightly shorter is okay.
Fasten off, leaving a long tail for sewing.
Assembly Instructions
Joining the Panels
Step 1: Lay your front circle flat, right side facing you. Position the side panel strip around the edge, starting at the bottom center. The strip should wrap around both sides and stop a few inches before meeting at the top.
Step 2: Using your yarn needle and a length of olive yarn, whip stitch the side panel to the front circle. Work through both pieces, keeping stitches close together for a sturdy seam.
Step 3: Once the front is attached, repeat with the back circle. Make sure the opening is at the top of the bag on both sides.
Step 4: Reinforce the corners where the side panel ends meet the opening. These spots take stress when you carry the bag.
Attaching D-Rings for the Strap
Step 1: Cut two short lengths of t-shirt yarn, approximately 6 inches each.
Step 2: Loop one piece through a D-ring. Fold in half.
Step 3: Position the D-ring at the top corner of the bag opening, on the outside. Thread both tails through to the inside and tie securely. Use fabric glue or stitch in place to reinforce.
Step 4: Repeat on the other side.
How to Crochet the Braided Flap
This decorative element sits above your clasp and adds that handmade luxury feel.
Step 1: Cut three strands of t-shirt yarn, each approximately 24 inches long.
Step 2: Hold all three strands together. Tie an overhand knot about 2 inches from one end.
Step 3: Braid the three strands tightly until you have a braided section approximately 4 to 5 inches long.
Step 4: Tie another overhand knot to secure. Trim the ends to about 1 inch.
Step 5: Position the braid horizontally across the upper front of your bag, just above where the clasp will sit. Stitch both knotted ends to the bag securely, hiding the raw ends underneath.
Attaching the Push Lock Clasp
Your clasp has two parts: the decorative top piece with the thumb turn, and the bottom catch piece.
Step 1: Position the top piece on the center front of your bag, just below the braid. Mark where the prongs will go through.
Step 2: Use sharp scissors to create small holes for the prongs. Push them through and bend flat on the inside. If your clasp comes with a backing plate, use it.
Step 3: Position the catch piece on the inside of the back panel, directly behind where the top piece sits when the bag is closed. Mark, cut holes, insert prongs, and secure.
Test the clasp before fully securing everything. Adjust placement if needed.
How to Make the Matching Tassel
Step 1: Cut a piece of cardboard approximately 4 inches tall.
Step 2: Wrap t-shirt yarn around the cardboard approximately 8 to 10 times.
Step 3: Slide a short piece of yarn under the top loops and tie tightly. This becomes your hanging loop.
Step 4: Cut through all the loops at the bottom of the cardboard.
Step 5: Wrap another piece of yarn around the tassel about half an inch below the top tie, creating the tassel head. Tie securely and tuck the ends inside.
Step 6: Trim the bottom of the tassel evenly.
Step 7: Attach the tassel to one of your D-rings or directly to the chain strap.
Crocheted Chain Handle Cover
That padded section on the chain strap is both comfortable and stylish.
Row 1: Ch 31. Sc in 2nd ch from hook and in each ch across. (30 sts)
Rows 2 through 6: Ch 1, turn. Sc in each st across. (30 sts)
Fasten off, leaving a long tail.
Wrap this crocheted strip around the center section of your chain strap. Use your yarn needle to whip stitch the long edges together, encasing the chain inside.
Final Assembly
Attach your chain strap to both D-rings using the lobster clasps or swivel hooks. Adjust the length if your chain has extra links.
Give your bag a final once-over. Trim any stray yarn ends. Make sure all hardware is secure.
Tips for Success
If you have never worked with t-shirt yarn before, here is what to expect. It can twist and curl as you work. Just let it relax and straighten it out as you go. Your finished fabric should look uniform even if the yarn felt awkward while crocheting.
For a different look, try making this bag in cream, blush pink, mustard, or classic black. The gold hardware looks stunning against any of these colors.
Want a longer strap? Simply use a longer chain or skip the chain entirely and crochet a strap using rows of single crochet.
You Did It
This olive round crossbody bag crochet pattern takes a bit of time but creates something you will genuinely use and love. Every time someone asks where you got your bag, you get to say you made it yourself.
Thank you so much for choosing this pattern and trusting me to guide you through it. I truly appreciate you being here.
I would absolutely love to see your finished bag. Tag me on Instagram or share in our Facebook group. Seeing your creations makes my entire day.
Happy crocheting, friend. You have got this.
