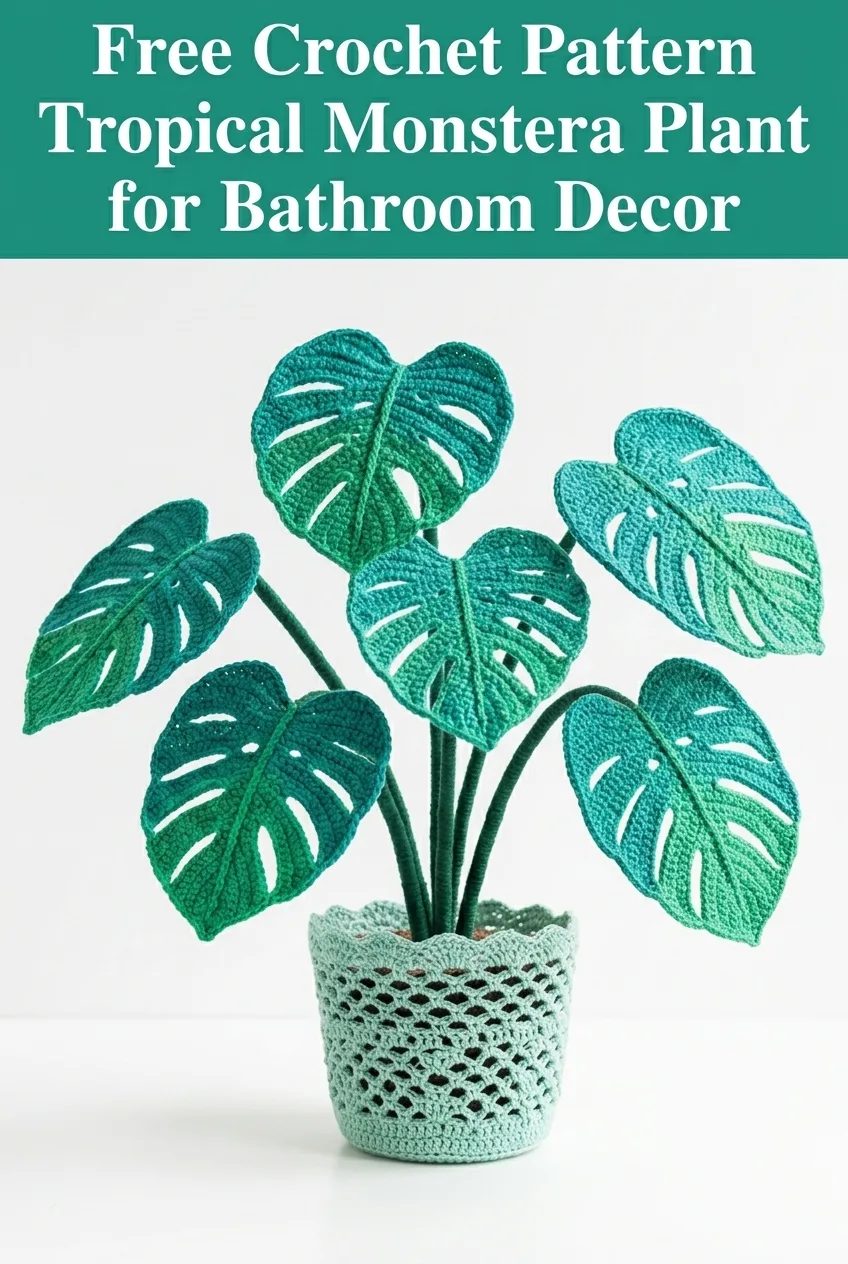
This is a crocheted monstera plant with fenestrated leaves, long wrapped stems, and a lacy pot cover. You need intermediate skills, basic stitches, and some patience. The finished piece stands approximately 12 inches tall and makes stunning botanical decor that never needs watering.
Why Crochet a Monstera Plant?
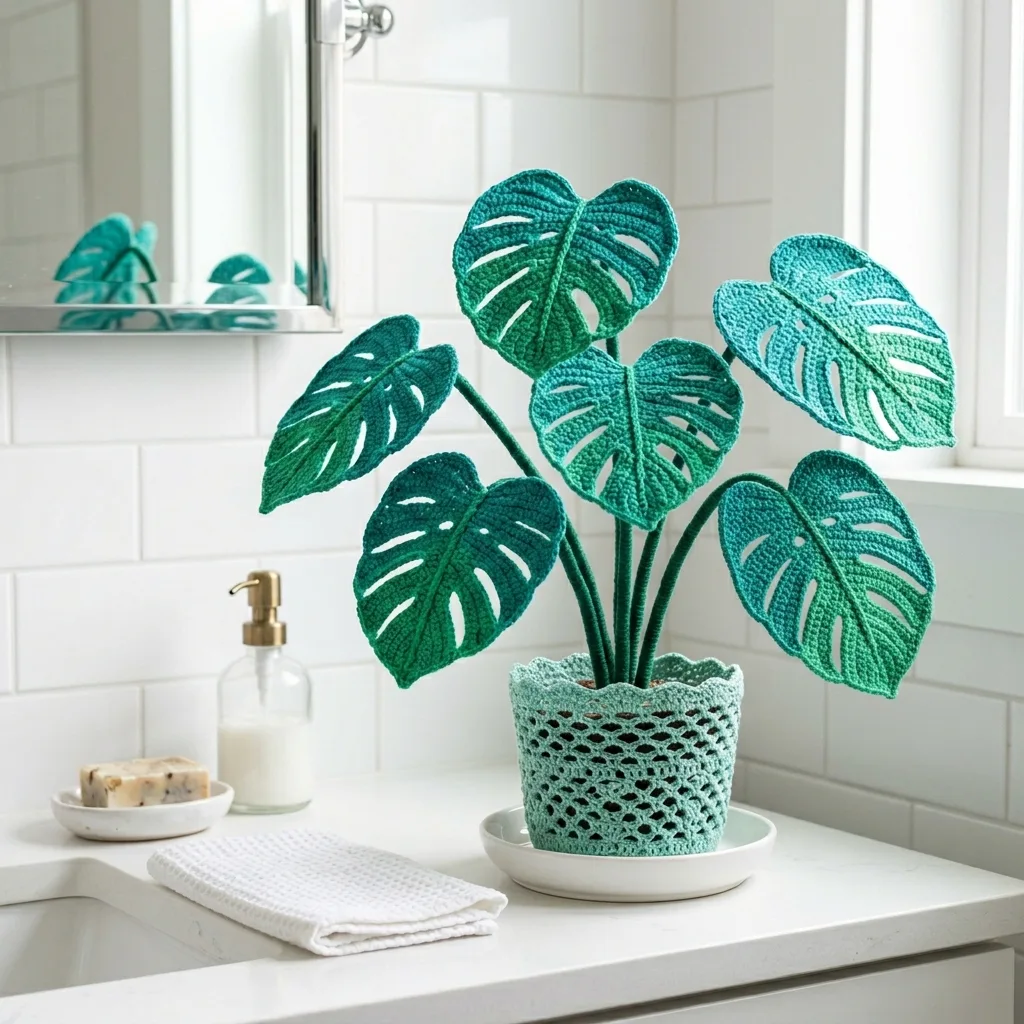
I have been obsessed with houseplants for years, but my bathroom has terrible lighting. Real plants just wilt and die in there. So I decided to crochet one instead.
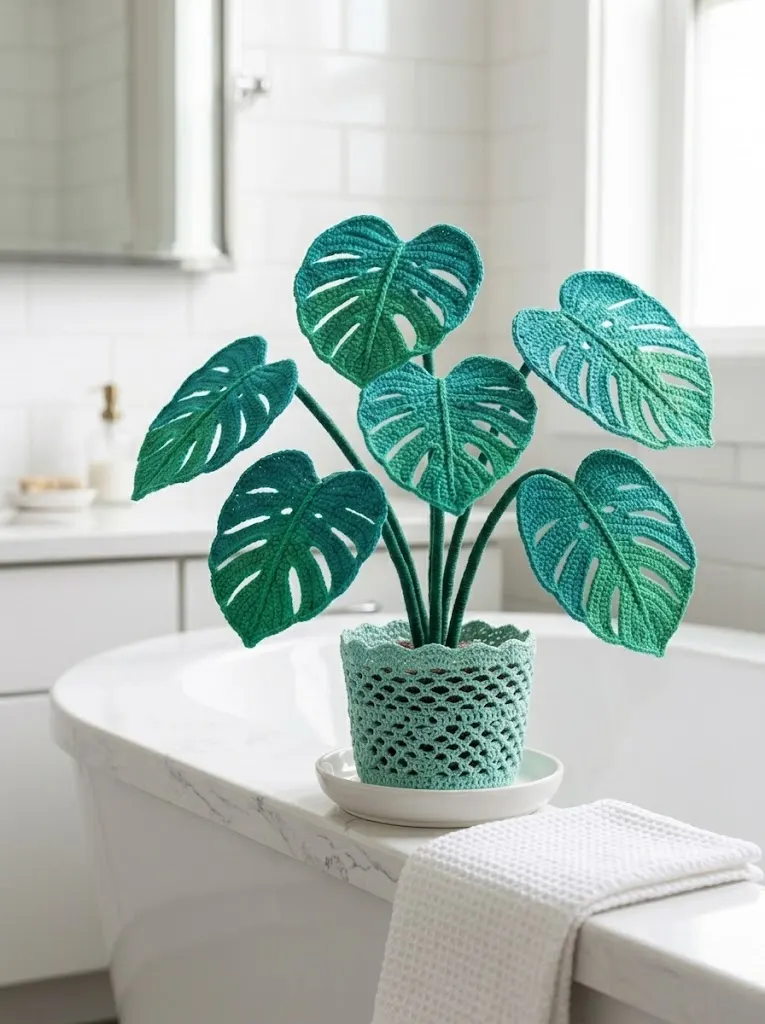
This tropical monstera crochet plant solves the problem beautifully. It looks lush and vibrant year round. It adds that jungle bathroom vibe without any maintenance. And honestly, it becomes a conversation starter every single time someone visits.
The construction involves several distinct elements. You will make individual monstera leaves with characteristic splits and holes. You will wrap stems with yarn to create that realistic plant look. And you will finish with an openwork pot cover that ties everything together.
Don’t let the intricate appearance intimidate you. Each component uses familiar stitches worked in creative ways. If you can single crochet and double crochet, you can absolutely make this.
Materials You Will Need
Gather these supplies before you begin your tropical monstera crochet plant project.
Yarn:
I recommend 100% cotton yarn for this project. Cotton holds its shape well and creates crisp stitch definition that makes the leaves look realistic. Brands like Lily Sugar’n Cream or Paintbox Cotton work wonderfully.
Hook:
Additional Supplies:
Gauge and Finished Size
Gauge: 16 single crochet stitches and 18 rows equals 4 inches square in single crochet with 4.0mm hook
Finished Leaf Size: Large leaves measure approximately 5 inches wide by 6 inches tall. Medium leaves measure approximately 4 inches wide by 5 inches tall.
Finished Plant Height: Approximately 12 to 14 inches from pot base to tallest leaf tip
Gauge matters here because you want leaves that look proportional to each other and to your pot. Take time to check your tension before diving in.
Abbreviations and Stitch Definitions
Let me walk you through every stitch abbreviation you will encounter in this crochet tutorial.
Ch = Chain. Wrap yarn over hook, pull through loop on hook. This creates the foundation for most crochet work.
Sl st = Slip stitch. Insert hook, yarn over, pull through both the stitch and the loop on your hook in one motion. Used for joining and moving across work invisibly.
Sc = Single crochet. Insert hook, yarn over, pull up a loop (2 loops on hook), yarn over, pull through both loops. The shortest and most basic crochet stitch.
Hdc = Half double crochet. Yarn over, insert hook, yarn over, pull up a loop (3 loops on hook), yarn over, pull through all 3 loops. Slightly taller than single crochet.
Dc = Double crochet. Yarn over, insert hook, yarn over, pull up a loop (3 loops on hook), yarn over, pull through 2 loops, yarn over, pull through remaining 2 loops. Creates a taller, more open fabric.
Tr = Treble crochet. Yarn over twice, insert hook, yarn over, pull up a loop (4 loops on hook), yarn over, pull through 2 loops three times. The tallest stitch used in this pattern.
Inc = Increase. Work 2 stitches into the same stitch to add width.
Dec = Decrease. Work 2 stitches together as one to reduce width.
Sk = Skip. Pass over a stitch without working into it.
How to Crochet Monstera Leaves (Make 6 to 8)
The heart shaped leaves with their signature splits give this tropical monstera crochet plant its authentic look. You will make leaves in different sizes and colors for visual variety.
Large Monstera Leaf Pattern
Work this leaf in rows, turning at the end of each row.
Row 1: Ch 4. Sc in 2nd ch from hook, sc in next ch, 3 sc in last ch (this creates the point). Working along opposite side of foundation chain, sc in next 2 ch. (7 sts)
Row 2: Ch 1, turn. 2 sc in first st, sc in next 2 sts, 3 sc in center st, sc in next 2 sts, 2 sc in last st. (11 sts)
Row 3: Ch 1, turn. 2 sc in first st, sc in next 4 sts, 3 sc in center st, sc in next 4 sts, 2 sc in last st. (15 sts)
Row 4: Ch 1, turn. 2 sc in first st, sc in next 6 sts, 3 sc in center st, sc in next 6 sts, 2 sc in last st. (19 sts)
Row 5: Ch 1, turn. 2 sc in first st, sc in next 8 sts, 3 sc in center st, sc in next 8 sts, 2 sc in last st. (23 sts)
Row 6: Ch 1, turn. Sc in first 11 sts, 3 sc in center st, sc in last 11 sts. (25 sts)
Row 7: Ch 1, turn. Sc in first 12 sts, 3 sc in center st, sc in last 12 sts. (27 sts)
Row 8: Ch 1, turn. Sc in first 13 sts, 3 sc in center st, sc in last 13 sts. (29 sts)
Creating the Fenestrations (Leaf Holes)
This is where the magic happens. The characteristic monstera splits require some shaping.
Row 9: Ch 1, turn. Sc in first 5 sts, ch 3, sk 3 sts, sc in next 6 sts, 3 sc in center st, sc in next 6 sts, ch 3, sk 3 sts, sc in last 5 sts. (23 sc plus 2 ch-3 spaces)
Row 10: Ch 1, turn. Sc in first 5 sts, 3 sc in ch-3 space, sc in next 6 sts, 3 sc in center st, sc in next 6 sts, 3 sc in ch-3 space, sc in last 5 sts. (31 sts)
Row 11: Ch 1, turn. Sc in first 6 sts, ch 4, sk 4 sts, sc in next 5 sts, 3 sc in center st, sc in next 5 sts, ch 4, sk 4 sts, sc in last 6 sts. (25 sc plus 2 ch-4 spaces)
Row 12: Ch 1, turn. Sc in first 6 sts, 4 sc in ch-4 space, sc in next 5 sts, 3 sc in center st, sc in next 5 sts, 4 sc in ch-4 space, sc in last 6 sts. (33 sts)
Finishing the Leaf Edge
Border Round: Do not turn. Work evenly around entire leaf edge. Sc around perimeter, placing 3 sc at leaf tip point and working 2 sc at each curve for smooth shaping. Sl st to first sc to join. Fasten off.
Weave in all ends on the wrong side of the leaf.
Medium Monstera Leaf Pattern
Follow the same construction but stop at Row 6. Add fenestrations on Row 5 using ch 2, sk 2 instead of ch 3, sk 3 for smaller holes proportional to the leaf size.
Creating Leaf Veins
For that realistic raised vein detail visible in the finished piece, use surface slip stitch embroidery.
Thread tapestry needle with matching yarn. Starting at the stem base, create a central line up to the leaf tip using running stitches or surface chain stitch. Branch off diagonally toward each fenestration.
Alternatively, use craft wire sandwiched between two leaf pieces to create dimensional veins that help leaves hold their shape.
How to Make Monstera Stems
The stems give your tropical monstera crochet plant its height and structure.
Materials per stem: One piece of 18 gauge floral wire (8 to 12 inches depending on desired height), green yarn, green floral tape.
Step by Step Stem Construction
1. Cut floral wire to desired length. Bend one end into a small loop to prevent poking through later.
2. Wrap entire wire with green floral tape first. This creates a base that grips yarn better.
3. Secure yarn end at wire base with a tight knot.
4. Wrap yarn tightly and evenly around wire, covering completely. Keep wraps close together with no gaps showing. Work from bottom to top.
5. When you reach the top, secure with another tight knot. Apply small dot of craft glue to prevent unraveling.
6. Leave approximately 2 inches of wrapped stem at top to attach to leaf center.
Attaching Leaves to Stems
Position stem behind leaf, aligned with center vein. Whip stitch stem to leaf back using matching yarn, securing at leaf base and working up center vein about 1 inch.
For extra stability, sandwich stem between two identical leaves worked back to back. Whip stitch edges together with leaf right sides facing outward.
Crocheted Pot Cover Pattern
This lacy openwork cover transforms a plain pot into botanical decor that coordinates beautifully.
Use light mint green yarn and 3.5mm hook for this component.
Foundation: Ch 60. Join with sl st to first ch to form ring, being careful not to twist chain. (60 ch)
Round 1: Ch 3 (counts as first dc throughout), dc in each ch around. Sl st to top of ch-3 to join. (60 dc)
Round 2: Ch 5 (counts as dc plus ch-2), sk 1 st, dc in next st, *ch 2, sk 1 st, dc in next st* repeat around. Sl st to 3rd ch of beginning ch-5. (30 dc, 30 ch-2 spaces)
Round 3: Sl st into ch-2 space. Ch 3, 2 dc in same space, ch 1, *3 dc in next ch-2 space, ch 1* repeat around. Sl st to top of ch-3. (30 shell clusters)
Round 4: Ch 5, dc in same st, *ch 2, dc in center dc of next shell, ch 2, (dc, ch 2, dc) in ch-1 space* repeat around, adjusting final repeat. Sl st to join.
Round 5: Sl st to ch-2 space. Ch 3, 4 dc in same space (creates scallop edge), *sc in next ch-2 space, 5 dc in next ch-2 space* repeat around. Sl st to join. Fasten off.
Shaping the Pot Cover
The cover naturally flares outward due to increasing stitch pattern. Weave elastic thread or thin yarn through Round 1 to cinch bottom around pot base. Tie securely.
Assembly and Finishing
Now bring your tropical monstera crochet plant together.
1. Prepare your pot. Place foam block inside pot, trimming to fit snugly.
2. Stiffen the leaves. Brush leaves with diluted white glue or commercial fabric stiffener. Pin to blocking mat in desired curved shape. Let dry completely, at least 24 hours.
3. Arrange stems. Insert stem wire ends into foam at varying heights and angles. Cluster some leaves, space others. Aim for natural, asymmetrical arrangement.
4. Add pot cover. Slip crocheted cover over pot. Adjust scalloped edge to drape attractively.
5. Final touches. Bend leaves and stems gently to create natural movement. Some leaves should face forward, others sideways, a few tilting backward.
Tips for Success
Blocking is essential. Stiffened, shaped leaves look infinitely more realistic than soft floppy ones.
Vary your greens. Using multiple shades creates depth and visual interest, just like real plants.
Don’t rush assembly. Spend time arranging and rearranging until the composition feels natural and balanced.
Consider scale. Match pot size to leaf size. Too small a pot makes leaves look overwhelming. Too large diminishes impact.
Customization Ideas
Perfect Placement Ideas
This beginner friendly botanical crochet project works beautifully in bathrooms, bedrooms, offices, or anywhere you want greenery without maintenance. The cotton yarn handles humidity well, making bathrooms an especially smart choice.
I hope you love making this tropical monstera crochet plant as much as I enjoyed designing it. The combination of familiar stitches, creative construction, and stunning finished result makes this one of my favorite projects to recommend.
If you make this pattern, I would absolutely love to see your version. Tag me on Instagram or share your finished plant in our Facebook group. Your creativity always inspires me.
Save this pattern to your Pinterest boards so you can find it whenever you are ready to start. And please drop a comment below if you make one. I read every single comment and love hearing how your projects turn out!
