I call this one the Creamy Openwork Lace Sweater, and honestly, it started as a scribble in my notebook about three years ago. I had been dreaming up a sweater that looked intricate and boutique-worthy but was actually built on a simple repeat. Something that would make people ask "you made that?" while secretly being straightforward to construct. I finally brought it to life this season, and I cannot wait to share every detail with you.
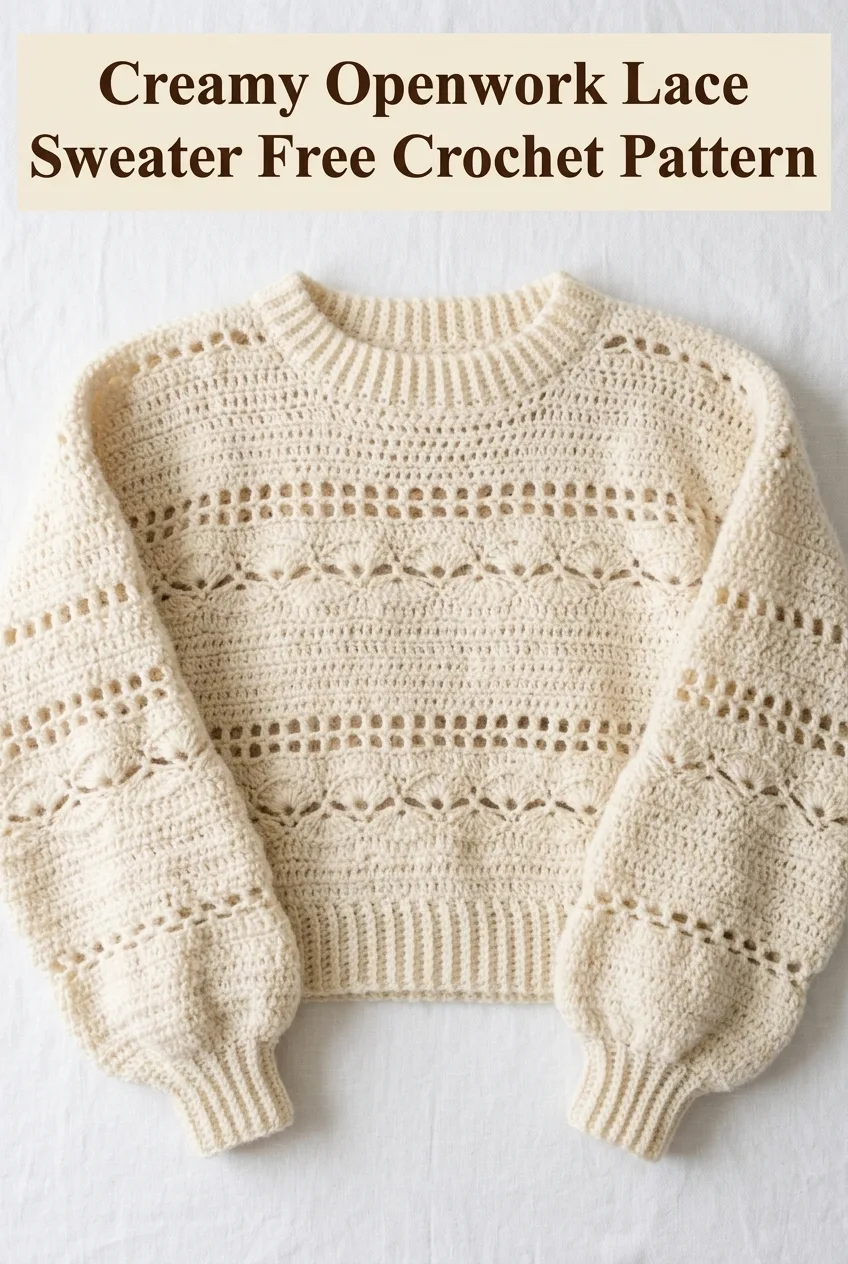
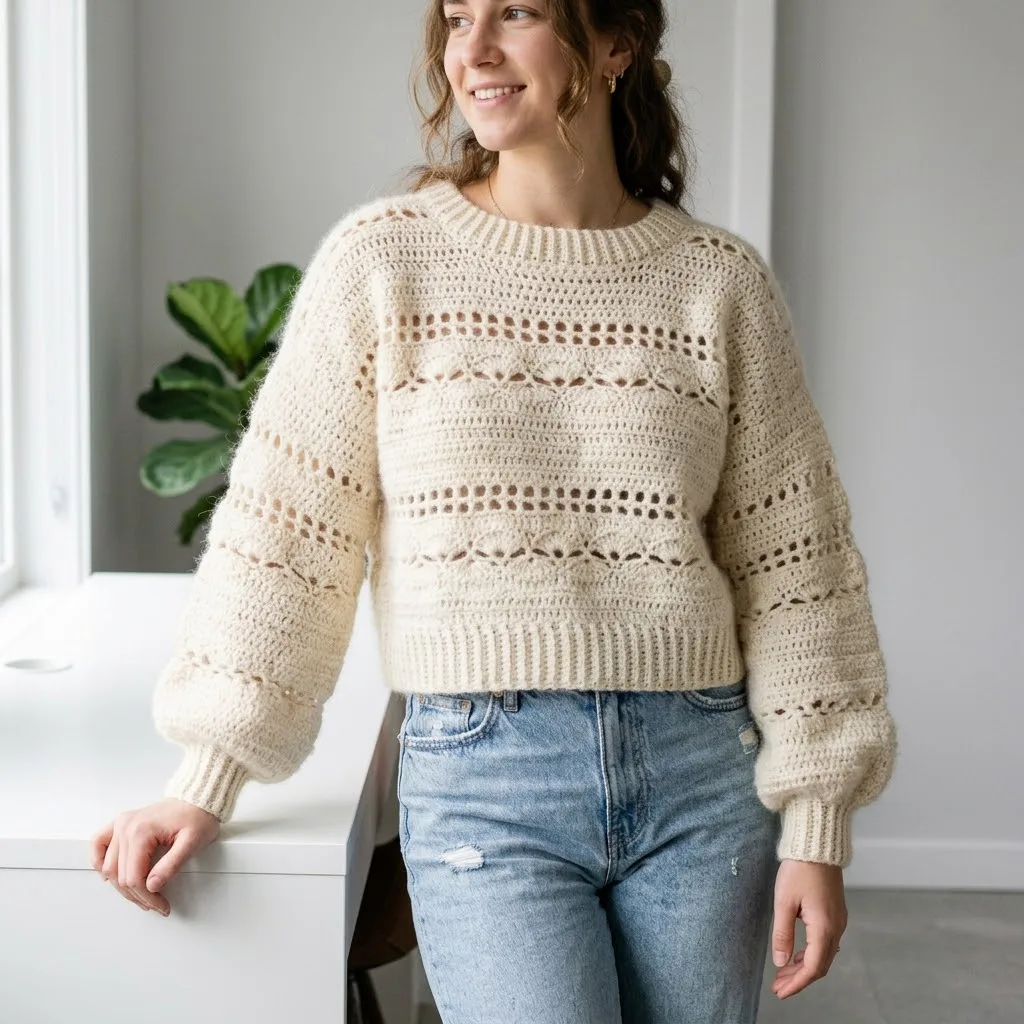
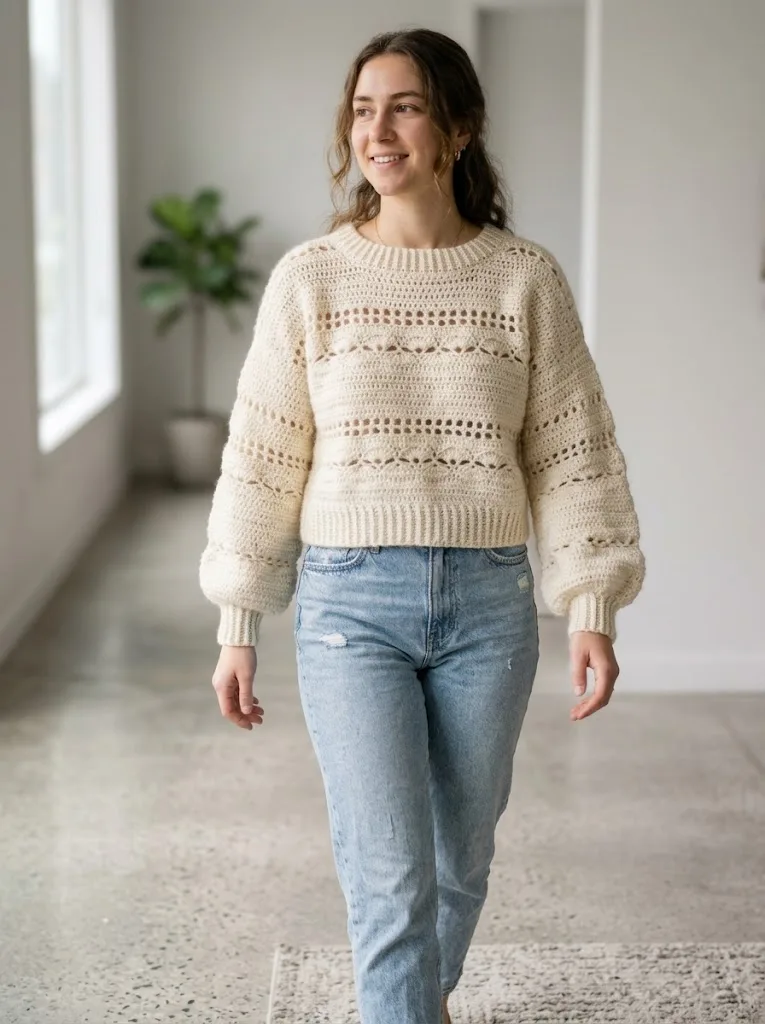
This crochet sweater pattern combines delicate openwork lace bands with solid textured sections, creating that gorgeous striped effect you see running horizontally across the body and sleeves. The result is a cozy yet breathable pullover perfect for transitional weather or layering over a tank top in cooler months.
Why You Will Love This Crochet Sweater Pattern
This sweater has that effortlessly elegant look that pairs beautifully with high-waisted jeans, skirts, or dressed up with trousers. The cropped length sits right at the natural waist, making it flattering on many body types. Those balloon sleeves with fitted ribbed cuffs add a romantic, modern touch that elevates the whole design.
What makes this crochet tutorial special is the texture variety. You are not just working row after row of the same stitch. Instead, you will move through different stitch patterns that keep the project interesting from start to finish. The openwork sections create visual interest without being overly complicated.
Skill level: Intermediate. If you have made a basic sweater or feel comfortable with garment construction, you can absolutely handle this project.
Materials Needed for This Crochet Pattern
Yarn:
Hooks:
Notions:
Gauge
Main body stitch pattern: 14 stitches and 12 rows = 4 inches using 5.0mm hook
Ribbing: 16 stitches and 14 rows = 4 inches using 4.5mm hook
Gauge matters for garments. Take time to make a swatch before diving in. If your swatch is too small, go up a hook size. Too large? Go down. This step saves heartache later, I promise.
Finished Measurements
Size S/M (shown):
Abbreviations and Stitch Definitions
Let me walk you through every stitch abbreviation you will encounter. I define these in plain language so you know exactly what your hook should be doing.
ch = chain. Wrap yarn over hook, pull through loop on hook. This creates your foundation.
sl st = slip stitch. Insert hook, yarn over, pull through stitch AND loop on hook in one motion. Used for joining and invisible movement.
sc = single crochet. Insert hook into stitch, yarn over, pull up a loop (2 loops on hook), yarn over, pull through both loops.
hdc = half double crochet. Yarn over, insert hook into stitch, yarn over, pull up a loop (3 loops on hook), yarn over, pull through all 3 loops at once.
dc = double crochet. Yarn over, insert hook into stitch, yarn over, pull up a loop (3 loops on hook), yarn over, pull through 2 loops, yarn over, pull through remaining 2 loops.
sk = skip. Miss the indicated stitch and work into the next one.
sp = space. The gap or hole created by chains or skipped stitches.
BLO = back loop only. Instead of inserting your hook under both loops at the top of a stitch, insert it under only the back loop (the one farthest from you).
FLO = front loop only. Insert hook under only the front loop (the one closest to you).
ch-sp = chain space. The gap created by a chain in the previous row.
Special Techniques
Openwork Lace Section
This creates those beautiful horizontal bands with the eyelet holes. It combines chains and double crochets to form the airy, lacy look.
Ribbing
The neckline, hem, and cuffs use rows of single crochet worked in the back loop only. This creates stretchy, knit-like ribbing that hugs the body nicely.
Seaming
The body is worked as front and back panels, then seamed at the shoulders and sides. Sleeves are sewn into the armholes. I recommend the mattress stitch or whip stitch for clean seams.
Step by Step Crochet Pattern
Back Panel
Foundation Row: Using 4.5mm hook, ch 12 for ribbing.
Ribbing Section:
Row 1: Sc in 2nd ch from hook and in each ch across, turn. (11 sts)
Rows 2 through 56: Ch 1, sc BLO in each st across, turn. (11 sts)
This creates your bottom ribbing band. It should measure approximately 16 inches long when slightly stretched.
Rotate your work 90 degrees. You will now pick up stitches along the long edge of the ribbing.
Body Setup Row: Using 5.0mm hook, work 70 evenly spaced hdc along the edge of the ribbing, turn. (70 sts)
Solid Section:
Rows 1 through 4: Ch 2 (does not count as a stitch here), hdc in each st across, turn. (70 sts)
Openwork Lace Band:
Row 5: Ch 3 (counts as dc), sk next st, dc in next st, *ch 1, sk 1, dc in next st*, repeat from * to * across, turn. (35 dc, 34 ch-1 sps)
Row 6: Ch 3, dc in first ch-1 sp, *ch 1, dc in next ch-1 sp*, repeat from * to * across, dc in top of turning ch, turn.
Row 7: Repeat Row 6.
Row 8: Ch 2, hdc in each dc and each ch-1 sp across, turn. (70 sts)
Texture Band with Decorative Loops:
Rows 9 through 11: Ch 2, hdc in each st across, turn. (70 sts)
Row 12: Ch 1, sc in first 4 sts, *ch 5, sk 3, sc in next 5 sts*, repeat from * to * across, ending with sc in last 4 sts, turn.
Row 13: Ch 2, hdc in each sc, 3 hdc in each ch-5 sp across, turn. (70 sts)
Repeat the pattern sequence (Rows 1 through 13) two more times for a total of three pattern repeats.
Work 4 more rows of hdc for the upper body.
Armhole shaping:
Next Row: Sl st in first 5 sts, ch 2, hdc across to last 5 sts, leave remaining sts unworked, turn. (60 sts)
Continue in pattern for 6 more inches, ending after a solid section.
Shoulder shaping:
Fasten off, leaving a 20-inch tail for seaming.
Front Panel
Work exactly as the Back Panel. The neckline on this sweater sits high, so front and back are identical.
Sleeves (Make 2)
Cuff Ribbing:
Using 4.5mm hook, ch 10.
Row 1: Sc in 2nd ch from hook and in each ch across, turn. (9 sts)
Rows 2 through 28: Ch 1, sc BLO in each st across, turn. (9 sts)
Rotate and pick up stitches:
Using 5.0mm hook, work 36 evenly spaced hdc along the ribbing edge, turn. (36 sts)
Increase Row: Ch 2, 2 hdc in first st, hdc across to last st, 2 hdc in last st, turn. (38 sts)
Work in pattern (matching the body), adding 2 stitches every 4th row until you have 54 stitches.
Continue even in pattern until sleeve measures 18 inches from cuff edge.
Fasten off, leaving a long tail.
Neckband
After seaming shoulders, attach yarn at one shoulder seam.
Round 1: Sc evenly around neck opening, sl st to first sc to join.
Rounds 2 through 6: Ch 1, sc BLO in each st around, sl st to join.
Fasten off and weave in end.
Assembly Instructions
1. Block all pieces before seaming. Wet blocking or steam blocking works well for this yarn type. Pin pieces to measurements and allow to dry completely.
2. Seam shoulders using mattress stitch or whip stitch. Leave center open for neck.
3. Attach sleeves by pinning the center of the sleeve cap to the shoulder seam, then working outward. Sew securely.
4. Seam sides and underarms in one continuous seam from hem to cuff.
5. Work neckband as described above.
6. Weave in all ends using your tapestry needle. Weave through several stitches, then double back for security.
Tips for Success with This Beginner Friendly Pattern
Yarn choice matters. A yarn with some fuzz or halo will soften the edges of your stitches and give that boutique sweater look. Pure cotton will not drape the same way.
Count your stitches. Especially in the openwork sections, it is easy to miss a chain space. Count at the end of each row until you feel confident.
Try it on as you go. Once your back panel is complete, hold it up to your body. This gives you a chance to adjust length before committing.
Do not stress about perfect seams. The fuzzy yarn hides a lot. Your seams do not need to be invisible to look professional.
Take breaks during the lace rows. These require a bit more focus than the solid sections. Fresh eyes catch mistakes faster.
Customization Ideas
Want a longer sweater? Simply add another pattern repeat before starting the armhole shaping.
Prefer fitted sleeves? Skip the increases and work the sleeve straight from cuff to underarm.
Need a larger size? Add 10 stitches to your foundation and adjust the pattern repeats to keep the openwork centered.
Love color? The lace sections would look stunning in a contrasting shade. Imagine cream body with dusty rose lace bands.
Caring for Your Finished Sweater
Hand wash in cool water with a gentle detergent. Squeeze out excess water without wringing. Lay flat on a towel and reshape. Allow to dry completely before storing.
If using a wool or alpaca blend, store with cedar balls to protect from moths.
I hope this Creamy Openwork Lace Sweater pattern brings you as much joy to make as it did for me to design. There is something so satisfying about wearing a handmade garment, especially one this cozy and beautiful.
Thank you so much for choosing to make this pattern. I truly appreciate you being here. If you complete this sweater, I would absolutely love to see it. Tag me on Instagram or share in my Facebook group. Seeing your creations is genuinely the highlight of my week.
If this pattern caught your eye, go ahead and save it to your Pinterest boards so you can find it when you are ready to cast on. And please drop a comment below if you make this sweater or have any questions along the way. I read every single one and love connecting with you.
