I’ve been looking for the perfect oversized vest pattern for months now, and after testing dozens of approaches, this is my favourite. The cable details give it that cozy, classic look without the fussiness of actual knitting. If you’ve been wanting a statement piece that looks like it came from a boutique but works up on your couch with a cup of tea, this is the one.
Why You’ll Love This Crochet Sweater Vest Pattern
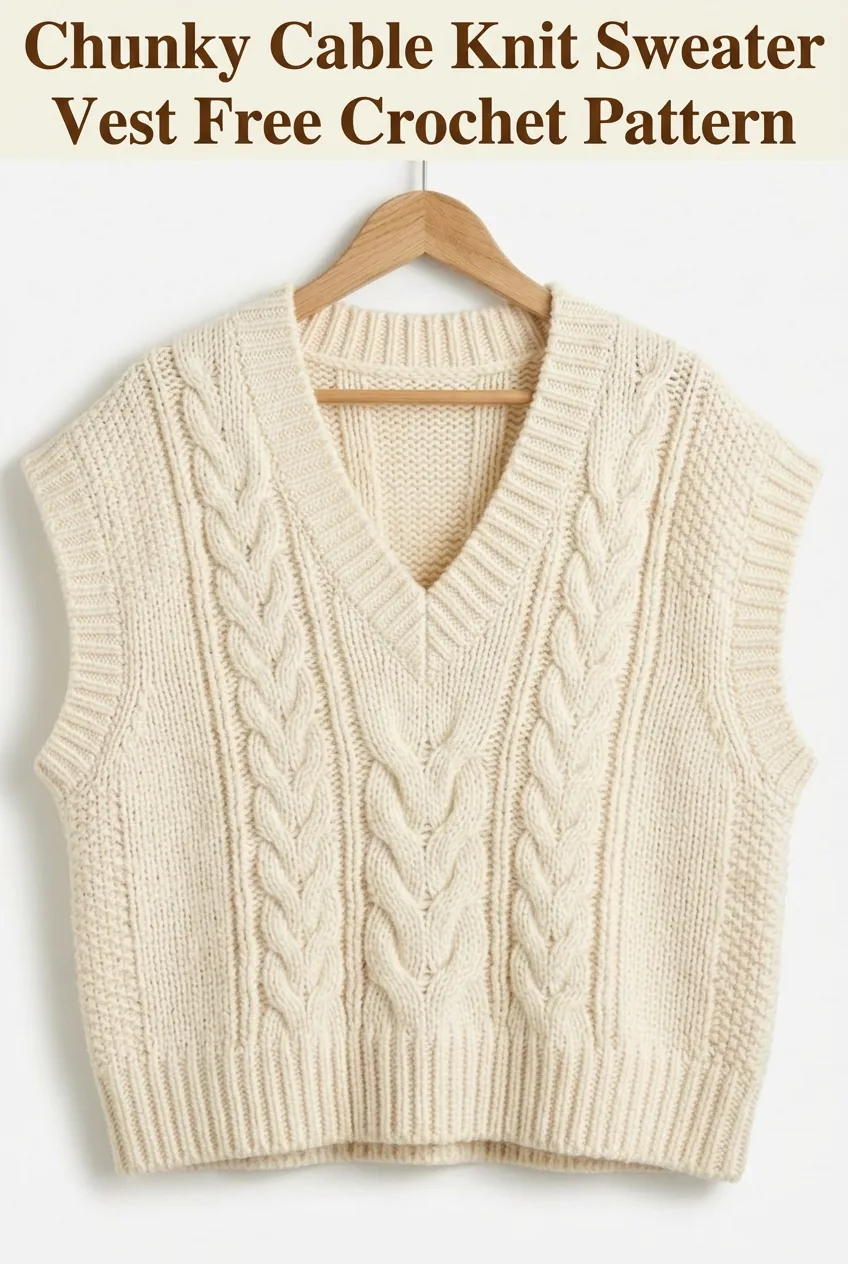
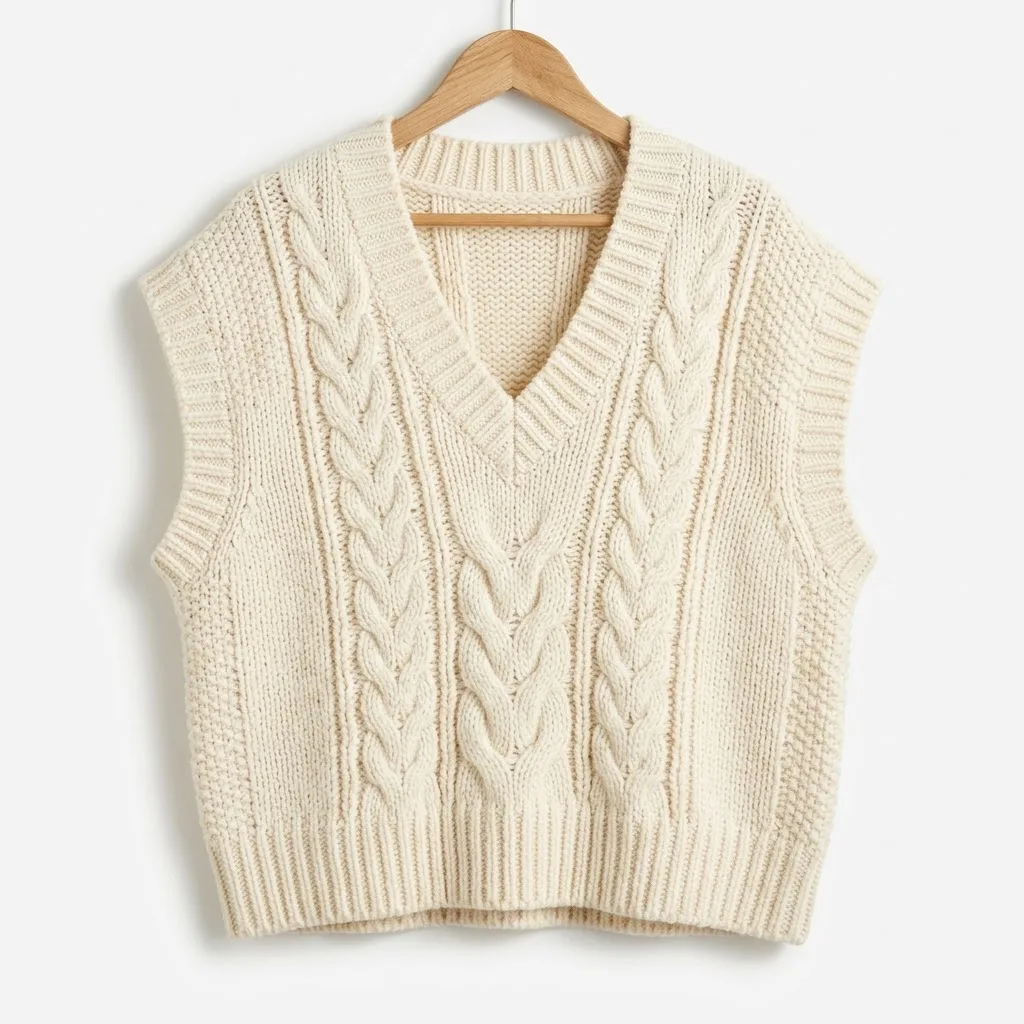
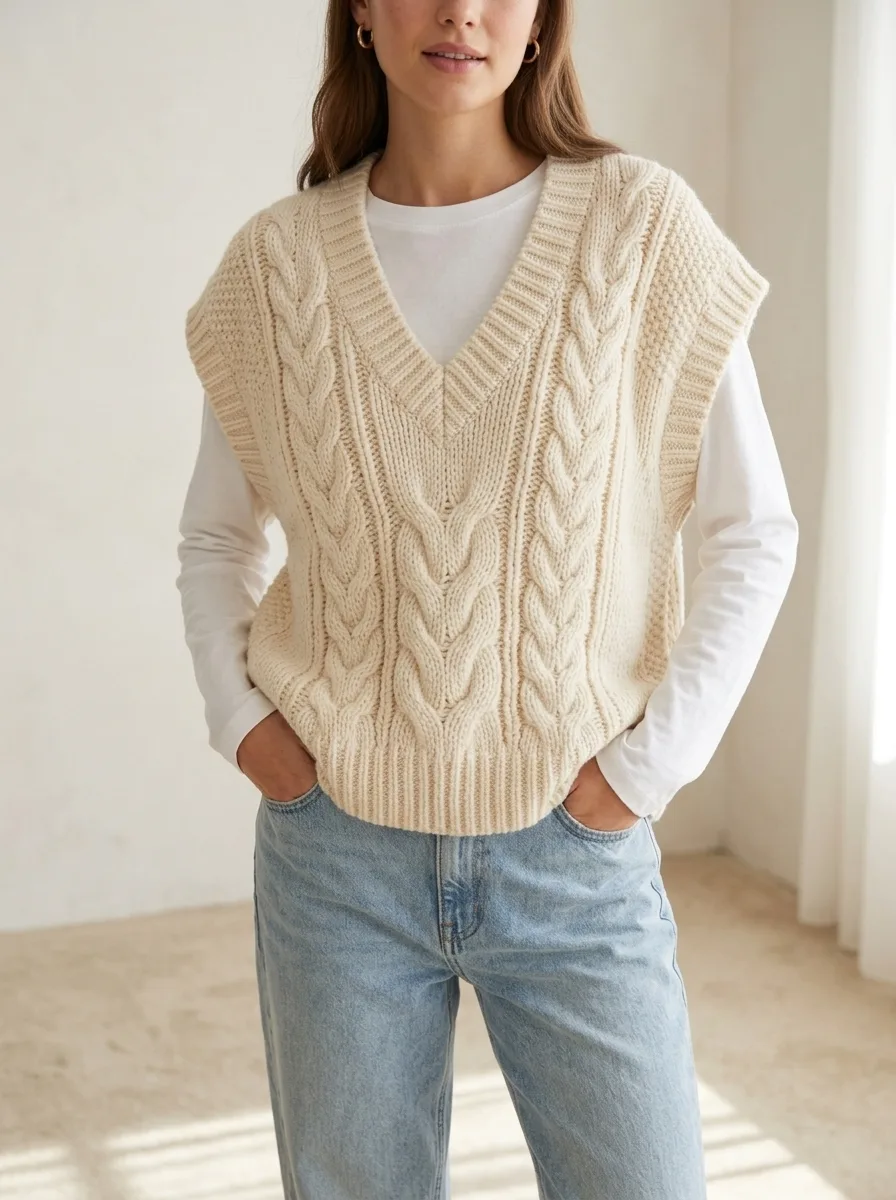
This chunky cable sweater vest combines the timeless appeal of cable stitching with the relaxed, oversized silhouette that’s everywhere right now. The deep V-neck creates an effortlessly stylish look whether you layer it over a crisp button-down or a simple turtleneck.
What makes this crochet vest pattern special is the texture. You’ll see vertical cable panels running down the front and back, flanked by ribbed sections that add visual interest and help the garment drape beautifully. The ribbed hem and armhole edging give everything a polished, finished look.
Don’t let the cables intimidate you. They’re created using front post stitches, which are much simpler than they appear. Once you get the rhythm, you’ll find it almost meditative.
Skill Level
Intermediate. You should be comfortable with basic crochet stitches and willing to learn front post and back post techniques. If you’ve never done cables before, this is actually a great first project because the chunky yarn makes it easy to see what you’re doing.
Finished Measurements
This pattern creates an oversized, boxy silhouette.
One Size (adjustable):
The beauty of this style is that the relaxed fit works across multiple body types. I’ll include notes on how to adjust for a smaller or larger size.
Materials Needed
Yarn:
Hook:
Notions:
Gauge
8 stitches and 6 rows = 4 inches in half double crochet using 10mm hook.
Please, please check your gauge. With a garment this size, even a small difference per inch adds up to major fit issues. Make a 6-inch swatch, wash and block it, then measure. Adjust your hook size up or down as needed.
Abbreviations and Stitch Definitions
Let me walk you through every stitch you’ll need. Even if you know these, a quick refresher never hurts.
Ch = Chain. Yarn over, pull through the loop on your hook. This creates your foundation.
Sl st = Slip stitch. Insert hook, yarn over, pull through both the stitch and the loop on your hook in one motion. Used for joining and moving across stitches.
Sc = Single crochet. Insert hook into stitch, yarn over and pull up a loop (2 loops on hook), yarn over and pull through both loops.
Hdc = Half double crochet. Yarn over, insert hook into stitch, yarn over and pull up a loop (3 loops on hook), yarn over and pull through all 3 loops at once.
Dc = Double crochet. Yarn over, insert hook into stitch, yarn over and pull up a loop (3 loops on hook), yarn over and pull through 2 loops, yarn over and pull through remaining 2 loops.
FPdc = Front post double crochet. Yarn over, insert your hook from front to back around the POST of the stitch below (not into the top of the stitch), then complete a regular double crochet. This pushes the stitch toward you, creating texture.
BPdc = Back post double crochet. Same as FPdc, but insert your hook from back to front around the post. This pushes the stitch away from you.
Cable Cross (worked over 6 stitches): Skip 3 stitches, work FPdc in next 3 stitches, then go back and work FPdc in the 3 skipped stitches, working in front of the stitches you just made. This creates the twist.
Special Techniques
Understanding Post Stitches
Post stitches are the secret to achieving that knit-look texture in crochet. Instead of inserting your hook into the top loops of a stitch, you wrap around the vertical "post" of the stitch from the row below.
Pro tip: When working FPdc, push your hook through from right to left if you’re right-handed. The stitch will naturally pop forward toward you.
Creating the Cable Twist
The cable cross might look complicated, but here’s what’s actually happening. You’re simply working 6 stitches out of order. By skipping the first 3 and then going back to them, you create the twist.
Think of it like braiding. The right strand crosses over the middle, then the left crosses over. Same concept, just with yarn.
Pattern Instructions
This vest is worked in two flat panels (front and back), then seamed at the shoulders and sides.
Back Panel
Foundation: Ch 47.
Row 1 (RS): Hdc in 3rd ch from hook and in each ch across. Turn. (45 sts)
Row 2: Ch 2 (does not count as stitch throughout), hdc in first 6 sts, *FPdc around next st, hdc in next 2 sts, FPdc around next st,* hdc in next 9 sts, work Cable Section over next 6 sts (FPdc around each of the next 6 sts), hdc in next 9 sts, repeat from * to * once, hdc in last 6 sts. Turn. (45 sts)
Row 3: Ch 2, hdc in first 6 sts, *BPdc around next st, hdc in next 2 sts, BPdc around next st,* hdc in next 9 sts, BPdc around next 6 sts, hdc in next 9 sts, repeat from * to * once, hdc in last 6 sts. Turn. (45 sts)
Row 4: Ch 2, hdc in first 6 sts, *FPdc around next st, hdc in next 2 sts, FPdc around next st,* hdc in next 9 sts, work Cable Cross over next 6 sts, hdc in next 9 sts, repeat from * to * once, hdc in last 6 sts. Turn. (45 sts)
Rows 5 through 7: Repeat Rows 3 and 2, ending with a Row 3. Work the cable cross every 4th row.
Continue in established pattern, working the cable cross on Rows 4, 8, 12, 16, 20, 24, and 28.
Rows 8 through 28: Continue in pattern. (45 sts)
After Row 28, piece should measure approximately 18 to 19 inches from foundation.
Shoulder Shaping:
Row 29: Ch 2, hdc in first 12 sts. Fasten off. Skip center 21 sts, rejoin yarn in next st, hdc in last 12 sts. Turn. (12 sts each shoulder)
Row 30: Ch 2, hdc in each st across. Fasten off. (12 sts)
Repeat for second shoulder.
Front Panel
The front is worked the same as the back until you reach the V-neck shaping.
Foundation through Row 16: Work same as Back Panel. (45 sts)
Begin V-Neck Shaping:
You’ll now work each side separately.
Row 17 (Right Side of Neckline): Ch 2, work in pattern across first 21 sts, hdc2tog over next 2 sts. Turn, leaving remaining sts unworked. (22 sts)
Row 18: Ch 2, hdc2tog, work in pattern to end. Turn. (21 sts)
Rows 19 through 28: Continue in pattern, decreasing 1 st at neck edge every row. (12 sts remain after Row 28)
Rows 29 and 30: Work even in pattern. Fasten off. (12 sts)
Left Side of Neckline:
Skip center stitch from Row 17. Rejoin yarn at center with RS facing.
Row 17: Ch 2, hdc2tog, work in pattern to end. Turn. (22 sts)
Continue to mirror Right Side, decreasing at neck edge until 12 stitches remain. Work even for 2 rows. Fasten off.
Assembly
Shoulder Seams: With right sides together, whip stitch or mattress stitch shoulder seams closed, matching 12 stitches on each side.
Side Seams: Starting at the bottom hem, seam up approximately 12 inches on each side, leaving the top 10 inches open for armholes.
Ribbed Hem
Working along the bottom edge of the joined front and back.
Round 1: Join yarn at side seam with sl st, ch 2, hdc evenly around entire hem edge, working approximately 1 hdc per row end. Join with sl st. (approximately 90 sts)
Round 2: Ch 2, *FPdc around next st, BPdc around next st,* repeat around. Join. (90 sts)
Rounds 3 through 5: Repeat Round 2.
Fasten off and weave in ends.
Armhole Edging
Round 1: Join yarn at underarm seam, ch 2, hdc evenly around armhole opening. Join with sl st. (approximately 40 sts)
Round 2: Ch 2, *FPdc around next st, BPdc around next st,* repeat around. Join. (40 sts)
Rounds 3 and 4: Repeat Round 2.
Fasten off. Repeat for second armhole.
Neckline Edging
Round 1: Join yarn at center back of neck, ch 2, hdc evenly around entire neckline, working hdc2tog at the point of the V to keep it sharp. Join with sl st.
Rounds 2 and 3: Ch 2, work in FPdc/BPdc ribbing around, working hdc2tog at center V point each round.
Fasten off and weave in ends.
Sizing Adjustments
For a smaller vest: Reduce foundation chain by 6 stitches (ch 41 instead of 47). Adjust cable placement to keep it centered.
For a larger vest: Add 6 stitches to foundation chain (ch 53). Add extra hdc stitches between the cable panels and side ribbing.
For a longer vest: Add rows before beginning shoulder shaping. Every 2 rows adds approximately 1.5 inches.
Finishing Tips
Blocking is essential. Wet block your finished vest by soaking it in lukewarm water for 20 minutes, gently squeezing out excess water (no wringing!), and laying flat to dry. Pin into shape if needed. This evens out your stitches and helps the cables pop.
Weave in ends invisibly by threading your tail through a tapestry needle and weaving through the backs of stitches for 2 to 3 inches, then reversing direction for 1 inch. Trim close.
Styling Your Finished Sweater Vest
This chunky cable crochet vest is incredibly versatile. Layer it over a fitted white t-shirt for a casual weekend look. Pair it with a collared blouse for preppy, academic vibes. It also looks stunning over a simple turtleneck in a contrasting color.
The oversized fit means it works beautifully belted at the waist or left loose and flowing.
I really hope you love making this cozy cable vest as much as I loved designing it. Thank you for trusting me with your time and your yarn stash. If you make one, I would absolutely love to see it! Tag me on Instagram or share a photo in my Facebook group.
If this crochet sweater vest pattern is calling your name, go ahead and save it to your Pinterest boards so you can find it when you’re ready to cast on. And please drop a comment below if you give it a try. I read every single one, and hearing about your projects truly makes my day.
