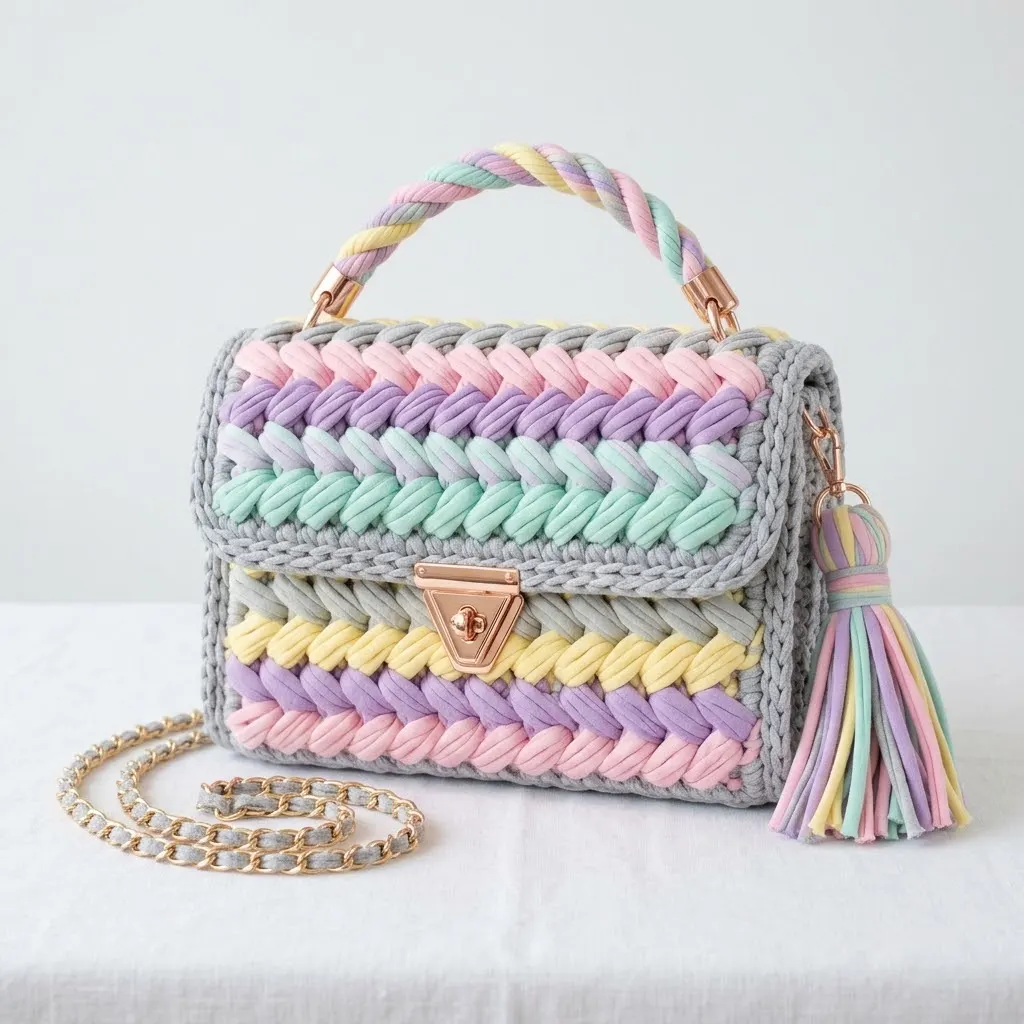
This is a structured crochet clutch bag made with t-shirt yarn and a puff braid stitch technique. You need basic crochet skills, a large hook, and about four hours. The finished bag measures approximately 8 inches wide by 6 inches tall by 3 inches deep.

I absolutely love how this bag turned out. The combination of soft pastel colors against the neutral gray base creates something that looks far more expensive than handmade. And that braided texture? It catches the light beautifully and adds serious visual interest without complicated colorwork charts.
Why This Pastel Rainbow Braided Clutch Bag Works
T-shirt yarn (also called trapillo or ribbon yarn) is the secret ingredient here. This chunky, stretchy material creates bags that hold their shape without additional stiffening. The yarn’s natural stretch makes the puff braid stitches pop, giving that woven, almost knitted appearance you see in the finished bag.
The construction is simpler than it looks. You will work a flat rectangular base, then build up the sides in joined rounds. The braided effect comes from a modified puff stitch worked over previous rows, pulling the yarn through in a specific way to create those interlocking V shapes.
Don’t let the intricate appearance intimidate you. If you can make a puff stitch and change colors, you can absolutely make this bag.
Skill Level
Intermediate
This crochet pattern requires comfort with puff stitches, working in continuous rounds, color changes, and basic shaping. The braided technique needs a bit of practice, but I will walk you through it step by step.
Finished Dimensions
Materials Needed
Yarn
T-shirt yarn / Trapillo / Ribbon yarn in the following colors:
T-shirt yarn typically comes in 100g balls with roughly 65 yards each. Popular brands include Hoooked Zpagetti, Yarn Art Maccheroni, and Bobilon. Any chunky t-shirt yarn will work.
Hook
Your gauge and personal tension will determine which size works best. The fabric should be firm but not stiff.
Notions
For the twisted handle, you will use leftover yarn from each pastel color twisted together and secured with the metal end caps.
Optional
Gauge
10 single crochet stitches and 10 rows = 4 inches (10 cm) in t-shirt yarn with recommended hook.
Gauge matters for this project because the bag needs to fit the hardware. Make a small swatch and adjust your hook size if needed.
Abbreviations
Special Technique: Braided Puff Stitch
This is where the magic happens. The braided look comes from working puff stitches that interlock with the row below.
To work a braided puff stitch:
1. Insert your hook from front to back, going BEHIND the post of the stitch in the row below
2. Work a puff stitch as normal: (yarn over, insert hook in same spot, pull up loop) 3 times
3. You will have 7 loops on your hook
4. Yarn over and pull through all 7 loops
5. Chain 1 to secure
The key is inserting your hook behind the previous row’s stitch post, not into the top of the stitch. This pulls the new puff forward and creates that woven, braided appearance.
Practice tip: Make a small swatch of 10 stitches and 4 rows before starting the bag. The technique clicks after a few repetitions.
Pattern Instructions
Base
The base is worked flat in gray yarn using single crochet.
Row 1: With gray, ch 21. Sc in 2nd ch from hook and in each ch across. (20 sts)
Rows 2 through 8: Ch 1, turn. Sc in each st across. (20 sts)
You should have a rectangle measuring approximately 8 inches by 3 inches. This forms the bottom of your bag.
Building the Sides
Now you will work in joined rounds around all four edges of the base.
Round 1: Do not turn. Working around all edges of the base, sc evenly around. Work 20 sc across the short end, 3 sc in corner, 8 sc along the long side, 3 sc in corner, 20 sc across the other short end, 3 sc in corner, 8 sc along the remaining long side, 3 sc in corner. Join with sl st to first sc. (64 sts)
Round 2: Ch 1. Sc in each st around, working 3 sc in each corner stitch. Join with sl st. (72 sts)
Rounds 3 through 5: Ch 1. Sc in each st around. Join with sl st. (72 sts)
Your bag base should now have short walls forming a box shape.
Braided Color Rows
Here is where you add the pastel stripes. Each color row uses the braided puff stitch technique.
Round 6 (Pink): Join light pink yarn. Ch 1. *Work braid puff in next st, skip 1 st.* Repeat around. Join with sl st. Fasten off pink. (36 braid puffs)
Round 7 (Gray): Join gray. Ch 1. Sc in each st and in each ch-1 space around. Join with sl st. (72 sts)
Round 8 (Lavender): Join lavender yarn. Ch 1. *Work braid puff in next st, skip 1 st.* Repeat around. Join with sl st. Fasten off lavender. (36 braid puffs)
Round 9 (Gray): Join gray. Ch 1. Sc in each st and space around. Join with sl st. (72 sts)
Round 10 (Mint): Join mint green yarn. Ch 1. *Work braid puff in next st, skip 1 st.* Repeat around. Join with sl st. Fasten off mint. (36 braid puffs)
Round 11 (Gray): Join gray. Ch 1. Sc in each st and space around. Join with sl st. (72 sts)
Upper Edge
Rounds 12 through 14: Continue with gray. Ch 1. Sc in each st around. Join with sl st. (72 sts)
Fasten off. Weave in ends.
Flap
The flap is worked flat, attached to the back panel of the bag.
Row 1: With gray, join yarn at center back of bag opening. Sc in next 20 sts across the back panel only. (20 sts)
Rows 2 through 4: Ch 1, turn. Sc in each st across. (20 sts)
Row 5 (Yellow): Join pale yellow. Ch 1, turn. *Work braid puff, skip 1 st.* Repeat across. (10 braid puffs)
Row 6 (Gray): Join gray. Ch 1, turn. Sc in each st and space across. (20 sts)
Row 7 (Lavender): Join lavender. Ch 1, turn. *Work braid puff, skip 1 st.* Repeat across. (10 braid puffs)
Row 8 (Gray): Join gray. Ch 1, turn. Sc in each st and space across. (20 sts)
Row 9 (Pink and Mint): For this row, work alternating colors. Join pink. Work braid puff. Join mint. Work braid puff. Continue alternating across. (10 braid puffs)
Rows 10 through 12: Join gray. Ch 1, turn. Sc in each st across. (20 sts)
Edging: Ch 1. Sc evenly around all three open sides of the flap, working 3 sc in each corner. Join with sl st.
Fasten off. Weave in all ends.
Twisted Handle
Cut 4 strands of yarn, one in each pastel color (pink, lavender, mint, yellow), each measuring 24 inches.
1. Hold all four strands together at one end
2. Twist tightly in one direction until the bundle starts to kink
3. Fold the twisted bundle in half, allowing it to twist around itself
4. Secure both ends with the metal end caps
5. Attach to D-rings on bag sides using the hardware loops
Tassel
Cut 8 strands of yarn, 2 in each pastel color, each measuring 10 inches.
1. Fold all strands in half
2. Use a small piece of matching yarn to tie tightly 1 inch from the fold
3. Trim the bottom ends evenly
4. Attach to a small lobster clasp or directly to the D-ring
Chain Strap
Thread the chain strap through the D-rings on each side of the bag. Most chain straps come with the gray fabric already woven through. If yours does not, cut a strip of gray t-shirt yarn and weave it through every other chain link.
Assembly and Hardware
Installing the turn lock:
1. Mark the center of the flap, approximately 1 inch from the bottom edge
2. Push the prongs of the turn lock through the crochet fabric
3. Bend prongs flat on the wrong side
4. Mark the corresponding spot on the bag front
5. Install the twist piece in the same manner
Tip: Reinforce the area behind the hardware with a small piece of felt or fabric to prevent stretching over time.
Attaching D-rings:
1. Fold a 4 inch piece of gray yarn in half
2. Thread through the D-ring
3. Sew securely to the inside corners of the bag opening
Finishing Touches
Block your finished bag by stuffing it with tissue paper and letting it rest overnight. This helps the stitches settle and the bag maintain its structured shape.
If you want added structure, cut a piece of plastic canvas to fit the bottom of the bag and slip it inside before adding a fabric lining.
A fabric lining is optional but recommended. Cut two rectangles slightly larger than the bag sides, sew them together, and hand stitch to the inside opening.
Care Instructions
Hand wash only in cool water with mild detergent. Reshape while damp and air dry flat. Do not machine wash or dry. Remove hardware before cleaning if possible.
Store stuffed with tissue paper to maintain shape. Keep metal hardware dry to prevent tarnishing.
Tips for Success
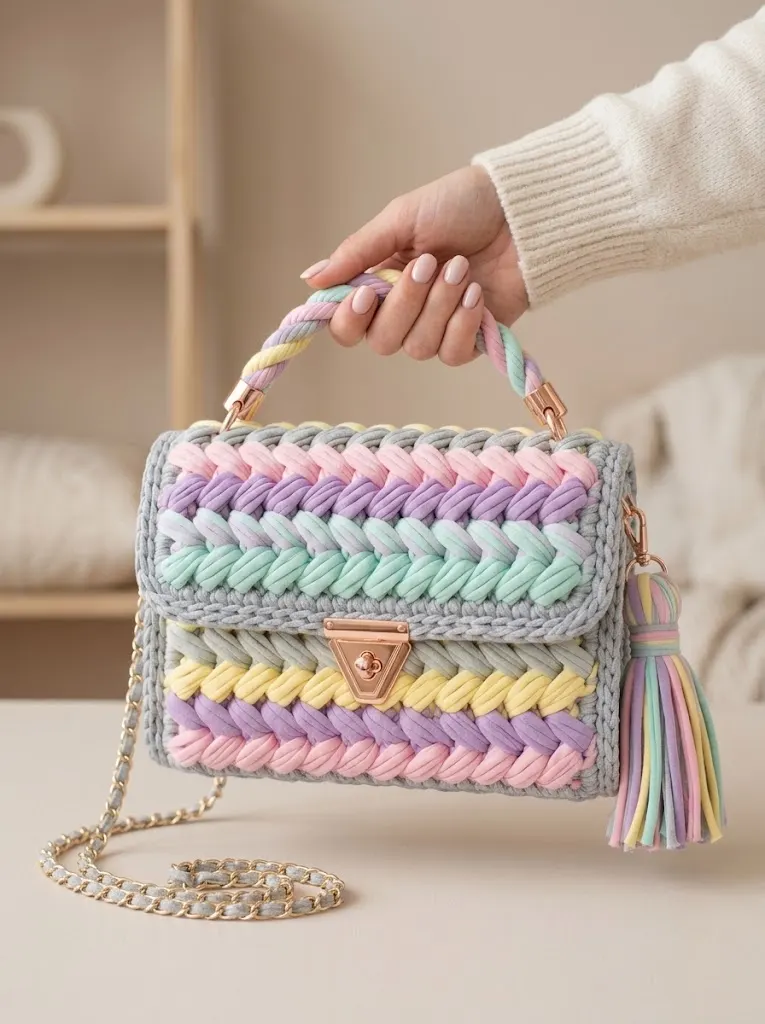
Color placement: The bag in the photo shows a specific color order, but feel free to arrange your pastels however you like. Consider your wardrobe when choosing which shade goes where.
Tension matters: Keep your stitches consistent but not too tight. T-shirt yarn has natural stretch, and overly tight stitches will make the bag stiff and small.
Hardware quality: Invest in good hardware. The rose gold finish elevates the entire piece, and quality clasps will last for years.
Yarn alternatives: If you cannot find t-shirt yarn, you can substitute chunky cotton rope or macrame cord. The texture will differ, but the construction remains the same.
I hope you love making this pastel rainbow braided clutch bag crochet pattern as much as I enjoyed designing it. This project makes a stunning gift or a statement piece for your own collection. The combination of that satisfying braided texture with soft spring colors creates something truly special.
If you make this bag, I would absolutely love to see your version. Share your photos on Instagram or Facebook and tag me so I can celebrate your beautiful work.
Save this pattern to your Pinterest boards so you can find it when you are ready to start. And please drop a comment below if you make one. I read every single comment and genuinely love hearing how your projects turn out.
