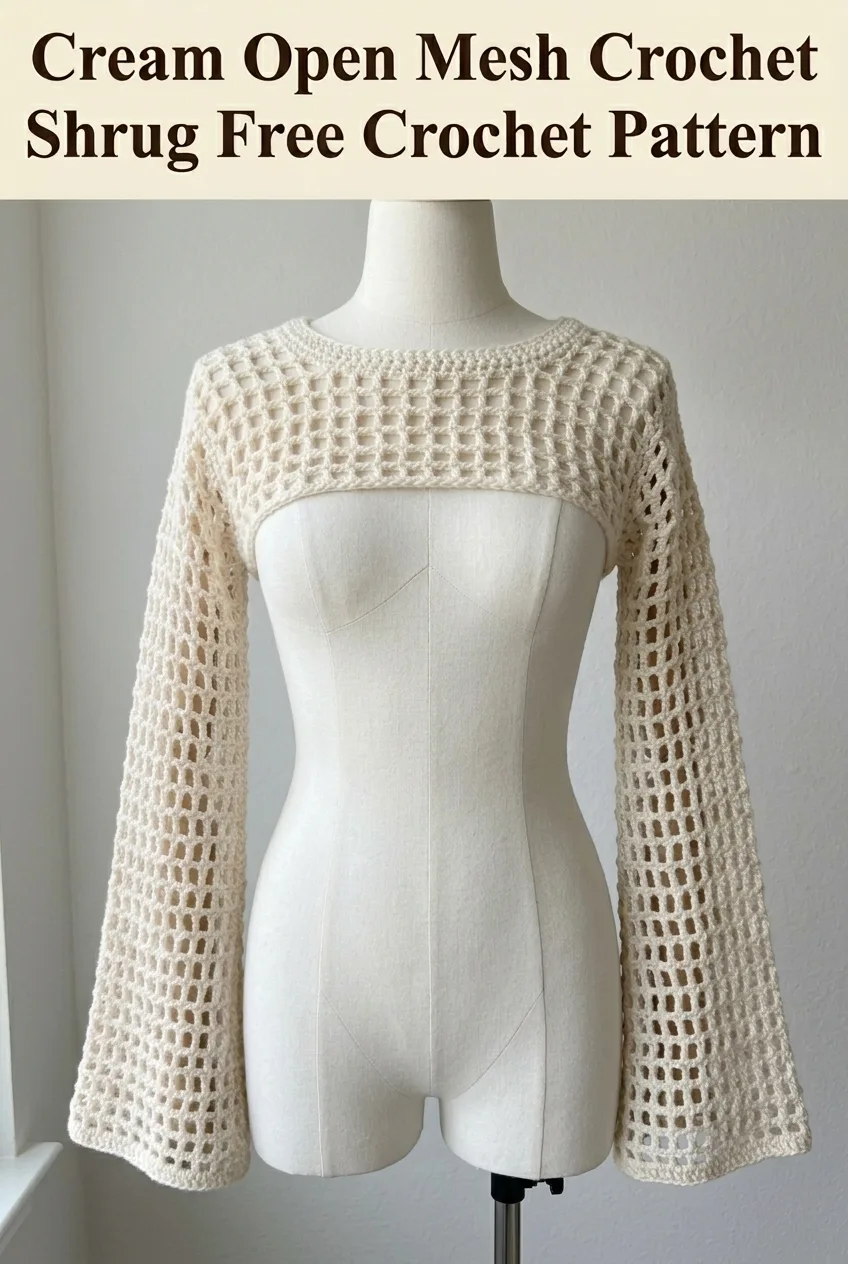
I’ve been looking for the perfect layering piece that feels bohemian and breezy without being too complicated to make. This cream open mesh crochet shrug is exactly what I had in mind. The dramatic bell sleeves, the cropped silhouette, and that gorgeous grid stitch pattern all come together in a piece that looks like it belongs in a boutique. I’m so excited to share this one with you.
About This Crochet Shrug Pattern
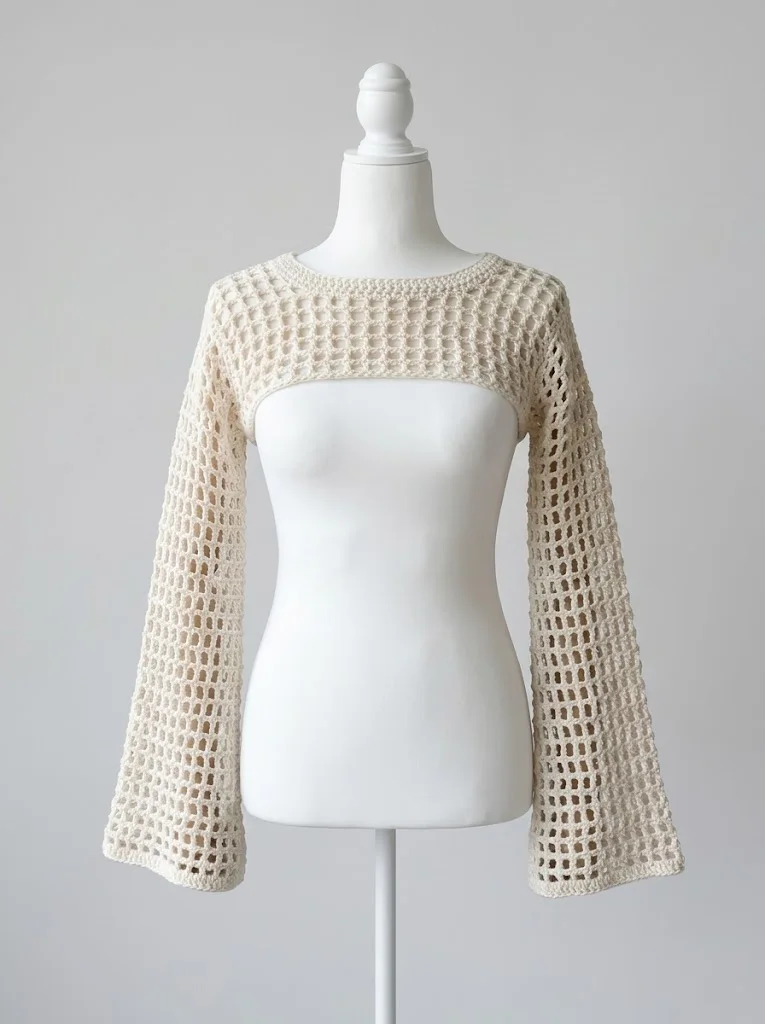
This stunning crochet shrug features an open mesh grid stitch that creates those beautiful rectangular windows throughout the entire garment. The construction is surprisingly simple once you understand the rhythm of the stitch pattern. You’ll work the body as one flat piece, then seam the sleeves and add a clean neckline border.
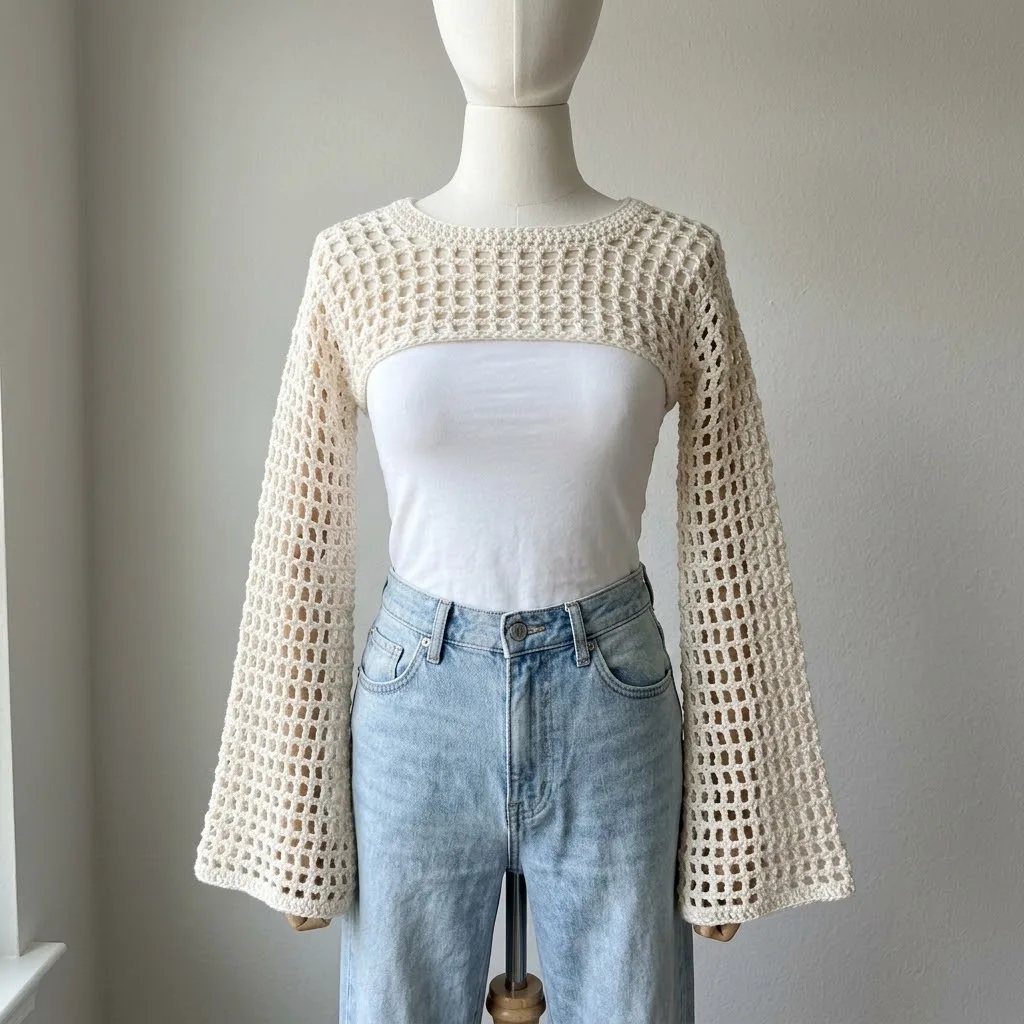
The bell sleeve silhouette adds instant drama to any outfit. Wear it over a tank top, a fitted dress, or even a simple tee like shown in the photo. The cream color keeps it versatile, but imagine this in dusty rose, sage green, or even black for an edgier vibe.
This crochet pattern works up as an intermediate level project. If you can chain, double crochet, and count your stitches, you can absolutely make this shrug. The mesh stitch might look fancy, but it’s really just a combination of chains and double crochets worked in a specific sequence.
Materials Needed
Yarn:
Hook:
Notions:
Gauge
Gauge matters for garments. Please take time to check yours before starting.
Work 14 stitches and 8 rows in the mesh stitch pattern to equal 4 inches square.
If your swatch is too small, go up a hook size. If it’s too large, go down a hook size. Getting gauge ensures your shrug fits the way it should.
Finished Measurements
This pattern is written for size Small/Medium. The finished measurements are approximately:
For a larger size, add multiples of 4 chains to your foundation chain and adjust body and sleeve dimensions accordingly.
Abbreviations and Stitch Definitions
Let me walk you through every abbreviation you’ll encounter in this crochet tutorial.
Ch = Chain. Wrap yarn over hook, pull through the loop on your hook. This creates the foundation of your work.
Sl st = Slip stitch. Insert hook, yarn over, pull through both the stitch and the loop on your hook in one motion. Used for joining and creating invisible seams.
Dc = Double crochet. Yarn over, insert hook into stitch, yarn over and pull up a loop (3 loops on hook), yarn over and pull through 2 loops (2 loops remain), yarn over and pull through remaining 2 loops. This tall stitch forms the structure of our mesh.
Sk = Skip. Pass over the indicated stitch without working into it.
Sp = Space. The gap or hole created between stitches, often by chain stitches.
St(s) = Stitch(es).
Rep = Repeat.
Understanding the Mesh Stitch Pattern
Before we dive into the full pattern, let’s talk about what makes this open grid mesh stitch work. The pattern creates those beautiful rectangular holes you see throughout the shrug.
Here’s the basic concept: you work a double crochet, then chain 1 and skip the next stitch, then work another double crochet. This creates a small window. On the following rows, you work your double crochets into the chain 1 spaces from the previous row.
The rhythm becomes almost meditative once you get going. Double crochet, chain 1, skip, double crochet, chain 1, skip. Over and over.
Quick tip: Count your stitches at the end of every row for the first several rows. The mesh pattern can be tricky to count, so I like to count the double crochets and the chain spaces separately, then add them together.
Step by Step Crochet Pattern
Body Panel
The body of this shrug is worked as one long rectangle that wraps around your upper body. The sleeves are formed by folding and seaming.
Foundation Row:
Ch 145.
Row 1: Dc in 5th ch from hook (the skipped chains count as dc plus ch 1), *ch 1, sk 1 ch, dc in next ch*, rep from * across. Turn. (72 dc, 71 ch-1 spaces)
Row 2: Ch 4 (counts as dc plus ch 1 throughout), sk first ch-1 sp, dc in next dc, *ch 1, sk ch-1 sp, dc in next dc*, rep from * across. Turn. (72 dc, 71 ch-1 spaces)
Rows 3 through 28: Rep Row 2.
Your body panel should measure approximately 36 inches wide and 14 inches tall at this point.
Do not fasten off. We will continue directly into the neckline shaping.
Neckline Border
The neckline gets a simple border of single crochet to create that clean, slightly raised edge you see in the photo.
Round 1: Ch 1, work 3 sc into the corner, then work sc evenly along the short edge of the body panel, placing approximately 2 sc for every row end. Work 3 sc into the next corner, sc across the foundation chain edge, 3 sc into corner, sc along the second short edge, 3 sc into final corner, sc across the top edge. Sl st to first sc to join. (Stitch count will vary based on your tension)
Round 2: Ch 1, sc in each st around, working 3 sc into each corner stitch. Sl st to join.
Round 3: Rep Round 2.
Fasten off and weave in ends.
Sleeve Construction
Here’s where the magic happens. Your body panel becomes a shrug through simple folding and seaming.
Fold the body panel in half widthwise, matching the short edges together. The wrong sides should be facing each other.
Mark your sleeve seams: From each folded corner, measure down 11 inches along the side edge. Place a stitch marker at this point on both sides.
Seam the sleeves: Using your tapestry needle and a length of yarn, whip stitch or mattress stitch from the folded corner down to your marker. This creates the underside of each sleeve. The open section between the markers becomes your body opening.
When you put the shrug on, your arms go through the sleeves, and the open center section sits across your upper back and chest.
Sleeve Cuffs
The sleeves get a simple border to match the neckline and create a finished look.
Round 1: Join yarn at the sleeve seam with a sl st. Ch 1, sc evenly around the sleeve opening, placing approximately 2 sc per mesh space. Sl st to first sc to join. (Approximately 48 to 52 sts)
Round 2: Ch 1, sc in each st around. Sl st to join.
Round 3: Rep Round 2.
Fasten off and weave in ends. Repeat for the second sleeve.
Hem Border
The bottom hem gets the same treatment for a cohesive look.
Round 1: Join yarn at one side seam with a sl st. Ch 1, sc evenly around the entire bottom opening of the shrug, working approximately 2 sc per mesh space along the front and back sections. Sl st to first sc to join.
Round 2: Ch 1, sc in each st around. Sl st to join.
Round 3: Rep Round 2.
Fasten off and weave in all remaining ends.
Finishing Your Crochet Shrug
Weave in all ends carefully, following the path of the stitches to keep them invisible. The mesh pattern can make ends tricky to hide, so weave through at least 3 to 4 inches of stitches.
Block your shrug for the best results. Wet blocking works beautifully for cotton yarn. Soak the finished shrug in cool water for about 20 minutes, gently squeeze out excess water (don’t wring), and lay flat to dry. Pin the sleeves into shape to enhance that bell sleeve flare.
Steam blocking also works well if you prefer a faster method. Hold your steamer a few inches above the fabric and let the steam relax the stitches into place.
Customization Ideas
This crochet pattern is wonderfully adaptable. Here are some ideas to make it your own.
Add length to the body: Work additional rows before starting the neckline border. Each additional row adds approximately half an inch to the body length.
Create longer sleeves: Increase your sleeve seam length from 11 inches to 14 or 15 inches for sleeves that extend past your wrists.
Add fringe: Attach fringe to the sleeve cuffs or hem for extra boho flair.
Change the yarn: Try a lightweight yarn and smaller hook for a more delicate, lacy look. Or use a bulky yarn and larger hook for a chunkier, winter-appropriate version.
Styling Your Open Mesh Crochet Shrug
This versatile piece works for so many occasions. Layer it over a white tank and jeans for casual everyday wear. Pair it with a midi dress for a festival-ready outfit. Throw it on over a swimsuit as a beach coverup.
The cropped length hits right at the natural waist, making it flattering on most body types. The open mesh keeps you cool while still providing visual interest and a little bit of arm coverage.
Troubleshooting Common Issues
My mesh holes look uneven. This usually comes from inconsistent tension on your chain stitches. Try to keep your chains the same tension as your double crochets.
My shrug is too tight across the chest. Check your gauge. If it’s close but still snug, try blocking aggressively to stretch the fibers, or consider remaking with a larger hook.
The sleeves are too loose. You can work a few extra rounds of single crochet at the cuffs to cinch them slightly, or use a smaller hook just for the border rounds.
I keep losing count. Use stitch markers every 10 or 20 stitches. Some crocheters place a marker in the first stitch of every row to track where they started.
Final Thoughts on This Crochet Shrug Pattern
This cream open mesh crochet shrug is one of those patterns that looks incredibly impressive but relies on just a few basic techniques. The grid stitch creates visual interest, the bell sleeves add drama, and the construction is straightforward once you understand the folding and seaming process.
I love how this piece transforms a simple outfit into something special. It’s the kind of handmade item that makes people ask, "Where did you get that?" And you get to say, "I made it."
Thank you so much for choosing this crochet tutorial. I truly appreciate you spending your time and creative energy on one of my patterns. If you make this shrug, I would absolutely love to see it. Tag me on Instagram or share a photo in my Facebook group. Seeing your finished projects is honestly the best part of my day.
Save this pattern to your Pinterest boards so you can find it when you’re ready to start. And please drop a comment below if you make this shrug or have any questions along the way. I’m always here to help, and I love hearing from you.
