
I don’t know about you, but I’ve always believed that the right dress can make you feel like an entirely different person. Something about slipping into a handmade garment, one you created stitch by stitch, transforms an ordinary Tuesday into something worth remembering.
Get the Ad-Free PDF Pattern
Scroll down for the full pattern, or get the ad-free printable PDF from the shop.
Get the Printable PDF →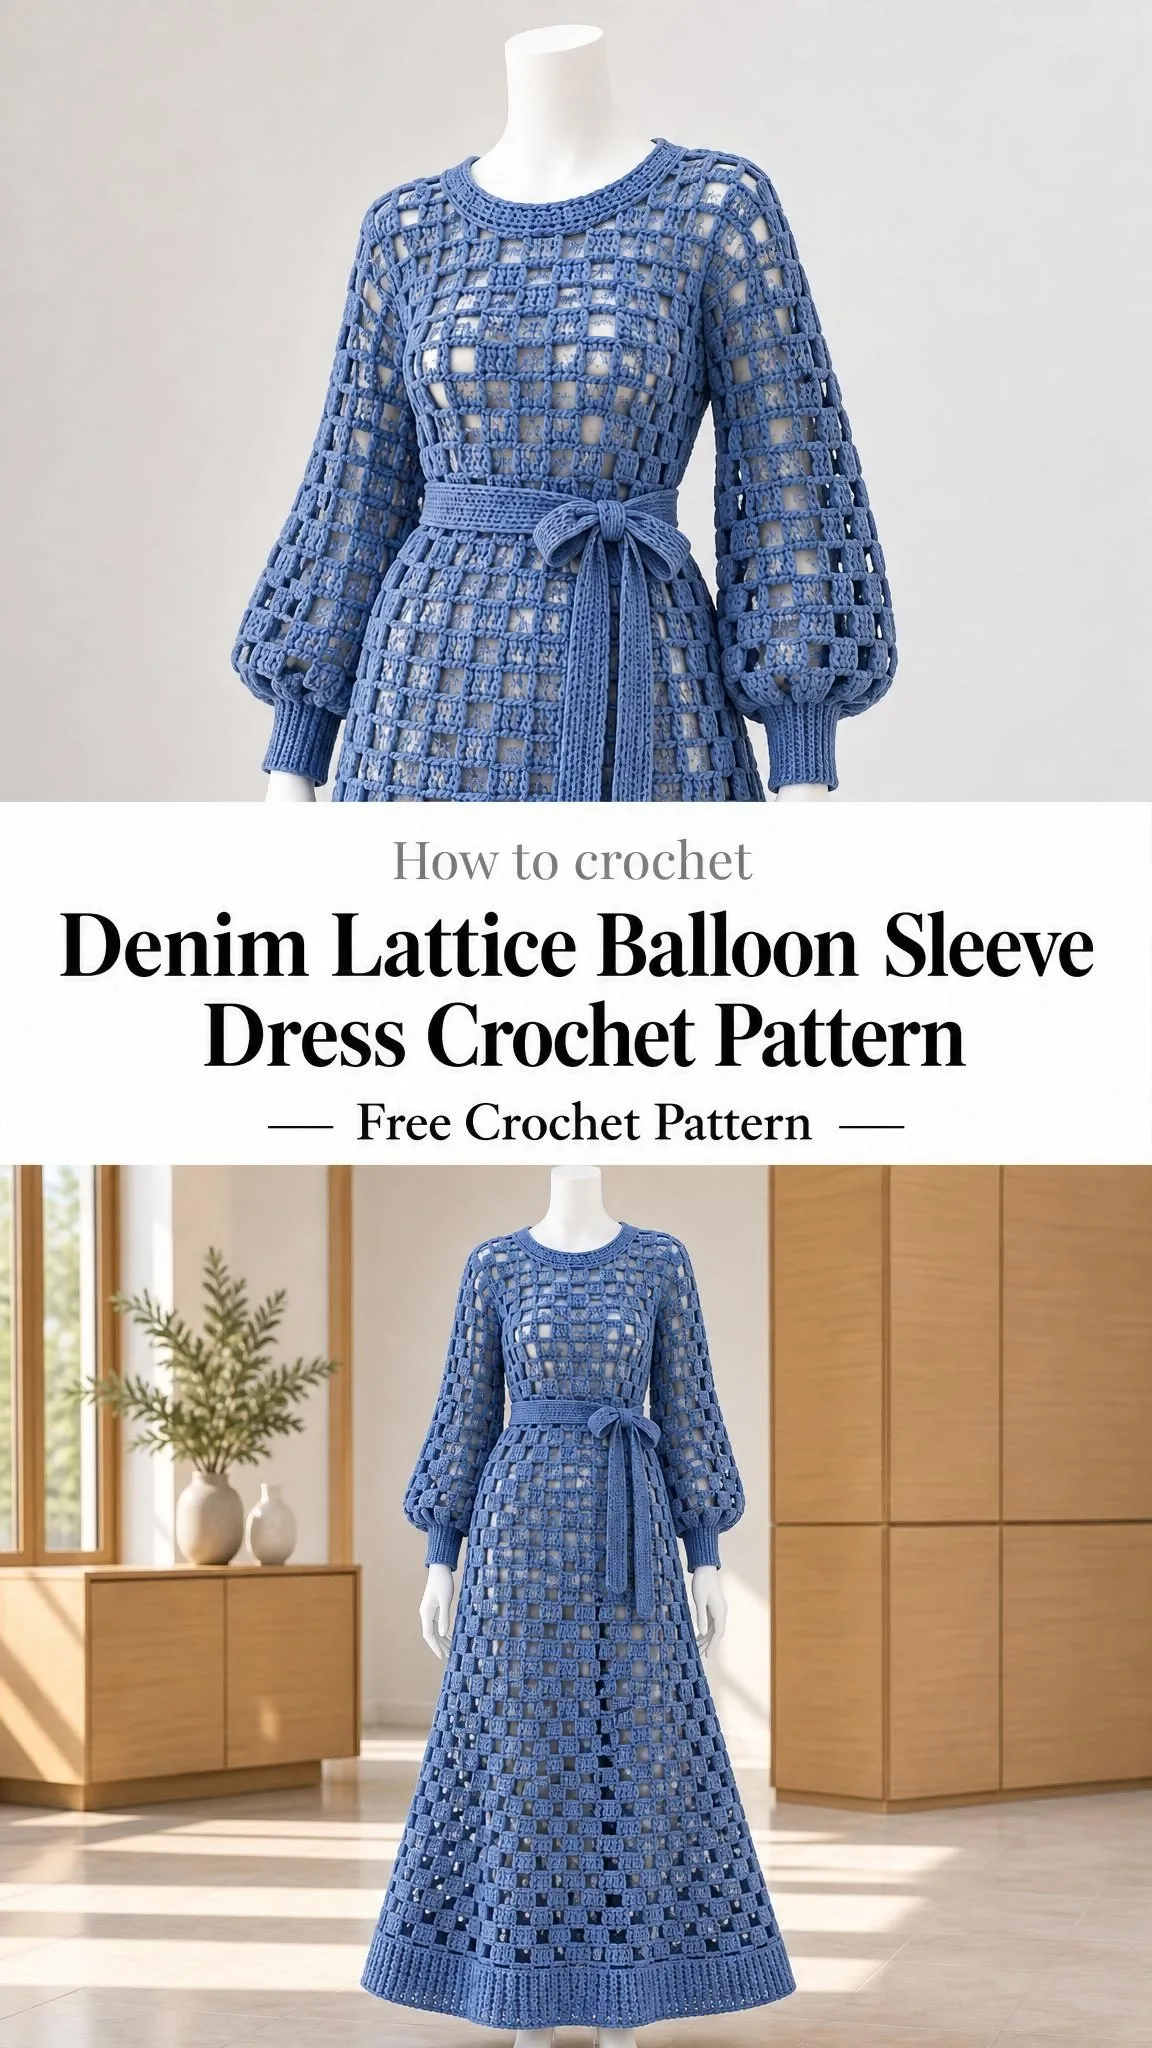
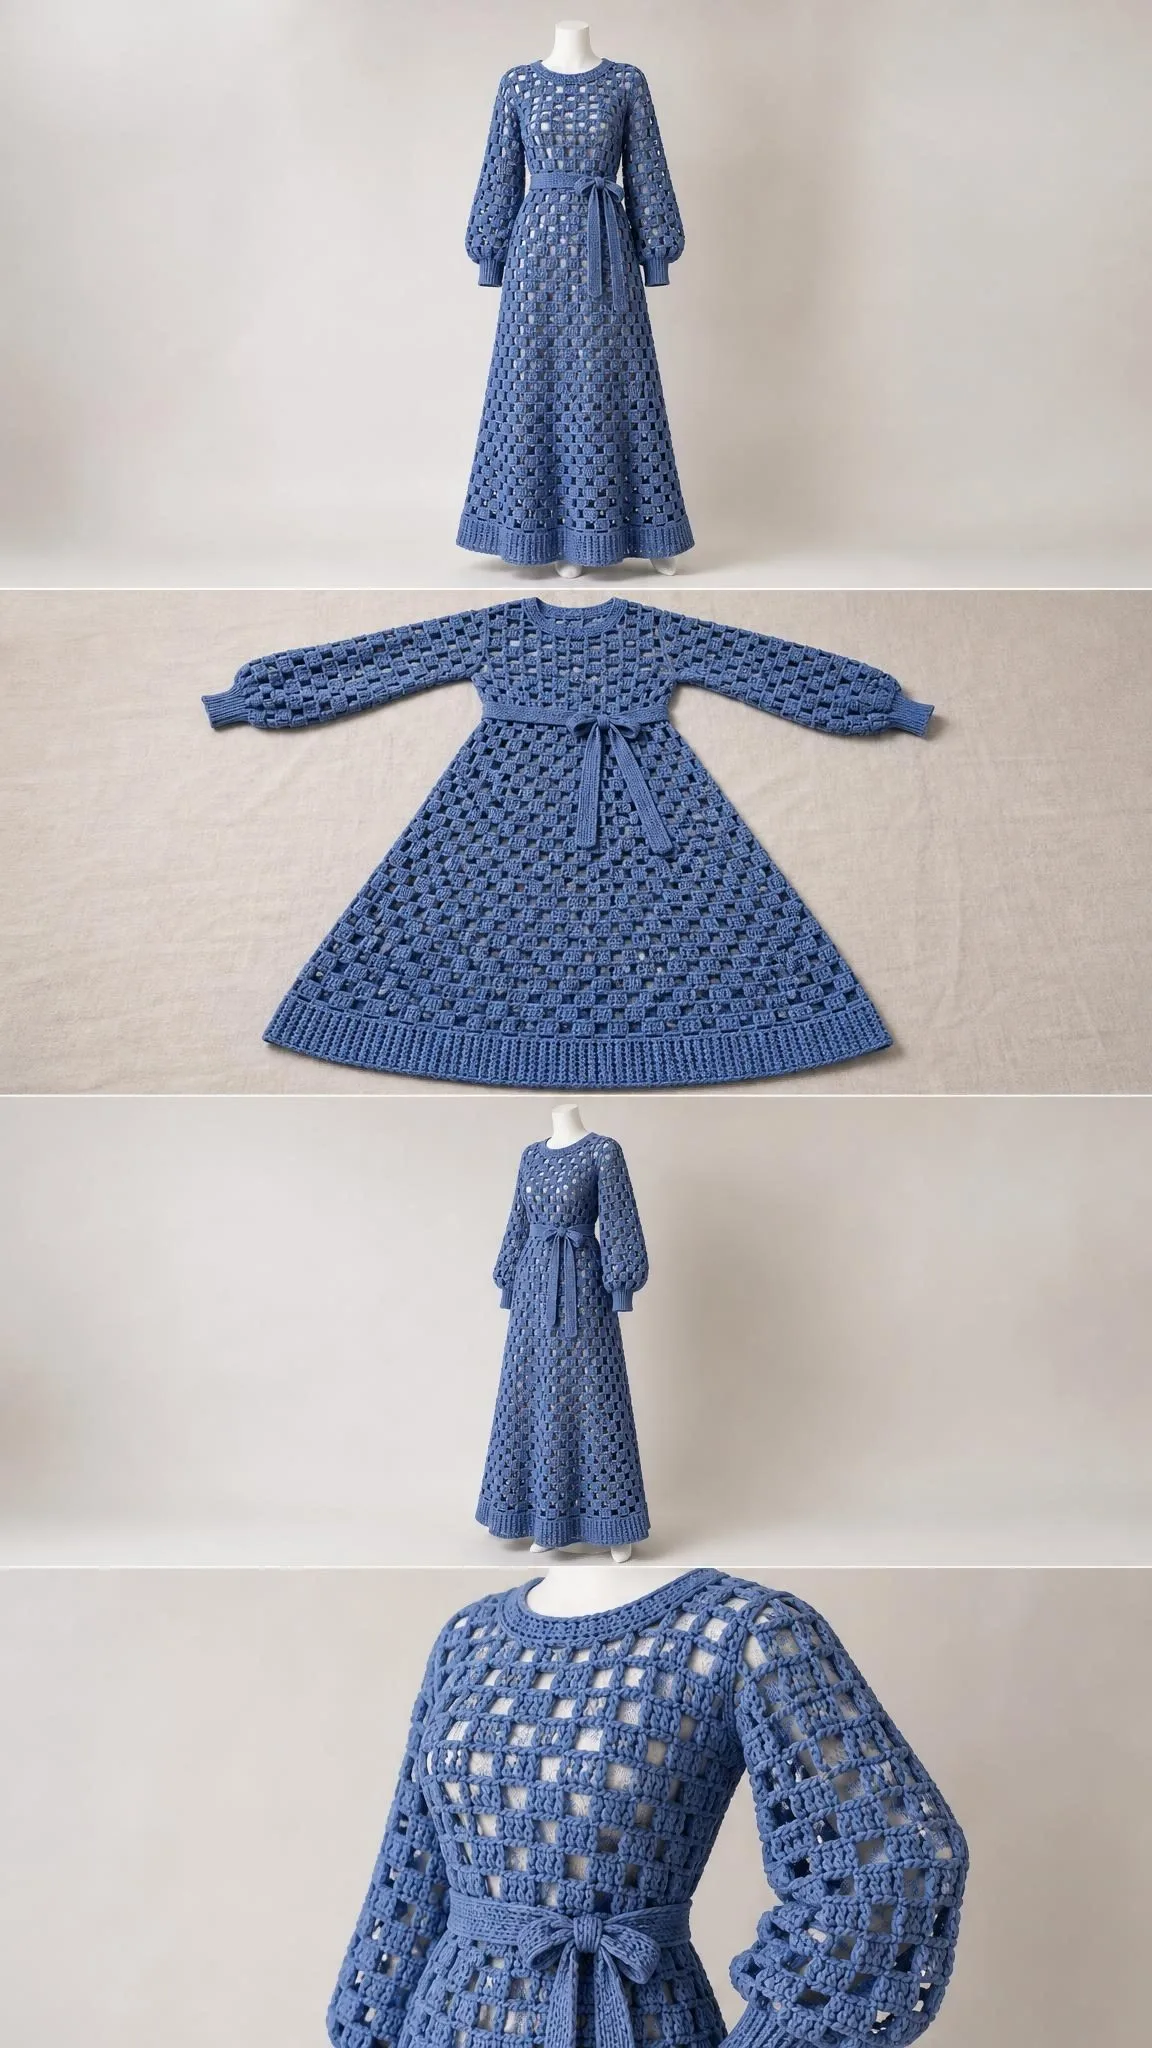
This denim lattice balloon sleeve dress is exactly that kind of piece. It’s dramatic without being fussy, elegant without feeling untouchable. The open square lattice creates a modern windowpane effect that catches the light beautifully, while those gathered balloon sleeves add just enough romance to balance the structured grid pattern.
The construction might look intimidating at first glance, but here’s the thing: it’s essentially flat panels joined together. No complex shaping, no confusing decreases scattered throughout. If you can work a double crochet and count to three, you’ve got this.
Why This Lattice Dress Pattern Works So Well
The genius of this design lies in its simplicity disguised as complexity. That stunning checker lattice? It’s just blocks of three double crochets alternating with chain-3 spaces. The visual impact comes from keeping your columns perfectly aligned row after row, creating those signature square windows that make this dress look like it belongs on a runway.
The A-line silhouette flatters nearly every body type. Six separate skirt panels are gathered into the bodice waist, giving you that beautiful swing and flow without any tricky increases or decreases. The belt cinches everything in at exactly the right spot, and you control how fitted or relaxed the final look feels.
Balloon sleeves have made a serious comeback, and for good reason. They’re romantic, they’re comfortable, and they hide a multitude of arm insecurities we won’t discuss further. The sleeves on this dress are worked as simple rectangles, then gathered into ribbed cuffs at the wrist. All that gorgeous puff happens naturally when you scrunch a 40 cm rectangle down to fit a 22-24 cm cuff.
Materials You’ll Need
Before you start, gather everything so you’re not hunting for supplies mid-project:
Yarn:
- Main color (denim blue): 1,128 grams or approximately 3,384 meters of smooth sport-weight cotton, around 300 meters per 100 grams
- The pattern calls for an additional 120 grams (360 meters) for accents, though the main and accent colors are the same denim blue in this version
Hooks:
- 3.5 mm hook for the main fabric
- 3.0 mm hook for firm borders, belt, and cuffs
Notions:
- Tapestry needle
- Removable stitch markers
- Tape measure
- Scissors
- Blocking mats and rust-resistant pins
- Sewing needle and matching thread
- 40 cm dress zipper
- 1 meter of 10 mm cotton tape for waist stabilization
Important: This is an openwork dress. You’ll need a separate opaque slip underneath for wearing.
Understanding the Gauge
Getting gauge right matters enormously with garment patterns. This isn’t a blanket where a few centimeters won’t hurt anyone.
Blocked main stitch gauge: 4 lattice repeats and 10 rows equals 10 x 10 cm
One repeat measures approximately 2.50 cm wide. Always measure away from edges where stitches tend to behave differently.
Border gauge: 20 single crochet (sc) and 24 sc rows equals 10 cm
Make a proper swatch using the stitch recipe with N equals 8 (that’s 8 horizontal repeats). Work at least 20 rows. Wet block it, dry flat for 24 hours, then hang for 12 hours. Cotton grows when it hangs, and you need to know how much yours stretches before committing to a full dress.
Finished Measurements
This pattern is written for a single size with the following dimensions:
| Piece | Measurement |
|---|---|
| Finished bust | 100 cm |
| Intended body bust | 90-94 cm (with 6-10 cm ease) |
| Untied waist | 100 cm |
| Waist with belt | 80-90 cm |
| Skirt length | 88 cm |
| Bodice (shoulder to waist) | 40 cm |
| Sleeve length | 50 cm |
Compare these measurements to a garment that fits you well before starting. The length descriptions are styling guidelines, so always check actual numbers against the intended wearer.
Abbreviations and Special Stitches
Let’s define everything you’ll encounter:
- ch = chain: wrap yarn over hook and pull through the loop on your hook
- sc = single crochet: insert hook, pull up a loop, yarn over and draw through both loops
- dc = double crochet: yarn over, insert hook, pull up a loop, yarn over and draw through two loops twice
- sl st = slip stitch: insert hook, pull up a loop and draw directly through the loop on your hook
- st(s) = stitch(es)
- sp = space
- RS/WS = right side/wrong side
- BLO = back loop only: work into only the back loop of the stitch below
- rep = repeat
- N = the number of horizontal motif repeats in a piece
The Lattice Repeat Explained:
One lattice repeat equals ch 3 followed by 3 dc. Each row starts with one edge dc. When you have N repeats, your row contains 3N+1 dc and N ch-3 spaces. The beginning ch 3 counts as your first dc.
The magic happens when you keep blocks directly above blocks. This creates those beautiful square window columns running vertically through the fabric.
The Lattice Stitch Pattern
This is the heart of the entire dress, so let’s break it down completely.
Foundation: Chain 6N+4 (where N is your number of repeats)
Row 1: Dc in fourth ch from hook, [ch 3, skip 3 ch, dc in each of next 3 ch] N times. The skipped three turning chains don’t count on this foundation row.
Count: 3N+1 dc and N spaces
Row 2 (and all plain rows): Ch 3, turn, skip first dc, dc in each of next 2 dc, [ch 3, skip ch-3 space, dc in each of next 3 dc] N-1 times, ch 3, skip last space, dc in final edge dc.
Count: 3N+1 dc, N spaces
Row 3 (mirror row): Ch 3, turn, skip first edge dc, [ch 3, skip space, dc in each of next 3 dc] N times.
Count: 3N+1 dc, N spaces
Alternate Rows 2 and 3 throughout. The key is never mistaking a ch-3 window for your turning chain.
Construction Overview
The dress comes together in this order:
- Make and block two bodice panels (front and back)
- Work neckline shoulders on each
- Make six skirt panels
- Make two sleeve rectangles
- Join shoulders
- Attach sleeves
- Close side seams (leaving zipper opening)
- Join skirt panels into a ring
- Gather and attach skirt to bodice waist
- Add belt, borders, and cuffs
Back Bodice Instructions
With main color and 3.5 mm hook, start the foundation with N equals 20. You’re working upward from the waist.
Row 1: Work foundation row. Count: 20 lattice repeats
Rows 2-37: Work the next plain recipe row, continuing to alternate between Row 2 and Row 3 of the pattern. Count: 20 lattice repeats each row
After Row 37, mark the central 8 repeats as your back neck opening. You’ll work the outer 6 repeats at each side separately now.
Rows 38-40 (each shoulder): Continue the recipe over the outer 6 repeats only, restarting yarn at the outer edge or neck edge as needed by row direction. Leave the marked center unworked. Count: 6 lattice repeats per shoulder
Front Bodice Instructions
Begin exactly as the back with N equals 20. The front is one continuous panel until you reach the neckline.
Row 1: Work foundation row. Count: 20 lattice repeats
Rows 2-30: Work next plain recipe row. Count: 20 lattice repeats each row
After Row 30, leave the central 8 repeats unworked. This creates your square neckline opening. Work each shoulder separately over 6 repeats.
Rows 31-40 (each shoulder): Continue next recipe row over this shoulder only. Count: 6 lattice repeats per shoulder
The front neckline starts 7 rows earlier than the back, creating a slightly deeper scoop at the front while keeping shoulders even.
Skirt Panels: Make Six
Work from waist downward. Start with N equals 12. Each rectangular panel measures 30 cm wide. When all six are joined, you’ll have 180 cm of fabric at the top, which gathers into the 100 cm bodice waist. This gathering creates that beautiful A-line fullness.
Row 1: Work foundation row. Count: 12 lattice repeats
Rows 2-88: Work next plain recipe row, following the color plan. Count: 12 lattice repeats each row
After completing all six panels, block them to 88 cm length and 30 cm width. Make sure they match within one row of tolerance.
Sleeves: Make Two
Use main color, 3.5 mm hook, and N equals 16. Work from shoulder edge to cuff.
Row 1: Work foundation row. Count: 16 lattice repeats
Rows 2-46: Continue the plain recipe row. Count: 16 lattice repeats each row
Each rectangle should measure 40 cm wide and approximately 46 cm long before adding the border. Both sleeves must match exactly.
Waist Tie Belt
Switch to your 3.0 mm hook and belt color.
Row 1: Ch 8, sc in second chain and next 6 chains. Count: 7 sc
Row 2 and every following row: Ch 1, turn, sc BLO in each stitch. Count: 7 sc per row
Continue until belt measures 160 cm. Don’t stretch while measuring. The finished belt should be approximately 3.5 cm wide.
Assembly Instructions
Join 1, Shoulders: Using mattress stitch, join corresponding outer shoulder edges. Align 6 complete motifs on each seam. You’ll have 2 shoulder seams total.
Join 2, Sleeves: Mark 20 cm down each side of front and back from the shoulder seam. Match the sleeve midpoint to the shoulder seam, then sew the 40 cm upper edge around this opening. For that puff styling, ease 2 cm at the sleeve midpoint.
Join 3, Sides: Sew from waist to armhole on the right side. On the left side, leave the bodice portion open for your 40 cm zipper. Continue that opening into the skirt below the waist as needed. Close sleeve underarms.
Join 4, Skirt: Align equal row ends and mattress stitch all six panels into a ring, keeping the left-side zipper gap open.
Join 5, Waist: Quarter-mark both bodice and skirt. Run two gathering threads through skirt foundation loops and draw to 100 cm, matching quarter marks. Sew to bodice waist. Sew the stabilizing cotton tape inside the waist without stretching.
Join 6, Closure: Hand-baste then backstitch zipper tapes to the inside of the left opening. Keep teeth clear of crochet loops. Secure top and lower stops.
Edgings and Details
Switch to your 3.0 mm hook for all borders.
Neckline:
Round 1: Join at back neck. Sc evenly around, approximately 2 sc per dc-row end and 1 sc per stitch. Adjust at steps to lie flat. At square inside corners, work sc2tog across the corner. Join with sl st.
Round 2: Ch 1, sc in each sc, join. Work sc2tog at any remaining inner steps.
Hem:
Round 1: Sc evenly along lower edge without drawing it in. Work one sc per dc and one per chain. Do not count seam loops twice.
Rounds 2-8: Ch 1, sc BLO in every sc, join.
Cuffs (make two):
Row 1: Ch 9, sc in second ch and across. Count: 8 sc
Row 2 and following: Ch 1, turn, sc BLO across until strip fits comfortably around hand and wrist, approximately 22-24 cm.
Sew strip ends together, then evenly gather sleeve edge to cuff ring. Sew through edge loops. Each cuff should be approximately 4 cm deep.
Finishing Your Dress
Weave in all ends through at least 5 cm of solid stitches, reversing direction twice. Don’t trim until after the first wash.
Soak according to your yarn label, lift supported, and press between towels. Lay flat to finished measurements. After fully dry, hang for 12 hours, then remeasure length and check the zipper, belt, and all details.
Cotton can grow with wear. Only shorten after the hanging check. Store folded, never suspended from shoulders.
Care Instructions
Follow your yarn’s care label. For cotton, cool gentle hand washing and flat drying work well. Always test colors first. Support the full wet garment and avoid wringing. That beautiful openwork catches easily on jewelry and furniture, so be mindful when wearing.
This is an adult garment designed for openwork. Always wear an opaque slip underneath. Keep long belt ends clear of moving equipment, and check that the hem doesn’t trip the wearer.
Tips for Success
Count religiously. The lattice pattern is forgiving visually, but one missed stitch throws off your entire column alignment. Count at the end of every single row.
Block aggressively. Cotton needs proper wet blocking to open up those lattice windows and show off the pattern. Don’t skip this step.
Check measurements constantly. After every 10 cm of work, measure and compare to the pattern. Catching gauge drift early saves heartbreak later.
Trust the gathering. That 180 cm of skirt fabric will look enormous before you gather it. This is correct. The fullness is what creates the beautiful drape.
This dress is a labor of love, no question. But every hour you spend on it results in a genuinely stunning, wearable piece of art. The kind of dress people stop you to ask about. The kind you’ll reach for again and again.
If you make this beautiful lattice dress, I’d absolutely love to see it! Save this pattern to your Pinterest boards so it’s easy to find when you’re ready to start, and please drop a comment below sharing your progress or finished photos. Happy crocheting!
Want a Quick & Easy Printable Version?
Get a clean, beautifully formatted PDF of this pattern — easy to follow step by step, ready to print or save on any device. No scrolling, no distractions, just the pattern.
Get the Printable PDF →