
You know that gorgeous gradient cake yarn sitting in your stash? The one you’ve been saving for "the perfect project"? This is it.
Get the Ad-Free PDF Pattern
You can find the free pattern below, or you can purchase the ad-free printable PDF from my shop.
Get the Printable PDF →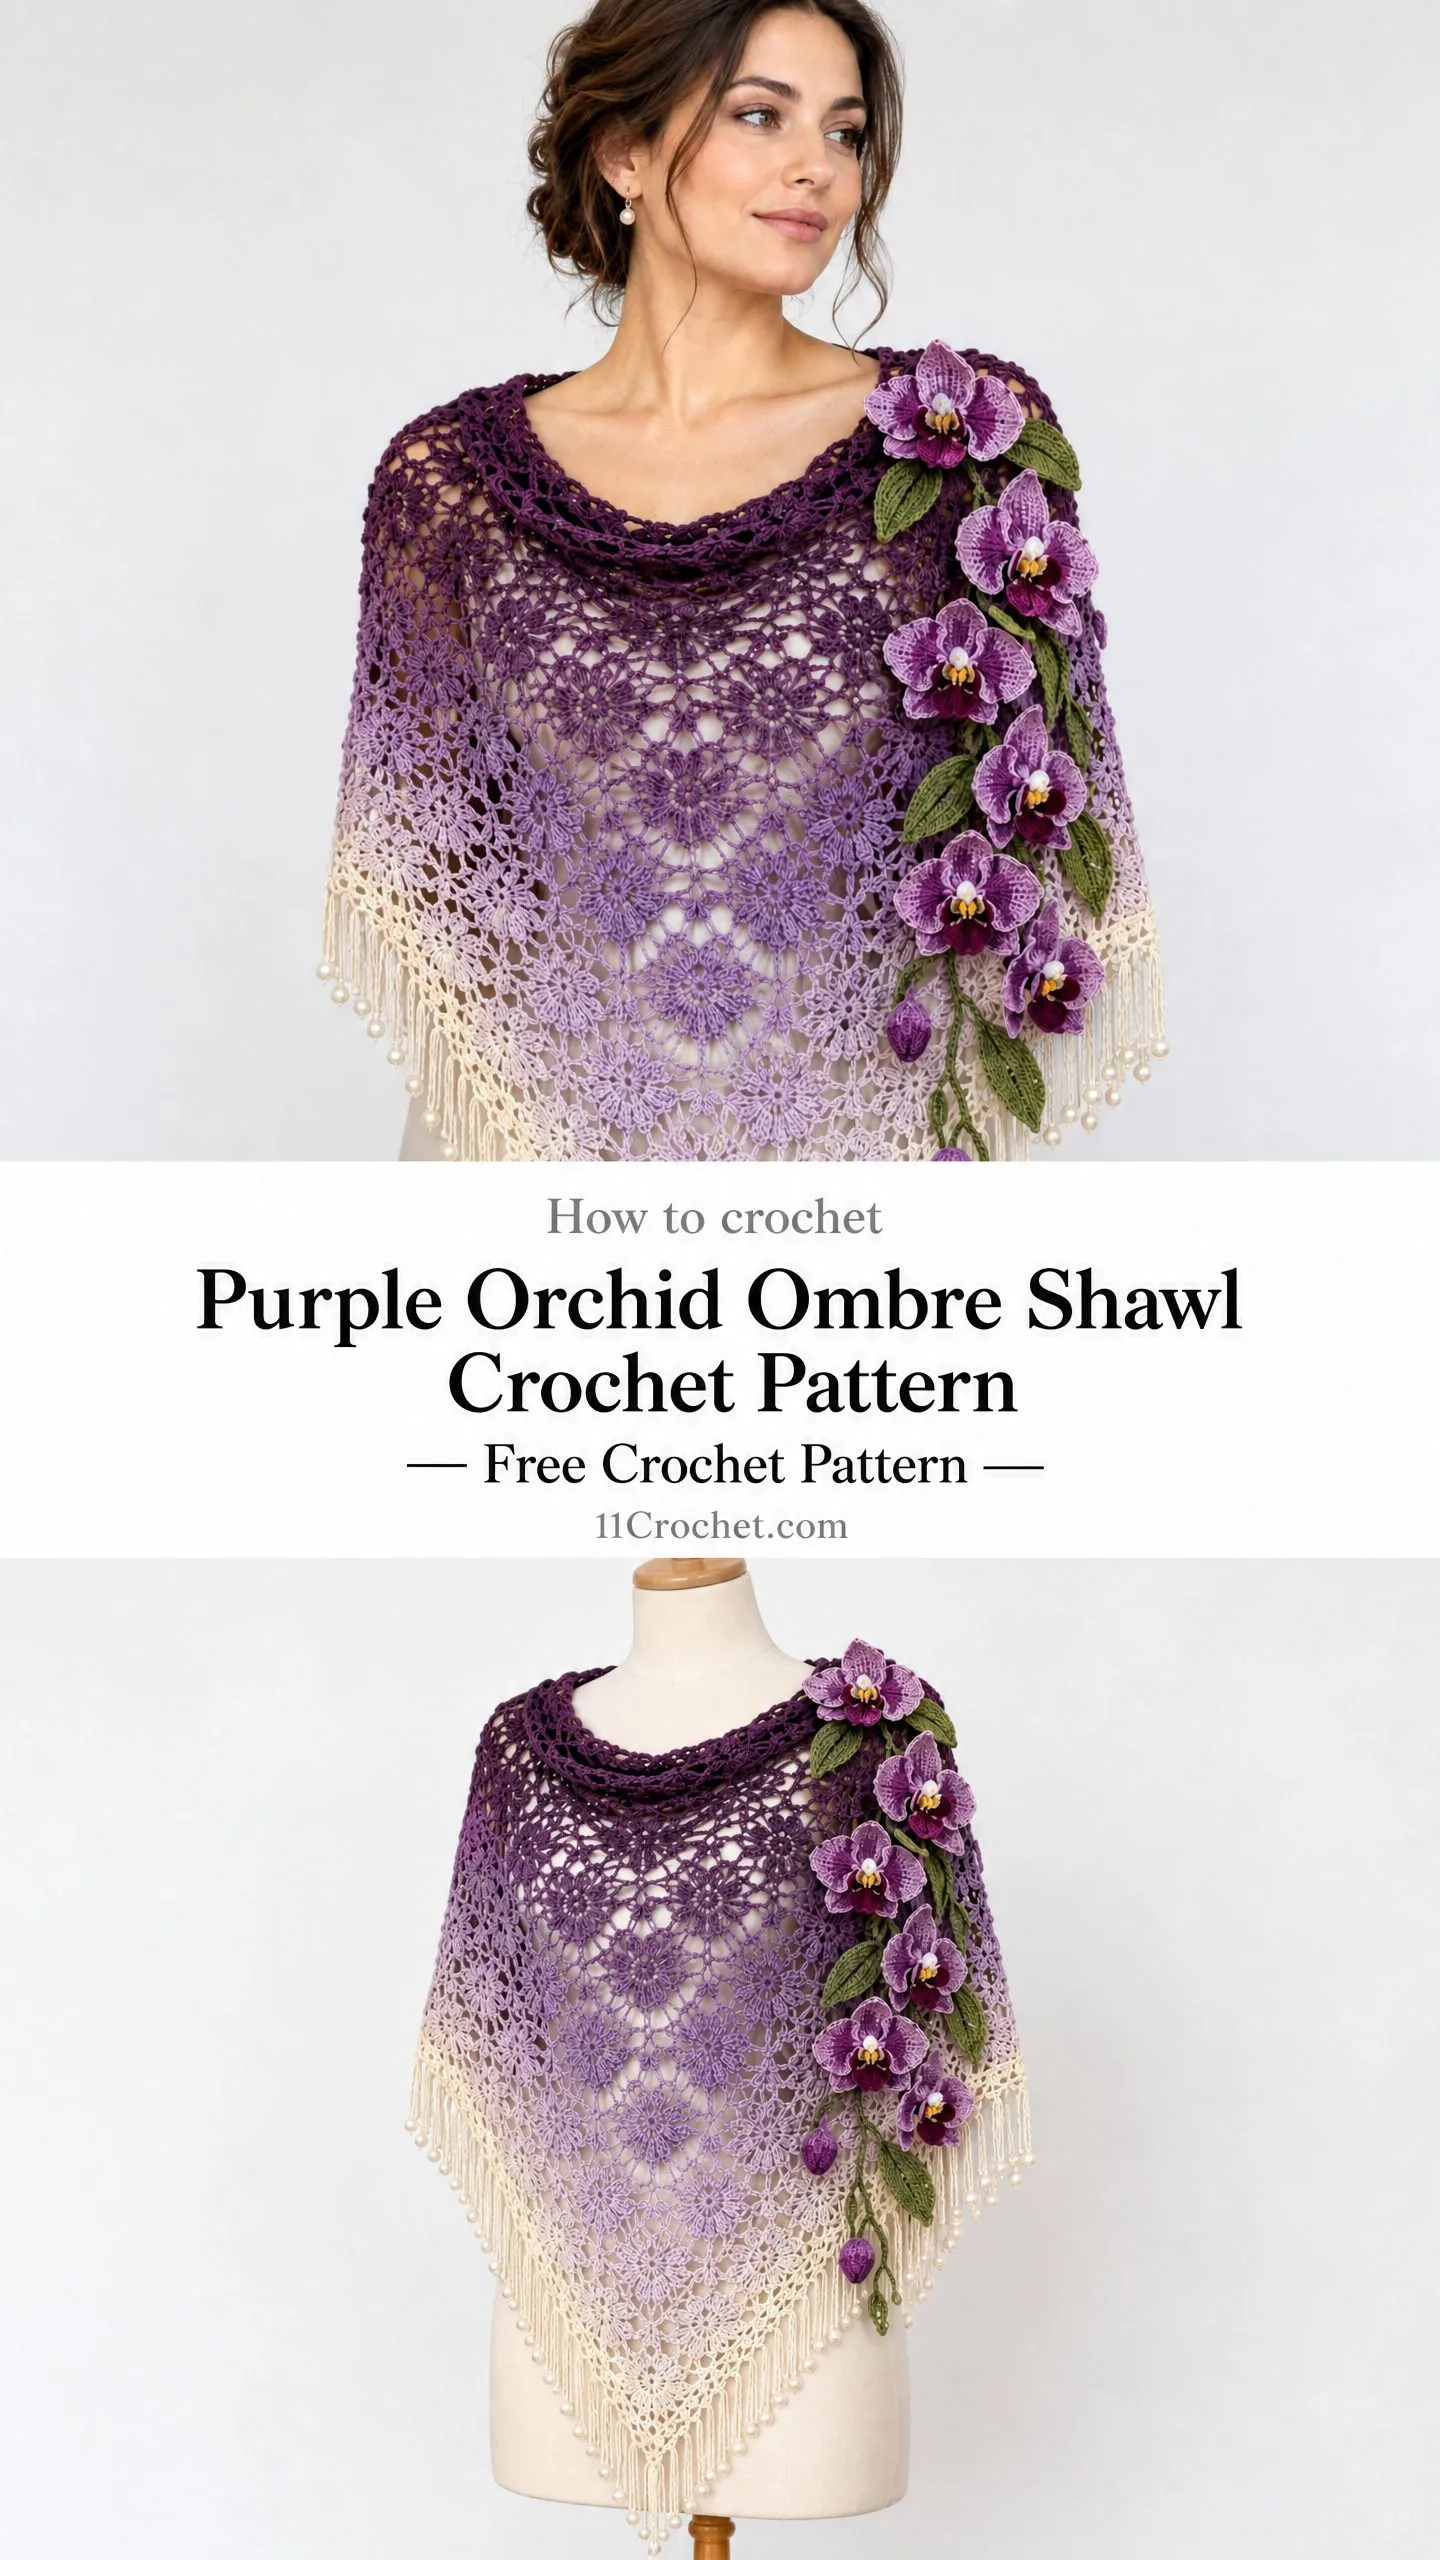
The Purple Orchid Ombre Shawl is exactly the kind of pattern that makes specialty yarn sing. The top-down triangular construction means your color transitions flow naturally from deep orchid at the neckline down through amethyst, lavender, and soft lilac to a pearl white edge. The lace body opens up beautifully with blocking, and the optional crocheted orchid flowers take this from lovely to absolutely stunning.
I’ll be honest with you. This is an intermediate pattern. You’ll need to be comfortable with basic increases, reading a lace pattern, and working chain spaces. But if you’ve made a few scarves and want to level up, this shawl is a gorgeous challenge that’s absolutely achievable. Let me walk you through every step.
Why This Shawl Pattern Works So Beautifully
The magic of this design is in its simplicity meeting its drama. The construction is straightforward. You start at the top center and work downward, increasing at the center spine and both edges to create that classic triangular shape. The lace body section adds airiness without complexity. And then those orchid flower accents? They’re completely optional, but they transform the whole piece into wearable art.
What I love most is how customizable this pattern is. Want a smaller wrap for cool summer evenings? Stop earlier. Want a dramatic full-coverage shawl? Keep going. The pattern grows with your yarn and your vision.
Materials You’ll Need
Before you start, gather everything so you can crochet uninterrupted.
Yarn: Fingering or light DK weight gradient yarn in purple orchid shades. You’ll need approximately 900 to 1200 meters depending on your finished size. Look for yarn that transitions through these colors:
Hook: 3.5 mm crochet hook. Adjust if needed to match gauge.
Notions:
Finished Size
The completed shawl measures approximately 180 cm wingspan by 85 cm depth. This is fully customizable based on how many repeats you work.
Abbreviations (US Terms)
Let me define every stitch you’ll use in this pattern:
ch = chain: Yarn over, pull through the loop on your hook. This creates the foundation and spaces throughout your work.
sc = single crochet: Insert hook, yarn over and pull up a loop, yarn over and pull through both loops. A short, tight stitch.
dc = double crochet: Yarn over, insert hook, yarn over and pull up a loop, yarn over and pull through two loops, yarn over and pull through remaining two loops. A taller stitch that creates the main fabric of this shawl.
tr = treble crochet: Yarn over twice, insert hook, yarn over and pull up a loop, then yarn over and pull through two loops three times. Even taller than double crochet.
sk = skip: Pass over a stitch without working into it.
sp = space: The gap created by chain stitches in previous rows.
sl st = slip stitch: Insert hook, yarn over, pull through both the stitch and the loop on your hook in one motion. Used for joining.
st = stitch: Any single stitch.
inc = increase: Adding stitches to make your fabric wider.
Pattern Notes to Read First
Understanding these points will make everything easier:
The shawl is worked from the center top edge downward, creating a triangular shape. Picture the top point of a triangle at your neck, with the fabric spreading wider as you work down.
The increases are made at the center spine and both outer edges. This creates three growth points that keep your triangle symmetrical.
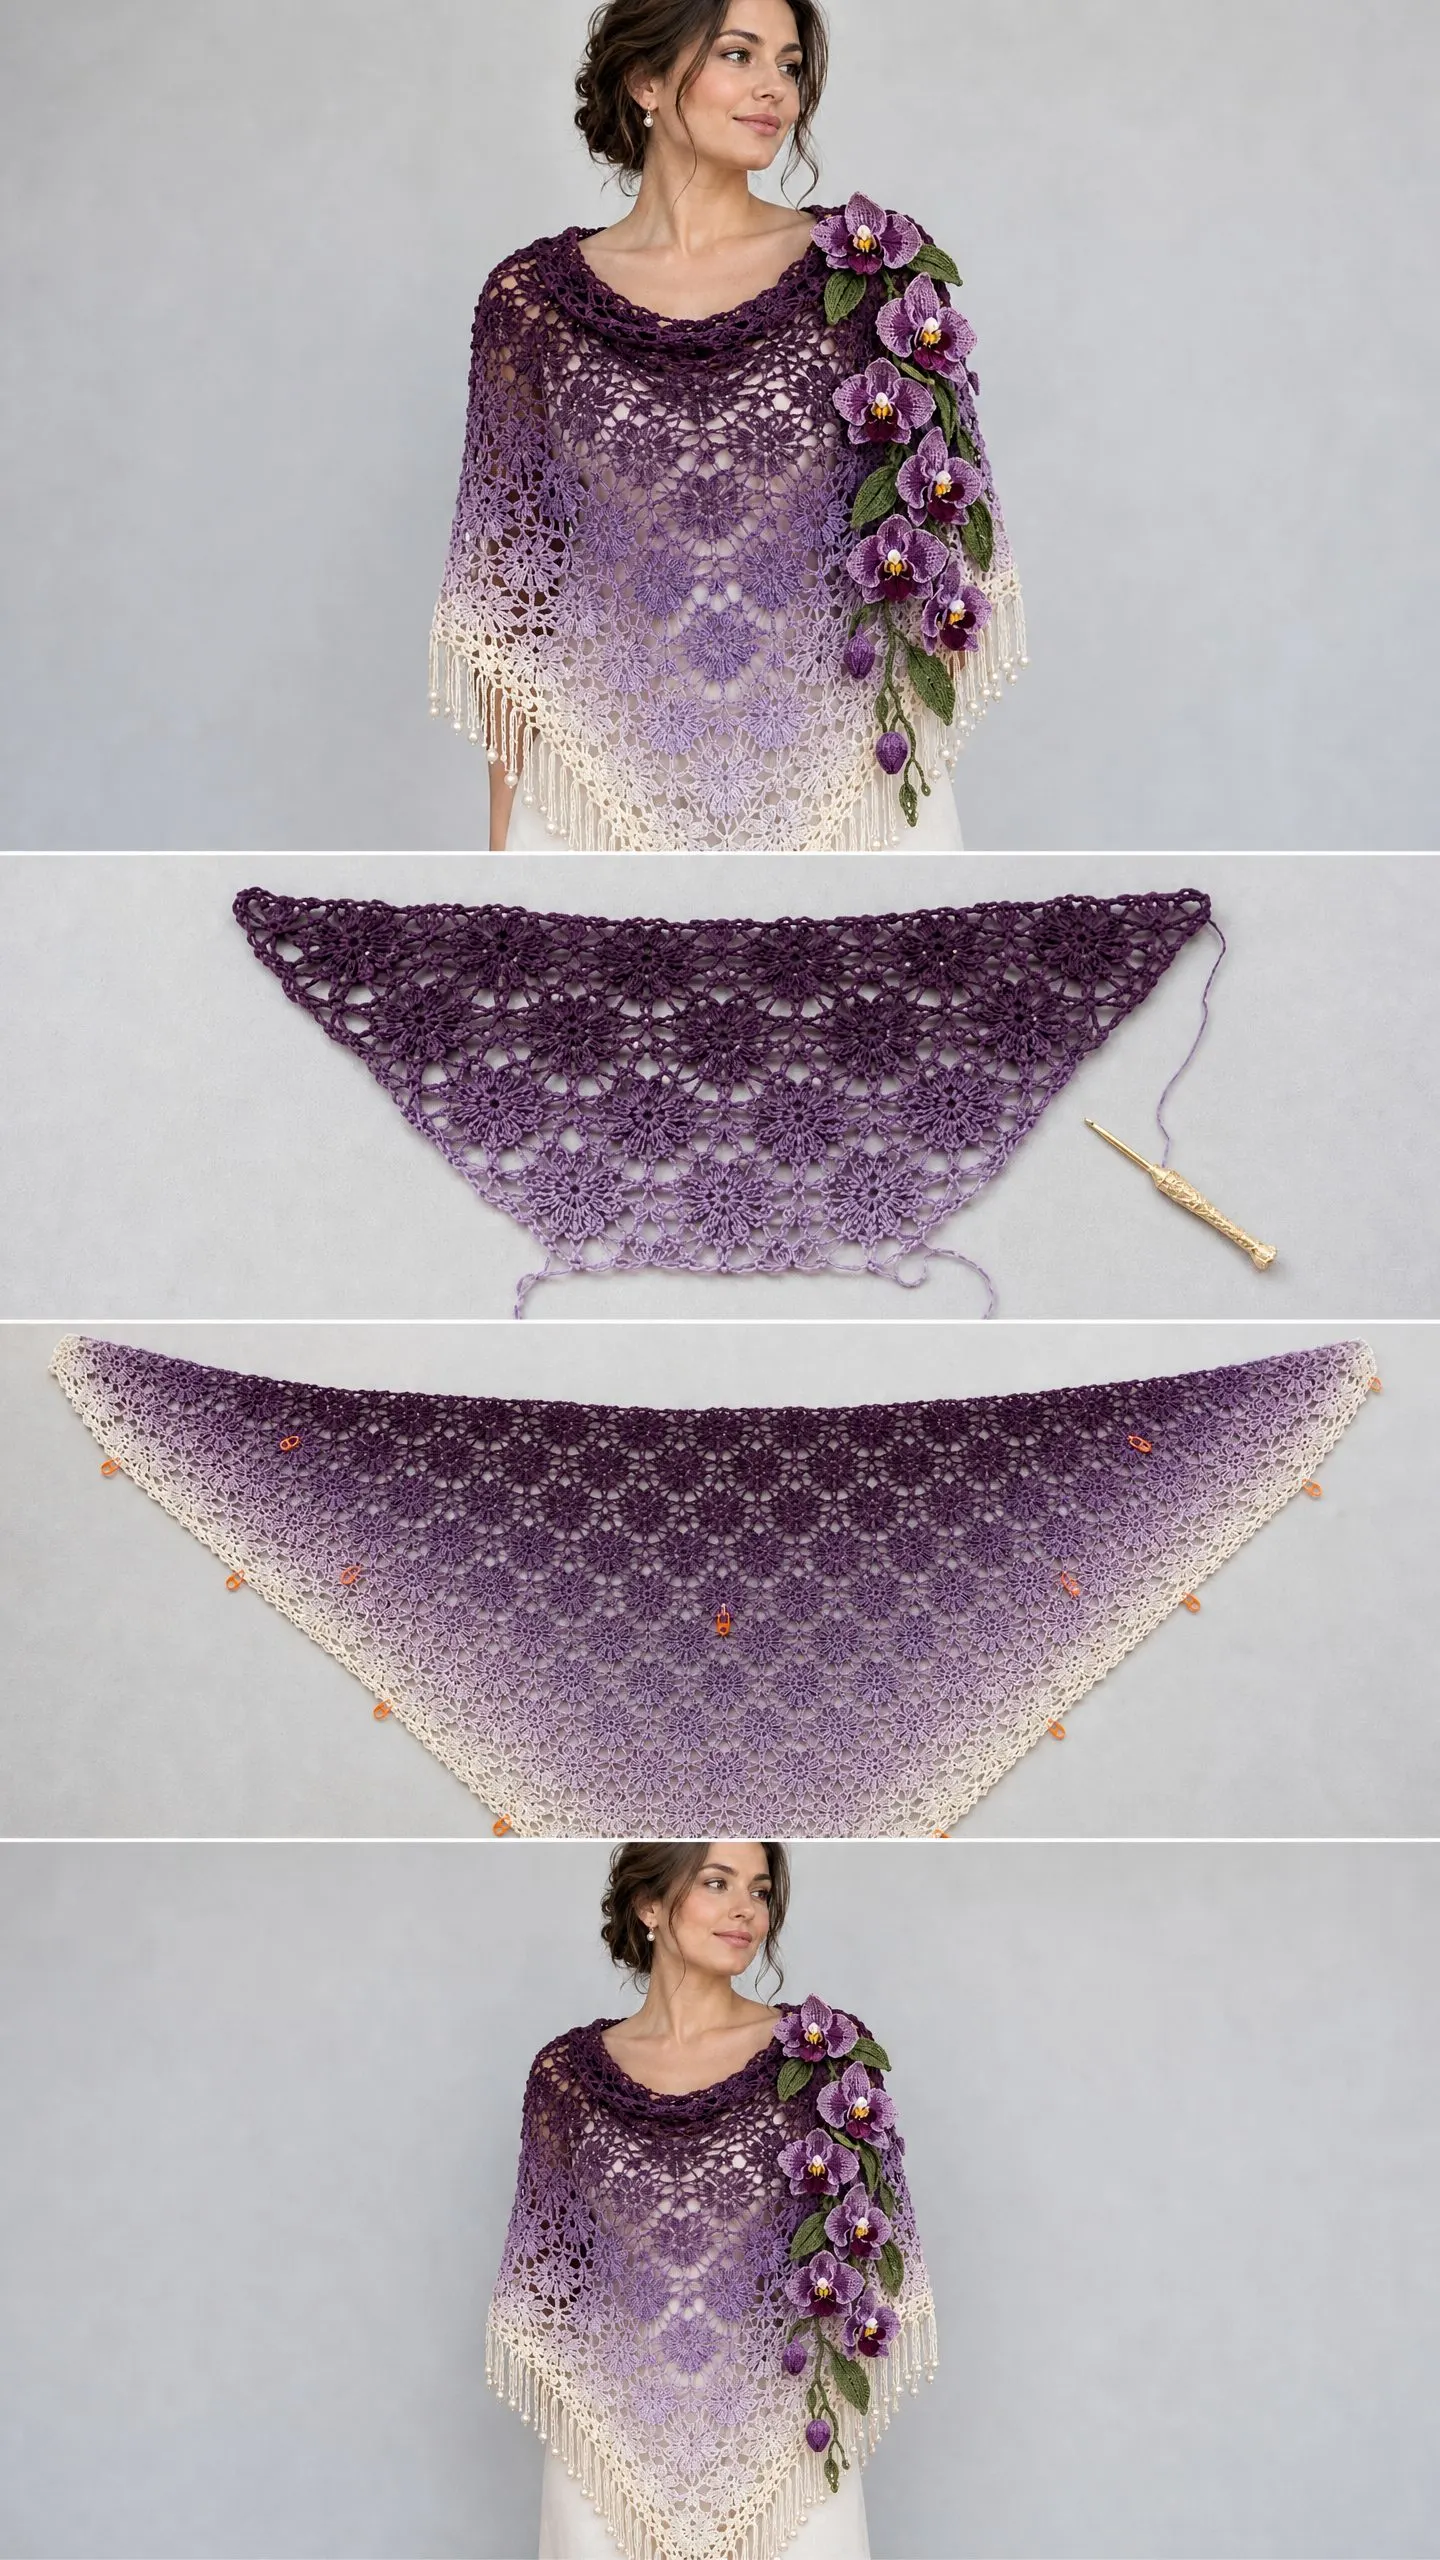
Blocking is essential. I cannot stress this enough. The lace pattern will look scrunched and closed until you wet block it. Once blocked, everything opens up and the pattern truly shines.
Step by Step Pattern Instructions
Foundation
Chain 5 (ch 5). Join with a slip stitch (sl st) to form a small ring.
This tiny ring is the starting point for your entire shawl. Don’t worry if it seems impossibly small. It will grow quickly.
Row 1
Ch 4 (counts as dc + ch 1), work 3 dc into ring, ch 2, work 3 dc into ring, ch 1, dc into ring. Turn.
Let me break this down. Your chain 4 acts as your first double crochet plus a chain space. Then you’re creating two groups of 3 double crochets with a chain 2 space between them. That chain 2 space is your center point, which you’ll increase into every row.
Row 2
Ch 4, dc into first stitch. Work dc clusters across to center space. In the center space: 2 dc, ch 2, 2 dc. Continue dc clusters to the end. Work dc, ch 1, dc in final stitch.
The pattern is establishing itself here. You’re increasing at the beginning, increasing at the center, and increasing at the end. Three growth points.
Rows 3 through 10
Repeat the increase structure:
By the time you finish Row 10, your shawl should be noticeably triangular. The center spine should be clear, and both edges should have that nice angled growth.
Helpful tip: Place a stitch marker in your center chain 2 space each row. This makes it impossible to lose track of your spine.
Lace Body Section
This is where the shawl really comes alive. You’ll continue increasing while alternating between two lace rows.
Lace Row A
Ch 4, skip 2 stitches, dc in next stitch, ch 2. Repeat across. At center point work 2 dc, ch 2, 2 dc.
This row creates the open, airy spaces that define lace crochet. The chain 2 gaps let light through and give the fabric its characteristic drape.
Lace Row B
Work dc clusters into every ch-2 space. Keep the center increase.
This row fills in some of the openness from Lace Row A, creating a rhythmic pattern of open and solid sections.
Repeat Lace Rows A and B until the shawl reaches approximately half of the desired size.
This is intentionally flexible. Your ombre yarn will be transitioning through its colors as you work. Check your progress against how much yarn remains and how the colors are flowing.
Orchid Flower Motif Accent
These flowers are completely optional, but they add such a stunning touch. If the image shows elaborate orchids cascading down one shoulder, this is how you create that effect.
Step 1: Make a magic ring. If you’re not familiar with magic rings, you can substitute ch 4 and join with sl st.
Step 2: Work 8 sc into ring.
Step 3 (Round 2): Work 2 dc in each stitch around. You’ll have 16 stitches.
Step 4 (Round 3): Create five-petal flower shapes using dc clusters.
Step 5: Sew flowers lightly along one side of the shawl.
For the most dramatic effect, create 4 to 6 flowers in varying sizes and shades. Arrange them cascading down one shoulder of the shawl. If you’re using an ombre yarn, save small amounts from different color sections to make flowers that echo the gradient.
Final Border
The border frames your entire shawl and adds a polished, finished look.
Round 1
Work sc evenly around all edges. This stabilizes the edges and gives you a consistent base for the decorative rounds.
Round 2
Ch 3, skip 1 stitch, sc into next stitch around. This creates a simple mesh effect.
Round 3: Picot Edging
Create picot edging: Sc, ch 3, sl st into first chain, sc into next stitch. Repeat around the entire shawl.
The picot creates those tiny decorative points along the edge. They catch the light and add texture without overwhelming the lace body.
Finishing Your Purple Orchid Shawl
Weave in all ends securely. With lace, loose ends are very visible after blocking. Take your time here.
Wet block the shawl into a smooth triangle. Soak your finished shawl in lukewarm water for 15 to 20 minutes. Gently squeeze out excess water (never wring). Lay flat on blocking mats and pin into shape.
Stretch lace sections gently to reveal the pattern. This is the satisfying part. Watch those chain spaces open up and the whole design come to life.
Allow to dry completely before removing pins. This might take 24 hours or more depending on humidity. Patience here means your shawl will hold its shape beautifully.
Customization Ideas
For a larger shawl: Continue repeating the lace rows. Your yarn amount will determine how far you can go.
For a smaller shawl: Stop after the desired number of repeats. A shorter version works beautifully as a neck wrap.
For an evening look: Add beads during the final border. Pearl beads complement the orchid colors beautifully and add just the right amount of sparkle for special occasions.
Tips for Working with Gradient Yarn
Gradient or ombre yarn can be tricky. Here are my best suggestions:
Start at the dark end of your gradient so the deepest purple sits at your neckline. This creates the most flattering visual effect, with the color lightening as it flows downward.
Check your color transitions as you work. If a color change happens in an awkward spot, you can sometimes adjust by working tighter or looser for a few rows.
Save yarn scraps from each color section for your orchid flowers. This gives you a palette to work with for the accents.
Skill Building in This Pattern
This shawl teaches you several valuable techniques:
Top-down construction: Once you understand this method, you can apply it to countless shawl patterns.
Center spine increases: A fundamental technique for triangular construction.
Lace patterning: Working with chain spaces and learning to see the pattern emerge.
Three-dimensional embellishments: The orchid flowers introduce shaping and assembly skills.
Wet blocking: Essential for any lace project and a skill you’ll use forever.
Who This Pattern Is Perfect For
This shawl makes an absolutely stunning gift for someone special. The combination of the ombre gradient, delicate lace, and optional orchid accents creates something that looks far more complex than it actually is.
It’s also perfect for craft shows or boutique-style collections. The visual impact is immediate, and the customizable nature means you can adjust sizes for different customers.
For yourself? This is the kind of project you’ll reach for again and again. Cool spring evenings, air-conditioned offices, autumn walks. The fingering weight yarn creates a fabric that’s warm without bulk.
I hope this Purple Orchid Ombre Shawl pattern inspires you to finally use that beautiful gradient yarn you’ve been saving. The finished piece is truly something special, and every stitch is worth it.
If you make this shawl, I would absolutely love to see it. Tag me on Instagram or share in our Facebook group. There’s nothing better than seeing these patterns come to life in your hands.
Save this pattern to your Pinterest boards so you can find it when you’re ready to cast on. And please drop a comment below if you have questions or want to share your finished shawl. I read every single one and love hearing from you!
Want a Quick & Easy Printable Version?
Get a clean, beautifully formatted PDF of this pattern — easy to follow step by step, ready to print or save on any device. No scrolling, no distractions, just the pattern.
Get the Printable PDF →