
I’ve been dreaming about creating the perfect barefoot summer accessory for ages now. Something delicate, feminine, and a little bit bohemian. When I finally sat down to design this orange blossom anklet, I knew I wanted it to work for different ankle sizes, use stitches that intermediate crocheters would feel confident tackling, and capture that romantic garden party vibe.
Get the Ad-Free PDF Pattern
You can find the free pattern below, or you can purchase the ad-free printable PDF from my shop.
Get the Printable PDF →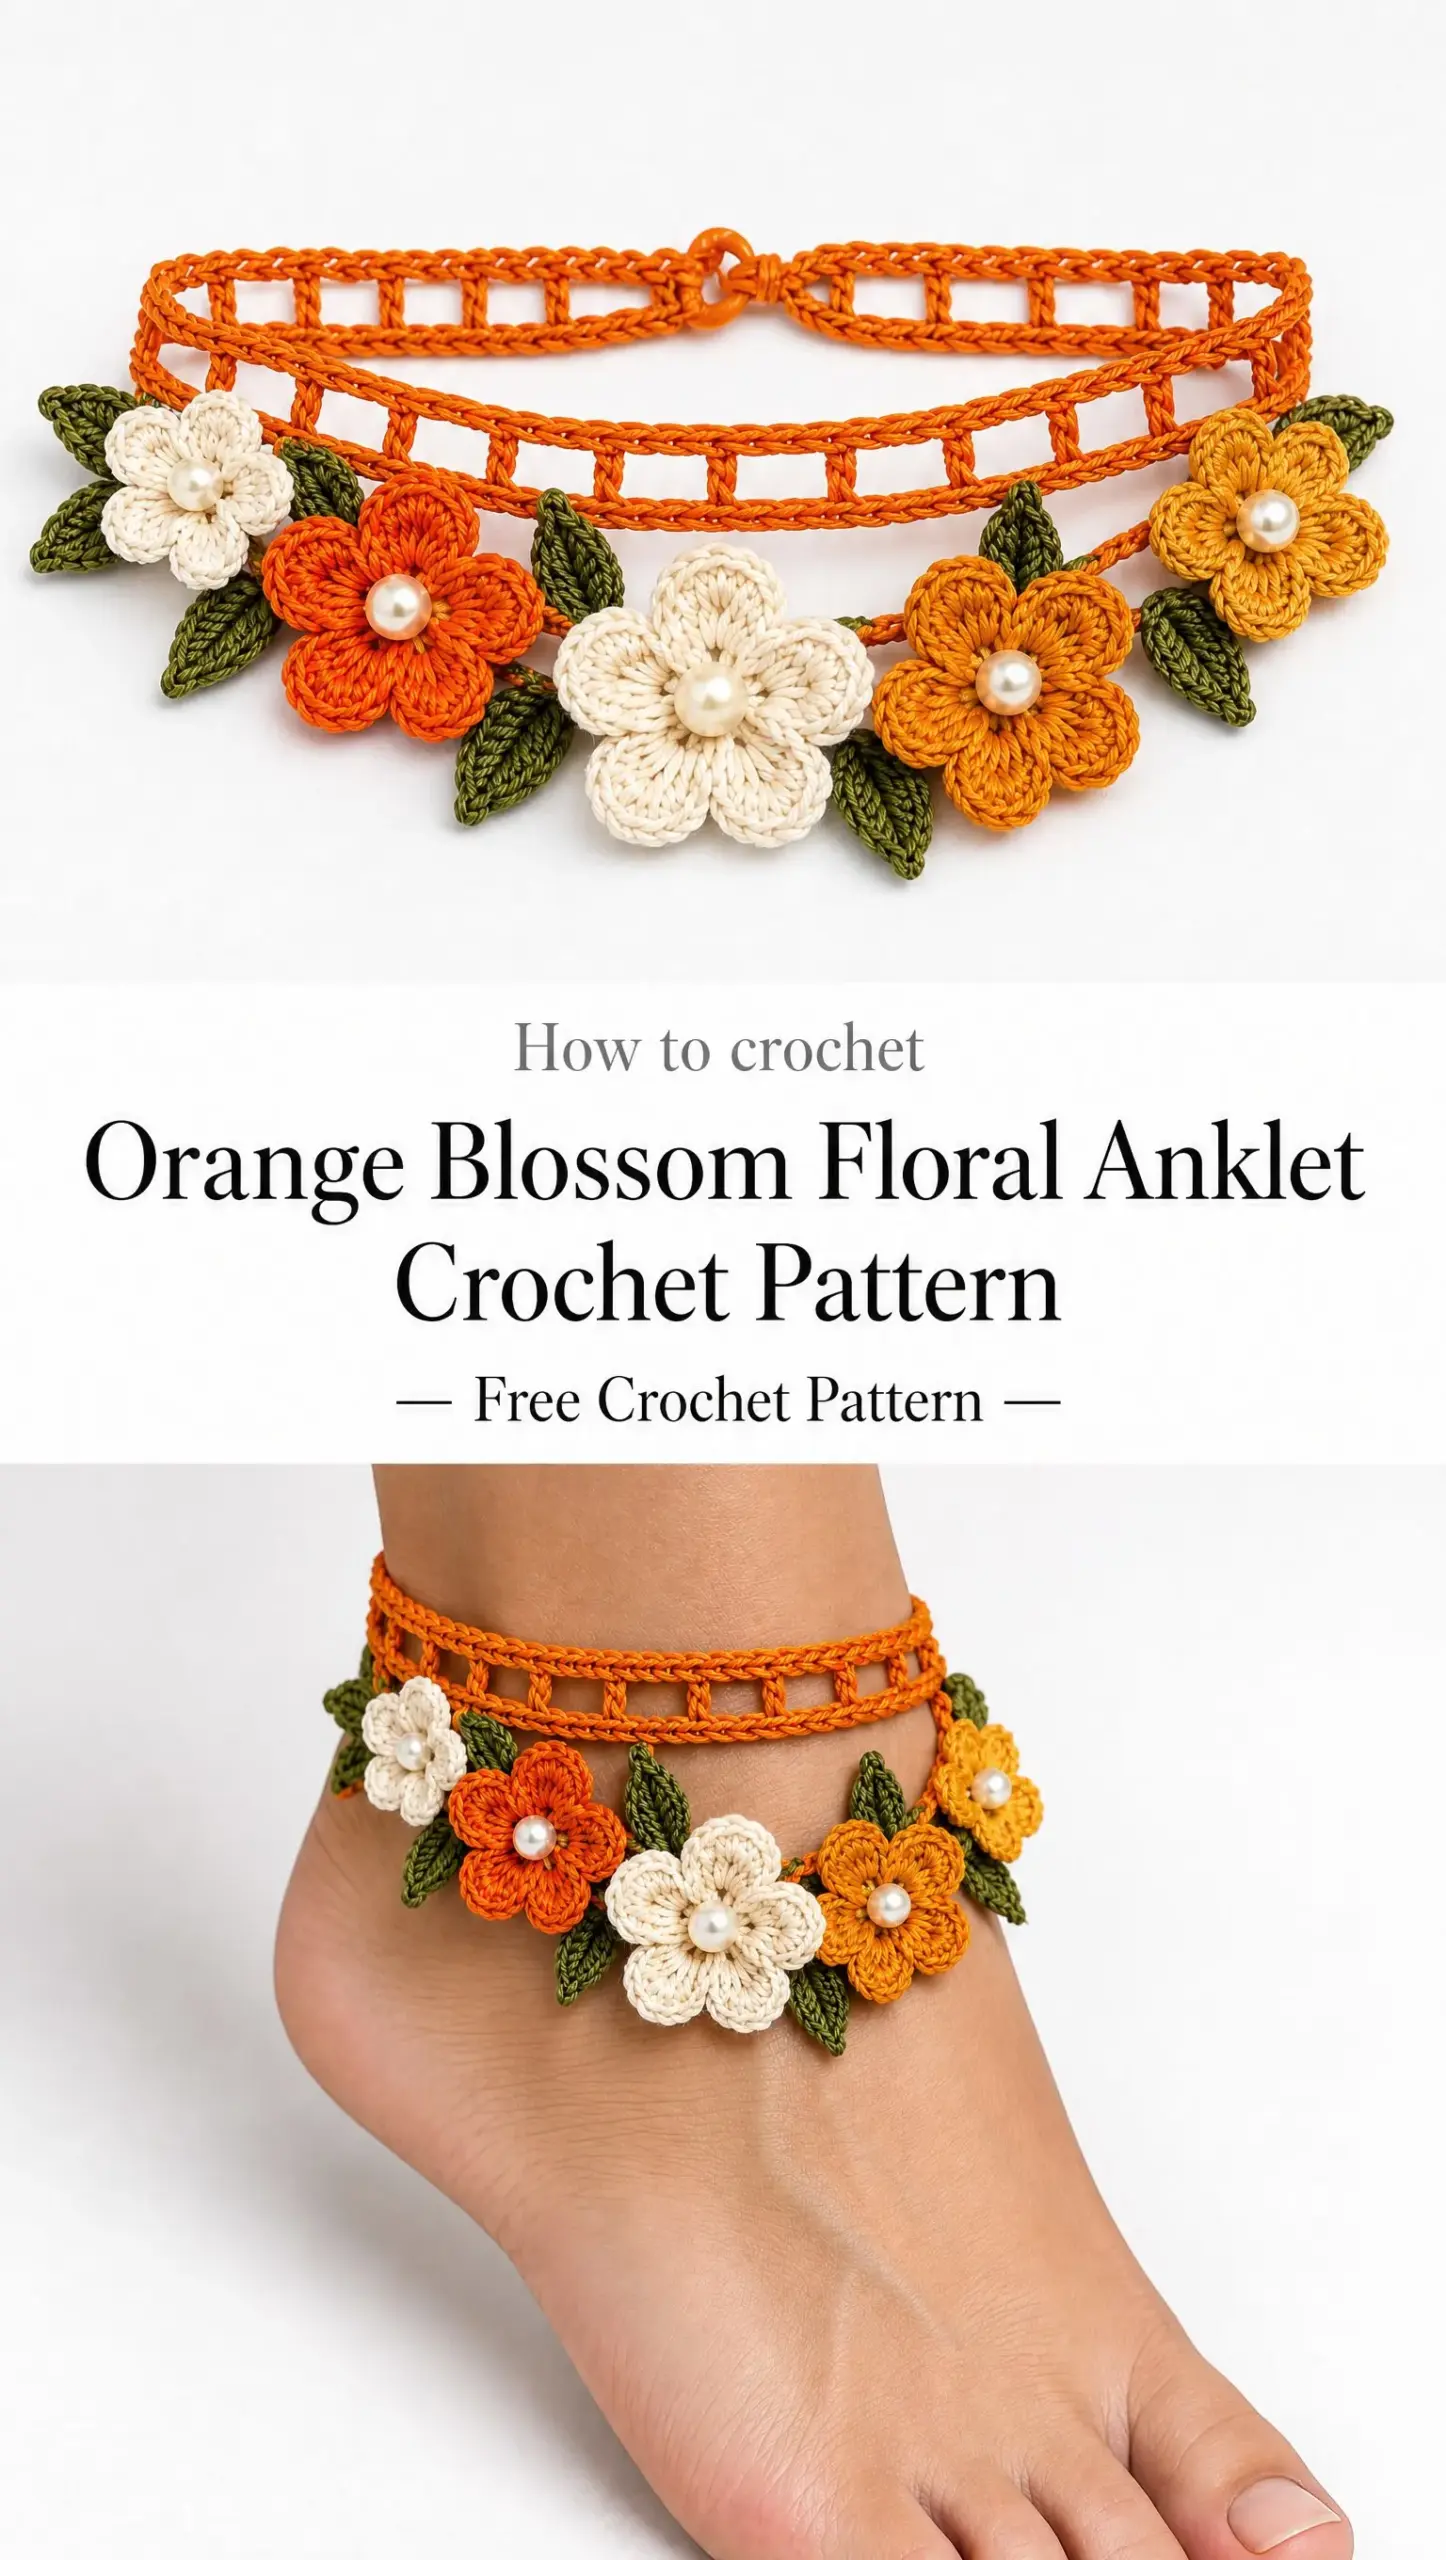
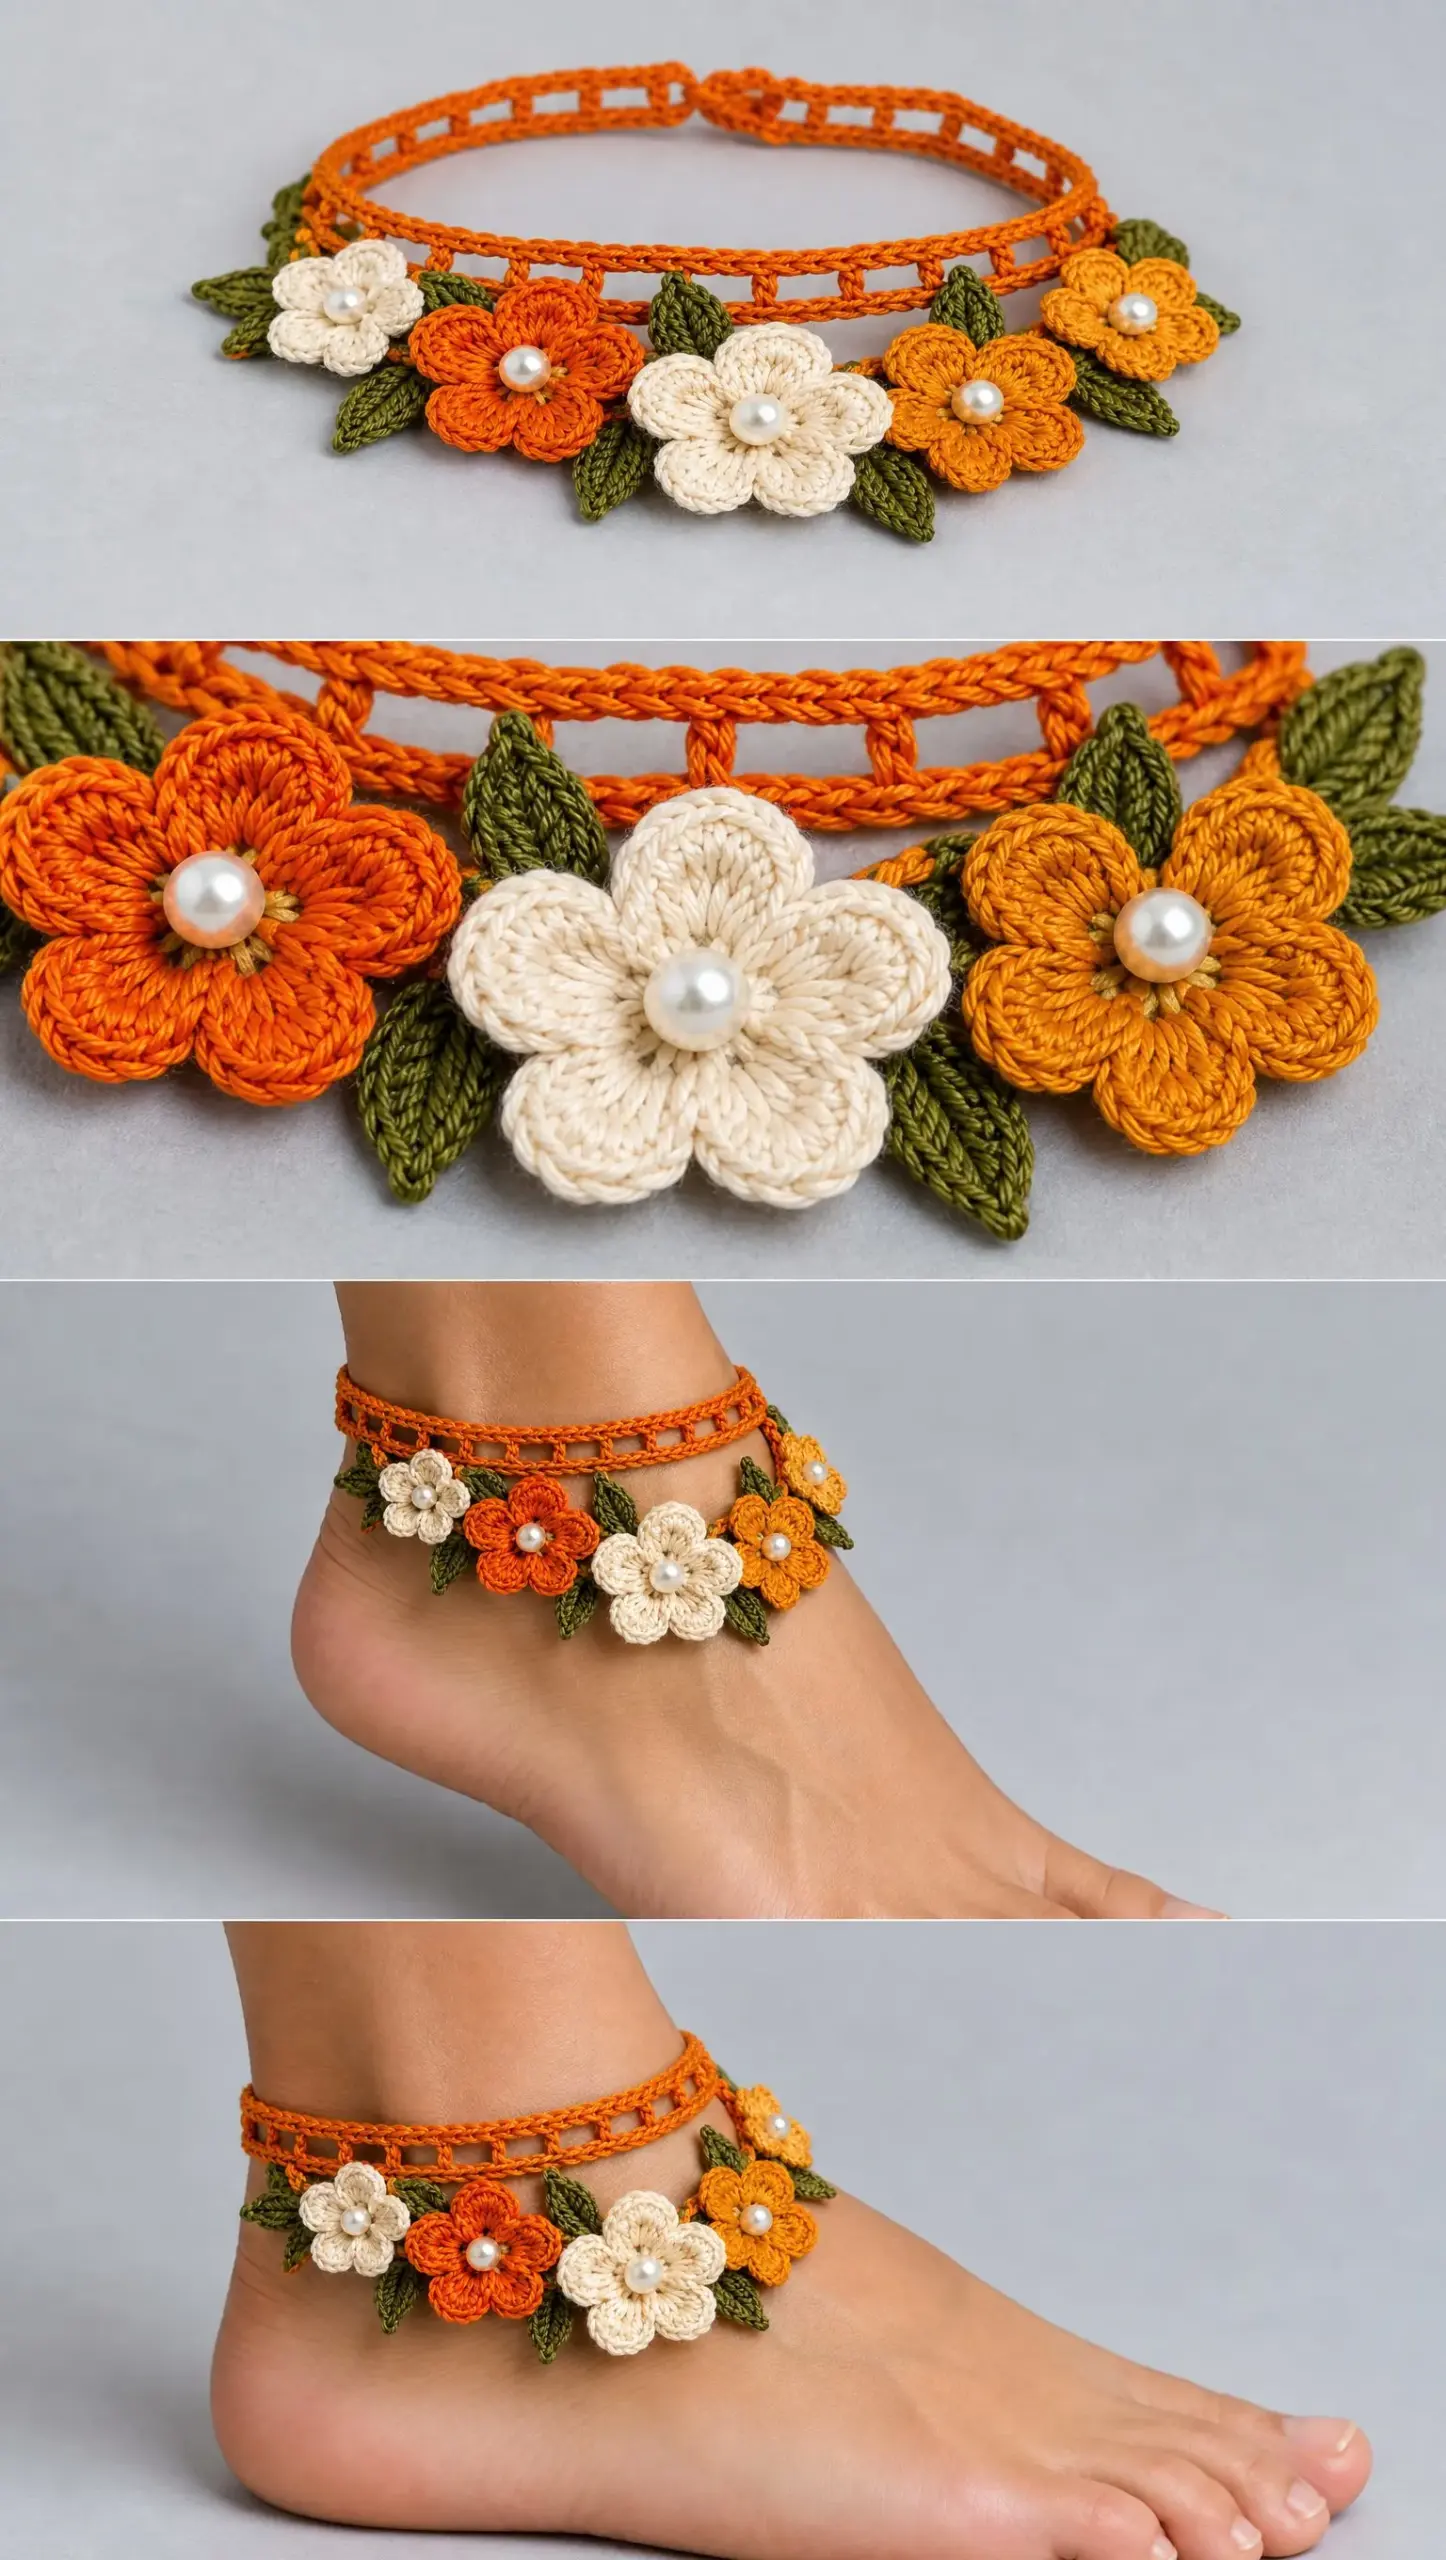
The three-dimensional flowers with their sweet pearl centers turned out even prettier than I imagined. And those tiny olive green leaves tucked between the blossoms? They give the whole piece that natural garland look I was going for.
I am SO thrilled with how this one turned out, and I cannot wait for you to try it!
About This Floral Anklet Pattern
This delicate barefoot anklet features a fine crochet chain base decorated with three-dimensional orange blossom flowers, pearl-like centers, and small green leaves. It wraps comfortably around your ankle and upper foot, making it the perfect lightweight accessory for summer weddings, beach days, or just feeling fancy on a warm afternoon.
The construction is straightforward once you understand the sections. You’ll crochet the ankle band first, then make the flower motifs separately, add the leaves, attach everything together, and finish with a toe loop. Breaking it down into these smaller pieces makes the whole project feel much more manageable.
Skill level: Intermediate. If you’re comfortable with basic crochet stitches and have tried a few small motifs before, you’ll do great with this pattern. The techniques include working in the round, color changes, joining pieces, and neat finishing work.
Finished Size
This anklet is adjustable to fit different ankle circumferences:
The foundation chain can be adjusted to fit your specific measurements, so don’t worry if you fall between sizes.
Materials You’ll Need
Yarn
You’ll be working with fine cotton yarn in fingering weight (category 1). Here’s what you need:
Suggested yarn options:
The mercerized cotton works beautifully for this project because it has a lovely sheen that catches the light. But honestly, any smooth fingering weight cotton will give you gorgeous results.
Hook
1.5 mm crochet hook (adjust according to your personal tension)
This is a small hook! If you’ve never worked with thread-weight yarn before, give yourself some grace. The stitches will feel tiny at first, but you’ll get into a rhythm quickly.
Other Materials
Gauge
Approximately 28 single crochet stitches x 32 rows = 10 x 10 cm
Here’s the good news: gauge is not critical for this project. Choose a hook size that creates a firm but flexible band. If your stitches look neat and the fabric feels sturdy without being stiff, you’re on the right track.
Abbreviations
Before we dive in, let me walk you through all the abbreviations you’ll encounter:
How to Crochet the Orange Blossom Floral Anklet
This pattern is worked in five sections. I’ll walk you through each one step by step.
Section 1: The Ankle Band
The ankle band forms the foundation of your anklet. This is where you’ll attach all those pretty flowers and leaves.
Foundation:
Chain 70 (or adjust this number so the chain fits comfortably around your ankle).
Row 1:
Work a single crochet (sc) in the second chain from the hook. Continue working sc across the entire chain. Turn your work. (69 sts)
Row 2:
Chain 1, then work sc across all stitches. Turn.
Repeat Row 2 until your band measures approximately 1.5 cm wide. This usually takes about 4 to 5 rows depending on your tension.
Creating the Button Loop:
At one end of your band, chain 8 stitches and join with a slip stitch to form a loop. This creates the closure for your anklet.
Sew a small bead or button at the opposite end of the band. This will slip through your chain loop to fasten the anklet securely.
Section 2: Flower Motifs (Make 5)
These sweet little orange blossoms are the stars of the show. You’ll make five of them, which gives you plenty to arrange across the front of your anklet.
Center:
With ivory yarn, make a magic ring. (If you’re not comfortable with magic rings, you can chain 4 and join with a slip stitch to form a ring instead.)
Round 1:
Chain 1, then work 10 sc into the ring. Join with a slip stitch to the first sc. (10 sts)
Round 2:
Change to orange yarn.
Chain 2, then work 2 dc in each stitch around. Join with a slip stitch. (20 sts)
Round 3:
Chain 1. Now you’ll create the petals: work sc in the next stitch, 5 dc in the next stitch, sc in the next stitch. Repeat this sequence around to create five petals. Join with a slip stitch.
Round 4:
Using orange yarn, work slip stitches around the petal edges to define the shape. This gives your flowers that crisp, finished look.
Adding the Pearl Center:
Sew a small pearl bead into the center of each flower. Alternatively, you can crochet a tiny raised bobble if you prefer an all-yarn look.
Section 3: Leaf Motifs (Make 6)
The leaves add that natural, organic touch that makes this anklet feel like a real orange blossom garland.
With green yarn, chain 7.
Row 1:
Work sc in the second chain from hook, hdc in the next chain, dc in the next 2 chains, hdc in the next chain, sc in the last chain.
Now rotate your work to continue along the opposite side of the foundation chain. Work matching stitches along this side: sc, hdc, dc, dc, hdc, sc.
Fasten off and weave in your ends.
The leaf should have a nice pointed oval shape. If yours looks a bit different, don’t worry. Natural leaves aren’t perfectly uniform anyway!
Section 4: Assembly
This is where everything comes together. Take your time with this step to get the placement just right.
1. Position the flowers: Arrange three larger flowers across the front center of the anklet band. These will be your focal point.
2. Add the smaller flowers: Place the remaining flowers toward each side of the center grouping.
3. Secure the flowers: Using your yarn needle and matching thread, stitch each flower securely onto the ankle band. Make sure they’re firmly attached since this piece will be worn on your foot.
4. Tuck in the leaves: Add leaves between the flowers for a natural orange blossom garland effect. Stitch them in place underneath and around the flowers.
Section 5: Toe Loop
The toe loop connects the anklet to your foot, keeping everything in place while you walk.
Attach your yarn below the center flower on the ankle band.
Chain 18 to 22 stitches, depending on your foot size. (Wrap the chain around your big toe or second toe to check the length before joining.)
Join the chain back to the anklet base with a slip stitch.
Work one round of single crochet around the entire chain loop for stability. This reinforces the toe loop and makes it more comfortable to wear.
Fasten off and weave in your ends.
Finishing Your Anklet
Almost done! Here’s how to give your anklet that polished, professional look.
Weave in all yarn ends securely. With such fine thread, loose ends can work themselves free, so take extra care here.
Block your anklet using either steam blocking or wet blocking. Lay it flat and gently shape the flowers and leaves while the piece is damp. Let it dry completely before wearing.
Blocking makes a huge difference with delicate lace projects like this one. Your flowers will lie flat and pretty instead of curling up.
Care Instructions
Your handmade anklet deserves gentle care to keep it looking beautiful:
I recommend washing it after every few wears, especially if you’ve been wearing it at the beach or pool.
Troubleshooting Common Issues
If the anklet feels loose:
Reduce the foundation chain length. It’s better to have a snug fit than a loose one that slides around.
If the flowers curl:
Try using a slightly larger hook for the flower motifs, or block the petals flat with pins while drying.
If the band stretches out:
Add an extra reinforcing row of single crochet along each long edge of the band. This gives it more structure.
Tips for Success
Working with fine cotton thread can feel tricky at first, especially if you’re used to worsted weight yarn. Here are some things that helped me:
Good lighting is essential. Set up near a window or use a bright craft lamp. Those tiny stitches are much easier to see in good light.
Take breaks. Your eyes and hands will thank you. This is not a race!
Use stitch markers liberally. Mark the beginning of each round and any important stitch placements. They’re lifesavers with small work like this.
Practice the magic ring before starting your flowers if you haven’t used one recently. Getting a nice tight center makes such a difference in how your flowers look.
Styling Your Orange Blossom Anklet
This barefoot anklet looks stunning for:
Pair it with flowy dresses, linen pants, or your favorite swimsuit. The orange and ivory color combination works beautifully with warm skin tones, but you could easily customize the colors to match a specific outfit or event.
Make It Your Own
Once you’re comfortable with this pattern, try experimenting! Here are some variations to consider:
The basic construction stays the same, so feel free to play with colors and embellishments.
Thank you so much for choosing this pattern for your next project! I really hope you love making this orange blossom anklet as much as I loved designing it. If you share your finished piece on Instagram or Facebook, please tag me. I absolutely love seeing what you create!
If this pattern brightened your day, save it to your Pinterest boards so you can find it easily when you’re ready to start. And please drop a comment below if you make one. I’d love to hear how it turns out for you!
Want a Quick & Easy Printable Version?
Get a clean, beautifully formatted PDF of this pattern — easy to follow step by step, ready to print or save on any device. No scrolling, no distractions, just the pattern.
Get the Printable PDF →