
Let me guess. You saw this dress and thought, "That is way too advanced for me." I get it. The sculpted cups, the gathered skirt, the delicate floral appliques scattered everywhere. It looks like something only a professional could pull off.
Get the Ad-Free PDF Pattern
You can find the free pattern below, or you can purchase the ad-free printable PDF from my shop.
Get the Printable PDF →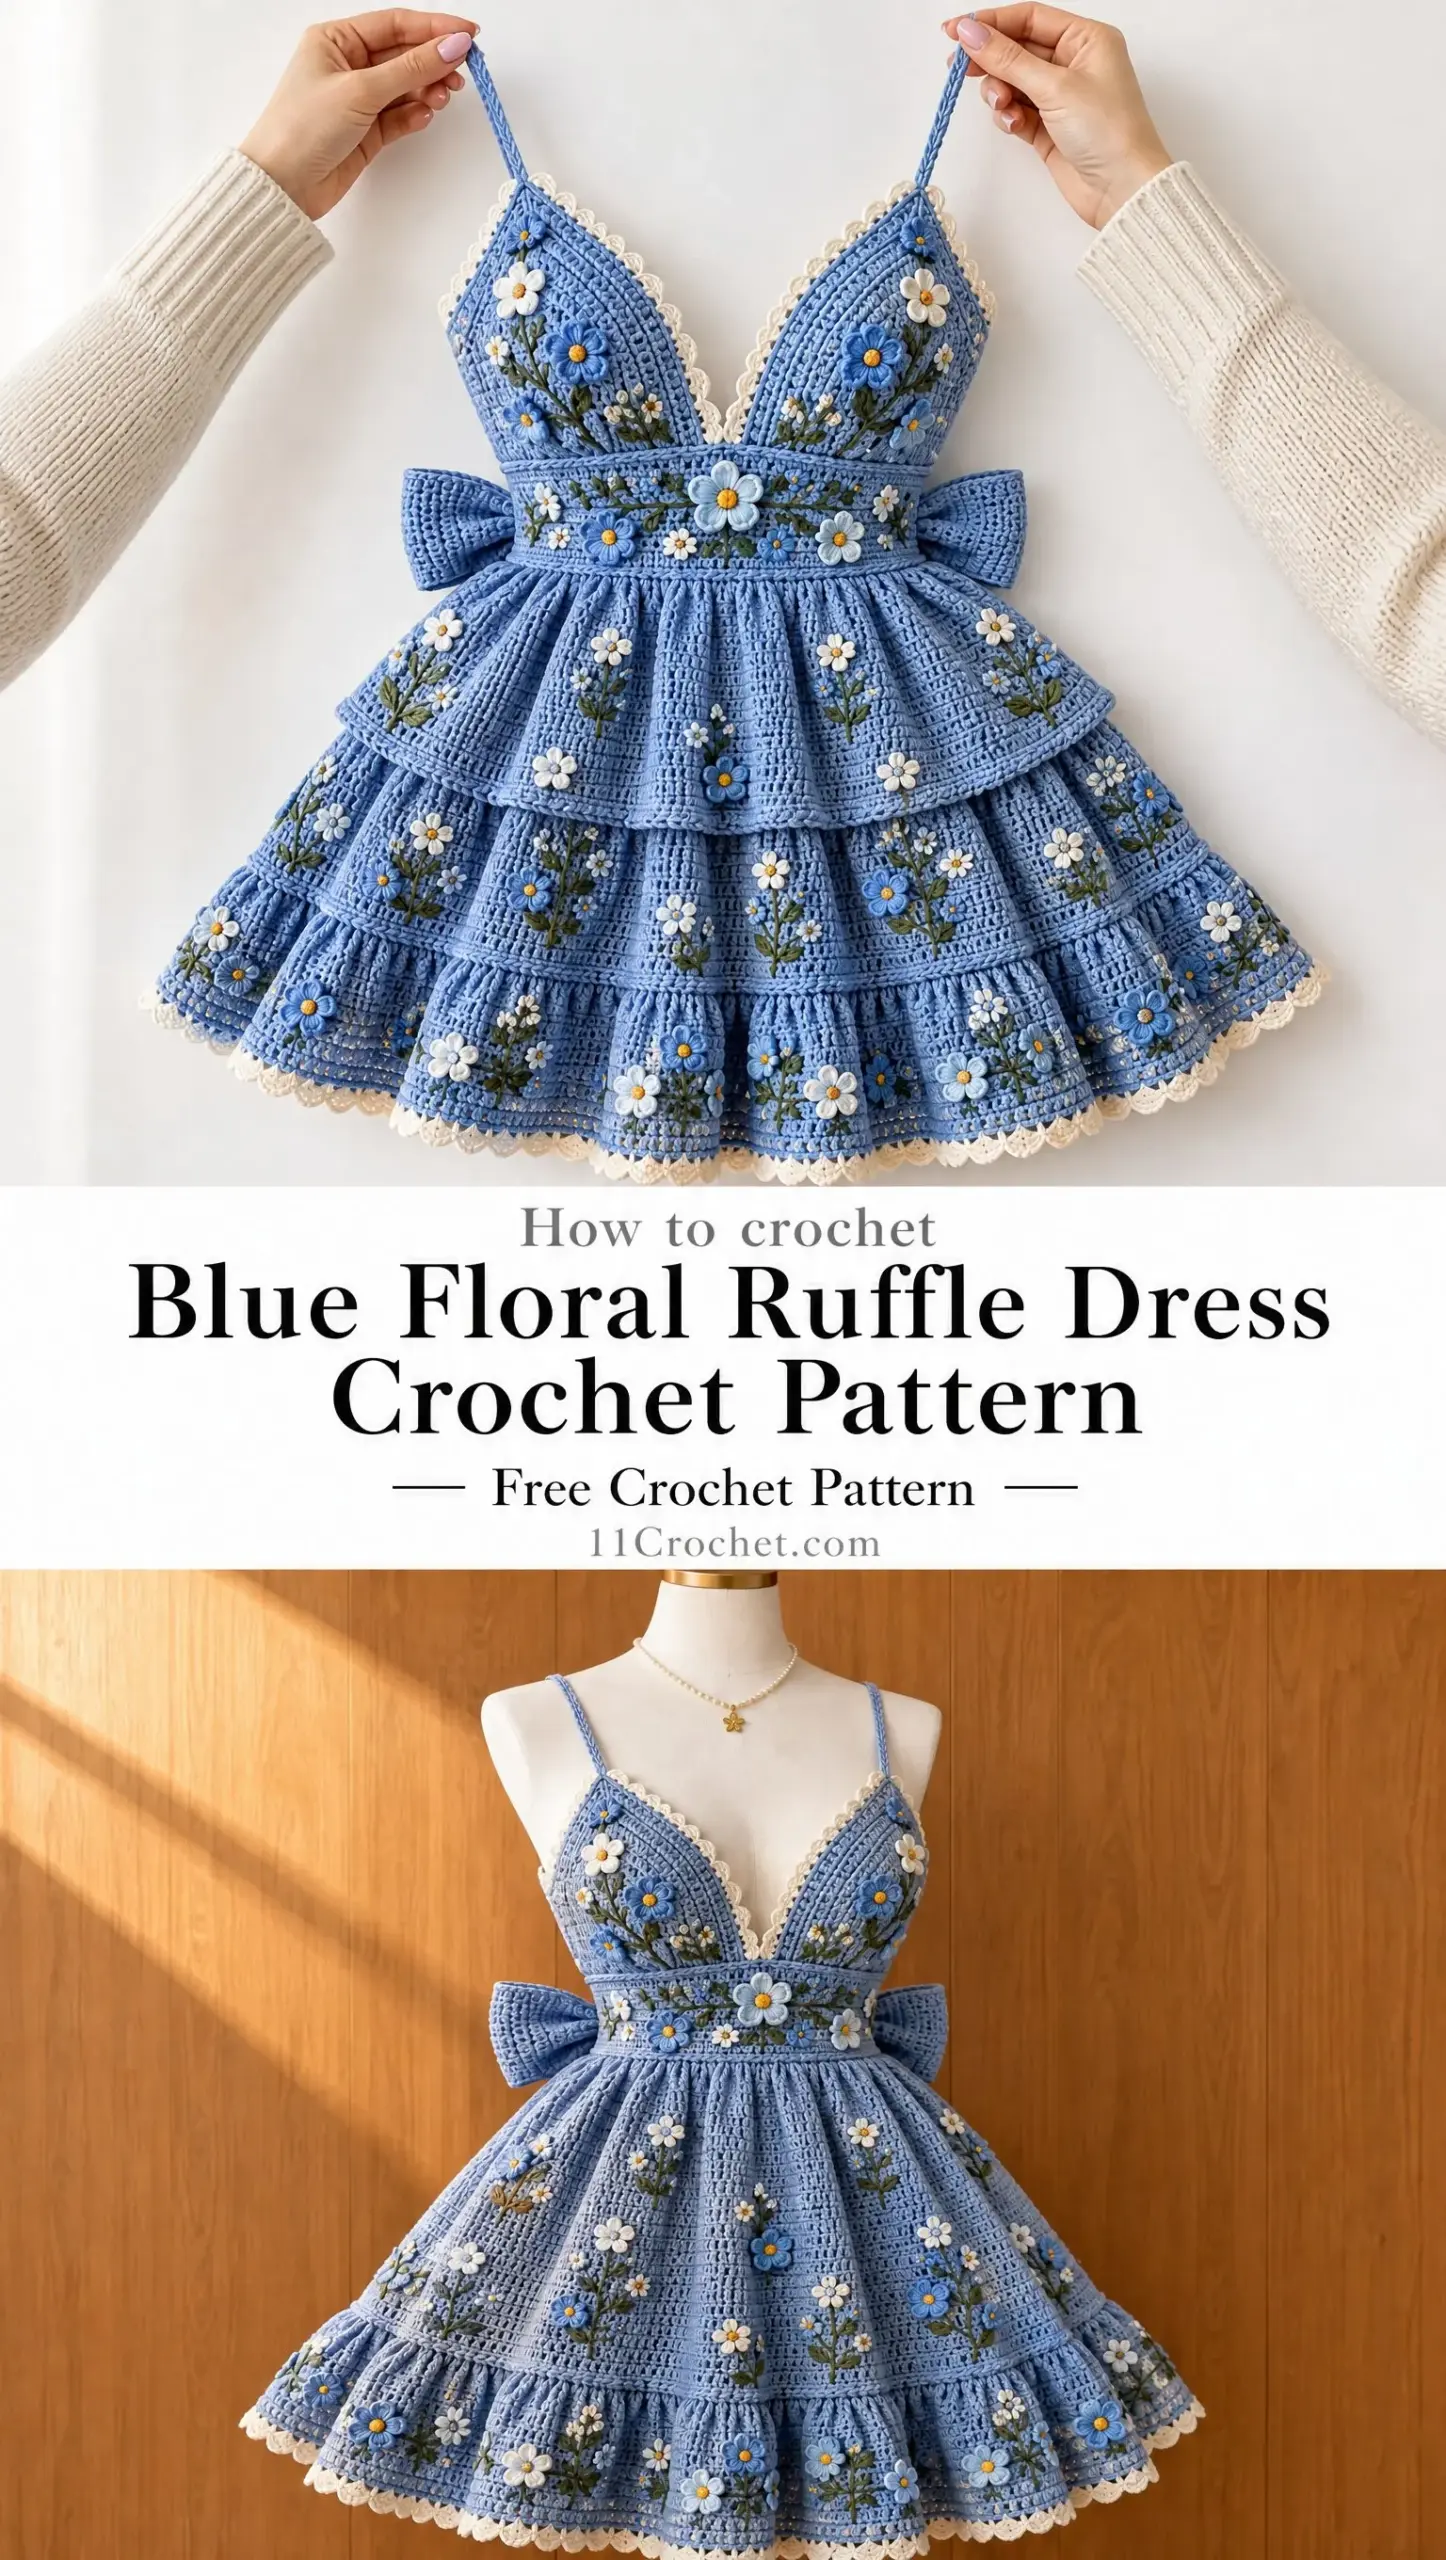
Here is the truth. If you can single crochet, chain, and follow a pattern step by step, you can absolutely make this dress. The construction breaks down into simple pieces that you assemble one at a time. No magic required.
This pattern is designed as a made-to-measure project, which means you will customize it to fit your exact body. That sounds intimidating, but I walk you through every measurement and calculation. Whether you are an intermediate crocheter ready to level up or an advanced maker looking for a stunning summer project, this Blue Floral Ruffle Dress crochet pattern will meet you where you are.
About This Blue Floral Ruffle Dress Pattern
This powder-blue sundress features a fitted bodice with two shaped triangular cups, a deep plunging V-neckline edged with tiny ivory scallops, a broad fitted waistband, and a full gathered A-line skirt with a dramatic lower ruffle. The back showcases an oversized bow that peeks out from both sides when viewed from the front. Scattered throughout the entire dress are handmade floral appliques in blue and ivory with cheerful yellow centers, connected by embroidered green stems and leaves.
The finished look is romantic, feminine, and perfect for spring or summer events. You can wear it over a slip or add a lining for extra opacity and support.
Skill Level: Intermediate to advanced
Construction Method: Worked in pieces, joined at the bodice and waist. Embellishments are sewn on after blocking.
Materials You Will Need
Gathering your supplies before you start makes the whole process smoother. Here is everything this crochet tutorial requires:
| Material | Specification | Amount | Use |
|---|---|---|---|
| Main yarn | Sport or light DK cotton, 100-125 m per 50 g | 850-1400 m | Dress body, straps, bow |
| Ivory yarn | Same weight cotton | 80-150 m | Scallops, flowers |
| Yellow yarn | Same weight or slightly finer | 10-20 m | Flower centers |
| Green yarn or embroidery cotton | Fine cotton | 15-30 m | Stems and leaves |
| Crochet hook | 3.0-3.5 mm | 1 | Choose size that meets gauge |
| Notions | Tapestry needle, stitch markers, pins, scissors | As needed | Assembly and finishing |
| Optional | 1/4 inch or 6 mm clear elastic | As needed | Extra support at waist and neckline |
| Optional lining | Light cotton voile or stretch lining | 0.75-1.5 yards | Additional opacity or support |
The yarn amount range accounts for different sizes. Smaller sizes need closer to 850 m of main yarn, while larger sizes may require up to 1400 m.
Gauge Information
Target gauge: 22 single crochet (sc) stitches x 24 rows = 4 x 4 inches or 10 x 10 cm after blocking in the main dense stitch.
Stitch gauge matters most at the cups and waistband where fit is critical. Row gauge can be adjusted by simply adding or removing rows as you work.
Always make a gauge swatch before starting. Wash and block your swatch exactly as you plan to treat the finished dress, then measure. This step saves hours of frustration later.
Body Measurements to Take
Since this is a made-to-measure pattern, you need these measurements before you begin:
Size Guide Reference
| Size | XS | S | M | L | XL |
|---|---|---|---|---|---|
| Bust (inches) | 30 | 34 | 38 | 42 | 46 |
| Waist (inches) | 24 | 28 | 32 | 36 | 40 |
| Bust (cm) | 76 | 86 | 97 | 107 | 117 |
| Waist (cm) | 61 | 71 | 81 | 91 | 102 |
Made-to-measure rule: For a firm cotton bodice, make the finished waistband circumference approximately W x 0.95 to W x 1.00, depending on how much stretch your fabric has. If you prefer a zipper-free pull-on version, use W x 1.00 and check that it passes comfortably over the bust or hips.
Abbreviations and Core Stitches
Before diving into the step by step instructions, let me define every stitch abbreviation you will encounter:
Tiny Ivory Scallop Edging
This decorative edge appears along the V-neckline, cup tops, and hem. Here is the repeat:
Scallop repeat: Slip stitch in first stitch, skip 1 stitch, 4 sc in next stitch, skip 1 stitch. Repeat across.
For a softer picot-like edge, work 3 sc instead of 4 sc.
Cup Construction
Each cup is worked from the lower inner corner toward the outer edge in short curved rows. The shaping creates a sculpted triangular shape that follows your natural curves.
Important: Make one cup first, pin it to your body or a dress form, then adjust width and depth before making the second cup. This ensures a perfect fit.
Cup Foundation
Step 1. With powder blue yarn, chain a length equal to your measured cup depth (CD) minus about 3/4 inch or 2 cm. For many adults, this is 18-28 chains. Chain 1 for turning.
Step 2. Row 1: Single crochet in the 2nd chain from hook and across. At the last chain, work 3 sc to turn around the foundation. Continue along the unused loops on the opposite side of the chain with sc in each chain. Do not join. Turn.
Step 3. Row 2: Chain 1, sc across to the center 3-stitch turn. Work sc, inc, sc across those center stitches, then sc to end. Turn.
Step 4. Shaping rows: Repeat the previous row, placing one increase at the bust apex/turn on every row until the cup reaches about 70% of the required width. Then increase every other row until the lower cup edge matches your CW measurement and the upper edge covers comfortably without gaping.
Step 5. Outer edge shaping: If more side coverage is needed, add 2-6 short rows worked only over the outer third of the cup. Decrease 1 stitch at the top edge on the last 1-2 short rows to keep the neckline clean.
Step 6. Lower cup edge: Work 1 final row of sc evenly across the underbust edge. Fasten off, leaving a long tail for joining.
Step 7. Second cup: Make a mirror-image cup. The apex increases should sit symmetrically when the cups are placed side by side.
Join Cups at Center Front
Step 8. Lay both cups right side up with the deepest V edges facing each other. Position the inner lower corners 0 to 1/2 inch (0 to 1.3 cm) apart according to your desired plunge depth.
Step 9. Using powder blue yarn, whipstitch or slip stitch the lower 1 to 1.5 inches (2.5 to 4 cm) of the cup edges together. Keep the top V open.
Step 10. Optional stabilization: Sew a short piece of clear elastic along the joined lower V and underbust edges using small hand stitches. Do not stretch the elastic as you sew.
Ivory Neckline Scallops
Step 11. Join ivory yarn at the lower center V. Work 1 round or row of evenly spaced sc up the first neckline edge, across the cup top if desired, and down the opposite neckline edge.
Step 12. Work the tiny scallop repeat along the V and cup tops. Fasten off and block lightly so the scallops lie flat.
Fitted Waistband
The waistband anchors the entire dress and needs to fit snugly without being uncomfortable.
Step 1. Determine length: Your finished waistband circumference should equal your target waist measurement from the sizing section. The band is worked as a rectangle about 2.5 to 3.25 inches (6.5 to 8 cm) deep.
Step 2. Chain enough stitches to reach the target circumference using your stitch gauge, or use foundation single crochet to the desired length. Join carefully without twisting if working in the round. For a back-seam version, work flat and seam later.
Step 3. Work sc in continuous rounds or rows until the band reaches the desired depth. For a subtle rib texture, alternate one plain sc row with one BLO sc row.
Step 4. Center the joined cups on the front half of the waistband. Pin securely and sew the underbust edges to the top of the band with mattress stitch or whipstitch. Reinforce the cup outer corners.
Step 5. Try on the dress. The band should sit flat and firm without folding. If it stretches too much, thread clear elastic through the top and lower waistband edges and secure invisibly.
Shoulder Straps
Step 1. At each cup peak, join powder blue yarn. Chain to your measured strap length (SL) plus 1 inch (2.5 cm) for adjustment. Work 1 row of slip stitch back along the chain, or work 2 rows of sc for a slightly wider strap.
Step 2. Pin each strap to the back upper edge of the waistband at a comfortable position, usually 3 to 5 inches (7.5 to 12.5 cm) from center back. Try on, adjust length, then sew securely.
Step 3. Weave ends through several directions and trim. Straps should feel firm, not stretchy.
Gathered A-Line Skirt
The smooth upper skirt should be about 80% of the total skirt depth, with the broad ruffle occupying the final 20%. For example, if your waist-to-hem measurement is 20 inches (51 cm), work about 16 inches (41 cm) of smooth skirt plus a 4 inch (10 cm) ruffle.
Step 1. Join powder blue to the lower edge of the waistband. Work 1 setup round of sc evenly around, aiming for roughly 1.25 to 1.5 stitches for every waistband stitch. Increase evenly until the skirt circumference is about 1.4 to 1.6 times the waist. This creates controlled gathering.
Step 2. Work sc in continuous rounds. Keep the fabric opaque and even. Mark the side seams and center front/back with stitch markers.
Step 3. A-line increases: Every 5th to 8th round, increase 4 stitches total. Place one increase near each side marker and one midway through the front and back. Repeat until the skirt hem circumference reaches about 1.8 to 2.2 times the waist, depending on your desired fullness.
Step 4. Continue until the smooth skirt section reaches approximately 80% of the desired skirt depth. End with an even number of stitches if possible.
Step 5. Optional shaping: For a more tailored silhouette, work fewer increases through the top third, then increase more frequently through the lower half.
Broad Ruffle
Step 1. At the lower edge of the smooth skirt, work 2 sc in each stitch around for a very full ruffle. Alternatively, work [2 sc in next st, 1 sc in next st] around for moderate fullness.
Step 2. Work 1 to 2 rounds even. Then work sc or hdc rounds, increasing 8 to 12 stitches evenly every 2 to 3 rounds if the ruffle begins to cup upward.
Step 3. Continue until the ruffle is about one-fifth of the total skirt depth, typically 3.5 to 5.5 inches (9 to 14 cm).
Step 4. Join ivory yarn. Work 1 round sc, then work the tiny scallop repeat around the hem. Keep your tension relaxed so the edge does not draw in.
Oversized Back Waist Bow
This dramatic bow is a signature feature of the dress.
Step 1. With powder blue yarn, chain 16 to 24 stitches depending on your desired width. Work sc rows until the strip measures 34 to 48 inches (86 to 122 cm) long. This length wraps the waist and forms side-visible loops.
Step 2. Wrap the strip behind the waistband. Form two large symmetrical loops, each about 6 to 9 inches (15 to 23 cm) wide, and two shorter tails. Adjust so the loops peek beyond each side of the waist from the front view.
Step 3. Wrap a separate 1 to 1.5 inch (2.5 to 4 cm) wide crochet band around the bow center. Sew firmly through the center wrap and into the back waistband so the bow cannot rotate.
Step 4. Optional removable bow: Instead of sewing permanently, attach the center wrap to the waistband with hidden snaps. Ensure the bow cannot detach accidentally during wear.
Floral Appliques and Embroidered Sprigs
The scattered flowers bring this dress to life. Make them in batches and block them separately before attaching.
Small Five-Petal Flower
Center: With yellow yarn, make a magic ring, chain 1, work 10 sc in ring, join with sl st, fasten off.
Petals: Join blue or ivory in any sc. Chain 2, work 2 dc in same stitch, chain 2, slip stitch in same stitch, slip stitch in next stitch. Repeat 5 times, spacing petals evenly. Fasten off.
Tiny Daisy
With yellow yarn, make a magic ring, work 5 sc, join with sl st. Change to ivory or blue. In each stitch work [sl st, ch 2, hdc, ch 2, sl st]. Fasten off.
Raised Layered Flower
Round 1: Yellow center. Work 8 sc in magic ring, join.
Round 2: Front petals in blue. (Sl st, ch 2, 2 hdc, ch 2, sl st) in next stitch. Repeat around.
Round 3: Working behind the petals into back loops or added chain spaces, make 6 slightly larger ivory petals with ch 3, 3 dc, ch 3, sl st.
Green Stems and Leaves
Use green embroidery cotton or split fine crochet yarn with a tapestry or embroidery needle.
Work stems in backstitch or stem stitch. Keep stems 1 to 4 inches (2.5 to 10 cm) long with gentle curves.
For leaves, use detached chain stitch (also called lazy daisy) or small satin-stitch leaves. Alternate leaf direction for a natural look.
Keep the inside of your work neat. Do not carry long floats across the fabric. Knot-free weaving is preferred.
Placement Guide
| Area | Suggested Quantity | Placement Idea |
|---|---|---|
| Cups | 3-6 flowers total | Cluster near outer/lower cup edges. Keep the deepest V visually open. |
| Waistband | 5-10 flowers | One larger center-front flower plus tiny blossoms and short vines |
| Upper skirt | 6-10 sprigs | Sparse vertical or diagonal sprigs, leaving negative space |
| Lower skirt | 10-18 flowers/sprigs | Increase density toward the lower skirt |
| Ruffle | 10-20 flowers | Scatter small appliques along folds. Avoid weighting one side. |
Complete Assembly Order
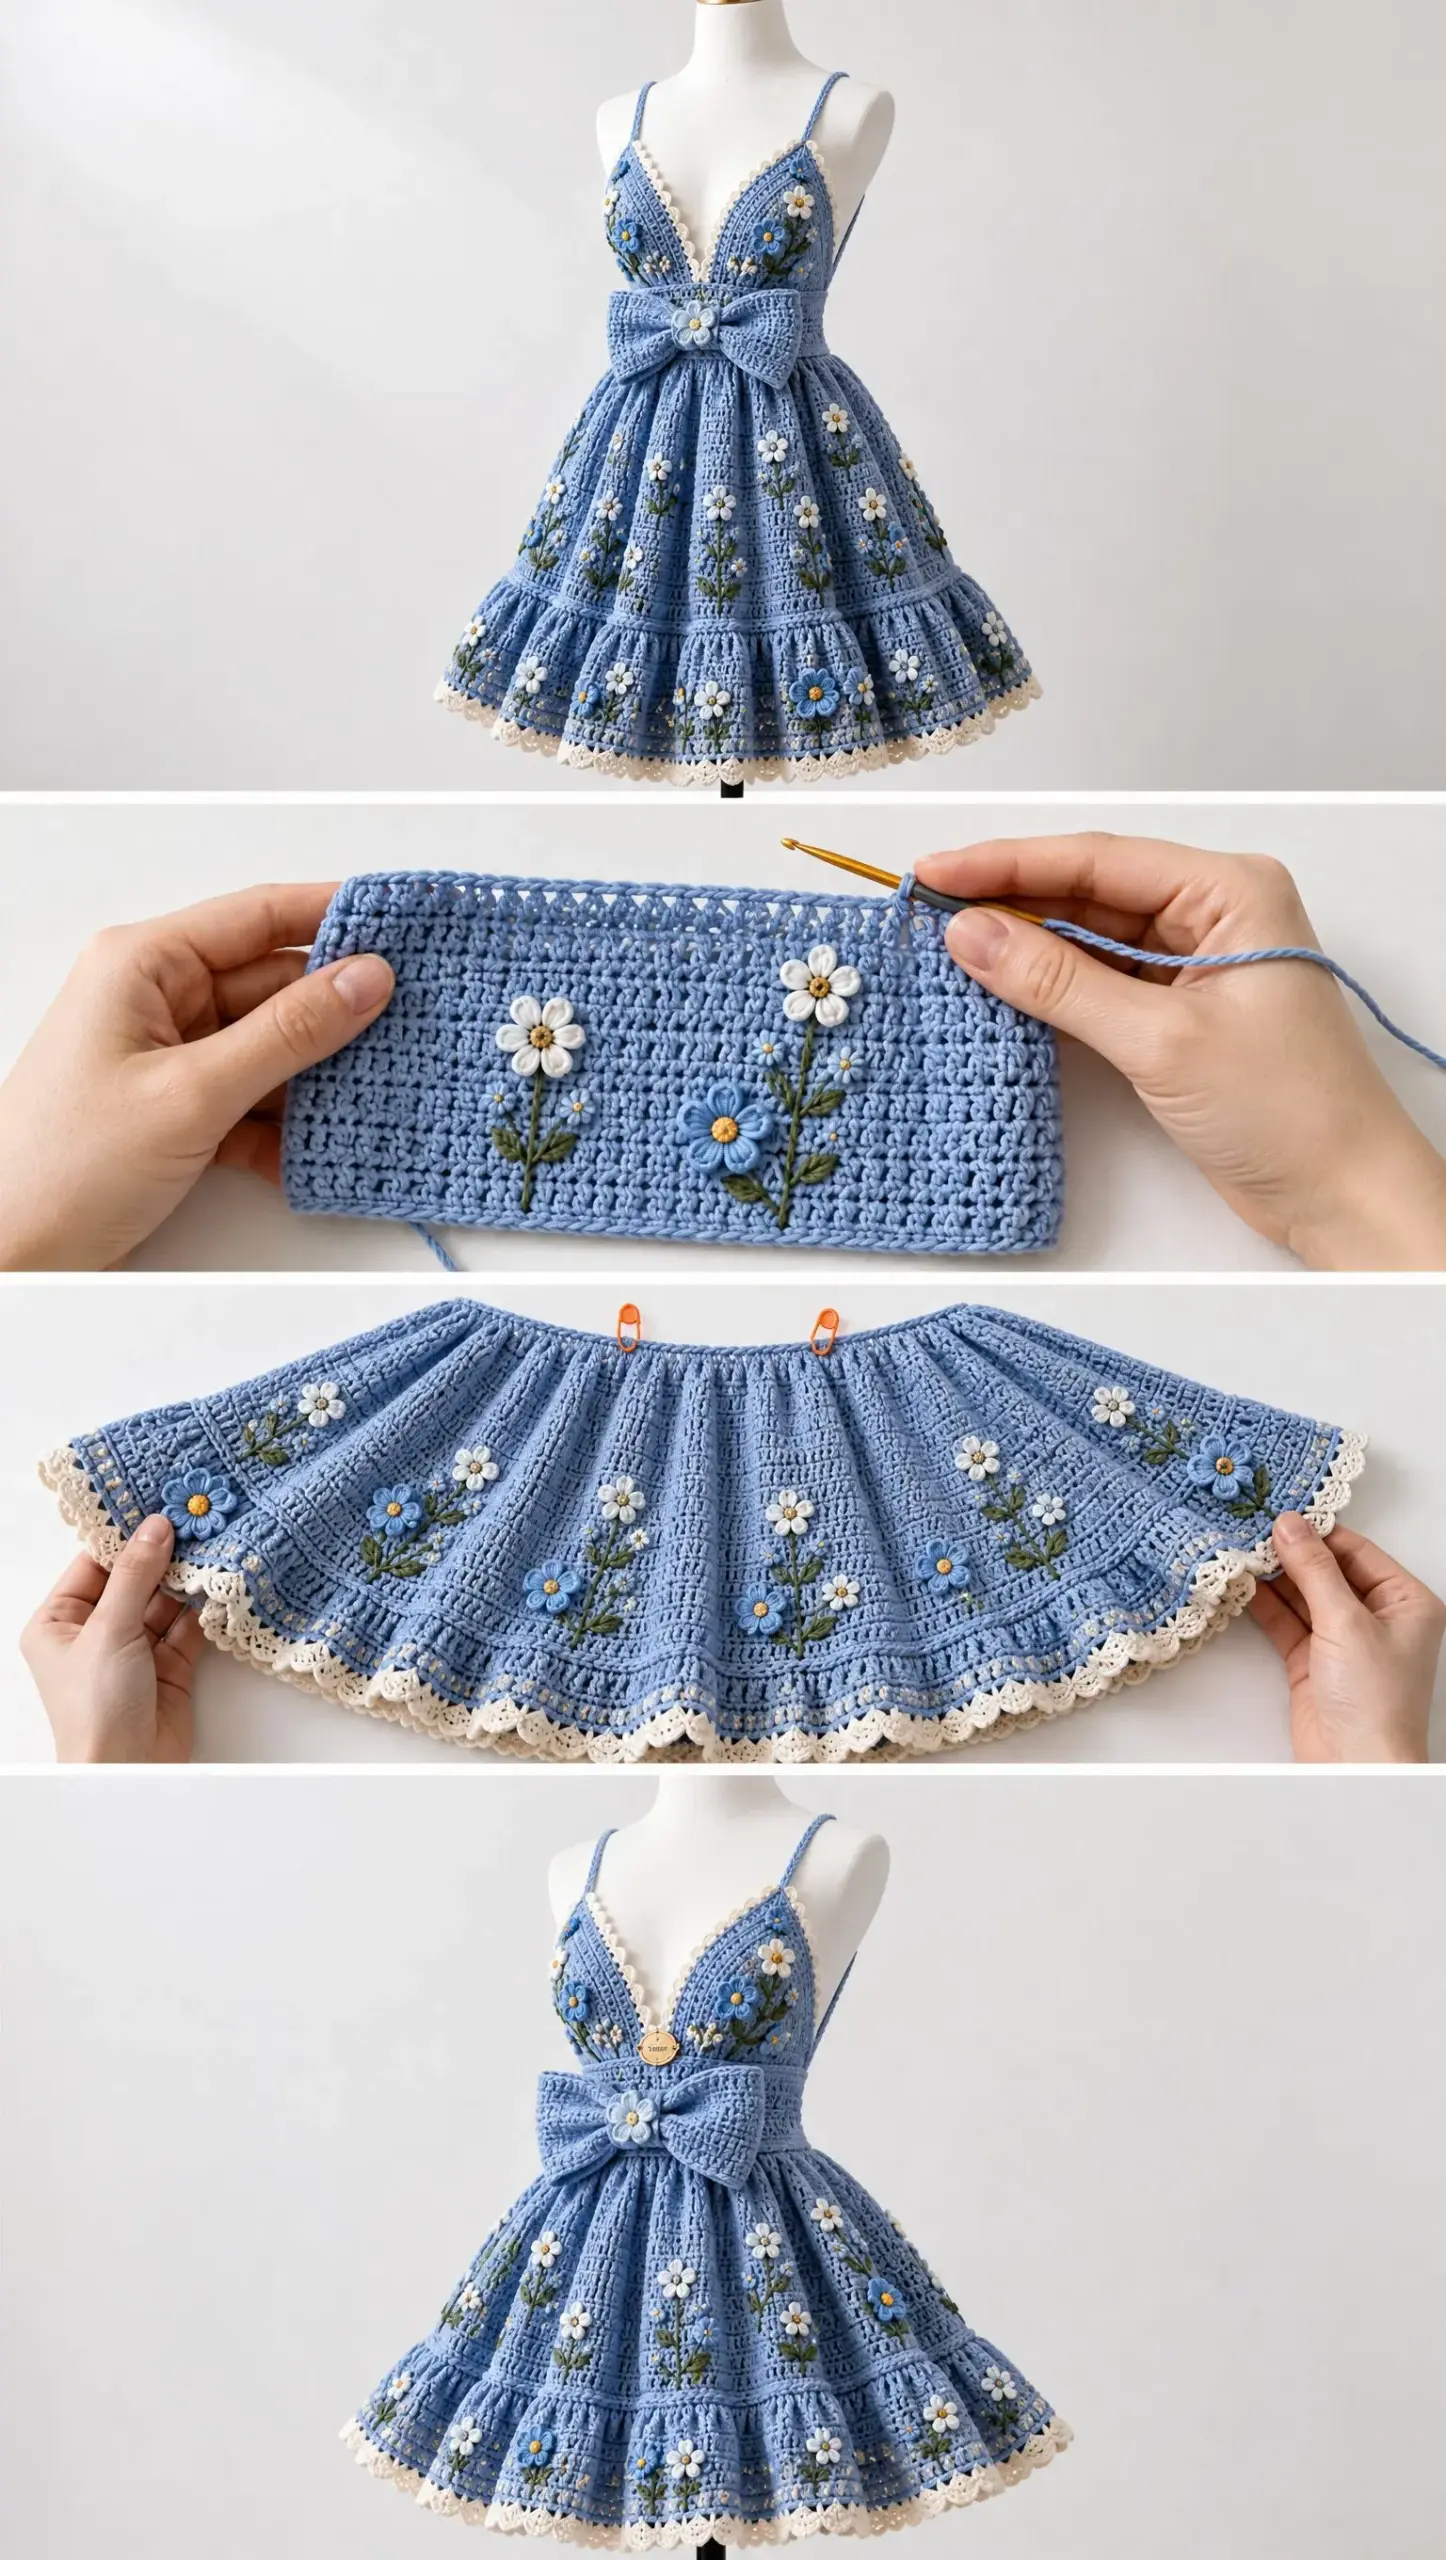
Follow this sequence for the smoothest construction process:
1. Make a gauge swatch, wash and block it, and record your final stitch/row gauge.
2. Take body measurements and decide your finished waist-to-hem length.
3. Crochet Cup 1. Pin and fit. Adjust before making Cup 2.
4. Crochet Cup 2 as a mirror image. Join lower center front.
5. Add ivory scallop edging to the deep V and cup tops.
6. Crochet the fitted waistband and seam/join if worked flat.
7. Pin cups to waistband, try on, then sew permanently.
8. Add straps, fit to wearer, and secure to back.
9. Work the gathered A-line skirt downward from the waistband.
10. Work the broad lower ruffle and ivory scalloped hem.
11. Crochet and attach the oversized back waist bow.
12. Make all floral appliques. Block them separately.
13. Pin flowers to the dress while it is on a form or flat surface. Check balance from several feet away.
14. Sew on appliques. Embroider stems and leaves afterward so vines can connect flowers naturally.
15. Weave in every yarn end, reinforce stress points, and steam/wet block to final measurements.
Fit Adjustments
Even with careful measurements, you may need to make adjustments. Here are solutions to common issues:
| Issue | Adjustment |
|---|---|
| Cup gapes at neckline | Remove 1-3 stitches from the upper outer edge or add 1-2 short shaping rows with decreases |
| Cup too shallow | Add more apex increase rows before tapering increases to every other row |
| Underbust too loose | Shorten waistband or add clear elastic inside top/lower edges |
| Underbust too tight | Add length to band. If seamed, insert a narrow side panel |
| Skirt too bulky at waist | Use fewer setup increases. Aim near 1.25 x waist instead of 1.5 x |
| Skirt not full enough | Add 4-8 increases every 3-5 rounds through lower half |
| Ruffle curls upward | Add more increases around the first 2-3 ruffle rounds |
| Ruffle ripples excessively | Reduce initial increase rate and work 1 plain round before increasing again |
| Straps stretch | Work slip-stitch cord or crochet around a strand of clear elastic |
Finishing and Blocking
Proper finishing makes the difference between homemade and handmade.
Weave in all ends for at least 1 to 1.5 inches (2.5 to 4 cm), changing direction twice. Pay special attention to cup peaks, strap joins, waistband seam, and bow center.
Hand wash in cool water with a mild detergent. Do not wring.
Roll in a towel to remove excess water, then lay flat or place on a dress form. Shape the cups, V neckline, waistband, and ruffle carefully.
Pin scallops and floral petals into shape. Allow to dry completely before moving.
If adding a lining, attach it by hand at the waistband and side seams so the crochet fabric can still move naturally.
Care Instructions
Safety note: Because this design has a deep V, narrow straps, and a full cotton skirt, check every join before wearing. For extra support, add clear elastic to the neckline and waistband or sew in a discreet lining with inner bust support.
Quick Make Checklist
Use this checklist to track your progress:
Final Thoughts on This Blue Floral Ruffle Dress Crochet Pattern
You now have everything you need to create this stunning Blue Floral Ruffle Dress from start to finish. Yes, it is a project that takes time and attention. But every piece is manageable on its own, and watching it all come together is incredibly rewarding.
Take it one section at a time. Celebrate each milestone. The cups, the waistband, the first few inches of skirt. Before you know it, you will have a one-of-a-kind handmade dress that fits you perfectly.
Thank you so much for choosing this pattern. I truly cannot wait to see what you create.
If you loved this pattern, I would be so grateful if you saved it to your Pinterest boards so you can find it later and share it with other makers. And please, leave a comment below when you finish your dress. I would absolutely love to see your version and cheer you on!
Want a Quick & Easy Printable Version?
Get a clean, beautifully formatted PDF of this pattern — easy to follow step by step, ready to print or save on any device. No scrolling, no distractions, just the pattern.
Get the Printable PDF →