
This is an ivory lace shoulder shawl featuring layered fan scallops, a dimensional crochet rose, leaf motifs, and pearl fringe. The pattern uses basic stitches like double crochet and treble crochet worked in a fan motif repeat. It is an intermediate level project with a finished wingspan of approximately 140 cm and a depth of 55 cm.
Get the Ad-Free PDF Pattern
You can find the free pattern below, or you can purchase the ad-free printable PDF from my shop.
Get the Printable PDF →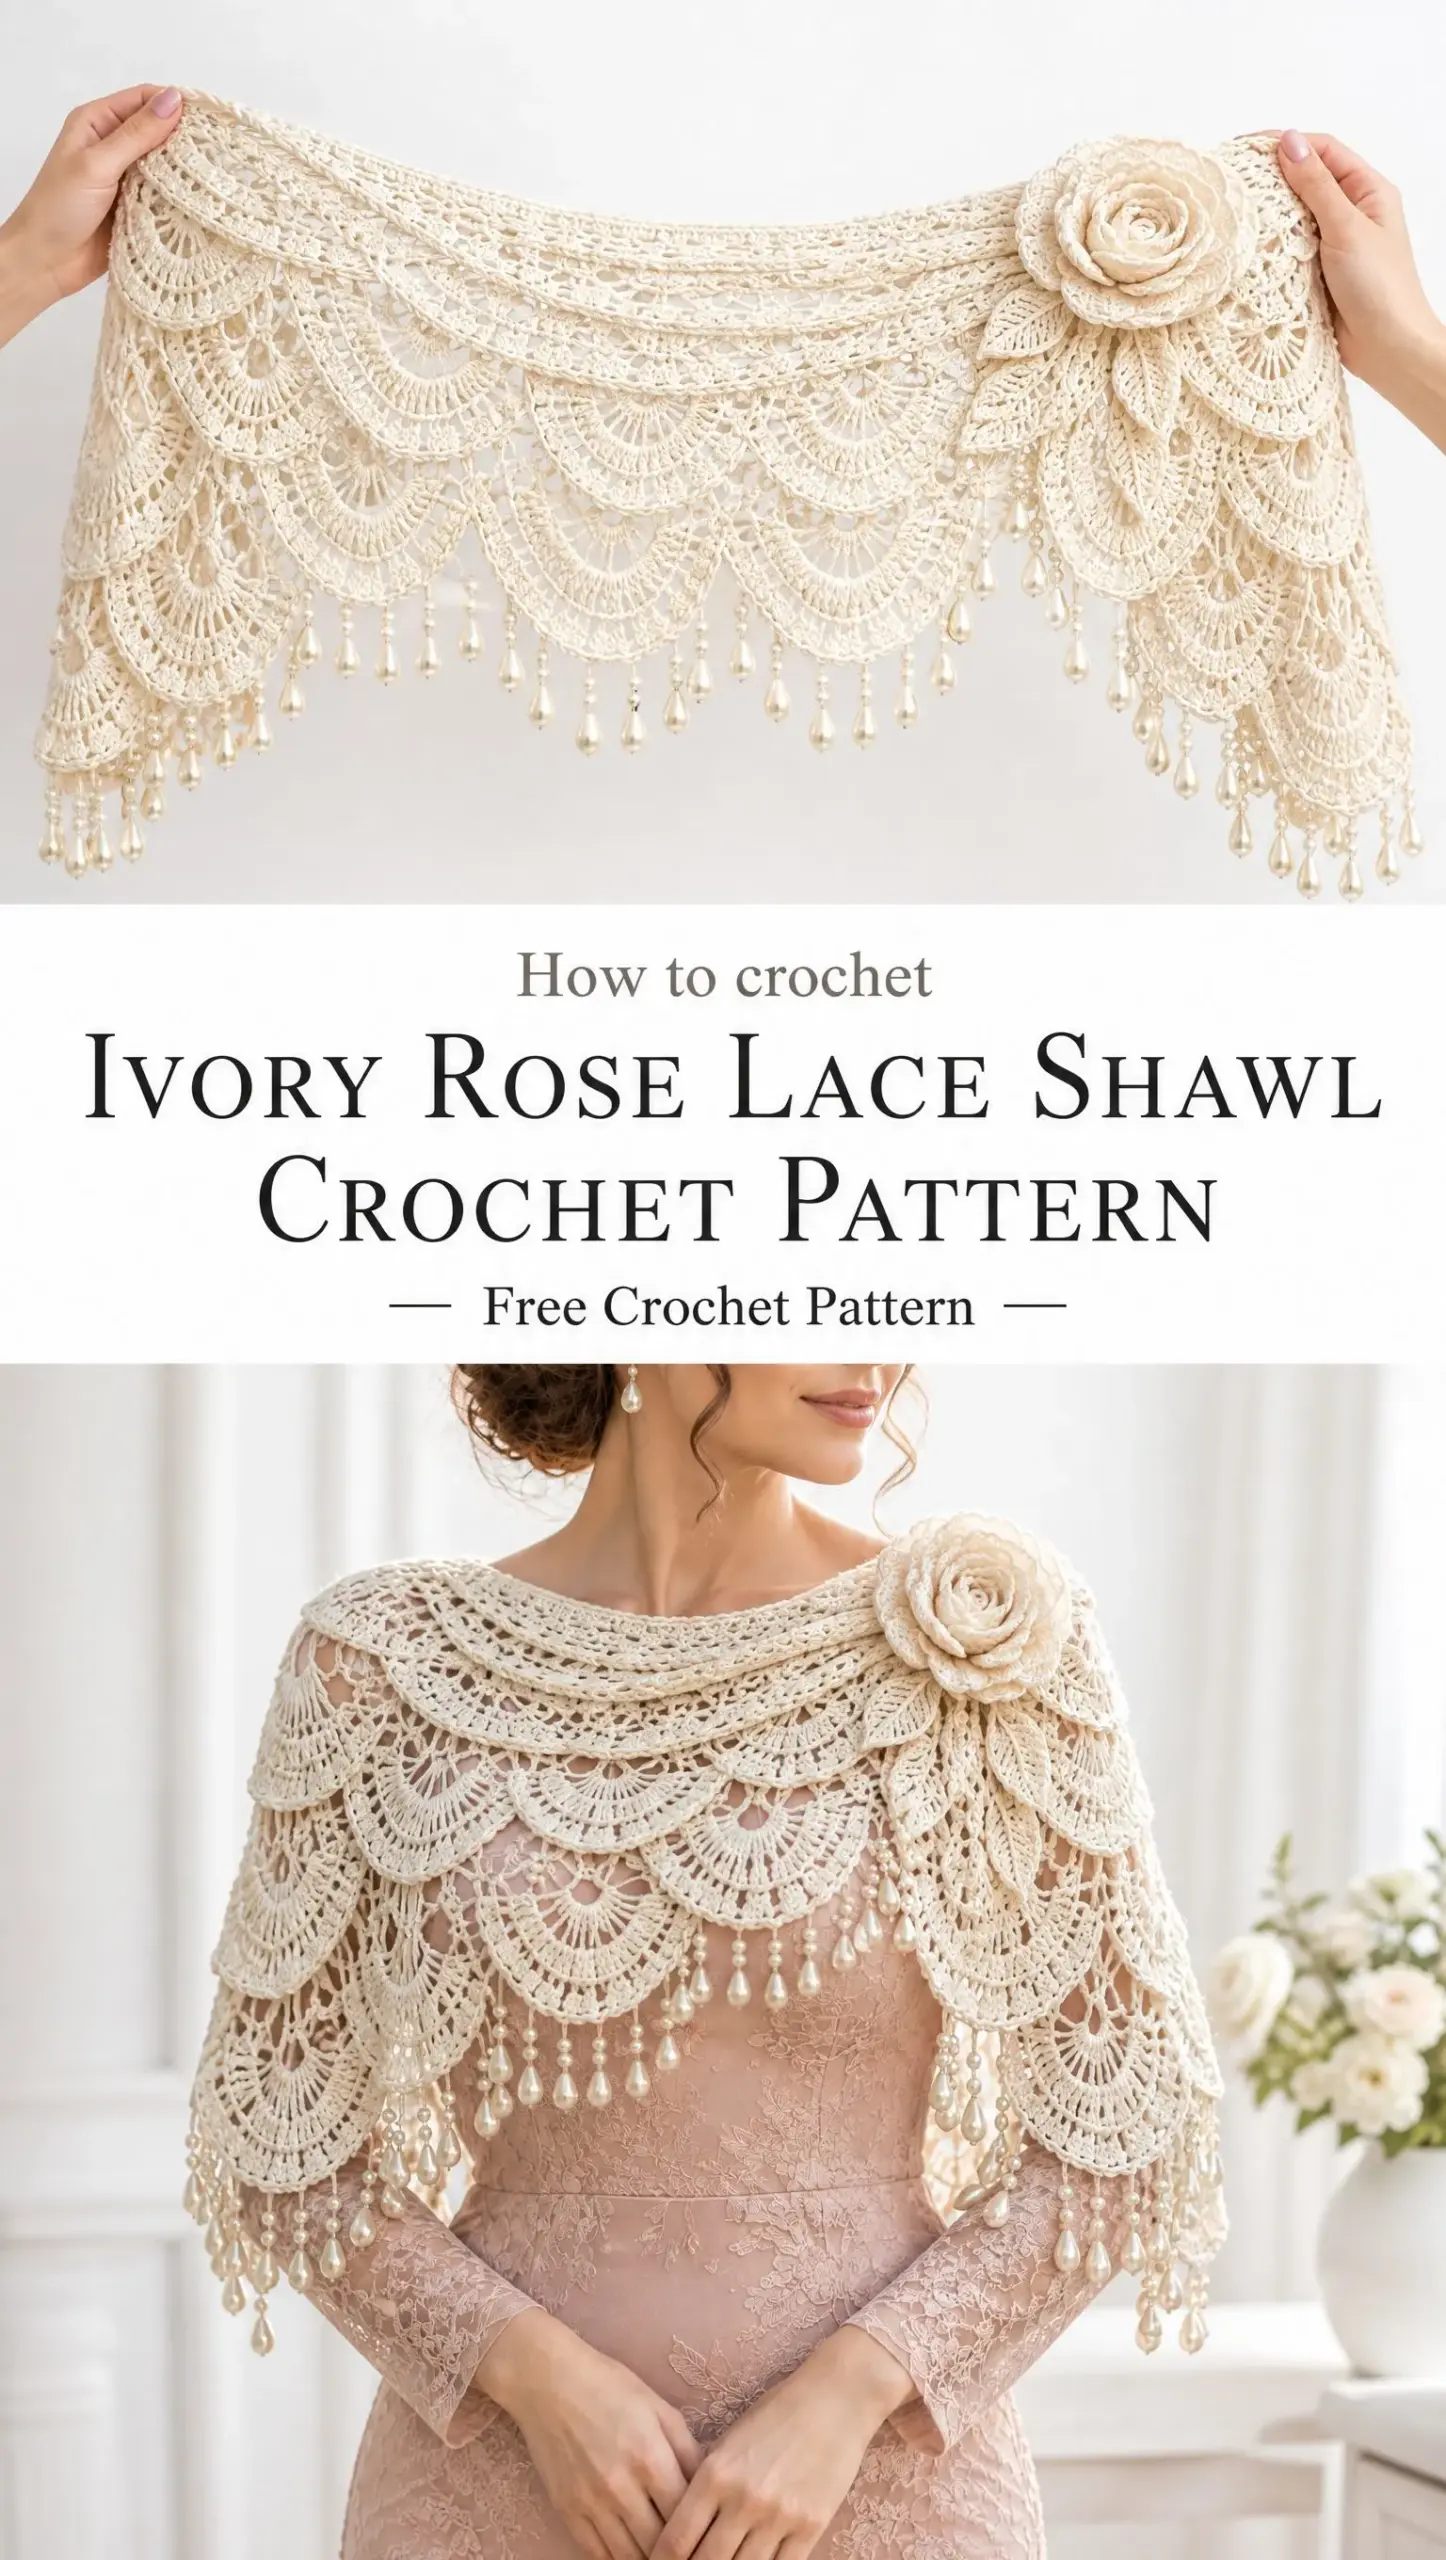
The construction is straightforward once you understand the fan stitch rhythm. You will work from the top down, starting with a foundation chain and building curved rows of increasingly larger fan motifs. The corded border, three dimensional rose, and pearl embellishments add elegance without complicated techniques.
If you have been wanting to try lace crochet but felt intimidated, this is a beautiful place to start. The pattern breaks everything into manageable sections, and I will walk you through each one step by step.
Why You Will Love This Pattern
This capelet style shawl drapes beautifully over the shoulders and works perfectly for weddings, garden parties, or any occasion that calls for something romantic and feminine. The ivory shade pairs with nearly everything, and the lustrous cotton or bamboo blend yarn gives the finished piece an elegant sheen.
The layered fan scallops create visual depth, while the oval chain openings add lightness and breathability. The dimensional crochet rose at the right shoulder makes a stunning statement, and the teardrop pearl fringe along the scalloped edge elevates the entire design.
I especially love how the construction naturally creates the curved capelet shape. You do not need to follow a complicated schematic or do any advanced shaping. The increasing fan groups toward the outer edge do all the work for you.
Materials and Tools
Here is everything you will need to complete this shawl:
Yarn:
Hook:
Notions:
Gauge:
Taking time to check your gauge before starting will help ensure your finished shawl matches the pattern dimensions. If your gauge is too tight, go up a hook size. If it is too loose, go down a hook size.
Abbreviations and Stitch Definitions
Before we begin, let me define every stitch abbreviation you will encounter. Even if you are familiar with these, a quick review helps prevent confusion later.
Shawl Construction
Foundation Row
Chain 180 loosely. Work 1 dc into the fourth chain from hook and in each chain across. Turn.
The turning chain counts as your first dc, so you should have 178 dc total across your foundation row. If your chain feels tight, try going up half a hook size just for the foundation chain, then switch back to your regular hook.
Upper Shoulder Band
This section creates the structured neckline of the capelet.
Row 1: Ch 3 (counts as dc), dc across. Turn.
Row 2: Ch 5, skip 2 stitches, dc in next stitch. Repeat across, creating open lace spaces. Turn.
Row 3: In each chain space, work (2 dc, ch 2, 2 dc). Turn.
Row 4: Add fan shaping by working (3 tr, ch 2, 3 tr) into each center space. Turn.
At this point, you should see the beginnings of your fan pattern forming. The treble crochet stitches (tr) are taller than double crochet, so your fans will start to open up and create that lovely scalloped effect.
Main Fan Lace Sections
Now comes the heart of the shawl. You will repeat the following fan motif rows until your shawl reaches the desired depth. The pattern naturally increases the number of fan groups toward the outer edge, which creates the curved capelet shape.
Fan Row A:
Ch 3, turn. Work 5 dc into the center of each previous fan.
Fan Row B:
Ch 4, skip stitches between fans, dc into the next fan center. Repeat across.
Fan Row C:
Into each fan center, work: 3 tr, ch 3, 3 tr. Add chain spaces between motifs to create oval openings.
Fan Row D:
Work a second layer of larger scallops: (5 tr, ch 3, 5 tr) into each previous fan peak.
Continue increasing the number of fan groups toward the outer edge to create the curved capelet shape. As you work more rows, your fans will naturally spread wider. Trust the process and keep your tension consistent.
Corded Outer Edge
The border gives the shawl a polished, finished look with a subtle twisted cord effect and decorative picots.
Round 1:
Work sc evenly around all outer edges. Try to keep your stitches close enough to prevent gapping but not so tight that the edge curls.
Round 2:
Work the twisted cord effect: sc, ch 1, sc into each edge space. This creates a raised texture along the border.
Round 3:
Add decorative picots: sc, ch 3, sl st into first chain, sc. The picot adds a delicate finishing touch that complements the lace pattern beautifully.
Pearl Fringe
The pearl fringe transforms this from a lovely shawl into a truly special heirloom piece.
Attach ivory seed beads and teardrop pearls along the scalloped edge.
For each fringe:
Chain 8, add 3 seed beads, chain 4, attach one teardrop pearl, chain 4, join with sl st.
Placement tip: Place longer fringe strands at the lower side edges for elegant draping. The fringe should move freely and catch the light as you wear the shawl.
If you have never added beads to crochet before, do not worry. You can pre string the beads onto your yarn before starting the fringe section, or you can sew them on afterward with a beading needle and thread. Both methods work well.
Three Dimensional Ivory Rose
This statement rose is what makes this shawl truly unforgettable. The layered petals create realistic dimension.
Rose Center
Make a magic ring. If you are not familiar with the magic ring technique, it is simply an adjustable loop that tightens completely closed when you pull the tail.
Round 1: 8 sc into ring. Pull the ring closed.
Round 2: 2 sc in each stitch around. (16 sc)
Round 3: Work small petals: (sc, hdc, dc, hdc, sc) in each stitch.
Petal Layers
Create 5 additional petal rounds with increasing sizes.
Small petals: (sc, dc, tr, dc, sc)
Medium petals: (hdc, dc, 2 tr, dc, hdc)
Large outer petals: (dc, tr, 3 tr, tr, dc)
Curl petals gently while sewing layers together. This curling creates the realistic rose shape. You can pin the petals in place temporarily while you sew to help maintain the shape you want.
Attach the finished rose securely at the right shoulder.
Crochet Leaf Motifs
Make 3 leaves to arrange beneath the rose.
Leaf:
Chain 12. Work sc, hdc, dc, tr, dc, hdc, sc along one side. Repeat on the opposite side. Add a center slip stitch vein by working sl st down the center of the leaf.
The leaves add botanical charm and help anchor the rose visually on the shawl.
Assembly
Follow these steps to finish your shawl:
1. Block the shawl gently into a curved capelet shape. Wet blocking works best for cotton and bamboo blends. Pin it out on blocking mats and let it dry completely.
2. Sew the rose to the shoulder area using matching thread and small, hidden stitches.
3. Arrange leaves beneath the flower and sew them in place.
4. Add pearl fringe evenly around scalloped edges.
5. Weave in all ends securely. Take extra care here since lace shows loose ends easily.
6. Steam lightly to enhance the fan shapes and drape. Hold your steamer a few inches away from the fabric and let the steam relax the fibers without pressing down.
Care Instructions
Hand wash in cool water with a gentle detergent. Lay flat to dry on a clean towel, reshaping as needed. Store folded to protect the dimensional flower and pearl details. Avoid hanging, as the weight of the beads could stretch the lace over time.
Tips for Success
Tension matters. Lace crochet looks best when your stitches are even and consistent. If you tend to crochet tightly, consciously relax your grip and let the yarn flow smoothly.
Count your fans. After each row, count your fan motifs to make sure you have not accidentally added or skipped one. Mistakes in lace are visible, so catching them early saves frustration later.
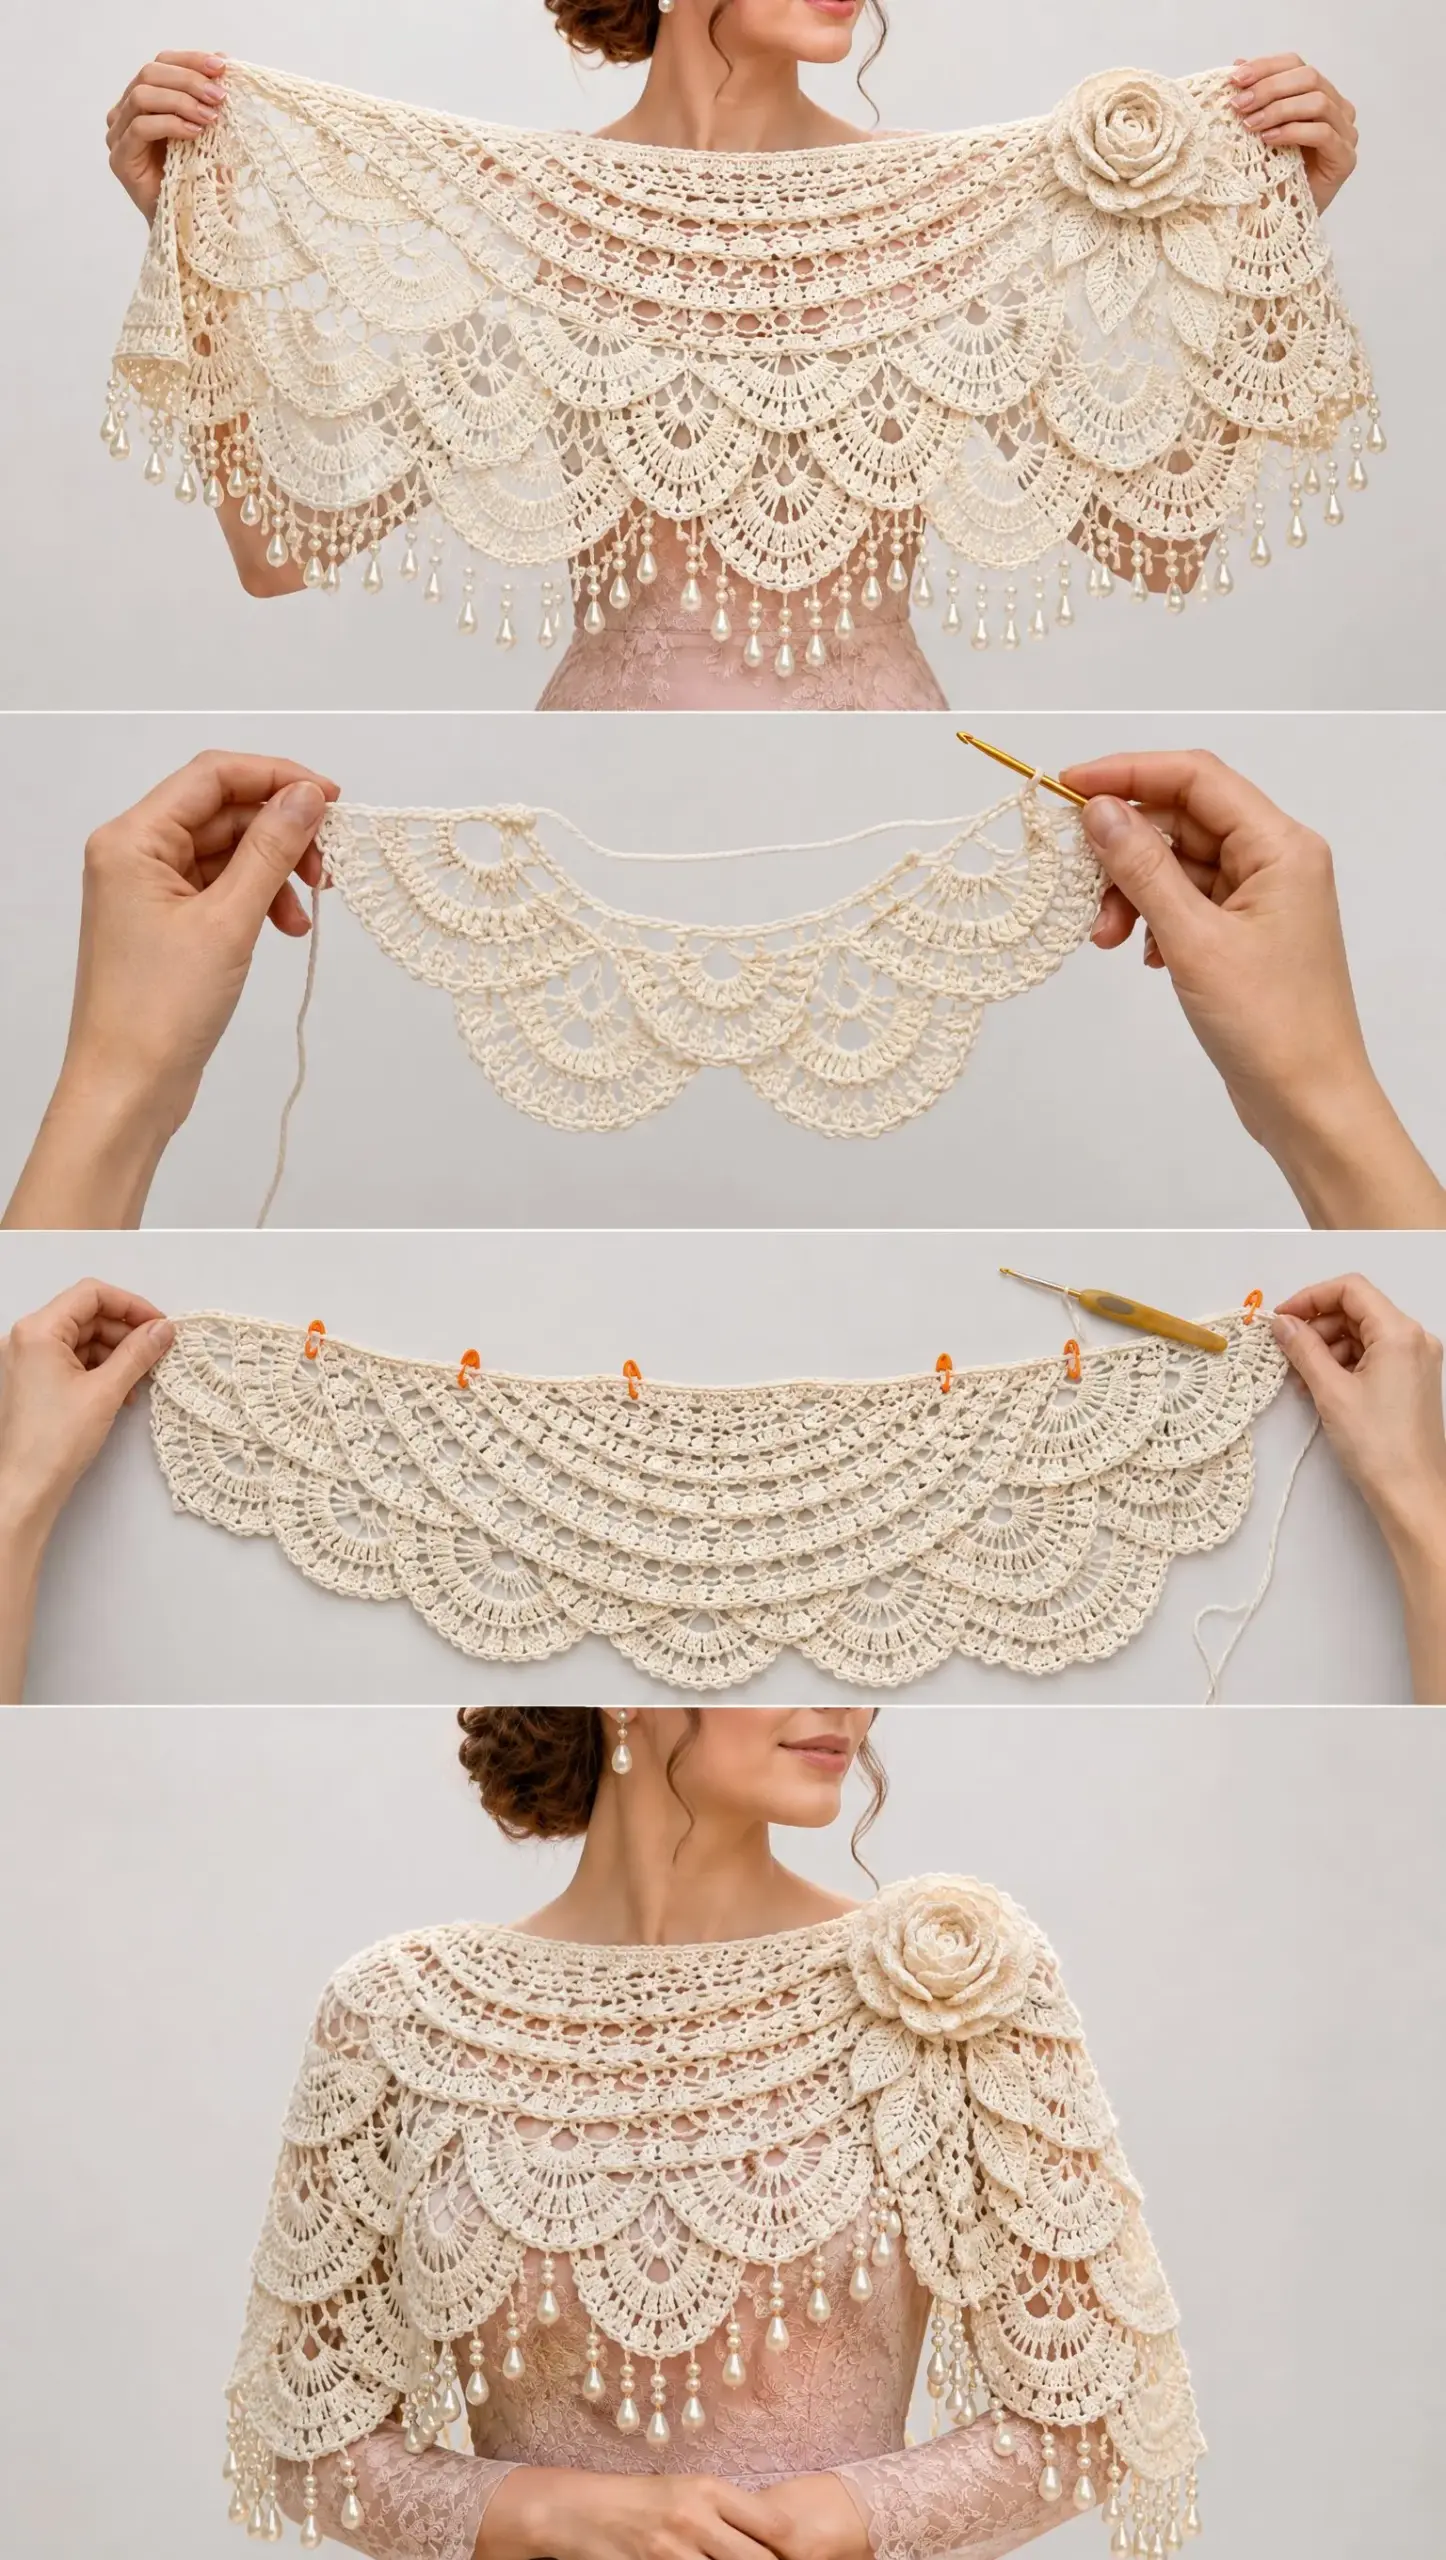
Use stitch markers. Place markers at the center of each fan or at regular intervals to help you keep track of your pattern placement.
Block generously. Lace crochet truly transforms after blocking. Do not skip this step. The fans will open up, the pattern will become more defined, and the drape will improve dramatically.
Take your time with the rose. The three dimensional flower is the showpiece of this design. Work slowly, shape each petal deliberately, and do not rush the assembly.
Finished Result
You will have a romantic ivory lace shoulder shawl with cascading fan scallops, a statement crochet rose, botanical details, and elegant pearl edging. This is the kind of piece that becomes a treasured heirloom, perfect for weddings, special occasions, or anytime you want to feel beautiful.
Thank you so much for choosing this pattern. I truly hope you enjoy making it as much as I enjoyed designing it. If you complete your Ivory Rose Lace Shawl, I would absolutely love to see it. Tag me on Instagram or share a photo in our Facebook group.
If this pattern caught your eye, go ahead and save it to your Pinterest boards so you can find it when you are ready to start. And if you make it, please leave a comment below. I love hearing about your projects and seeing how you make each pattern your own.
Want a Quick & Easy Printable Version?
Get a clean, beautifully formatted PDF of this pattern — easy to follow step by step, ready to print or save on any device. No scrolling, no distractions, just the pattern.
Get the Printable PDF →