
This is hands down one of the most IMPRESSIVE miniature crochet projects I have ever designed. We are talking a stunning floral nose cuff that looks like it took weeks but actually comes together in an afternoon. It is tiny, delicate, and absolutely showstopping.
Get the Ad-Free PDF Pattern
You can find the free pattern below, or you can purchase the ad-free printable PDF from my shop.
Get the Printable PDF →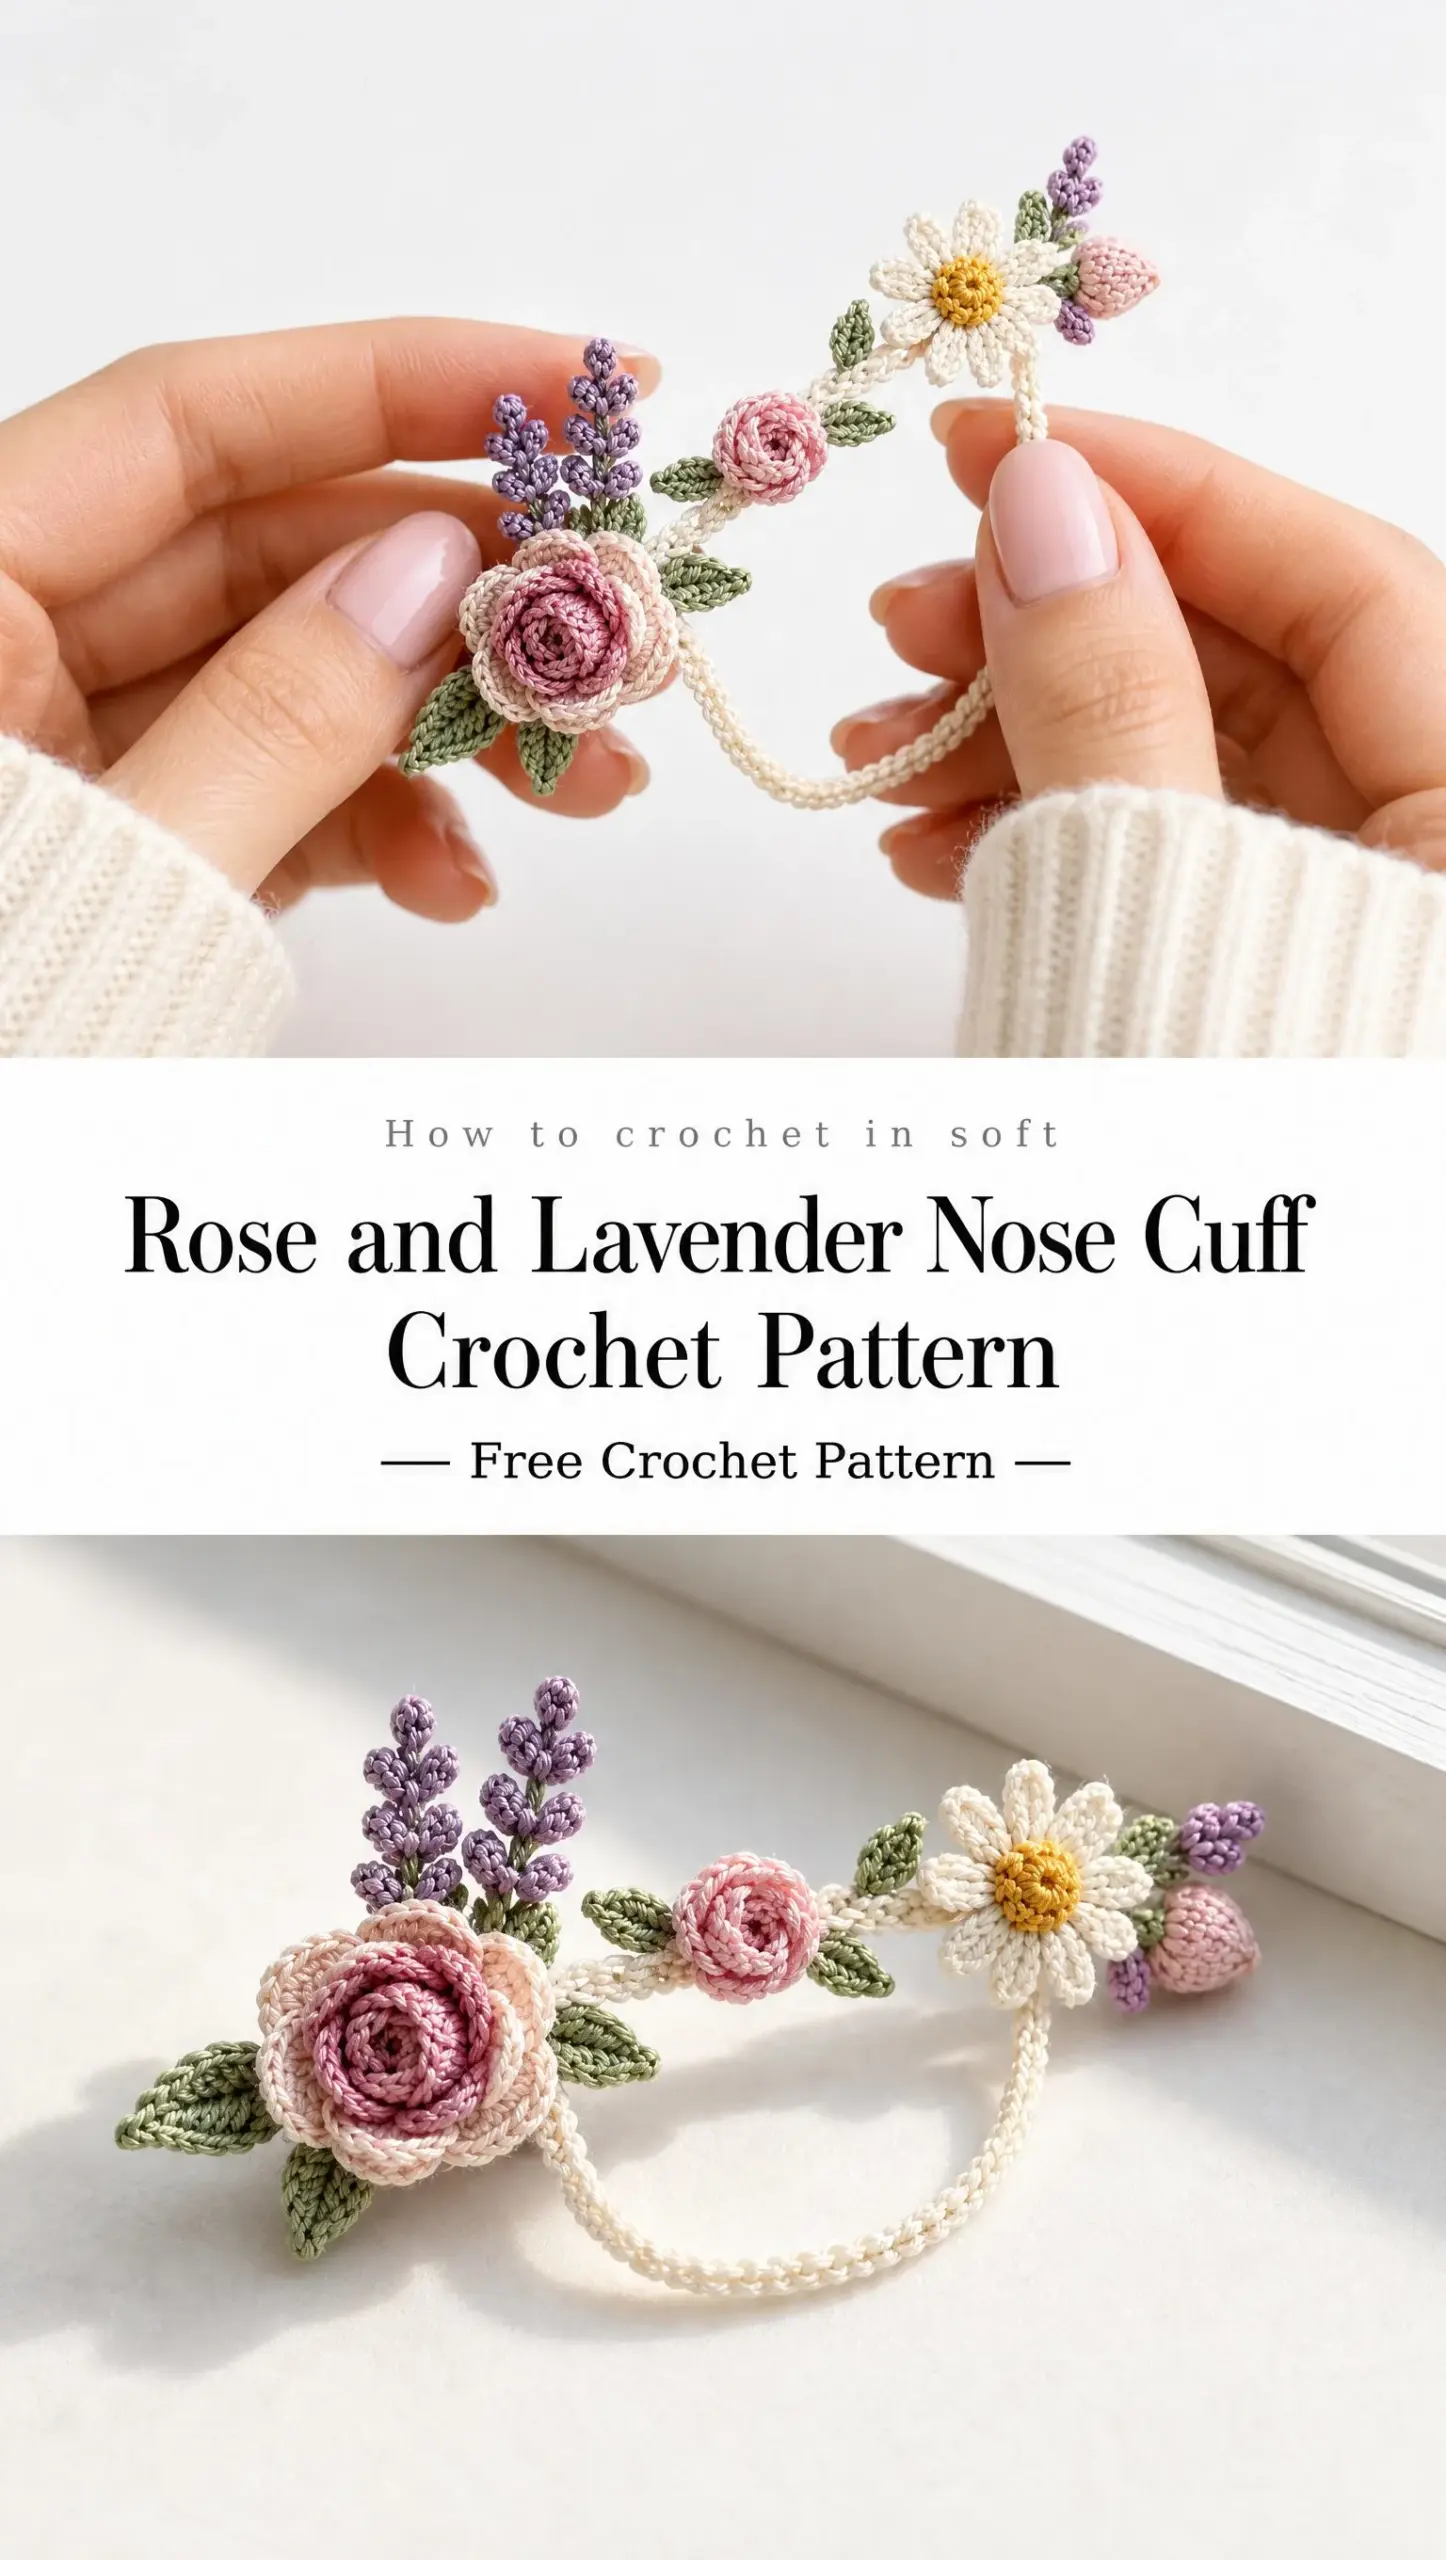
If you have ever wanted to try thread crochet or create wearable art that makes people stop and ask "wait, you MADE that?", this is your pattern. The combination of roses, lavender sprigs, a sweet little daisy, and sage leaves creates a botanical masterpiece that sits beautifully across the bridge of your nose.
This makes an incredible conversation starter, a unique gift for your most creative friend, or simply a fun challenge to test your miniature crochet skills. Let me walk you through every single step.
About This Rose and Lavender Nose Cuff Pattern
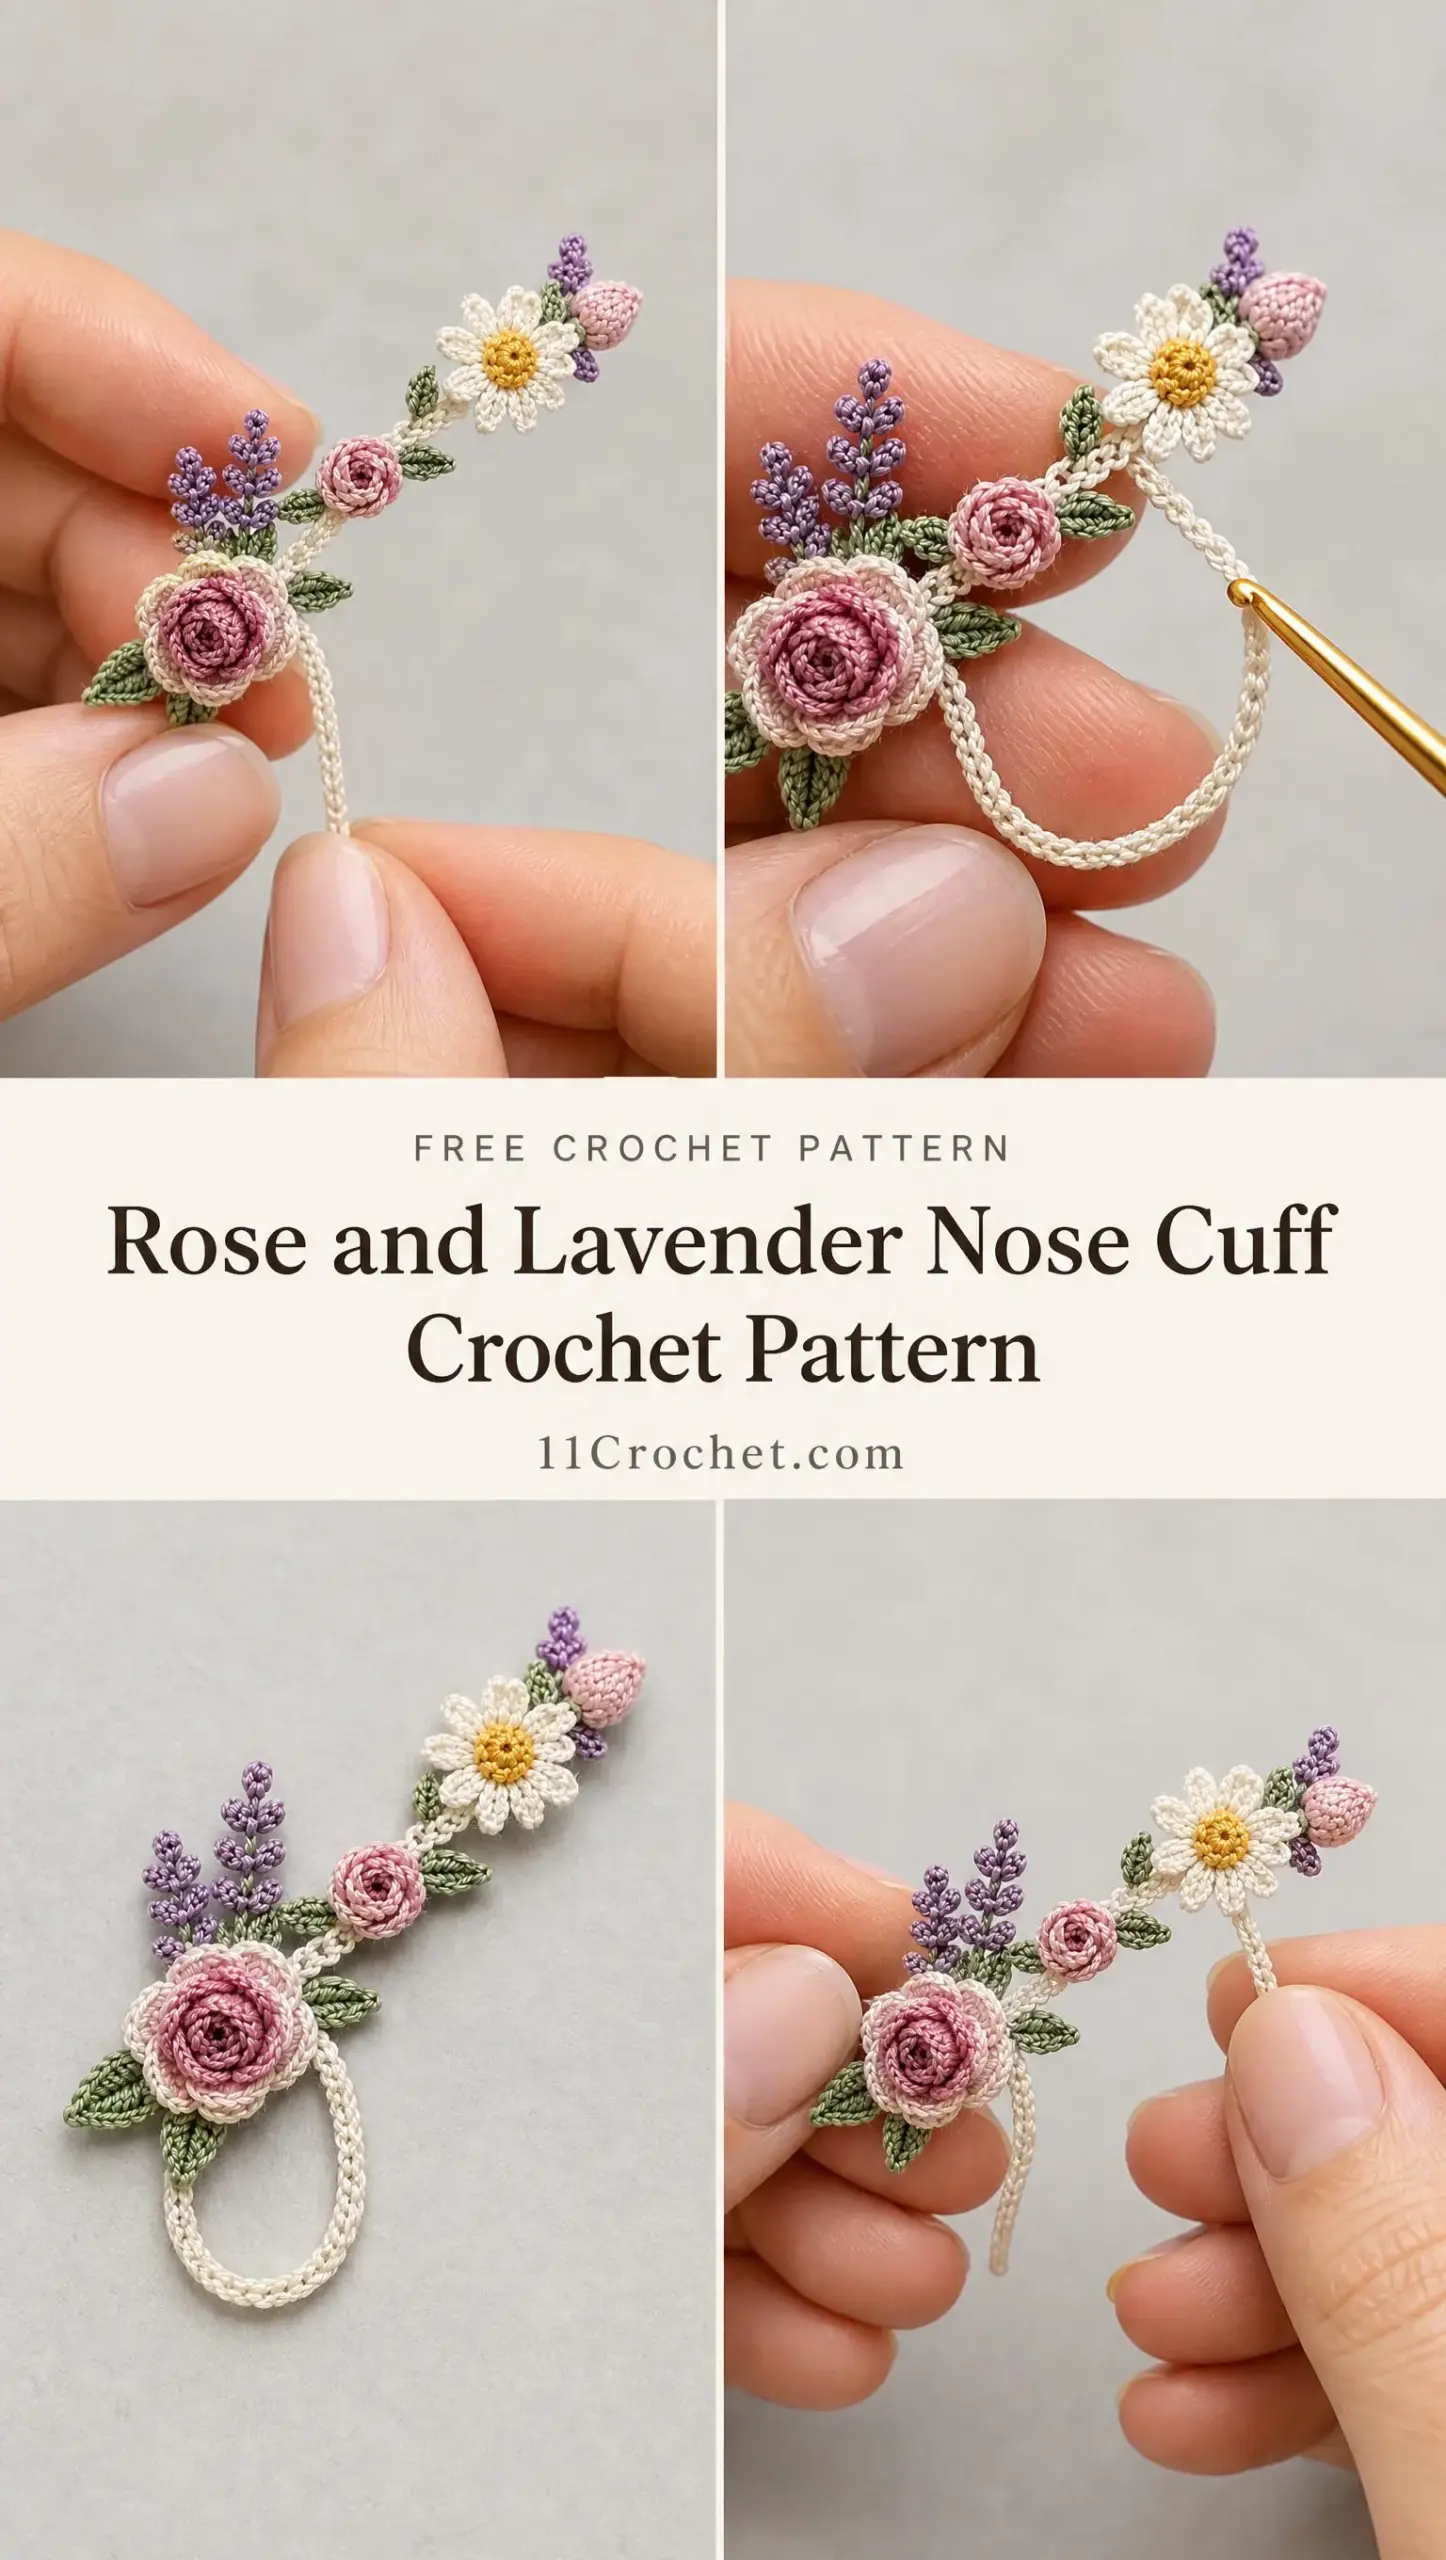
This thread crochet nose cuff is a soft, non-piercing decorative accessory. It features a delicate ivory foundation that drapes diagonally across your nose bridge, anchored by a gentle loop that sits beside your nostril. Not inside it, just beside it for comfort.
The finished piece measures approximately 55 to 70 mm across the bridge, making it perfectly proportioned for most face shapes. The large rosette comes in at about 9 to 11 mm, while the small rose measures 6 to 7 mm. The daisy sits at 7 to 8 mm, and the lavender sprigs stand 12 to 16 mm tall.
What makes this design special is the modular construction. You create the foundation first, fit it to your own anatomy, then crochet each flower motif separately before sewing everything together. This means you can adjust, replace, or rearrange individual elements without starting over.
Skill Level
This pattern is rated intermediate for thread crochet. If you have worked with fine thread before and feel comfortable with basic stitches like single crochet (sc), double crochet (dc), and slip stitches (sl st), you can absolutely tackle this project.
The challenge here is not complicated stitches. It is working at a miniature scale with very fine thread and a tiny hook. Take your time, use good lighting, and maybe invest in a magnifying lamp if your eyes need help.
Materials You Will Need
Thread: Size 80 or similarly fine, smooth mercerized cotton crochet thread. You will need small quantities in:
Hook: 0.60 to 0.75 mm steel hook. Use the smallest size that still lets you work clean, distinct loops.
Notions:
Gauge
Exact stitch gauge is not critical for this project. What matters is the motif diameter. If your large rose exceeds 12 mm, you should either reduce your hook size, switch to finer thread, or remove one petal repeat.
Keep your tension firm but not rigid. The foundation should lie flat against the skin, while the flower petals should be slightly firmer so they hold their sculpted shape.
Abbreviations
Before we dive in, here are all the abbreviations you will see throughout this pattern:
Color and Placement Map
Here is how each color is used throughout the design:
| ID | Color | Placement |
|---|---|---|
| A | Ivory | Diagonal bridge foundation and nostril loop |
| B | Dusty rose + cream | Large layered rose at lower left end |
| C | Lavender | Two upright lavender sprigs above large rose |
| D | Sage | Leaves around roses and along foundation |
| E | Blush | Small spiral rose midway upward |
| F | White + gold | Daisy at upper right bridge |
| G | Pale pink | Small bud near daisy |
| H | Lilac | Tiny accent buds toward far side |
Step by Step Pattern Instructions
Part 1: Ivory Foundation and Nostril Loop
Make this first and fit it before crocheting the flowers. The exact chain count can vary with your thread and nose shape.
Row 1: With ivory, ch 38. Lay the chain diagonally across the bridge from the lower near side placement point toward the upper far side placement point. Add or remove chains until the relaxed chain follows the bridge without pulling.
Row 2: Starting in the 2nd ch from hook, sl st in each ch across. This makes a narrow cord-like strip. FO, leaving a 12 cm sewing tail.
For the nostril loop: Rejoin ivory at the lower near side end. Ch 16 to 22, depending on your fit. Curve the chain beside the nostril and sl st back into the joining point to form a soft loop. Do not tighten the loop around the nostril.
Optional blush accent: Join blush to the outer half of the loop and work 5 to 8 evenly spaced sl sts over the ivory chain, then FO. This gives the pale ivory and blush effect without adding bulk.
Pin the foundation on a padded surface in the same gentle diagonal curve it will take when worn. Steam lightly from a distance or mist block. Do not flatten the chain completely.
Fit checkpoint: The lower floral end should sit on the sidewall of the nose, not over the nostril opening. The daisy end should remain on the bridge. Adjust now before attaching motifs.
Part 2: Large Layered Dusty Rose Rosette
Target diameter: 9 to 11 mm. Work in deep rose for the rolled center, dusty rose for the middle petals, and pale cream for the outer rims.
Step 1 (Center strip, deep rose): Ch 12. In 2nd ch from hook work 2 sc, then work 2 sc in each remaining ch. FO with long tail. The strip should curl naturally.
Step 2: Roll the curled strip into a tight spiral, keeping the starting end at the center. With the tail, tack the underside every 2 to 3 mm so the spiral cannot unwind.
Step 3 (Middle petal round, dusty rose): Join to the outer base of the spiral. Ch 3, 2 dc in same base point, ch 2, sl st in next visible base point. Rep 5 to 6 times around, distributing petals evenly. FO.
Step 4 (Cream petal rims): Join pale cream at the outer edge of any dusty rose petal. Work (sc, ch 1, sc) across the petal crest, then sl st down the side to the next petal. Rep around. Keep the cream narrow so it reads as a rim, not a full outer round.
Step 5: With a fine needle and matching thread, make 2 to 3 hidden tacking stitches through the underside so the flower remains cupped rather than spreading flat.
Part 3: Small Blush Spiral Rose
Step 1: With blush, ch 9. In 2nd ch from hook work 2 sc, then 2 sc in each remaining ch. FO with a 10 cm tail.
Step 2: Roll into a loose spiral approximately 6 to 7 mm across. Sew the underside securely. For a more petal-like edge, use the needle to tease the outer coil slightly open.
Step 3 (Optional center depth): Take one tiny straight stitch in deeper rose through the center coil.
Part 4: Lavender Sprigs (Make 2)
These are miniature loop stitch stems designed to rise above the large rose without becoming heavy. Make one about 15 to 16 mm tall and one about 12 to 13 mm.
Step 1 (Stem): With sage or muted green, ch 10 for the taller sprig or ch 8 for the shorter. Sl st back along the chain. FO, leaving a sewing tail.
Step 2 (Lavender buds): Join lavender at the top stem stitch. Ch 3, sl st in same stem stitch, ch 3, sl st in same stitch to make a tiny paired loop cluster. Sl st into the next stem stitch.
Step 3: Rep the paired loop cluster down 4 to 5 stem positions. On the lower two positions, add a third ch 3 loop so the sprig becomes slightly fuller toward the base.
Step 4: FO and weave the lavender tail along the back of the stem. Do not cut the green sewing tail. Use it later to anchor the sprig behind the rose.
Part 5: Sage Leaves (Make 5 to 7)
Vary the leaves slightly. Most should be 4 to 6 mm long.
Step 1: With sage, ch 5.
Step 2: Starting in 2nd ch from hook: sl st, sc, hdc. In last ch work (sc, ch 1, sc).
Step 3: Rotate to work along the unused loops on the opposite side of the foundation chain: hdc, sc, sl st.
Step 4: FO with a 7 to 10 cm tail. Pin into a pointed almond shape. For smaller leaves, ch 4 and use sl st, sc, then (sc, ch 1, sc) at the tip.
Part 6: White Daisy with Golden Center
Step 1 (Center): With golden yellow, make MR. Work 6 sc in ring. Join with sl st. FO.
Step 2 (Petals): Join white in any sc. Ch 5, sl st in same sc, ch 5, sl st in same sc, sl st in next sc. Rep around for 12 narrow looped petals total.
Step 3: For a firmer sculpted daisy, on each ch 5 loop work sl st into the first 2 chains only, then leave the remainder as a loop. This subtly narrows the petal base.
Step 4: FO with a long white tail for assembly. Finished diameter should be about 7 to 8 mm.
Part 7: Pale Pink Bud
Step 1: With pale pink, make MR. Work 5 sc in ring. Do not join.
Step 2: 2 sc in each st around. (10 sc)
Step 3: Rounds 3 and 4: sc around. Stuff only with the thread tail if needed. The bud should remain tiny.
Step 4: Round 5: sc2tog around. Pull closed. FO with long tail.
Step 5: With sage, ch 4, sl st back to make a tiny stem. Sew the stem to the base of the bud.
Part 8: Tiny Lilac Accents
Step 1: With lilac, ch 2. In 2nd ch from hook work (sc, ch 2, sl st) twice. FO. This creates a 2 loop mini bud.
Step 2: Make 2 to 3 accents and reserve them for the far side near the daisy and bud.
Assembly Instructions
Use the reference image as a visual guide, but prioritize comfort and scale. All motif backs should sit flat against the ivory foundation.
Step 1: Place the ivory foundation on your work surface in its fitted diagonal curve. Mark the lower near side end and upper far side end with pins.
Step 2: Position the large dusty rose rosette at the lower near side end. It should partly overlap the foundation while leaving the nostril loop free. Sew only through the flower base and foundation cord, not through visible petals.
Step 3: Slide two sage leaves beneath the large rose, one pointing down left and one down right. Add a third leaf just above the rose. Tack each at its base and along the first 1 to 2 mm only so the tips remain dimensional.
Step 4: Place the taller lavender sprig directly behind and slightly above the large rose. Place the shorter sprig a few millimeters to its side. Anchor stems to the foundation and hide the lower stem ends under the rose.
Step 5: Sew the small blush rose approximately halfway up the bridge foundation. Angle it slightly outward. Add one small sage leaf above or beside it.
Step 6: At the upper bridge, attach the white daisy so its golden center faces forward. Keep the daisy separated from the small rose by a visible section of ivory chain.
Step 7: Attach the pale pink bud just beyond or above the daisy, angled toward the far side. Add one or two tiny lilac accents nearby.
Step 8: Add the remaining sage leaves where needed for balance. Avoid filling every gap. Open chain spaces are part of the delicate design.
Step 9: Turn the piece over. Weave every tail through the backs of nearby stitches for at least 8 to 10 mm. Trim closely. No knots or thread ends should touch the skin.
Step 10: Lightly shape the roses with your fingers. Lift the lavender loops, pinch leaf points, and separate daisy petals.
Fitting and Adjustment Tips
| Issue | Adjustment |
|---|---|
| Too loose across bridge | Shorten the ivory strip by 1 to 3 chains, or overlap 2 to 3 mm at the lower flower before sewing |
| Too tight or motifs pull | Lengthen the bridge chain. The accessory should rest on the skin, not indent it |
| Loop slips downward | Shorten the nostril loop by 1 to 2 chains. Keep it beside the nostril, never drawn tightly around it |
| Flowers feel bulky | Use size 100 thread or remove one outer petal repeat from the large rose |
| Daisy twists | Add a second hidden tack at the back of the daisy between two adjacent petals |
| Lavender collapses | Steam very lightly and let dry pinned upright. Do not saturate |
Care Instructions for Your Nose Cuff
Wear for short periods at first. Remove immediately if the loop pinches, rubs, or interferes with breathing. This is meant to be comfortable and decorative, never restrictive.
Do not share the cuff without cleaning it. Hand wash gently in cool water with mild soap, rinse thoroughly, blot in a towel and reshape flat to dry.
Avoid starch, perfume, makeup spray, and heavy fabric stiffeners on parts that contact skin.
Store flat in a small box so the miniature petals and lavender loops are not crushed.
Quick Pattern Checklist
Before you call your nose cuff complete, make sure you have:
Customization Ideas
For a softer romantic palette, replace lavender with pale lilac and use pearl pink for the small rose.
For a more botanical version, add one extra sage leaf near the daisy and omit one lilac accent.
For an even smaller cuff, work the same construction in size 100 thread with a 0.50 to 0.60 mm hook.
Final Thoughts on This Rose and Lavender Nose Cuff Crochet Pattern
This pattern is intentionally modular. The foundation provides fit, each flower is worked separately for crisp definition, and the motifs are then sewn onto the strip so their backs remain flat and the flowers can be positioned precisely.
This method also lets you replace or rearrange one motif without rebuilding the entire cuff. So if your first large rose does not turn out quite right, just make another one. No harm done.
I absolutely love how this project pushes the boundaries of what crochet can be. It is wearable art, pure and simple.
Thank you so much for trying this pattern! I would love to see your finished nose cuffs. Tag me on Instagram or share a photo in my Facebook group. Seeing your creations is honestly the best part of designing patterns.
If you loved this project, go ahead and save it to your Pinterest boards so you can find it later. And please drop a comment below if you make one. I want to hear how it turned out for you!
Want a Quick & Easy Printable Version?
Get a clean, beautifully formatted PDF of this pattern — easy to follow step by step, ready to print or save on any device. No scrolling, no distractions, just the pattern.
Get the Printable PDF →