
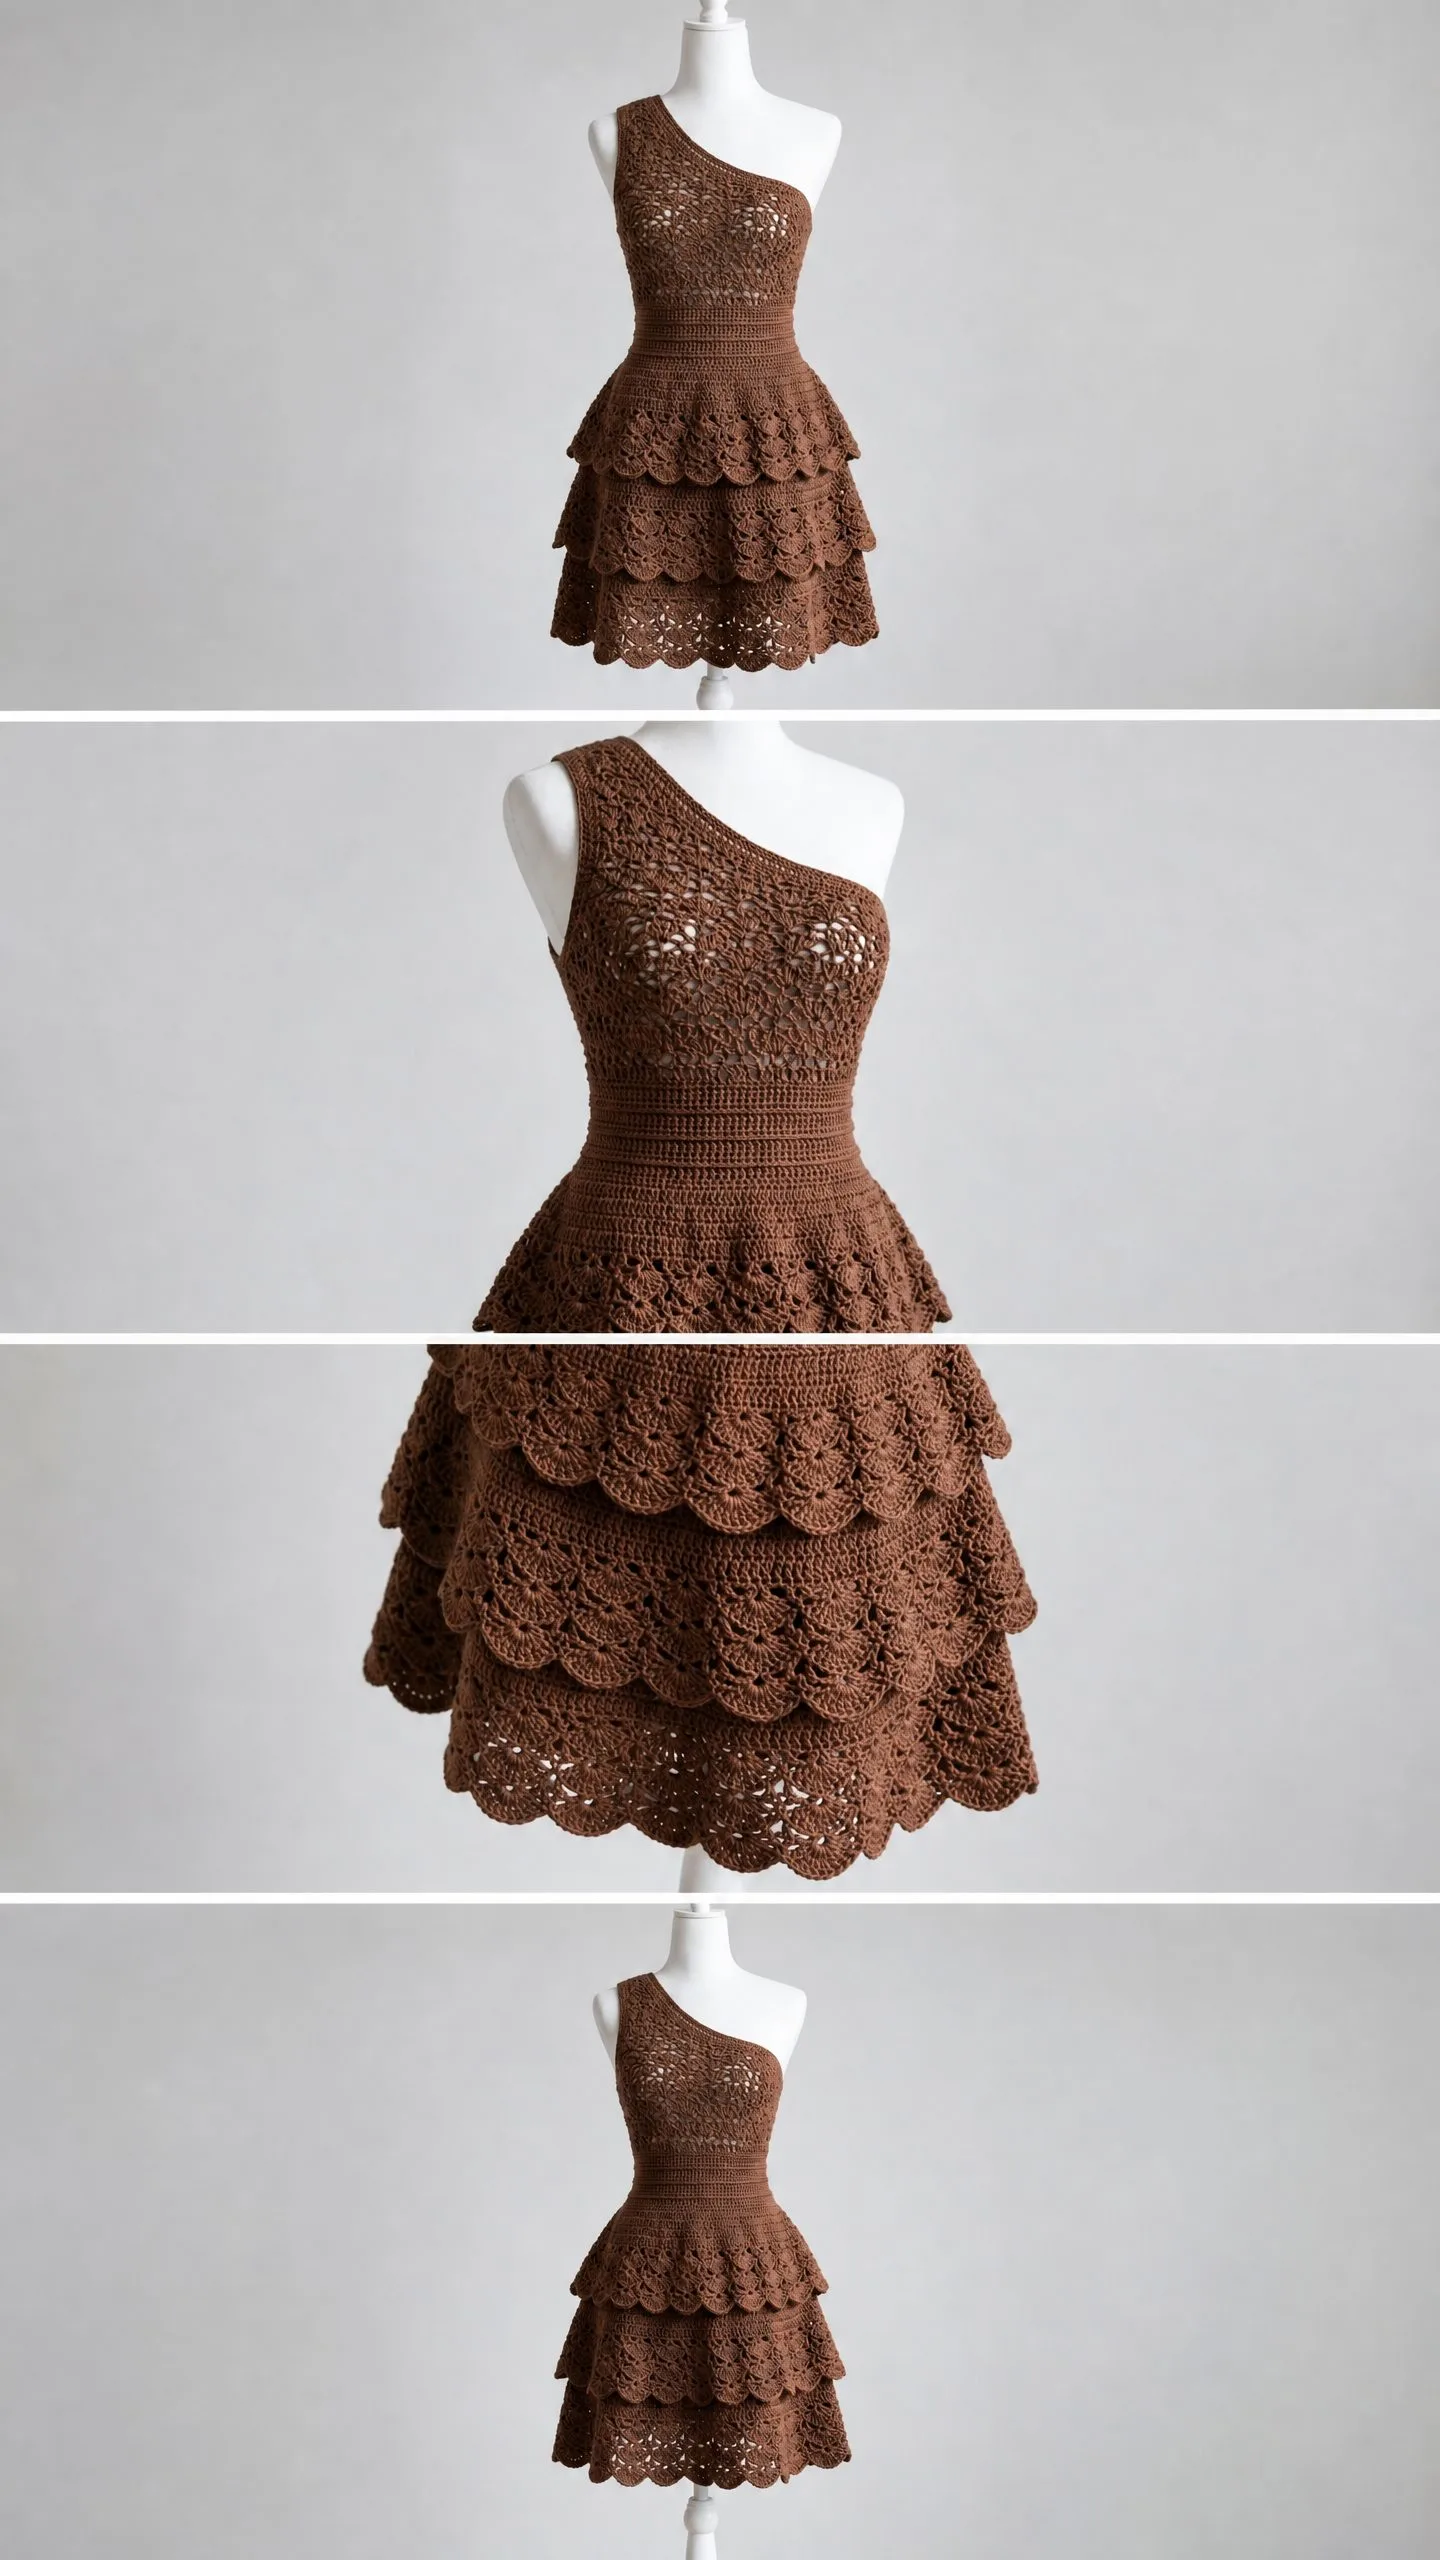
Looking for a statement piece that will turn heads at your next summer event? This brown one-shoulder tiered ruffle dress delivers serious style while keeping you cool in warm weather. The bodice features a delicate lace fan stitch that creates beautiful openwork, perfect for layering over a slip. A snug ribbed waistband cinches at the natural waist before cascading into three flirty ruffled tiers.
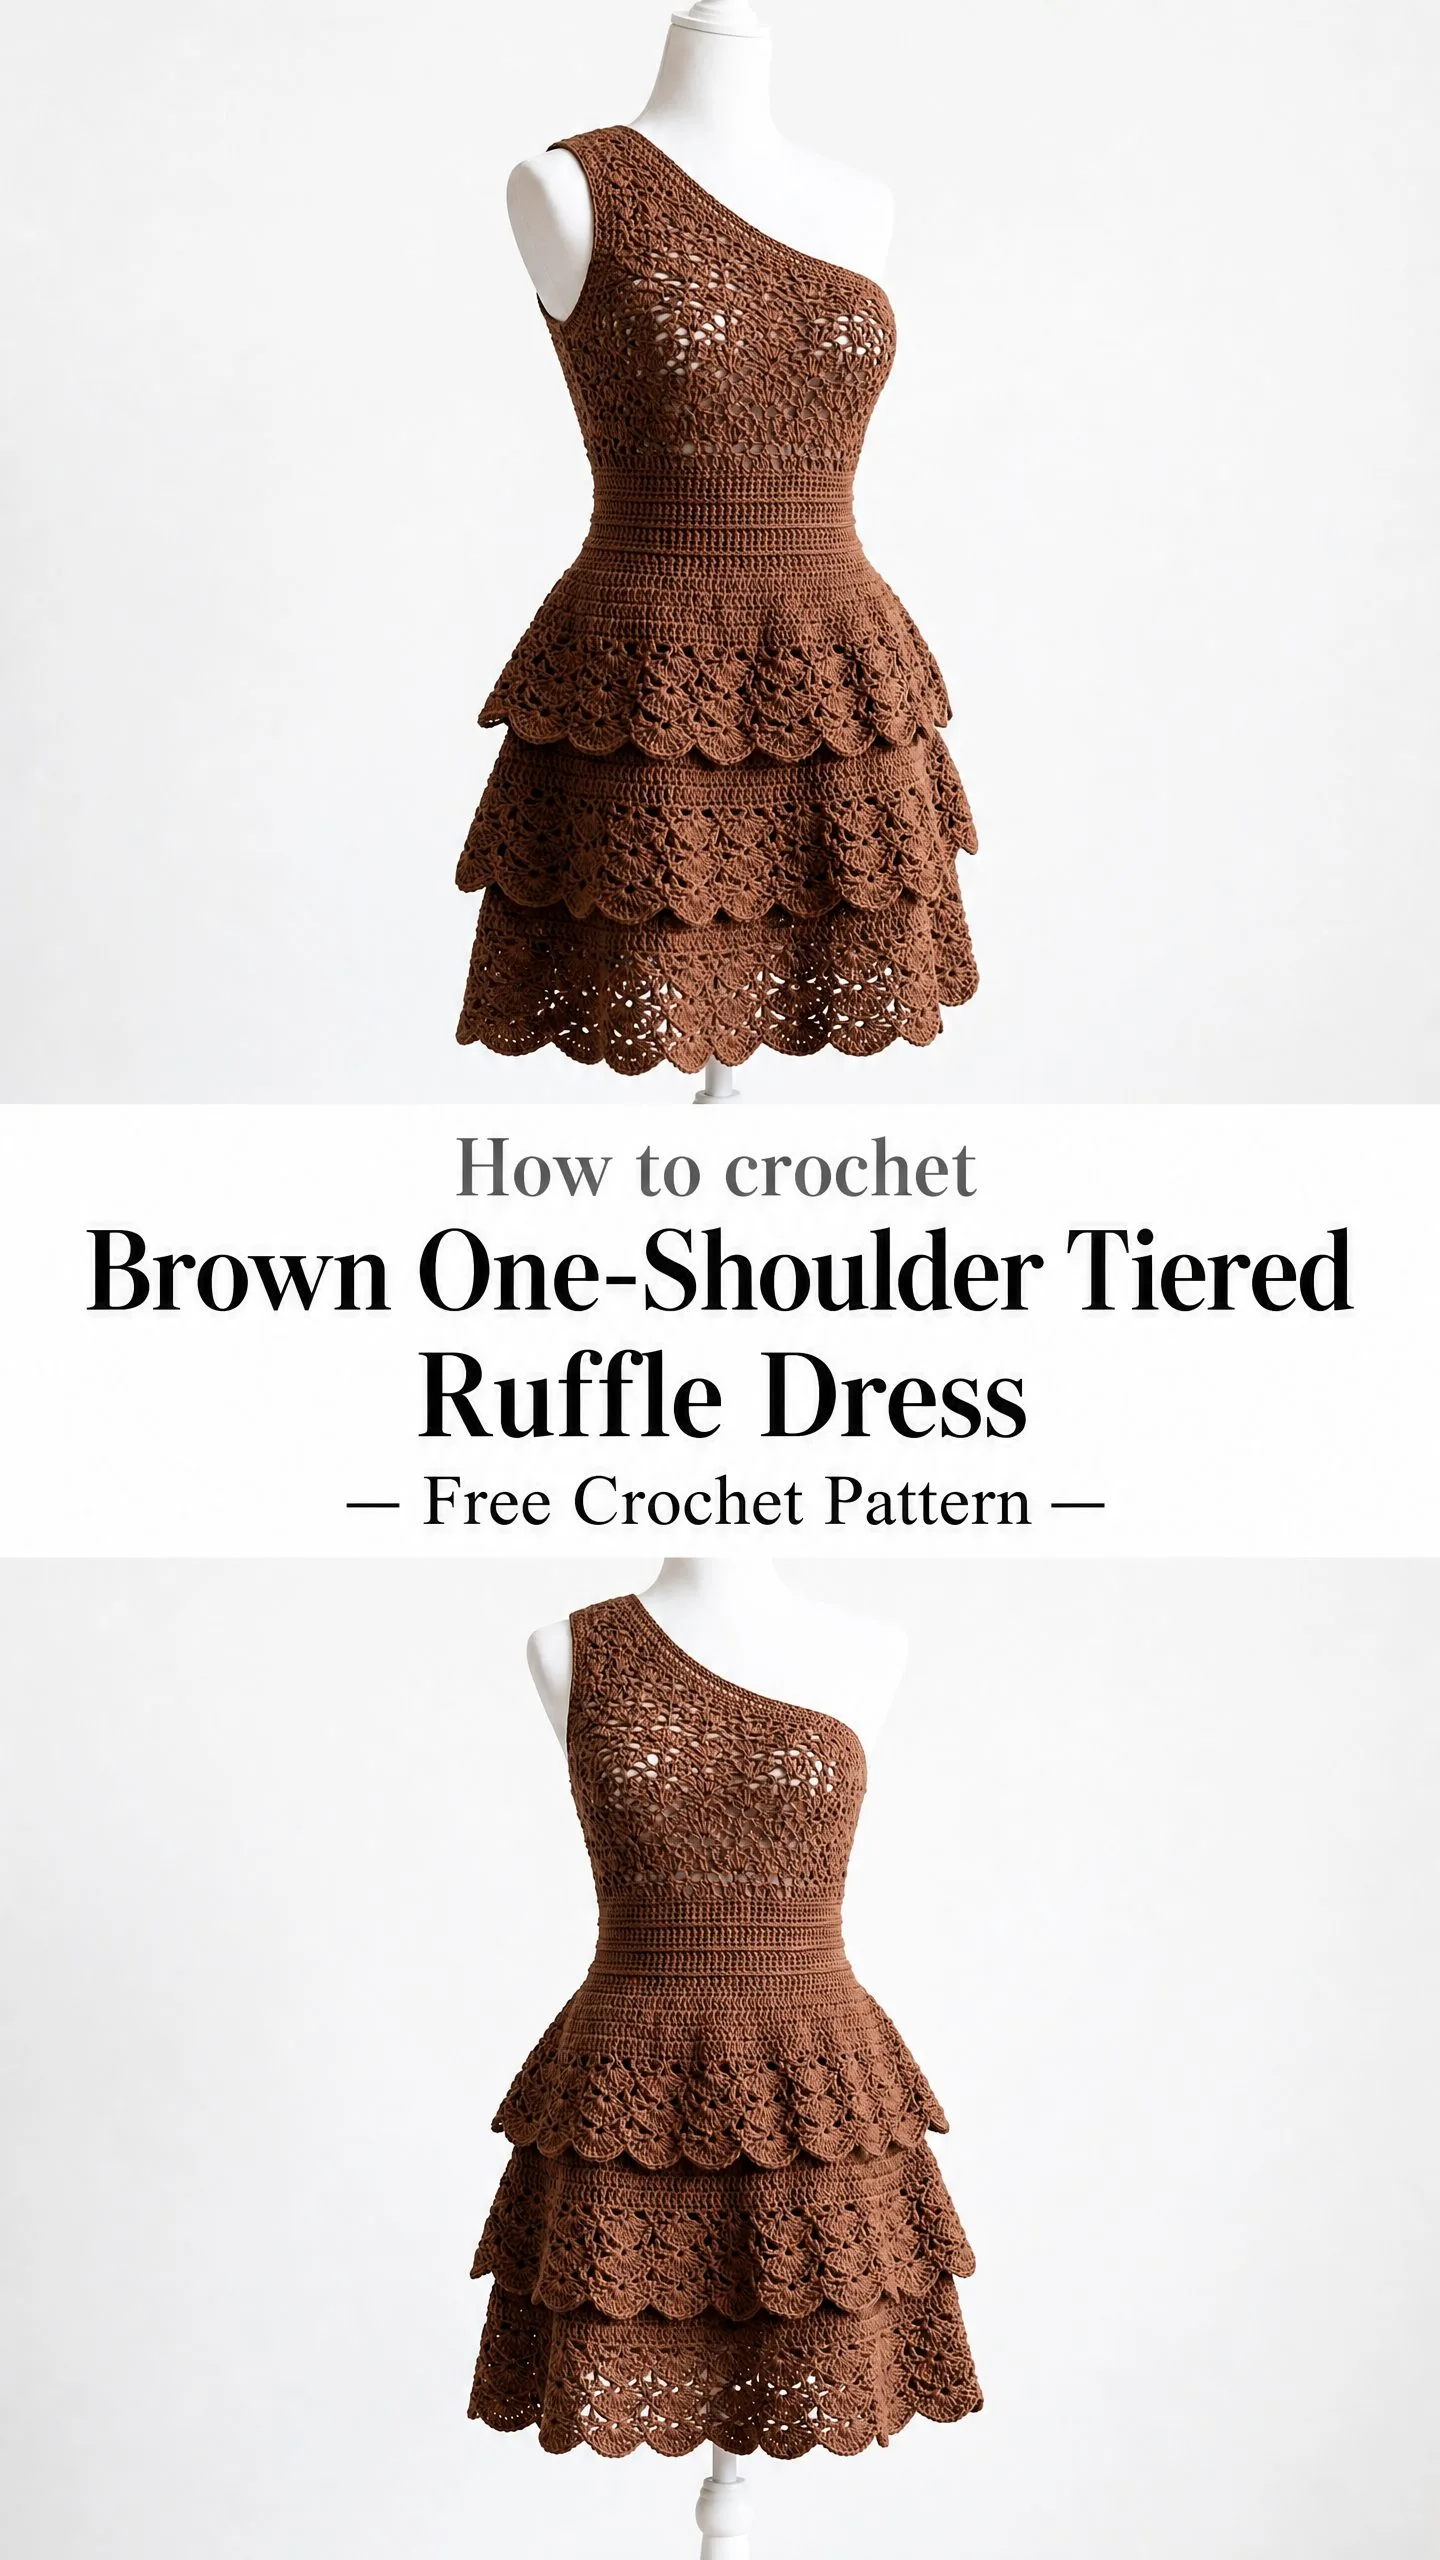
This crochet pattern works up in a gorgeous chocolate brown cotton blend yarn. The construction flows from top to bottom, making it easier to try on as you go and adjust the fit. Each tier ends in a scalloped shell edging that gives the hem movement and visual interest.
Whether you are making this for yourself or as a special gift for someone who appreciates handmade fashion, this dress is absolutely worth the time investment. The stitch techniques include lace fans, ribbing worked in the back loop only, and shell edging. Experienced crocheters will love the challenge, and the finished result is genuinely stunning.
About This Crochet Pattern
This advanced crochet tutorial walks you through creating a sophisticated garment from start to finish. The dress features a one-shoulder silhouette with the strap crossing the left shoulder while the right side opens to a flattering scoop back. A keyhole detail at the center back adds an elegant touch.
Skill level: Advanced. You should be comfortable with lace fan repeats, working in the round, top-down garment shaping, seaming, and maintaining precise stitch counts across multiple sections. Experience reading lace patterns is essential.
Time estimate: Approximately 40 to 60 hours depending on your working speed.
Finished measurements: The written instructions create a US size Small/Medium fitting a 34 to 36 inch bust (86 to 91 cm) and 26 to 28 inch waist (66 to 71 cm). Finished length measures approximately 20 inches (51 cm) from shoulder to hem. Size customization tips are included at the end.
Materials You Will Need
Yarn: Approximately 1,200 to 1,400 yards (1,097 to 1,280 m) of DK weight yarn (CYCA 3), 100 percent mercerized cotton or cotton-acrylic blend, in chocolate brown.
Recommended yarn options:
Hooks:
Notions: Stitch markers (at least 6), yarn needle for weaving ends, scissors, measuring tape, blocking mats and pins, optional dress lining fabric in brown or nude (approximately 1 yard / 0.9 m), sewing needle and thread for lining attachment.
Substitution note: Choose a smooth, plied DK cotton or cotton blend with minimal halo. Fuzzy or hairy yarns will obscure the lace detail. Always check your gauge swatch before beginning.
Gauge Information
Getting gauge right is mandatory for this crochet pattern. A difference of even one stitch per inch over 20 stitches results in a finished measurement that is off by more than 1.5 inches at the bust.
After blocking:
For lace fan stitch:
Swatch in both single crochet and the fan stitch pattern. Block your swatch before measuring.
Abbreviations and Stitch Definitions
Let me walk you through every abbreviation used in this pattern. Understanding these terms is essential before you begin.
ch: chain. Wrap yarn over hook, pull through loop on hook.
sl st: slip stitch. Insert hook, yarn over, pull through stitch and loop on hook in one motion.
sc: single crochet. Insert hook, yarn over, pull up a loop (2 loops on hook), yarn over, pull through both loops.
hdc: half double crochet. Yarn over, insert hook, yarn over, pull up a loop (3 loops on hook), yarn over, pull through all 3 loops.
dc: double crochet. Yarn over, insert hook, yarn over, pull up a loop (3 loops on hook), yarn over, pull through 2 loops, yarn over, pull through remaining 2 loops.
tr: treble crochet. Yarn over twice, insert hook, yarn over, pull up a loop (4 loops on hook), yarn over, pull through 2 loops three times.
ch-sp: chain space. The gap created by a chain in the previous row.
sk: skip. Pass over the indicated number of stitches without working into them.
st(s): stitch(es)
rep: repeat
rnd: round
RS: right side (the public-facing side of your work)
WS: wrong side (the inside of your work)
BLO: back loop only. Work into only the back loop of the stitch, leaving the front loop unworked.
FLO: front loop only
pm: place marker
sm: slip marker
sp: space
tog: together
dc2tog: double crochet 2 together (a decrease). Yarn over, insert hook in next st, yarn over, pull up loop, yarn over, pull through 2 loops. Yarn over, insert hook in next st, yarn over, pull up loop, yarn over, pull through 2 loops. Yarn over, pull through all 3 loops on hook.
inc: increase. Work 2 stitches in 1 stitch.
beg: beginning
rem: remaining
approx: approximately
Special Stitches Explained
These three techniques appear throughout the dress. Practice them on a small swatch before starting if they are new to you.
Fan Stitch (worked over a multiple of 12 sts plus 1)
This creates the beautiful lace texture in the bodice and tiers.
Row/Rnd 1 (foundation): Sc in each st across or around.
Row/Rnd 2: Ch 3 (counts as dc), sk 2 sts, (dc, ch 1, dc, ch 1, dc, ch 1, dc, ch 1, dc) all in next st (this is 5 dc with ch-1 sps between each, forming the fan), sk 2 sts, sc in next st; rep from beginning of fan sequence across, ending dc in last st.
Row/Rnd 3: Ch 1, sc in first st, ch 3, sc in center dc of fan (third dc of the 5-dc fan), ch 3, sc between fans; rep across, ending sc in last st.
Row/Rnd 4: Ch 3, 2 dc in first ch-3 sp, sc in sc, 5 dc in next ch-3 sp, sc in sc; rep across, ending 3 dc in last ch-3 sp.
Row/Rnd 5: Rep Row/Rnd 2 but offset by half a repeat so fans fall between prior fans (work fan into the sc between fans of prior repeat).
These 4 rows (Rows 2 through 5) form the fan lace pattern. Rows are offset on alternating repeats to create the all-over lace texture.
Shell Scallop Edging (worked over a multiple of 6 sts)
This creates the pretty scalloped hem at the bottom of each ruffle tier.
Rnd 1: Join yarn, ch 1, sc in first st, sk 2 sts, 5 dc in next st (shell made), sk 2 sts, sc in next st; rep from sc across or around, join with sl st to first sc.
Crab Stitch (reverse sc)
This creates a twisted, corded edge for finishing.
Working from left to right (opposite the normal crochet direction), insert hook into next st to the RIGHT, yarn over, pull up a loop, yarn over, draw through both loops.
BLO Rib
All sc are worked into the back loop only of each stitch. This creates visible horizontal ridges that mimic a ribbed band. When worked in the round, the rib runs vertically and creates the stretchy fitted waistband.
Pattern Notes Before You Begin
1. The dress is worked top-down. The bodice begins as a flat panel for the front, is shaped for the one-shoulder neckline, then joined in the round at the underarm.
2. The right shoulder (when worn) has no strap. The left shoulder strap is approximately 1.5 inches (3.8 cm) wide.
3. The waistband is worked in the round in BLO sc rib using the smaller hook for a snug fit.
4. Each ruffle tier is worked in the round, beginning with a foundation chain joined to the lower edge of the waistband or prior tier. Increases are built into the tiers to create flare.
5. Tier 1 (peplum) flares to approximately 1.5 times the waist circumference. Tier 2 flares to approximately 2 times. Tier 3 flares to approximately 2.5 times.
6. When working in the round, Ch 3 counts as the first dc throughout.
7. The back neckline has a keyhole opening created by working the back upper bodice as two flat panels with a 2-inch opening at center back.
8. Pin or block each tier before attaching to keep the layers from curling.
9. Lining is strongly recommended due to the open lace fabric.
Step by Step Instructions
Bodice Front Panel
The bodice front is worked flat from the top edge downward. It is shaped to accommodate the one-shoulder neckline.
Foundation: Ch 73. (72 working sts)
Row 1 (WS): Sc in second ch from hook and in each ch across. Turn. (72 sc)
Row 2 (RS): Ch 3, sk 2, (dc, ch 1, dc, ch 1, dc, ch 1, dc, ch 1, dc) in next st, sk 2, sc in next st; rep across, ending dc in last st. Turn. (6 fans of 5 dc, 6 sc, and 2 edge dc; 6 repeats of 12 sts = 72 sts)
Row 3: Ch 1, sc in first st, (ch 3, sc in center dc of fan, ch 3, sc between fans) across, ending sc in last st. Turn.
Row 4: Ch 3, 2 dc in first ch-3 sp, sc in sc, (5 dc in next ch-3 sp, sc in sc) across, ending 3 dc in last sp. Turn.
Row 5: Ch 3, sk 2, (dc, ch 1, dc, ch 1, dc, ch 1, dc, ch 1, dc) in next sc, sk 2, sc in next st; rep across. Turn.
Rows 6 through 13: Rep Rows 3 through 5 twice, then rep Rows 3 and 4 once more. (8 rows of established lace pattern; bodice front lace section measures approximately 4 inches / 10 cm from foundation)
One-Shoulder Neckline Shaping
The right side of the neckline drops away completely while the left shoulder strap continues.
Row 14 (RS): Work lace pattern across first 36 sts only. Turn. Leave rem 36 sts unworked.
Row 15: Work established lace pattern across 36 sts. Turn. (36 sts)
Row 16: Work lace pattern across first 12 sts only. Turn. (12 sts; this forms the shoulder strap base)
Rows 17 through 24: Work established lace pattern on these 12 sts for 8 more rows. (Strap section measures approximately 3 inches / 7.5 cm)
Fasten off. This completes the front panel with integrated left shoulder strap.
Bodice Back Panel
The back panel matches the front but includes a keyhole opening.
Foundation: Ch 73. (72 working sts)
Rows 1 through 13: Rep as for Bodice Front Panel, working all 72 sts across all rows. (72 sts; back lace section matches front height)
Keyhole Opening Shaping
Row 14 (RS): Work lace pattern across first 30 sts. Turn. Leave center 12 and rem 30 sts unworked.
Rows 15 through 18: Work lace pattern across 30 sts. Turn. (4 rows; back right panel)
Fasten off.
Rejoin yarn at st 43 (leaving 12 center sts unworked for keyhole).
Rows 14 through 18: Work lace pattern across rem 30 sts. Turn. (4 rows; back left panel)
Fasten off.
The 12 center sts at top back form the keyhole opening. Work 1 rnd of sl st around keyhole opening to stabilize edges.
Joining Shoulder and Side Seams
Align front and back panels with RS together. Using yarn needle or sl st seam method, join the left shoulder strap of front panel to the corresponding 12 sts at top left back panel.
Seam left side edge of front panel to left side edge of back panel from underarm down to lower edge of bodice.
Leave right side open 4 inches (10 cm) from the top for armhole, then seam right side from that point down to lower edge of bodice.
After seaming, the bodice forms a tube with a closed left shoulder strap, an open right shoulder, an open keyhole at center back, and two side seams.
Total stitch count at lower bodice edge: 144 sts around.
Bodice Lower Edge Joining Round
With RS facing, join yarn at right side seam at lower edge of bodice.
Rnd 1: Ch 1, sc evenly around entire lower bodice edge, placing approximately 1 sc per stitch across front and back lower edges. Join with sl st. (144 sc)
Checkpoint: The bodice should measure approximately 7 inches (18 cm) from shoulder strap to lower edge, and approximately 14 inches (35.5 cm) around the lower bodice.
Waistband
Switch to smaller hook (US D-3 / 3.25 mm). Work in the round. All rnds worked in BLO.
Rnd 1: Ch 1, sc in BLO of each st around. Join with sl st to first sc. (144 sc)
Rnds 2 through 14: Rep Rnd 1 for 13 more rnds. (14 rnds total; waistband measures approximately 2.5 inches / 6.5 cm tall)
Do not fasten off. Switch back to larger hook (US E-4 / 3.5 mm).
Checkpoint: The waistband should have noticeable vertical rib texture from the BLO working method. Stitch count remains 144 sc throughout.
Tier 1 (Peplum Ruffle)
Tier 1 attaches at the lower edge of the waistband and flares outward. The tier increases the stitch count to 216 sts.
Attachment Rnd (increase rnd): Working into the lower edge of the waistband, ch 1, work (2 sc, inc in next st) 48 times around. Join with sl st. (192 sc)
Rnd 2: Ch 1, (sc in next 7 sts, inc in next st) 24 times around. Join with sl st. (216 sc)
Rnd 3: Ch 1, sc in each st around. Join with sl st. (216 sc)
Rnds 4 through 7: Work Fan Stitch pattern in the round for 4 rnds. (216 sts; 18 fan repeats)
Rnd 8: Ch 1, sc in each st around. Join with sl st. (216 sc)
Shell Scallop Hem: Work Shell Scallop Edging rnd. (36 shells)
Fasten off.
Checkpoint: Tier 1 should measure approximately 3 inches (7.5 cm) from attachment rnd to top of scallop edge.
Tier 2 (Mid Ruffle)
Tier 2 attaches at the base of Tier 1’s shell scallop edging and increases to 288 sts.
With RS facing, join yarn at Rnd 8 of Tier 1 (the sc rnd above the scallop).
Attachment Rnd: Ch 1, working into 216 sts, work (sc in next 2 sts, inc in next st) 72 times around. Join with sl st. (288 sc)
Rnd 2: Ch 1, sc in each st around. Join with sl st. (288 sc)
Rnds 3 through 8: Work Fan Stitch pattern in the round for 6 rnds. (288 sts; 24 fan repeats)
Rnd 9: Ch 1, sc in each st around. Join with sl st. (288 sc)
Shell Scallop Hem: Work Shell Scallop Edging rnd. (48 shells)
Fasten off.
Checkpoint: Tier 2 should measure approximately 4 inches (10 cm) from attachment rnd to top of scallop.
Tier 3 (Hem Ruffle)
Tier 3 is the longest and widest tier, increasing to 360 sts.
With RS facing, join yarn at Rnd 9 of Tier 2.
Attachment Rnd: Ch 1, working into 288 sts, work (sc in next 3 sts, inc in next st) 72 times around. Join with sl st. (360 sc)
Rnd 2: Ch 1, sc in each st around. Join with sl st. (360 sc)
Rnds 3 through 10: Work Fan Stitch pattern in the round for 8 rnds. (360 sts; 30 fan repeats)
Rnd 11: Ch 1, sc in each st around. Join with sl st. (360 sc)
Shell Scallop Hem: Work Shell Scallop Edging rnd. (60 shells)
Fasten off.
Checkpoint: Tier 3 should measure approximately 5 inches (12.5 cm) from attachment rnd to top of scallop.
Shoulder Strap Edging
With RS facing, join yarn at the outer edge of the 12-st left shoulder strap at the front.
Rnd 1: Ch 1, sc evenly along the left strap outer edge, across the back, and along the right strap outer edge, working approximately 1 sc per row end along the strap sides. Join or fasten off at end of strap.
For the right (open) shoulder edge: Join yarn at top right front. Work 1 rnd of crab stitch (reverse sc) along the entire right shoulder, armhole, and back neckline to stabilize and finish the raw edge. Fasten off.
Work 1 rnd of sc around the keyhole back opening. Fasten off and seam the keyhole closed at the base with 2 to 3 sl sts if preferred, or leave open for ease of dressing.
Finishing and Blocking
Weave in all ends using a yarn needle, burying tails in the wrong side of the work.
Wet block the entire dress by submerging in cool water. Gently squeeze out excess water without wringing. Lay flat on blocking mats and pin each tier out to the correct dimensions. Pay special attention to each scallop edge by pinning each point outward to define the shells clearly.
Allow to dry completely before removing pins. This step is mandatory for cotton fabric. Blocking will open the lace fans and define the shells beautifully.
Lining (optional but recommended): Cut a lining panel to match the bodice and upper waistband dimensions. Hem the lining at the waist level. Attach the lining to the WS of the bodice with a slip stitch or whip stitch around the waistband, at the shoulder strap inner edge, and along the armhole edge. The tiers remain unlined to preserve their drape.
Size Customization Tips
To size up to Large/XL (38 to 40 inch bust): Add one additional fan repeat (12 sts) to the foundation chain of both bodice panels. This adjusts the bust measurement by approximately 2.4 inches per 12 sts added. Adjust the waistband joining rnd proportionally. Each tier’s stitch count increases by approximately 18 sts per tier to maintain the flare ratio.
To size down to XS/S (32 to 34 inch bust): Remove one fan repeat from the foundation chain. Adjust accordingly throughout.
To adjust dress length: Add or remove rows from Tier 3. Each 2-row addition of fan stitch adds approximately 1 inch (2.5 cm) to dress length. For a midi length, add 8 additional fan rnd rows to Tier 3.
To adjust waistband width: Add or remove rnds from the waistband. Each 2 rnds adds approximately 0.35 inch (0.9 cm).
To adjust shoulder strap width: The current 12-st strap equals approximately 2.4 inches (6 cm). For a narrower strap, reduce to 6 sts. For a wider strap, increase to 18 sts.
Care Instructions
Machine wash on a gentle cycle in cold water, or hand wash in cool water with a mild detergent. Do not wring. Lay flat to dry. Do not tumble dry. Do not hang dry as cotton fabric will stretch under its own weight when wet. Iron on a low cotton setting if needed, or use a pressing cloth. Store folded, not hung, to preserve the shape of the waistband and bodice.
Final Thoughts on This Brown One-Shoulder Tiered Ruffle Dress Pattern
This crochet pattern is absolutely a labor of love, but the finished dress is something truly special. The combination of delicate lace, structured ribbing, and cascading ruffles creates a garment that looks like it belongs in a boutique window. I hope you enjoy every stitch of this project.
Thank you so much for choosing this pattern. If you make this dress, I would absolutely love to see it! Tag me on Instagram or share your photos in our Facebook group. Seeing your finished projects is honestly the best part of sharing patterns.
Save this brown one-shoulder tiered ruffle dress crochet pattern to your Pinterest boards so you can find it when you are ready to start. And please leave a comment below if you make this dress. I love hearing how projects turn out and seeing your color choices!
