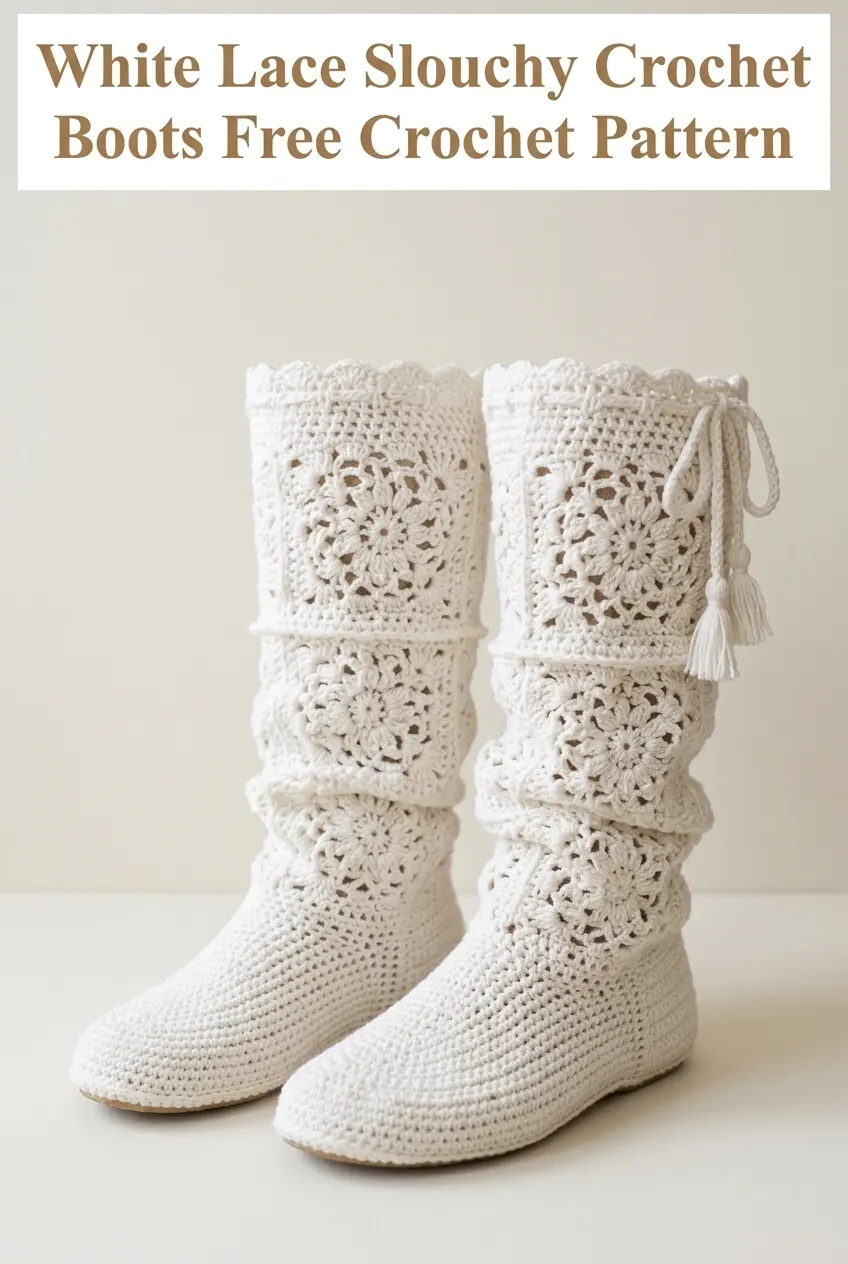
These are crochet slipper boots with a lace granny square leg section and a solid foot. They use basic stitches and simple construction. If you can make a granny square and work in the round, you can make these boots.
Why You’ll Love This Crochet Pattern
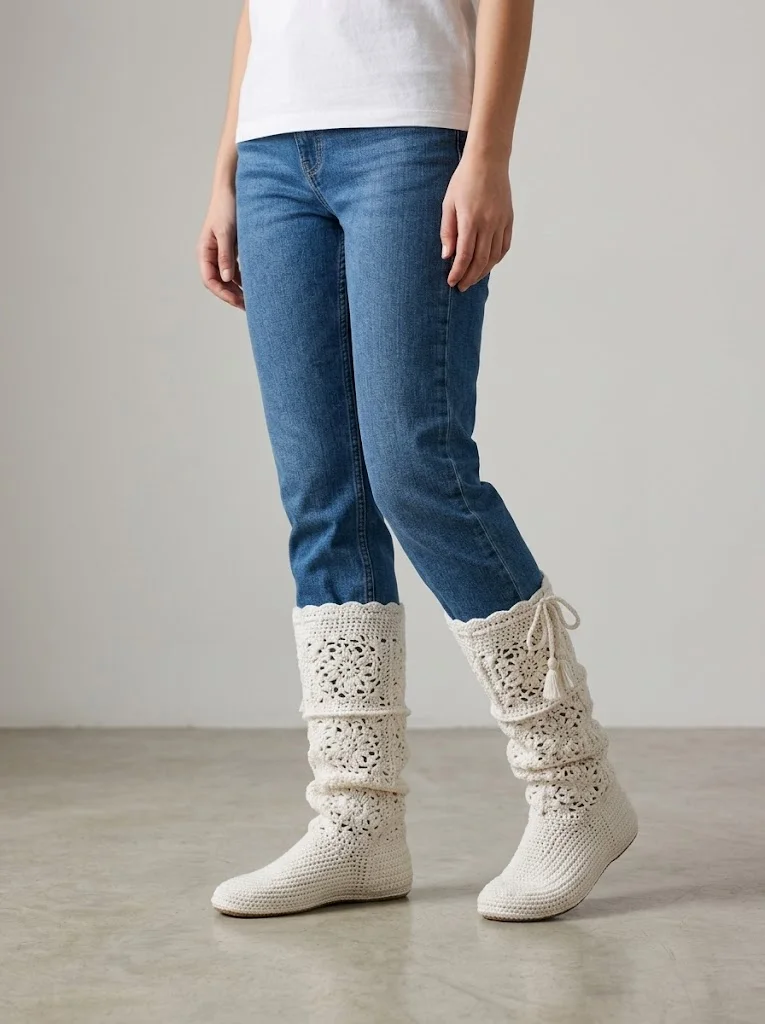
I have been obsessed with cozy footwear lately. Regular slippers are fine, but they always slide down or feel too bulky under jeans. These slouchy crochet boots solve both problems. The lace leg section is breathable enough to wear over pants without overheating. The solid foot keeps your toes warm on cold floors.
The design looks intricate, but it is actually quite approachable. The leg is made from simple granny square motifs joined together. The foot works up in basic single crochet. No complicated shaping or confusing decreases here.
I love how the cream color shows off the lace detail. You could make these in any color, but lighter shades really highlight the openwork pattern. The little tassel ties at the top add a sweet finishing touch and help you adjust the fit around your calf.
Skill Level
Intermediate beginner to confident beginner. If you have made a granny square before and feel comfortable working in the round, you are ready for this project. I will walk you through every step.
The only tricky part is joining the motifs and attaching them to the foot section. I will explain this in detail so you feel confident.
Finished Measurements
These instructions create boots to fit a women’s US size 7-8 foot. The foot section measures approximately 9 inches from heel to toe. The leg section stands about 10 inches tall when worn, though the slouchy nature means it can scrunch down to around 7 inches.
To adjust the size: Add or subtract rows in the foot section to lengthen or shorten. For wider feet, increase the starting chain by 2-4 stitches. For a taller boot, add an extra row of granny motifs or extend the single crochet section between the foot and the lace.
Materials Needed
Yarn:
Hook:
Notions:
Gauge
Foot section: 14 single crochet stitches and 16 rows = 4 inches square
Granny motif: Each finished square measures approximately 3.5 inches across
Gauge matters most for the foot section. Check your gauge before starting. If your stitches are too loose, the boots will be floppy and too big. If too tight, they will be stiff and small.
Abbreviations and Stitch Definitions
Let me explain every stitch you will use. Even if you know these, a quick refresher helps.
Ch = Chain. Wrap yarn over hook, pull through loop on hook. This creates a foundation or spaces in lacework.
Sl st = Slip stitch. Insert hook, yarn over, pull through stitch AND loop on hook in one motion. Used for joining and moving across stitches without adding height.
Sc = Single crochet. Insert hook in stitch, yarn over and pull up a loop (2 loops on hook), yarn over and pull through both loops. Creates a short, dense stitch.
Dc = Double crochet. Yarn over, insert hook in stitch, yarn over and pull up a loop (3 loops on hook), yarn over and pull through 2 loops (2 loops remain), yarn over and pull through last 2 loops. Taller stitch that creates the lacy look.
Dc3tog = Double crochet 3 together. A decrease that joins 3 double crochets at the top. Work a dc but stop before the final yarn over (2 loops on hook). Repeat in next 2 stitches (4 loops on hook). Yarn over and pull through all 4 loops.
Sp = Space. The gap created by chain stitches in the previous row.
The Pattern
You will make each boot in sections, then join them together. We will create the sole and foot first, then the granny lace motifs, then attach everything and add finishing details.

Sole and Foot Section (Make 2)
The foot works from the toe up in continuous rounds of single crochet.
Starting at the toe:
Round 1: Ch 12. Sc in 2nd ch from hook, sc in next 9 ch, 3 sc in last ch. Working along the opposite side of the foundation chain, sc in next 9 ch, 2 sc in last ch. Do not join. Place a stitch marker in the first stitch and move it up each round. (24 sc)
Round 2: 2 sc in first st, sc in next 9 st, 2 sc in each of next 3 st, sc in next 9 st, 2 sc in each of last 2 st. (30 sc)
Round 3: Sc in first st, 2 sc in next st, sc in next 9 st, (sc in next st, 2 sc in next st) 3 times, sc in next 9 st, (sc in next st, 2 sc in next st) twice. (36 sc)
Round 4: Sc in first 2 st, 2 sc in next st, sc in next 9 st, (sc in next 2 st, 2 sc in next st) 3 times, sc in next 9 st, (sc in next 2 st, 2 sc in next st) twice. (42 sc)
Rounds 5-8: Sc in each st around. (42 sc)
This creates the toe box. Try it on if possible. The toe should feel snug but not tight.
Rounds 9-24: Sc in each st around. (42 sc)
These rounds create the length of the foot. After round 24, the foot section should measure approximately 6 inches from the starting chain. Add or remove rounds here to adjust length.
Heel shaping:
Round 25: Sc in first 21 st. Turn. (21 sc)
You are now working back and forth on half the stitches to create the heel.
Row 26: Ch 1, skip first st, sc in next 19 st, leave last st unworked. Turn. (19 sc)
Row 27: Ch 1, skip first st, sc in next 17 st, leave last st unworked. Turn. (17 sc)
Row 28: Ch 1, skip first st, sc in next 15 st, leave last st unworked. Turn. (15 sc)
Row 29: Ch 1, skip first st, sc in next 13 st, leave last st unworked. Turn. (13 sc)
Row 30: Ch 1, sc in each st across. Turn. (13 sc)
Closing the heel:
Fold the heel piece in half with wrong sides together. The two edges with the stepped decreases should align. Using a slip stitch or whip stitch, join the back seam of the heel. Fasten off and weave in the end.
Turn the foot right side out. The seam should be on the inside.
Ankle transition:
With right side facing, join yarn at the center back heel seam.
Round 31: Ch 1, sc evenly around the ankle opening, working approximately 42-44 sc. Join with sl st to first sc. (42-44 sc)
Rounds 32-35: Ch 1, sc in each st around. Join with sl st to first sc. (42-44 sc)
This creates a stable base for attaching the lace leg section.
Fasten off and weave in ends.
Granny Lace Motifs (Make 12 total, 6 per boot)
Each motif is a simple granny square with an open, lacy center.
Round 1: Ch 4, sl st to first ch to form a ring. Ch 3 (counts as first dc), 2 dc in ring, ch 2, (3 dc in ring, ch 2) 3 times. Join with sl st to top of beginning ch-3. (12 dc, 4 ch-2 spaces)
Round 2: Sl st in next 2 dc and into ch-2 corner space. Ch 3, 2 dc in same sp, ch 1, (3 dc, ch 2, 3 dc) in corner sp, ch 1. Repeat from around, ending with 3 dc in first corner, ch 2. Join with sl st to top of beginning ch-3. (24 dc, 4 corners, 4 ch-1 spaces)
Round 3: Sl st in next 2 dc and into ch-1 sp. Ch 3, 2 dc in same sp, ch 1, (3 dc, ch 2, 3 dc) in corner ch-2 sp, ch 1, 3 dc in next ch-1 sp, ch 1. Repeat from around. Join with sl st to top of beginning ch-3. (36 dc)
Round 4: Sl st in next 2 dc and into ch-1 sp. Ch 3, 2 dc in same sp, ch 1, 3 dc in next ch-1 sp, ch 1, (3 dc, ch 2, 3 dc) in corner ch-2 sp, ch 1. Continue around in pattern. Join with sl st to top of beginning ch-3. (48 dc)
Fasten off, leaving a 12-inch tail for joining.
Each motif should measure approximately 3.5 inches square. Make 12 total.
Assembling the Leg Section
Lay out 6 motifs for each boot. You will arrange them in two rows of 3 motifs each.
Joining motifs horizontally:
Hold two motifs with right sides together. Using the long tail, whip stitch through the back loops only along one edge. This creates a flat, nearly invisible seam on the right side.
Join 3 motifs in a row. Repeat for the second row.
Joining rows together:
Align the two rows and whip stitch along the long edge, connecting row 1 to row 2.
Forming the tube:
Bring the short edges of the joined piece together to form a cylinder. Whip stitch the seam closed. You now have a lace tube.
Attaching the Leg to the Foot
Place the lace tube over the foot section with the tube’s bottom edge overlapping the ankle transition rounds.
Using a yarn needle and matching yarn, whip stitch the bottom edge of the lace tube to Round 35 of the foot section. Work all the way around, spacing your stitches evenly.
The lace should sit slightly loose, creating that signature slouchy look.
Top Edging and Drawstring Channel
Round 1: Join yarn at any point along the top edge of the lace tube. Ch 1, sc evenly around the top, working approximately 1 sc per dc and 1 sc in each ch-1 space. Join with sl st. (approximately 60 sc)
Round 2: Ch 4 (counts as dc plus ch 1), skip 1 st, dc in next st. Repeat from around. Join with sl st to 3rd ch of beginning ch-4.
This creates an eyelet round for the drawstring.
Round 3: Ch 1, sc in each dc and each ch-1 sp around. Join with sl st. (approximately 60 sc)
Round 4: Ch 1, working from left to right (reverse single crochet), sc in each st around for a decorative scalloped edge. Join with sl st.
Fasten off and weave in ends.
Drawstring Tie with Tassels (Make 2)
Chain: Ch 120. Fasten off.
Tassel (make 2 per boot):
Cut 10 strands of yarn, each 6 inches long. Fold in half. Thread the folded loop through one end of the chain. Pull the cut ends through the loop and tighten. Wrap a separate strand around the tassel about half an inch from the top and secure.
Repeat for the other end of the chain.
Weave the drawstring through the eyelet round. Adjust to your preferred tightness.
Finishing Touches
Weave in all ends carefully. For the foot section, weave ends along seams where they will not show or feel uncomfortable against your foot.
Block the lace motifs if desired. Wet blocking or steam blocking will open up the lacework and give a more polished look.
Add non-slip soles for safety on hard floors. You can apply fabric paint dots to the bottom, glue on purchased slipper soles, or leave them as is if you will wear them primarily on carpet.
Care Instructions
Hand wash in cool water with a gentle detergent. Gently squeeze out excess water without wringing. Reshape and lay flat to dry. The lace section may need gentle reshaping while damp.
If you used acrylic yarn, you can machine wash on delicate inside a mesh bag. Lay flat to dry.
Customization Ideas
Color variations: Try making the foot section in one color and the lace motifs in a contrasting shade. A navy foot with cream lace looks stunning.
Shorter boot: Use only one row of 3 motifs for an ankle-height version.
Different motifs: Substitute your favorite granny square pattern for the leg section. Just make sure the gauge matches.
No drawstring: Skip the eyelet round and simply work straight single crochet for a cleaner top edge.
Troubleshooting Tips
My foot section is too loose: Go down one hook size and try again. Slippers need a snug fit.
My motifs are different sizes: Check your tension. Tighter stitchers should go up a hook size. Looser stitchers should go down.
The lace section gaps at the ankle: Add an extra round or two of single crochet to the ankle transition before attaching the lace.
The boot keeps falling down: Make the drawstring tie snugger, or add a few rounds of ribbing (sc in back loop only) at the top for stretch and grip.
I hope you absolutely love making these white lace slouchy crochet boots. They make such a thoughtful handmade gift and look beautiful in any color you choose. The combination of the delicate granny square lace and the cozy solid foot really does work up into something special.
If you make these boots, I would love to see them. Save this crochet pattern to your Pinterest boards so you can find it when you are ready to start. And please drop a comment below if you give this pattern a try. Hearing from you truly makes my day.
