
I don’t know about you, but I have a soft spot for statement accessories that look impossibly intricate yet feel totally wearable. This cascading red poppy hair vine delivers all the drama with none of the stiffness you might expect from thread crochet.
Get the Ad-Free PDF Pattern
You can find the free pattern below, or you can purchase the ad-free printable PDF from my shop.
Get the Printable PDF →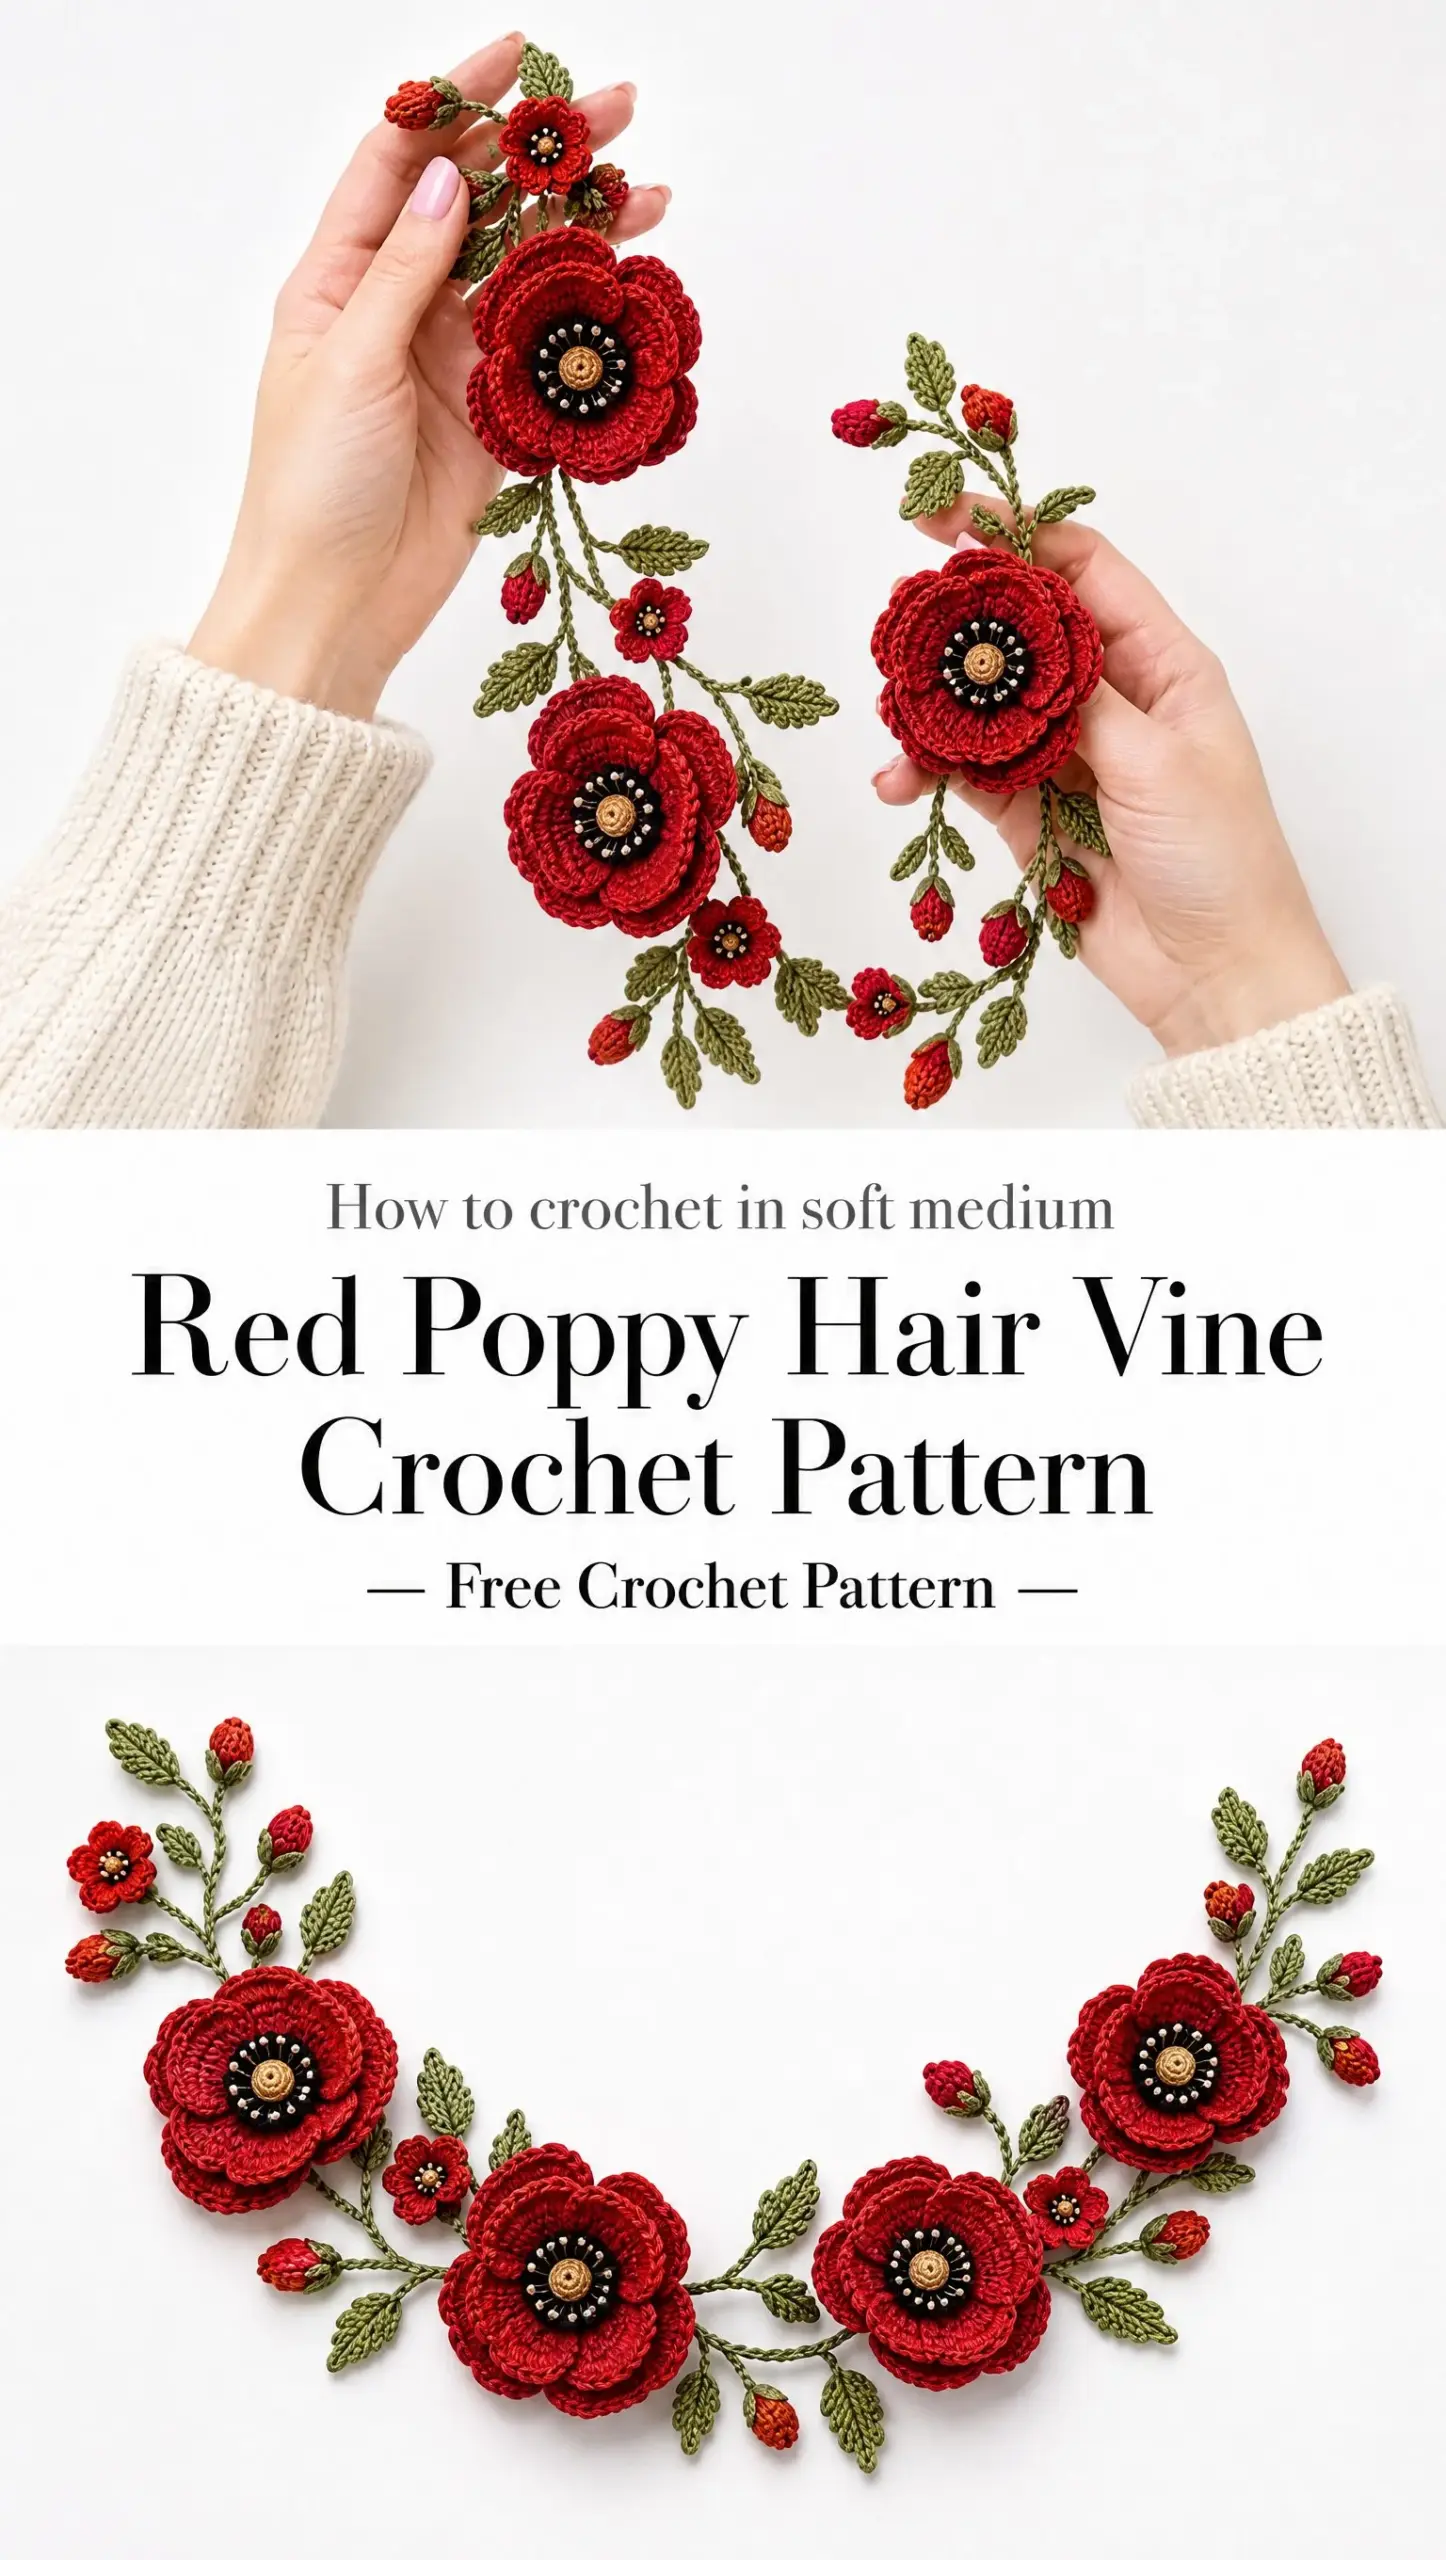
The moment I saw this design, I knew it was special. Layered petals, textured centers, delicate buds trailing down a braid. It looks like something from a romantic painting, yet it bends and flows naturally with your hair.
If you have been saving that beautiful crimson thread for just the right project, this is your sign. Grab your tiniest hook and let’s make something stunning together.
About This Red Poppy Hair Vine Crochet Pattern
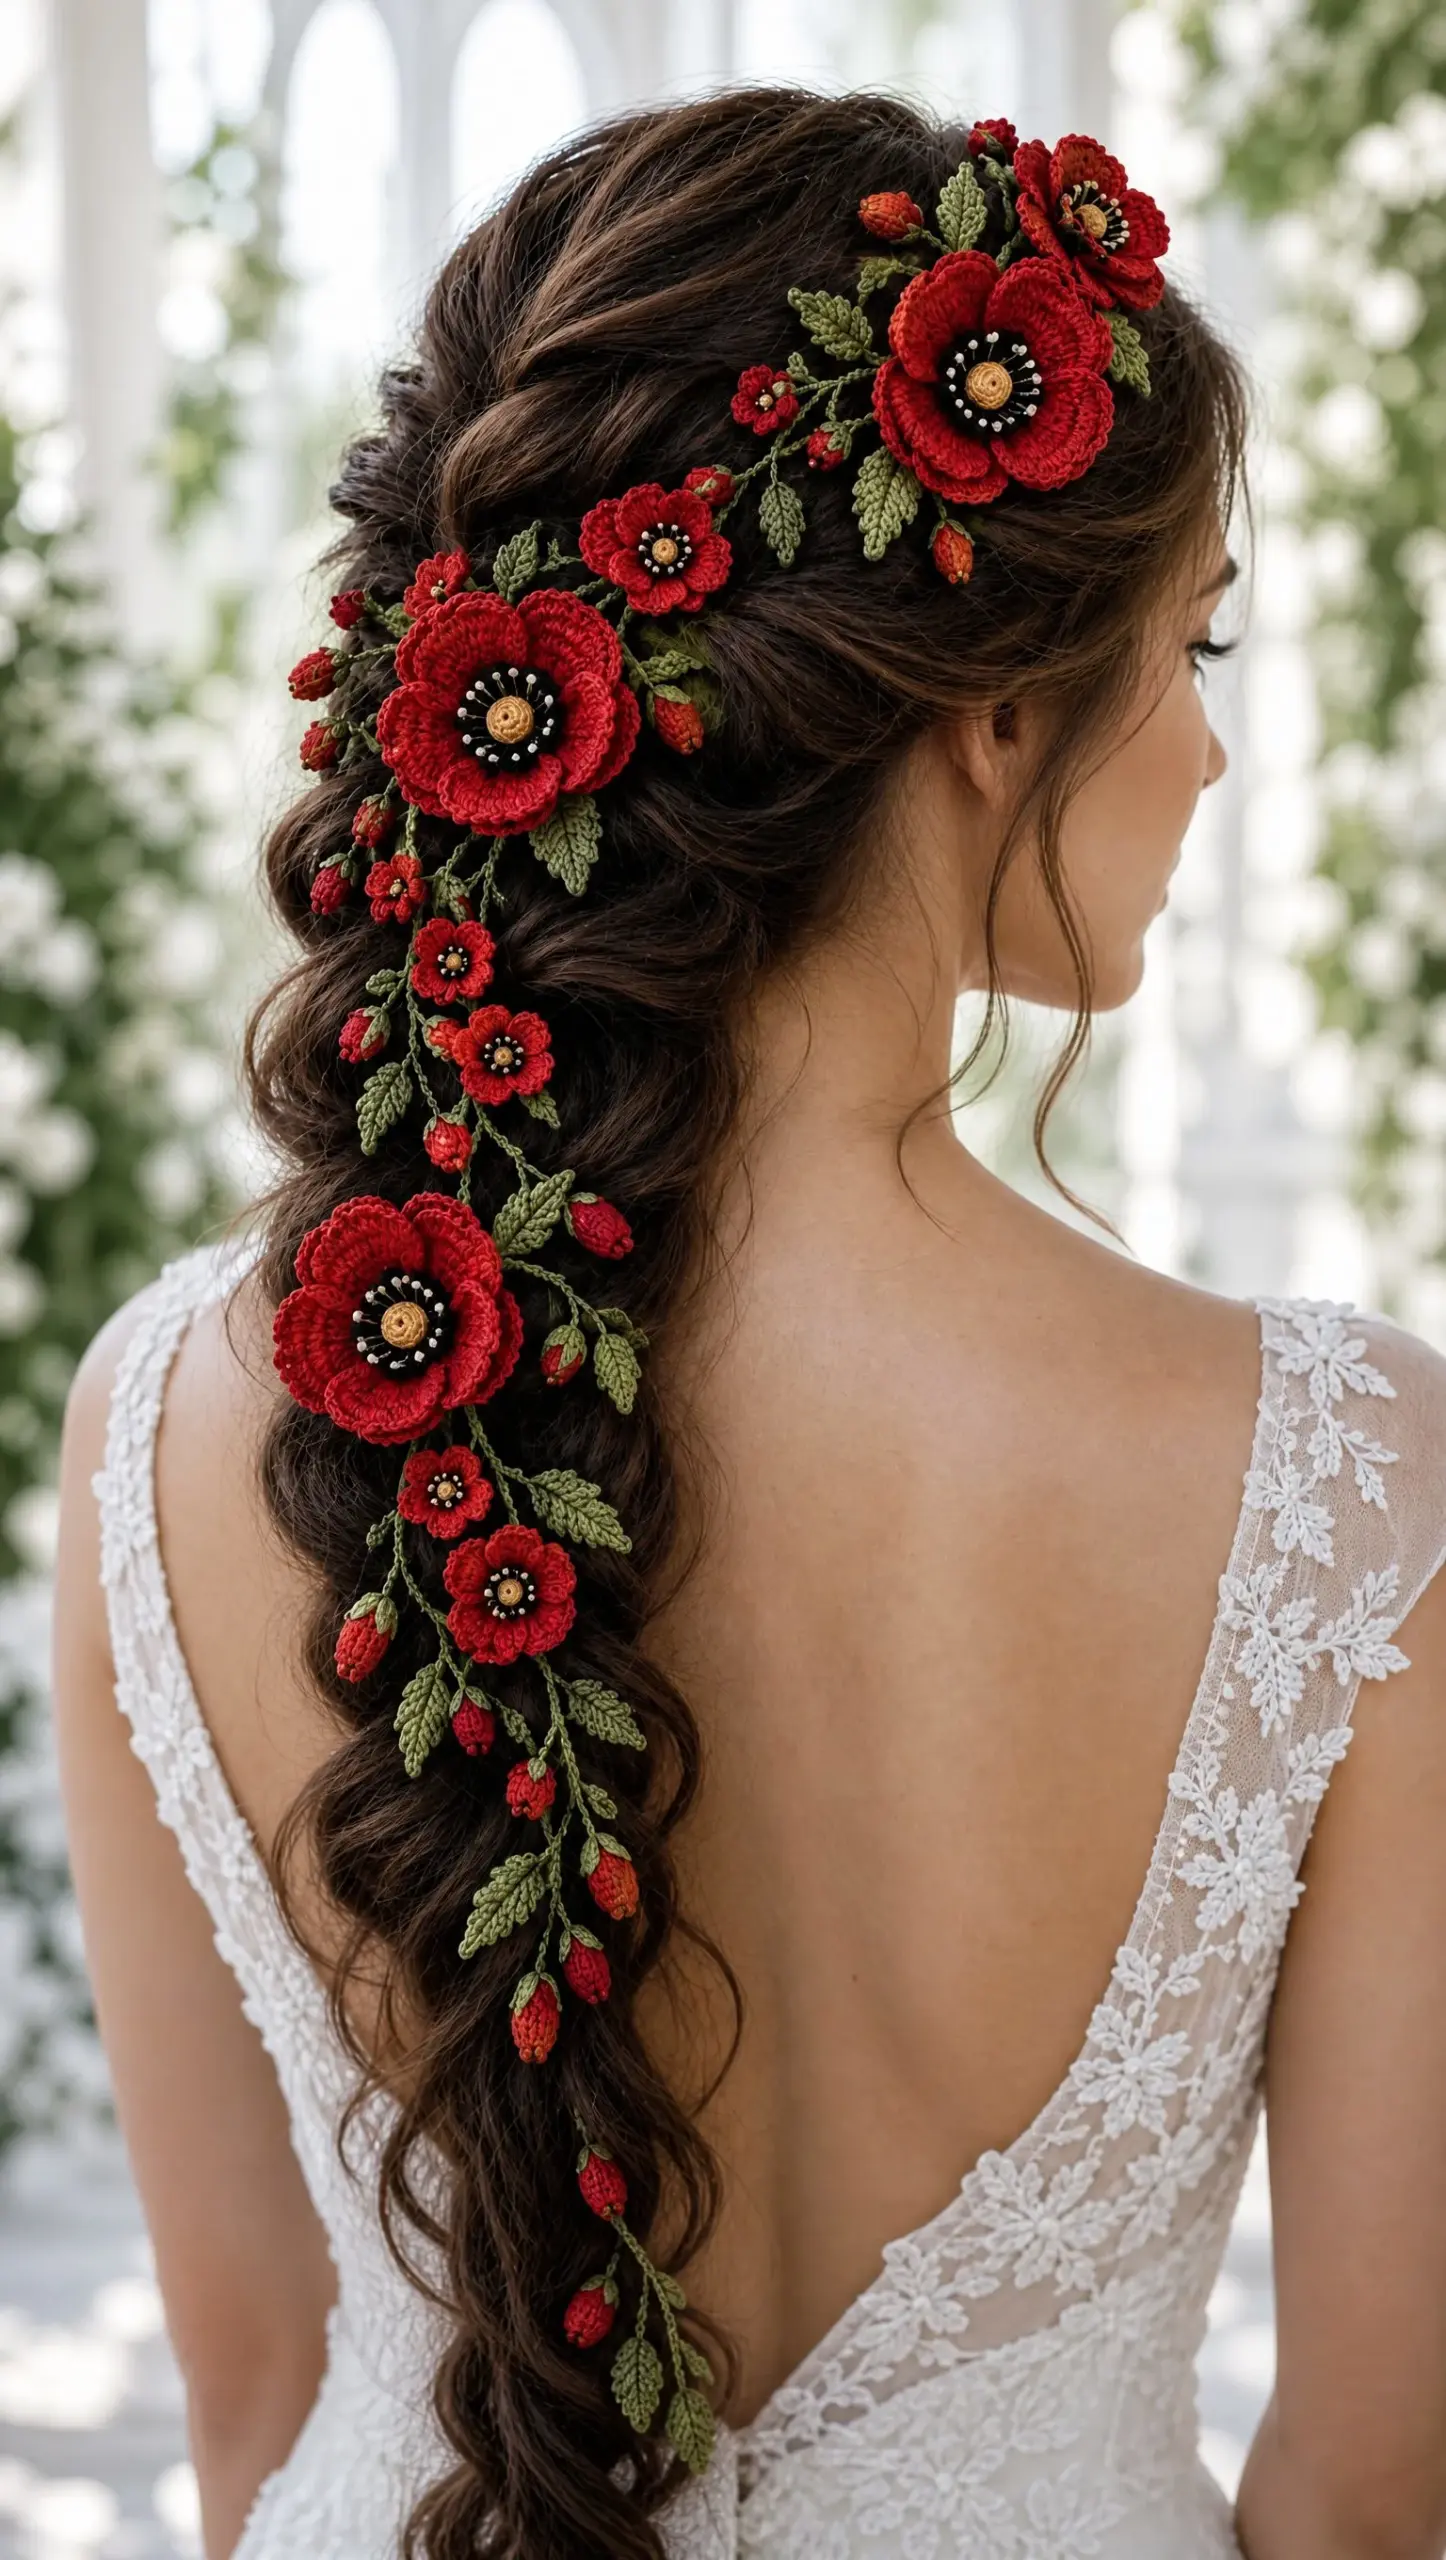
This flexible thread crochet floral accessory features layered poppies, closed buds, veined leaves, and branching stems. The design cascades from the crown of the head down through a braid, creating a breathtaking botanical statement piece perfect for weddings, special occasions, or anytime you want to feel like a garden goddess.
The finished vine measures approximately 27 to 31 inches (69 to 79 cm) from the crown end to the lowest cascade tip. You can easily adjust this length by changing your foundation chain.
Individual element sizes:
Skill Level
This pattern is rated intermediate. The stitches themselves are simple, but the project involves very small thread, shaped pieces, layered assembly, branch placement, and invisible sewing.
You should be comfortable working in the round, increasing and decreasing, crocheting around both sides of a foundation chain, and sewing small motifs neatly.
Don’t let that intimidate you though. If you take it one component at a time, this project is absolutely achievable. Think of it as making many tiny projects that come together into one showstopper.
Materials Needed
Thread:
Optional embellishment:
Tools:
Recommended thread brands:
Any tightly spun cotton thread will work beautifully. If you use size 20 thread, reduce your hook to about 0.9 to 1.25 mm and expect smaller motifs.
Gauge
Exact gauge is not critical because this vine is modular. For reference, 10 single crochet (sc) stitches should measure about 1 inch (2.5 cm) when worked firmly in size 10 cotton with a 1.5 mm hook.
More important than hitting an exact number: your petals should hold their shape without feeling board stiff, and your main vine should bend easily around the hairstyle.
Abbreviations
Construction Overview
This design is built in modules. You will crochet the main vine first, then make the blooms, buds, leaves, and short branches separately. Each flower gets assembled completely before being sewn to the vine.
This modular approach keeps the accessory flexible and lets you fine tune placement on an actual braid or mannequin head before committing to the final arrangement.
Recommended Motif Count
| Motif | Suggested Count | Placement Role |
|---|---|---|
| Large poppy | 4 | 2 at crown/right side; 2 on lower braid cascade |
| Medium poppy | 4 to 5 | Bridge the diagonal sweep and fill upper cascade |
| Small poppy | 5 to 7 | Transition points and lower detail |
| Closed buds | 10 to 14 | Branch tips, especially outer edges |
| Leaves | 18 to 26 | Alternate sizes along branches and beside blooms |
Main Vine Cord Instructions
Step 1 – Foundation: With olive green thread, ch 190 for approximately 29 inches (74 cm). Measure the chain relaxed, not stretched. Add or remove chains until it is 2 to 3 inches (5 to 8 cm) longer than your intended visible route through the hair.
Step 2 – Return Row: Starting in the 2nd ch from hook, sl st loosely in each ch to the end. Do not pull tight. The cord must remain bendable.
Step 3 – Strengthening Pass: Rotate the cord. Working into the unused bump of each foundation chain, sl st back along the opposite side. FO, leaving a 10 inch (25 cm) tail for securing the crown end.
Step 4 – Optional Hidden Loops: At 3 to 4 strategic points, join olive and ch 5, sl st back into the same spot to form tiny loops for bobby pins. Place these loops behind large flowers so they remain invisible.
Branch Stems
For a short branch: Ch 12 to 20 with olive. Sl st in 2nd ch and each ch back to the base.
For a forked branch: Work to the midpoint, ch 8 to 12 for the side branch, sl st back to the midpoint, then continue sl st down the main branch.
Leave 4 to 6 inch (10 to 15 cm) tails at the branch base for sewing. Buds and leaves get attached before the branch is sewn to the main vine.
Large Poppy Pattern (Make 4)
Each large poppy needs 5 petals, 1 black stamen ring, and 1 raised yellow center.
Large Poppy Petals (Make 5 per flower)
With crimson thread:
Row 1: Ch 9. Sc in 2nd ch from hook and across. (8 sc)
Row 2: Ch 1, turn, inc, sc 6, inc. (10 sc)
Row 3: Ch 1, turn, inc, sc 8, inc. (12 sc)
Rows 4 and 5: Ch 1, turn, sc across. (12 sc)
Row 6: Ch 1, turn, dec, sc 8, dec. (10 sc)
Row 7: Ch 1, turn, dec, sc 6, dec. (8 sc)
Edging: Ch 1. Work sc evenly down the side, 3 sc in the lower corner, sc across the foundation edge, 3 sc in the next corner, sc up the side, then work (sc, ch 1, sc) in each of the 3 center stitches across the rounded top. Sl st to first edging sc. FO with an 8 inch (20 cm) tail.
To cup the petal: Thread the tail through the first 3 edging stitches along the lower edge, pull very gently, and knot. The base narrows while the upper edge stays broad, giving that beautiful cupped poppy shape.
Medium Poppy Pattern (Make 4 to 5)
Each medium poppy needs 5 petals.
Medium Poppy Petals (Make 5 per flower)
With crimson thread:
Row 1: Ch 8. Sc in 2nd ch from hook and across. (7 sc)
Row 2: Inc, sc 5, inc. (9 sc)
Row 3: Inc, sc 7, inc. (11 sc)
Rows 4 and 5: Sc across. (11 sc)
Row 6: Dec, sc 7, dec. (9 sc)
Row 7: Dec, sc 5, dec. (7 sc)
Work the edging exactly as for the large petal, using the center 3 top stitches for the tiny ch 1 scallops.
Small Poppy Pattern (Make 5 to 7)
Each small poppy needs only 4 petals.
Small Poppy Petals (Make 4 per flower)
With crimson thread:
Row 1: Ch 6. Sc in 2nd ch from hook and across. (5 sc)
Row 2: Inc, sc 3, inc. (7 sc)
Row 3: Inc, sc 5, inc. (9 sc)
Row 4: Sc across. (9 sc)
Row 5: Dec, sc 5, dec. (7 sc)
Row 6: Dec, sc 3, dec. (5 sc)
Work the edging as above. For the smallest blossoms, you can omit the ch 1 scallops and use plain sc around the top curve for a simpler finish.
Black Stamen Ring (Make 1 per flower)
Round 1: With black thread, make a magic ring. Work 10 sc into the ring. Join with sl st. Pull the ring closed.
Round 2: Ch 1, work 2 sc in each stitch around. (20 sc) Join. FO leaving an 8 inch (20 cm) tail.
Adding stamen tips: Using ivory thread and a fine needle, make 12 to 16 tiny French knots around the outer half of the black disk. Alternatively, sew one 2 mm ivory bead at each selected point. Keep the tips irregular rather than perfectly evenly spaced for a natural look.
Raised Yellow Center (Make 1 per flower)
Round 1: With golden yellow thread, make a magic ring. Work 6 sc in the ring. Do not join.
Round 2: Inc in each stitch around. (12 sc)
Round 3: Working in BLO, sc around. (12 sc) FO, leaving a tail.
Stuff the tiny cup with the starting tail or a pinch of matching thread. Flatten it slightly, then sew it centered over the black stamen disk.
Assembling Each Poppy
Step 1: Lay petals in a circle with bases overlapping by about one third. Use 5 petals for large and medium flowers, 4 petals for small flowers.
Step 2: Using crimson tails, tack neighboring petal bases together. Do not stitch through the broad upper half of the petal.
Step 3: Set the black stamen disk over the joined petal bases and sew around its outer edge with black thread. The black disk should cover most joining stitches.
Step 4: Sew the yellow center on top. Gently curl alternating petal edges forward and back with your fingers for natural variation.
Closed Red Bud Pattern (Make 10 to 14)
Round 1: With crimson thread, make a magic ring. Work 6 sc.
Round 2: Inc around. (12 sc)
Rounds 3 through 5: Sc around. (12 sc)
Round 6: (Dec, sc 2) repeat 3 times. (9 sc)
Round 7: (Dec, sc 1) repeat 3 times. (6 sc)
Lightly stuff with thread tails. Cut yarn, thread through the 6 remaining front loops, pull closed, and secure. Shape into an oval rather than a ball.
Pointed Green Calyx
Join olive at the bud base. Ch 5, sl st in 2nd ch, sc, hdc, dc, then sl st to the next base point. Repeat 3 times to make three pointed sepals. FO, leaving a tail. The sepals should hug the lower third of the bud.
Narrow Veined Leaf Pattern (Three Sizes)
Small Leaf
Foundation: Ch 7
Round 1: Sl st, sc, hdc, dc, hdc, 3 sc in the last ch. Work down the other side: hdc, dc, hdc, sc, sl st.
Medium Leaf
Foundation: Ch 10
Round 1: Sl st, sc, hdc, dc 4 times, hdc, 3 sc in the last ch. Down the other side: hdc, dc 4 times, hdc, sc, sl st.
Large Leaf
Foundation: Ch 13
Round 1: Sl st, sc, hdc, dc 7 times, hdc, 3 sc in the last ch. Down the other side: hdc, dc 7 times, hdc, sc, sl st.
Adding the vein: Without fastening off, ch 1 and work surface slip stitches along the center foundation chain from base toward tip. FO with a 5 inch (13 cm) tail for sewing. For a more serrated look, place a tiny ch 1 picot at 2 or 3 points along each outer edge.
Tiny Side Leaf
Ch 5. Sl st in 2nd ch, sc, hdc, 3 sc in last ch. Work down other side: hdc, sc, sl st. FO. These little leaves are perfect near buds where a large leaf would look too heavy.
Building Bud and Leaf Sprigs
Step 1: Make a 3 to 5 inch (8 to 13 cm) branch stem.
Step 2: Sew one closed bud to the branch tip with olive thread, hiding the join beneath the calyx.
Step 3: Sew 1 to 3 leaves along the branch, alternating sides. Angle leaves 20 to 45 degrees away from the branch rather than laying them perfectly flat.
Step 4: For a natural botanical rhythm, combine one full bud, one tiny side leaf, and one medium leaf on most sprigs. Save the largest leaves for areas beside large poppies.
Final Assembly Guide
Before sewing anything permanently, arrange the cord over a loose half up braid or on a foam head. Pin all the motifs in place first. The vine should travel from the upper right crown diagonally toward the left back of the head, then descend with the braid toward the upper back.
Suggested Layout by Zone
Zone A (Right Crown Focal Cluster) 0 to 8 inches from crown end:
2 large poppies, 1 medium poppy, 2 small poppies, 3 to 4 buds, 5 to 7 leaves
Zone B (Diagonal Bridge) 8 to 16 inches:
1 medium poppy, 2 small poppies, 2 to 3 buds, 4 to 5 leaves
Zone C (Upper Braid Cascade) 16 to 23 inches:
1 large poppy, 2 medium poppies, 2 small poppies, 3 buds, 5 to 6 leaves
Zone D (Lower Cascade) 23 to 31 inches:
1 large poppy, 1 medium poppy, 1 to 2 small poppies, 3 to 4 buds, 4 to 6 leaves
Assembly Sequence
Step 1 – Anchor the focal crown flowers: Sew two large poppies near the crown end, offset rather than side by side. Add one medium poppy between and slightly below them.
Step 2 – Create the diagonal sweep: Add medium and small flowers 2 to 3 inches (5 to 8 cm) apart, rotating them so not every center faces the same direction. Fill gaps with short bud sprigs and medium leaves.
Step 3 – Build the upper cascade: Place one large poppy around the first third of the descending braid section. Surround it with 1 to 2 medium flowers, then taper into small blooms.
Step 4 – Finish the lower cascade: Place the final large poppy about 5 to 7 inches (13 to 18 cm) above the lower tip. Continue below it with small flowers, buds, and narrow leaves so the design ends delicately rather than abruptly.
Step 5 – Sew invisibly: Use olive thread for stem to vine joins and the matching flower color when sewing through petal bases. Stitch only through the back layers of motifs. Make 4 to 6 tiny attachment stitches per large flower and 2 to 4 per small motif.
Step 6 – Hide and secure ends: Weave each tail through dense stitches on the back for at least 0.75 inch (2 cm), reverse direction once, then trim. A tiny dot of washable fabric glue is optional.
Step 7 – Wear test: Bend the vine around the finished hairstyle. Add hidden bobby pin loops wherever the accessory lifts away from the hair.
Tips for a Natural Look
Keep roughly 60% of the visual weight in the crown and upper half. Let the lower half become progressively lighter and more delicate.
Do not line flowers up at equal intervals. Use clustered spacing, then small quiet gaps.
Let some leaves partly disappear behind flowers. Layering makes the piece look botanical rather than diagrammatic.
Turn 2 or 3 buds outward from the braid so their silhouettes remain visible.
Avoid sewing stems across the front surface of petals. All structural stitching should stay on the back.
Blocking and Shaping
Step 1: Pin leaves and petals on a blocking mat. Shape petal edges into soft, uneven curves and keep leaf tips sharp.
Step 2: Lightly mist with water. Allow cotton pieces to dry fully before assembly.
Step 3: Do not aggressively block the main vine straight. It should retain a soft natural curve.
Step 4: After assembly, use your fingers to re cup petals. If needed, place rolled tissue under petals overnight to encourage dimensional shape.
How to Secure in Hair
Position the vine after the braid or twist is complete. Use the long crown tail to tie discreetly around a small interior section of hair, then hide the knot.
Slide bobby pins through the optional crocheted loops and under the braid. Cross two pins at the crown for the strongest hold.
For very fine or slippery hair, sew 2 to 3 tiny clear elastic loops to the back of the vine and thread pins through them.
Care Instructions
Spot clean first whenever possible. If a full wash is needed, hand wash briefly in cool water with a small amount of mild detergent.
Do not wring. Roll in a towel, reshape every flower and leaf, and dry flat.
If beads are used, avoid soaking for long periods and check bead stitching before each wear.
Store flat in a shallow box with tissue supporting the cupped petals. Keep away from direct sunlight to protect the crimson color.
Troubleshooting Common Issues
Petals look stiff and square: Your hook may be too small or your edging too tight. Try a slightly larger hook, keep edging loose, and cup only the petal base.
Flowers flop forward: Add 2 to 3 hidden stitches through the black disk and vine cord.
Vine twists into a rope: Remake the cord with a larger hook or looser slip stitches.
Leaves curl strongly: Block while damp. On future leaves, relax stitches on the second side.
Accessory feels too heavy: Replace some large blooms with small flowers and buds. Make sure you are using thread weight cotton.
Final Thoughts on This Red Poppy Hair Vine Crochet Pattern
This project takes time, somewhere between 12 and 18 hours total. But every single one of those hours creates something truly special. The kind of piece that makes people gasp when they see it in your hair.
Take it slow. Make a few petals while watching your favorite show. Assemble one flower at a time. Before you know it, you will have a cascading vine of crimson poppies that looks like it came straight from a fairy tale.
Thank you so much for choosing this pattern. I truly hope you love making it as much as I loved designing it. If you create your own poppy hair vine, I would absolutely love to see it. Tag me on Instagram or share in my Facebook group. Nothing makes my day quite like seeing your beautiful finished pieces.
If this pattern caught your eye, go ahead and save it to your Pinterest boards so you can find it when you are ready to start. And please drop a comment below if you make one. I love hearing how your projects turn out and seeing where these little poppies end up blooming!
Want a Quick & Easy Printable Version?
Get a clean, beautifully formatted PDF of this pattern — easy to follow step by step, ready to print or save on any device. No scrolling, no distractions, just the pattern.
Get the Printable PDF →