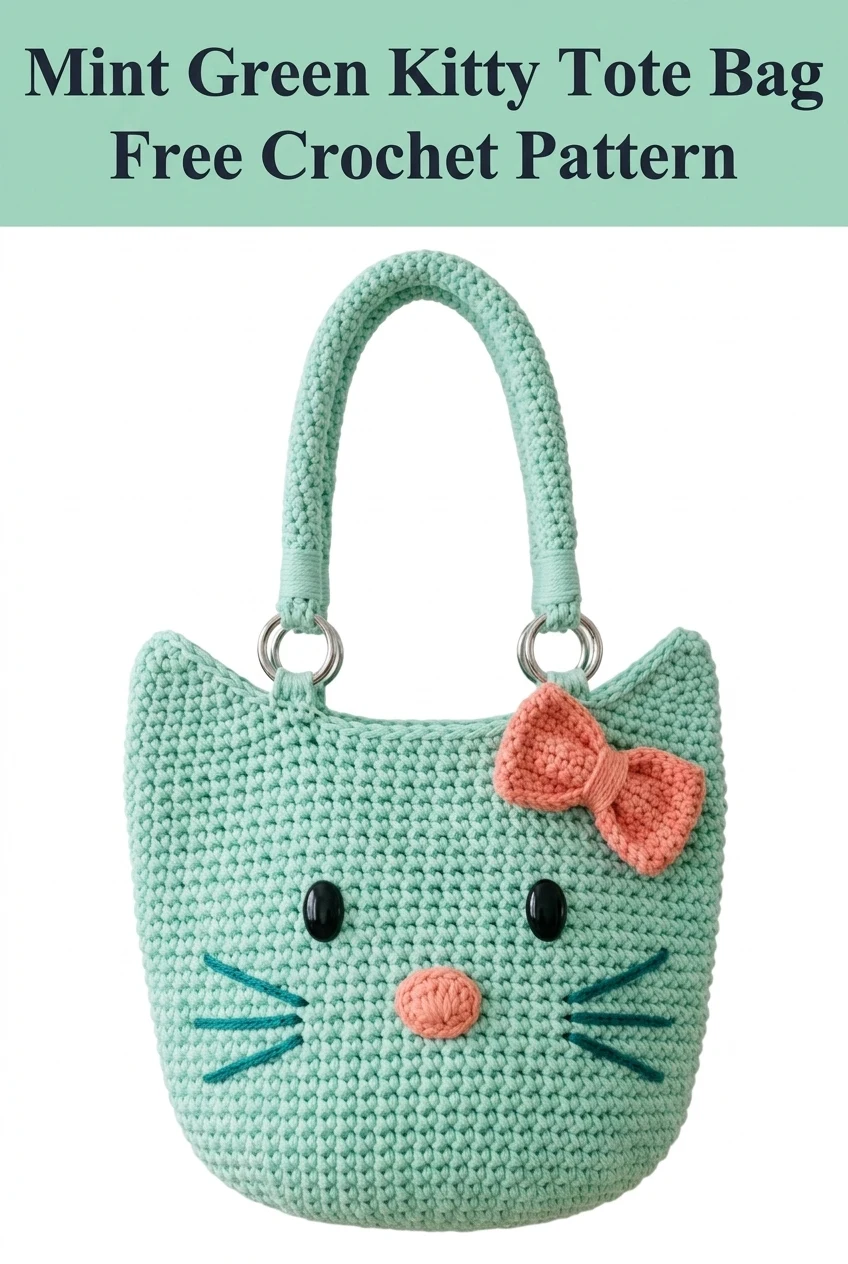
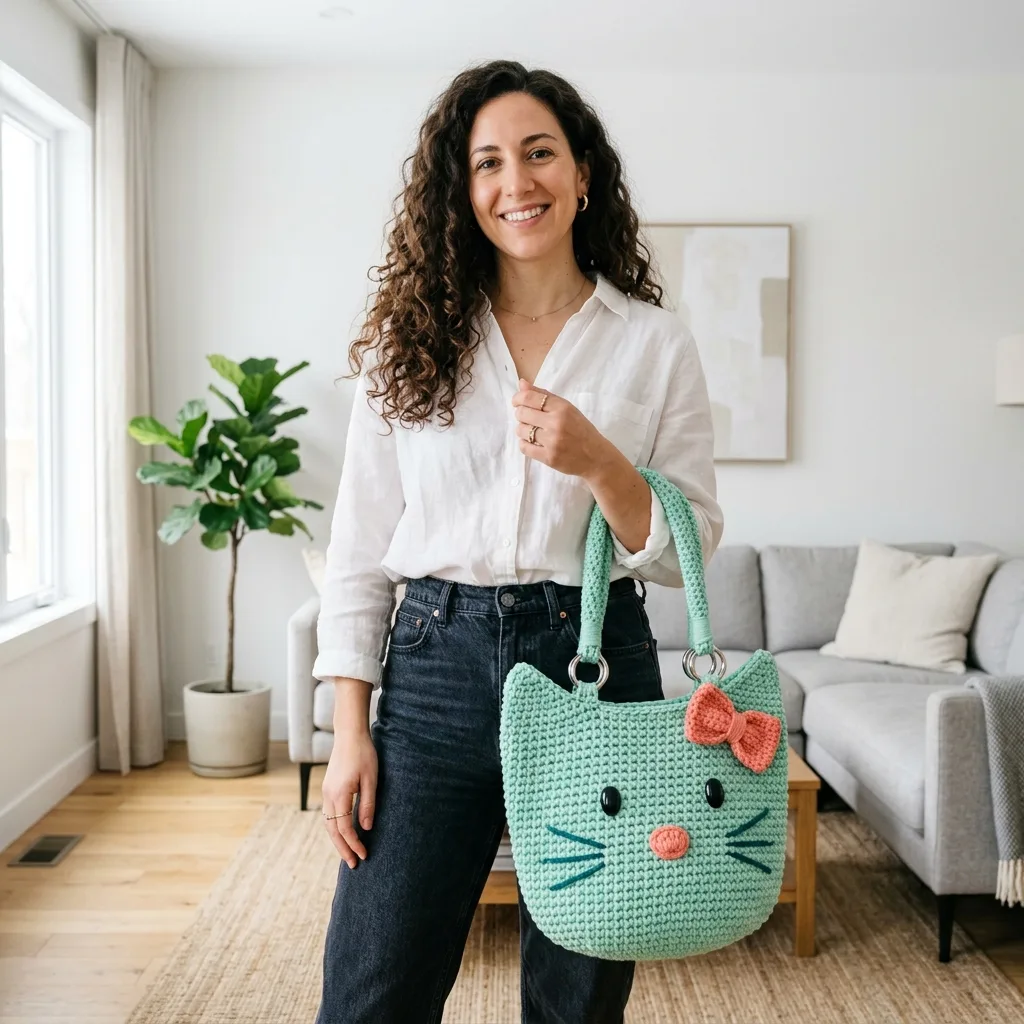
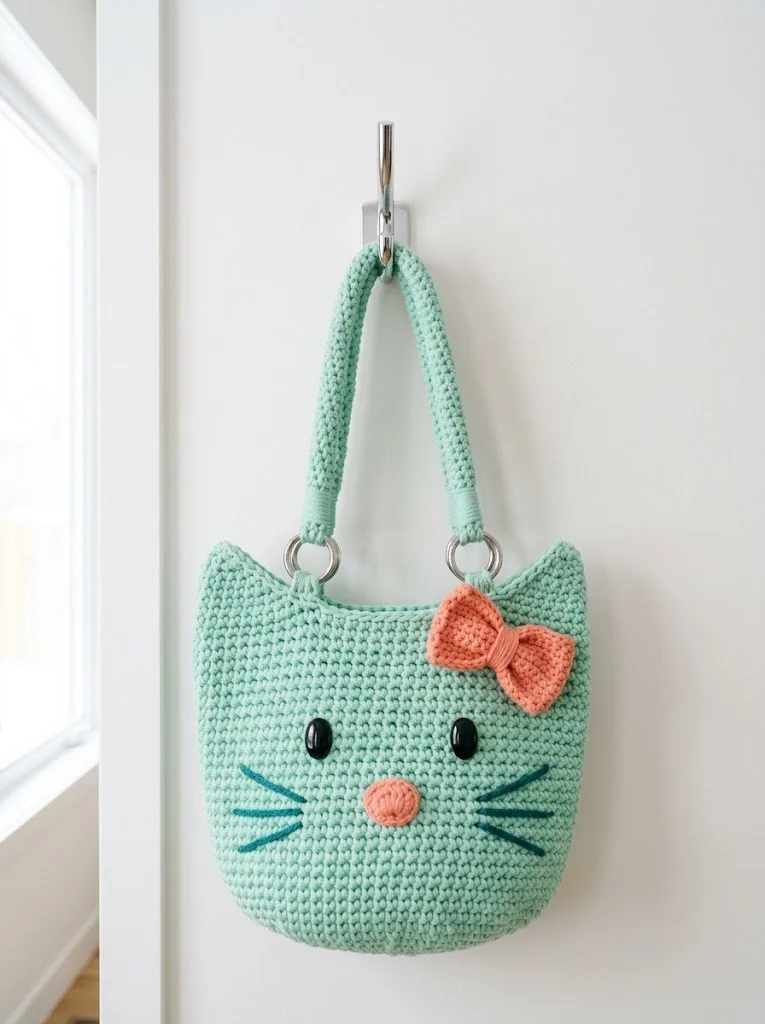
Looking for a practical everyday bag that doubles as an adorable conversation starter? This mint green kitty tote bag works up using basic single crochet stitches, making it perfect for confident beginners ready to tackle their first structured project. The roomy interior holds everything from groceries to craft supplies, while the sweet cat face brings a playful touch to any outfit. This pattern makes an unforgettable handmade gift for the cat lover in your life, and the sturdy construction means it will last for years of daily use.
Why You’ll Love This Crochet Kitty Tote Bag Pattern
This crochet tote bag combines function with pure charm. The mint green color feels fresh and modern, while the cat details add personality without being over the top. I love how the metal ring hardware gives it a polished, professional finish that elevates the whole design.
The bag body uses simple single crochet worked in continuous rounds, which creates that dense, sturdy fabric you need for a bag that will actually hold your stuff. No complicated stitch patterns to memorize here. If you can single crochet, you can make this bag.
What makes this kitty tote special:
Skill Level
Confident Beginner to Intermediate
You should be comfortable with single crochet worked in the round and basic increases. The construction involves making separate pieces and seaming them together, which requires some finishing skills. Don’t worry if you haven’t attached hardware before. I’ll walk you through it step by step.
Finished Dimensions
Materials Needed
Yarn
I recommend using 100% cotton yarn for this project. Cotton holds its shape beautifully, doesn’t stretch out over time, and creates that crisp, clean stitch definition you see in the photos. Acrylic will work in a pinch, but your bag may lose its structure with heavy use.
Hook
Notions
Gauge
14 stitches and 16 rows = 4 inches (10 cm) in single crochet
Take time to check your gauge. A tote bag that’s too loose will sag and stretch. A bag that’s too tight will be stiff and difficult to work. Your gauge should create a dense but flexible fabric.
Abbreviations
Stitch Tutorial: Single Crochet in Continuous Rounds
This bag is worked in continuous rounds, which means you don’t join at the end of each round. Instead, you spiral upward without stopping. Use a stitch marker in your first stitch of each round so you don’t lose track of where your rounds begin.
This technique creates a seamless fabric with no visible joining line. Perfect for bags!
Crochet Kitty Tote Bag Pattern Instructions
Bag Base
The base is worked in an oval shape using increases at each end.
With mint green yarn and 5.0 mm hook:
Ch 21
Rnd 1: Starting in the 2nd ch from hook, sc in the next 19 ch, 3 sc in the last ch (this is the curved end). Working along the opposite side of the foundation chain, sc in the next 19 ch, 2 sc in the last ch. Place marker. (44 sts)
Rnd 2: Inc in the first st, sc in the next 19 sts, inc in each of the next 3 sts, sc in the next 19 sts, inc in each of the last 2 sts. (50 sts)
Rnd 3: Sc in the first st, inc in the next st, sc in the next 19 sts, (sc in the next st, inc in the next st) 3 times, sc in the next 19 sts, (sc in the next st, inc in the next st) 2 times. (56 sts)
Rnd 4: Sc in the next 2 sts, inc in the next st, sc in the next 19 sts, (sc in the next 2 sts, inc in the next st) 3 times, sc in the next 19 sts, (sc in the next 2 sts, inc in the next st) 2 times. (62 sts)
Rnd 5: Sc in the next 3 sts, inc in the next st, sc in the next 19 sts, (sc in the next 3 sts, inc in the next st) 3 times, sc in the next 19 sts, (sc in the next 3 sts, inc in the next st) 2 times. (68 sts)
Your base should now measure approximately 4 inches wide by 8 inches long.
Bag Body
Now we work straight up without increases to create the walls.
Rnd 6: Working in the back loops only for this round, sc in each st around. (68 sts)
This back loop round creates a defined edge where the base meets the sides.
Rnds 7-46: Sc in each st around. (68 sts)
Continue in continuous rounds for 40 rounds total, or until your bag body measures approximately 10 inches from the base.
Rnd 47: Sl st in the next st. FO and weave in ends.
Cat Ears (Make 2)
With mint green yarn and 5.0 mm hook:
Row 1: Ch 12, sc in the 2nd ch from hook and in each ch across. (11 sts)
Row 2: Ch 1, turn. Sc2tog (insert hook in first st, pull up loop, insert hook in next st, pull up loop, yarn over, pull through all 3 loops), sc in the next 7 sts, sc2tog over the last 2 sts. (9 sts)
Row 3: Ch 1, turn. Sc2tog, sc in the next 5 sts, sc2tog. (7 sts)
Row 4: Ch 1, turn. Sc2tog, sc in the next 3 sts, sc2tog. (5 sts)
Row 5: Ch 1, turn. Sc2tog, sc in the next st, sc2tog. (3 sts)
Row 6: Ch 1, turn. Sc3tog (insert hook in each of 3 sts, pulling up a loop each time, yarn over, pull through all 4 loops). (1 st)
FO, leaving a long tail for sewing.
Bow
With coral yarn and 5.0 mm hook:
Bow Center:
Ch 4
Row 1: Sc in the 2nd ch from hook and in each ch across. (3 sts)
Rows 2-6: Ch 1, turn. Sc in each st across. (3 sts)
FO, leaving a tail.
Bow Loops (Make 2):
Ch 9
Row 1: Sc in the 2nd ch from hook and in each ch across. (8 sts)
Rows 2-4: Ch 1, turn. Sc in each st across. (8 sts)
FO, leaving a tail.
Assembling the Bow:
Fold each bow loop piece in half to create a loop shape. Stack both loops with ends together. Wrap the bow center piece tightly around the middle, covering the raw edges. Stitch in place on the back.
Nose
With coral yarn and 5.0 mm hook:
Ch 2
Rnd 1: 6 sc in the 2nd ch from hook. Place marker. (6 sts)
Rnd 2: Inc in each st around. (12 sts)
Rnd 3: Sc in each st around. (12 sts)
Sl st in the next st. FO, leaving a long tail. Flatten slightly into an oval or triangle shape for a cute cat nose look.
Handles (Make 2)
With mint green yarn and 5.0 mm hook:
Ch 61
Row 1: Sc in the 2nd ch from hook and in each ch across. (60 sts)
Rows 2-4: Ch 1, turn. Sc in each st across. (60 sts)
FO, leaving a long tail.
Fold the handle in half lengthwise, wrong sides together. Whip stitch or slip stitch the long edges together to create a tube. This gives your handles body and strength.
Assembly Instructions
Step 1: Attach the Eyes
Position the safety eyes on the front of the bag, approximately 3 inches down from the top edge. Space them about 3 inches apart. The eyes should sit in the upper third of the bag face. Once you’re happy with placement, secure the backs inside the bag.
Tip: If using buttons instead of safety eyes, sew them on securely with matching thread.
Step 2: Embroider the Whiskers
Using teal yarn and your yarn needle, embroider 3 whiskers on each side of the face. Each whisker should be approximately 1.5 inches long. Work them at a slight downward angle, radiating from where the nose will sit.
Use a simple straight stitch or backstitch for clean lines.
Step 3: Attach the Nose
Center the nose below and between the eyes, approximately 1 inch down. Whip stitch in place using your yarn tail.
Step 4: Attach the Ears
Position the ears at the top corners of the bag, angling them outward slightly like real cat ears. The base of each ear should overlap the top edge of the bag by about half an inch. Whip stitch securely along the bottom edge of each ear.
Step 5: Attach the Bow
Position the bow on the right side of the bag (as you look at the face), near the base of the right ear. Stitch securely in place.
Step 6: Attach the Metal Rings
Fold the end of one handle over a metal O-ring by about 1 inch. Stitch the folded section to the handle body. This creates a secure loop around the ring.
Repeat for both ends of both handles.
Step 7: Attach Handles to the Bag
Position the metal rings at the top corners of the bag, just beside each ear. Stitch the rings securely to the bag using matching yarn. Reinforce your stitches here. The handles will bear weight, so they need to be sturdy.
Pattern Customization Ideas
Change the face: Try different eye placements, add eyelashes with embroidery, or create a sleepy cat with closed eyes using curved stitches.
Add a lining: For extra durability, sew a fabric lining inside. This also hides your yarn ends and prevents items from catching on stitches.
Switch the colors: Try classic black with a red bow, white with a pink bow, or go wild with rainbow stripes.
Skip the hardware: If you don’t have metal rings, simply sew the handles directly to the bag body.
Helpful Tips for Success
Keep your tension consistent. Uneven tension will create a lopsided bag. Take breaks if you notice your stitches getting tighter or looser.
Block your pieces. Wet blocking your finished bag helps even out stitches and gives it a polished look.
Reinforce the handles. Consider sewing a strip of grosgrain ribbon inside each handle for extra strength.
Stuff with tissue paper. When not in use, stuff your bag lightly to help it keep its shape.
Why Cotton Yarn Works Best for Crochet Bags
Cotton yarn is the gold standard for crochet bags because it doesn’t stretch the way acrylic does. Over time, an acrylic bag loaded with heavy items will sag and lose its shape. Cotton stays firm. It also has a beautiful matte finish that shows off your stitches.
If you want a bit of stretch, look for a cotton blend with a small percentage of acrylic or polyester. This gives you the best of both worlds.
Wrapping Up Your Kitty Tote Bag Crochet Pattern
You did it! This crochet kitty tote bag pattern creates something truly special. A handmade accessory that’s as functional as it is adorable. Whether you made it for yourself or as a gift, this bag is sure to bring smiles everywhere it goes.
Thank you so much for choosing this pattern. I hope you loved making it as much as I loved designing it. If you’d like to share your finished bag, tag me on Instagram or post a photo in our Facebook community. I’d absolutely love to see your version!
Save this crochet tote bag pattern to your Pinterest boards so you can find it whenever you’re ready to start. And if you make this kitty bag, please drop a comment below. I’d love to hear how it turned out and see your color choices!
