
Last summer, my best friend called me in a panic three days before her birthday trip to wine country. She wanted something flirty and feminine that would look amazing in photos but still feel like her. Every store option was either too plain or wildly expensive. So I grabbed my hooks, a pile of forest green cotton, and got to work.
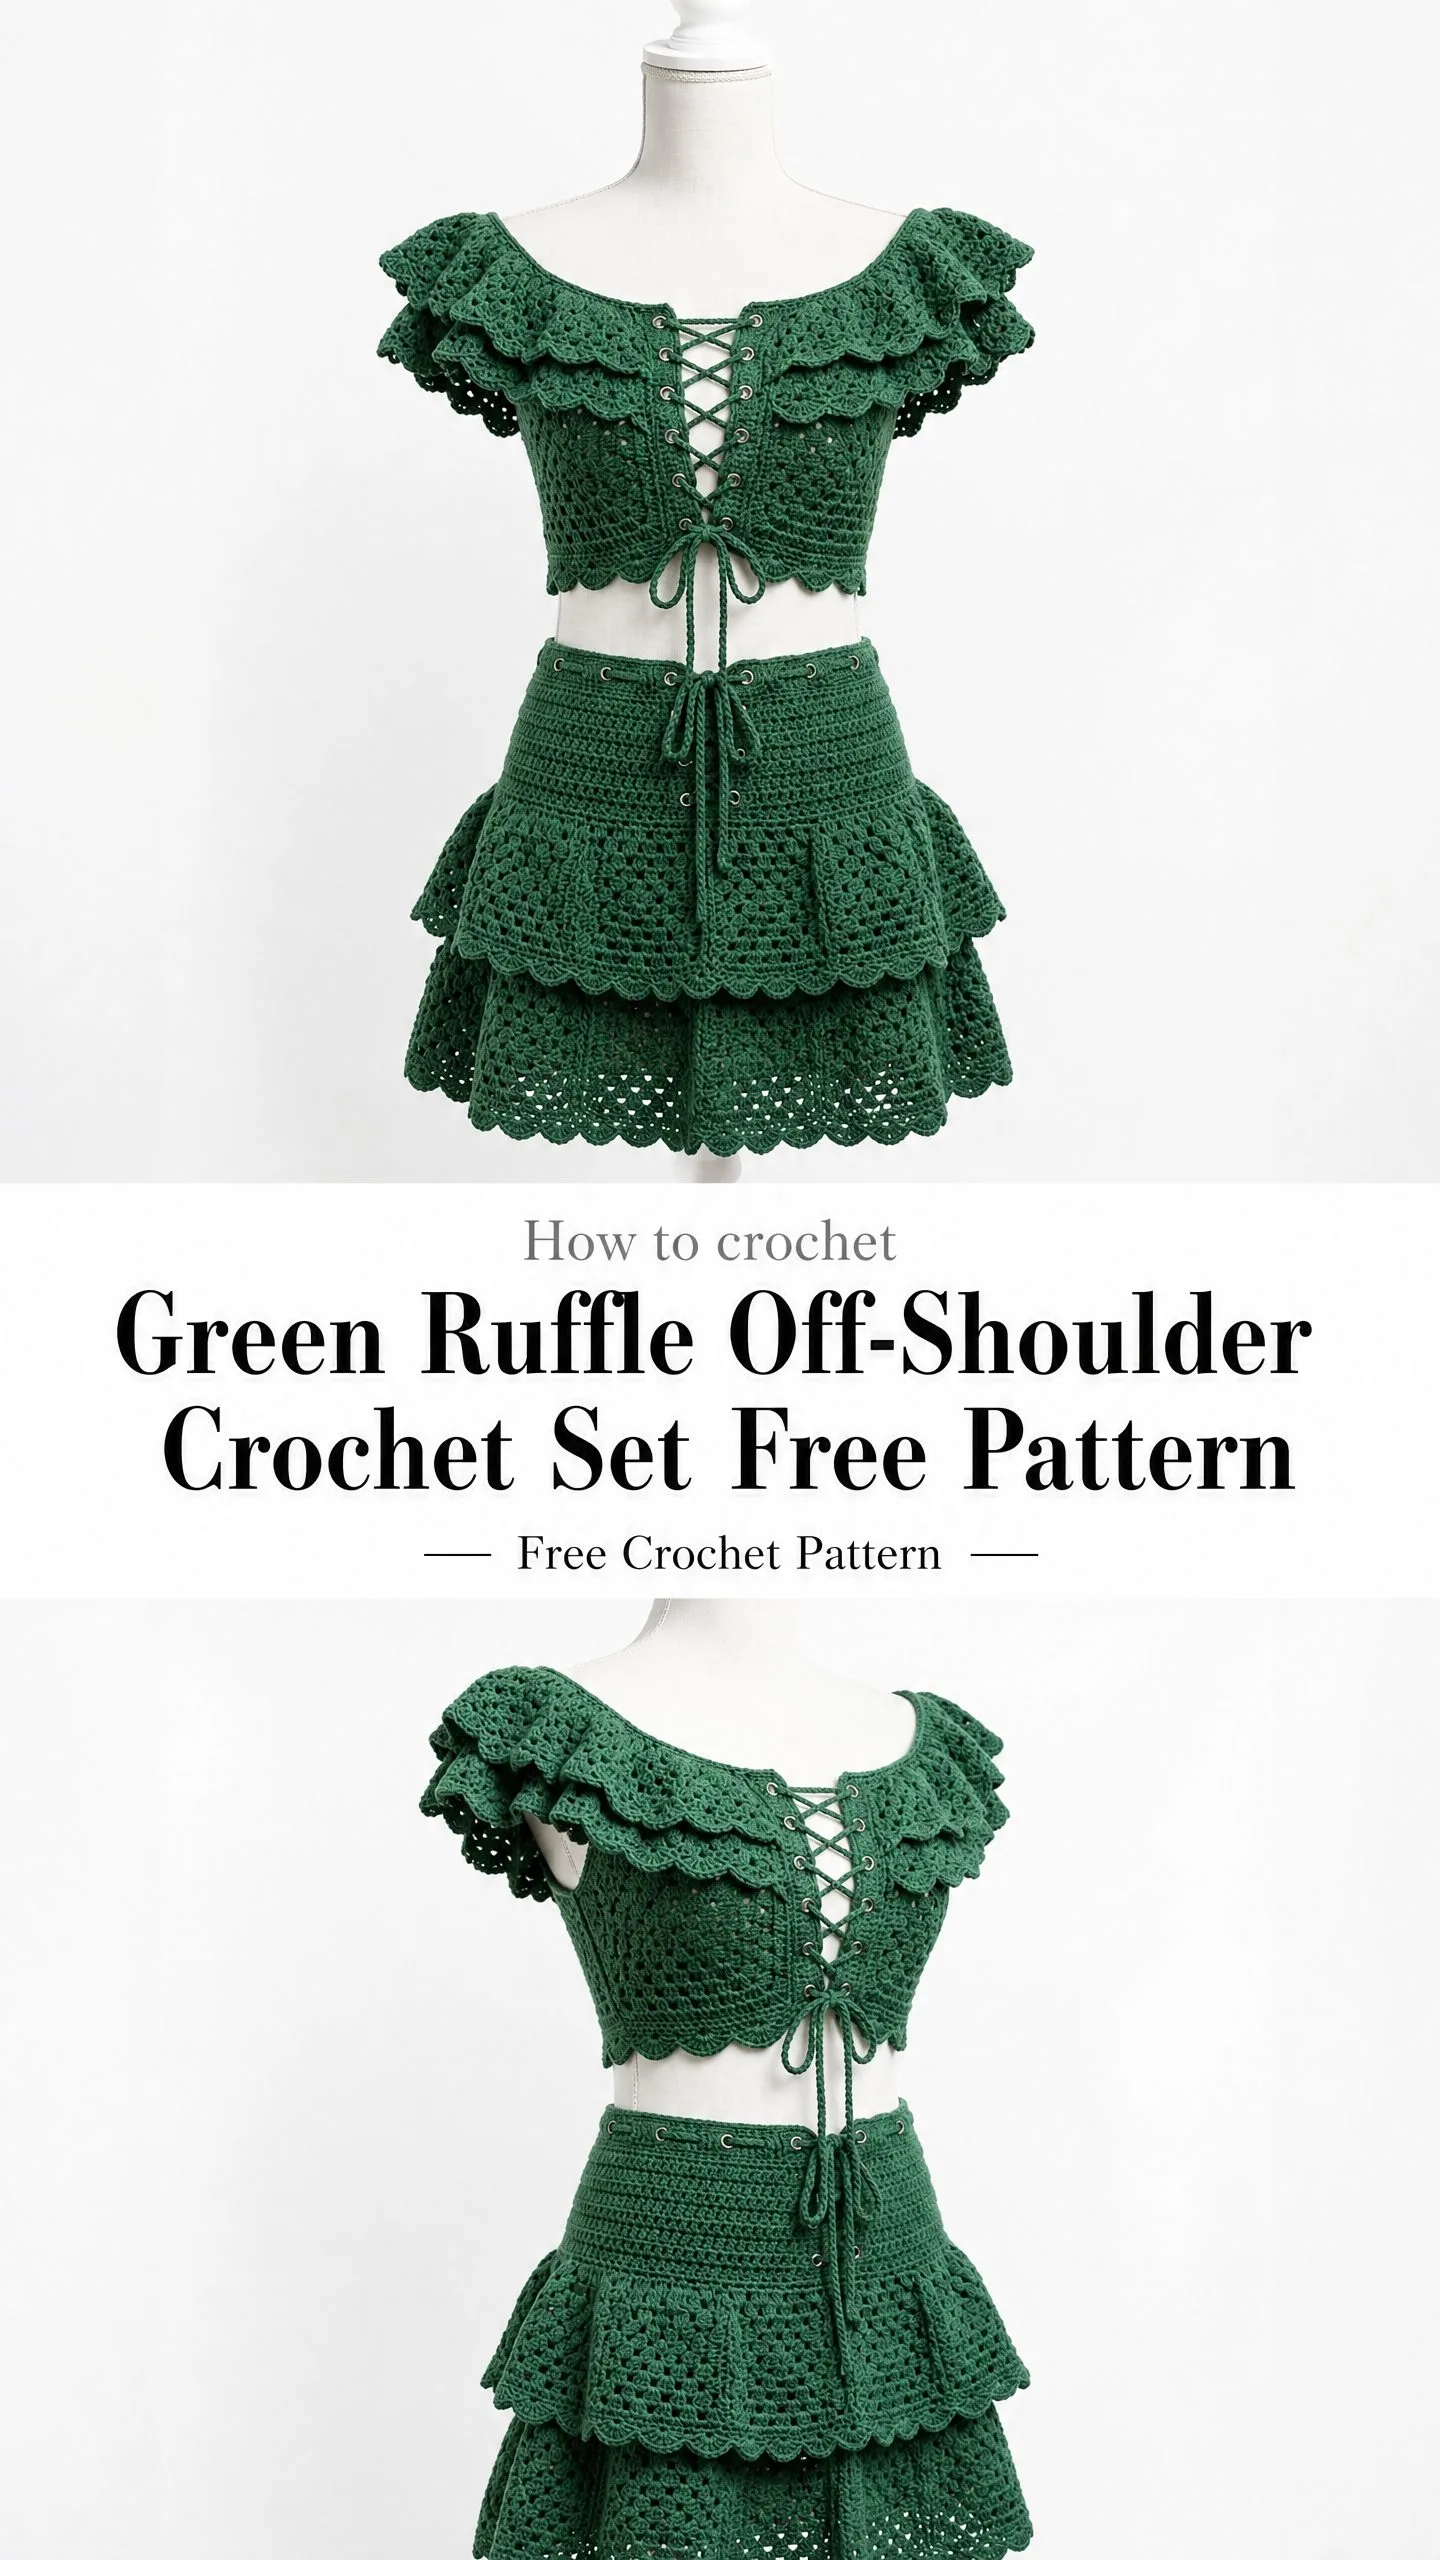
That frantic weekend project turned into this two-piece set. A ruffled off-shoulder crop top with a romantic lace-up front, paired with a tiered ruffle mini skirt that moves beautifully when you walk. My friend wore it with sandals and gold jewelry, and honestly? She looked like she stepped out of a cottagecore dream.
Now I’m sharing the full pattern with you. Fair warning, this is not a quick weekend project. But if you’re ready to level up your garment-making skills and create something truly stunning, keep reading.
About This Crochet Set Pattern
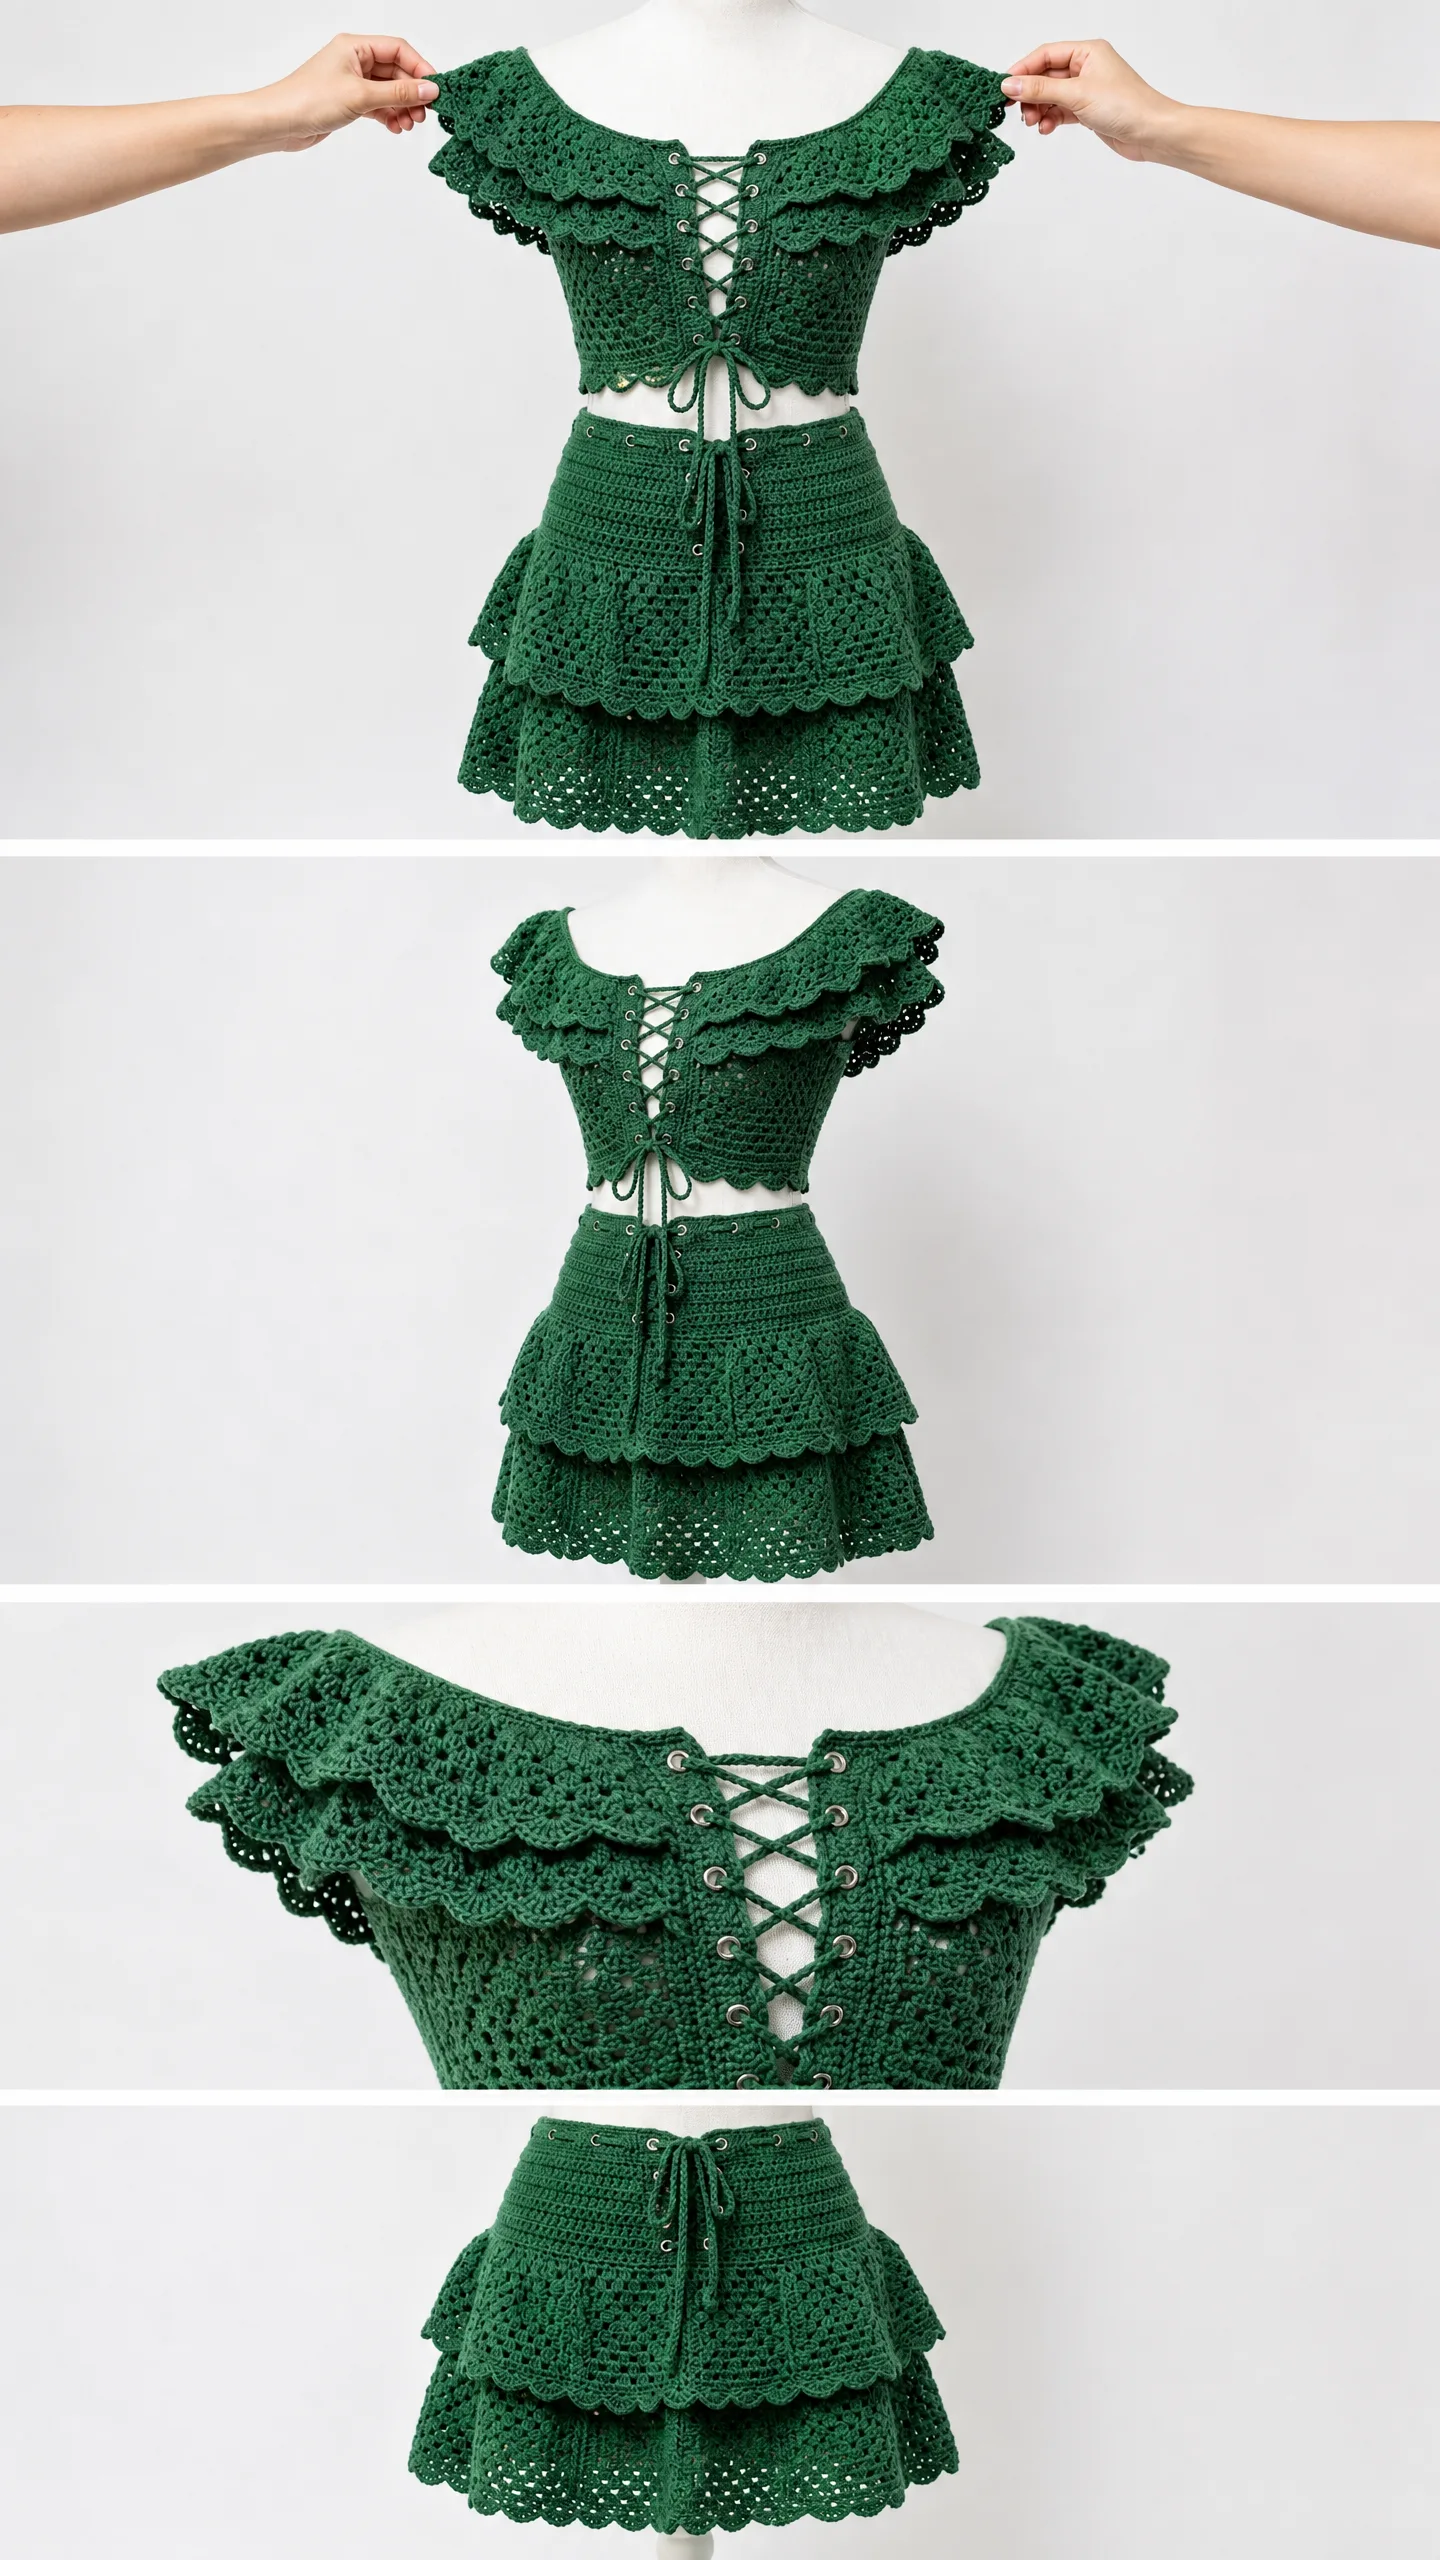
This coordinating two-piece features some seriously gorgeous details. The crop top has a fitted bodice worked in shell stitch, a dramatic double-layered ruffle collar that sits off the shoulders, and a lace-up front closure with metal grommets. The mini skirt has a ribbed high waistband with its own lace-up detail, plus three cascading tiers of ruffles that get progressively wider as they descend.
Both pieces are worked in forest green DK weight cotton yarn. The color photographs beautifully and the cotton fiber gives the structured drape you need for garment construction. Every single ruffle tier ends with a delicate scalloped edge that adds that professional, polished finish.
The stitch combination includes single crochet (sc), half double crochet (hdc), double crochet (dc), and the star of the show, the shell stitch. If you’ve never worked shell stitch before, don’t worry. I’ll walk you through it completely.
Skill Level and Time Commitment
Let me be honest with you. This pattern is rated intermediate to advanced. You should feel confident working in the round, shaping with increases and decreases, seaming pieces together, and following detailed row-by-row instructions.
The estimated time for the complete set is 30 to 45 hours depending on your experience level and working speed. I recommend breaking it into sessions. Do the crop top first, then tackle the skirt. Celebrate each finished tier.
If you’re a determined beginner who wants to stretch your skills, you can absolutely do this. Just take it slow, read ahead before each section, and don’t be afraid to use stitch markers generously.
Finished Measurements
The pattern is written for size Small (US 4 to 6) with notes throughout for adjusting to Medium (US 8 to 10) and Large (US 12 to 14).
Crop Top:
Mini Skirt:
Materials Needed
Yarn:
Yarn Suggestions:
1. Lion Brand 24/7 Cotton in Jade (100% cotton, 186 yds per 3.5 oz skein), approximately 8 skeins. This yarn has excellent stitch definition and drape.
2. Paintbox Yarns Simply DK (100% cotton, 137 yds per 1.76 oz skein), approximately 11 skeins. Consistent twist shows shell stitch detail beautifully.
3. WeCrochet Comfy DK (75% pima cotton / 25% acrylic, 218 yds per 3.5 oz skein), approximately 7 skeins. The acrylic content adds slight stretch for better fit.
Substitution Note: Choose any DK weight yarn that achieves gauge. Cotton or cotton-blend is strongly recommended. Avoid yarn with excessive halo or texture, as it will obscure the shell and eyelet stitch detail.
Hooks:
Notions:
Gauge
With E-4 hook and DK cotton:
Gauge is critical for garment fit. Make a 5 in x 5 in gauge swatch, block it, and measure before beginning. I know swatching isn’t the fun part, but trust me on this one.
Abbreviations (US Terms)
Special Stitches
Shell Stitch
Work 5 dc all into the same stitch or space. This creates a fan-shaped cluster. Insert hook into the designated stitch, yarn over, pull up a loop, complete the first dc, then work 4 more dc into that exact same stitch without moving to a new stitch.
Scallop Edging
Step 1: Sl st into first st.
Step 2: Ch 1, sc into the same st.
Step 3: Skip 1 st, work 5 dc into the next st to create a shell.
Step 4: Skip 1 st, sc into the next st.
Step 5: Repeat steps 3 and 4 across or around.
Step 6: Join with sl st to the first sc.
This creates the beautiful wave finish on every ruffle hem.
V-Stitch
Work (dc, ch 1, dc) all into the same stitch or space. This open stitch appears in the eyelet sections.
Pattern Notes Before You Begin
Please read through the entire pattern before starting. Trust me, future you will thank present you.
The crop top is constructed from the bottom hem upward. The main bodice is worked flat (back and forth in rows) to create the lace-up front opening. The ruffle collar is picked up and worked outward from the neckline after the bodice is complete.
The skirt is worked in the round from the waistband down. The waistband is worked flat first, then seamed into a ring. Each ruffle tier is picked up from the lower edge of the tier above it.
Size adjustments for M and L appear in brackets throughout as [M / L]. Where only one number appears, it applies to all sizes.
Stitch counts in parentheses at the end of each row or round represent the total working stitches, not including turning chains unless stated.
When working the turning chain for dc rows, ch 3 counts as the first dc throughout this pattern unless otherwise noted.
Crop Top Instructions
Bodice
The bodice is worked flat from the lower hem edge upward to the neckline.
Foundation Chain:
Chain 146 [164 / 182].
Row 1 (RS): Sc in the 2nd ch from hook and in each ch across. Turn. (145 sc) [163 sc / 181 sc]
Row 2 (WS): Ch 1, sc in each st across. Turn. (145) [163 / 181]
Row 3 (RS): Ch 1, sc in each st across. Turn. (145) [163 / 181]
Row 4 (WS): Ch 1, sc in each st across. Turn. (145) [163 / 181]
These 4 rows establish the lower hem band. The fabric should measure approximately 0.75 in (2 cm) tall.
Begin shell stitch body panel:
Row 5 (RS): Ch 3 (counts as dc here and throughout), sk 2 sts, work shell in next st, sk 2 sts, dc in next st, (sk 2 sts, shell in next st, sk 2 sts, dc in next st) across. Turn.
For S: 24 shells with dc posts between.
For M: 27 shells with dc posts between.
For L: 30 shells with dc posts between.
Row 6 (WS): Ch 3, (shell in the center dc of each shell below, dc in the dc post between shells) across, ending dc in top of t-ch. Turn.
Rows 7 through 14: Rep Row 6 eight more times. The bodice panel body should now measure approximately 5 in (12.5 cm) from the base of Row 5.
CHECKPOINT: After Row 14, the bodice should measure approximately 6 in (15 cm) total height including the 4-row hem band.
Upper Bodice Shaping
Row 15 (RS): Ch 3, (shell in center dc of each shell, dc between shells) across through the first 2 repeats, then dc2tog over the center dc of the 3rd shell and the dc post after it, continue pattern across, performing dc2tog decreases to reduce by 2 shell units total (one at each side seam position). Turn.
S result: 22 shells. (133)
M result: 25 shells. (151)
L result: 28 shells. (169)
Row 16 (WS): Work even in established pattern. Turn. (133) [151 / 169]
Row 17 (RS): Work even in established pattern. Turn. (133) [151 / 169]
Row 18 (WS): Work even in established pattern. Turn. (133) [151 / 169]
CHECKPOINT: After Row 18, the bodice should measure approximately 8.5 in (21.5 cm) total.
Neckline Edge Preparation
Row 19 (RS): Ch 1, sc across entire top edge working 1 sc into each dc and 1 sc into the center dc of each shell (do not sc into all 5 shell dc; pick up only the center one for a clean edge). Turn.
S: (89 sc) [M: 101 sc / L: 113 sc]
Row 20 (WS): Ch 1, sc in each st across. Turn. (89) [101 / 113]
Do not fasten off. Leave a long tail and place on stitch holder. The neckline stitches will be picked up for the ruffle collar construction.
Side Seams
Fold the bodice piece so that the two side edges meet. Seam each side using mattress stitch or sl st seam, leaving the front opening unsewn. This creates the tube bodice with a front lace-up gap of approximately 2 in (5 cm) visible when the lace is closed.
Ruffle Collar
The ruffle collar is picked up from the neckline edge and worked outward. The collar consists of two ruffle layers.
Collar Base Round:
With RS of neckline facing, attach yarn at right shoulder edge. Ch 1, work 1 sc in each neckline st all the way around the full neckline circumference, joining with sl st to first sc.
S: (89 sc) [M: 101 sc / L: 113 sc]
Collar Round 1 (increase for first ruffle layer):
Ch 3, work 2 dc in each sc around. Join with sl st to top of ch-3. (178 dc) [202 dc / 226 dc]
Collar Round 2:
Ch 3, dc in each dc around. Join. (178) [202 / 226]
Collar Round 3 (scallop edge for first ruffle layer):
Work scallop edging around entire collar edge. The stitch count must be divisible by 4.
For S: Adjust to 176 dc by working sc2tog at 2 evenly spaced points in Round 2. 176 / 4 = 44 scallop repeats.
For M: Adjust to 200 dc. 200 / 4 = 50 scallop repeats.
For L: Adjust to 224 dc. 224 / 4 = 56 scallop repeats.
Fasten off first ruffle layer.
Second Ruffle Layer
Return to Collar Base Round. Working into the BLO of the original neckline sts:
Second Collar Round 1:
Ch 3, (2 dc in next st, dc in next st) around to create a graduated increase. Join.
S: (134 dc) [M: 152 dc / L: 170 dc]
Second Collar Round 2:
Ch 3, dc in each dc around. Join. (134) [152 / 170]
Second Collar Round 3 (scallop):
S: Adjust to 132 dc. 132 / 4 = 33 scallop repeats.
M: 152 / 4 = 38 scallop repeats.
L: Adjust to 168 dc. 168 / 4 = 42 scallop repeats.
Fasten off.
Crop Top Lower Hem Finishing
With RS facing, join yarn at the bottom of the bodice. Work 1 round of scallop edging along the lower edge using the foundation chain loops.
S: 144 / 4 = 36 scallop repeats.
M: 164 / 4 = 41 scallop repeats.
L: 180 / 4 = 45 scallop repeats.
Fasten off.
CHECKPOINT: The completed top should measure approximately 9 in (23 cm) from lower hem scallop to the top of the neckline, and the two ruffle collar layers should extend approximately 2.5 in (6.5 cm) above the main bodice.
Lace-Up Front Opening
After blocking, install 8 grommets evenly spaced down the left-front edge and 8 grommets down the right-front edge (16 grommets total). Space them beginning 0.5 in from the top and bottom, with remaining grommets approximately 1 in apart.
Mini Skirt Instructions
Waistband
The waistband is worked flat in rows using the D-3 (3.25 mm) hook, then seamed to form a band.
Foundation Chain:
Chain 19.
Waistband Row 1: Hdc in the 3rd ch from hook and in each ch across. Turn. (17 hdc)
Waistband Rows 2 through 116 [130 / 148]: Ch 2, hdc in BLO of each st across. Turn. (17 hdc each row)
After all rows, the waistband strip should measure:
S: approximately 26 in (66 cm)
M: approximately 30 in (76 cm)
L: approximately 34 in (86 cm)
Seam the two short ends together using sl st seam, leaving a 2 in (5 cm) gap for the front lace-up opening. Install 5 grommets on each side of the gap (10 grommets total for the skirt).
Skirt Body Tier 1 (Upper Tier)
Switch to E-4 (3.5 mm) hook.
Pickup Round: Join yarn at side seam, ch 1, work 1 sc in each row-end st along the bottom of the waistband all the way around.
S: (116 sc) [M: 130 sc / L: 148 sc]
Tier 1, Round 1:
Ch 3, work 2 dc in each sc around. Join.
S: (232 dc) [M: 260 dc / L: 296 dc]
Tier 1, Round 2:
Ch 3, dc in each dc around. Join. (232) [260 / 296]
Tier 1, Round 3:
Ch 3, dc in each dc around, adjusting stitch count for shell pattern divisibility. Work sc2tog as needed.
Corrected counts: S: (228 dc) [M: 258 dc / L: 294 dc]
Tier 1, Round 4 (shell pattern):
Ch 3, sk 2, shell in next st, sk 2, dc in next st, repeat around. Join.
S: 38 shell repeats.
M: 43 shell repeats.
L: 49 shell repeats.
Tier 1, Rounds 5 and 6:
Shell in center dc of each shell, dc between shells, around. Join.
Tier 1 Scallop Hem:
Work scallop edging around. Adjust to nearest multiple of 4 if needed.
S: 57 scallops. M: 64 scallops. L: 73 scallops.
Fasten off Tier 1.
Skirt Body Tier 2 (Middle Tier)
Pick up yarn at Tier 1 Round 3, working into FLO.
Tier 2 Pickup Round:
Ch 1, sc in each FLO around.
S: (228 sc) [M: 256 sc / L: 292 sc]
Tier 2, Round 1:
Ch 3, (2 dc in next st, dc in next st) rep around. This increases by 50%.
S: (342 dc) [M: 384 dc / L: 438 dc]
Tier 2, Round 2:
Ch 3, dc in each dc around, adjusting for shell divisibility.
S: (340 dc) [M: 384 dc / L: 436 dc]
Tier 2, Round 3 (shell):
Ch 3, (sk 2, shell in next, sk 2, dc in next) around. Join.
S: 57 repeats. M: 64 repeats. L: 73 repeats.
Tier 2, Rounds 4 and 5:
Work even in shell pattern. Join.
Tier 2 Scallop Hem:
S: 85 scallops. M: 96 scallops. L: 109 scallops.
Fasten off Tier 2.
Skirt Body Tier 3 (Lower Tier)
Pick up yarn at Tier 2 Round 2, working into FLO.
Tier 3 Pickup Round:
Ch 1, sc in each FLO around, adjusting count for clean doubling.
S: (339 sc) [M: 384 sc / L: 432 sc]
Tier 3, Round 1:
Ch 3, (2 dc in each st) around. Doubles the stitch count for maximum flare.
S: (678 dc) [M: 768 dc / L: 864 dc]
Tier 3, Round 2:
Ch 3, dc in each dc around. Join. (678) [768 / 864]
Tier 3, Rounds 3 through 6 (shell pattern):
Ch 3, (sk 2, shell in next, sk 2, dc in next) around. Work 4 rounds total of shell pattern.
S: 113 repeats. M: 128 repeats. L: 144 repeats.
Tier 3 Scallop Hem:
Adjust to nearest multiple of 4. S: 169 scallops. M: 192 scallops. L: 216 scallops.
Fasten off Tier 3.
CHECKPOINT: Total skirt length from waistband top to Tier 3 scallop hem should measure approximately 14 in (35.5 cm).
Size Customization Tips
To adjust the crop top for a different bust measurement: Calculate your bust circumference, divide by 4 in (10 cm), and multiply by 18 sc to get your foundation stitch count. The count minus 1 must be divisible by 6 for the shell repeat.
To lengthen the crop top: Add additional shell pattern rows between Row 14 and Row 15.
To adjust the skirt waist: Each waistband row corresponds to approximately 0.225 in (0.57 cm). Divide your waist measurement by 0.225 to determine the number of rows needed.
To lengthen the skirt: Add additional shell pattern rounds to any or all tiers before working the scallop hem.
Finishing and Blocking
Weave in all yarn tails securely using a tapestry needle, working the tail through at least 1 in of stitches in two directions.
Wet block both pieces by submerging in cool water, gently squeezing out excess water without wringing, then laying flat on blocking mats. Pin each piece to the finished measurements. Allow to dry completely, which may take 12 to 24 hours.
Once fully dry, install the metal grommets at the marked positions using the grommet setting tool and hammer. Test each grommet to ensure it is fully crimped.
Thread the lace cord through the grommets in a criss-cross pattern starting from the bottom, ending with a bow at the neckline of the top and at the waistline of the skirt.
Care Instructions
Hand wash in cool water with gentle soap. Do not wring or twist. Press gently between clean towels to remove moisture. Lay flat to dry away from direct sunlight. Do not tumble dry. Steam block lightly from a distance if needed. Store folded, not hung, to prevent stretching.
Final Thoughts on This Crochet Set Pattern
This green ruffle off-shoulder crochet set is definitely a labor of love. But when you slip it on for the first time and see those ruffles cascade perfectly, feel that fitted bodice hug you just right, and tie those laces into a pretty bow? Worth every single stitch.
My friend still gets compliments on hers two years later. I hope this pattern brings you the same joy it brought her.
If you loved making this pattern, I’d be thrilled if you saved it to your Pinterest boards so you can find it again later, or so other crafters can discover it too. And please leave a comment below if you make your own version. I genuinely love seeing what you create!
