
This is one of the MOST impressive crochet projects you can make, and honestly? It is way easier than it looks. If you have ever wanted to create a statement piece that stops people in their tracks, this granny square hooded cardigan is exactly what you need.
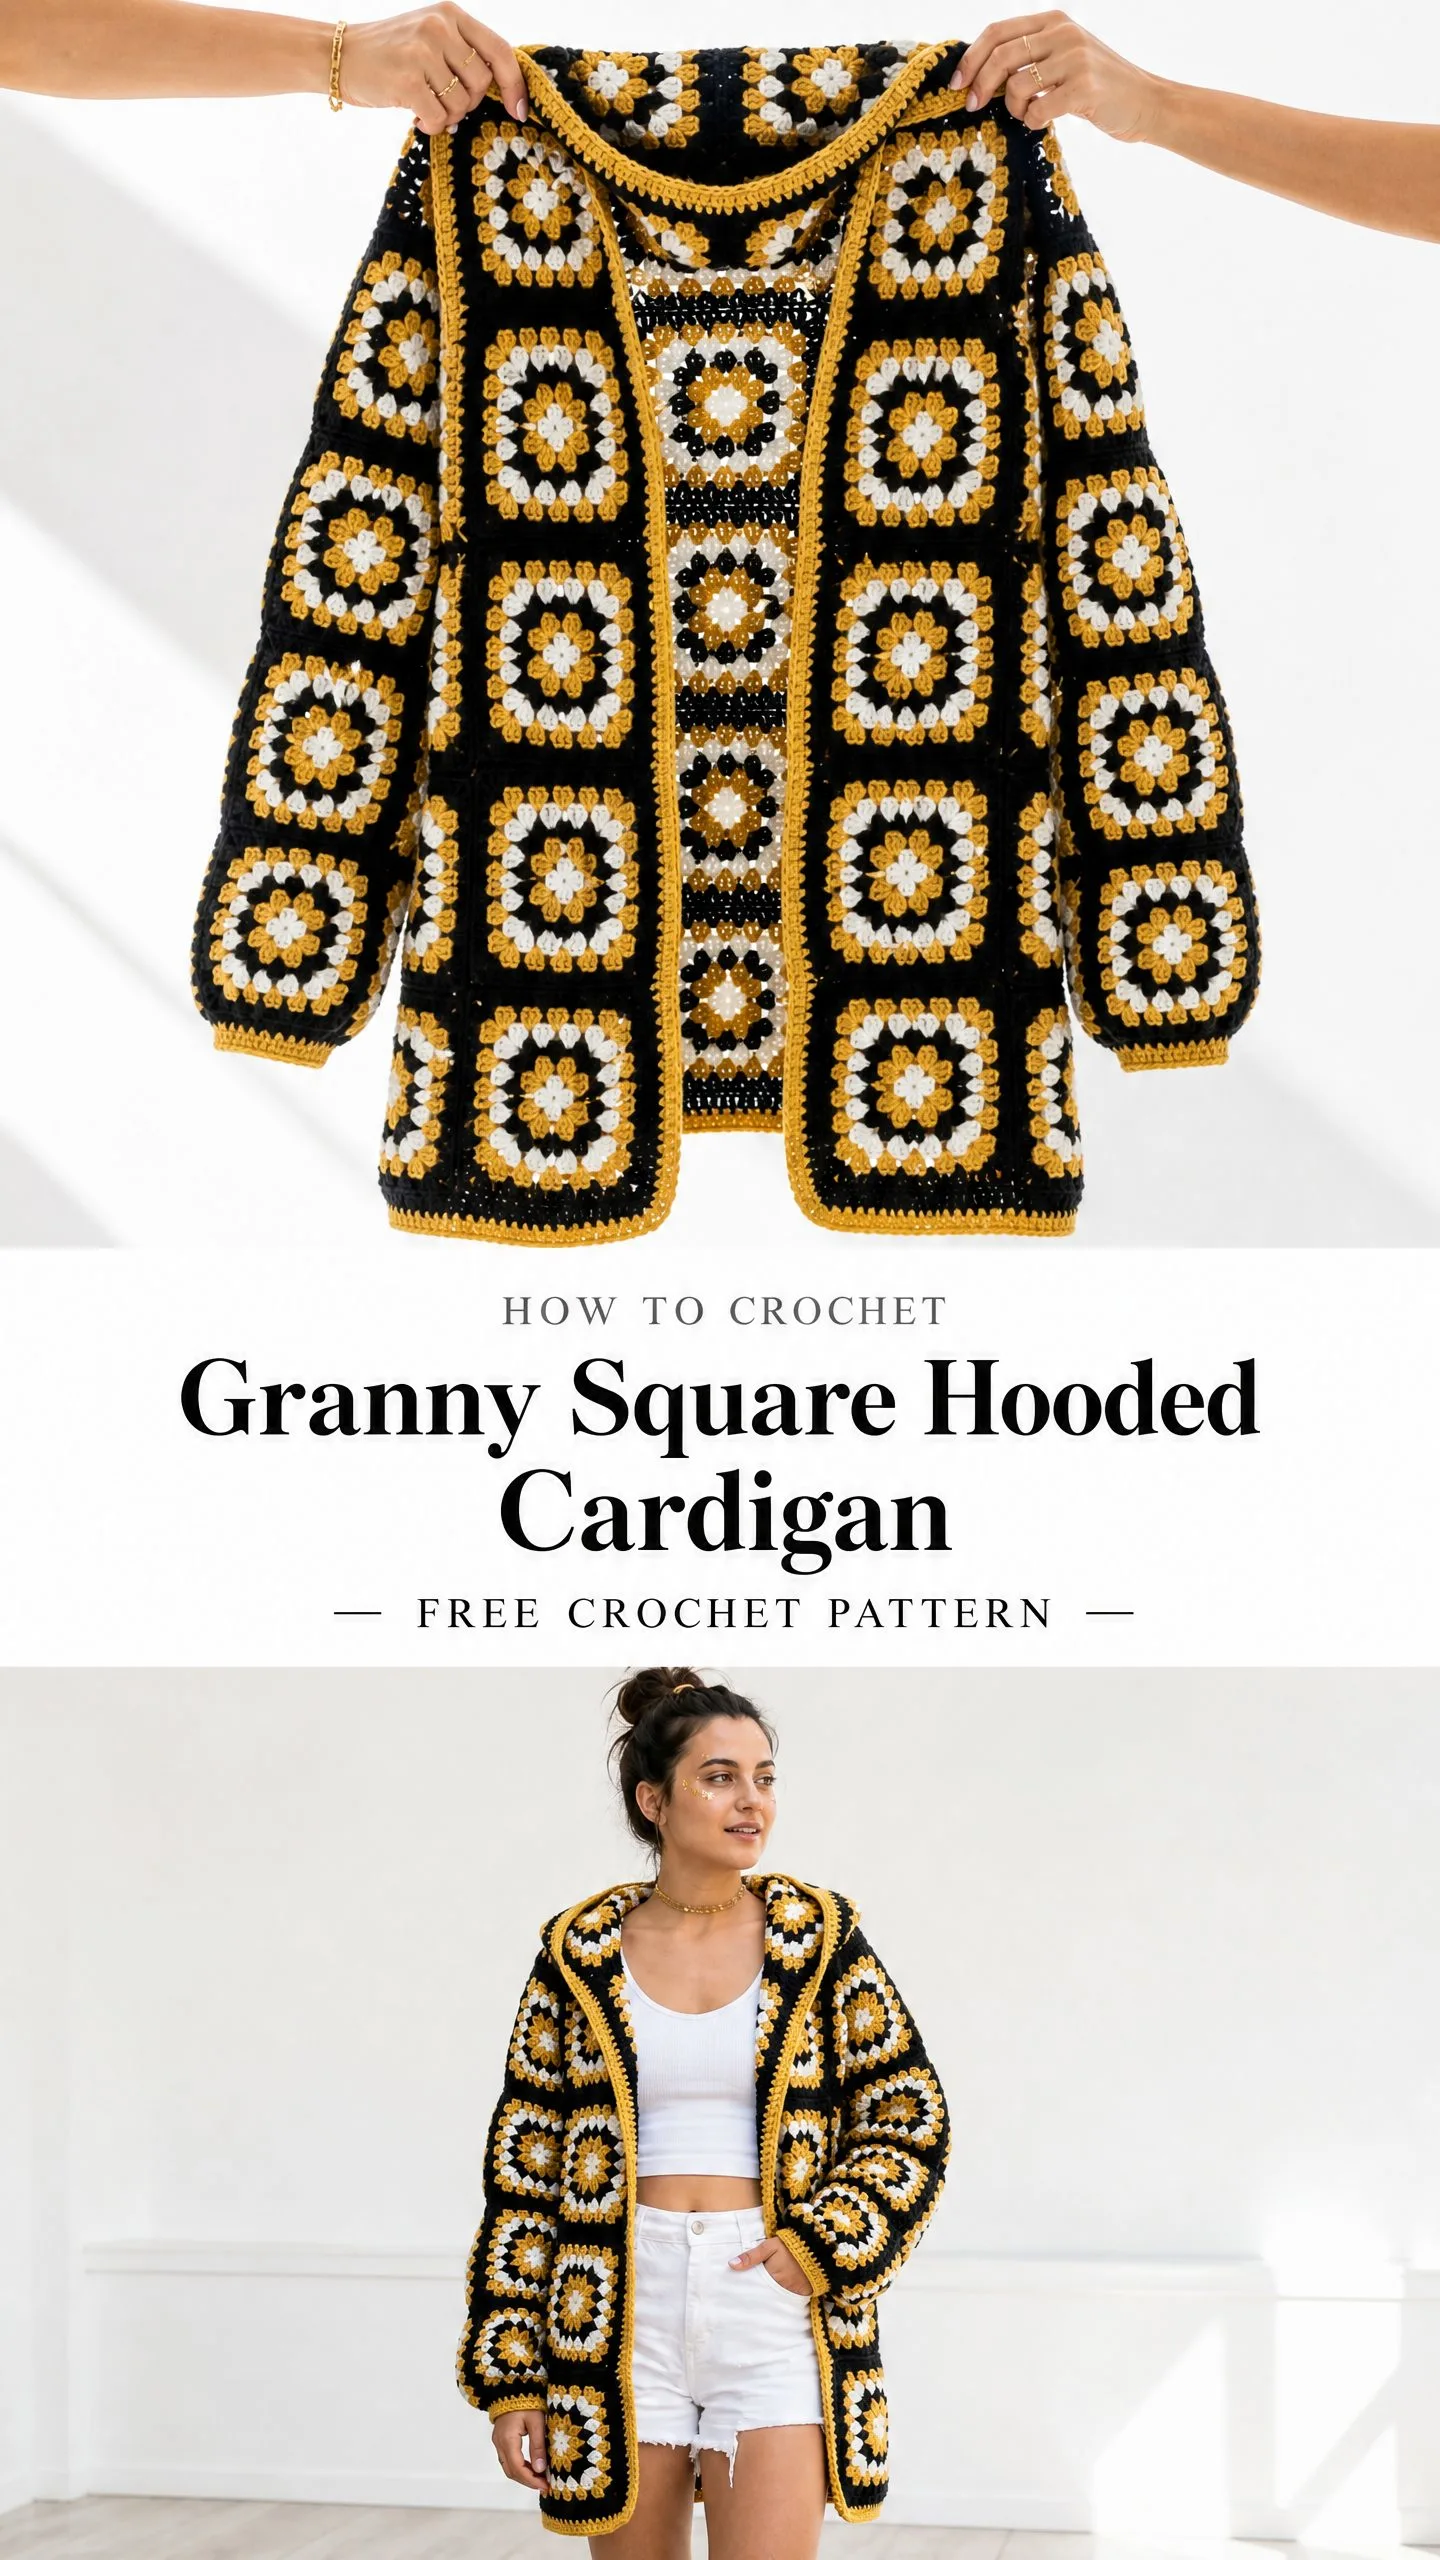
Yes, it takes some time. We are talking 30 to 45 hours depending on your pace. But here is the thing. Every single square uses the same simple four-round pattern. Once you have made your first five squares, your hands will work on autopilot. You will be binge-watching your favorite show and cranking out squares without even thinking about it.
The finished cardigan is oversized, cozy, and screams vintage bohemian vibes. That bold black background with mustard yellow and white? Chef’s kiss. This makes an incredible gift, but fair warning. You might want to keep it for yourself.
About This Granny Square Cardigan Pattern
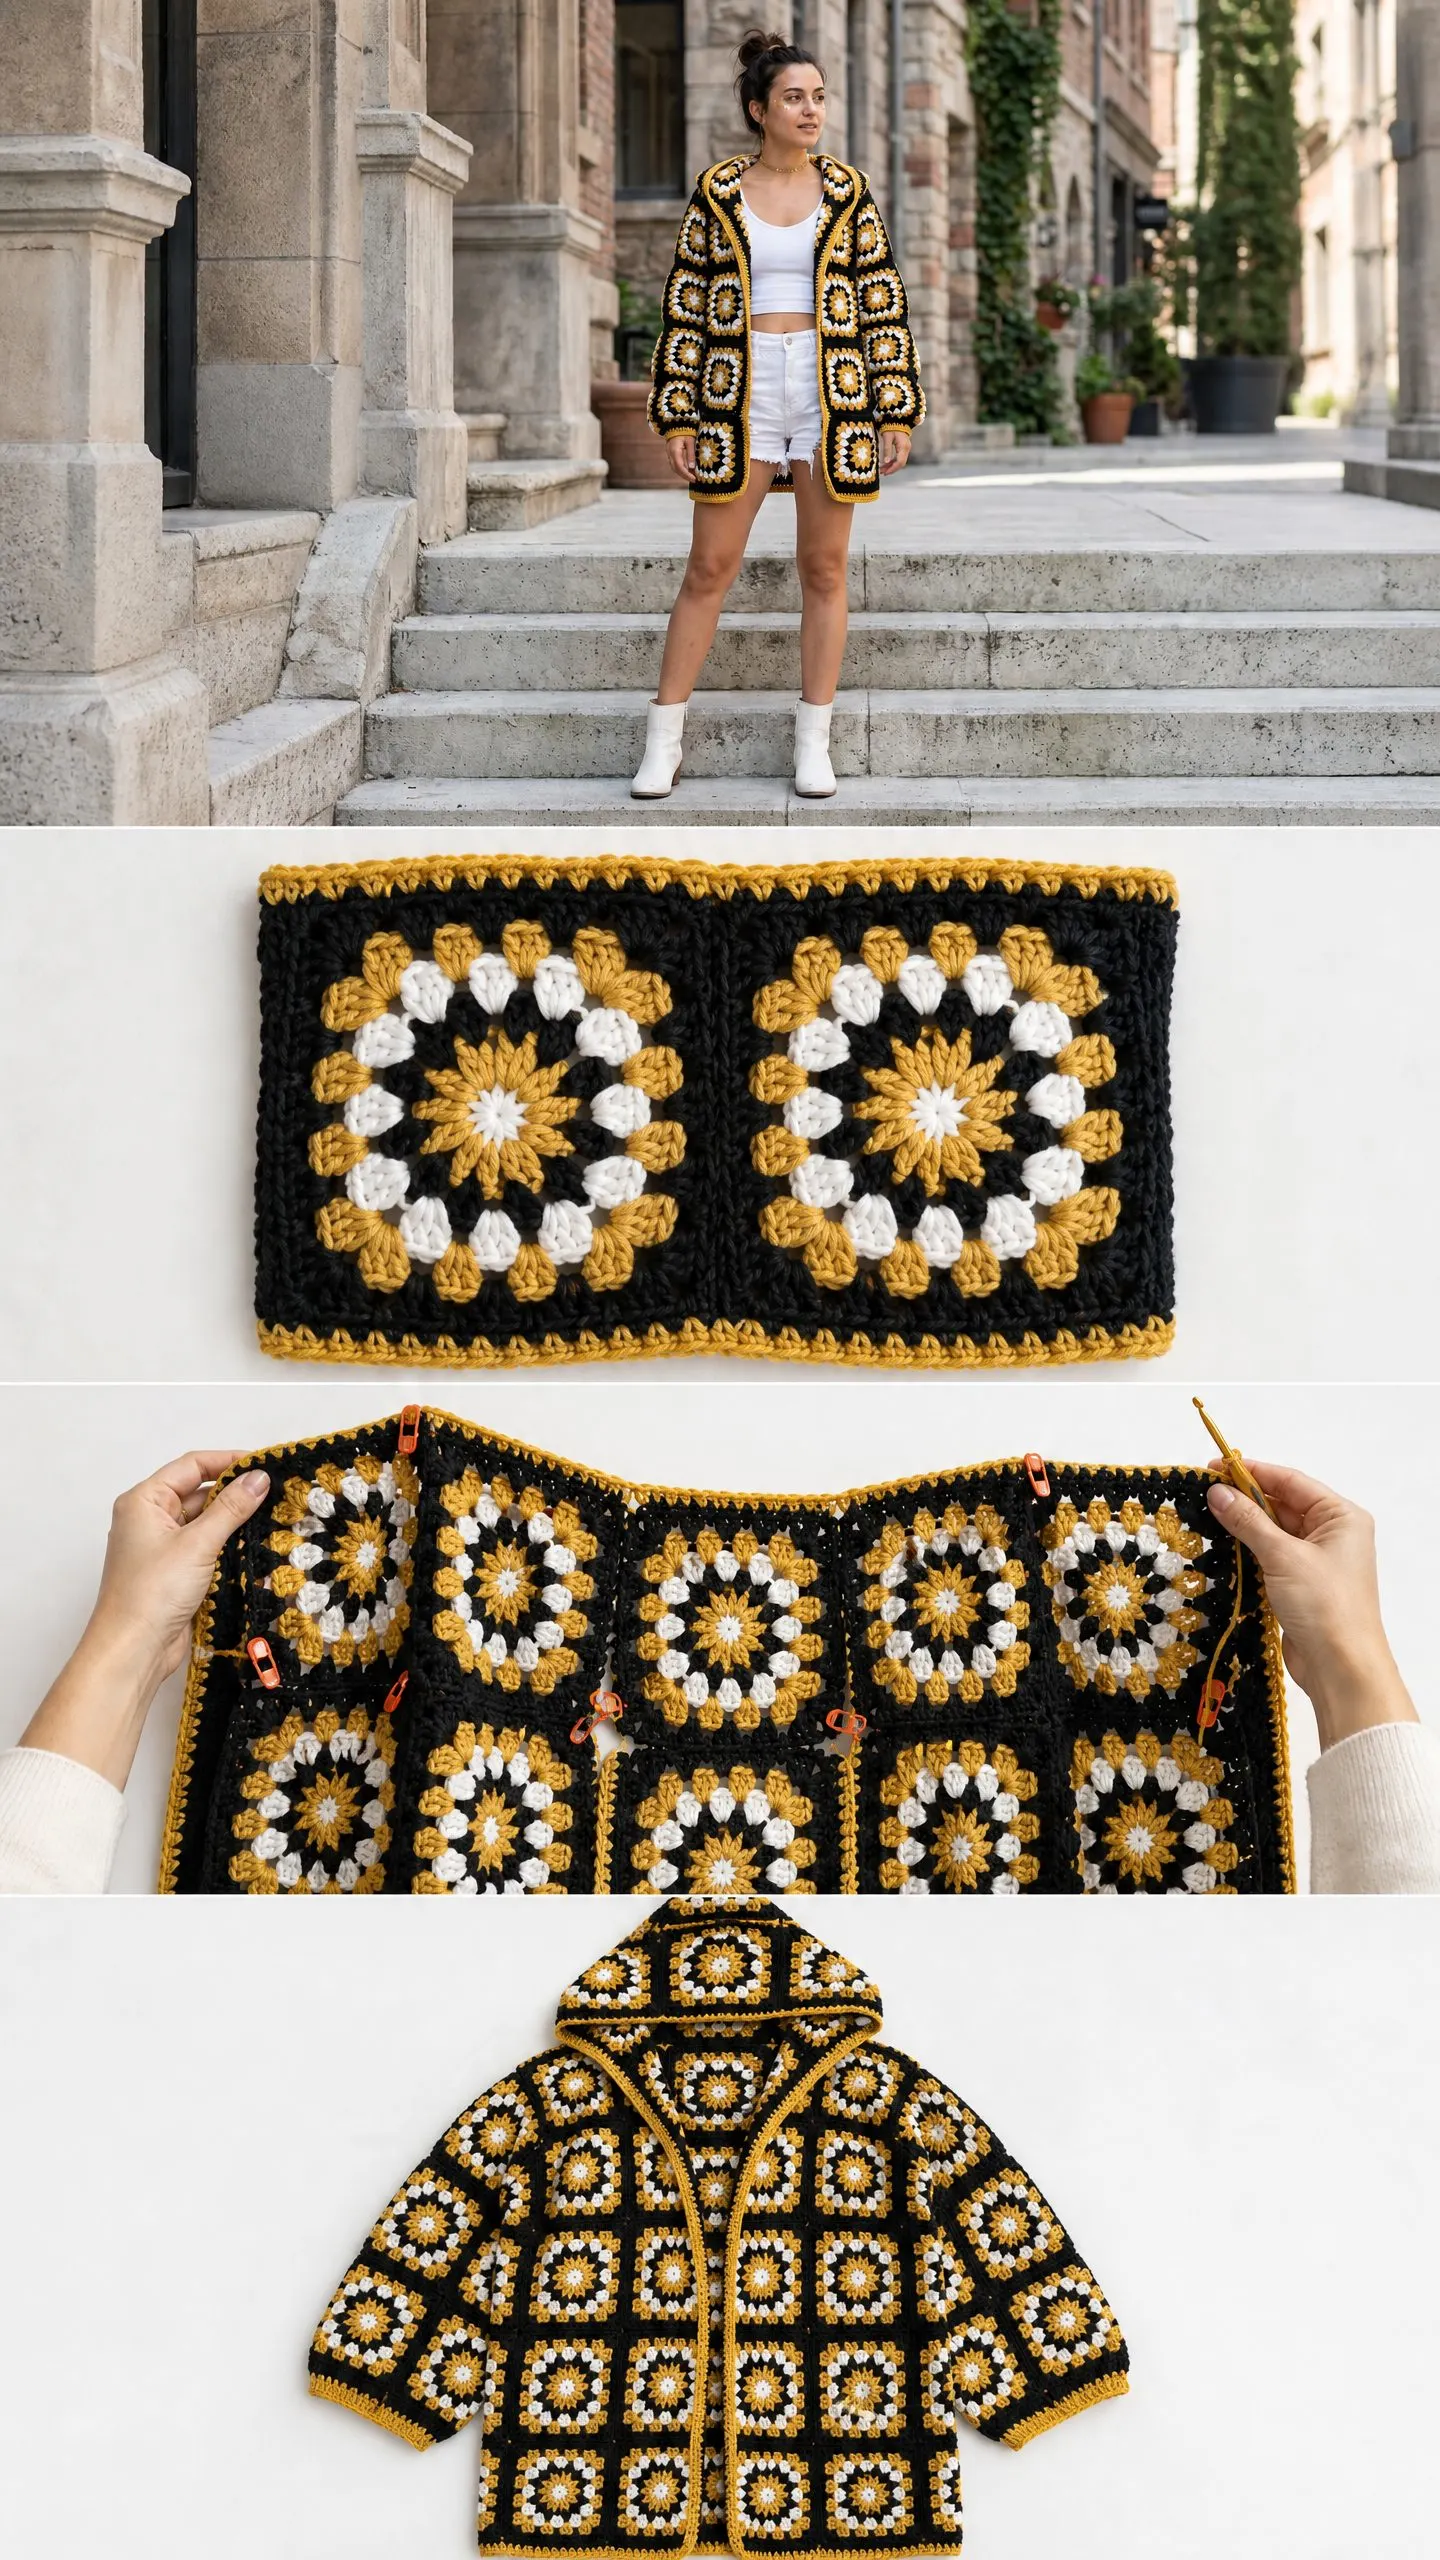
This hooded cardigan is constructed entirely from classic granny squares joined together to form panels. The construction method is straightforward once you understand the layout. You make individual squares, join them into flat panels, seam the panels together, add sleeves, build a hood from picked-up stitches, and finish with a simple border.
The skill level is intermediate. The granny squares themselves are beginner-friendly. What makes this project intermediate is the assembly work. You need to join squares precisely, seam panels together, and pick up stitches evenly for the hood. If you have completed at least two garment projects before, you are ready for this.
Finished measurements for this relaxed, oversized fit:
Materials You Will Need
Yarn: Worsted weight, medium weight 4
Total yardage: approximately 1,600 to 1,800 yards
Hook: US size J-10 / 6.0 mm, or size needed to obtain gauge
Additional supplies:
Yarn Suggestions
Lion Brand Wool-Ease in Black, Gold, and Fisherman works beautifully. It has a slight halo, excellent stitch definition, and is machine washable on gentle cycle.
Paintbox Yarns Simply DK held double gives excellent color vibrancy. Use Black, Mustard Yellow, and Cream.
Malabrigo Rios in Black, Frank Ochre, and Natural creates a luxurious finish if you want something special.
Any smooth worsted weight yarn with at least 200 yards per 100g skein will work. Avoid fuzzy or textured yarns since they obscure the geometric granny square pattern.
Gauge
One completed 4-round granny square equals 4 inches by 4 inches after blocking.
To check gauge: Make one complete granny square through all four rounds. Fasten off, weave in ends, block it, and measure from flat edge to flat edge. Adjust your hook size if needed.
This gauge is non-negotiable. The entire garment sizing depends on your squares measuring exactly 4 inches. Take the time to check this before you commit to making 131 squares.
Abbreviations and Stitch Definitions
ch = chain: yarn over, pull through loop on hook
sl st = slip stitch: insert hook, yarn over, pull through both loops at once
sc = single crochet: insert hook, yarn over, pull up a loop, yarn over, pull through both loops
dc = double crochet: yarn over, insert hook, yarn over, pull up a loop, yarn over, pull through two loops, yarn over, pull through remaining two loops
sp = space
ch-sp = chain space: the gap created by chain stitches in the previous row
rep = repeat
RS = right side
WS = wrong side
rnd = round
sk = skip
st(s) = stitch(es)
JAYG = join-as-you-go: a method where you join squares during the final round rather than sewing them together afterward
How Many Squares Do You Need?
Total squares: 131
Here is the breakdown:
The hood is worked in rows of single crochet, not granny squares, so no additional squares are needed for that section.
How to Make the Classic 4-Round Granny Square
Every square uses the same color sequence:
Round 1 (Color C)
Make a magic ring, or chain 4 and join with a slip stitch to form a ring.
Ch 3 (this counts as your first double crochet). Work 2 dc into the ring. Ch 2. Work 3 dc into the ring, ch 2. Repeat from * three more times. Join with sl st to the top of the beginning ch-3.
Fasten off Color C.
You now have 4 clusters of 3 dc and 4 corner ch-2 spaces.
Round 2 (Color B)
Join Color B with a sl st to any ch-2 corner space.
Ch 3, work 2 dc in the same space, ch 2, 3 dc in the same space. You just made your first corner. Ch 1. Work 3 dc in the next ch-2 corner space, ch 2, 3 dc in the same space, ch 1. Repeat from * around. Join with sl st to the top of the beginning ch-3.
Fasten off Color B.
You now have 8 clusters of 3 dc, 4 corner ch-2 spaces, and 4 side ch-1 spaces.
Round 3 (Color C)
Join Color C with a sl st to any ch-2 corner space.
Ch 3, work 2 dc in the same space, ch 2, 3 dc in the same space. Ch 1. Work 3 dc in the next ch-1 side space. Ch 1. Work 3 dc in the next ch-2 corner space, ch 2, 3 dc in the same space, ch 1, 3 dc in the next ch-1 side space, ch 1. Repeat from * around. Join with sl st to the top of the beginning ch-3.
Fasten off Color C.
You now have 12 clusters of 3 dc, 4 corner ch-2 spaces, and 8 side ch-1 spaces.
Round 4 (Color A)
Join Color A with a sl st to any ch-2 corner space.
Ch 3, work 2 dc in the same space, ch 2, 3 dc in the same space. Ch 1, 3 dc in the next ch-1 space. Repeat from twice more. Ch 1. Work 3 dc in the next ch-2 corner space, ch 2, 3 dc in the same space. (Ch 1, 3 dc in next ch-1 space) twice, ch 1. Repeat from around. Join with sl st to the top of the beginning ch-3.
Fasten off Color A.
Your finished square has 16 clusters of 3 dc, 4 corner ch-2 spaces, and 12 side ch-1 spaces.
Pro tip: Weave in your ends as you go after each color change. Trust me, you do not want to weave in 500+ ends at the end of this project.
Join-As-You-Go Method
When you attach a new square to an existing square, you modify Round 4 along the edges being joined.
For corners: Instead of ch 2, work ch 1, sl st into the corresponding corner ch-2 space of the adjacent square, ch 1.
For sides: Instead of ch 1 between clusters, work just a sl st into the corresponding ch-1 space of the adjacent square. No chains on either side.
This creates a flat, nearly invisible seam. When joining at a corner where three or four squares meet, slip stitch through all the corner spaces together.
Assembly Instructions
Step 1: Make All Squares
Work all 131 granny squares following the instructions above. Block every square to exactly 4 inches by 4 inches before joining. This step matters more than any other for a professional finish.
Step 2: Join the Back Panel
Arrange 49 squares in a 7-column by 7-row grid.
Start with the bottom-left square. Work it completely through Round 4 with no joining. This is your anchor square.
For the second square, join its left edge to the right edge of the first square using JAYG during Round 4.
Continue across the row, then build upward row by row. Each new square joins to all adjacent completed squares during its Round 4.
Your finished back panel measures 28 inches wide by 28 inches tall.
Step 3: Join the Front Panels
Work each front panel as a 3-column by 7-row grid (21 squares each).
Each front panel measures 12 inches wide by 28 inches tall.
Step 4: Join Side Seams
Hold the right front panel and back panel with right sides facing out. Using Color A, slip stitch through corresponding chain spaces along the full 7-square height to create the side seam.
Repeat for the left side.
Important: Leave the top 2 squares of each side seam unjoined. This creates your armhole opening.
Step 5: Assemble Sleeves
For each sleeve, join 20 squares in a 4-column by 5-row grid.
Fold the sleeve panel in half lengthwise and use Color A to slip stitch the two long edges together. This forms the underarm seam. Your sleeve is now a tube.
Step 6: Set In Sleeves
Insert the top of each sleeve tube into the armhole opening. Align the underarm seams. Using Color A, slip stitch around the entire armhole to attach the sleeve.
At this point, your cardigan body is complete except for the hood and border.
Building the Hood
The hood is worked in rows of single crochet using Color A.
Picking Up Stitches
With RS facing, start at the right front top edge. Work single crochet evenly along the neckline, picking up approximately 4 sc per square edge.
Total: 36 sc
Hood Rows
Row 1 (RS): Ch 1, turn. Sc in each sc across. (36 sc)
Rows 2 through 60: Continue in single crochet, turning at the end of each row. Do not increase or decrease. (36 sc per row)
Working 60 rows gives you approximately 12 inches of hood height.
Closing the Hood
Fold the hood rectangle in half, bringing the two short ends together. With RS facing out, slip stitch across the top through both layers to close the crown.
Fasten off and weave in ends.
Front Opening and Hemline Border
The border is one continuous round of single crochet in Color A around the entire front opening, hem, and hood face.
Starting at the bottom-right corner of the right front panel:
1. Sc up the right front opening (28 sc)
2. Work 3 sc in the corner
3. Sc up the right side of the hood face (24 sc)
4. Work 3 sc in the corner
5. Sc across the hood crown (36 sc)
6. Work 3 sc in the corner
7. Sc down the left hood face (24 sc)
8. Work 3 sc in the corner
9. Sc down the left front opening (28 sc)
10. Work 3 sc in the corner
11. Sc across the entire bottom hem (52 sc)
12. Work 3 sc in the corner, then sl st to the first sc to close
Fasten off and weave in all remaining ends.
Optional Sleeve Cuffs
For a more finished look, use Color A to work one round of sc around the lower edge of each sleeve. Pick up 4 sc per square edge (16 sc total per sleeve). Join with sl st and fasten off.
Blocking and Finishing
Before assembly: Block each individual square to exactly 4 inches by 4 inches. This is the single most important finishing step.
After assembly: Wet block the finished cardigan by soaking in cool water for 20 minutes. Gently press out excess water in a towel. Lay flat on blocking mats and pin the hem, front edges, cuffs, and hood to their stated measurements. Allow to dry completely.
Care Instructions
For acrylic or acrylic-blend yarns: Machine wash cold on gentle cycle. Lay flat to dry. Do not tumble dry or iron directly.
For wool or wool-blend yarns: Hand wash in cool water with wool-safe detergent. Lay flat to dry away from direct sunlight.
Store folded, not on a hanger, to maintain the shape of the shoulders and sleeves.
Size Customization Tips
To make it smaller: Remove 1 column from the back panel (6 wide instead of 7) and remove 1 row from all panels. Adjust front panels proportionally.
To make it larger: Add 1 square to each dimension. Each additional column adds 4 inches to body width. Each additional row adds 4 inches to length.
To lengthen sleeves: Add one row of squares to each sleeve panel (6 rows instead of 5, adding 4 inches).
I hope you love making this granny square hooded cardigan as much as I loved designing it. If you make one, I would absolutely love to see your finished project. Tag me on Instagram or share it in our Facebook group so I can cheer you on!
Save this pattern to your Pinterest boards so you can find it whenever you are ready to start. And please leave a comment below if you make it. I read every single one and your photos make my day.
