
When I sat down to design this tote, I had a very specific vision in mind. I wanted something structured enough for farmers market runs, cute enough to carry everywhere, and interesting enough to keep my hands busy without overwhelming a confident beginner. The bobble cherries were non-negotiable because I wanted that satisfying three-dimensional pop without any sewing of separate appliqués.
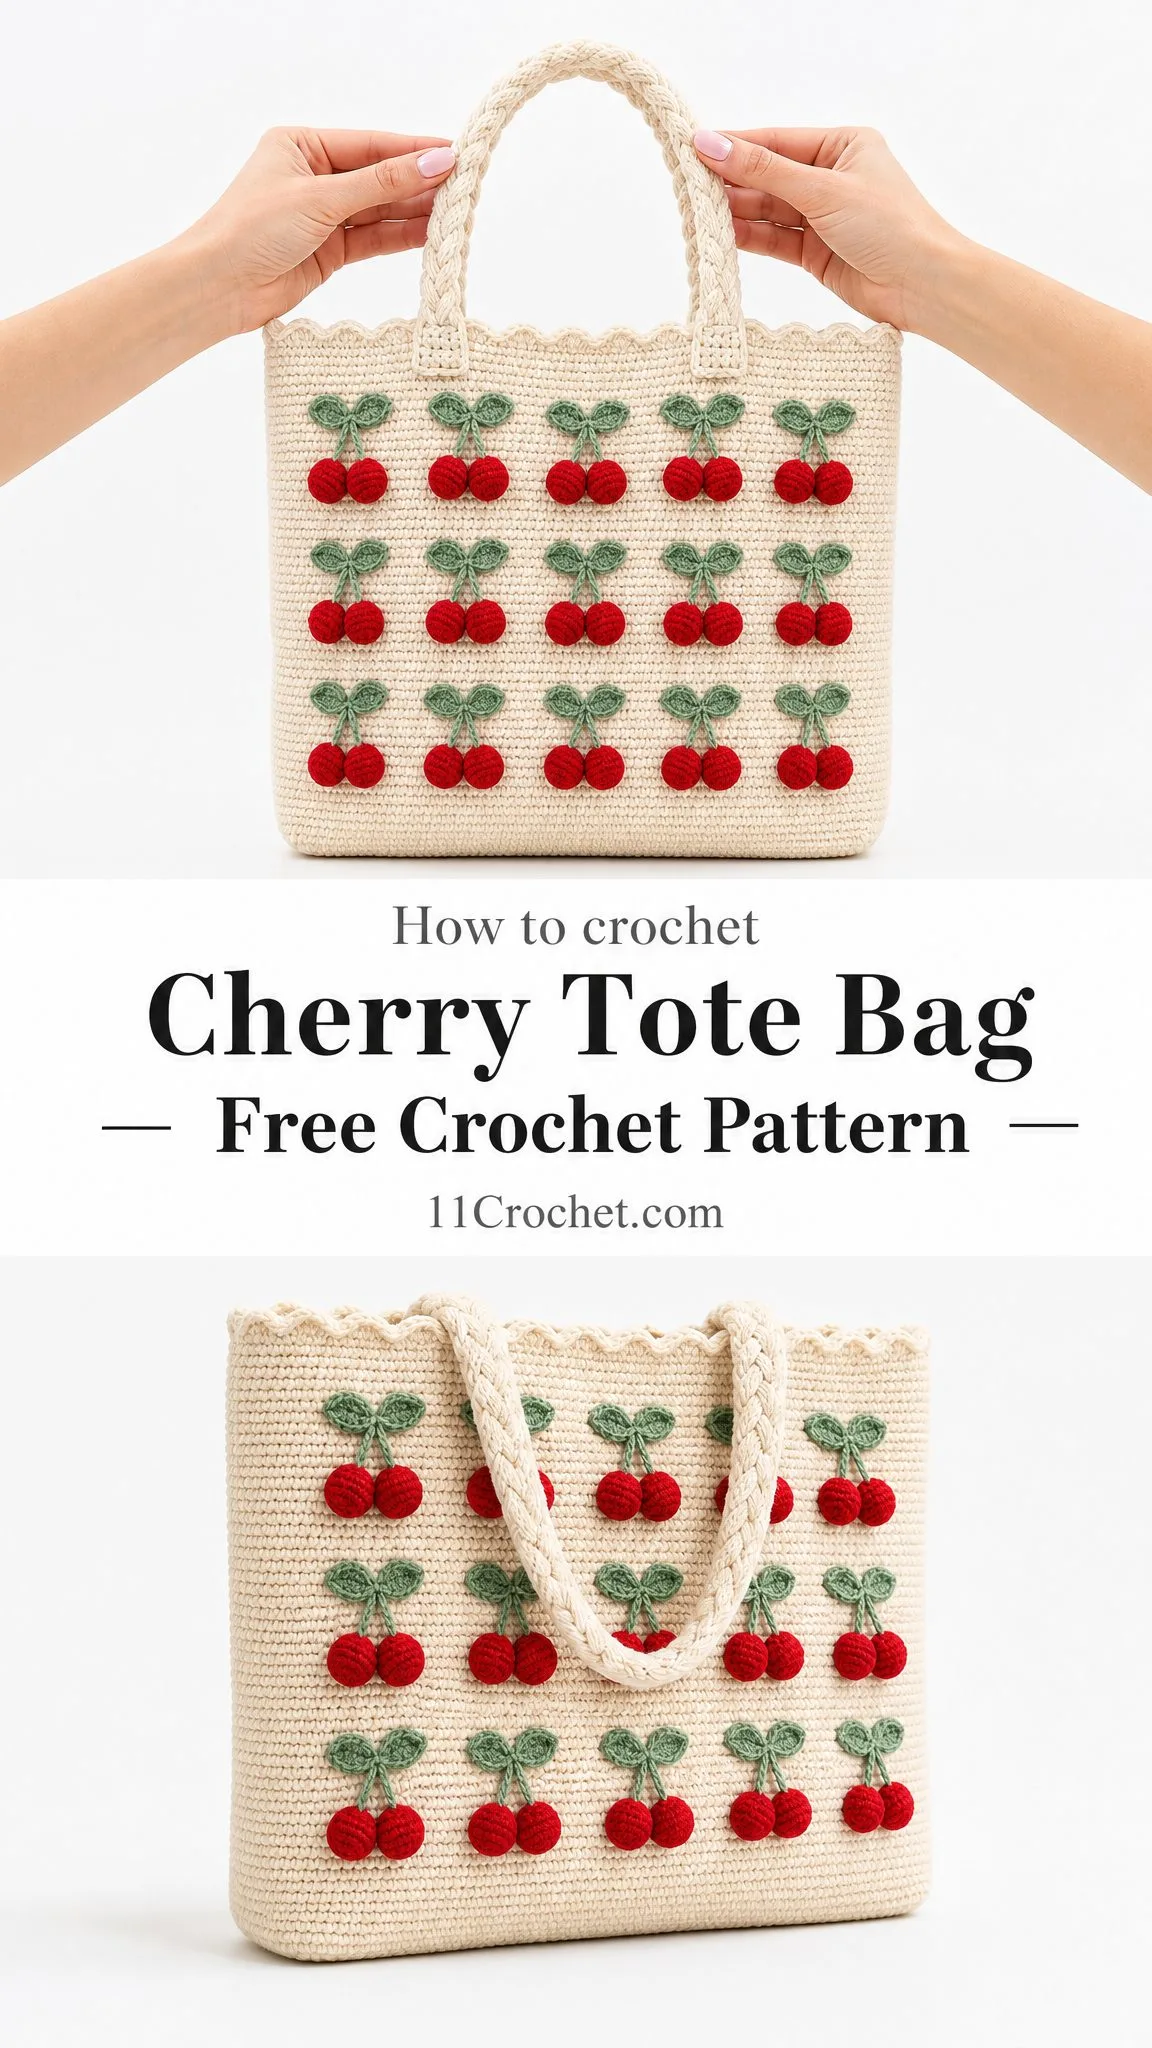
I spent way too long figuring out the exact spacing for the cherry grid so everything would line up perfectly row after row. The scalloped edge? That was a happy accident that ended up being my favorite detail.
I am SO pleased with how this one turned out, and I cannot wait for you to make your own.
About This Cherry Market Tote Pattern
This structured cotton tote features plump bobble stitch cherries worked directly into the fabric, leafy sage sprigs, and a soft scalloped rim. The bag is worked seamlessly in the round over a sturdy flat base, then finished with braided handles that feel substantial in your hands.
The construction method means no seaming the sides together at the end. You simply build up from a rectangular base and keep going in a continuous spiral until you reach the top. The cherries are integrated as you work, so they stay secure and pop right off the surface beautifully.
Skill Level: Confident Beginner +
Time to Complete: 12 to 16 hours
Finished Dimensions: 13 × 12.5 × 3 inches (33 × 32 × 7.5 cm)
Handle Drop: 9 inches (23 cm)
Materials You Will Need
Gathering your supplies before you start makes the whole process smoother. Here is everything you need to complete this cherry tote bag crochet pattern.
Yarn
You will be working with medium weight / worsted (UK aran) 100% cotton yarn in three colors. Cotton is essential here because it holds shape beautifully and gives the crisp stitch definition the cherries deserve. I would avoid soft acrylic if you want your tote to stand tall on its own.
Cream or ivory cotton: approximately 380 to 420 yards (350 to 385 m) for the body, base, and handles
Cherry red cotton: approximately 60 yards (55 m) for the bobbles
Sage green cotton: approximately 35 yards (32 m) for leaves and stems
Yarn Recommendations
Here are three lovely options that work wonderfully for this project:
Tools
Gauge
16 single crochet (sc) and 17 rounds = 4 inches (10 cm) with the 4.0 mm hook in single crochet.
Take a moment to swatch before diving in. Your gauge sets the finished width, so a firm, even fabric matters more here than speed. If your swatch is too loose, go down a hook size. Too tight? Go up a size.
Abbreviations
This pattern uses US crochet terms. UK equivalents are noted in italics.
Pattern Notes Before You Begin
A few things to keep in mind as you work through this cherry tote bag crochet tutorial.
The body is worked in a continuous spiral, which means you will not join at the end of each round. Place a marker in the first stitch of each round and move it up as you go. This keeps you from losing your place.
Stitch counts appear in parentheses at the end of every instruction. Check against them often, especially before cherry rounds, to make sure your columns will line up.
Bobbles always pop to the right side (outside) of the bag. Push them out firmly with your finger as you close each one. If they are hiding on the inside, just give them a gentle poke.
The leaves and stems are added after the bag is complete. This means the cherry grid placement is your only concern while crocheting the body.
Special Stitches
Two special stitches make the cherries come to life. Do not worry if these look intimidating. I will walk you through each one.
Make Bobble (MB)
This creates each cherry. You will work this stitch in red yarn into a single stitch.
Yarn over, insert hook in stitch, pull up a loop, yarn over, draw through 2 loops. You now have 2 loops on your hook.
Repeat this 4 more times into the same stitch. You will have 6 loops on your hook.
Yarn over and draw through all 6 loops to close the bobble.
Push the bobble firmly to the right side of your work. That is 1 MB made.
Tip: Make all your bobbles consistent by counting the loops every time. Five "yarn over, pull up, through two" repeats plus the closing pull gives a cherry that sits proud without gaping.
Little Leaf (Make 80 Total)
You will need two leaves per cherry pair, which means 40 pairs across both faces of the bag.
With sage green yarn: Ch 4. Starting in the 2nd chain from hook: sl st, sc, hdc.
In the final chain, work 3 stitches to turn the tip: (sc, ch 1, sc).
Working back down the opposite side of the chain: hdc, sc, sl st.
Fasten off, leaving a long tail for sewing. That is 1 leaf made.
The Base
The base is worked flat in rows with cream cotton and your 4.0 mm hook. This firm rectangle becomes the floor of your tote.
Foundation Rows
Row 1: Ch 53. Sc in 2nd ch from hook and in each ch across. (52 sc)
Rows 2 through 12: Ch 1, turn, sc in each st across. (52 sc each row)
After Row 12, do not fasten off. You will travel straight around the outer edge of this rectangle to begin the body. No seaming required.
Set-Up Round
Rnd 1: Ch 1. Working around the entire perimeter of the base, place sc evenly: 52 sc along the first long edge, 12 sc across the short edge, 52 sc along the second long edge, 12 sc across the final short edge.
Join with sl st to first sc, or place a marker to begin the spiral. (128 sc)
Your Map for the Body
Understanding the layout helps with cherry placement:
Mark the first stitch of the front and back panels. These anchor your cherry columns.
The Body and Cherry Rounds
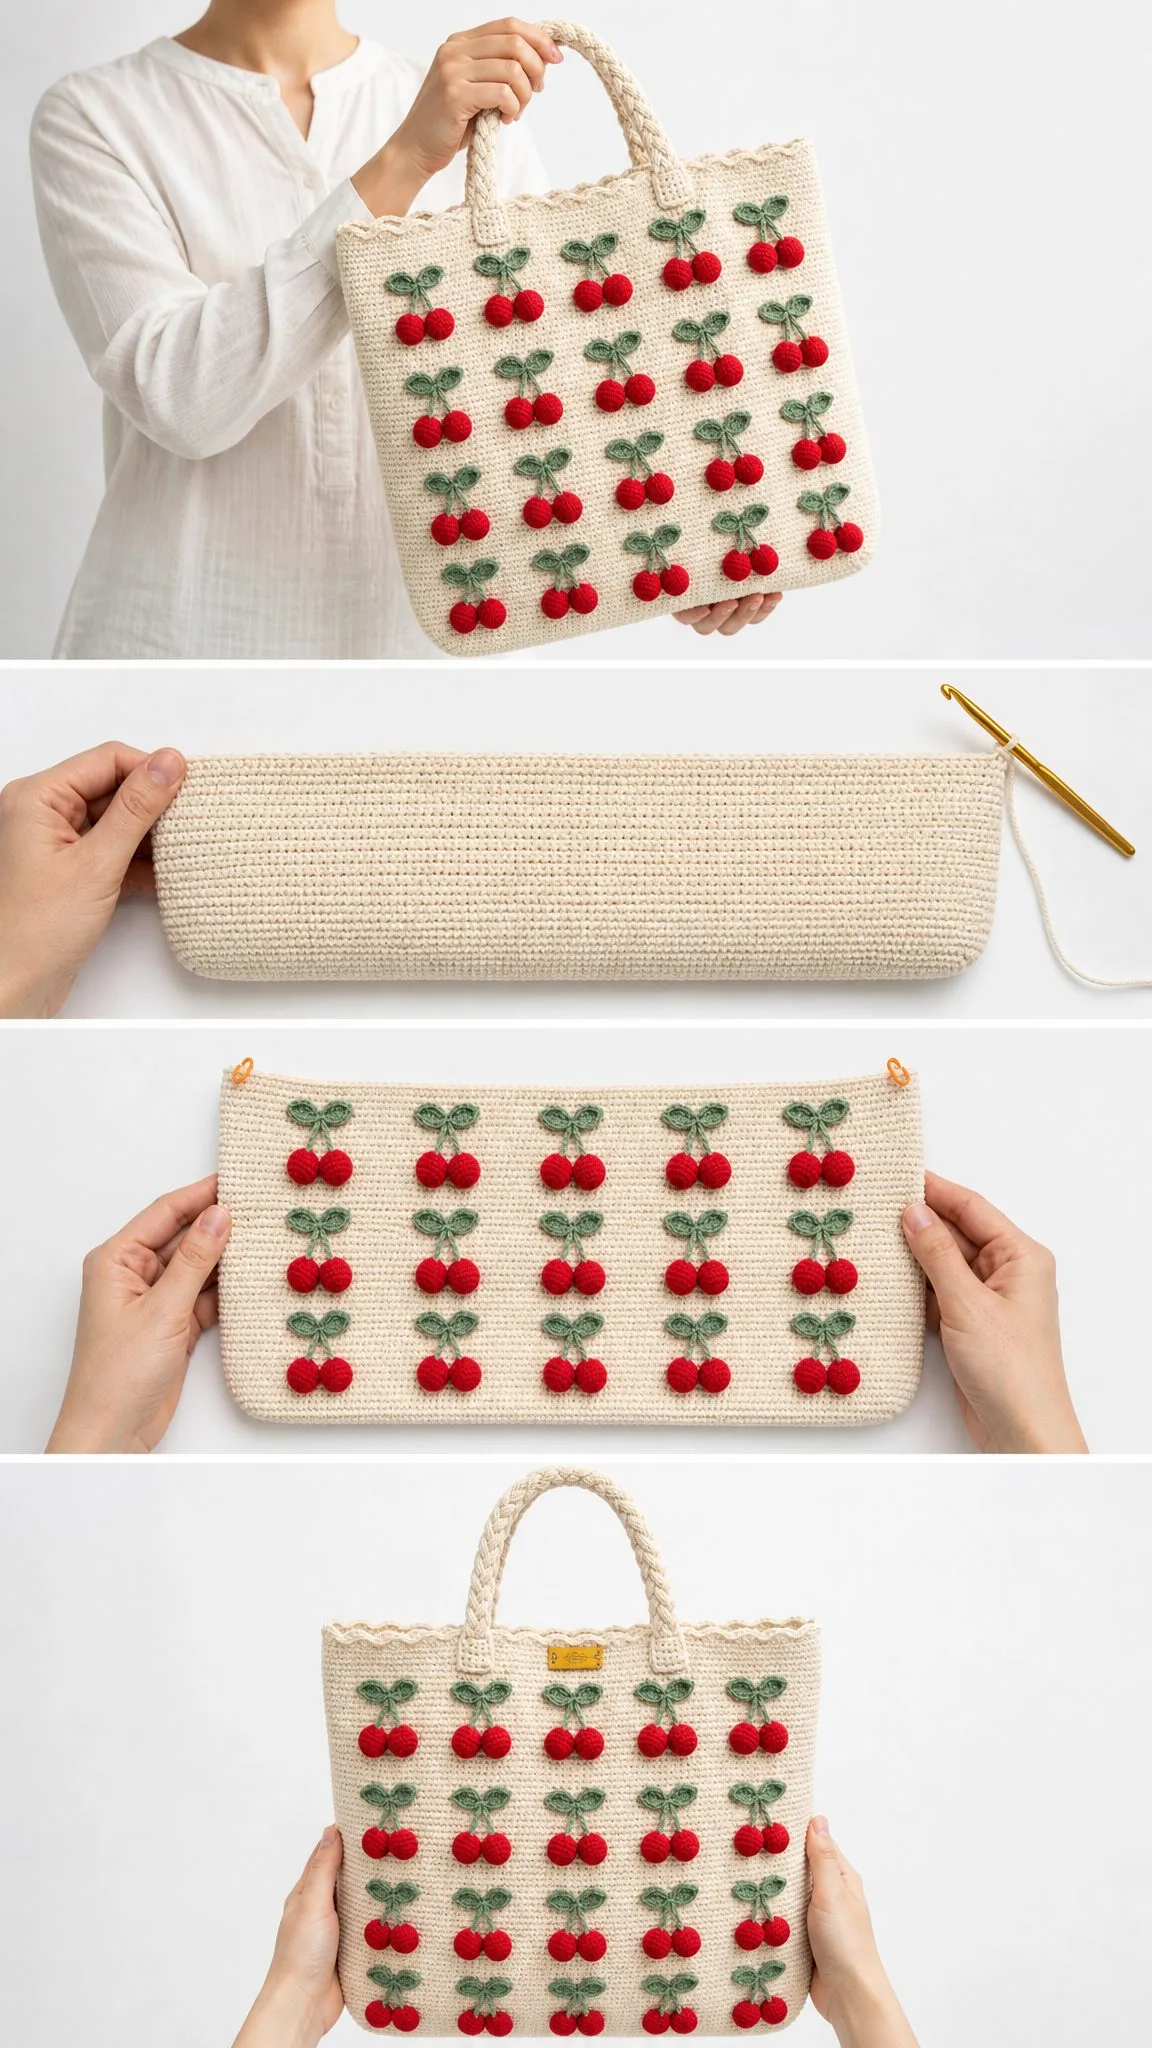
Continue in a seamless spiral on your 128 stitches. Plain rounds build the cream fabric while four cherry rounds drop the bobbles into a tidy 5-across, 4-high grid on each face.
Lower Band
Rnds 2 through 6: Sc in each st around. (128 sc each rnd)
Cherry Round Pattern
Across each 52-stitch panel, work:
Sc 5, [MB, sc 1, MB, sc 7] 4 times, MB, sc 1, MB, sc 4. (52 sts, 5 cherry pairs)
Across each 12-stitch side gusset: Sc 12. (12 sc)
Row 1: First Cherries
Rnd 7: Work the Cherry Round once around: front panel pattern, side 12 sc, back panel pattern, side 12 sc. (128 sts, 10 cherry pairs)
Rnds 8 through 17: Sc in each st around. (128 sc each rnd)
Row 2: Second Cherries
Rnd 18: Cherry Round. (128 sts)
Rnds 19 through 28: Sc around. (128 sc)
Row 3: Third Cherries
Rnd 29: Cherry Round. (128 sts)
Rnds 30 through 39: Sc around. (128 sc)
Row 4: Top Cherries
Rnd 40: Cherry Round. (128 sts)
Rnds 41 through 50: Sc around. (128 sc)
You now have four even rows of cherry pairs, five across each face.
Alignment check: Each cherry round should line its bobbles up directly above the last, keeping your columns straight. If a column drifts, recount the sc 5 / sc 4 starts before the next cherry round.
After Rnd 50: Sc to the side gusset so your spiral ends at a corner, then sl st in the next st to even the rim before the trim. (128 sc)
Scalloped Top Edge
A soft scalloped rim frames the top edge beautifully and adds that sweet vintage feel.
Rnd 51: Sl st to begin. [Sk 1 st, 5 dc in next st, sk 1 st, sl st in next st] around. Join and fasten off. (32 scallops)
Why does it divide so perfectly? The rim is 128 stitches and each scallop spans 4 stitches. 128 divided by 4 equals 32 even shells all the way around with no fudging needed.
Braided Handles
These substantial handles feel wonderful in your hands and add to the handmade charm of the tote. Make 2.
Cords
For each handle, make 3 cords.
Per cord: Ch 75. Sc in 2nd ch from hook and in each ch across. Fasten off, leaving long tails. (74 sc per cord, 6 cords total)
Braiding
Hold 3 cords together and knot one end. Braid firmly to the other end and knot. Repeat for the second handle.
Placing the Handles
On the front face, count in and mark the gaps roughly above cherry columns 2 and 4. This is about 4 inches (10 cm) apart, centered.
Mirror the same two points on the back face.
Thread the handle tails through the top band and sew each end down securely. Reinforce with several passes for durability.
The Sage Sprigs
Now for the finishing touches that bring your cherries to life.
Stems
With sage green yarn and a tapestry needle, embroider a slim Y shape above each cherry pair. One stem rises from each bobble, and they meet at a point about 3/4 inch (2 cm) above.
Use backstitch or chain stitch for a raised line that shows up nicely against the cream background.
Assembly
1. Make your 80 little leaves (two per cherry pair, 40 pairs across both faces).
2. Sew two leaves at the top of each stem-point, angled outward in a gentle V shape.
3. Weave in every tail on the inside, tugging each bobble to sit proud.
4. Block lightly and, if using, drop in a firm base insert for extra structure.
Care Instructions
Your finished cherry market tote deserves proper care to keep it looking fresh.
Hand wash in cool water with mild soap. Cotton loves gentle handling.
Reshape while damp and lay flat to dry. Pat the walls square so it stands properly.
Do not wring the bobbles. Press water out gently in a towel instead.
Steam-block the scalloped rim flat if it curls after washing.
Customizing Your Tote
Want to make this pattern your own? Here are some easy adjustments.
Wider tote: Add stitches to the base in multiples of 10 and add one cherry column for each extra 10 stitches on the front and back.
Taller tote: Add plain rounds between cherry rows. Keep the spacing even (about 11 rounds) for a balanced grid.
Deeper bag: Lengthen the base rectangle and add the same number of stitches to each gusset.
Mini version: Drop to 3 cherry columns and 3 rows for a sweet little pouch.
Remember: Whenever you change the base, keep the front and back panels a multiple of 10 plus 2, and your cherry repeat will keep dividing evenly.
Troubleshooting Tips for This Crochet Pattern
Bobbles hiding on the wrong side? Make sure to push each one firmly to the outside as you close it. A gentle poke from the inside helps them pop forward.
Cherry columns not lining up? Count your stitches before each cherry round. The sc 5 at the start and sc 4 at the end of each panel are critical for alignment.
Bag too floppy? Try going down a hook size or adding a firm base insert. Cotton also firms up a bit after blocking.
Scallops uneven? Double-check that you have exactly 128 stitches before starting the trim round. Each scallop needs exactly 4 stitches to work properly.
Final Thoughts on This Cherry Tote Bag Pattern
This cherry market tote is one of those projects that looks impressive but is genuinely achievable for a confident beginner. The bobbles might seem intimidating at first, but once you get into a rhythm, they become almost meditative to make.
I love how the integrated construction means your cherries are secure and will stay plump wash after wash. And those braided handles? They feel so substantial and professional.
Whether you are heading to the farmers market, the beach, or just running errands around town, this sweet summer carry will get compliments everywhere you go.
Thank you so much for choosing this pattern for your next project. I truly hope you love making it as much as I loved designing it. If you give it a try, I would absolutely love to see your finished tote. Tag me on Instagram or share a photo on Facebook so I can cheer you on.
Do not forget to save this cherry tote bag crochet pattern to your Pinterest boards so you can find it easily when you are ready to start. And if you make one, please drop a comment below. I love hearing which colors you chose and seeing how your cherries turned out.
