
I’ve been looking for the perfect project to showcase those delicate crochet thread techniques, and this cherry blossom ear cuff is my new favorite find. It combines everything I love about miniature crochet work: tiny flowers, dainty leaves, and that satisfying feeling of creating something truly wearable and unique.
This is one of those patterns that looks incredibly intricate but breaks down into simple, repeatable motifs. If you’ve ever wanted to try your hand at crochet jewelry, this ear cuff is an absolutely stunning place to start.
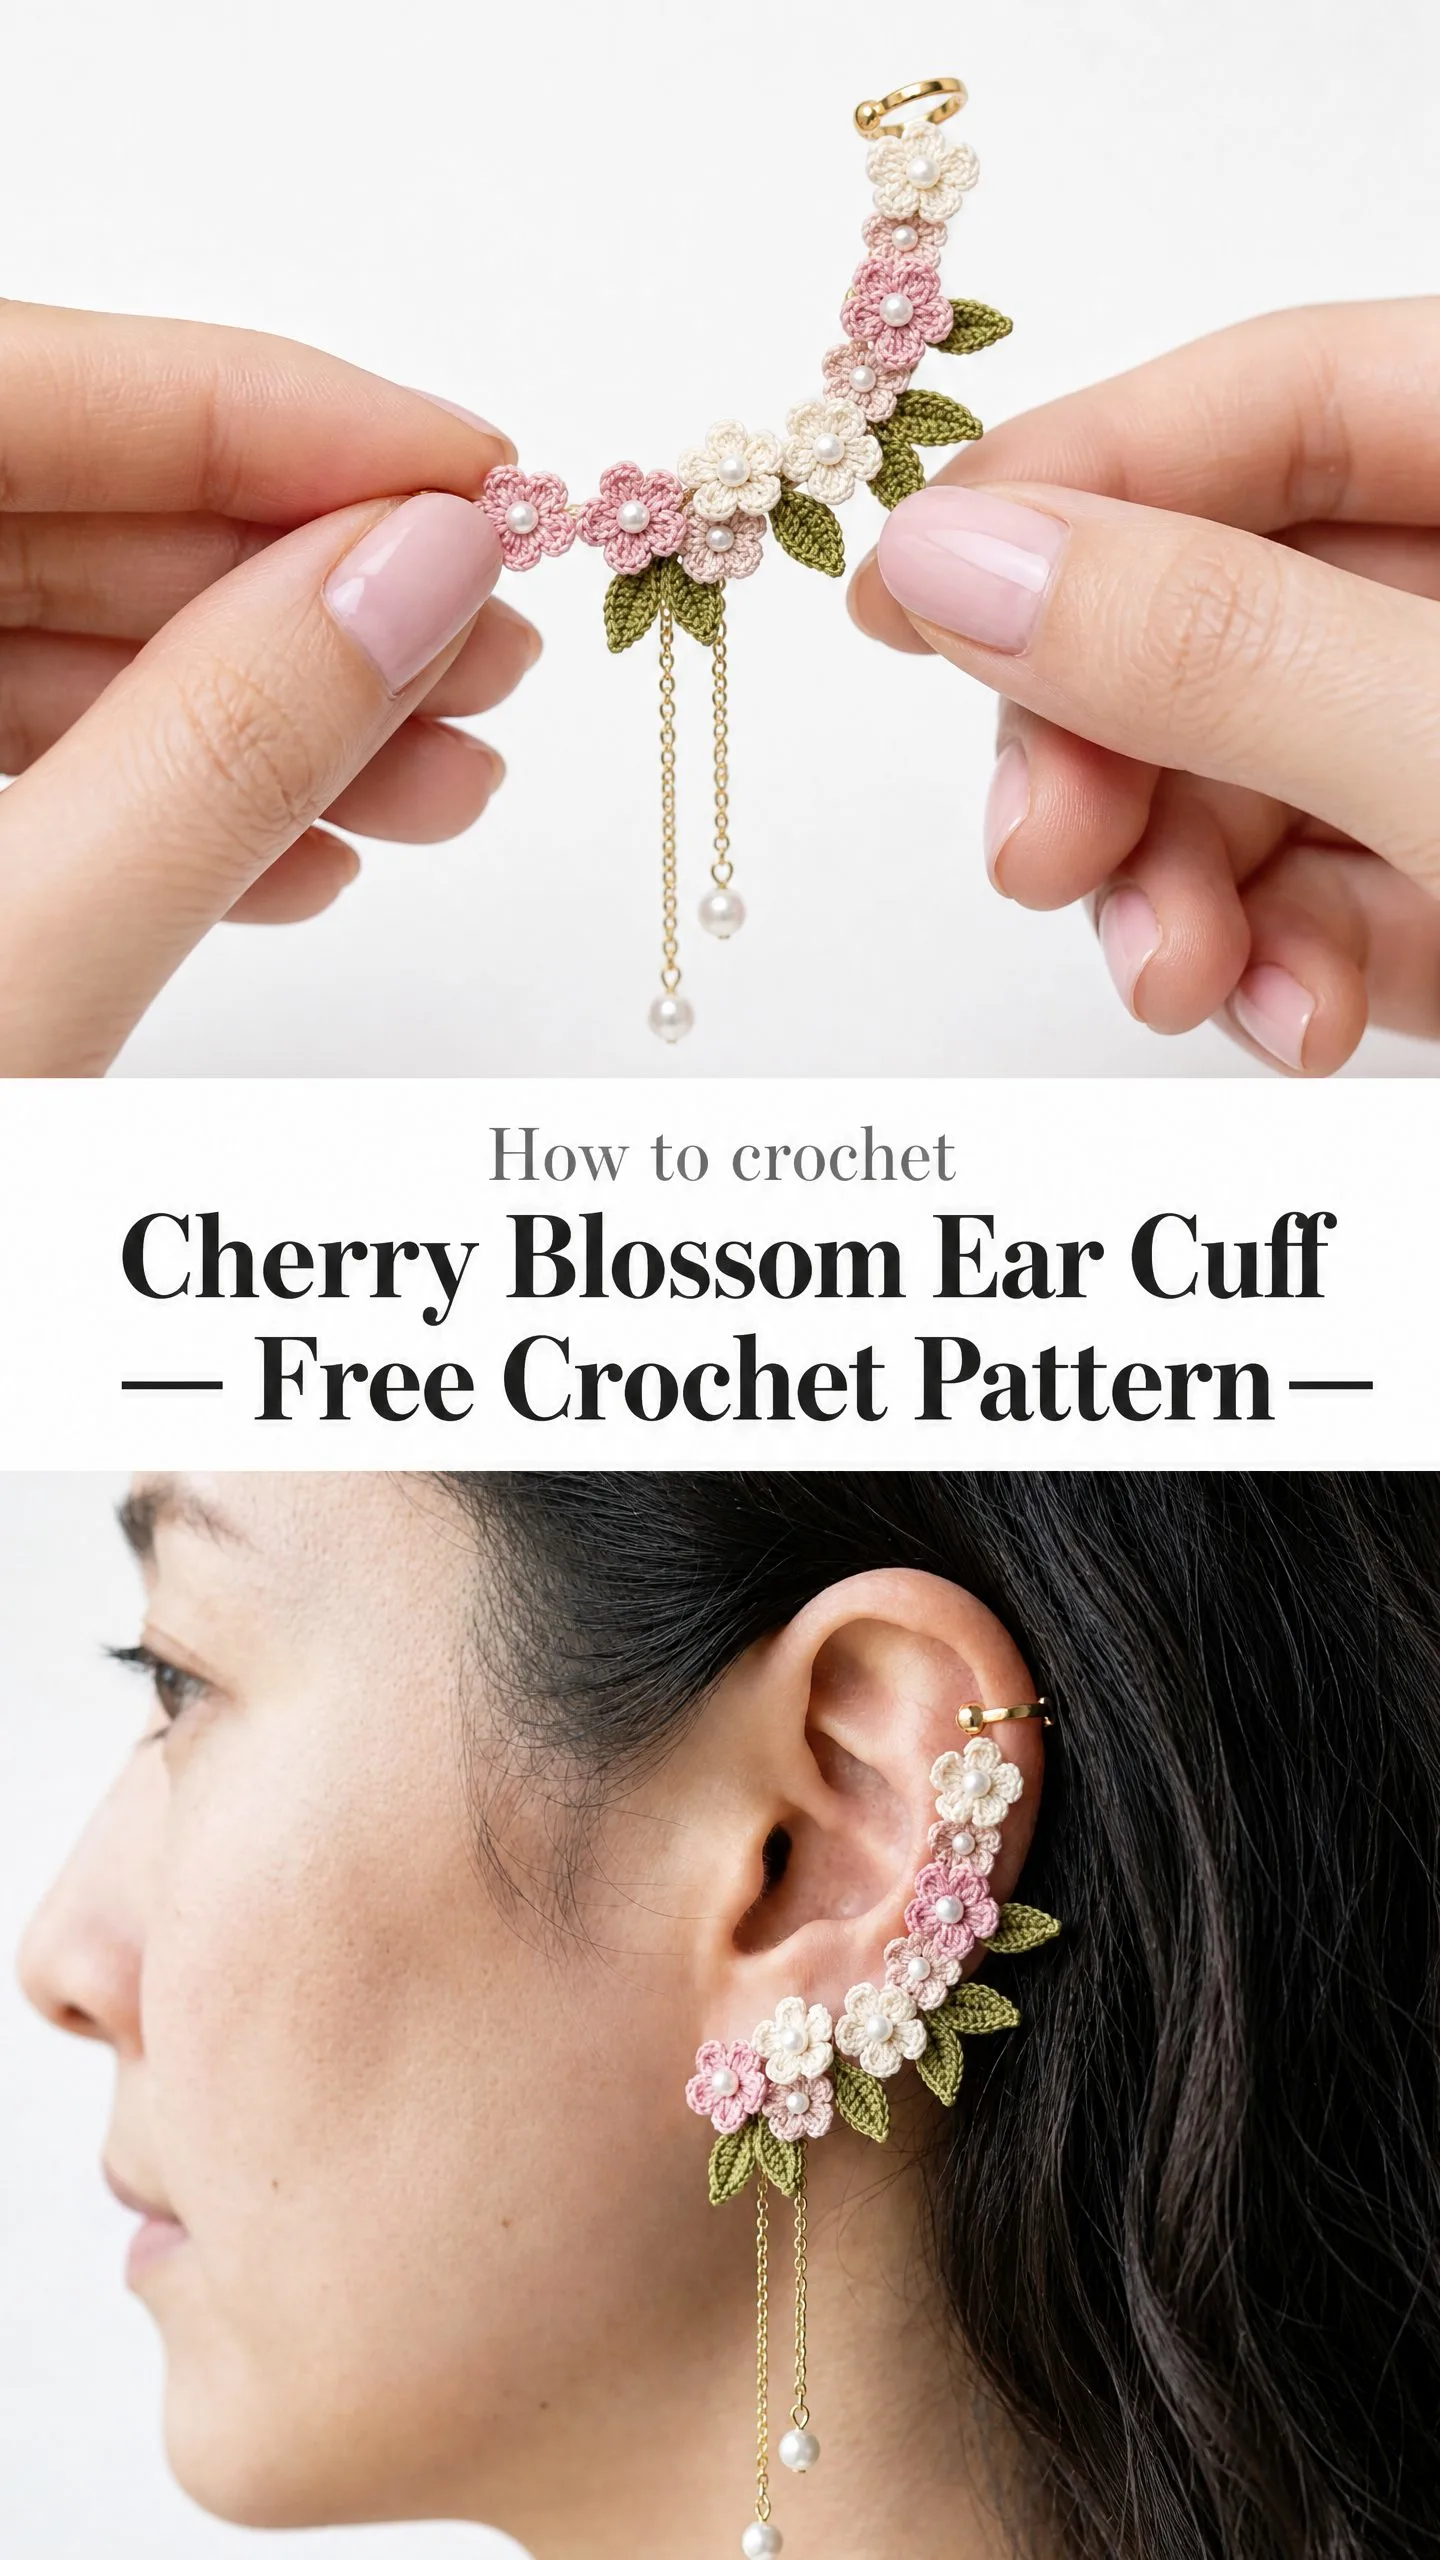
The finished piece features a cascading garland of cream and dusty pink blossoms with sage green leaves, all anchored by a gold ear cuff finding and finished with delicate chain drops. It’s the kind of accessory that makes people stop and ask, "Wait, you made that?"
What You’re Making
This ear cuff creates a botanical garland that curves along the outer rim of your ear from the helix down to the lobe. Eight miniature cherry blossom flowers in alternating cream and dusty rose pink nestle among eight pointed sage green leaves. Each flower center gets a tiny pearl bead, and two gold chains hang from the bottom cluster, each finished with a pearl drop.
The finished size measures approximately 3.5 inches long by 2 inches wide at the widest point, not including the hanging chains. Those chain drops add another 2.5 inches below the base of the cuff. It’s substantial enough to make a statement but light enough to wear comfortably.
This pattern produces one ear cuff for the right ear as shown. To make a left ear version, simply mirror the assembly so everything sits on the opposite side.
Skill Level
I’d call this an intermediate project. The individual motifs themselves use basic stitches and work up quickly once you get the hang of them. The challenge comes from the scale. We’re working with size 10 crochet thread and a tiny steel hook, which requires patience and good lighting.
If you’ve never worked with crochet thread before, don’t let that stop you. The stitches are familiar: single crochet (sc), half double crochet (hdc), double crochet (dc), and slip stitches (sl st). You just need to be comfortable with small-scale work and have steady hands for the assembly and finishing steps.
Time estimate: Four to six hours for one complete ear cuff, including all the joining and finishing. If you’re experienced with thread crochet, you might finish in three hours.
Materials You’ll Need
Yarn and Thread
For this project, you’ll need size 10 crochet cotton thread in three colors:
Yarn suggestions: Aunt Lydia’s Classic Crochet Thread Size 10 works beautifully and comes in all these colors. The tight twist gives crisp stitch definition, which matters when your petals are this small. DMC Cebelia Crochet Cotton Size 10 is another excellent choice with a lovely sheen that complements the pearl embellishments. Lizbeth Crochet Thread Size 10 produces a slightly softer fabric if you prefer petals with gentle drape.
Important substitution note: Stick with size 10 thread. Do not substitute size 3 or size 5 thread, as your motifs will be too large and bulky to sit against the ear gracefully. If you go smaller to size 20 thread, reduce your hook to a 9 or 10 steel hook and expect motifs approximately 15 to 20 percent smaller.
Hook
Steel crochet hook size 7 US steel (1.65 mm)
Steel hooks are numbered differently than regular hooks. The higher the number, the smaller the hook. A size 7 steel hook is quite fine, so work in good light and take breaks to rest your hands.
Notions and Findings
Gather these supplies before you start:
Gauge
One completed cherry blossom flower motif measures approximately 0.5 inch (1.3 cm) in diameter when blocked.
One completed leaf motif measures approximately 0.75 inch (1.9 cm) long by 0.3 inch (0.8 cm) wide when blocked.
Gauge isn’t critical for fit since this is jewelry, but staying close to these measurements ensures your motifs assemble correctly and the piece fits a standard adult ear.
Abbreviations
Let me define each abbreviation before we dive into the instructions:
Special Techniques
The Five-Petal Flower Motif
Each flower is worked in the round, creating a flat five-petaled bloom with a small raised center. The petals form as shells worked into chain spaces.
To work one petal: In the designated chain space, work all of these stitches into that same space: 1 sc, 1 hdc, 2 dc, 1 hdc, 1 sc. This creates one complete rounded petal. After finishing each petal, slip stitch into the base before moving to the next chain space.
The Leaf Motif
Each leaf is worked back and forth along both sides of a foundation chain, creating a pointed oval shape with a rounded tip and pointed base.
Pattern Instructions
Flower Motif
Make 4 in Color A (cream) and 4 in Color B (dusty rose). 8 total.
Begin with a magic ring (MR).
Round 1: Ch 1. Work 5 sc into the magic ring. Pull ring closed snugly. Sl st to the first sc to join. (5 sc)
Round 2: Ch 3 (counts as first ch-3 space). Sl st into the same stitch. (Ch 3, sl st into the next st) 4 times. You will have 5 chain-3 loops total hanging from the ring. (5 ch-3 loops)
Round 3 (petals): Working into each ch-3 loop in turn, work the following into each loop: 1 sc, 1 hdc, 2 dc, 1 hdc, 1 sc. After completing the stitches into each loop, sl st into the base slip stitch at the base of that loop before moving to the next loop. Work this sequence into all 5 loops. (5 petals completed, each containing 6 sts: total 30 sts across all petals)
Fasten off, leaving a tail of approximately 6 inches for sewing.
Checkpoint: Each completed flower should measure approximately 0.5 inch across its widest point. It should lie flat with five distinct rounded petals. The center hole should be small and tight.
Leaf Motif
Make 8 in Color C (sage green).
Ch 7.
Row 1 (first side of leaf): Starting in the second ch from hook: 1 sc in second ch from hook, 1 hdc in next ch, 1 dc in next ch, 1 hdc in next ch, 1 sc in next ch. Work 3 sc into the final ch (this forms the tip of the leaf). Do not turn. Continue working along the underside of the foundation chain, working into the loops on the bottom side of each original chain stitch: 1 sc, 1 hdc, 1 dc, 1 hdc, 1 sc. Sl st into the very first sc worked at the beginning of Row 1 to join and close the leaf base. (13 sts plus the joining slip stitch)
Fasten off, leaving a tail of approximately 6 inches for sewing.
Checkpoint: Each completed leaf should measure approximately 0.75 inch long by 0.3 inch wide. The tip should be rounded and the base should come to a slight point where you joined.
Spine Chain for Ear Cuff Frame
This optional foundation element helps give the assembled garland a consistent curve. Work it in Color A or Color B (your choice, as it will be hidden inside the assembly).
Ch 18. Fasten off, leaving long tails at each end for sewing.
The chain should measure approximately 3 inches relaxed. When curved, it forms the inner arc along which you’ll arrange motifs.
Assembly Instructions
Take your time with assembly. This is where your ear cuff really comes together.
Step 1: Arrange Motifs Before Sewing
Lay the spine chain in a gentle arc on a flat surface, curving it so it resembles the shape of the outer ear rim. The arc should span approximately 3.5 inches from end to end.
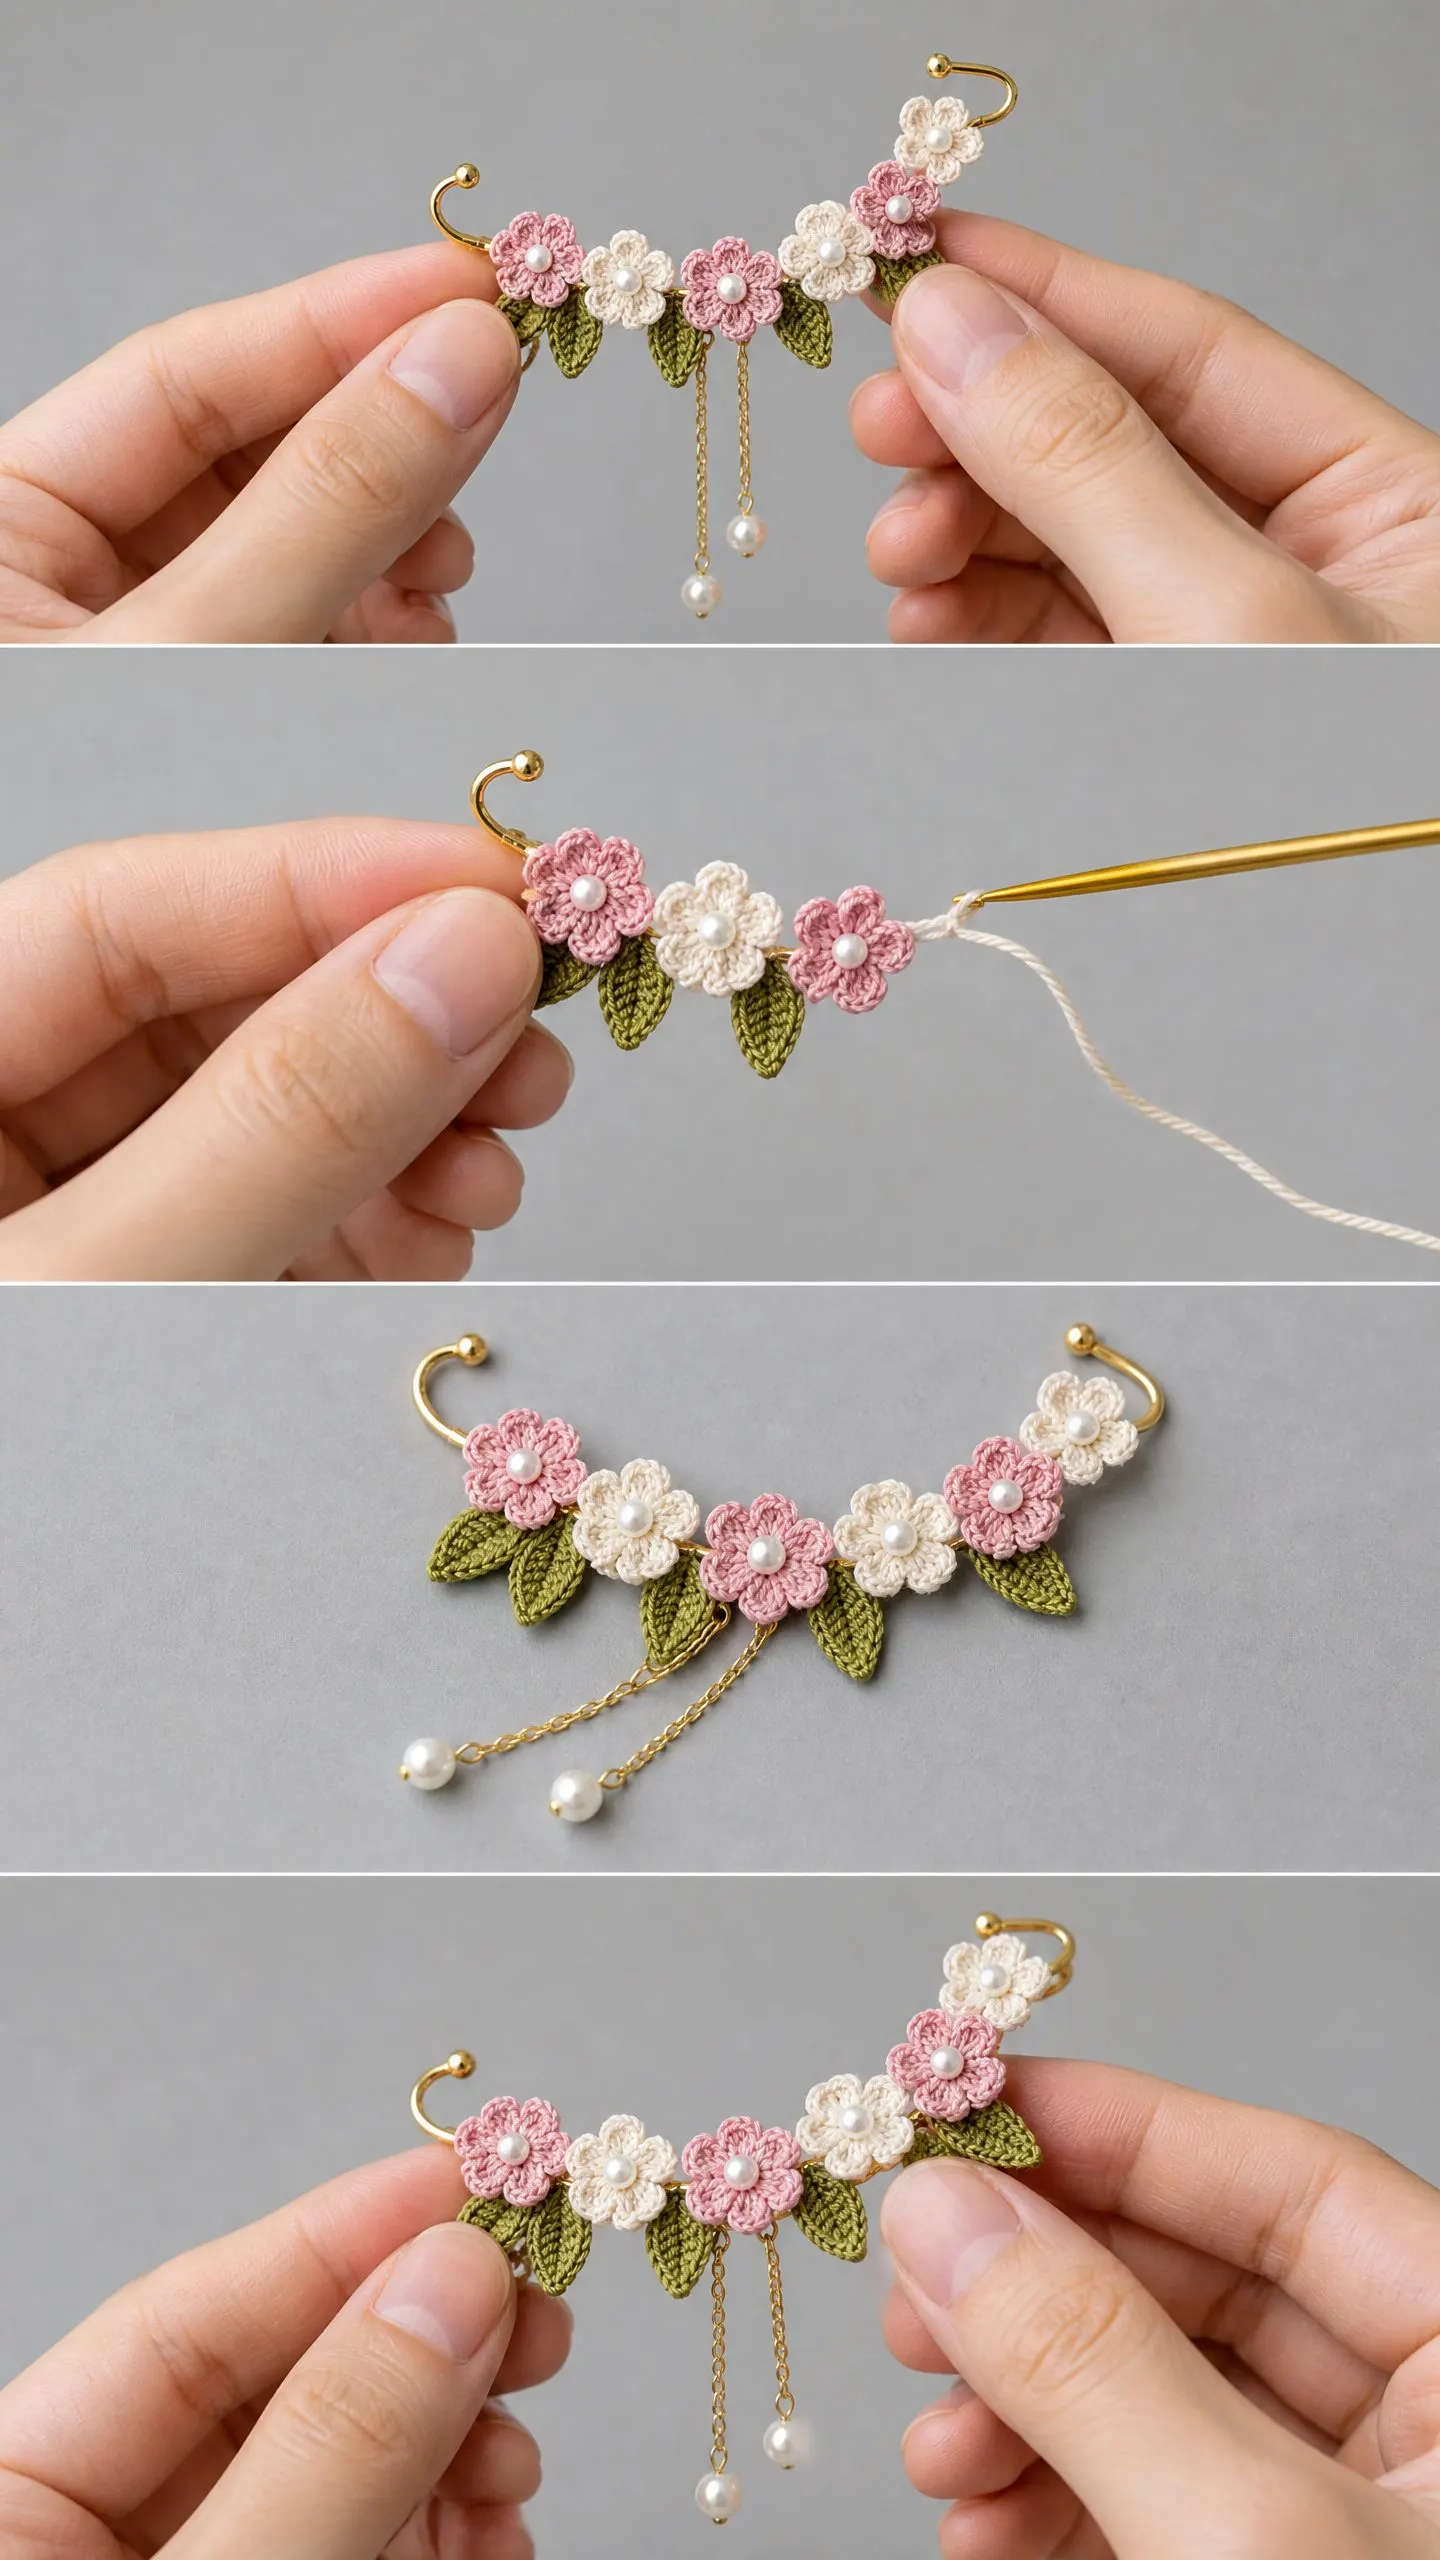
Arrange the eight flowers along the front face of the spine chain arc in the following order from top to bottom (helix end to lobe end): Color A, Color B, Color A, Color B, Color A, Color B, Color A, Color B. Alternate cream and pink throughout.
Tuck the eight leaf motifs around and between the flowers, with leaf tips pointing outward from the arc. Place two leaves at the bottom cluster near the lobe, two leaves in the middle section, and distribute the remaining four across the upper section. Reference your finished images to match the dense, garden-garland look.
The bottom two to three flowers should form a slightly more prominent cluster that hangs just below earlobe level.
Step 2: Sew Flowers to the Spine Chain
Using the tail ends of each flower motif and a fine tapestry needle, sew each flower to the spine chain. Catch the chain link and a stitch from the flower base. Pull firmly so each flower sits flat against the chain. Weave in and trim excess tails except for those you’ll use to join adjacent flowers.
Step 3: Sew Adjacent Flowers Together
Where two flowers sit side by side, use a length of matching thread or a remaining tail to sew the edges of adjacent petals together with two or three whipstitches. This prevents gaps and makes the garland look unified.
Step 4: Sew Leaves to the Assembly
Position each leaf motif behind or beside the flower groupings so that the leaf tips extend beyond the flower edges. Sew each leaf base to the spine chain or to the back of adjacent flower stitches using the leaf tail. The leaves should be slightly visible from the front, peeking between and below flowers.
Step 5: Sew the Pearl Bead Centers
Thread a fine sewing needle with sewing thread in white or cream. Sew one 4 mm pearl bead to the center of each flower, passing the needle through the tight center ring of the flower and through the bead, then back through again, knotting off securely on the back. Repeat for all eight flowers.
Checkpoint: After attaching all flowers, leaves, and pearl centers, your assembled garland should measure approximately 3.5 inches from top to bottom and 2 inches across the widest point at the lower cluster.
Step 6: Attach the Ear Cuff Finding
Position the gold ear cuff finding at the uppermost point of the garland (the helix end). Using matching thread or thin jewelry wire, lash the cuff finding to the top of the spine chain with several tight wraps, then knot securely. The finding should sit perpendicular to the garland so it clamps over the top of the ear while the garland drapes down along the outer rim.
Step 7: Attach the Chain Drops
Open one jump ring using needle-nose pliers. Thread it through the lowest point of the garland at the lobe end, specifically through one of the spine chain links or through a lower flower stitch. Attach one piece of gold chain (3 inch length) to this jump ring. Close the jump ring firmly.
Repeat with a second jump ring and the second chain length, attaching approximately 0.25 inch away from the first point so the two chains hang parallel.
Step 8: Attach Pearl Drop Finishes
Thread one pearl drop bead onto a gold head pin. Using jewelry pliers, bend the top of the head pin into a loop (wrapped loop technique) and attach the loop to the bottom link of one chain before closing it completely. Repeat for the second chain.
Checkpoint: The finished piece with chains should measure approximately 6 inches from the top of the ear cuff finding to the bottom of the pearl drops.
Size Customization Tips
To make it longer (for a larger ear or more dramatic look): Add one or two additional flower and leaf motifs and extend the spine chain by 3 to 4 chains per added motif.
To make it shorter (for a minimalist look): Remove the bottom cluster and work with six flowers instead of eight, reducing the spine chain by approximately 6 chains.
To make a matching pair: Make one assembled cuff as described and one mirrored cuff by flipping the assembly so the chain drops and large lower cluster are on the opposite end.
Finishing and Blocking
Place the finished garland on a clean towel. Mist lightly with water or hold briefly over steam. Gently shape each petal into a slight cup, and ease the leaf shapes into smooth pointed ovals. Allow to dry completely flat with the arc shaped as desired.
Do not press with an iron, as the pearl beads and findings can be damaged by direct heat.
Once dry, if any joins look insecure, apply a tiny drop of clear fabric glue or jewelry adhesive to the back of thread joins only, avoiding all metal findings and pearl surfaces.
Care Instructions
Hand wash gently in cool water with a drop of mild dish soap if the thread becomes soiled. Submerge briefly, swish, rinse thoroughly. Roll in a clean towel to remove excess water. Reshape the garland and allow to air dry flat.
Do not machine wash or tumble dry. Remove the ear cuff from the ear before washing. Store flat or loosely coiled in a small jewelry pouch to prevent tangling and crushing.
Final Thoughts on This Cherry Blossom Ear Cuff Crochet Pattern
This crochet tutorial walks you through every step of creating wearable art. The combination of delicate thread crochet, pearl accents, and gold findings creates something that looks far more complex than it actually is. Each motif uses basic stitches you probably already know. The magic happens in the assembly.
I hope you love making this cherry blossom ear cuff pattern as much as I enjoyed putting together this step by step guide. It makes a gorgeous gift for someone special or a beautiful treat for yourself.
If this cherry blossom ear cuff is calling your name, go ahead and save this pattern to your Pinterest boards so you can find it when you’re ready to start. And please, if you make one, drop a comment below or tag me on social media. I would absolutely love to see your finished ear cuffs blooming!
