
I don’t know about you, but I have always dreamed of owning a dress that looks like it belongs in a summer garden party or a bohemian wedding. Something handmade, intricate, and completely one of a kind. The kind of piece that makes people stop and ask, "Wait, you made that yourself?"
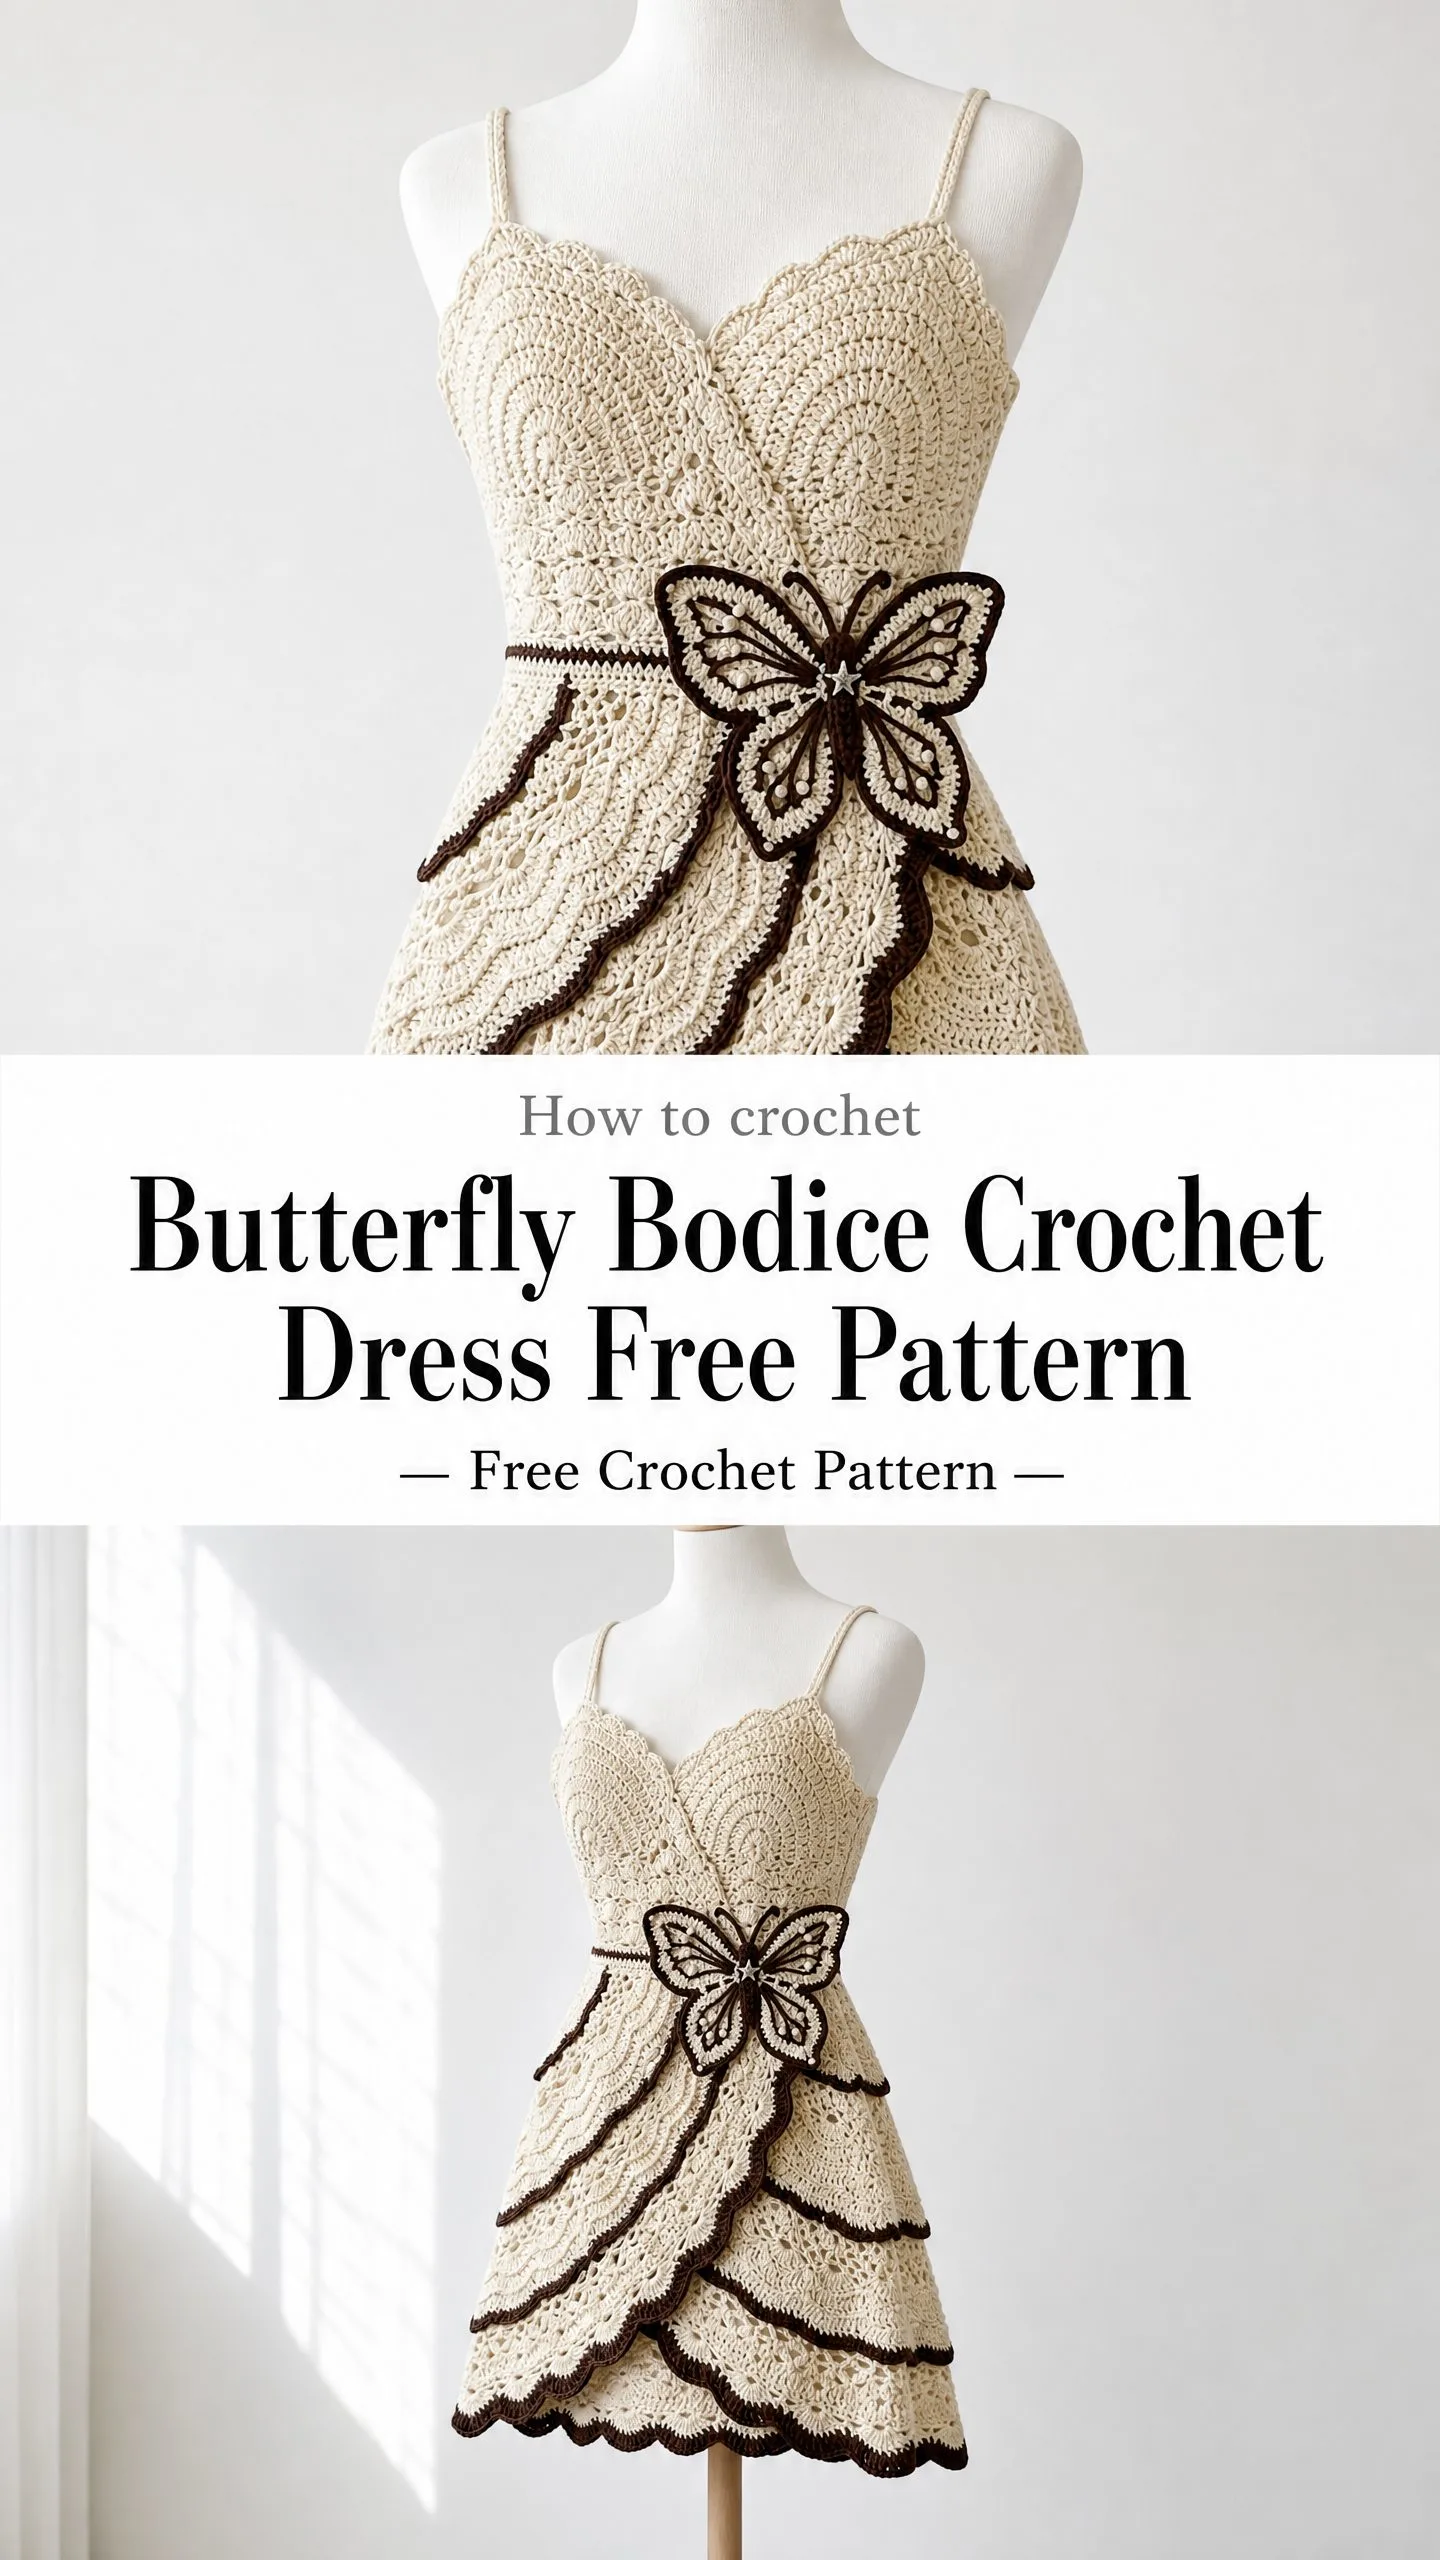
Well, this butterfly bodice crochet dress is exactly that dream brought to life. With its sweetheart neckline, tiered ruffle skirt, and that gorgeous 3D butterfly perched right at the waist, this dress is a true showstopper. Yes, it takes time and patience. But every single hour is worth it when you slip into something you created with your own two hands.
If you have been crocheting for a while and you are ready to challenge yourself with a fitted garment, grab your favorite cotton yarn and let’s dive in together. I promise to walk you through every step.
About This Butterfly Bodice Crochet Dress Pattern
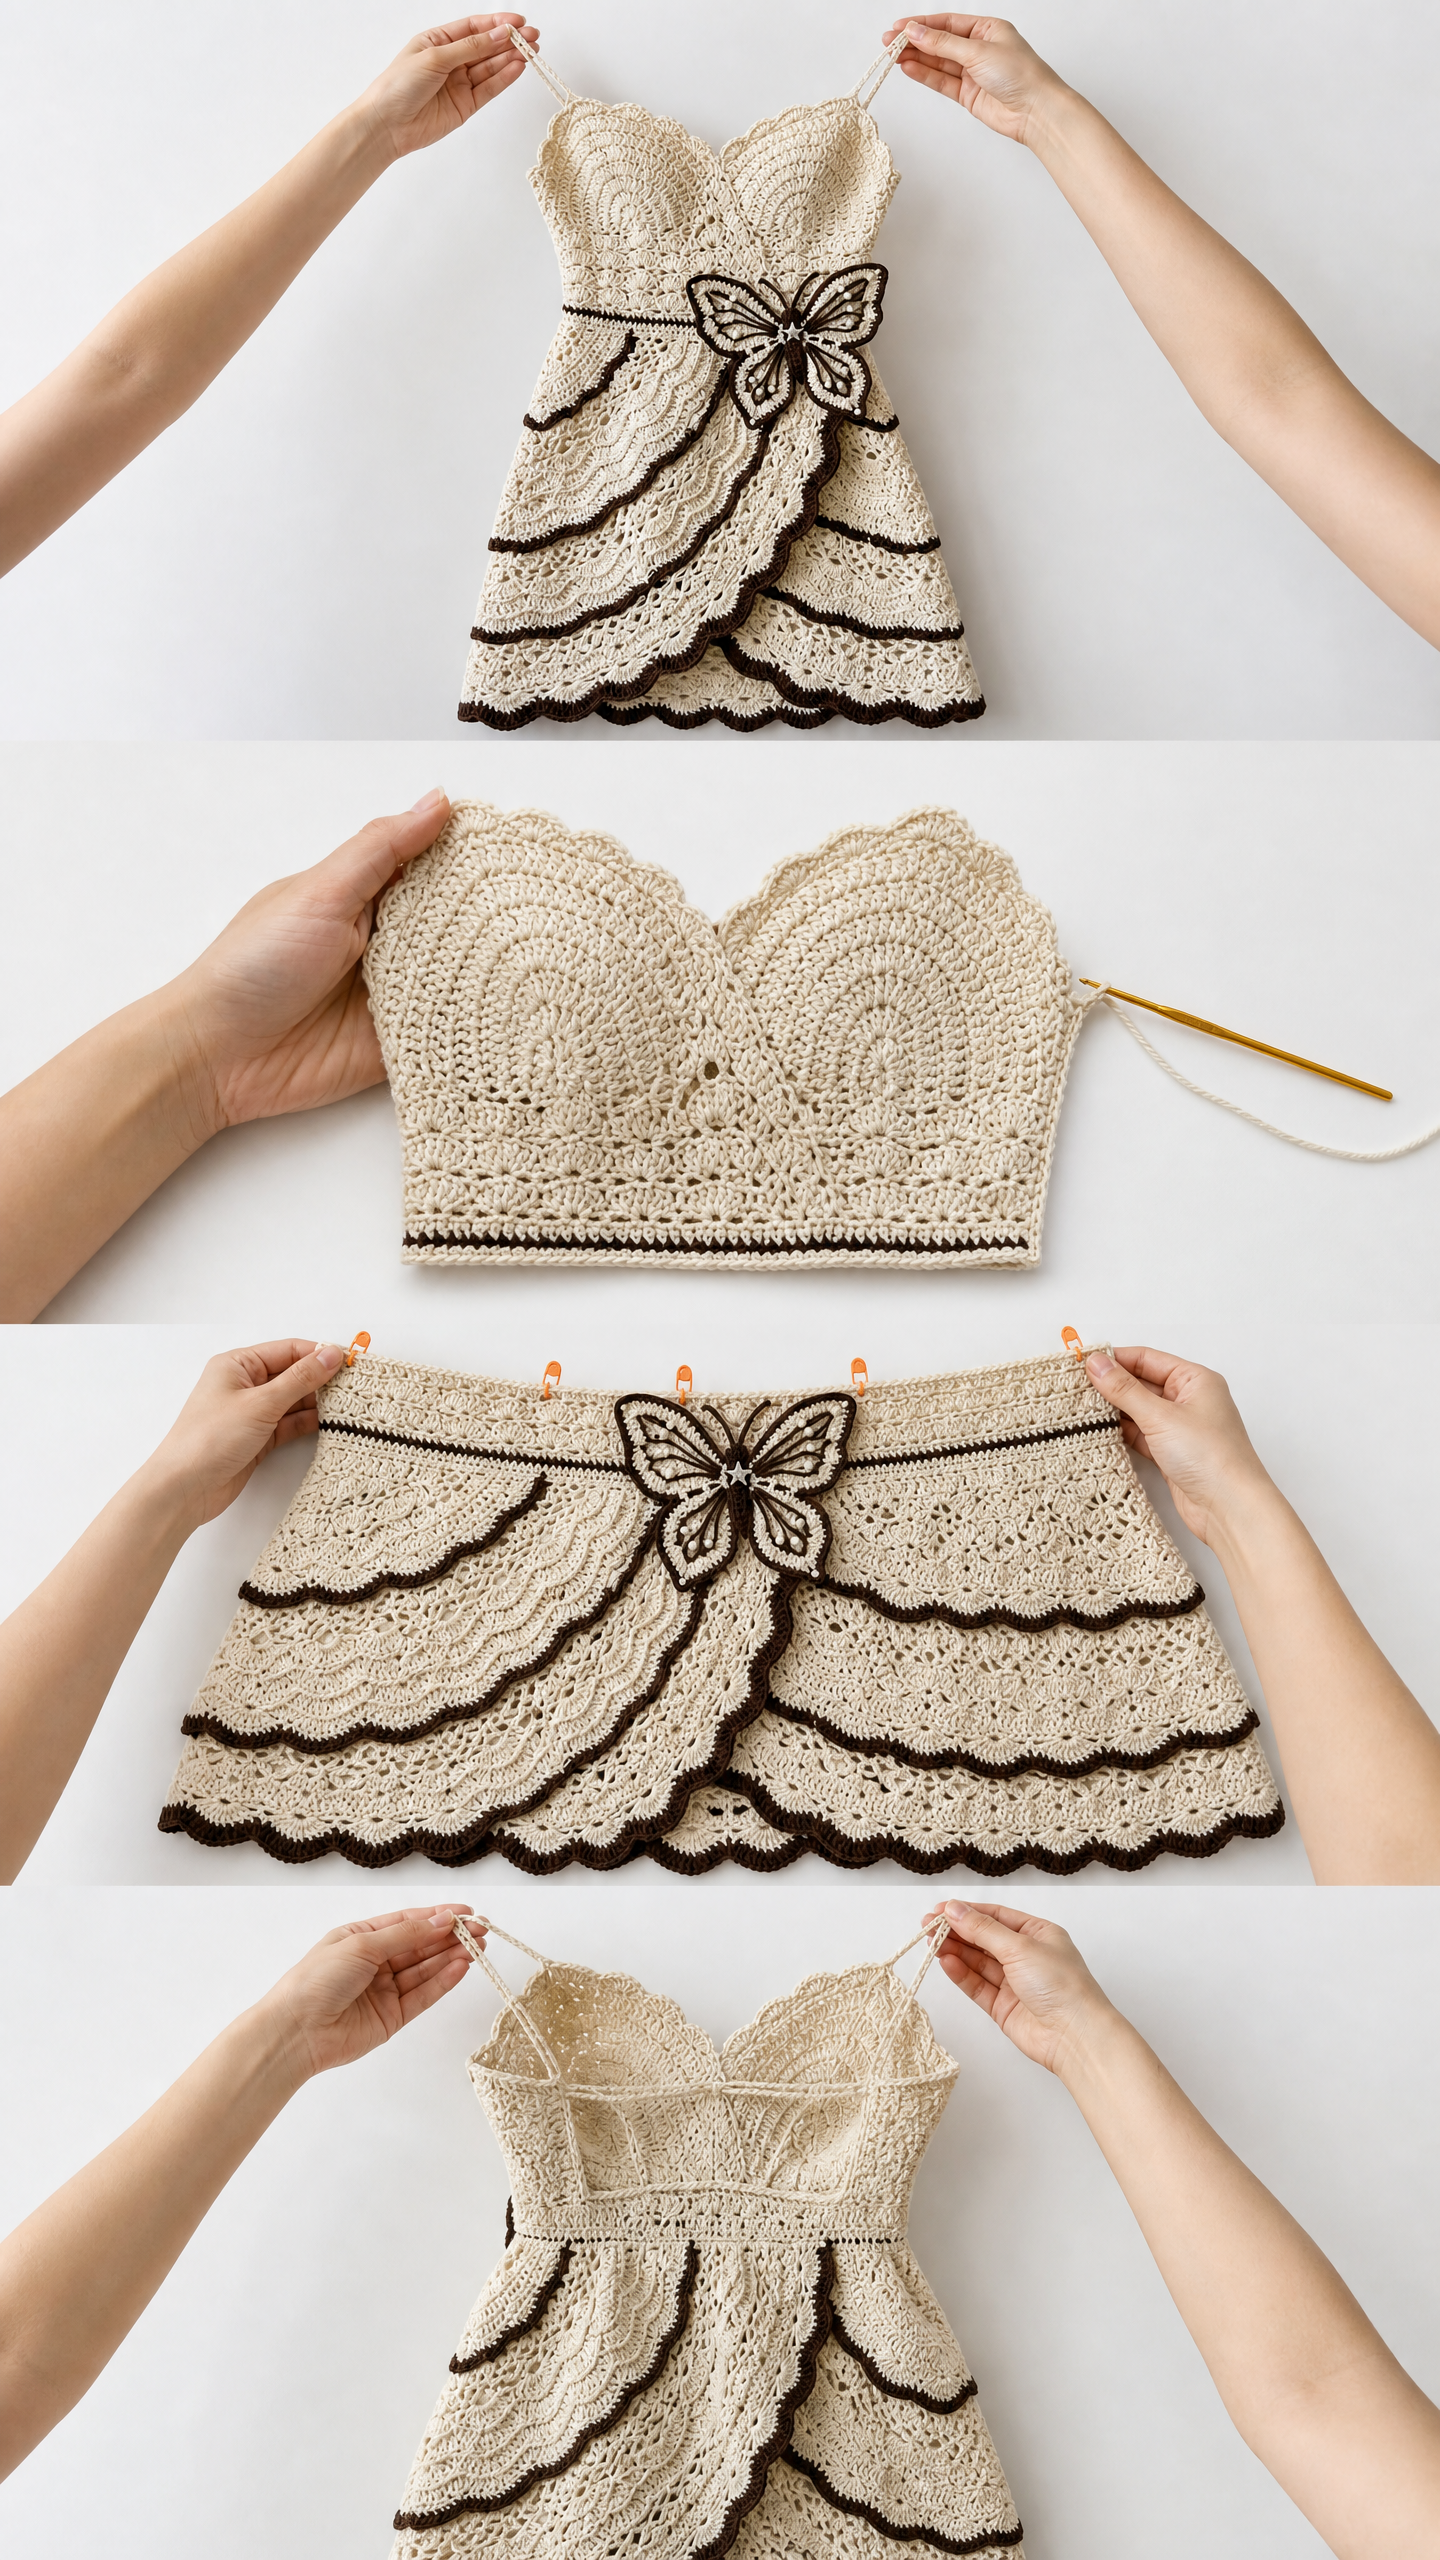
This stunning crochet dress features a fitted bodice worked in a beautiful wave stitch pattern that creates gentle diagonal texture across the fabric. The sweetheart neckline is shaped using short rows, which might sound intimidating but is actually just working partial rows and turning early. The skirt consists of three layered tiers worked in a shell lace stitch with contrast scallop edging in chocolate brown.
The real star of this crochet tutorial is the dimensional butterfly motif at the center front waist. It is constructed from four separate wing pieces, a body, and delicate antennae, then assembled and attached so the wings stay slightly lifted for a true 3D effect.
Skill level: Advanced. You should feel comfortable with sweetheart neckline shaping, short rows, working in the round, picking up stitches along edges, color changes, and constructing motifs. I recommend completing at least two fitted garment projects before attempting this dress.
Time estimate: 40 to 60 hours depending on your experience level.
Finished Size
This pattern is written for size Small (US 4-6).
Finished measurements:
Size modification notes appear at the end of this pattern for those who need to adjust.
Materials Needed for This Crochet Dress Pattern
Yarn A (main color): Cream or natural off-white cotton or cotton-blend DK weight yarn, approximately 1,200 yards / 1,097 m
Yarn B (contrast color): Dark chocolate brown DK weight yarn, approximately 200 yards / 183 m
Hooks:
Additional supplies:
Yarn Suggestions
Option 1: Paintbox Yarns Simply DK (100% cotton, 137 yards / 125 m per 50 g ball). Use Champagne White for Yarn A and Chocolate Brown for Yarn B. This yarn produces excellent stitch definition and is machine washable.
Option 2: Lion Brand 24/7 Cotton DK (100% mercerized cotton, 186 yards / 170 m per 100 g ball). The mercerized finish gives a subtle sheen that enhances the lace texture. Use Natural for Yarn A and Espresso for Yarn B.
Option 3: Paintbox Yarns Cotton DK (100% cotton, 137 yards / 125 m per 50 g ball). Widely available and excellent for warm-weather garments. The matte finish suits the artisan aesthetic of this dress.
Substitution note: Use any DK weight (Light 3) cotton or cotton-blend yarn that achieves the stated gauge. Avoid yarns with excessive stretch or halo, as these will obscure the lace and wave stitch textures. Always work a gauge swatch before beginning.
Gauge
Using E-4 hook and Yarn A in wave stitch pattern:
18 stitches and 14 rows = 4 in / 10 cm
Using F-5 hook and Yarn A in shell lace stitch:
One 6-stitch shell repeat (shell + ch-2 + sc) = 1.25 in / 3.2 cm wide; 4 rows = 2 in / 5 cm
Gauge is critical for a fitted garment. Adjust hook size as needed to match gauge exactly. Trust me on this one. Taking the time to swatch will save you from heartbreak later.
Abbreviations
Special Stitches
Wave Stitch (used in bodice)
This stitch creates a gentle diagonal wave pattern that gives the bodice its texture. It is worked over a multiple of 10 stitches plus 1 turning chain.
Row 1 (RS): Ch 1, sc in first st, (sc in next 4 sts, 3 sc in next st, sc in next 4 sts, sk 1 st) across, sc in last st, turn.
Row 2 (WS): Ch 1, sc in each st across, turn.
Repeat Rows 1 and 2 for pattern. The wave is created by the strategic "3 sc in one st" (peak) and the "sk 1 st" (valley) that always land in the same column on RS rows, building a diagonal wave effect.
Shell Lace Stitch (used in skirt tiers)
Worked over a multiple of 6 stitches plus 1.
Foundation: In designated stitch, work (3 dc, ch 2, 3 dc) for one shell.
Row/Rnd 1: Ch 3, sk 2 sts, sc in next st, (ch 2, shell in next st, ch 2, sc in next st) across, turn.
Row/Rnd 2: Ch 3, 3 dc in first ch-2 sp, ch 2, sc in top of shell ch-2 sp, (ch 2, shell in next sc, ch 2, sc in next shell ch-2 sp) across, 3 dc in last ch-2 sp, turn.
Repeat Row/Rnd 2 for pattern.
Scallop Edge (Yarn B, used on all tier hems)
Attach Yarn B to any stitch at hem edge. Ch 1, sc in same st, (sk 2 sts, 5 dc in next st, sk 2 sts, sc in next st) across, join with sl st to first sc. Fasten off.
Contrast Chain Trim (Yarn B, used on tier horizontal lines)
Attach Yarn B at edge. Sl st evenly across the top edge of each tier at a rate of 1 sl st per stitch, working loosely so edge does not pucker. Fasten off.
Sc Decrease (sc2tog)
Insert hook into first stitch, pull up loop (2 loops on hook). Insert hook into second stitch, pull up loop (3 loops on hook). Yo and draw through all 3 loops.
Pattern Notes
The dress is worked in the following order: back bodice panel, front bodice panel (with sweetheart shaping), seaming bodice at sides, picking up stitches for skirt, working skirt tiers in the round outward from bodice, adding straps, adding contrast trim, making and attaching butterfly motif, and making the waist tie.
All stitch counts in parentheses at the end of each row or round reflect the total number of working stitches in that row or round, not counting turning chains unless specified.
Turning chain 1 counts as sc. Turning chain 3 counts as dc.
The sweetheart neckline is shaped using short rows on the front panel only. The center front dip is created by working partial rows and leaving the center stitches unworked temporarily.
The skirt tiers are worked flat (back and forth in rows) but joined at side seams. Each tier is worked as a rectangle and the hem of each tier is gathered slightly by picking up more stitches than the row below. This creates the layered ruffle effect.
Step by Step Instructions
Back Bodice Panel
Foundation Chain: Using Yarn A and E-4 hook, ch 74.
Row 1 (RS): Sc in 2nd ch from hook, sc in each ch across. Turn. (73 sc)
Row 2 (WS): Ch 1, sc in each st across. Turn. (73 sc)
Rows 3 through 4: Rep Row 2. (73 sc)
Begin Wave Stitch. Note: 73 = 7 repeats of 10 sts plus 3 extra sts at edges for symmetry.
Row 5 (RS): Ch 1, sc in first st, sc in next 1 st, (sc in next 4 sts, 3 sc in next st, sc in next 4 sts, sk 1 st) 7 times, sc in last 2 sts. Turn. (73 sc)
Row 6 (WS): Ch 1, sc in each st across. Turn. (73 sc)
Rows 7 through 28: Rep Rows 5 and 6 (12 more complete wave repeats). (73 sc)
Waist Decrease Section (Rows 29 through 36)
Row 29 (RS): Ch 1, sc2tog, sc in next 69 sts, sc2tog. Turn. (71 sc)
Row 30 (WS): Ch 1, sc in each st across. Turn. (71 sc)
Row 31 (RS): Ch 1, sc2tog, sc in next 67 sts, sc2tog. Turn. (69 sc)
Row 32 (WS): Ch 1, sc in each st across. Turn. (69 sc)
Row 33 (RS): Ch 1, sc2tog, sc in next 65 sts, sc2tog. Turn. (67 sc)
Row 34 (WS): Ch 1, sc in each st across. Turn. (67 sc)
Row 35 (RS): Ch 1, sc2tog, sc in next 63 sts, sc2tog. Turn. (65 sc)
Row 36 (WS): Ch 1, sc in each st across. Turn. (65 sc)
Waist Band Row (Row 37): Ch 1, sc in each st across. Turn. (65 sc)
Note: The natural waist is at Row 37. The skirt will be picked up here later.
Underarm Shaping (Rows 38 through 46)
Row 38 (RS): Ch 1, sc2tog, sc in next 61 sts, sc2tog. Turn. (63 sc)
Row 39 (WS): Ch 1, sc in each st across. Turn. (63 sc)
Row 40 (RS): Ch 1, sc2tog, sc in next 59 sts, sc2tog. Turn. (61 sc)
Row 41 (WS): Ch 1, sc in each st across. Turn. (61 sc)
Row 42 (RS): Ch 1, sc2tog, sc in next 57 sts, sc2tog. Turn. (59 sc)
Row 43 (WS): Ch 1, sc in each st across. Turn. (59 sc)
Row 44 (RS): Ch 1, sc2tog, sc in next 55 sts, sc2tog. Turn. (57 sc)
Row 45 (WS): Ch 1, sc in each st across. Turn. (57 sc)
Row 46 (RS): Ch 1, sc2tog, sc in next 53 sts, sc2tog. Turn. (55 sc)
Straight Top Band (Rows 47 through 50)
Row 47 (WS): Ch 1, sc in each st across. Turn. (55 sc)
Row 48 (RS): Ch 1, sc in each st across. Turn. (55 sc)
Rows 49 through 50: Rep Row 47 and 48. (55 sc)
Fasten off. This completes the back bodice panel. Set aside.
CHECKPOINT: Back panel should measure approximately 10 in / 25.5 cm tall and 16.5 in / 42 cm wide at the widest point (foundation), narrowing to approximately 12 in / 30.5 cm wide at the top.
Front Bodice Panel
Foundation Chain: Using Yarn A and E-4 hook, ch 74.
Row 1 (RS): Sc in 2nd ch from hook, sc in each ch across. Turn. (73 sc)
Rows 2 through 4: Ch 1, sc in each st across. Turn. (73 sc)
Rows 5 through 28: Work Wave Stitch same as back panel. (73 sc)
Waist Decrease Section (Rows 29 through 36): Same as back panel Rows 29 through 36. (65 sc after Row 36)
Row 37 (Waist Band Row): Ch 1, sc in each st across. Turn. (65 sc)
Underarm Shaping Rows 38 through 46: Same as back panel. (55 sc after Row 46)
Straight Band Rows 47 through 48: Same as back panel. (55 sc)
Now work the sweetheart neckline using short rows.
Sweetheart Neckline Shaping
The neckline is divided at the center (stitch 28 from each edge). The panel is worked as two cups, left cup first.
Left Cup
Row 49 (RS): Ch 1, sc in first 25 sts, sc2tog over sts 26 and 27. Turn. Leave remaining 28 sts unworked. (26 sc)
Row 50 (WS): Ch 1, sc2tog, sc in next 22 sts, sc2tog. Turn. (24 sc)
Row 51 (RS): Ch 1, sc2tog, sc in next 20 sts, sc2tog. Turn. (22 sc)
Row 52 (WS): Ch 1, sc2tog, sc in next 18 sts, sc2tog. Turn. (20 sc)
Row 53 (RS): Ch 1, sc in each st across. Turn. (20 sc)
Row 54 (WS): Ch 1, sc in each st across. Do not fasten off. (20 sc)
Neckline scallop edge on left cup: Still on WS with Yarn B, ch 1, work scallop edge (5 dc in sc, sk 2, sc) across top of left cup edge. Fasten off Yarn B.
Right Cup
Row 49R (RS): Attach Yarn A to stitch 29 of Row 48, RS facing. Ch 1, sc2tog over sts 28 and 29, sc in next 25 sts. Turn. (26 sc)
Row 50R (WS): Ch 1, sc2tog, sc in next 22 sts, sc2tog. Turn. (24 sc)
Row 51R (RS): Ch 1, sc2tog, sc in next 20 sts, sc2tog. Turn. (22 sc)
Row 52R (WS): Ch 1, sc2tog, sc in next 18 sts, sc2tog. Turn. (20 sc)
Row 53R (RS): Ch 1, sc in each st across. Turn. (20 sc)
Row 54R (WS): Ch 1, sc in each st across. Fasten off Yarn A. (20 sc)
Apply scallop edge on right cup top edge same as left cup.
Apply scallop edge to the V-shaped inner center dip: Attach Yarn B at lower center of sweetheart dip. Work sc evenly up one side, sc in center point, sc evenly down other side to join. Fasten off.
CHECKPOINT: The front panel should match the back panel in width and height. The sweetheart top adds approximately 1.5 in / 3.8 cm of scalloped height above the straight band at center front. Each cup top measures approximately 4.5 in / 11.5 cm wide.
Seaming the Bodice
Lay front and back panels with WS together. Using Yarn A and tapestry needle, whipstitch or mattress stitch the two side seams from Row 1 (hem, waist pick-up row) up to Row 46 (just before the top band). Leave the top edges open for now. Leave an opening at each side under the arms between Rows 38 and 46 of approximately 1.5 in / 3.8 cm for a clean armhole edge. The front and back top bands are left separate at shoulders for strap attachment.
The resulting tube at the waist (Row 37) has a circumference of 130 stitches (65 front plus 65 back).
CHECKPOINT: After seaming, try the bodice on (or measure against a dress form). The waist should measure approximately 26 in / 66 cm around, the bust line (Row 44 to 46) approximately 30 in / 76 cm around (this will be eased slightly with straps), and the lower bust/waist transition should feel snug but not binding.
Waist Chain Row (Butterfly Belt Channel)
Attach Yarn B at the right side seam at Row 37.
Round 1: Ch 1, sl st in each st around the waist edge (working into both front and back panel rows at Row 37). Join with sl st. (130 sl st)
This creates the Yarn B chain ring that serves as the belt channel visible at the waistline. The butterfly tie belt will thread through this ring later.
Fasten off Yarn B.
Skirt Tiers
The skirt is constructed in three tiers worked in rows (back and forth, flat), seamed at the sides after each tier to form a tube. Each tier fans out by increasing stitches in the foundation row to create the ruffle effect.
Tier 1
Tier 1 spans from the waist (Row 37 of bodice) downward for approximately 5.5 in / 14 cm.
Foundation Row: Attach Yarn A with F-5 hook at right side seam at Row 37 waist edge. Working into the free bottom-edge loops of Row 37 of both front and back panels, ch 1, work 2 sc in every 3rd st around the entire waist circumference (130 sts divided: work 1 sc in first st, 1 sc in second st, 2 sc in third st, repeat). This produces approximately 174 sts in the foundation row of Tier 1. (174 sc)
Row 1 (RS): Ch 3 (counts as dc), sk first st, (3 dc in next st, ch 2, sc in next st, ch 2) across, ending dc in last st. Turn. With 174 sts: 174 divided by 6 = 29 repeats exactly. Work 29 shells. (174 working positions, 29 shells plus 2 edge dc)
Rows 2 through 11: Work shell lace stitch pattern as described in SPECIAL STITCHES. Rep Row/Rnd 2 of shell lace stitch 10 times. Each row maintains 29 shell repeats.
Contrast Scallop Hem: Attach Yarn B. Work scallop edge (sc, sk 2, 5 dc in next st, sk 2) across the bottom of Tier 1, working into the bases of the last shell row. Each 6-st shell repeat accommodates 1 scallop repeat. Work 29 scallops. Fasten off Yarn B.
Contrast Top Trim: Attach Yarn B at top of Tier 1 (the foundation row join edge). Sl st in each st across. Fasten off Yarn B.
Seam Tier 1: With WS together, seam the two side edges of Tier 1 using mattress stitch. Tier 1 is now a tube.
CHECKPOINT: Tier 1 should measure approximately 5.5 in / 14 cm tall and approximately 38.5 in / 98 cm around at the hem.
Tier 2
Tier 2 is picked up at the Row 37 waist edge of the bodice, behind (overlapping) Tier 1, approximately 1 in / 2.5 cm below the Tier 1 foundation row. This creates the layered overlap effect.
Foundation Row: Attach Yarn A with F-5 hook 1 in / 2.5 cm below Tier 1 foundation row, working into the front bodice and back bodice lower skirt edge available stitches. Work 2 sc in each st around for a total of approximately 216 sc, adjusted to the nearest multiple of 6. (216 sc)
Note: 216 divided by 6 = 36 repeats exactly.
Rows 1 through 13: Work shell lace stitch for 13 rows maintaining 36 shell repeats.
Contrast Scallop Hem: Attach Yarn B. Work 36 scallops as before. Fasten off Yarn B.
Contrast Top Trim: Sl st Yarn B across top edge. Fasten off Yarn B.
Seam Tier 2 at sides.
CHECKPOINT: Tier 2 should measure approximately 6.5 in / 16.5 cm tall and approximately 48 in / 122 cm around at the hem.
Tier 3
Tier 3 is the bottom hem tier and widest layer.
Foundation Row: Attach Yarn A with F-5 hook 1.25 in / 3.2 cm below Tier 2 foundation row. Work 2 sc in every st around for approximately 258 sc, adjusted to nearest multiple of 6. (258 sc)
Note: 258 divided by 6 = 43 repeats exactly.
Rows 1 through 15: Work shell lace stitch for 15 rows maintaining 43 shell repeats.
Contrast Scallop Hem: Attach Yarn B. Work 43 scallops. Fasten off Yarn B.
Contrast Top Trim: Sl st Yarn B across top edge. Fasten off Yarn B.
Seam Tier 3 at sides.
CHECKPOINT: Tier 3 should measure approximately 7.5 in / 19 cm tall and approximately 57 in / 145 cm around at the hem. Total dress length from top of bodice to bottom of Tier 3 hem should be approximately 27 to 28 in / 68.5 to 71 cm.
Skirt Overlap Draping
To create the diagonal front drape visible on the skirt, Tiers 2 and 3 are not seamed entirely at one side. At the front right seam only, leave the top 2 in / 5 cm of each tier seam open and allow Tier 2 to drape slightly over Tier 1 at the front right. Tack each tier’s upper-right corner to the bodice side seam at the waist using a few whipstitches, pulling the top corner of Tier 2 upward by approximately 1.5 in / 3.8 cm to create the swept drape. Repeat for Tier 3, sweeping upward by approximately 1 in / 2.5 cm. This creates the asymmetrical diagonal waterfall effect visible on the skirt front.
Shoulder Straps
Two options are given. Option 1 uses crocheted chains. Option 2 uses narrow ribbon or lingerie strap.
Crocheted Strap (make 2):
With Yarn A and E-4 hook, ch 65 (approximately 14 in / 35.5 cm unstretched). Sl st in each ch back across for a firm double-thickness strap. Fasten off, leaving a 12 in / 30.5 cm tail for sewing.
Attach each strap at the outer top corner of the front bodice (each cup outer corner at Row 54) and at the corresponding position on the back panel top band (Row 50). Adjust strap length for desired fit before fastening off permanently. Each strap joins at the scallop neckline edge of the front cup and at the straight top edge of the back panel.
Waist Tie Belt
With Yarn B and E-4 hook, ch 200 (approximately 43 in / 109 cm).
Row 1: Sl st in each ch across. Fasten off.
Thread the tie belt through the Yarn B chain ring at the waist (Round 1 of the Waist Chain Row). Pull ends to even them on each side. The butterfly motif will be centered at front over this tie.
Butterfly Motif
The butterfly is worked in pieces: two upper wings, two lower wings, a central body, and two antennae.
Upper Wings (make 2)
With Yarn B and E-4 hook, work into a magic ring.
Round 1: Ch 3 (counts as dc), 11 dc in ring. Join. (12 dc)
Round 2: Ch 3, dc in same st, 2 dc in each st around. Join. (24 dc)
Round 3: Ch 3, dc in same st, dc in next st, (2 dc in next st, dc in next st) around. Join. (36 dc)
Round 4: Ch 1, sc in first 10 sts, (hdc, dc, tr, dc, hdc) in next st (this creates the pointed wing tip), sc in next 14 sts, (hdc, dc, tr, dc, hdc) in next st (second tip), sc in rem 10 sts. Join. (46 sts)
Round 5 (Yarn A): Attach Yarn A. Ch 1, sc in each st around. Join. (46 sc)
Round 6 (Yarn B): Attach Yarn B. Ch 1, sl st in each st around. Join. Fasten off.
Make 2 upper wings. Do not mirror them; the shape is symmetrical by default.
Lower Wings (make 2)
With Yarn B and E-4 hook, work into a magic ring.
Round 1: Ch 3, 9 dc in ring. Join. (10 dc)
Round 2: Ch 3, dc in same st, 2 dc in each st around. Join. (20 dc)
Round 3: Ch 3, dc in same st, dc in next st, (2 dc in next st, dc in next st) around. Join. (30 dc)
Round 4: Ch 1, sc in first 8 sts, (hdc, dc, tr) in next st (outer lower wing tip), dc in next 2 sts, (tr, dc, hdc) in next st, sc in next 8 sts, sl st in rem 10 sts for the inner straight edge. (30 sts)
Round 5 (Yarn A): Attach Yarn A. Ch 1, sc in each st around. Join. (30 sc)
Round 6 (Yarn B): Attach Yarn B. Sl st in each st around. Fasten off.
Butterfly Body
With Yarn B and E-4 hook, ch 12.
Row 1: Sc in 2nd ch from hook, sc in each ch across. Turn. (11 sc)
Rows 2 through 3: Ch 1, sc in each st across. Turn. (11 sc)
Row 4: Ch 1, sc2tog, sc in next 7 sts, sc2tog. Turn. (9 sc)
Row 5: Ch 1, sc2tog, sc in next 5 sts, sc2tog. Turn. (7 sc)
Row 6: Ch 1, sc in each st across. Turn. (7 sc)
Row 7: Ch 1, (2 sc in next st, sc in next 2 sts) twice, sc in last st. Turn. (9 sc)
Row 8: Ch 1, (2 sc in next st, sc in next 3 sts) twice, sc in last st. (11 sc) Fasten off, leaving a long tail.
The body narrows at the waist (Rows 4 and 5) and widens again at the thorax (Rows 7 and 8). If desired, fold the body piece lengthwise and seam the long edges, stuffing lightly before closing, for a more 3D appearance.
Butterfly Antennae (make 2)
With Yarn B and E-4 hook, ch 14.
Sl st in 2nd ch from hook. (1 sl st)
Work 10 sl sts across chain. (11 sl sts)
At tip: ch 3, sl st in first ch from hook to form small loop. Fasten off.
Each antenna is a firm chain cord with a tiny loop at the tip.
Butterfly Assembly
Lay the two upper wings side by side with the straight inner edges touching. Place the two lower wings below them, also with inner straight edges touching and slightly overlapping the lower portion of the upper wings by approximately 0.25 in / 6 mm. Place the body piece vertically at the center, overlapping where all four wings meet. Using Yarn B and tapestry needle, whipstitch all pieces together at the center join. Attach the two antennae at the top of the body piece, angling outward and upward. Tack down lightly to hold the angle.
The finished butterfly should measure approximately 5 in / 12.5 cm wide (wingspan) and 4 in / 10 cm tall.
Butterfly Attachment
Center the assembled butterfly at the front waist over the Yarn B chain row and the tie belt knot/center. Using Yarn B, tack the butterfly body firmly to the dress at the center front waist.
