
I call this one the Rosalie choker.
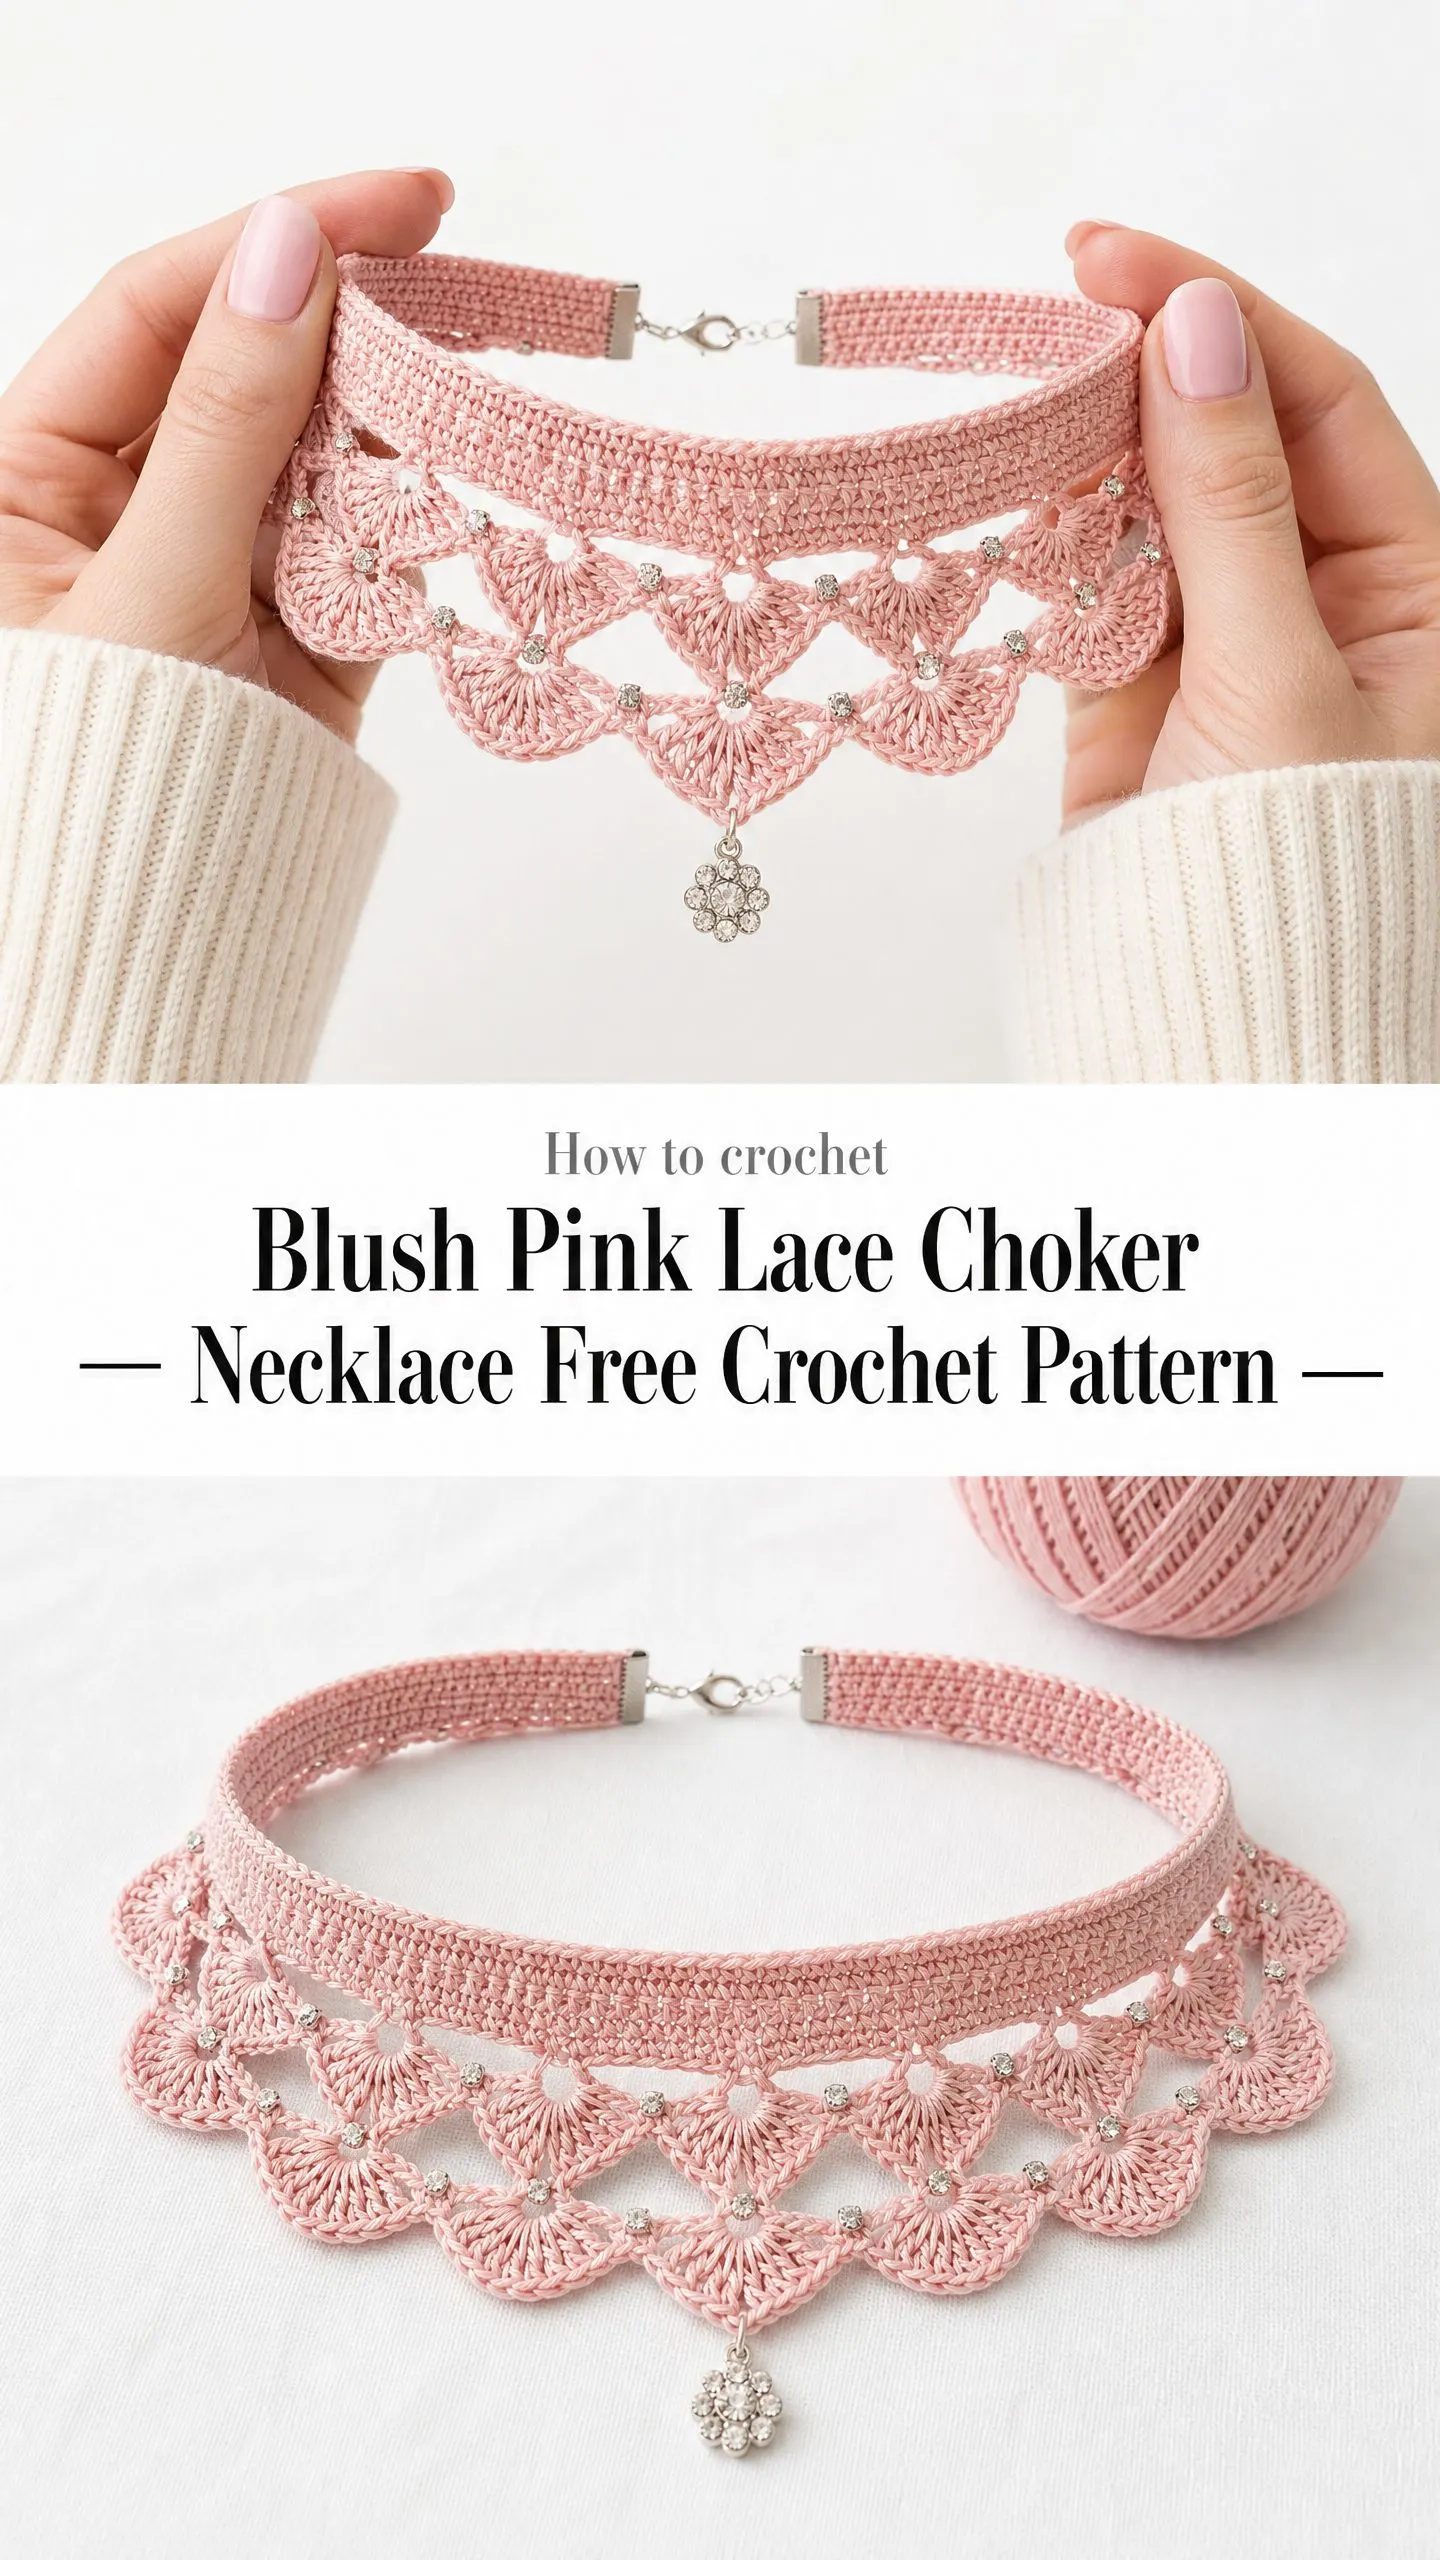
I sketched the first version of this design in a little notebook about three years ago, sitting in a coffee shop and watching rain streak down the windows. A friend had asked me to make something special for her daughter’s sweet sixteen, and I wanted to create jewelry that felt delicate and romantic but still had a handmade warmth to it. That original sketch had scalloped edges, tiny sparkling beads, and a single charm dangling from the center.
The pattern sat in that notebook for a long time. I pulled it out last spring, reworked the proportions, tested the bead placement about a dozen times, and finally got it exactly right. The Rosalie choker is now one of my favorite pieces I have ever designed.
If you have never tried crochet jewelry before, this project might surprise you. Working with fine thread feels different from yarn, but once you get the rhythm, it is incredibly satisfying. The finished piece looks like something you would find in a boutique, and it makes a stunning gift for someone you love.
What Makes This Crochet Choker Pattern Special
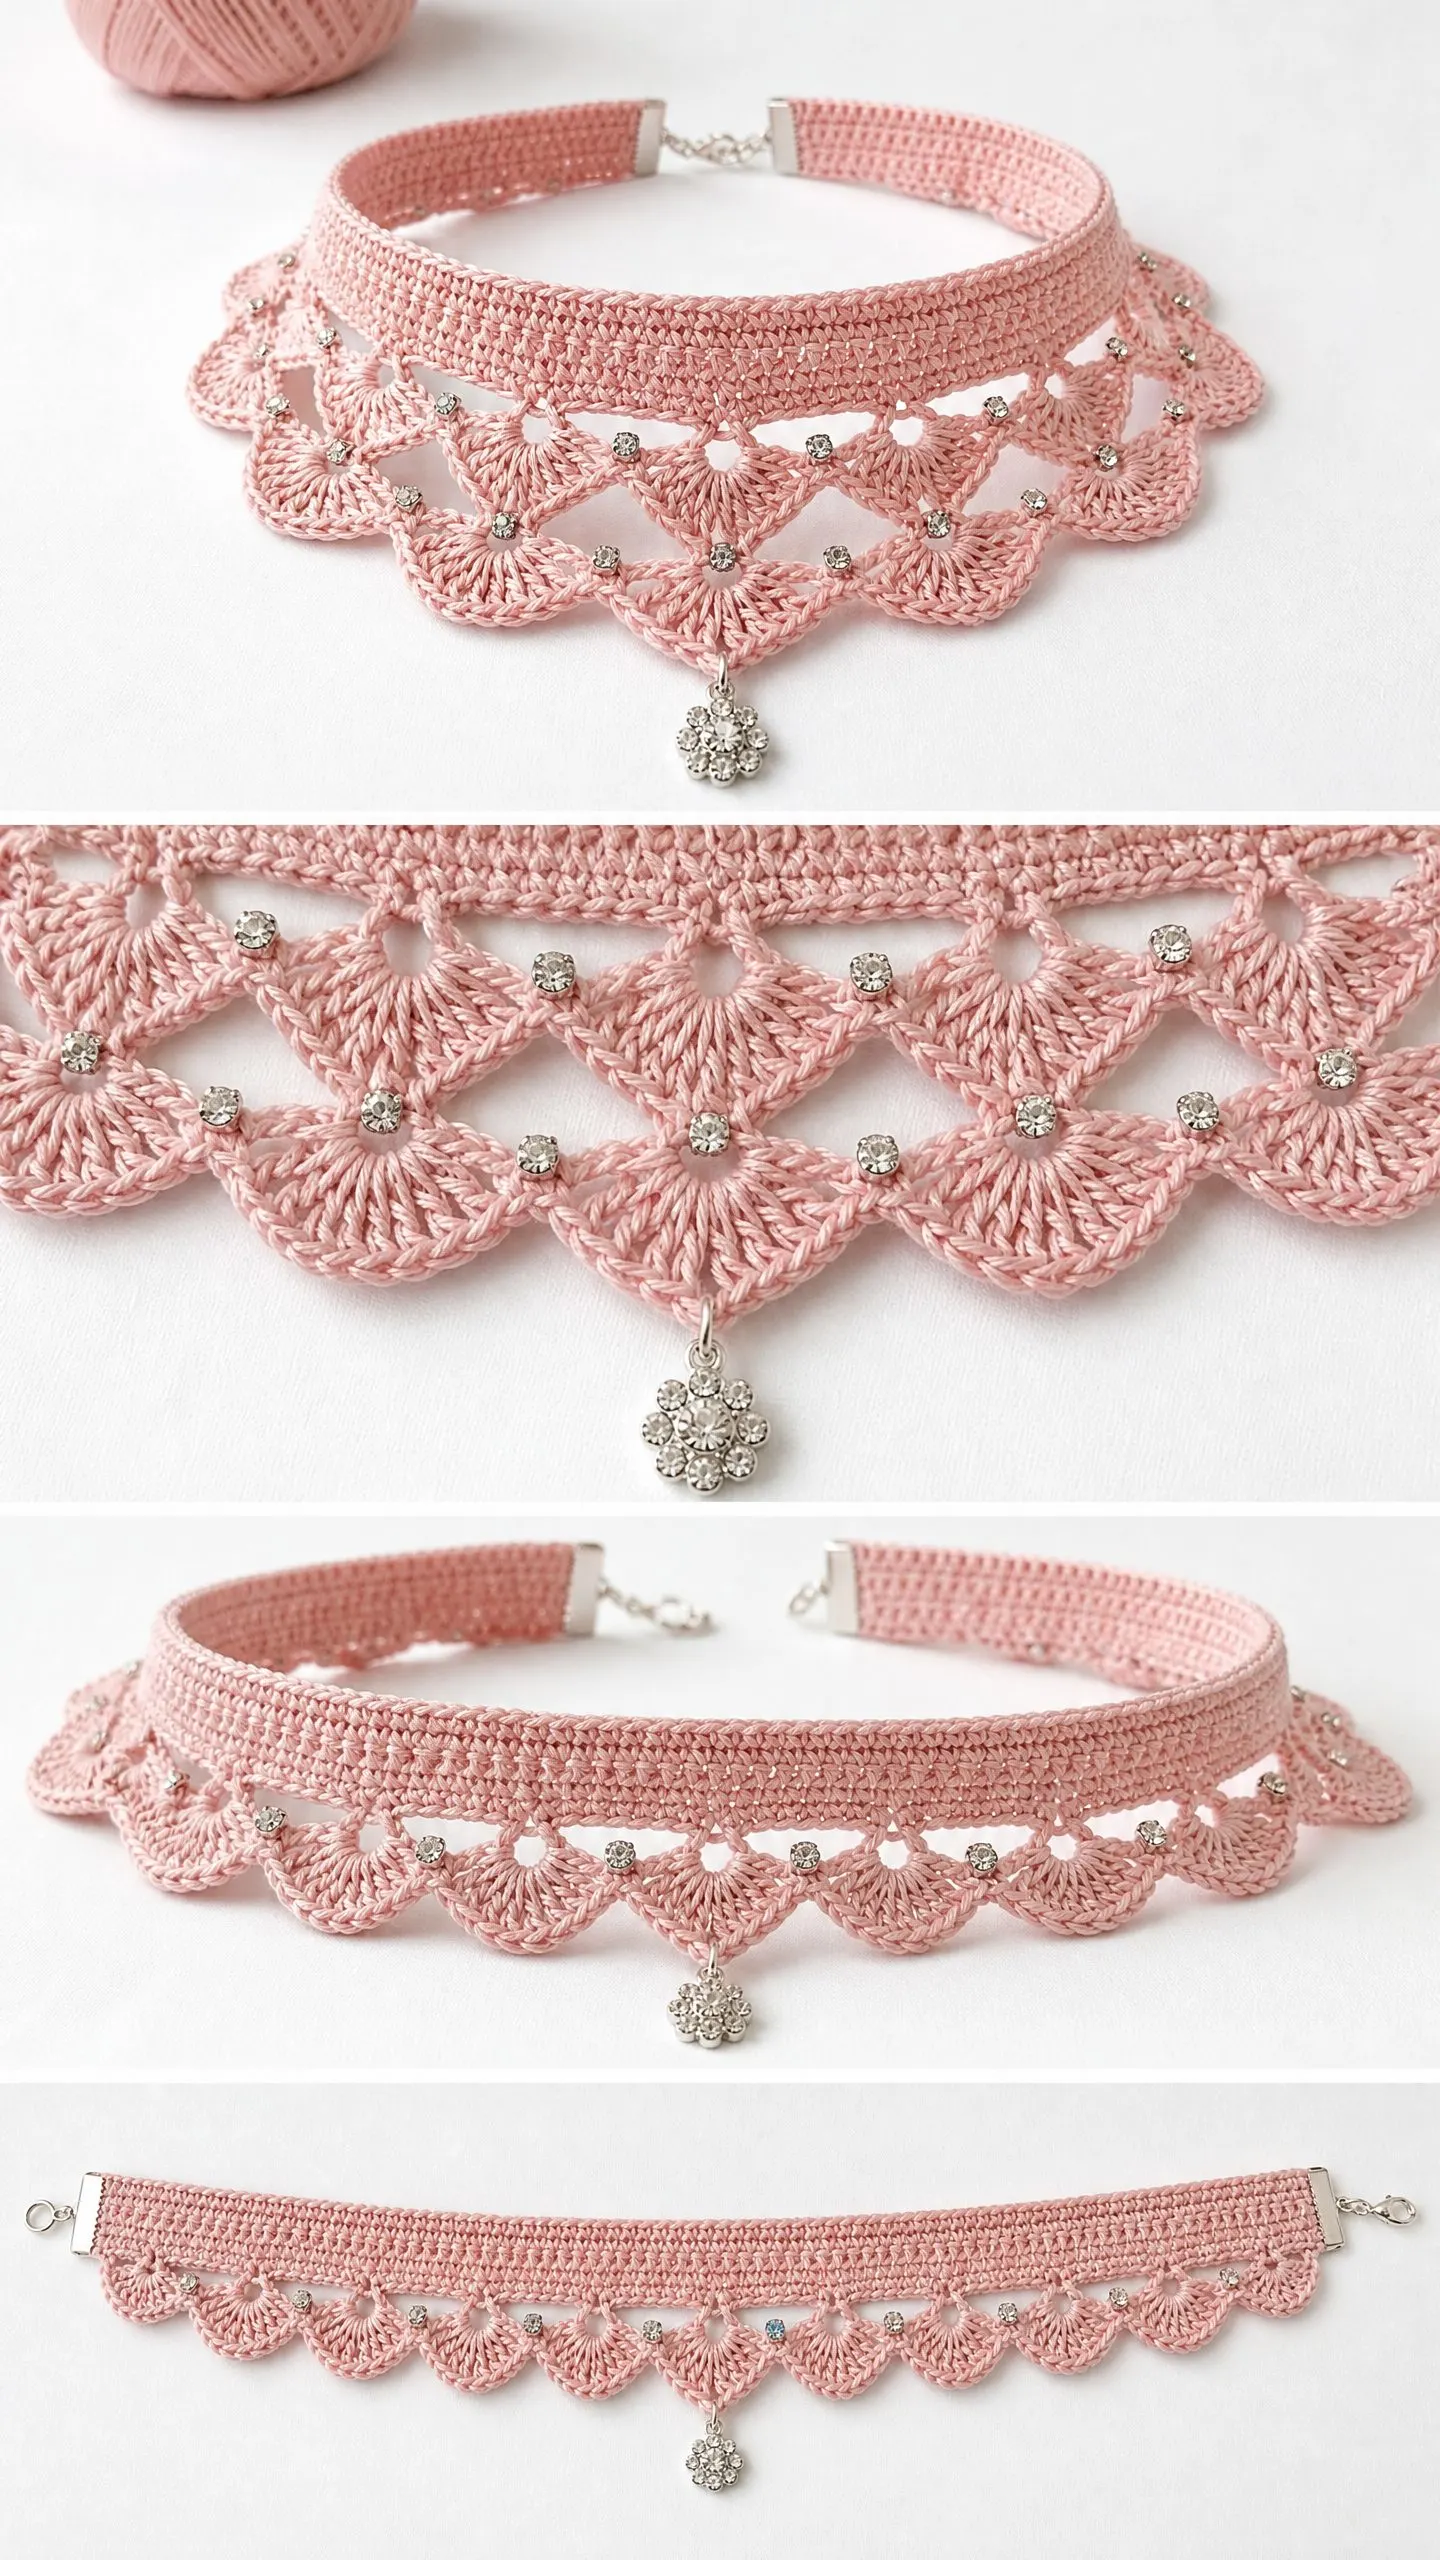
This blush pink lace choker necklace combines structured simplicity with romantic elegance. The band is worked in tight single crochet (sc) rows, which creates a firm foundation that sits comfortably against the neck. Attached to the lower edge is a gorgeous lace section featuring fan stitches and scattered rhinestone beads that catch the light beautifully.
The construction happens in two stages. First, you crochet the band flat from one short end to the other. Then you rotate the work and build the lace edging directly along the bottom edge. Rhinestone rondelle beads are pre-strung onto your thread before you start the lace, and you push them into position as you go. A silver flower charm dangles from the center front, and the whole thing closes with a lobster claw clasp and extender chain.
This is an intermediate level crochet pattern. The band itself only uses single crochet, so any beginner can handle that part. The lace edging introduces fans worked with double crochet (dc) clusters and chain spaces, combined with precise bead placement. The small hook size and fine thread require patience and good lighting, but nothing here is beyond your reach if you take it slowly.
Finished Measurements
Band length: approximately 13 inches / 33 cm tip to tip of clasp hardware, fitting a neck circumference of approximately 12 to 14 inches / 30.5 to 35.5 cm with the extender chain providing additional adjustment.
Band width: approximately 1 inch / 2.5 cm.
Total drop from lower band edge to lowest lace point: approximately 1.5 inches / 3.8 cm.
Total width at widest lace point (front center drape): approximately 2 inches / 5 cm.
Materials Needed
Yarn: approximately 50 yards / 46 meters of size 10 crochet cotton thread, color blush pink.
Hook: US Steel Hook size 7 / 1.65 mm.
Notions:
Recommended Yarn Options
Aunt Lydia’s Classic Crochet Thread Size 10 in Soft Mauve or Tea Rose works beautifully. This mercerized cotton produces a smooth, slightly lustrous surface that showcases the fan stitches cleanly.
DMC Cebelia Crochet Cotton Size 10 in Dusty Rose or Light Salmon is another excellent choice. It has a slightly firmer handle that helps the band hold its shape.
Coats and Clark South Maid Crochet Thread Size 10 in Blush or Natural Rose gives a softer, more matte appearance if you prefer a romantic look.
Use any size 10 mercerized cotton crochet thread. Do not substitute with size 3 or thicker thread, as the band will become too stiff and the lace will not drape correctly. Avoid acrylic or nylon threads for this project.
Gauge
9 sc x 10 rows = 1 inch / 2.5 cm in single crochet, worked flat, with US Steel Hook size 7 / 1.65 mm and size 10 crochet cotton thread.
Gauge matters here. Because the band must fit snugly at the neck, even small deviations will affect your finished length. Work a gauge swatch before beginning and adjust your hook size if needed.
Abbreviations Used in This Pattern
All stitches use US crochet terminology.
Special Stitches
Fan Stitch
The fan stitch consists of 5 double crochet stitches worked into the same stitch or space. This creates a pretty shell shape that fans outward.
To work a fan: Yarn over, insert hook into indicated stitch or space, yarn over, pull up a loop, yarn over, pull through 2 loops on hook. You have completed 1 dc. Repeat 4 more times in the same stitch or space. You now have 5 dc sharing one base point.
Bead Double Crochet (bead-dc)
Before starting this stitch, make sure a bead is already strung on your working thread.
Work as follows: Yarn over, insert hook into indicated stitch or space, yarn over, pull up a loop. You now have 3 loops on hook. Slide one bead up the thread so it sits snugly against the back of the work (the bead will show on the right side). Yarn over, pull through all 3 loops in one motion, completing the stitch.
The bead is now locked at the base of the stitch on the right side. Always push the bead firmly to the RS before closing the stitch.
Pattern Notes Before You Begin
1. The band is worked flat in rows from one short end to the other. The short ends are finished with crimp end caps after crocheting.
2. The lace edging is worked along the lower long edge of the completed band, with the right side facing you throughout.
3. Pre-string ALL beads onto your thread ball before beginning the lace section. String them in reverse order: the last bead you will place gets strung first. String 30 beads.
4. How to pre-string beads: Thread a beading needle with a short length of sewing thread, fold it to form a loop, and pass your crochet thread through the loop. Thread beads onto the sewing needle, sliding them down onto the crochet thread.
5. Place a stitch marker at the center front of the band before starting the lace edging. This helps you identify where to attach the charm later.
6. Turning chains: ch-1 at the start of band rows does NOT count as a stitch. Ch-3 or ch-5 at the start of lace edging rows DOES count as the first dc.
Instructions: Section 1, The Band
Do not pre-string beads yet. You will do that before Section 2.
Foundation Chain
Chain 213.
This produces a band of approximately 12.5 inches / 31.75 cm in working length before hardware is attached.
Row 1 (RS)
Starting in 2nd ch from hook, sc across. Turn. (212 sc)
Row 2 (WS)
Ch 1, sc across. Turn. (212 sc)
Rows 3 through 8
Ch 1, sc across. Turn. (212 sc)
Row 9 (RS)
Ch 1, sc across. Do not turn. Do not fasten off. (212 sc)
You will now begin the lace edging by rotating the work to access the lower edge.
Checkpoint: Your completed band should measure approximately 12.5 inches / 31.75 cm long and approximately 0.9 inches / 2.3 cm wide. The fabric should be dense and smooth with straight edges on both long sides.
Instructions: Section 2, Lace Edging
Pre-work
Cut the yarn, leaving a 6-inch tail. Fasten off temporarily. Pre-string 30 rhinestone rondelle beads onto your main thread ball now.
Then join yarn with a slip stitch into the first available foundation chain loop at the right end of the lower edge of the band, with RS facing you.
Note: When you look at the foundation chain, you will see the back bump of each chain stitch running in a horizontal row. Insert your hook under both loops of these chain stitches to work the edging. You will work into 210 stitches along this edge (skipping the very first and very last chain, which will be secured under the crimp end caps).
Setup Row (RS, worked along lower edge)
Ch 1 (does not count as st), sc in each available foundation chain stitch across the lower edge. Do not turn. Do not fasten off. (210 sc)
Turn so you can work back across these 210 sc stitches.
Lace Row 1
Ch 1, sc in first sc, (sk 2 sc, 5 dc in next sc, sk 2 sc, sc in next sc) across to end, placing the last sc in the 210th stitch. Turn. (35 fans, 35 sc)
Lace Row 2 (with bead placement)
Ch 5 (counts as dc + ch 2), sc in 3rd dc of first fan, (ch 2, bead-dc in next sc, ch 2, sc in 3rd dc of next fan, ch 2, dc in next sc, ch 2, sc in 3rd dc of next fan) 17 times, ch 2, dc in last sc. Turn.
This row uses 17 bead-dc stitches in alternating positions.
Lace Row 3
Ch 1, sc in first dc, (sk ch-2, 5 dc in next sc, sk ch-2, sc in next bead-dc or dc) 34 times, sk ch-2, 5 dc in last sc, sk ch-2, sc in top of t-ch. Turn. (35 fans, 36 sc)
Lace Row 4 (with bead placement, offset from Row 2)
Ch 5 (counts as dc + ch 2), sc in 3rd dc of first fan, (ch 2, dc in next sc, ch 2, sc in 3rd dc of next fan, ch 2, bead-dc in next sc, ch 2, sc in 3rd dc of next fan) 17 times, ch 2, dc in last sc. Turn.
This row uses 17 bead-dc stitches, offset from the previous bead row to create a scattered effect.
Lace Row 5 (Scallop Edging)
Ch 3 (counts as first dc), 2 dc in first dc at left edge, (sc in next dc or bead-dc, 5 dc in next sc) 34 times, sc in next dc or bead-dc, 3 dc in top of t-ch at right edge. Fasten off. Leave a 6-inch tail.
Checkpoint: Your lace edging should span the full length of the lower edge of the band. You should see 35 fan clusters across the middle rows and a continuous scallop along the bottom. Beads should appear scattered at the fan intersections in a staggered arrangement.
Instructions: Section 3, Attaching the Center Charm
Identify the center scallop of the bottom edging row. For 35 fans, the center fan is fan number 18 (with 17 fans on each side of it).
Open a small jump ring using flat-nose pliers. Attach the flower rhinestone charm to the jump ring. Pass the jump ring through the sc at the base of the center front scallop and close the ring with pliers.
The charm should hang from the lowest center point of the lace.
Finishing Your Crochet Choker Necklace
Step 1: Weave in all yarn ends with a tapestry needle, working tails into the WS of the band. Do not trim ends until after blocking.
Step 2: Block the lace edging. Pin the band to a blocking board, stretching the lace section downward gently and pinning each outer scallop point in place. Spray lightly with water, then apply a light coat of spray starch. Allow to dry completely for at least 2 hours or overnight. Remove pins.
Step 3: Trim yarn tails.
Step 4: Apply the crimp end caps. Fold approximately 0.25 inches / 6 mm of each short end of the band back on itself. Insert the folded end into the open crimp end cap. Use flat-nose pliers to press the end cap closed firmly around the folded band end. Repeat for the other end.
Step 5: Attach hardware. On one end cap, use a jump ring to attach the lobster claw clasp. On the other end cap, attach the extender chain with a jump ring. The necklace now closes by hooking the clasp onto any link of the extender chain.
Step 6: Give the finished necklace a final gentle pressing under a damp cloth if needed to smooth the band.
Customizing the Size
To lengthen the band: Add stitches to the foundation chain in multiples of 6. Each 6-stitch increment adds approximately 0.67 inches / 1.7 cm. For example, chain 225 instead of 213 for about 1.3 inches extra length.
To shorten the band: Subtract stitches in multiples of 6. Chain 201 for a band approximately 1.3 inches shorter.
To widen the band: Work additional rows of sc in Section 1 before beginning the lace. Each additional 2 rows adds approximately 0.2 inches to the band width.
Care Instructions
Hand wash in cool water with mild soap. Gently squeeze without wringing. Rinse thoroughly and lay flat to dry on a clean towel. Re-block the lace section if needed after washing by pinning the scallop points and allowing to air dry.
Do not machine wash or tumble dry. Remove before swimming or bathing. The rhinestone beads and silver-tone hardware may tarnish with moisture, so pat dry immediately if the necklace gets wet.
You Did It
Thank you so much for making the Rosalie choker with me. I hope you love wearing it as much as I loved designing it. This little piece of jewelry holds a special place in my heart, and now it gets to be part of your story too.
If you make this blush pink lace choker necklace, I would absolutely love to see your finished piece. Tag me on Instagram or share a photo in our Facebook group. Seeing your creations is honestly the best part of sharing patterns.
If you want to come back to this crochet tutorial later, go ahead and pin it to your Pinterest boards so you can find it easily. And if you have any questions or want to share how yours turned out, drop a comment below. I always love hearing from you.
