
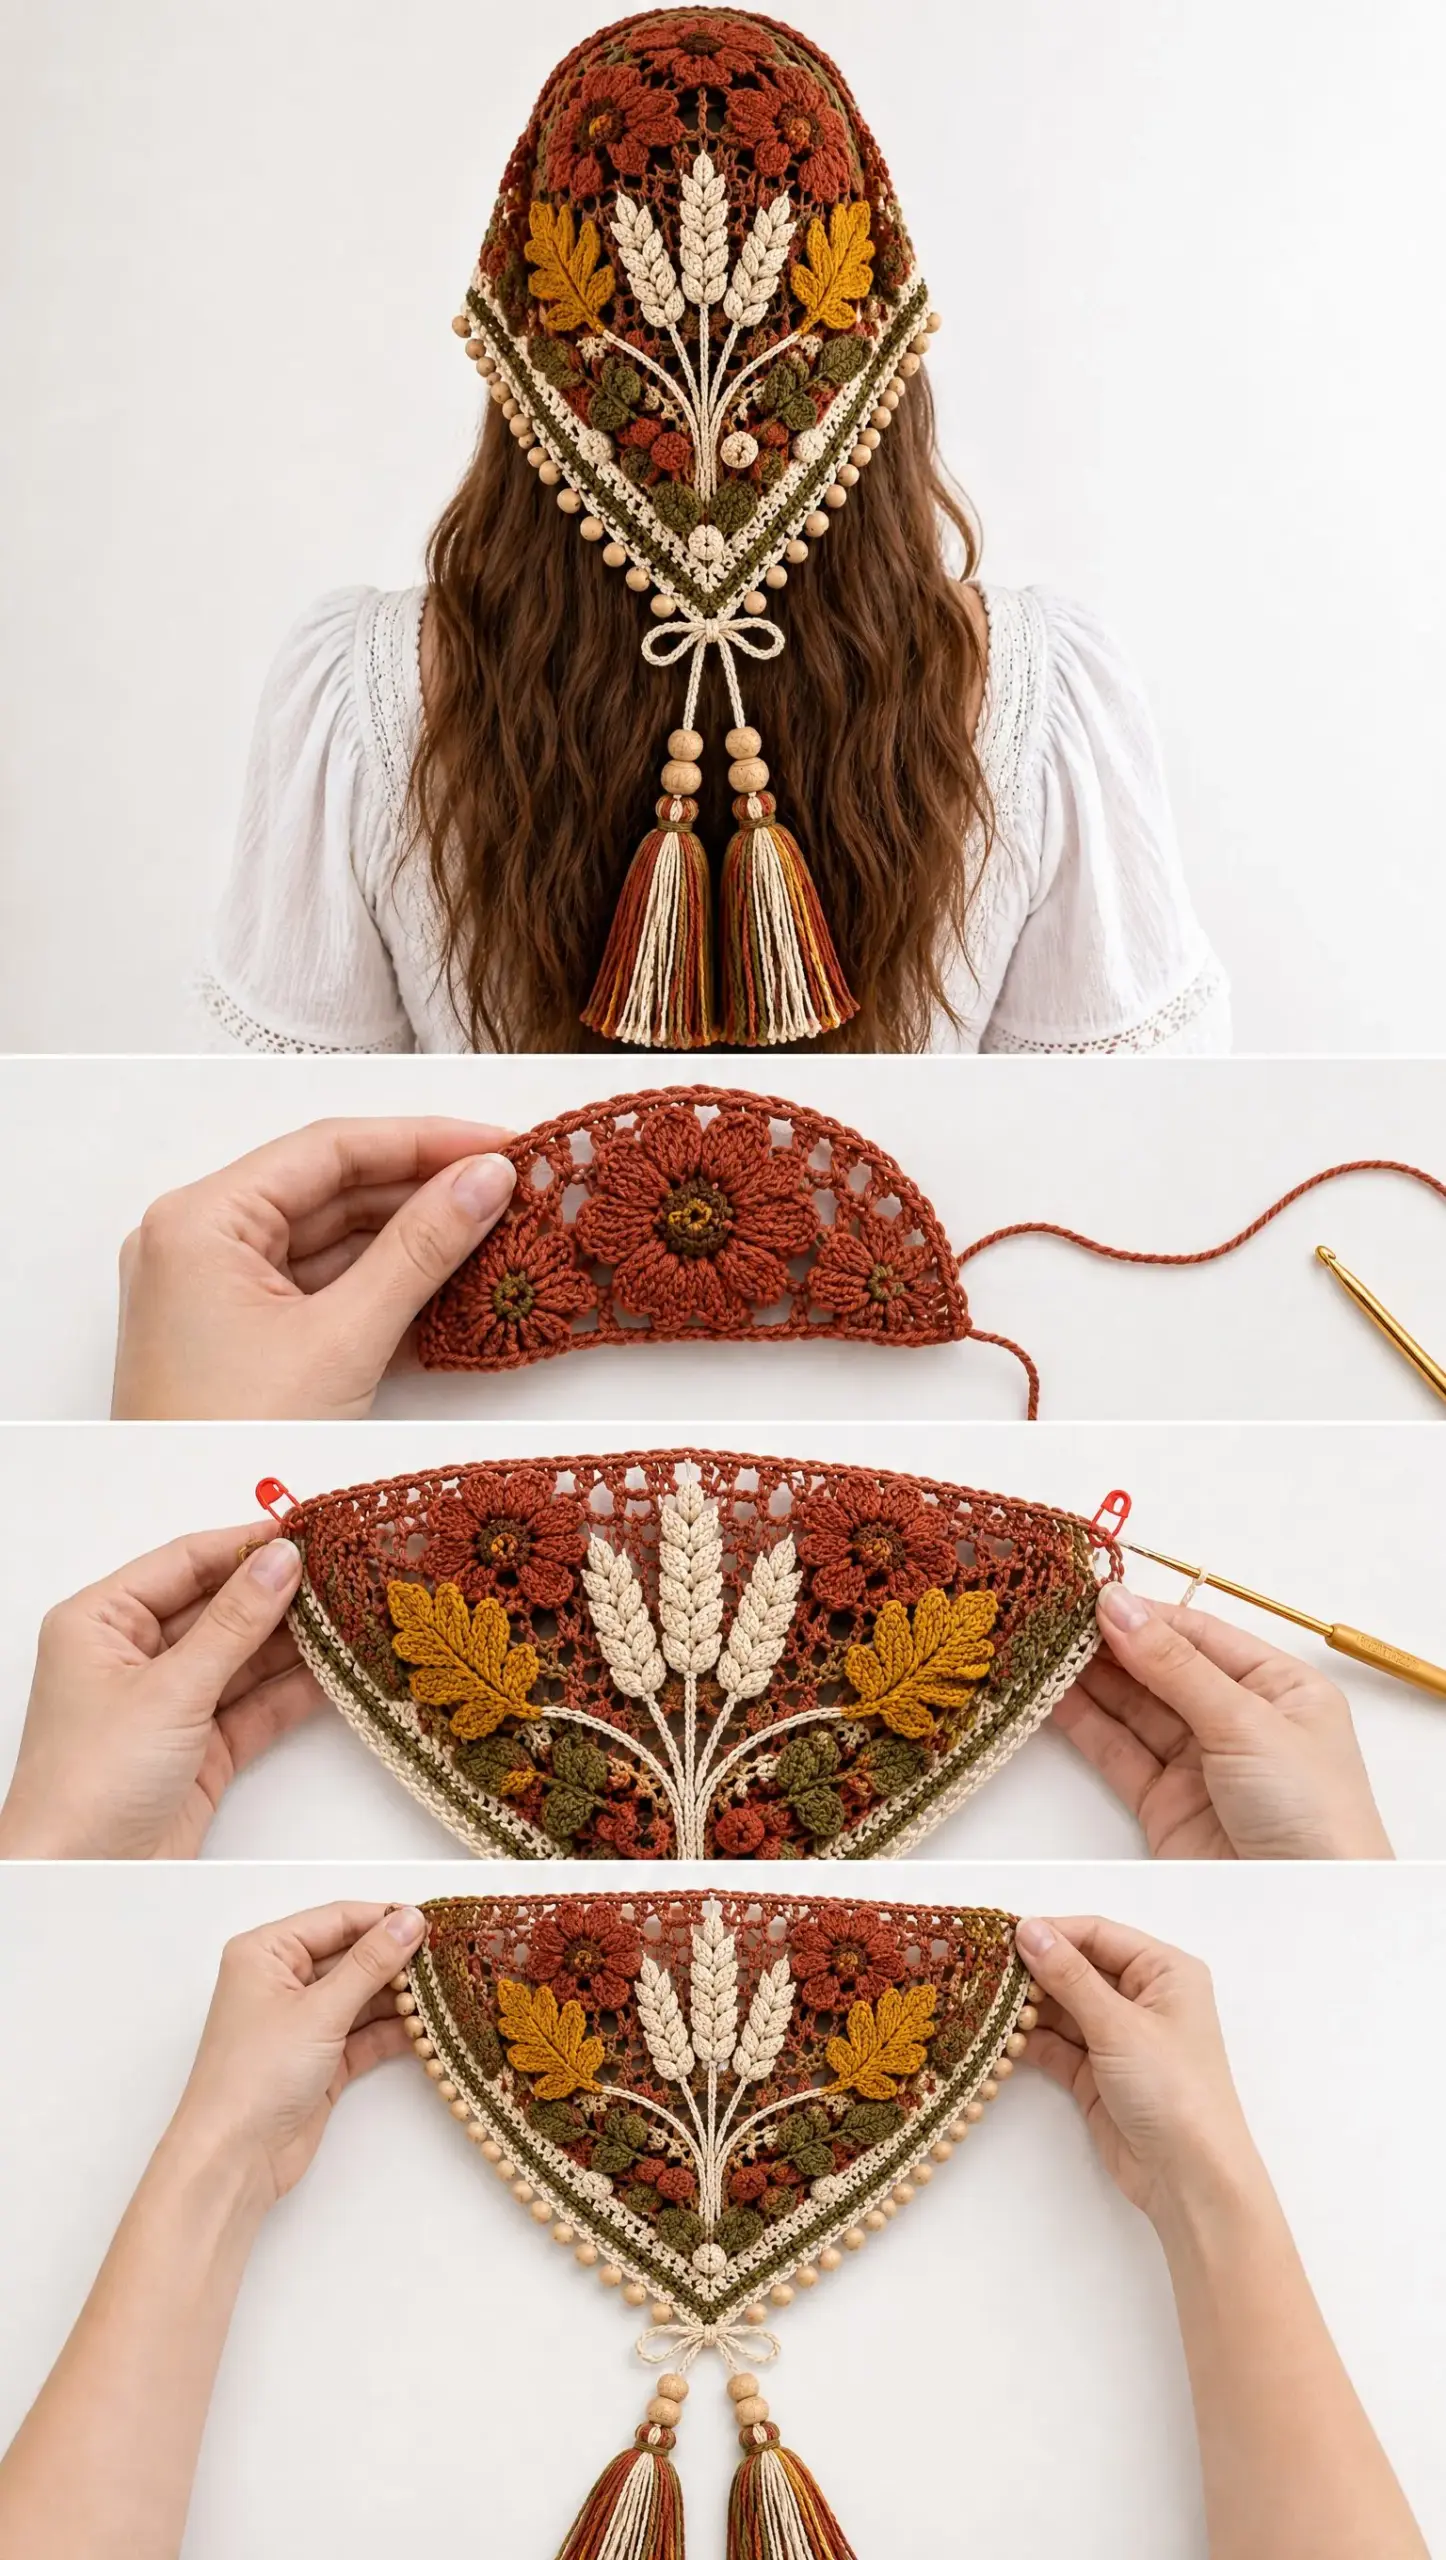
This is a triangular headscarf worked from joined floral motifs at the crown, expanded with triangular rows, and finished with decorative borders. It uses basic stitches like single crochet, double crochet, and treble crochet. The finished piece features wheat sprigs, oak leaves, berry accents, wooden bead edging, and long tassels.
Get the Ad-Free PDF Pattern
You can find the free pattern below, or you can purchase the ad-free printable PDF from my shop.
Get the Printable PDF →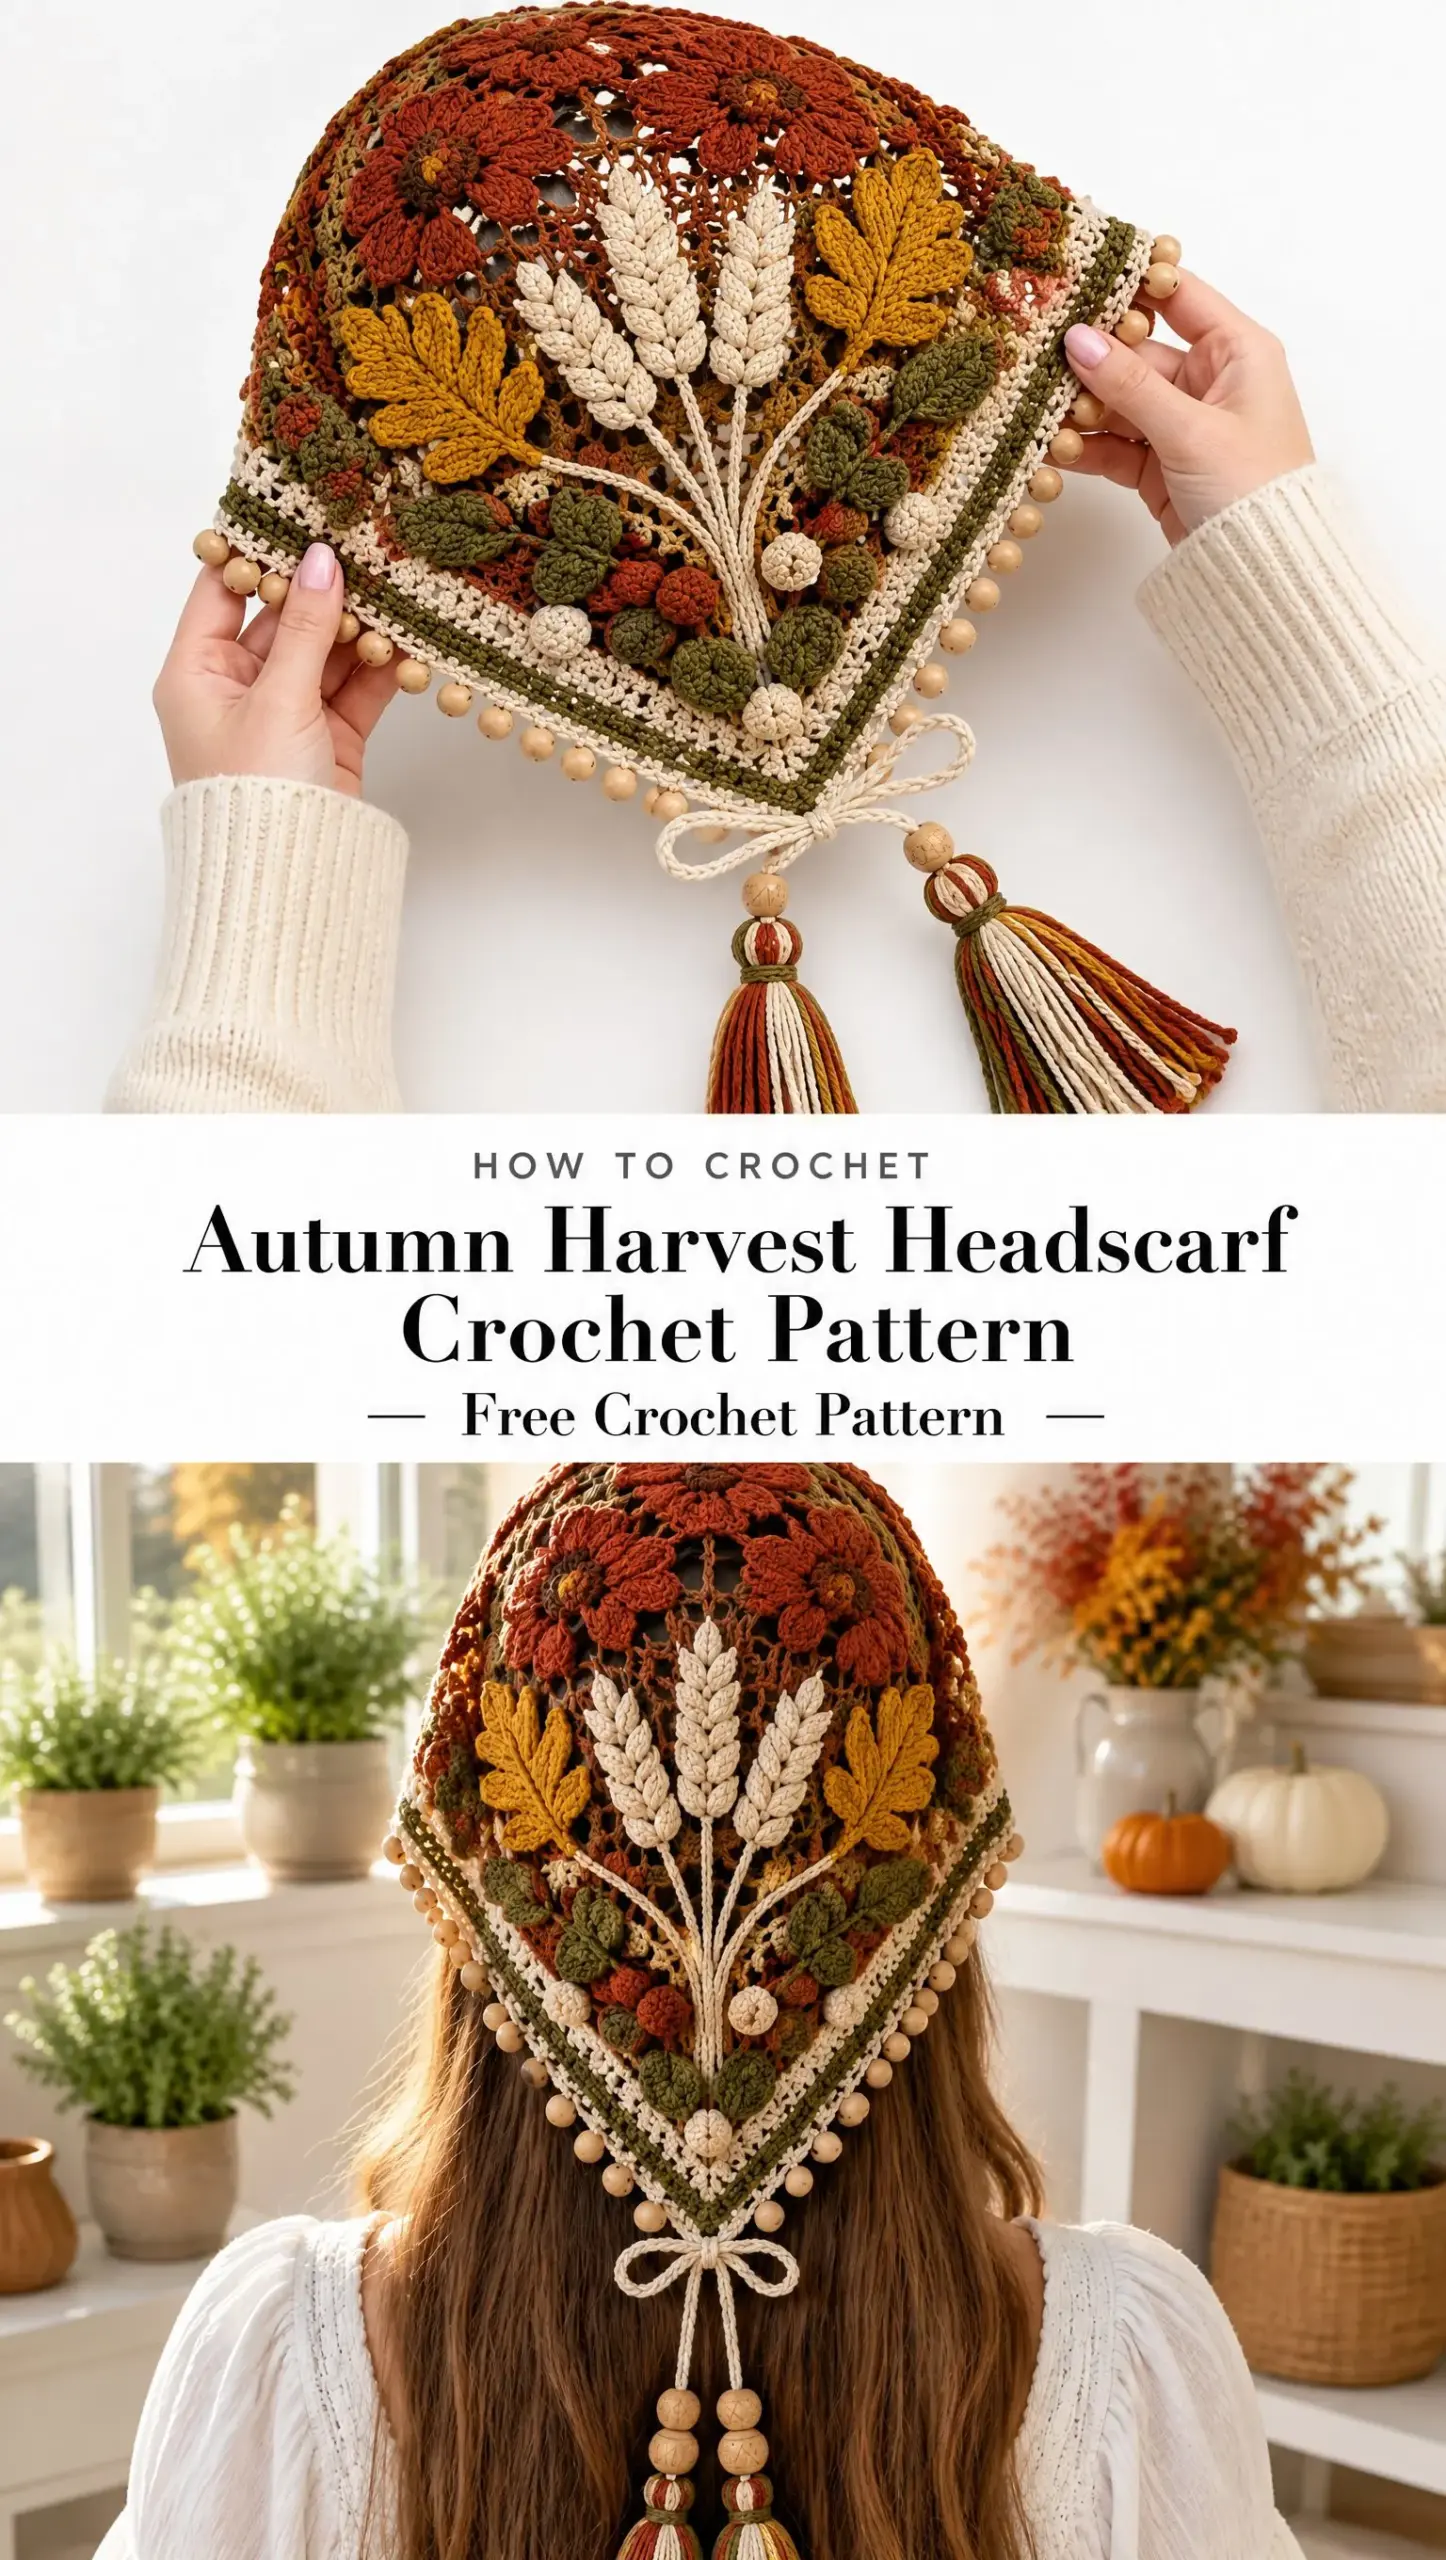
The construction is straightforward once you understand how the pieces come together. You will make the main triangle base, create separate floral and leaf motifs, then attach everything with surface details and embellishments.
If you have worked in rounds before and feel comfortable joining motifs, you are ready for this project. The skill level is intermediate, but I will walk you through each section so nothing feels overwhelming.
Finished Size and Dimensions
Before you gather your materials, here is what you are making:
Approximate finished triangle width: 24 to 28 inches (61 to 71 cm)
Center back point depth: 18 to 22 inches (46 to 56 cm)
Tassel length: 8 to 10 inches (20 to 25 cm)
The headscarf sits over the crown of your head and extends to a deep point at your upper back. The long tassels hang from the bottom point, adding movement and visual interest.
Materials You Will Need
Having everything ready before you start makes the whole process smoother. Here is your complete supply list:
Yarn:
Fine weight cotton or cotton-blend yarn with a soft halo in these colors:
Tools:
The yarn amounts give you a range because everyone’s tension varies slightly. If you tend to crochet loosely, lean toward the lower end. If you crochet tightly, grab a bit extra.
Gauge Information
Gauge is not critical for this project. Aim for a flexible fabric with visible stitch openings and enough drape to conform comfortably around the head. If your fabric feels stiff, go up a hook size. If it feels too loose and floppy, try going down.
Stitch Abbreviations and Definitions
Let me explain every stitch you will use. If you already know these, feel free to skip ahead.
ch (chain): Yarn over, pull through the loop on your hook. This creates the foundation for most crochet work.
sl st (slip stitch): Insert hook into stitch, yarn over, pull through both the stitch and the loop on your hook in one motion. Used for joining and moving across stitches without adding height.
sc (single crochet): Insert hook into stitch, yarn over and pull up a loop (2 loops on hook), yarn over and pull through both loops. The shortest standard stitch.
hdc (half double crochet): Yarn over, insert hook into stitch, yarn over and pull up a loop (3 loops on hook), yarn over and pull through all 3 loops. Slightly taller than single crochet.
dc (double crochet): Yarn over, insert hook into stitch, yarn over and pull up a loop (3 loops on hook), yarn over and pull through 2 loops, yarn over and pull through remaining 2 loops. A versatile medium-height stitch.
tr (treble crochet): Yarn over twice, insert hook into stitch, yarn over and pull up a loop (4 loops on hook), yarn over and pull through 2 loops three times. A tall stitch that creates nice open work.
dc2tog (double crochet two together): A decrease stitch. Work a double crochet but stop before the final yarn over, leaving 2 loops on hook. Repeat in the next stitch so you have 3 loops on hook. Yarn over and pull through all 3 loops.
st (stitch): Refers to any single stitch.
sp (space): The gap or opening between stitches, often created by chain stitches.
sk (skip): Pass over a stitch without working into it.
Construction Overview
Understanding how this headscarf comes together will help you visualize each step. The headscarf is built from joined floral motifs at the crown, expanded with triangular rows, then finished with decorative borders.
You will work in this order:
1. Create the main triangle base
2. Make floral motifs separately and join them
3. Create wheat sprig appliques
4. Make oak leaf motifs
5. Add berry details
6. Work the border
7. Create the cord bow and tassels
8. Block and finish
Keep the fabric blocked flat after each major section to maintain the triangle shape. This is especially important before attaching the motifs and appliques.
Main Triangle Base Instructions
This is the foundation of your headscarf. Grab your terracotta yarn and let’s begin.
Step 1: With terracotta yarn, make a magic ring.
Step 2 (Round 1): Ch 3 (counts as first dc), work 2 dc, ch 2, 3 dc, ch 2, join with sl st to top of beginning ch 3.
Step 3 (Round 2): Ch 3, dc into each stitch, work (2 dc, ch 2, 2 dc) into each corner space. Join with sl st.
Step 4: Continue increasing at both side corners every row until the triangle reaches approximately 12 inches (30 cm) from top to bottom.
Step 5: Change colors gradually using terracotta, olive, and oatmeal sections.
The corner increases are what create the triangle shape. Each time you work into a corner space, you are adding stitches that make the piece grow outward. Take your time here and count your stitches after each round to make sure you are staying on track.
Floral Motifs
These raised dimensional flowers give the headscarf its beautiful texture. You will make multiple rust flower motifs and join them together at the crown.
Step 1: Create a brown circular center with 8 sc stitches joined in a round.
Step 2: Add terracotta petals by working the following sequence around the center:
Step 3: Add a second petal layer with larger shell stitches for a raised dimensional flower. This creates that lovely 3D effect you see in the reference images.
Step 4: Join flowers together using chain arches and slip stitches.
When joining the flowers, work loosely so the connections do not pucker. The chain arches create a lacy effect between the blooms.
Wheat Sprig Applique
The wheat sprigs add that perfect harvest touch. You will make three sprigs total.
Step 1: Use oatmeal yarn and create a thin stem using chain stitches.
Step 2: Add paired leaf stitches along each side by working hdc and dc clusters around the stem.
Step 3: Make three sprigs and attach them in the center fan area.
These look more complicated than they are. The clusters mimic the look of wheat kernels, and the chain stem holds everything together.
Oak Leaf Motifs
The mustard yellow oak leaves frame the wheat sprigs beautifully.
Step 1: With mustard yarn, chain the leaf spine.
Step 2: Work pointed leaf sections using alternating sc, hdc, and dc stitches.
Step 3: Add raised surface stitches for leaf veins.
Step 4: Attach two leaves beside the wheat sprigs.
The varying stitch heights create the classic oak leaf shape with its rounded lobes. Do not stress about making them perfectly symmetrical. Real leaves are not perfect either.
Berry Details
These small bobble berries add pops of color throughout the design.
Step 1: Work 5 incomplete dc stitches into one space. This means you stop each dc before the final yarn over, keeping all the loops on your hook.
Step 2: Yarn over and pull through all loops. This closes the bobble and creates that rounded berry shape.
Step 3: Add alternating rust and cream berries along decorative bands.
Bobbles can feel awkward at first if you have never made them. Just keep all those loops organized on your hook, and the final pull-through will bring everything together.
Border Instructions
The border frames the entire piece and provides the foundation for your wooden bead edging.
Step 1: Work an olive stripe around both diagonal edges.
Step 2: Add dense oatmeal edging:
Step 3: Attach evenly spaced wooden beads along the side border.
When working the sc border, aim for even spacing. On diagonal edges, you may need to work 2 sc per row end to keep the edge flat. If it ripples, you have too many stitches. If it pulls in, add more.
Cord Bow and Tassels
The finishing touches bring everything together.
Step 1: Crochet two oatmeal cords using chain stitches.
Step 2: Tie into a bow at the bottom point.
Step 3: Create tassels:
Step 4: Trim tassels evenly.
For consistent tassels, use a piece of cardboard cut to your desired tassel length (8 to 10 inches works well for this project). Wrap your yarn around it about 30 to 40 times, then cut at one end.
Blocking Your Finished Headscarf
Blocking makes a significant difference in how professional your finished piece looks.
Step 1: Pin the triangle into shape on a blocking mat.
Step 2: Lightly mist with water.
Step 3: Allow to dry completely.
Step 4: Shape flowers, leaves, and tassels so they remain dimensional.
Be gentle with the raised elements. You want them to hold their shape, not flatten completely. Use pins around the motifs rather than through them.
Finishing and Care Instructions
Your beautiful headscarf deserves proper care to last for seasons to come.
The cotton yarn will soften with washing, making the headscarf even more comfortable to wear.
Tips for Success
Block as you go. After completing the main triangle and before attaching motifs, give everything a light blocking. This makes placement much easier.
Use stitch markers liberally. Mark your corners, mark where motifs will attach, mark anything that helps you stay oriented.
Take photos of your progress. This helps you remember what you did if you need to set the project aside and come back to it later.
Trust the drape. Cotton yarn can feel stiff while you are working, but it relaxes beautifully once blocked and worn.
Skills You Will Practice
This pattern is rated intermediate and will help you build these abilities:
If any of these are new to you, take your time with that section. There is no rush.
Pattern Notes
This pattern is for personal use only. Do not resell, redistribute, or copy this pattern. Finished handmade items may be sold in small quantities with designer credit.
I hope you love making this autumn harvest headscarf as much as I loved designing it. The combination of floral motifs, harvest elements, and those gorgeous tassels creates something truly special for the fall season.
If you found this crochet tutorial helpful, I would love for you to save it to your Pinterest boards so you can find it when you are ready to start. And please leave a comment below if you make one. Seeing your finished headscarves absolutely makes my day!
Want a Quick & Easy Printable Version?
Get a clean, beautifully formatted PDF of this pattern — easy to follow step by step, ready to print or save on any device. No scrolling, no distractions, just the pattern.
Get the Printable PDF →