You know that gorgeous skein of cotton yarn you’ve been saving for the perfect project? This is it. Dig into your stash and pull out that blush pink you’ve been hoarding, because this romantic market tote combines an airy diamond mesh body with dimensional peony appliques that look far more impressive than they actually are to make. The construction is interesting without being fussy. You’ll work from a firm oval base upward in joined rounds, then add the floral cluster separately. Rated intermediate, but if you can chain, single crochet, and follow a repeat, you’re ready.
Get the Ad-Free PDF Pattern
You can find the free pattern below, or you can purchase the ad-free printable PDF from my shop.
Get the Printable PDF →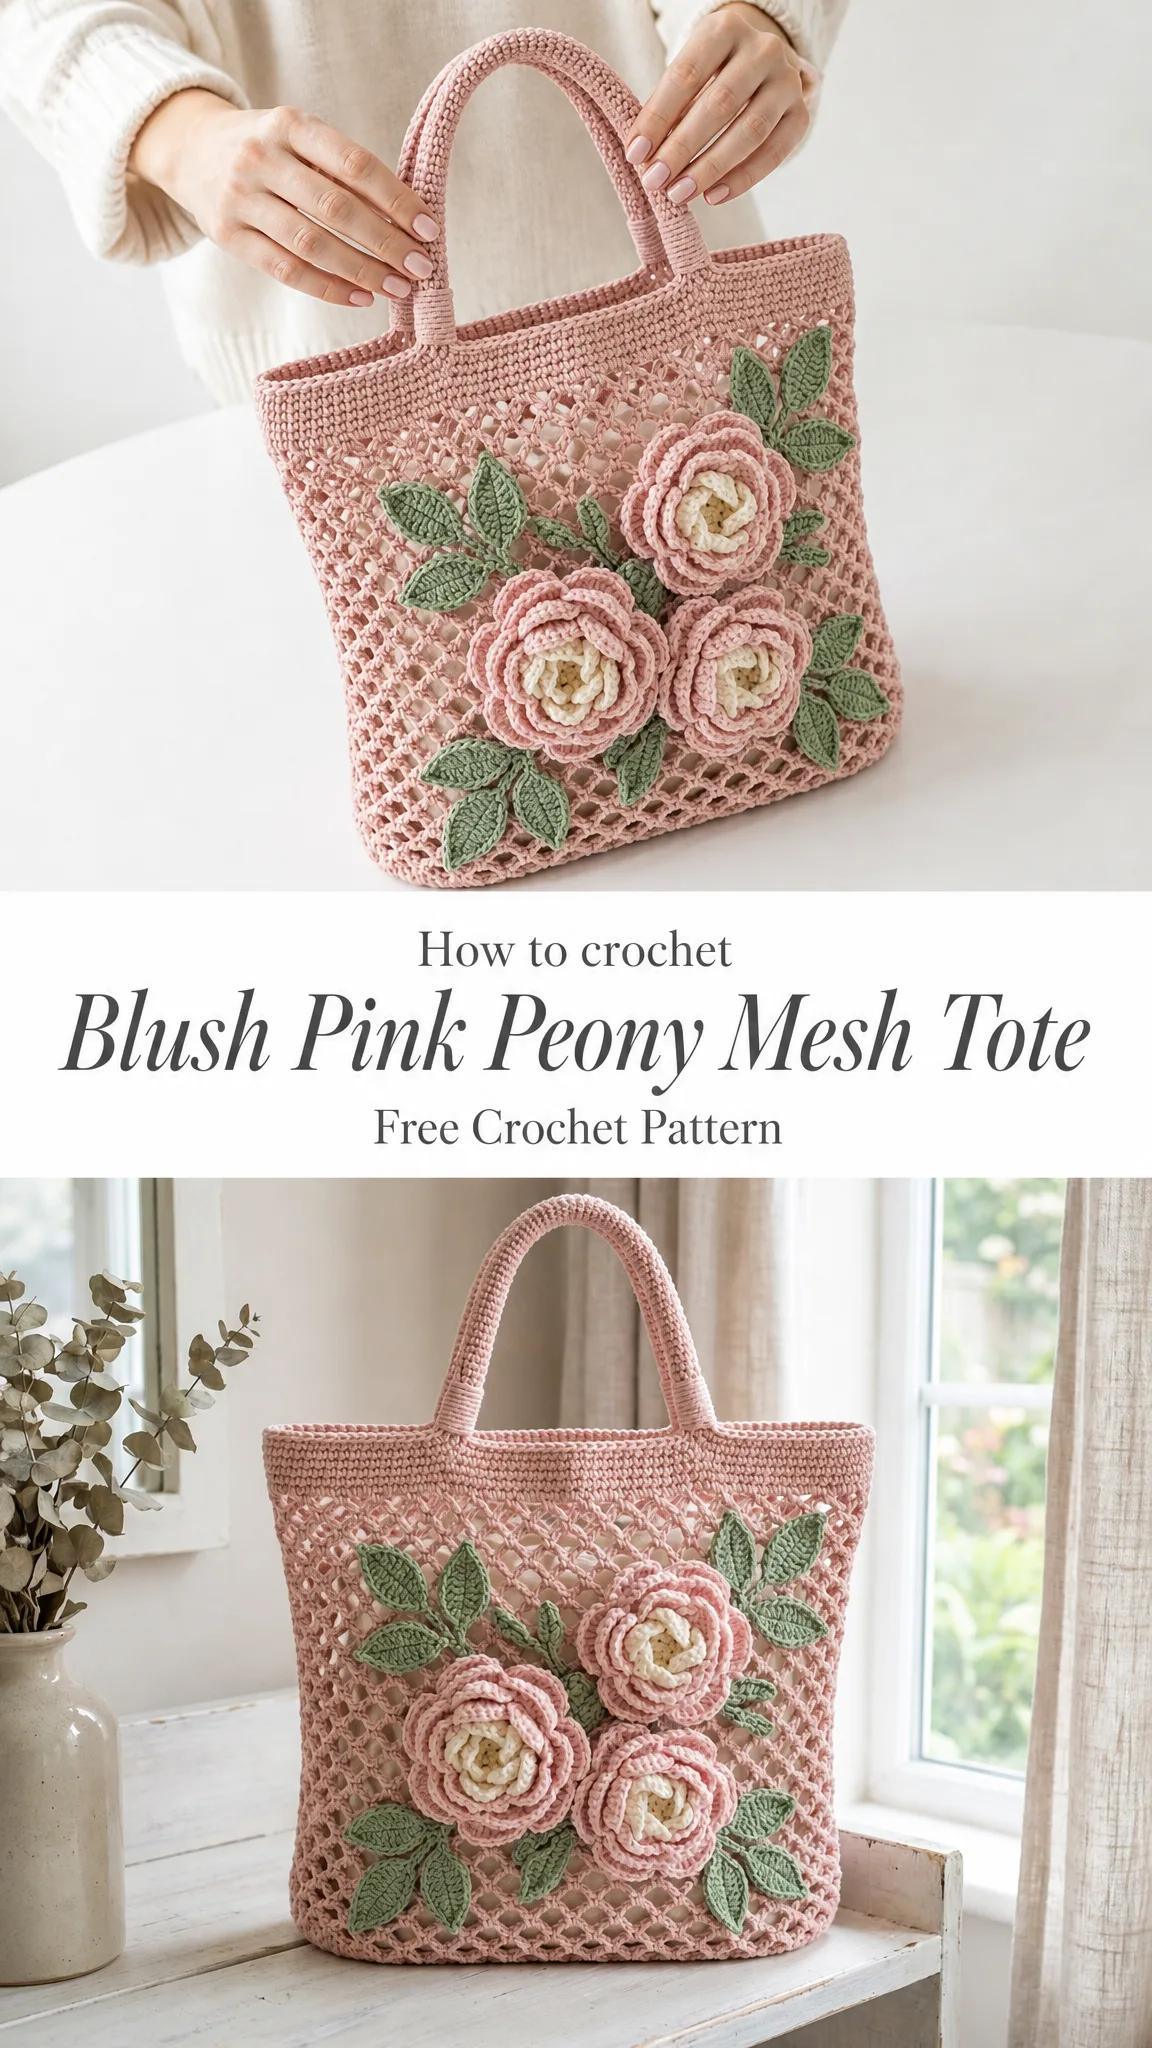
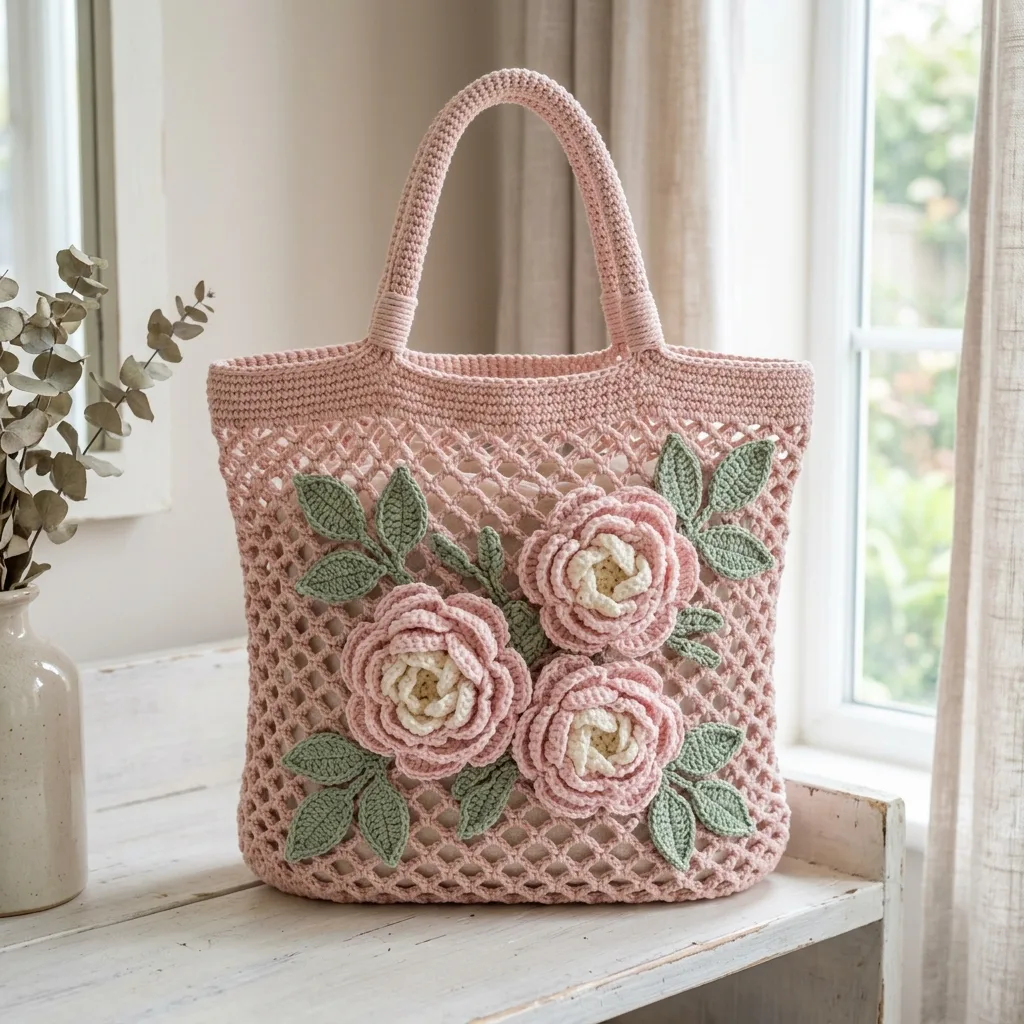
About This Blush Pink Peony Mesh Tote
This tote is the kind of project that makes people stop you on the street. The combination of open diamond mesh, a sturdy top band, and those lush crocheted peonies creates something that looks boutique quality. But here’s the thing: it’s all built on simple stitches worked in a logical order.
The bag measures approximately 11 inches wide, 10.5 inches tall, and 3.5 inches deep. The handle drop sits at about 7.5 inches, which is perfect for carrying over your shoulder or in the crook of your arm. It’s sized right for farmers market hauls, beach days, or just looking cute while running errands.
What makes this crochet pattern special is how the different elements come together. The solid oval base gives you structure where you need it. The mesh body keeps things light and airy. The top band adds stability at the opening. And those peonies? They’re surprisingly simple rolled strips that create gorgeous dimension.
Materials You’ll Need
Gather these supplies before you start:
Yarn:
Hooks:
Notions:
Yarn Suggestions:
Lion Brand 24/7 Cotton works beautifully here. It gives you crisp stitch definition and sturdy handles that won’t stretch out. Paintbox Yarns Cotton Aran is another excellent choice if you want a smooth, colorful option that’s easy to substitute. Knit Picks Dishie offers durability with a soft matte finish.
The key is choosing a firm worsted cotton that meets gauge. Avoid very stretchy yarns because they may lengthen the mesh and handles over time.
Gauge Information
Getting gauge right matters here, especially for the handles and overall bag structure.
Gauge: 16 single crochet (sc) and 18 rounds equals 4 inches in worked in the round single crochet with the 4.0 mm hook.
Mesh gauge after gentle blocking: 4 mesh repeats and 6 mesh rounds equals 4 inches.
Make a small round swatch and adjust your hook size to match both stitch and row gauge before starting. I know swatching feels tedious, but with a structured bag like this, it really does make a difference.
Abbreviations and Special Stitches
Let me walk you through every stitch you’ll use.
Standard Abbreviations:
Special Stitches:
Diamond mesh repeat: This creates those beautiful open diamonds in the body. Work single crochet anchoring points with chain 5 (ch 5) loops. On the first mesh round, each repeat uses 4 stitches: sc, ch 5, skip 3. On following mesh rounds, sc is worked into each ch 5 loop. It sounds more complicated than it is. Once you get into the rhythm, it’s almost meditative.
Crab stitch: Also called reverse single crochet. Working from left to right (opposite of normal), insert hook in previous stitch, yarn over, pull up a loop, yarn over and pull through both loops. This creates a firm corded edge that looks professional and helps the top band hold its shape.
Petal shell: In the indicated stitch work (sc, hdc, 3 dc, hdc, sc). Slip stitch in the next stitch to separate petals. This is what makes those gorgeous peony petals.
Step by Step Crochet Tutorial
Base (Blush Pink)
Work joined rounds. Start with ch 36.
Rnd 1: Sc in 2nd ch from hook and next 33 ch, 3 sc in last ch, rotate to work along opposite side, sc in next 33 bottom loops, 2 sc in same ch as first sc, join. (72 sc)
Rnd 2: Ch 1, sc in first 34 sts, 2 sc in each of next 4 sts, sc in next 34 sts, 2 sc in each of last 4 sts, join. (80 sc)
Rnd 3: Ch 1, sc in first 36 sts, [2 sc in next st, sc in next st] 4 times, sc in next 36 sts, [2 sc in next st, sc in next st] 4 times, join. (88 sc)
Rnd 4: Ch 1, sc in each st around, join. (88 sc)
Checkpoint: Your base should measure about 11 x 3.5 inches after gentle shaping. If it’s significantly off, check your gauge.
Mesh Body
Here’s where the magic happens. This creates that gorgeous airy diamond pattern.
Rnd 5: Ch 1, sc in first st, *ch 5, skip next 3 sts, sc in next st; rep from * 21 more times, join to first sc. (22 ch 5 loops)
Rnds 6 through 20: Sl st into first ch 5 loop, ch 1, sc in same loop, *ch 5, sc in next ch 5 loop; rep from * 21 more times, join to first sc. (22 ch 5 loops each rnd)
Checkpoint: Your mesh body should measure about 10 inches tall from base edge before the top band.
Top Band
This solid section provides structure and gives you something sturdy to attach the handles to.
Rnd 21: Ch 1, sc in first sc, *3 sc in next ch 5 sp, sc in next sc; rep from * 21 times, 3 sc in last ch 5 sp, join. (88 sc)
Rnds 22 through 27: Ch 1, sc in each st around, join. (88 sc)
Rnd 28: Crab stitch in each st around, join and fasten off. (88 crab sts)
The crab stitch edge looks beautiful and prevents the top from curling.
Rounded Handles (Make 2)
Switch back to your 4.0 mm hook for these.
Foundation: Ch 72.
Row 1: Sc in 2nd ch from hook and each ch across. (71 sc)
Rows 2 through 5: Ch 1, turn, sc in each st across. (71 sc)
Finish: Fold the strip lengthwise around a soft cord of yarn scraps, or leave it unfilled for a flatter handle. Seam the long edges with mattress stitch. The finished length is about 17 inches before sewing, with a handle drop of about 7.5 inches.
Peony Flowers
Make 2 large and 1 medium in blush with cream inner petals and beige centers. Use your 3.75 mm hook.
Large Strip:
Ch 61. Row 1: Sc in 2nd ch from hook and each ch across. (60 sc) Row 2: *Petal shell in next st, sl st in next st; rep from * across. (30 petals) Fasten off, roll into a rose shape, and sew through the base to secure.
Medium Strip:
Ch 49. Row 1: Sc in 2nd ch from hook and each ch across. (48 sc) Row 2: *Petal shell in next st, sl st in next st; rep from * across. (24 petals) Roll and sew.
Cream Inner Curls:
For each flower, ch 25, sc in 2nd ch and each ch across. (24 sc) Curl and stitch into the center of each peony.
Center:
With beige, make a magic ring. Rnd 1: 8 sc in ring. Rnd 2: 2 sc in each st around. (16 sc) Fasten off and stitch inside the cream curl.
Leaves (Make 12)
With green and 3.75 mm hook, ch 13.
Rnd 1: Sc in 2nd ch from hook, hdc in next ch, dc in next 7 ch, hdc in next ch, sc in next ch, 3 sc in last ch; rotate, sc in next ch, hdc in next ch, dc in next 7 ch, hdc in next ch, sc in last ch, join. (25 sts)
Detail: Sl st through the center chain ridge for a vein. Fasten off, leaving a long sewing tail.
Assembly and Finishing
Handle Placement
Lay the tote flat. On the front top edge, center one handle with its ends about 4 inches apart. Pin through the solid top band only. Repeat on the back.
Sew each handle end securely through several rows of the top band. Do not sew into the open mesh only because it won’t hold.
Floral Placement
Place the largest flowers diagonally across the front, with the medium flower slightly lower and centered. Tuck 12 leaves around the cluster: 4 upper leaves, 4 side leaves, and 4 lower leaves. Pin everything, step back, and adjust until the cluster feels balanced before sewing.
Checkpoint: Your floral cluster should cover about 7.5 x 6 inches on the front panel.
Blocking
Steam or wet block the bag gently over a folded towel. Open the mesh with your fingers, square the top band, and allow to dry fully. Block flowers and leaves separately before sewing for crisp texture.
Maker Count Guide
Use this chart to check your work:
| Section | Expected Count |
|---|---|
| Base Rnd 1 | 72 sc |
| Base Rnd 2 | 80 sc |
| Base Rnds 3 and 4 | 88 sc |
| Mesh Rnds 5 through 20 | 22 ch 5 loops |
| Top Rnds 21 through 28 | 88 sts |
| Each handle row | 71 sc |
Troubleshooting Tips
Mesh twisting: Join each round cleanly before slip stitching into the first loop. Keep your tension consistent.
Top band ruffling: Reduce hook size for the band or skip a few setup stitches evenly.
Handles stretching: Use firm cotton, seam tightly, and add a fabric liner or hidden cord if desired.
Flowers flattening: Sew only through the flower base so petals remain dimensional.
Size Customization
Want to adjust the size? Here’s how:
Care Instructions
Hand wash gently in cool water. Roll in a towel to remove excess moisture, reshape the mesh and flowers, and dry flat. Store flat or lightly stuffed so the peonies keep their dimension.
Left Handed Note
Left handed crocheters may work the rounds in the opposite direction. Keep the front floral placement centered and mirror the applique layout as needed.

Final Thoughts on This Blush Pink Peony Mesh Tote Crochet Pattern
This Blush Pink Peony Mesh Tote is one of those projects that gives you so much satisfaction. Every time you use it, you’ll remember the hours spent creating something beautiful and functional. The skills you’ll practice here, oval base construction, mesh repeats, dimensional flower making, and applique placement, will serve you well in countless future projects.
Take your time with the peonies. They’re the star of the show, and getting them just right makes all the difference. And don’t stress about making yours look exactly like the photos. Your handmade version will have its own personality, and that’s what makes crochet special.
Thank you so much for choosing this pattern for your next project. I genuinely hope you love making it as much as I loved designing it. If you create your own version, I would absolutely love to see it! Tag me on Instagram or share a photo on Facebook. Seeing your beautiful makes is the best part of sharing patterns.
If this pattern caught your eye, go ahead and save it to your Pinterest boards so you can find it whenever you’re ready to start. And please drop a comment below if you make one. I love hearing about your yarn choices, any modifications you tried, and how the finished tote turned out!
Want a Quick & Easy Printable Version?
Get a clean, beautifully formatted PDF of this pattern — easy to follow step by step, ready to print or save on any device. No scrolling, no distractions, just the pattern.
Get the Printable PDF →