I don’t know about you, but I absolutely love a handbag that makes people stop and ask, "Wait, did you *make* that?" This Pastel Rainbow Bow Handbag delivers exactly that reaction. All the charm of a boutique accessory with none of the hefty price tag, and you get the satisfaction of saying, "Yes, I crocheted it myself."
Get the Ad-Free PDF Pattern
You can find the free pattern below, or you can purchase the ad-free printable PDF from my shop.
Get the Printable PDF →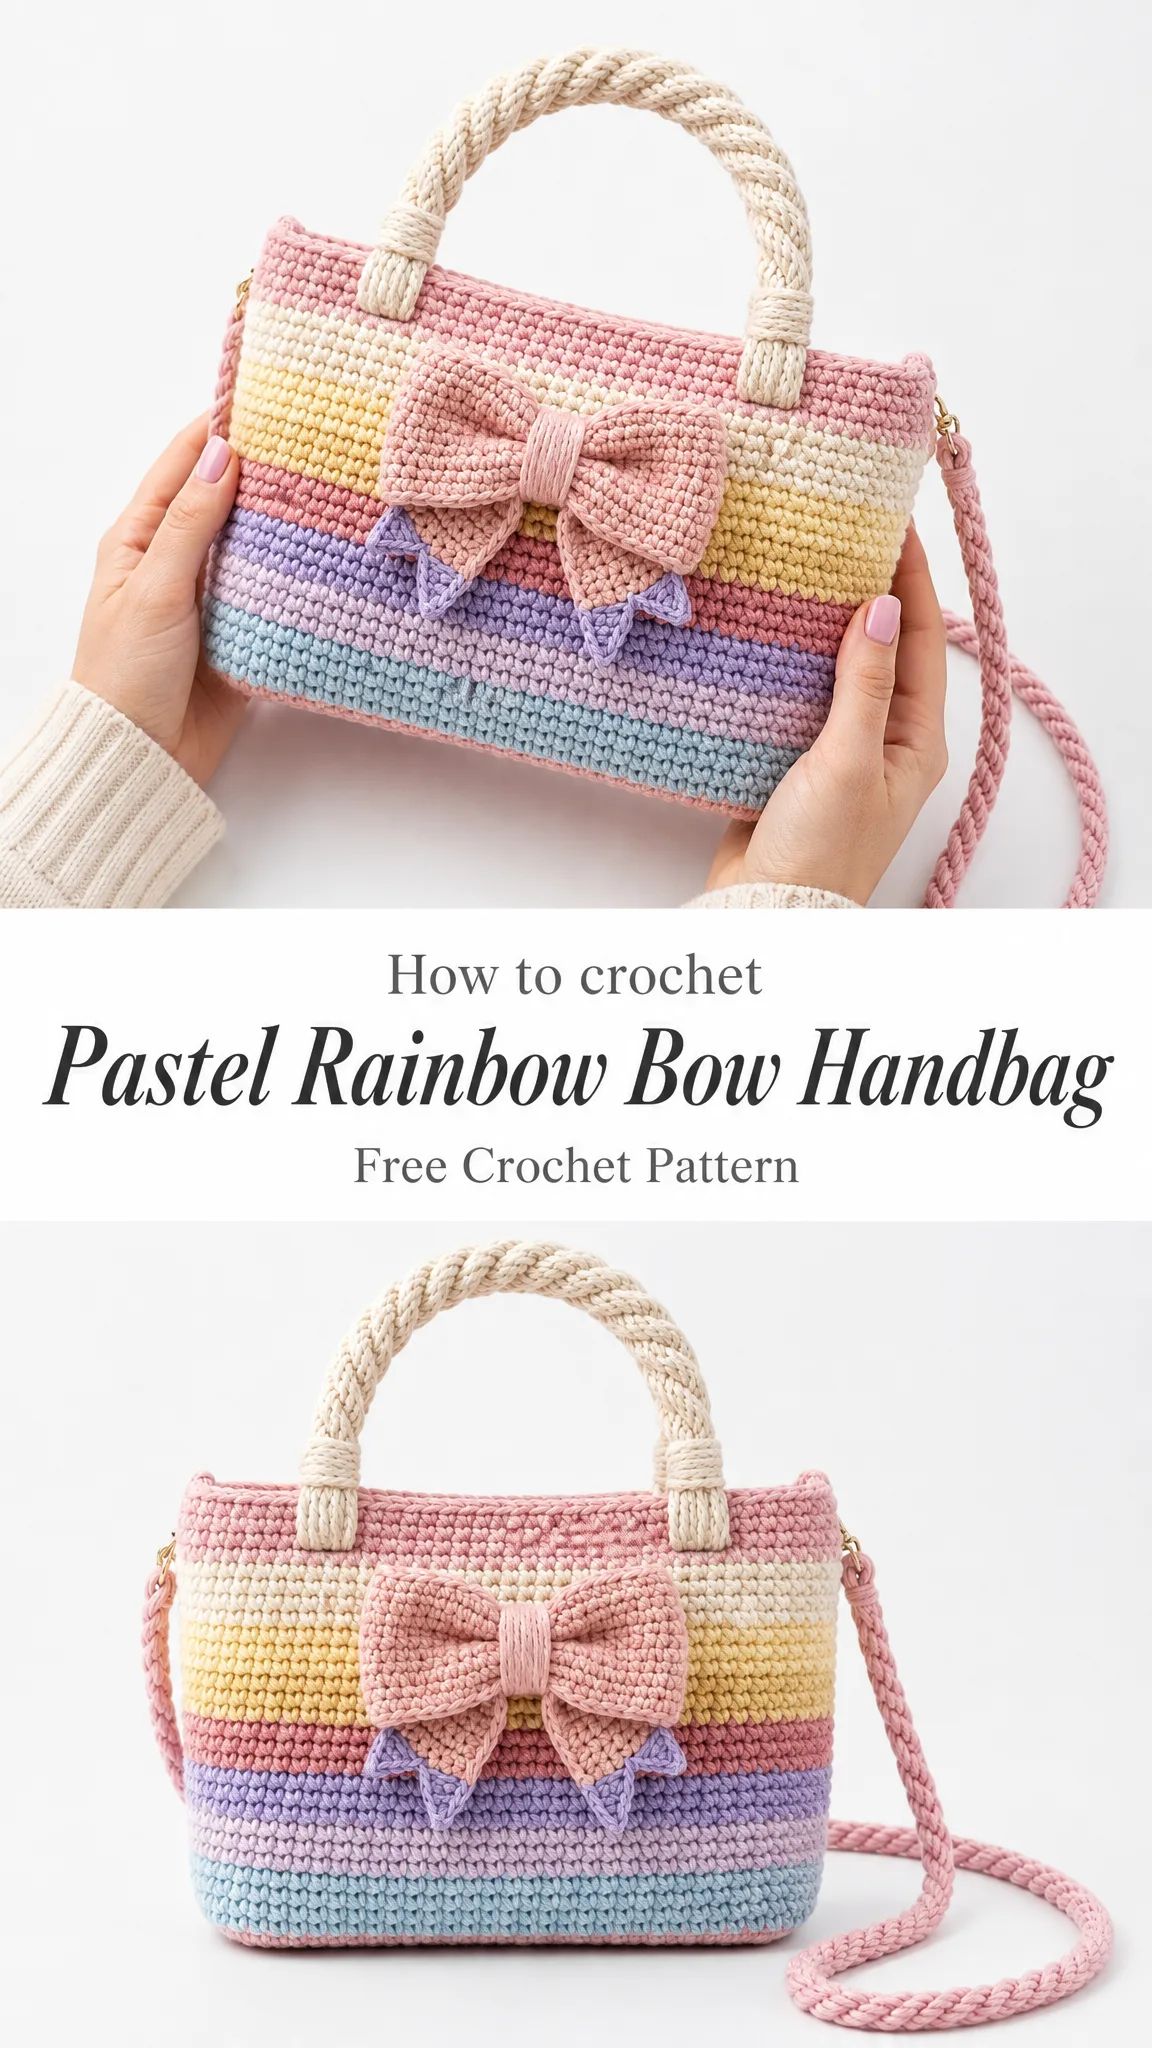
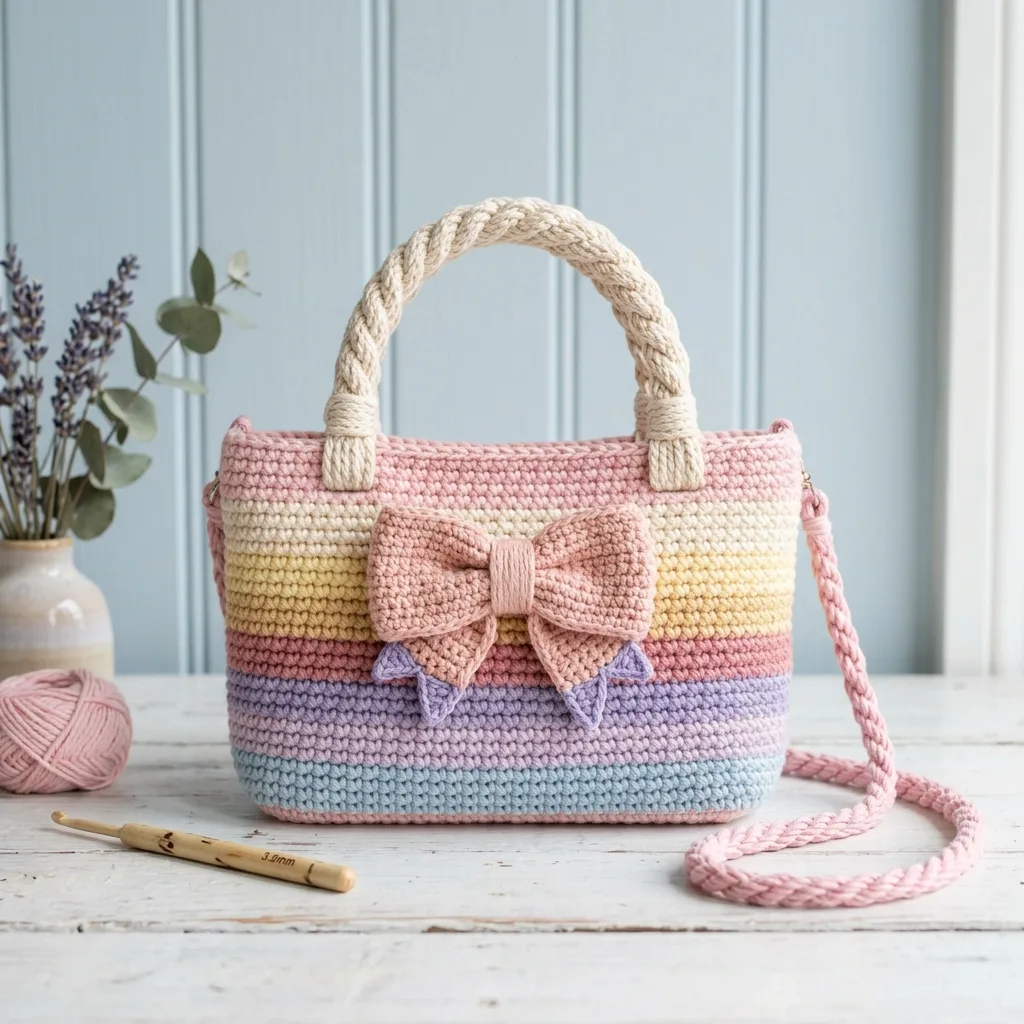
This structured mini handbag combines soft pastel stripes, a plush decorative bow, braided rope handles, and an optional shoulder strap. It’s the kind of project that looks far more complicated than it actually is. If you can work a single crochet and follow color changes, you can absolutely make this bag.
Why You’ll Love This Crochet Handbag Pattern
This pattern hits that sweet spot between impressive and achievable. The finished bag measures approximately 8.75 inches wide x 6.25 inches tall x 2.25 inches deep (22 x 16 x 5.5 cm), excluding handles and strap. It’s the perfect size for essentials like your phone, wallet, keys, and a lip balm or two.
The pastel rainbow stripes create visual interest without requiring complicated colorwork techniques. You’re simply changing colors at the end of rounds, which even confident beginners can handle. The decorative bow adds a feminine touch that elevates the entire piece, and the rope-style handles give it that polished, store-bought look.
Skill level: Confident beginner to easy intermediate. You’ll work a firm single crochet base, joined rounds, color changes, simple rectangles, shaping for bow tails, and basic assembly.
Time estimate: 8 to 12 hours, depending on your strap and finishing choices.
Materials You’ll Need
Before you start, gather these supplies. Having everything ready makes the whole process smoother.
Yarn: DK or light worsted cotton or cotton-blend yarn. Use firm, non-stretchy yarn for the best handbag structure.
Approximate yarn amounts (310 to 360 yards / 284 to 329 meters total):
Recommended yarn brands:
If you substitute yarn, match the gauge with a firm fabric. If your yarn is softer, go down a hook size or plan to add a lining or insert for structure.
Hooks:
Notions:
Gauge
18 single crochet stitches and 20 rows/rounds = 4 inches (10 cm) in single crochet after light blocking.
To check your gauge, make a swatch about 5 inches (13 cm) square in single crochet, block it lightly, then measure the center 4 inches (10 cm). Matching gauge keeps the stripe placement, bow scale, and final size close to the sample. Don’t skip this step, especially for a structured project like a handbag.
Abbreviations and Stitch Guide
Here’s every abbreviation you’ll encounter in this pattern, along with plain-English definitions.
ch = chain
sc = single crochet (insert hook in next stitch, yarn over and pull up a loop, yarn over and pull through both loops on hook)
sl st = slip stitch
st(s) = stitch(es)
RS / WS = right side / wrong side
rep = repeat
BLO = back loop only
sc2tog = single crochet 2 stitches together (insert hook in next stitch and pull up a loop, insert hook in following stitch and pull up a loop, yarn over and pull through all 3 loops). This creates a decrease.
Standing color join: Make a slip knot on your hook, insert hook in the indicated stitch, yarn over, pull up a loop, yarn over and complete a single crochet. This gives you a neat first stitch when changing colors.
Invisible join: After the last stitch, cut yarn and pull the tail through. Thread the tail on a needle, insert under both loops of the first stitch, then back down through the center of the last stitch. This creates a seamless round.
Pattern Notes Before You Begin
This pattern uses US crochet terms. If you’re a UK maker, remember that US sc equals UK dc.
The chain 1 at the start of a row or joined round does not count as a stitch. This is important for maintaining your stitch counts.
Work the bag body in joined rounds. Join with a slip stitch to the first single crochet unless instructed otherwise.
For a cleaner stripe join, place the join at one side edge and move the first stitch one stitch to the left every few rounds. This helps prevent the visible "jog" that sometimes happens with stripes.
Left-handed crocheters can follow the same stitch counts. Your work will travel in the opposite direction. Just keep the color-change seam at one side edge.
Handbag Body Instructions
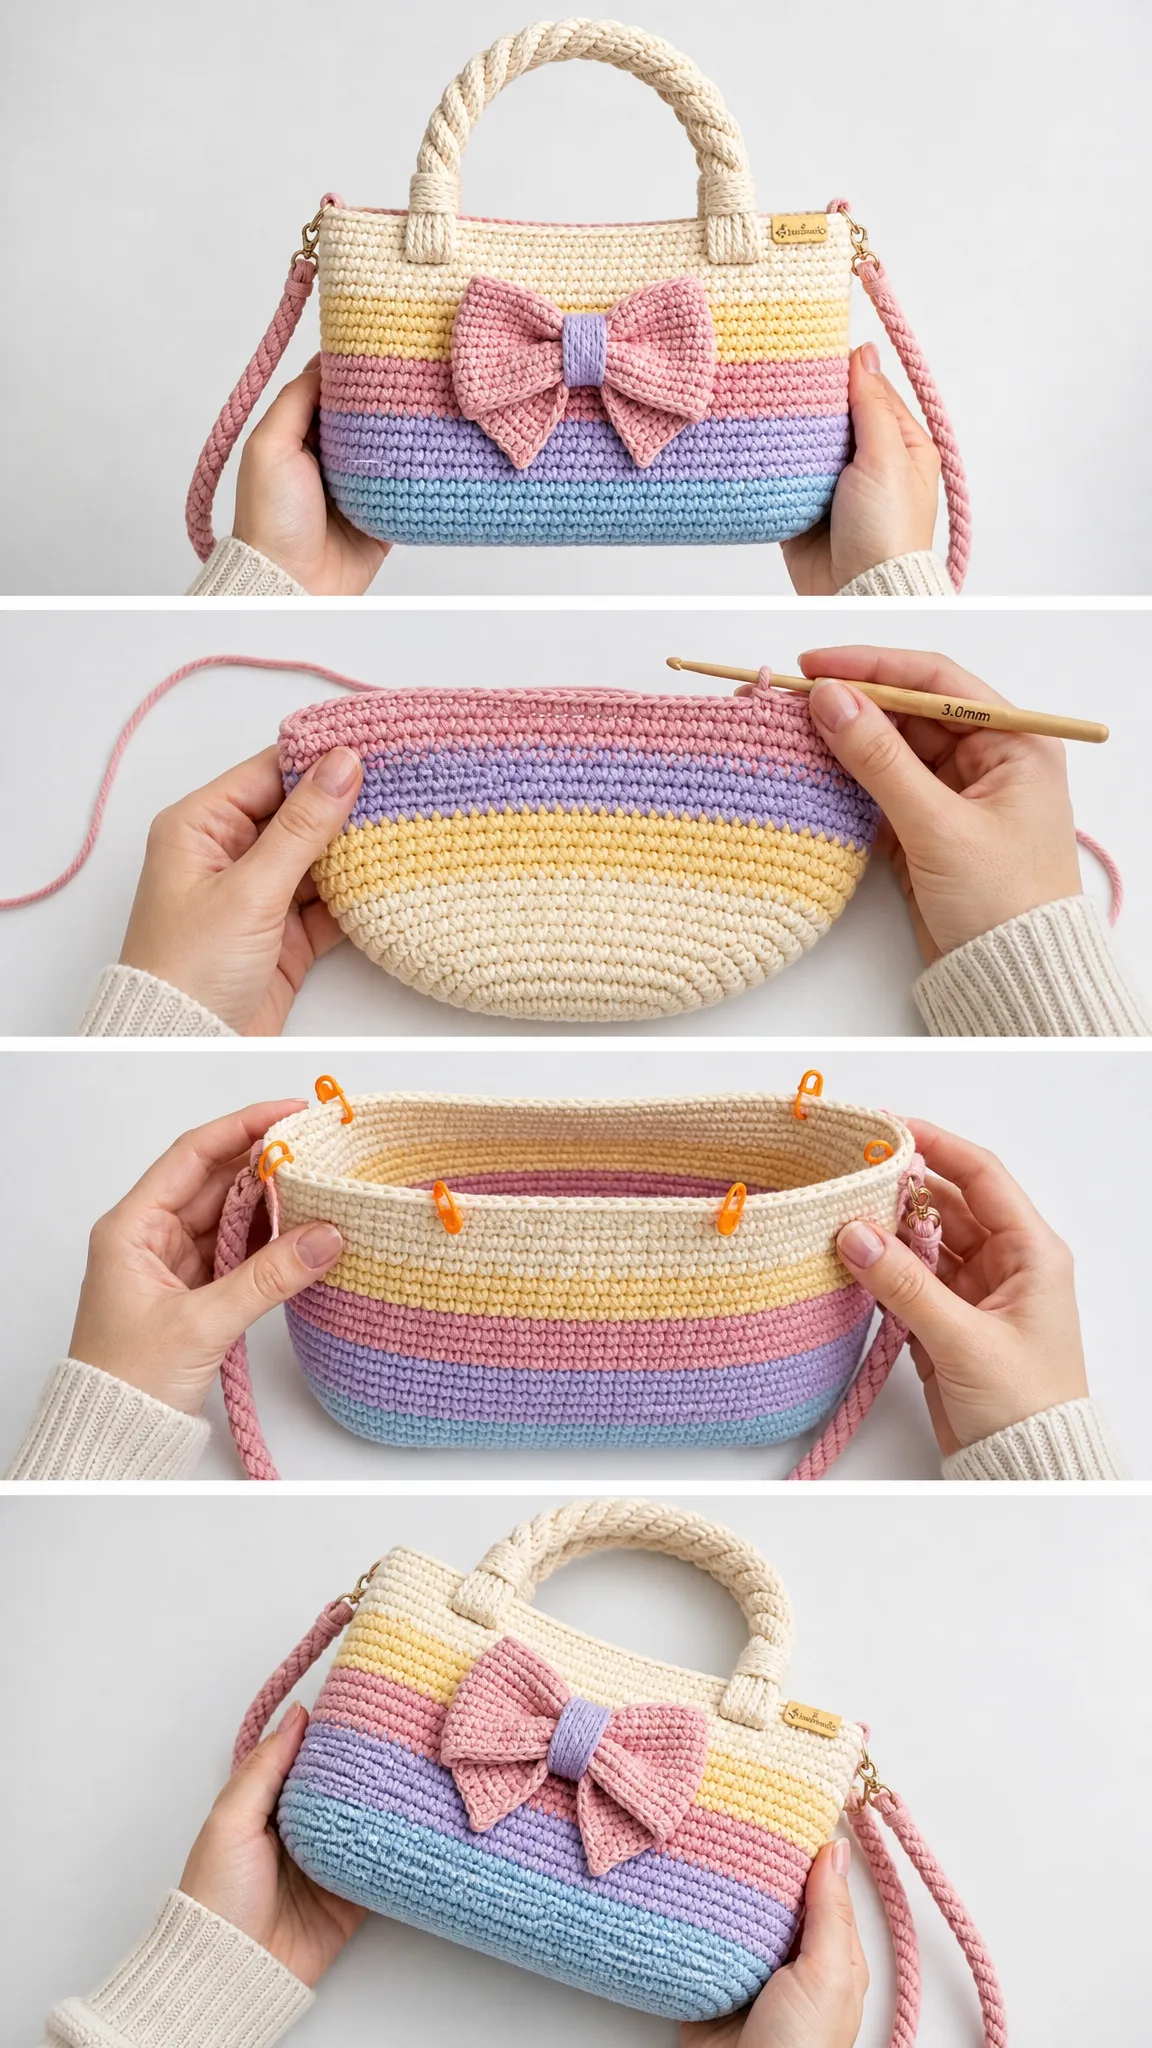
This is where your bag comes to life. You’ll start with a rectangular base, then work upward in joined rounds, changing colors to create the rainbow stripes.
Base
Checkpoint before sides: Your base should measure about 7.25 x 2 inches (18.5 x 5 cm) before working upward.
Base Row 1: With blue, ch 33. Sc in 2nd ch from hook and in each ch across. Ch 1, turn. (32 sc)
Base Rows 2 through 10: Sc in each st across. Ch 1, turn after Rows 2 through 9 only. Do not turn after Row 10. (32 sc each row)
Body Setup Round
Now you’ll work around the entire rectangle to begin building the sides.
Working around the rectangle: sc 32 across the long edge, sc 10 evenly down the short edge, sc 32 across the foundation edge, sc 10 evenly up the second short edge. Join. (84 sc)
Striped Body Rounds
Rounds 1 through 4 (Blue): Ch 1, sc in each st around, join. (84 sc each round)
Rounds 5 through 9 (Lavender): Ch 1, sc in each st around, join. (84 sc each round)
Rounds 10 through 12 (Soft Pink): Ch 1, sc in each st around, join. (84 sc each round)
Rounds 13 through 15 (Rose): Ch 1, sc in each st around, join. (84 sc each round)
Rounds 16 through 20 (Yellow): Ch 1, sc in each st around, join. (84 sc each round)
Rounds 21 through 23 (Cream): Ch 1, sc in each st around, join. (84 sc each round)
Rounds 24 through 28 (Top Pink): Ch 1, sc in each st around, join. (84 sc each round)
Checkpoint after body: Top circumference should be about 18.5 to 19 inches (47 to 48 cm). Height from base edge to top should be about 5.5 to 5.75 inches (14 to 14.5 cm).
Top Edging, Handles, and Strap
Top Edging Round
With top pink, ch 1, sc in each st around, join with invisible join. (84 sc)
Optional firm lip: Work 1 extra round in BLO for a slightly rolled top edge. (84 sc)
Rope Handles (Make 2)
These braided handles give the bag its polished, boutique-style appearance.
Cut three 30-inch (76 cm) strands of ecru yarn for each handle. Knot one end, braid or twist firmly, then knot the other end. Finished handle length: about 13 inches (33 cm) before attaching.
Attach one handle to the front and one to the back. Place handle ends 14 stitches apart on the top edge, centered over each wide panel. Wrap each end with ecru yarn for about 1 inch (2.5 cm) and sew through the bag wall several times for strength.
Placement checkpoint: Front handle bases sit about 2 inches (5 cm) from each side edge. Repeat on the back to match.
Optional Shoulder Strap
If you want the versatility of wearing this bag crossbody, add the shoulder strap.
Cut nine 54-inch (137 cm) strands of top pink yarn. Divide into 3 groups of 3 strands and braid firmly to about 39 to 42 inches (99 to 107 cm), or your preferred length. Knot ends, thread through D-rings or side loops, and secure with several passes of yarn.
Side loops: Join pink at one side top corner, ch 8, sl st into same corner, turn, work 10 sc around chain loop, fasten off. Repeat at the opposite side. (10 sc around each loop)
Bow and Embellishment
The bow is what takes this handbag from cute to absolutely adorable. It’s made from three separate pieces: the main bow, two lavender tails, and a center band.
Main Bow
With peach-pink, ch 31.
Row 1: Sc in 2nd ch from hook and across. Ch 1, turn. (30 sc)
Rows 2 through 10: Sc across. Ch 1, turn after Rows 2 through 9 only. (30 sc each row)
Fasten off, leaving a long tail. Pinch the center tightly and wrap the tail 10 to 12 times to cinch.
Bow checkpoint: Main bow measures about 4.25 x 2 inches (11 x 5 cm) before cinching. Finished bow width is about 4 inches (10 cm).
Lavender Tails (Make 2)
Ch 11.
Row 1: Sc in 2nd ch and across. Ch 1, turn. (10 sc)
Row 2: Sc2tog, sc 6, sc2tog. Ch 1, turn. (8 sc)
Row 3: Sc2tog, sc 4, sc2tog. Ch 1, turn. (6 sc)
Row 4: Sc2tog, sc 2, sc2tog. Ch 1, turn. (4 sc)
Row 5: Sc2tog twice. (2 sc)
Fasten off.
Center Band
With peach-pink, ch 8.
Row 1: Sc in 2nd ch and across. Ch 1, turn. (7 sc)
Rows 2 through 6: Sc across. (7 sc each row)
Wrap around the cinched bow center and sew the short edges together at the back.
Assembly
Place lavender tails behind the bow, angled downward. Sew tails to the back of the bow.
Center the bow on the front panel at the rose/yellow stripe line, with the top of the bow about 2.25 inches (5.5 cm) below the top edge. Sew securely through the bow center and corners.
Photo-style placement tip: Keep the bow centered and slightly high on the front panel so it overlaps the cream/yellow/rose transition and rests above the lavender band.
Finishing Your Pastel Rainbow Handbag
You’re almost there! These final steps make the difference between a homemade project and a professional-looking finished piece.
Weave in all ends on the inside. Steam lightly from the wrong side without pressing the stitches flat. Shape the base by pinning the rectangle corners square while damp.
For a polished handbag, sew in a simple fabric lining or insert plastic canvas in the base. Keep any lining slightly smaller than the crochet shell so the bag doesn’t pucker.
Size Customization Tips
Want to adjust the size? Here’s how.
To widen the bag: Add chain stitches to the base in multiples of 2. Each added 2 chains adds 2 stitches to the setup round.
To change depth: Add or remove base rows before the setup round. Each added base row adds 2 stitches to the setup round.
To change height: Add or remove side rounds within a color stripe. Keep the final top edge at 84 sc unless you intentionally want to resize the opening.
Troubleshooting Common Issues
Bag flares outward: Try a smaller hook or keep your color joins snug. Don’t add extra corner stitches after the setup round.
Base cups: Check that the setup round has 84 sc and that you worked 10 sc along each short side.
Stripes lean: Joined rounds naturally shift slightly. Move the join at the side edge and block gently.
Bow droops: Use the smaller hook for bow pieces, add a few hidden stitches at the bow corners, or back the bow with felt or fabric for extra support.
Care Instructions
Spot clean or hand wash gently in cool water. Roll in a towel to remove moisture, reshape, and dry flat. Avoid machine drying, which can distort the handles and bow.
Make This Crochet Handbag Your Own
This Pastel Rainbow Bow Handbag crochet pattern gives you everything you need to create a stunning accessory that’s both functional and conversation-starting. Whether you stick with the pastel rainbow palette or choose your own color story, the structured shape and sweet bow detail will make this bag a favorite.
Thank you so much for choosing this pattern! I’d love to see your finished handbag, so please tag me on Instagram or share in our Facebook group when you complete yours. Seeing your makes truly brightens my day.
If you love this pattern, save it to your Pinterest boards so you can find it whenever you’re ready to start. And if you do make it, drop a comment below and let me know how it turned out! Happy crocheting!
Want a Quick & Easy Printable Version?
Get a clean, beautifully formatted PDF of this pattern — easy to follow step by step, ready to print or save on any device. No scrolling, no distractions, just the pattern.
Get the Printable PDF →