Crochet jewelry looks intimidating. I get it. You see those delicate thread earrings and think they require years of experience and the patience of a saint. But here’s the truth: if you can single crochet and double crochet, you can absolutely make these stunning maple leaf earrings. The ombre effect? It’s just two colors joined strategically. The intricate leaf veins? Simple chain stitches worked into the surface. I promise this project is far more approachable than it appears, and I’m going to walk you through every single step.
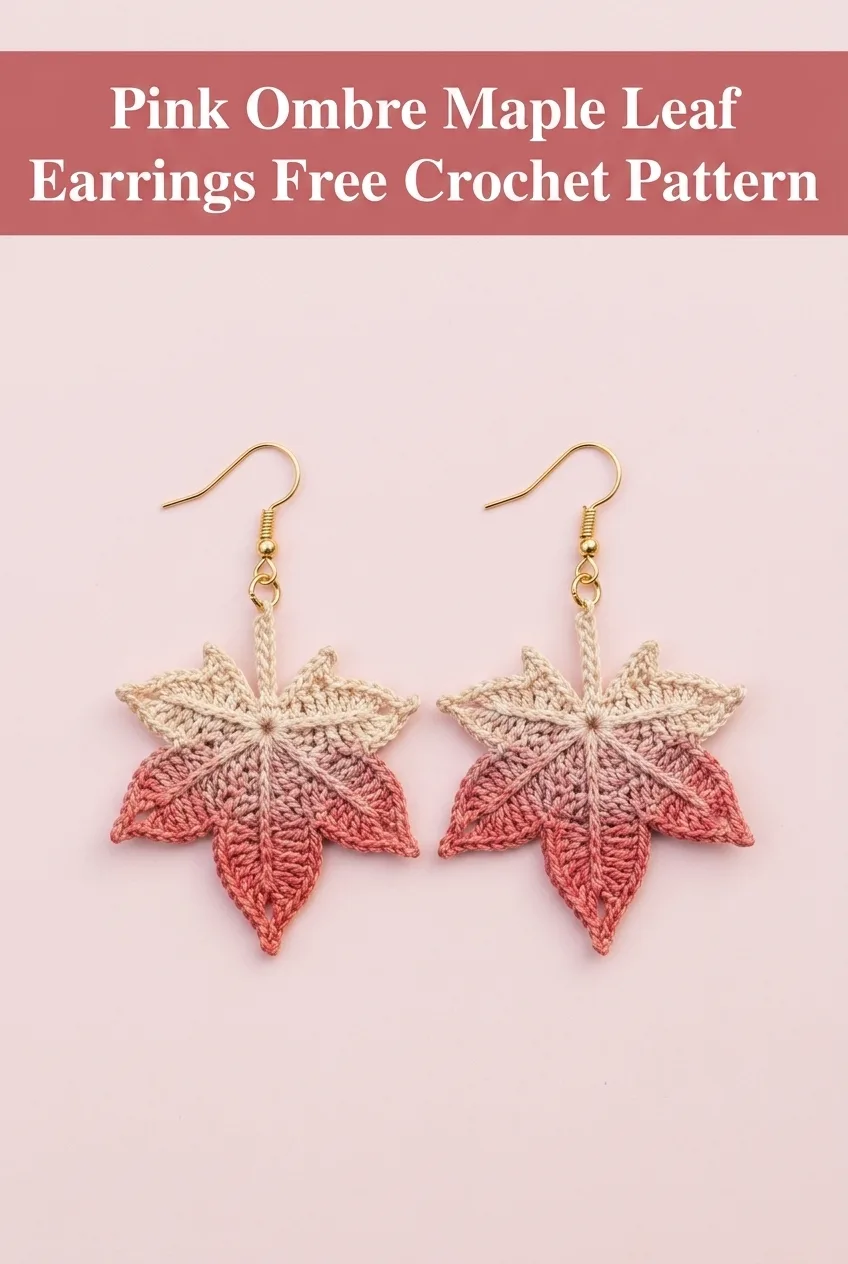
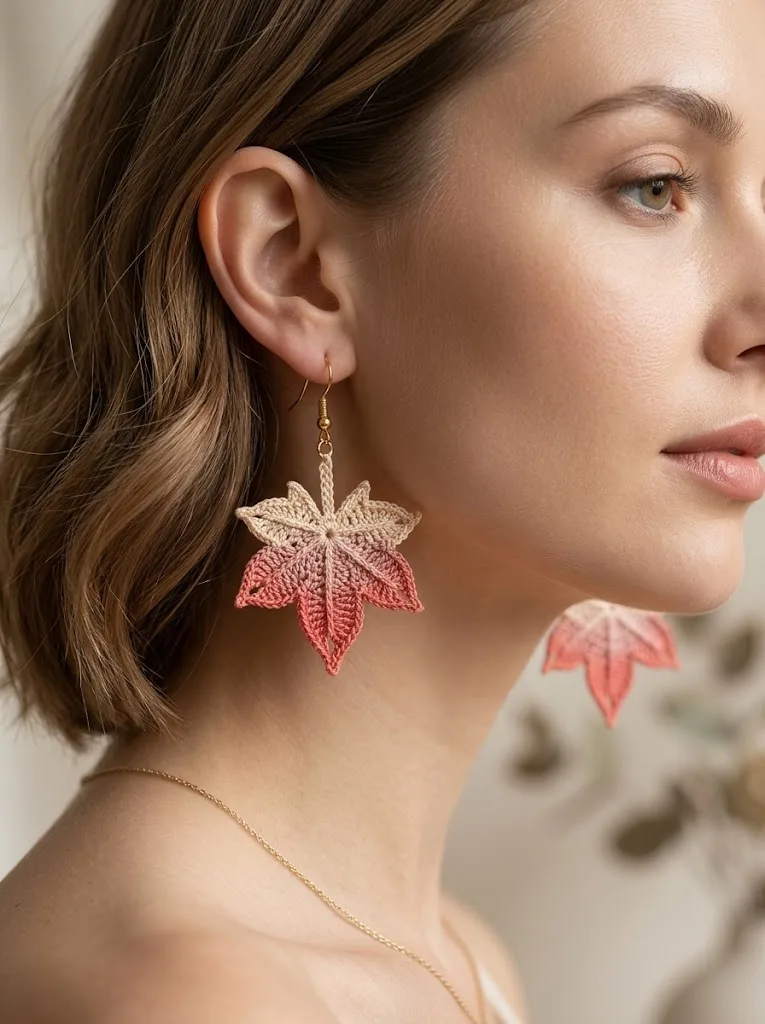
These Pink Ombre Maple Leaf Earrings are the perfect introduction to crochet jewelry. Whether you’re an adventurous beginner ready to try something new or an experienced crocheter looking for a quick, satisfying project, this crochet pattern delivers beautiful results in about an hour per earring.
Why You’ll Love This Crochet Maple Leaf Earrings Pattern
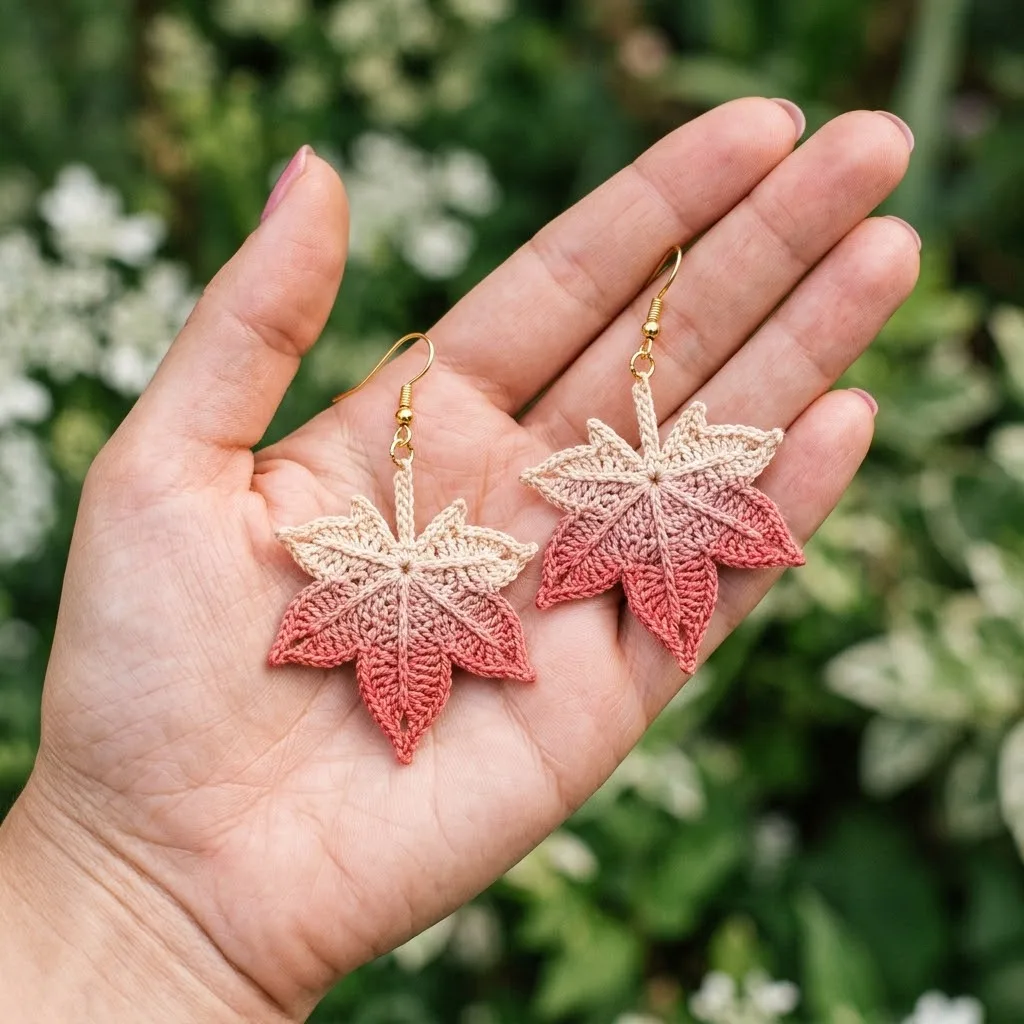
Let me tell you what makes this crochet tutorial special. First, the size. These earrings are substantial enough to make a statement but lightweight enough to wear comfortably all day. Each finished leaf measures approximately 2 inches wide and 2.5 inches tall, not including the ear wire hardware.
The ombre gradient from dusty coral pink to soft cream creates visual depth that looks far more complex than it actually is. You’re working with two separate colors, joining them at the center to create that gorgeous fade effect.
This pattern is perfect for:
Materials Needed for Your Crochet Leaf Earrings
Before we dive into the step by step instructions, let’s gather everything you need. Having your materials ready makes the process smooth and enjoyable.
Yarn/Thread:
Hook:
Notions:
Gauge:
Exact gauge is not critical for jewelry, but your stitches should be tight and uniform. If your leaf looks loose or floppy, try going down a hook size.
Skill Level and Techniques
This crochet pattern is beginner friendly with some intermediate elements. You should be comfortable with:
Don’t worry if surface crochet is new to you. It’s simply slip stitching along the top of your finished fabric to create raised lines. Think of it as drawing with your hook and thread.
Abbreviations and Stitch Definitions
Let me break down every stitch abbreviation you’ll encounter. Even if you know these, a quick review never hurts.
ch = chain: Yarn over, pull through loop on hook. This is your foundation stitch.
sl st = slip stitch: Insert hook, yarn over, pull through stitch AND loop on hook in one motion. Used for joining and surface decoration.
sc = single crochet: Insert hook, yarn over, pull up a loop (2 loops on hook), yarn over, pull through both loops.
hdc = half double crochet: Yarn over, insert hook, yarn over, pull up a loop (3 loops on hook), yarn over, pull through all 3 loops.
dc = double crochet: Yarn over, insert hook, yarn over, pull up a loop (3 loops on hook), yarn over, pull through 2 loops, yarn over, pull through remaining 2 loops.
tr = treble crochet: Yarn over twice, insert hook, yarn over, pull up a loop (4 loops on hook), [yarn over, pull through 2 loops] 3 times.
inc = increase: Work 2 stitches into the same stitch.
sk = skip: Pass over the indicated stitch without working into it.
Understanding the Construction
Before you begin, let me explain how these maple leaf earrings come together. This will help everything make sense as you work.
Each earring consists of five pointed lobes radiating from a center point, just like a real maple leaf. You’ll create each lobe separately, working from the tip down toward the center. The lobes are then joined together, and surface crochet adds the realistic vein details.
The color transition happens naturally. You work the outer portion of each lobe in coral pink, then switch to cream for the inner section near the center. When all lobes connect, the ombre effect emerges beautifully.
A chain stem at the top provides the attachment point for your ear wire hardware.
Pink Ombre Maple Leaf Earrings Pattern Instructions
Make 2 identical leaves.
Center Lobe (Largest)
This is the main point at the top of your maple leaf.
With coral pink thread:
Row 1: Ch 12. Starting in 2nd ch from hook, work: sl st, sc, hdc, dc, dc, tr, dc, dc, hdc, sc, sl st. (11 sts)
Row 2: Ch 1, turn. Sk first sl st, sl st in sc, sc in hdc, hdc in dc, dc in dc, tr in tr, dc in dc, hdc in dc, sc in hdc, sl st in sc. Leave last sl st unworked. (9 sts)
Row 3: Ch 1, turn. Sk sl st, sl st in sc, sc in hdc, hdc in dc, dc in tr, hdc in dc, sc in hdc, sl st in sc. (7 sts)
Change to cream thread:
Row 4: Ch 1, turn. Sk sl st, sl st in sc, sc in hdc, hdc in dc, sc in hdc, sl st in sc. (5 sts)
Row 5: Ch 1, turn. Sk sl st, sl st in sc, sc in hdc, sl st in sc. (3 sts)
Fasten off, leaving a 6 inch tail. Set aside.
Side Lobes (Make 4)
These are slightly smaller than the center lobe. Make two for the left side and two for the right side of your leaf.
With coral pink thread:
Row 1: Ch 10. Starting in 2nd ch from hook, work: sl st, sc, hdc, dc, tr, dc, hdc, sc, sl st. (9 sts)
Row 2: Ch 1, turn. Sk first sl st, sl st in sc, sc in hdc, hdc in dc, dc in tr, hdc in dc, sc in hdc, sl st in sc. (7 sts)
Row 3: Ch 1, turn. Sk sl st, sl st in sc, sc in hdc, hdc in dc, sc in hdc, sl st in sc. (5 sts)
Change to cream thread:
Row 4: Ch 1, turn. Sk sl st, sl st in sc, sc in hdc, sl st in sc. (3 sts)
Row 5: Ch 1, turn. Sl st in center sc. (1 st)
Fasten off, leaving a 6 inch tail.
Assembling the Leaf
Now comes the satisfying part. Lay out your five lobes in a fan arrangement with the center lobe at the top.
Step 1: Thread your tapestry needle with cream thread. Position the center lobe pointing straight up.
Step 2: Place one side lobe on each side of the center lobe, angled outward at approximately 45 degrees. The cream portions should touch at the center.
Step 3: Place the remaining two side lobes at the outer edges, angled more dramatically at about 70 degrees from center.
Step 4: Using your tapestry needle and cream thread, whip stitch the cream bases of all five lobes together. Work through the back loops only to keep the join invisible from the front. Pull firmly to gather the lobes into a cohesive maple leaf shape.
Step 5: Secure your join with several knots and weave in the end.
Adding the Vein Details
This surface crochet step transforms your leaf from good to stunning. The veins add texture and realistic detail.
With cream thread and your steel hook:
Center Vein: Join cream thread at the very tip of the center lobe with a sl st. Working through the top of your stitches, sl st down the center of the lobe toward the base. You should make approximately 8 to 10 sl sts. Fasten off.
Side Veins: Repeat this process for each side lobe, slip stitching from tip to base along the center of each lobe.
Connecting Veins (Optional): For extra detail, you can add small diagonal veins branching off from each main vein. Work 2 to 3 sl sts angling outward from the main vein line.
Creating the Stem
The stem provides your attachment point and adds an authentic finishing touch.
With cream thread:
Join cream thread at the center base of the leaf, right where all five lobes meet.
Ch 8. Sl st in 2nd ch from hook and in each remaining ch back to the leaf base. (7 sl sts)
Join with sl st to the leaf base. Fasten off and weave in end.
Finishing Your Crochet Earrings
Blocking and Stiffening
For earrings that hold their shape beautifully, I strongly recommend stiffening your finished leaves.
Option 1: Fabric Stiffener
Dip your completed leaf in commercial fabric stiffener. Squeeze out excess and pin to your blocking board with the lobes spread into the correct maple leaf shape. Allow to dry completely, usually 4 to 6 hours.
Option 2: Diluted Glue
Mix white school glue with water at a 1:1 ratio. Apply with a small brush, pin to shape, and let dry.
Option 3: Spray Starch
Lighter hold, but works in a pinch. Pin your leaf and apply several coats of heavy spray starch, allowing each coat to dry before adding the next.
Attaching Ear Wire Hardware
Once your leaves are completely dry and stiff:
Step 1: Open your jump ring by twisting sideways, never pulling apart.
Step 2: Thread the jump ring through the top of your stem chain, catching a stitch securely.
Step 3: Thread your fish hook ear wire onto the same jump ring.
Step 4: Close the jump ring by twisting back to closed position.
Step 5: Repeat for the second earring.
Pattern Variations and Tips
Color Ideas:
Size Adjustments:
For larger leaves, use size 5 crochet thread with a size 5 (1.90mm) steel hook. For smaller, more delicate leaves, try size 20 thread with a size 10 (1.30mm) hook.
Matching Set:
This same leaf works beautifully as a pendant. Simply make one leaf and attach it to a jewelry bail and chain instead of ear wires.
Troubleshooting:
If your leaf curls or cups, your tension is too tight. Try relaxing your grip or going up one hook size. If your leaf is floppy, your tension is too loose. Go down a hook size or be sure to stiffen thoroughly.
Care Instructions
Share these tips when gifting your handmade earrings:
Make These Your Signature Gift
These Pink Ombre Maple Leaf Earrings work up in about an hour once you get the rhythm down. That means you can create an entire gift collection in a weekend. Package them on a simple card with a handwritten note, and you have a meaningful handmade present that costs almost nothing but looks absolutely luxurious.
I love keeping a few pairs in my craft fair inventory. They photograph beautifully, catch the light with lovely texture, and appeal to customers who appreciate delicate, nature inspired jewelry.
This crochet maple leaf earrings pattern proves that stunning results don’t require complicated techniques. You’ve got this.
I really hope you enjoy making these beautiful leaf earrings as much as I enjoyed designing them. If this pattern helped you create something lovely, I’d be thrilled if you saved it to your Pinterest boards so you can find it again and share it with fellow crocheters. And please, drop a comment below if you make a pair. I absolutely love seeing your finished projects and hearing which color combinations you chose!
