THIS is the project you have been waiting for. A SUPER impressive chunky cable sweater vest that looks like you spent weeks on it but actually works up in a weekend. I am talking serious wow factor with cozy oversized vibes that everyone is obsessed with right now. If you have ever wanted to make a garment that makes people ask "wait, you MADE that?" then grab your hook and your chunkiest yarn because this one delivers. Perfect for gifting, perfect for keeping, and honestly perfect for finally showing off what you can do.
Why You Will Love This Cable Sweater Vest Crochet Pattern
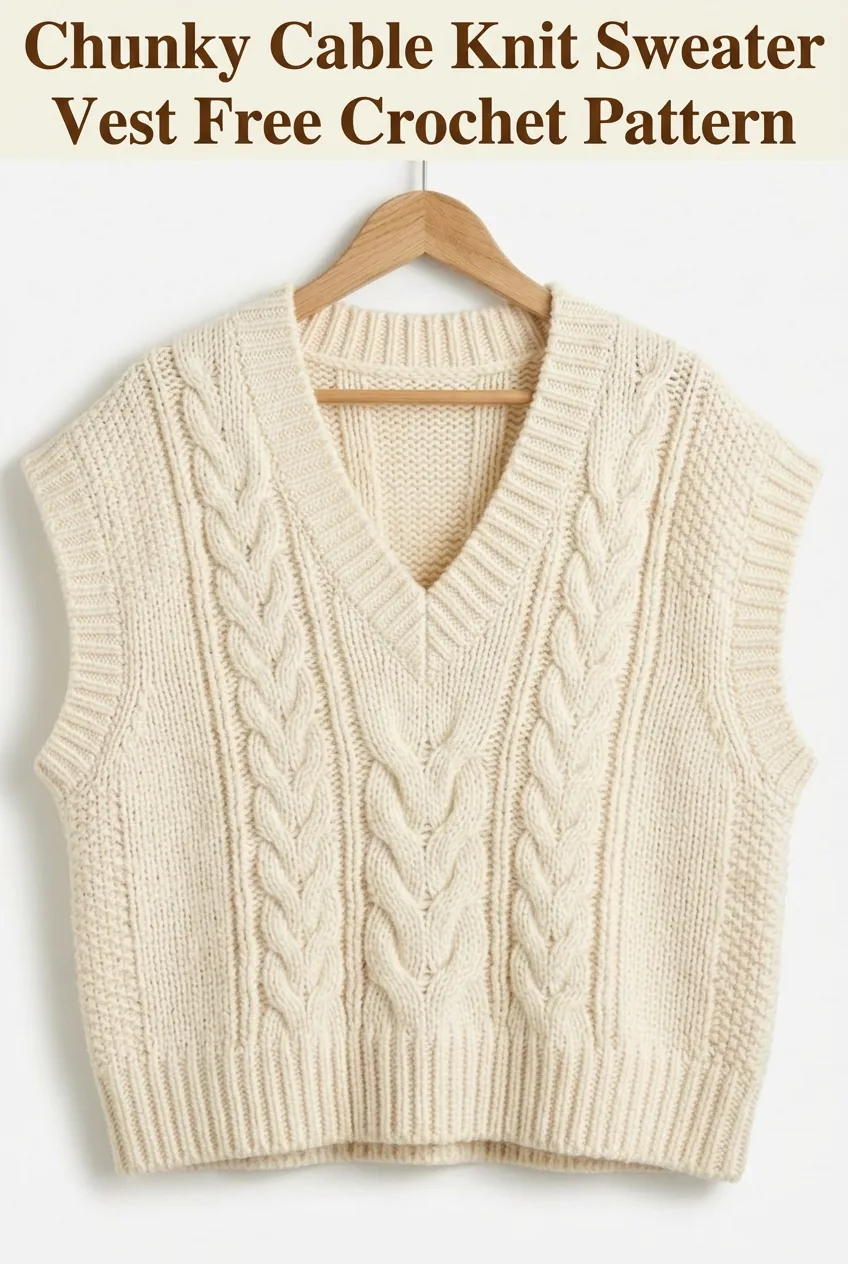
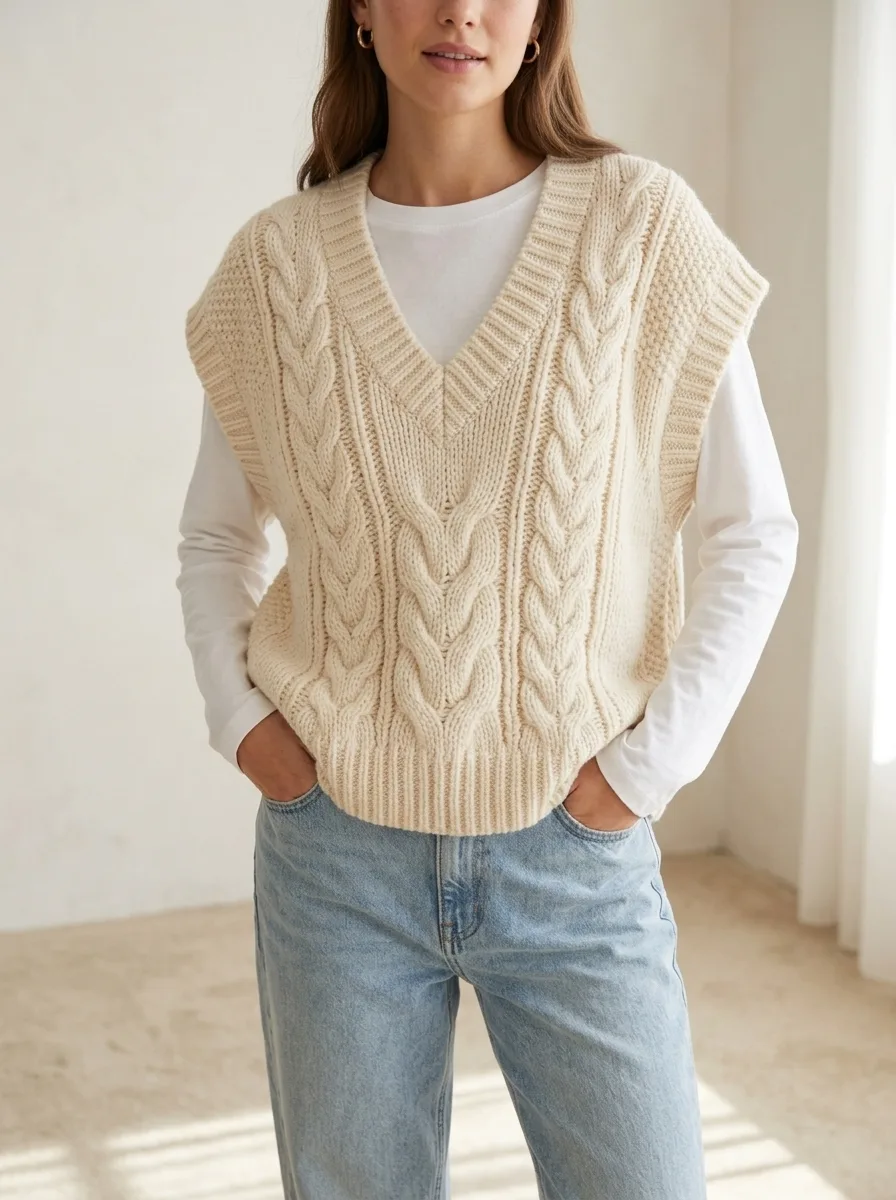
This chunky cable knit sweater vest combines classic styling with modern oversized proportions. The deep V-neckline creates that effortlessly cool layered look that works over everything from basic tees to crisp button-downs. The cream colorway keeps it versatile, but this pattern looks stunning in any solid color that shows off the cable texture.
The construction might look intimidating, but I promise it is more approachable than you think. We are working this vest in flat panels, then seaming them together. The cables use front post double crochet (fpdc) stitches that create those gorgeous braided columns without any actual knitting involved.
Skill level: Intermediate. You should be comfortable with basic stitches and willing to learn front post techniques if they are new to you.
Materials Needed for Your Crochet Sweater Vest
Yarn:
I recommend yarns like Lion Brand Wool-Ease Thick & Quick, Bernat Roving, or Malabrigo Rasta. The key is finding a yarn with good stitch definition so those cables really pop.
Hook:
Notions:
Gauge (Please Do Not Skip This)
Gauge: 8 stitches and 6 rows = 4 inches in half double crochet
I know checking gauge feels tedious, especially when you are excited to start. But garments absolutely require it. A sweater vest that is three inches too small or too large is not wearable. Take ten minutes now to save yourself heartbreak later.
To check gauge, chain 14. Work 10 rows of half double crochet. Block lightly and measure. Adjust hook size up if your swatch is too small, down if too large.
Abbreviations and Stitch Definitions
Let me walk you through every stitch we will use. Even if you know these, a quick refresher never hurts.
Ch = Chain. Wrap yarn over hook, pull through loop on hook. This creates your foundation.
Sl st = Slip stitch. Insert hook, yarn over, pull through stitch AND loop on hook in one motion. Used for joining and moving across stitches without adding height.
Sc = Single crochet. Insert hook, yarn over, pull up a loop (2 loops on hook), yarn over, pull through both loops. Creates a short, dense stitch.
Hdc = Half double crochet. Yarn over, insert hook, yarn over, pull up a loop (3 loops on hook), yarn over, pull through all 3 loops. Slightly taller than sc with nice drape.
Dc = Double crochet. Yarn over, insert hook, yarn over, pull up a loop, yarn over, pull through 2 loops, yarn over, pull through remaining 2 loops. Taller stitch with more drape.
Fpdc = Front post double crochet. This is our cable stitch. Instead of inserting your hook into the top of the stitch, you insert it around the POST (vertical part) of the stitch from the previous row. Yarn over, insert hook from front to back to front around the post, yarn over, pull up a loop, complete as a regular dc. This pushes the stitch forward, creating texture.
Bpdc = Back post double crochet. Same concept but insert from back to front to back. This pushes the stitch backward. We use both to create the ribbing effect.
Size Information
This pattern is written for size Medium with an oversized fit. The finished measurements are approximately:
For smaller or larger sizes, adjust your starting chain by increments of 4 stitches to maintain the cable pattern repeat.
Special Technique: Crochet Cables
Crochet cables look complicated but follow a simple principle. You are crossing stitches over each other by skipping stitches, working into later stitches first, then going back to work the skipped ones. This creates that braided, rope-like effect.
6-stitch right-leaning cable (C6R):
Skip the next 3 stitches. Work fpdc into each of the following 3 stitches. Now go back and work fpdc into each of the 3 skipped stitches, working in front of the stitches you just made.
6-stitch left-leaning cable (C6L):
Skip the next 3 stitches. Work fpdc into each of the following 3 stitches, but work BEHIND the skipped stitches. Now go back and work fpdc into each of the 3 skipped stitches in front.
Do not panic if this sounds confusing. When you have hook and yarn in hand, it will click. The key is keeping your tension relaxed so you can maneuver around those posts.
Back Panel Instructions
The back panel is worked flat from bottom to top.
Foundation:
Ch 46.
Row 1 (RS): Hdc in 3rd ch from hook and in each ch across. Turn. (44 sts)
Rows 2 to 4 (Ribbing): Ch 2 (does not count as st throughout), *fpdc around next st, bpdc around next st* repeat across. Turn. (44 sts)
This alternating post stitch pattern creates the stretchy ribbed hem you see at the bottom of the vest.
Row 5: Ch 2, hdc in first 8 sts, fpdc around next 6 sts (this is your cable panel setup), hdc in next 16 sts, fpdc around next 6 sts, hdc in last 8 sts. Turn. (44 sts)
Row 6 and all WS rows: Ch 2, hdc in each st and around each post st across. Turn. (44 sts)
Row 7 (Cable Row): Ch 2, hdc in first 8 sts, work C6R over next 6 sts, hdc in next 16 sts, work C6R over next 6 sts, hdc in last 8 sts. Turn. (44 sts)
Rows 8 to 10: Repeat Row 6 for WS rows and Row 5 pattern for RS rows (fpdc without crossing).
Row 11: Repeat Row 7 (cable crossing row).
Continue this pattern, crossing cables every 4th RS row, until piece measures approximately 10 inches from beginning.
Armhole Shaping:
At the beginning of the next 2 rows, sl st across first 4 sts, then continue in pattern to last 4 sts, leave remaining sts unworked. Turn. (36 sts)
Continue in established pattern for another 10 inches.
Shoulder Shaping:
Work 12 sts in pattern, leave remaining sts unworked for first shoulder. Fasten off.
Skip center 12 sts for back neck. Rejoin yarn and work remaining 12 sts for second shoulder. Fasten off.
Front Panel Instructions (Make 2)
Each front panel is worked separately, then seamed at the center back of the shoulders.
Foundation:
Ch 26.
Row 1 (RS): Hdc in 3rd ch from hook and in each ch across. Turn. (24 sts)
Rows 2 to 4 (Ribbing): Ch 2, *fpdc, bpdc* repeat across. Turn. (24 sts)
Row 5: Ch 2, hdc in first 4 sts, fpdc around next 6 sts, hdc in last 14 sts. Turn. (24 sts)
Continue in pattern matching the back panel, crossing cables every 4th RS row.
V-Neck Shaping (begin when piece measures 10 inches):
For the RIGHT front: At neck edge (beginning of RS rows), decrease 1 st every RS row by working hdc2tog. Continue until 12 sts remain for shoulder.
For the LEFT front: At neck edge (end of RS rows), decrease 1 st every RS row. Continue until 12 sts remain for shoulder.
Continue working armhole side straight while maintaining decreases at neck edge.
When front panels match back panel length, fasten off.
Ribbed Edging for Armholes
Once panels are seamed at shoulders and sides, you will add ribbed edging around each armhole.
Round 1: Join yarn at underarm seam. Ch 1, work sc evenly around armhole opening, approximately 48 to 52 sts. Join with sl st. (Adjust count to an even number)
Rounds 2 to 3: Ch 2, *fpdc, bpdc* around. Join. (48 to 52 sts)
Fasten off and weave in ends.
V-Neck Ribbing
The neckline gets the same treatment to create that polished finish.
Round 1: Join yarn at center back neck or shoulder seam. Ch 1, work sc evenly around entire neckline, placing 3 sc at the point of the V and marking the center stitch. Join. (Approximately 60 to 70 sts)
Rounds 2 to 3: Ch 2, work fpdc/bpdc ribbing around, working sc3tog at the V point to maintain the sharp angle. Join.
Fasten off and weave in ends.
Assembly Instructions
Step 1: Block all pieces gently. Lay flat, spritz with water, and pin to measurements. Allow to dry completely.
Step 2: Place front and back panels with right sides together. Using mattress stitch or whip stitch, seam shoulders together.
Step 3: Seam side panels from bottom hem to armhole opening.
Step 4: Add armhole ribbing to both sides.
Step 5: Add V-neck ribbing.
Step 6: Weave in ALL ends. Seriously, all of them. Check twice.
Styling Your Finished Sweater Vest
This oversized cable sweater vest layers beautifully. Try it over a crisp white button-down for preppy vibes, or with a simple long-sleeve tee for everyday comfort. The cream color pairs with practically everything, but imagine this in forest green, burgundy, or classic navy.
Troubleshooting Tips for This Crochet Pattern Tutorial
Cables look flat: Your tension might be too tight. Relax your grip and let the yarn move freely.
Cables twist the wrong direction: Double check whether you are working in front of or behind the skipped stitches.
Edges are uneven: Count your stitches at the end of every row. It takes two seconds and saves hours of frustration.
Ribbing is not stretchy: Post stitches naturally have less stretch than regular stitches. This is normal. The ribbing will relax slightly with wear.
Thank you so much for choosing this pattern and trusting me to guide you through it. I genuinely cannot wait to see your finished vests. Tag me on Instagram or share in my Facebook group when you finish because your versions always inspire me and other makers in our community.
If you loved this chunky cable sweater vest crochet pattern, save it to your Pinterest boards so you can find it whenever you are ready to cast on. And please drop a comment below if you make one. I read every single comment and love hearing which colors you choose. Happy crocheting, friend.
