I’ve been looking for the perfect forever flowers project, and this blue hydrangea crochet planter is hands down my favourite. The combination of delicate clustered blooms, realistic leaves, and a cozy crocheted vase creates a stunning display that never needs watering. If you want a show-stopping piece for your home or a meaningful handmade gift, this is the one.
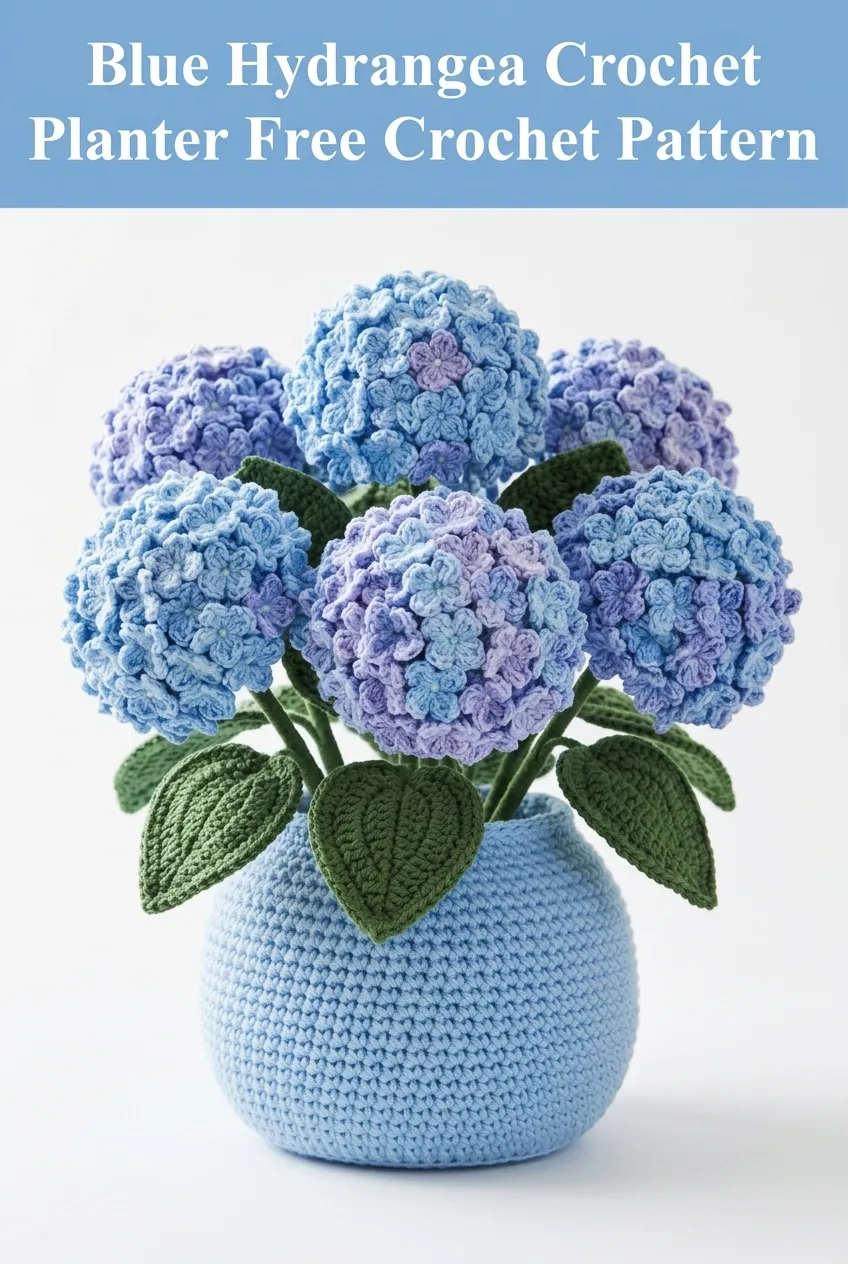
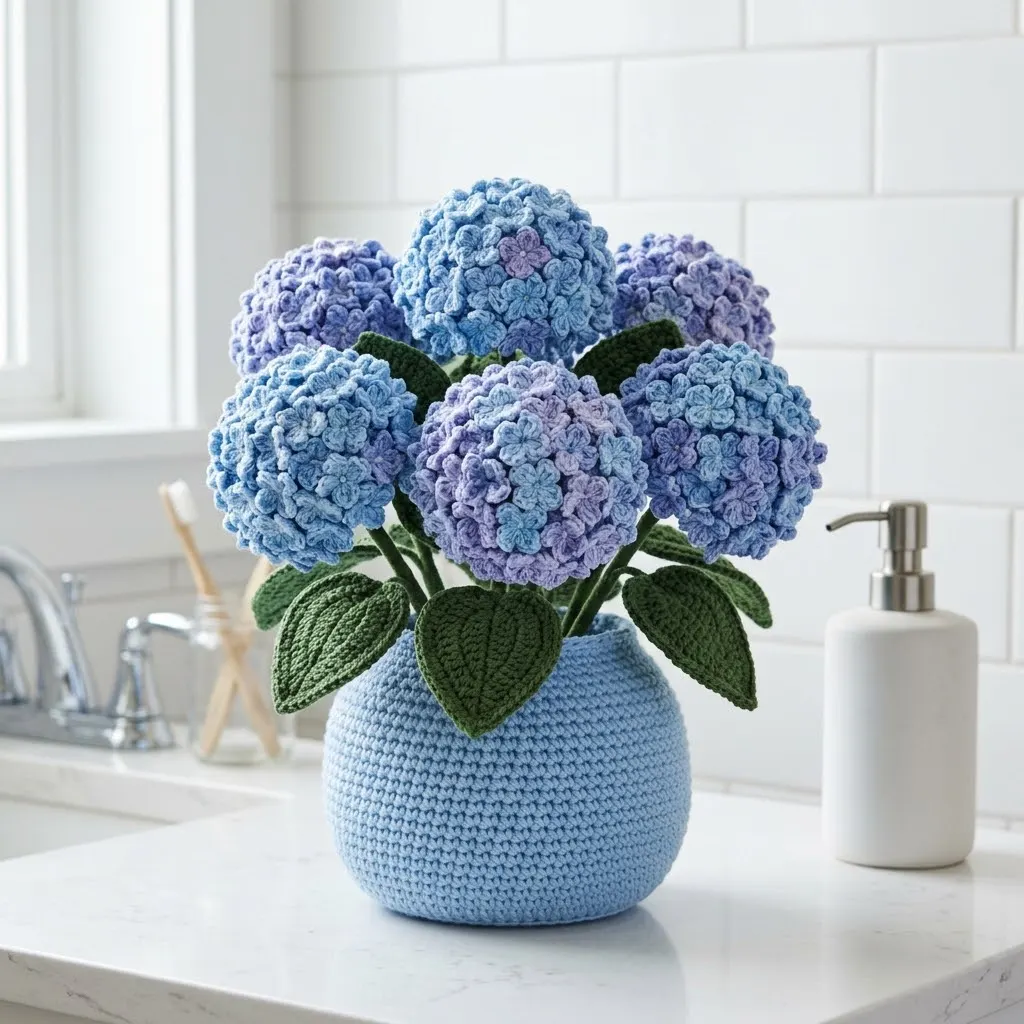
This crochet tutorial walks you through every component of this gorgeous arrangement. You will learn how to crochet individual hydrangea florets, assemble them into full rounded bloom clusters, create realistic heart-shaped leaves, and construct a sturdy decorative vase to hold everything together. The finished piece measures approximately 12 inches tall and makes an incredible centerpiece for bathrooms, kitchens, or living spaces.
Why You’ll Love This Crochet Pattern
This step by step pattern breaks down what looks like a complex project into simple, repeatable elements. Each tiny flower uses the same basic technique. Once you make your first floret, you will have the rhythm down and can crochet dozens while watching your favourite show.
The magic of this design comes from repetition and assembly rather than complicated stitches. If you can work a chain (ch), single crochet (sc), and double crochet (dc), you have all the skills you need.
I designed this pattern with patient beginners and confident intermediate crocheters in mind. The individual pieces are small and manageable. Nothing here requires counting hundreds of stitches or following complex charts. You simply make lots of little components and bring them together at the end.
Skill Level
Intermediate beginner. This project requires patience more than advanced skills. The techniques are straightforward, but you will make many small pieces that need careful assembly.
Finished Dimensions
Materials Needed
Yarn:
I recommend cotton or cotton blend yarn for excellent stitch definition. Acrylic works well too and offers more color options.
Hook:
Notions:
Abbreviations and Stitch Definitions
ch = chain: Yarn over, pull through loop on hook
sl st = slip stitch: Insert hook, yarn over, pull through stitch and loop on hook in one motion
sc = single crochet: Insert hook into stitch, yarn over, pull up a loop (2 loops on hook), yarn over, pull through both loops
dc = double crochet: Yarn over, insert hook into stitch, yarn over, pull up a loop (3 loops on hook), yarn over, pull through 2 loops, yarn over, pull through remaining 2 loops
hdc = half double crochet: Yarn over, insert hook into stitch, yarn over, pull up a loop (3 loops on hook), yarn over, pull through all 3 loops
inc = increase: Work 2 stitches into the same stitch
dec = decrease: Work 2 stitches together as one (single crochet decrease)
MR = magic ring: An adjustable starting ring that can be pulled tight to close the center hole
Gauge
Gauge is not critical for this decorative project. Your florets should measure approximately 1 inch across. If yours are significantly larger or smaller, adjust your hook size.
How to Crochet the Hydrangea Florets
Each hydrangea bloom requires approximately 30 to 40 individual florets. Yes, that sounds like a lot. But each one takes only about 2 minutes once you get going. Put on a podcast and enjoy the meditative rhythm.
Make approximately 180 to 240 florets total for 6 full blooms.
Individual Floret Pattern
Using your 3.5mm hook and blue, lavender, or purple yarn:
Round 1: Make a magic ring (MR). Ch 2 (counts as first dc throughout). Work 11 dc into the ring. Sl st to top of ch-2 to join. Pull ring closed. (12 dc)
Round 2: *Ch 3, skip next dc, sl st in following dc.* Repeat from * around 5 more times to create 6 chain loops. Sl st to base of first ch-3. (6 loops)
Round 3: In each ch-3 loop, work (sc, hdc, dc, hdc, sc). This creates 6 petals. Sl st to first sc to join. (6 petals, 30 sts total)
Fasten off, leaving a 6-inch tail for sewing.
Quick Tip for Beginners
If the magic ring feels tricky, you can substitute ch 4 and sl st to first ch to form a ring. Work your 12 dc into the center of that ring instead.
Color Mixing
For realistic hydrangea blooms, mix your colors randomly. I made roughly:
This creates that beautiful natural variation you see in real hydrangeas.
How to Assemble the Hydrangea Bloom Heads
This is where the magic happens. You will attach your florets to a styrofoam ball base to create that gorgeous rounded cluster shape.
Step 1: Prepare the Base
Take your 3-inch styrofoam ball. Cut a small hole in the bottom to insert the stem later.
Step 2: Attach Florets
Thread your tapestry needle with the tail from a floret. Push the needle through the center of the floret and into the styrofoam ball. Pull snug and knot or glue to secure.
Start at the top center and work your way around in a spiral pattern. Overlap florets slightly so no styrofoam shows through. Push them close together for that lush, full look.
Step 3: Mix Colors as You Go
Avoid placing same-color florets directly next to each other. The random color placement creates depth and realism.
Step 4: Leave Bottom Open
Stop attaching florets about 1 inch from the bottom hole. You need room to insert and secure the stem.
How to Crochet the Leaves
The leaves use a simple oval shape with a pointed tip. The surface detail comes from working around a center chain spine.
Large Leaf Pattern (Make 8 to 10)
Using your 3.5mm hook and dark green yarn:
Foundation: Ch 15.
Row 1: Starting in 2nd ch from hook, sc in next 13 ch, 3 sc in last ch (this is the tip). Rotate to work along opposite side of foundation chain. Sc in next 13 ch. (29 sc)
Row 2: Ch 1, turn. Sc in next 13 sc, 3 sc in center sc of tip, sc in remaining 13 sc. (31 sc)
Row 3: Ch 1, turn. Sc in next 14 sc, 3 sc in center sc of tip, sc in remaining 14 sc. (33 sc)
Row 4: Ch 1, turn. Working in back loops only (blo), sc in next 15 sc, 3 sc in center sc of tip, sc in remaining 15 sc. (35 sc)
Fasten off, leaving a 12-inch tail.
Adding Leaf Veins
Using your tapestry needle and the long tail, embroider a center vein from base to tip using simple running stitches. Add 3 to 4 diagonal veins branching off each side.
How to Crochet the Stems
The stems need internal support to hold the weight of the blooms.
Stem Cover Pattern (Make 6)
Using your 3.5mm hook and dark green yarn:
Round 1: Ch 4. Sl st to first ch to form ring. Ch 1, work 6 sc into ring. Do not join. Work in continuous spiral. (6 sc)
Rounds 2 through 30: Sc in each sc around. (6 sc per round)
Adjust length as needed. Longer stems create a more dramatic arrangement.
Fasten off and weave in ends.
Assembling the Stem
Cut your floral wire to desired length plus 2 inches. Wrap wire completely in green floral tape. Insert covered wire into the crocheted tube. The crochet cover should fit snugly around the wire.
How to Crochet the Vase
The vase uses simple single crochet worked in continuous rounds. The two-tone effect comes from changing colors partway through.
Vase Pattern
Using your 4mm hook and medium blue yarn:
Round 1: Make a magic ring. Work 6 sc into ring. Do not join. Place stitch marker in first sc and move it up each round. (6 sc)
Round 2: Inc in each sc around. (12 sc)
Round 3: *Sc in next sc, inc in next sc.* Repeat around. (18 sc)
Round 4: *Sc in next 2 sc, inc in next sc.* Repeat around. (24 sc)
Round 5: *Sc in next 3 sc, inc in next sc.* Repeat around. (30 sc)
Round 6: *Sc in next 4 sc, inc in next sc.* Repeat around. (36 sc)
Round 7: *Sc in next 5 sc, inc in next sc.* Repeat around. (42 sc)
Round 8: *Sc in next 6 sc, inc in next sc.* Repeat around. (48 sc)
Rounds 9 through 12: Sc in each sc around. (48 sc)
Change to light blue yarn.
Rounds 13 through 20: Sc in each sc around. (48 sc)
Round 21: *Sc in next 6 sc, dec.* Repeat around. (42 sc)
Rounds 22 through 25: Sc in each sc around. (42 sc)
Round 26: *Sc in next 5 sc, dec.* Repeat around. (36 sc)
Rounds 27 through 28: Sc in each sc around. (36 sc)
Fasten off, leaving a long tail for weaving.
Finishing the Vase
Stuff the vase firmly with polyfill. You want it sturdy enough to support the stems. Alternatively, place a small weighted object inside before stuffing for extra stability.
Final Assembly
Now for the satisfying part. Bringing everything together.
Step 1: Attach Stems to Blooms
Insert the top of each stem into the bottom hole of a bloom head. Secure with hot glue or stitch in place using green yarn.
Step 2: Attach Leaves to Stems
Using green yarn, sew leaves to stems at various heights. Angle them naturally. Real hydrangea leaves point outward and slightly downward.
Step 3: Arrange in Vase
Push stems into the stuffed vase. Arrange blooms at varying heights for dimension. The tallest blooms should be in the center or back.
Step 4: Secure Everything
Once happy with your arrangement, tack stems to the inside of the vase with a few stitches to prevent shifting.
Pattern Notes and Tips
Yarn choice matters. Cotton yarn shows stitch definition beautifully. The florets look crisp and the leaves hold their shape.
Don’t rush assembly. Take time arranging your blooms. Step back and look at the overall shape. Adjust until it feels balanced.
Make extras. I always make 10 to 15 extra florets per bloom. Some get lost, some don’t look quite right, and having spares means you can fill any gaps.
Customize your colors. Pink, white, and green hydrangeas are equally stunning. Use this same pattern with different yarn colors for endless variations.
Caring for Your Crochet Hydrangea Planter
This piece requires minimal maintenance. Dust occasionally with a soft brush or use a hairdryer on cool setting. Avoid direct sunlight to prevent fading. If using cotton yarn, you can spot clean gently if needed.
More Crochet Flower Patterns to Try
If you enjoyed this crochet pattern, you might also love making roses, sunflowers, or lavender stems. Building a complete forever flower garden is incredibly rewarding.
Thank you so much for choosing this pattern for your next project. I truly hope you love making these hydrangeas as much as I loved designing them. If you create your own arrangement, I would absolutely love to see it. Tag me on Instagram or share a photo in my Facebook group.
If this pattern inspired you, go ahead and save it to your Pinterest boards so you can find it easily when you are ready to start. And please drop a comment below if you make this beautiful hydrangea planter. I read every single one and your photos make my day.
