
You know that feeling when the weather can’t make up its mind? One minute you’re warm, the next you’re reaching for a layer. You need something that adds cozy coverage without weighing you down, something that looks intentional and polished rather than like you grabbed whatever was closest to the door.
Get the Ad-Free PDF Pattern
Scroll down for the full pattern, or get the ad-free printable PDF from the shop.
Get the Printable PDF →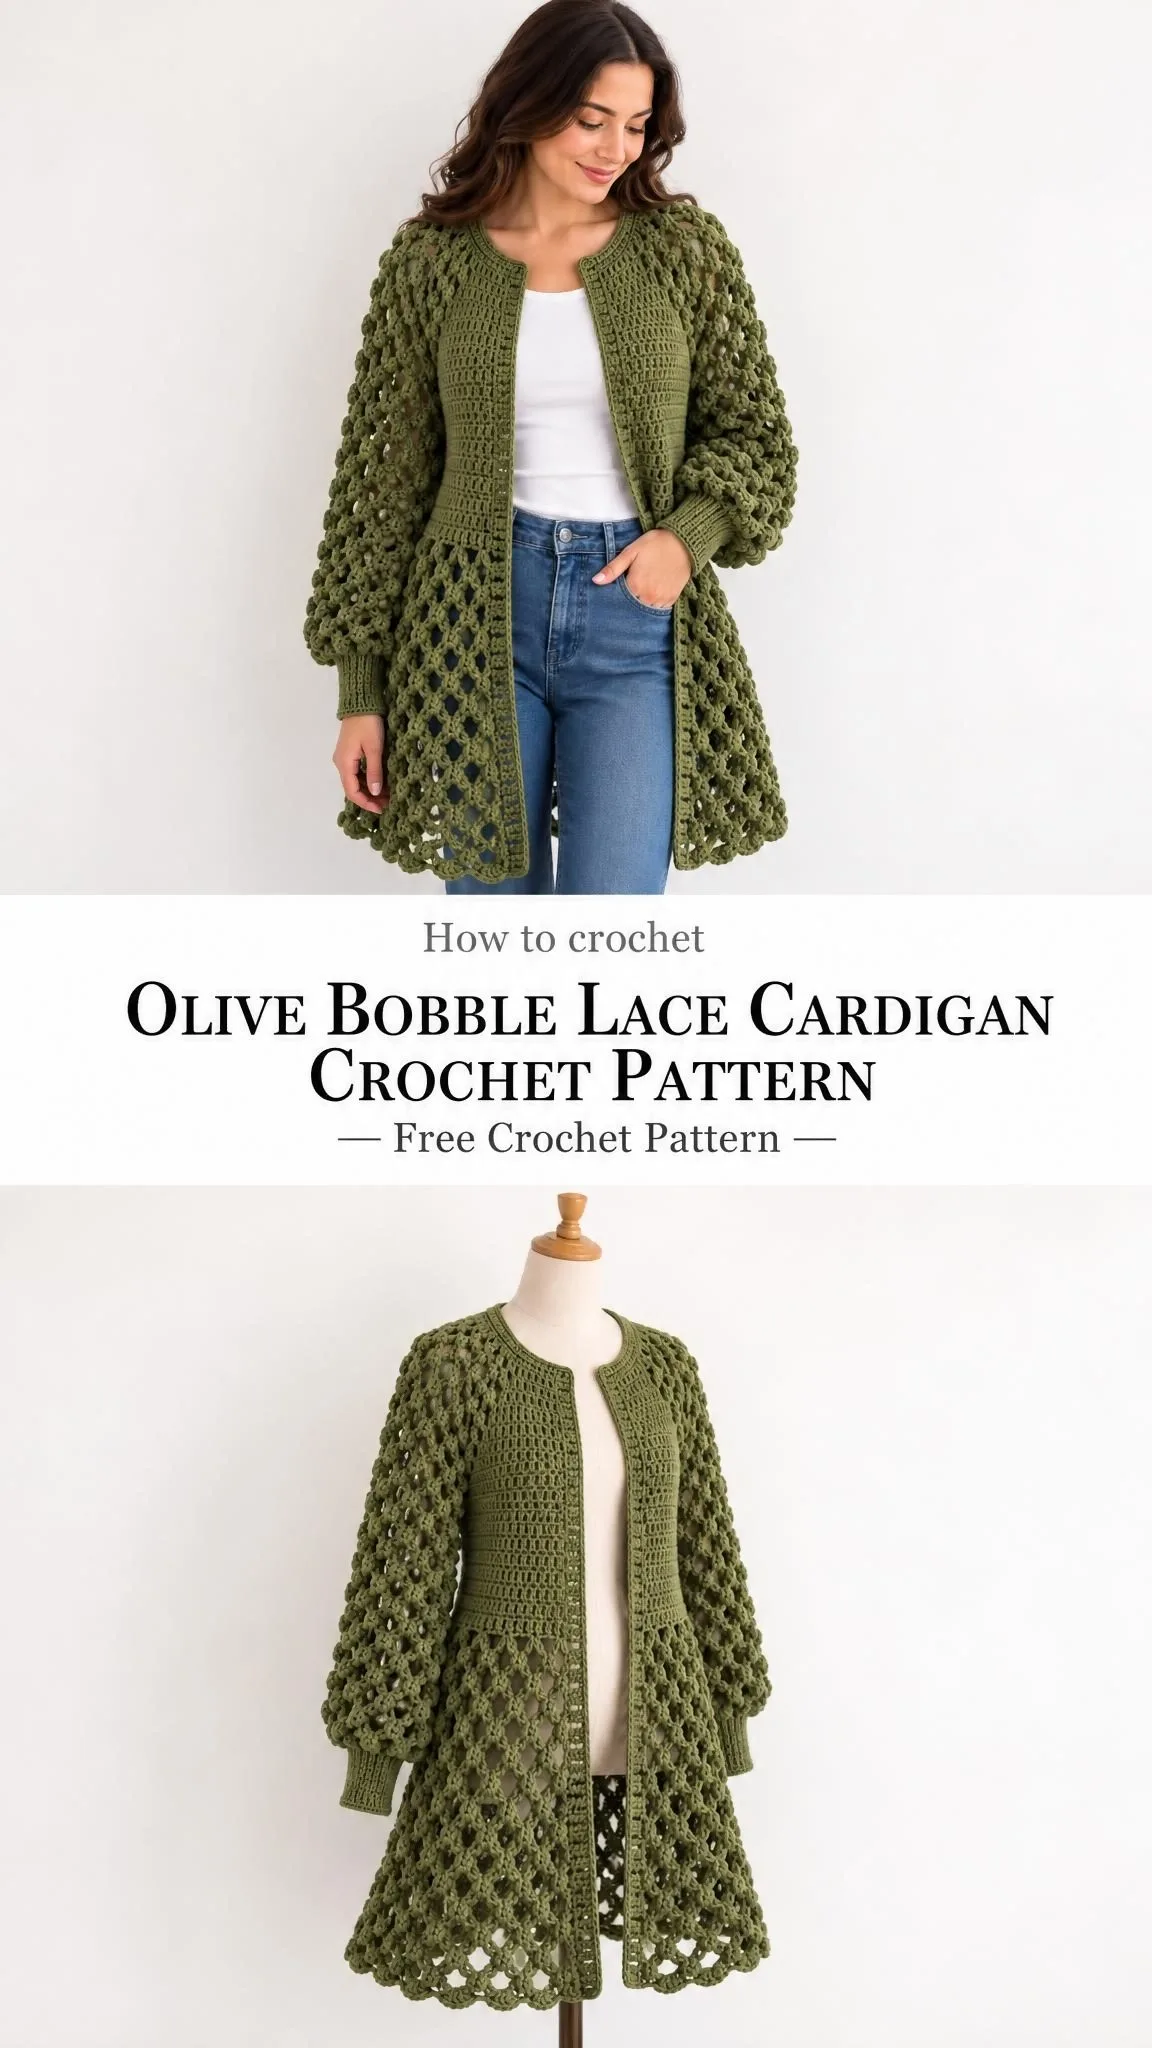
This olive bobble lace cardigan is exactly that piece. It’s the kind of layering cardigan that makes people ask where you got it, and you get to smile and say you made it yourself. The combination of a structured upper body with airy, textured lace panels creates visual interest that’s hard to look away from.
The voluminous balloon sleeves with matching bobble lattice give this cardigan serious statement potential, while the fitted ribbed cuffs keep everything practical and polished. Whether you’re heading to brunch, working from home, or just need something beautiful to wrap yourself in, this design delivers.
Why This Cardigan Design Works
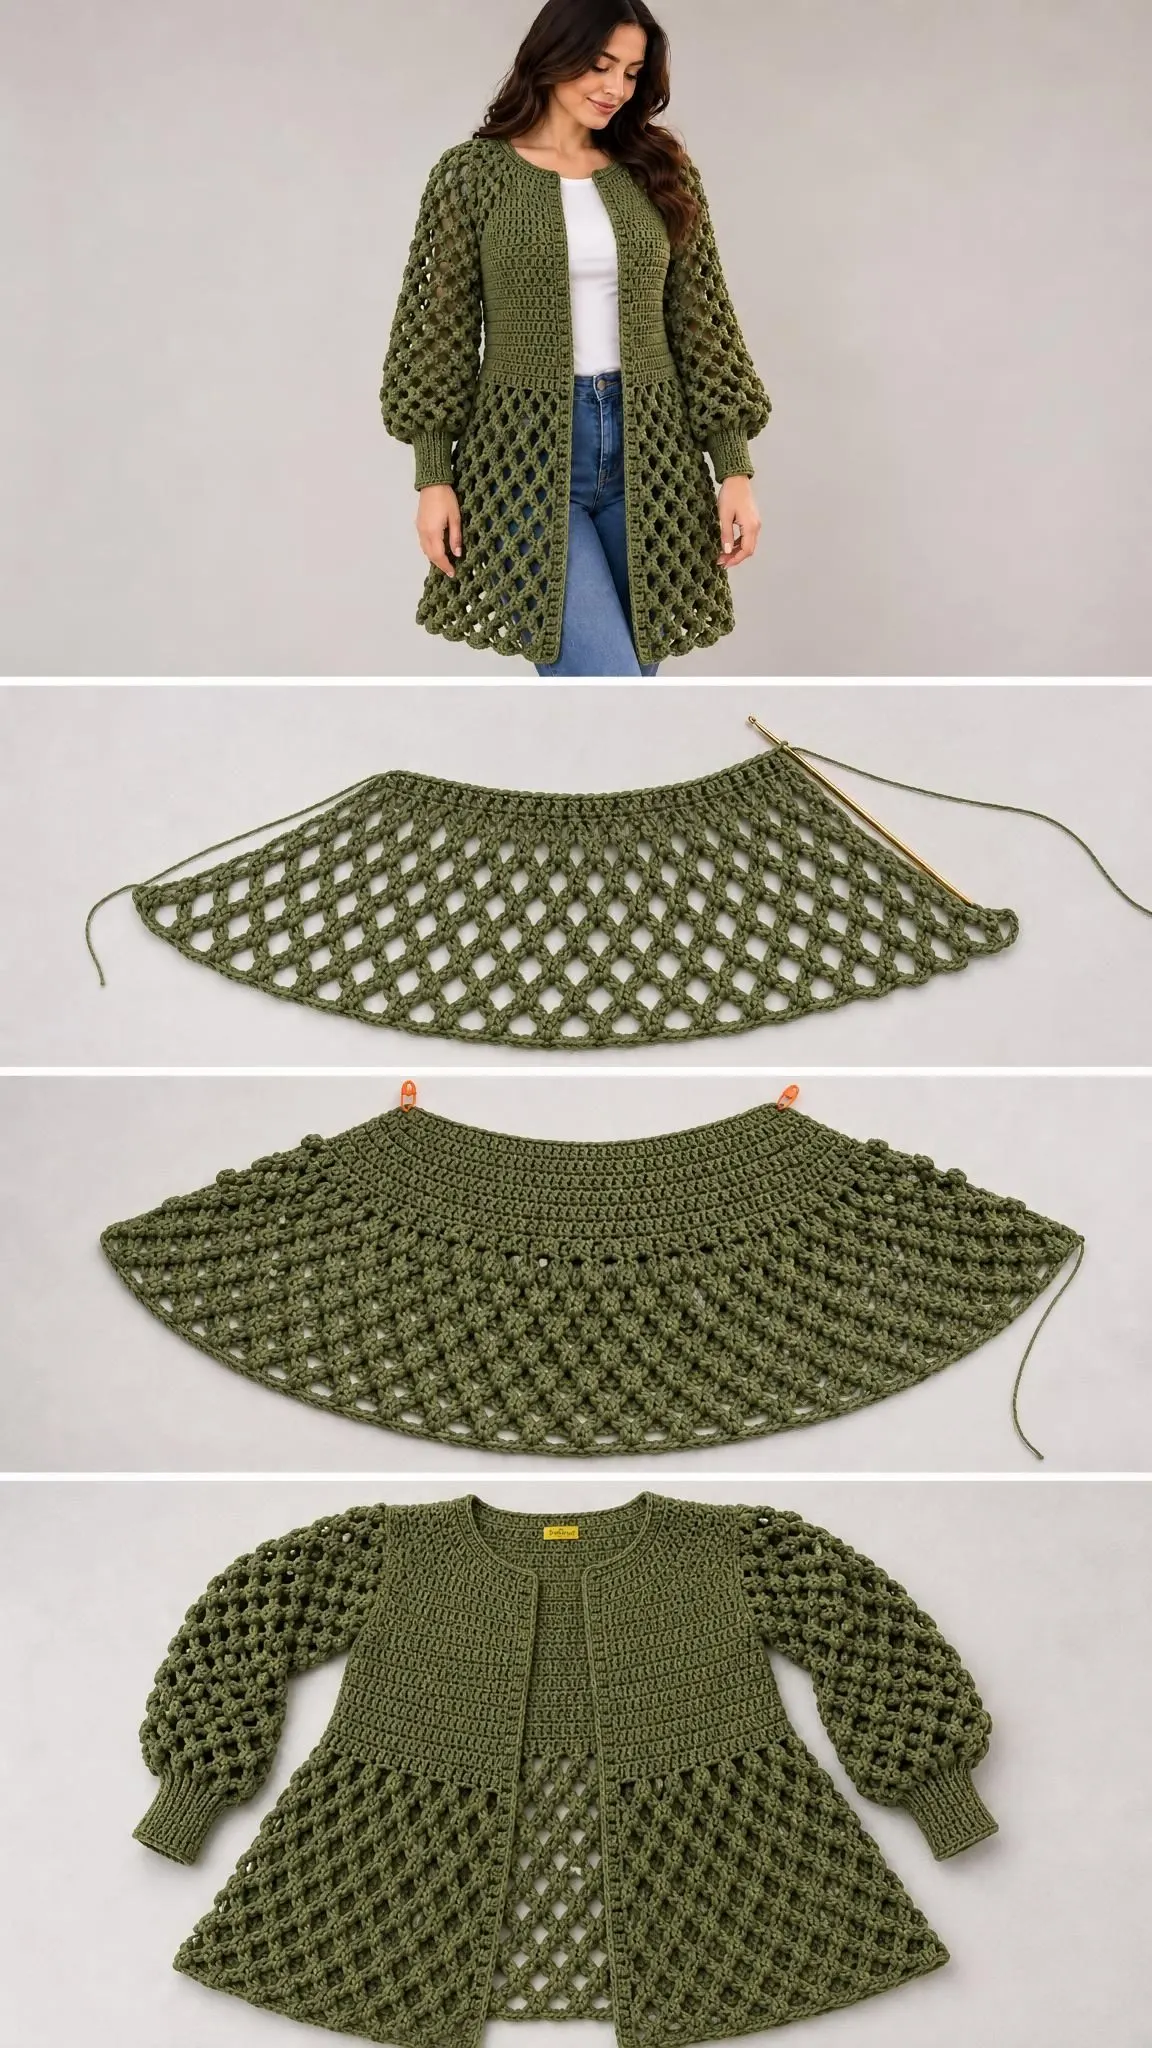
The construction of this cardigan is thoughtfully planned to give you the best of both worlds. The upper body features a dense small grid mesh that provides structure and coverage where you need it most. Below that transition point, the large bobble diamond mesh opens up into a flowing, elegant silhouette that moves beautifully when you walk.
Working the body in three panels from the shoulder down means you can see your progress clearly and adjust fit along the way. The back panel and two front panels are worked separately, then joined at the shoulders and sides before adding those gorgeous sleeves.
Finished measurements for this pattern include approximately 102 cm of body coverage, designed for an 88 to 94 cm bust with about 8 to 14 cm of ease. The body length measures approximately 76 cm, and the sleeves are about 44 cm including the ribbed cuffs.
Materials You’ll Need
Before you begin this crochet pattern, gather all your supplies. Having everything ready makes the process so much smoother.
Yarn: Smooth DK weight cotton blend, approximately 220 m per 100 g. You’ll need 700 g (about 1540 m) in olive green for the main color. If you’re adding the optional pearl version details, set aside 100 g (220 m) total for contrast colors.
Hooks: 4 mm hook for the main fabric and a 3.5 mm hook for the cuffs and trim. Always check your gauge and adjust hook size as needed.
Notions: Tapestry needle, 8 stitch markers, measuring tape, scissors. For the pearl version, you’ll also need 12 sew-on imitation pearls and strong thread.
Understanding Gauge
Getting your gauge right is essential for a cardigan that fits properly. This pattern uses two different stitch fabrics, and you’ll want to swatch both before starting.
Small mesh gauge: 16 stitch positions (8 cells) by 10 rows equals 10 cm.
Large lattice gauge: 4 arches by 10 rows equals 10 cm, lightly blocked.
Make a swatch at least 15 by 15 cm, wash and dry it as you plan to care for the finished piece, then measure the central 10 cm without stretching. Record both width and height measurements. All dimensions in this pattern are blocked targets, and keep in mind that cotton lace can lengthen while worn.
The back small mesh section should measure about 40 cells or approximately 51 cm wide. Each front panel should measure 20 cells or about 26 cm wide.
Abbreviations and Special Stitches
This pattern uses US crochet terminology throughout. Here are the abbreviations you’ll encounter:
ch = chain
st(s) = stitch(es)
sp = space
sl st = slip stitch
sc = single crochet (insert hook, yarn over, pull up a loop, yarn over, pull through both loops)
hdc = half double crochet
dc = double crochet (yarn over, insert hook, yarn over, pull up a loop, yarn over, pull through two loops twice)
tr = treble crochet
BLO = back loop only
RS/WS = right side/wrong side
rep = repeat
inc = increase
sc2tog = single crochet 2 stitches together
Small Mesh Stitch
Work this stitch flat: ch 3 (this counts as your first dc), then work [ch 1, skip next ch-1 sp, dc in next dc] to the end of the row. Always work the dc into the post stitch, not the gap. A mesh cell is one ch-1 space bounded by dc posts on either side. For flat work with C cells, you’ll have C+1 dc posts and C chains, giving you a total of 2C+1 positions.
Bobble Stitch (BO)
This creates the beautiful textured bumps throughout the lattice sections. To work a bobble: [yarn over, insert hook in indicated anchor, yarn over and draw up loop, yarn over and pull through 2 loops] 5 times, then yarn over and pull through all 6 loops on the hook.
In the bobble design sections, you’ll replace each internal sc anchor on offset rows with a bobble, then ch 1 to secure. This chain is not counted as an arch. Keep your edge anchors plain.
Shell Trim
On a prepared sc edge with a multiple of 6 stitches, work: [skip 2 sc, 5 dc in next sc, skip 2 sc, sl st in next sc].
Picot Trim
Work: [sc in next 3 sts, ch 3, sl st into third ch from hook].
Pattern Notes Before You Begin
Your turning ch 3 counts as a dc throughout this pattern. The ch 1 does not count as a sc. Join rounds with a sl st unless stated otherwise.
Flat rows turn after each row, while joined rounds do not turn. Brackets enclose a repeat section. Do not count joining slip stitches in your stitch counts. Sew pieces together with right sides facing unless directed otherwise.
This document provides one adult sample size only. Check the measurements carefully before committing your yarn. Altering stitch counts requires recalculating motif placement and shaping.
Construction Overview
The cardigan comes together in a logical order:
- Crochet the back panel from shoulder down
- Crochet both front panels from shoulder down
- Sew shoulders and sides
- Attach flat-worked sleeves
- Gather sleeves to cuffs
- Add continuous front edging
Back Panel Instructions
Row 1: Ch 84. Dc in sixth ch from hook, [ch 1, skip 1 ch, dc in next ch] 39 times, turn. You should have 40 cells with 41 dc plus 40 ch-1 spaces.
Rows 2 through 30: Work small mesh across, turn. Maintain 40 cells throughout these rows.
Row 31: Work large-lattice foundation, turn. This creates 20 arch equivalents, where the two edge halves count as one.
To work the large lattice foundation: ch 1, sc in first dc, [ch 5, skip next mesh cell and its following cell, sc in their ending dc post] across. Each arch spans 4 old stitch positions, ending on every second old dc post.
Row 32: Work offset lattice row with bobbles at internal anchors, turn. Maintain 20 arch equivalents.
For the offset lattice row: ch 5 (counts as edge dc plus ch 2), sc in first old arch, [ch 5, sc in next old arch] to last arch, ch 2, dc in last edge sc (or third chain of prior turning ch-5), turn. Count the two edge half-arches together as one arch.
Row 33: Work return lattice row with plain sc anchors, turn. Maintain 20 arch equivalents.
For the return lattice row: ch 1, sc in first dc, [ch 5, sc in next full arch] across, then ch 5, sc in last edge dc.
Rows 34 through 76: Continue alternating between offset lattice rows with bobbles at internal anchors and return lattice rows with plain sc anchors. Each row maintains 20 arch equivalents.
Checkpoint: Your back panel should measure about 76 cm in length and approximately 51 cm in width. Do not block the lower lace wider than the upper grid section.
Left Front Panel Instructions
Row 1: Ch 28. Dc in sixth ch from hook, [ch 1, skip 1 ch, dc in next ch] 11 times, turn. You should have 12 cells with 13 dc plus 12 ch-1 spaces.
Mark the neck edge and keep the opposite armhole edge straight. For the left front, the neck edge is at the start of Row 2.
Rows 2 through 9: Work small mesh while increasing one cell at the marked neck edge only each row. You’ll progress from 13 cells up to 20 cells.
To increase at row start: ch 3 then work (ch 1, dc) in the first dc. To increase at row end: add (ch 1, dc) again in the last dc.
Rows 10 through 30: Work small mesh across, turn. Maintain 20 cells throughout.
Row 31: Work large-lattice foundation, turn. This creates 10 arch equivalents.
Rows 32 through 76: Continue alternating between offset lattice rows with bobbles at internal anchors and return lattice rows with plain sc anchors. Each row maintains 10 arch equivalents.
Checkpoint: Your left front panel should measure about 76 cm in length and approximately 26 cm in width.
Right Front Panel Instructions
Work exactly as for the left front, with one key difference: for the right front, the neck edge is at the end of Row 2 rather than the start. All increases happen at this opposite neck edge.
Complete all 76 rows following the same pattern as the left front.
Checkpoint: Your right front panel should measure about 76 cm in length and approximately 26 cm in width.
Sleeve Instructions (Make 2)
Row 1: Ch 84. Dc in sixth ch from hook, [ch 1, skip 1 ch, dc in next ch] 39 times, turn. You should have 40 cells.
Row 2: Work large-lattice foundation, turn. This creates 20 arches.
Rows 3 through 39: Alternate between offset lattice rows with bobble anchors and return lattice rows throughout. Each row maintains 20 arch equivalents.
Ribbed Cuffs (Make 2)
Switch to your 3.5 mm hook for the cuffs.
Row 1: Ch 11. Sc in second ch and each remaining ch, turn. You should have 10 sc.
Rows 2 through 40: Ch 1, sc BLO in each st, turn. Maintain 10 sc throughout.
Your cuff target is about 5 cm deep by 20 cm around before joining. Adjust the cuff row count only if needed to pass comfortably over the hand. Record your actual count so you can match it for the second cuff.
Assembly Instructions
Gather your main color yarn, tapestry needle, 4 mm hook, both sleeves, and optional cuffs.
Seam pass 1 (shoulders): At each side, join the outer 12 front mesh cells to the outer 12 back mesh cells along the foundation edge. Leave the center 16 back cells unseamed. The front neck shaping remains open. You’ll complete 2 shoulder seams of 12 cells each.
Seam pass 2 (sides): Mark 25 cm down from the shoulder on both the back and corresponding front. Sew the body sides from hem to markers. This creates 2 armholes of about 50 cm circumference each.
Seam pass 3 (sleeves): Sew each sleeve lengthwise. Place the sleeve seam at the underarm, match the sleeve-top midpoint to the shoulder, and sew the top edge evenly into the armhole.
Seam pass 4 (cuffs): If using cuffs, join the cuff’s first and last rows into a ring. Quarter-mark both the cuff and sleeve opening, then whipstitch while gathering the sleeve evenly. Do not stretch the cuff beyond comfortable hand circumference.
Assembly checkpoint: Shoulders should sit evenly, sleeves should move comfortably, and front edges should remain open. Upper back width measures about 51 cm with each front about 26 cm. Adjust seam tension before trimming any tails.
Edgings and Border Details
Switch to your 3.5 mm hook and main color (or named contrast color if desired).
Border round 1: Join at one lower front corner. Sc evenly around the entire open front, neck, and hem outline. Work 2 sc per dc row end, 1 sc per foundation position, 4 sc per complete lower-lattice arch (2 per edge half-arch), and 3 sc at each outward corner. Record your total stitch count and mark the middle corner stitches.
Border round 2: Sc in each st, placing 3 sc in each marked corner st. Move markers to the middle corner stitches.
Border round 3: Repeat Round 2 for broad-band versions only. Otherwise, omit this round.
For shell-edged versions, add shell trim along the lower hem and sleeve openings using complete 6-st repeats and finishing any remainder in sc. For picot versions, add picot trim along the hem. Keep the front and neck edge plain to avoid curling.
The lattice texture provides the decoration for this design. The bobble lace pattern is the star here.
Edging checkpoint: Front bands should lie flat with no unintentional flare at the hem. Cuffs should pass over hands and recover their shape.
Finishing Your Cardigan
Finishing pass 1: Weave every yarn end through at least 5 cm of fabric, reverse direction, and trim. Leave no loose tails.
Finishing pass 2: Wet-block flat, aligning side seams and matching sleeve lengths. Pin the lace to the upper-panel width rather than stretching it.
Final checkpoint: Body length should measure about 76 cm, sleeves about 44 cm including cuffs when present, and total body coverage about 102 cm. Recheck measurements after drying and again after a short wear.
Care Instructions
Follow your yarn label for specific care instructions. Unless it specifies otherwise, hand-wash cool with mild detergent, support the wet fabric, and dry flat away from direct heat. Do not wring, tumble dry, or iron acrylic components.
This is an adult item only. If you’ve added any beads or appliques, attach them securely and inspect before wear. Open mesh does not provide sun protection or opaque coverage.
Tips for Success
Take your time with the transition row. Moving from the small mesh to the large lattice is the trickiest part of this pattern. Count carefully and mark your anchor points.
Use stitch markers generously. Marking your arch counts as you go will save you from having to count back across long rows.
Block gently. Cotton lace responds beautifully to blocking, but avoid stretching the lower lace wider than your upper panels or the proportions will look off.
Make both cuffs match. If you adjust the cuff row count for fit, write down your number immediately so both cuffs are identical.
This cardigan represents a satisfying intermediate-level project that builds your skills in working with multiple stitch patterns within a single garment. The result is a stunning, wearable piece you’ll reach for again and again.
Thank you so much for choosing this pattern for your next project. This bobble lace cardigan is truly a showstopper, and you should feel proud bringing it to life with your own hands. If you make one, please share your finished photos on Instagram or Facebook. Seeing your creations in different colors and yarns is always such a joy.
Save this olive bobble lace cardigan crochet pattern to your Pinterest boards so you can find it whenever inspiration strikes. And if you do make this cozy cardigan, drop a comment below. Your fellow makers would love to hear how it turned out and what yarn you chose.
Want a Quick & Easy Printable Version?
Get a clean, beautifully formatted PDF of this pattern — easy to follow step by step, ready to print or save on any device. No scrolling, no distractions, just the pattern.
Get the Printable PDF →