
I don’t know about you, but I love a good poncho. All the cozy layering vibes with none of the sleeve fuss.
Get the Ad-Free PDF Pattern
You can find the free pattern below, or you can purchase the ad-free printable PDF from my shop.
Get the Printable PDF →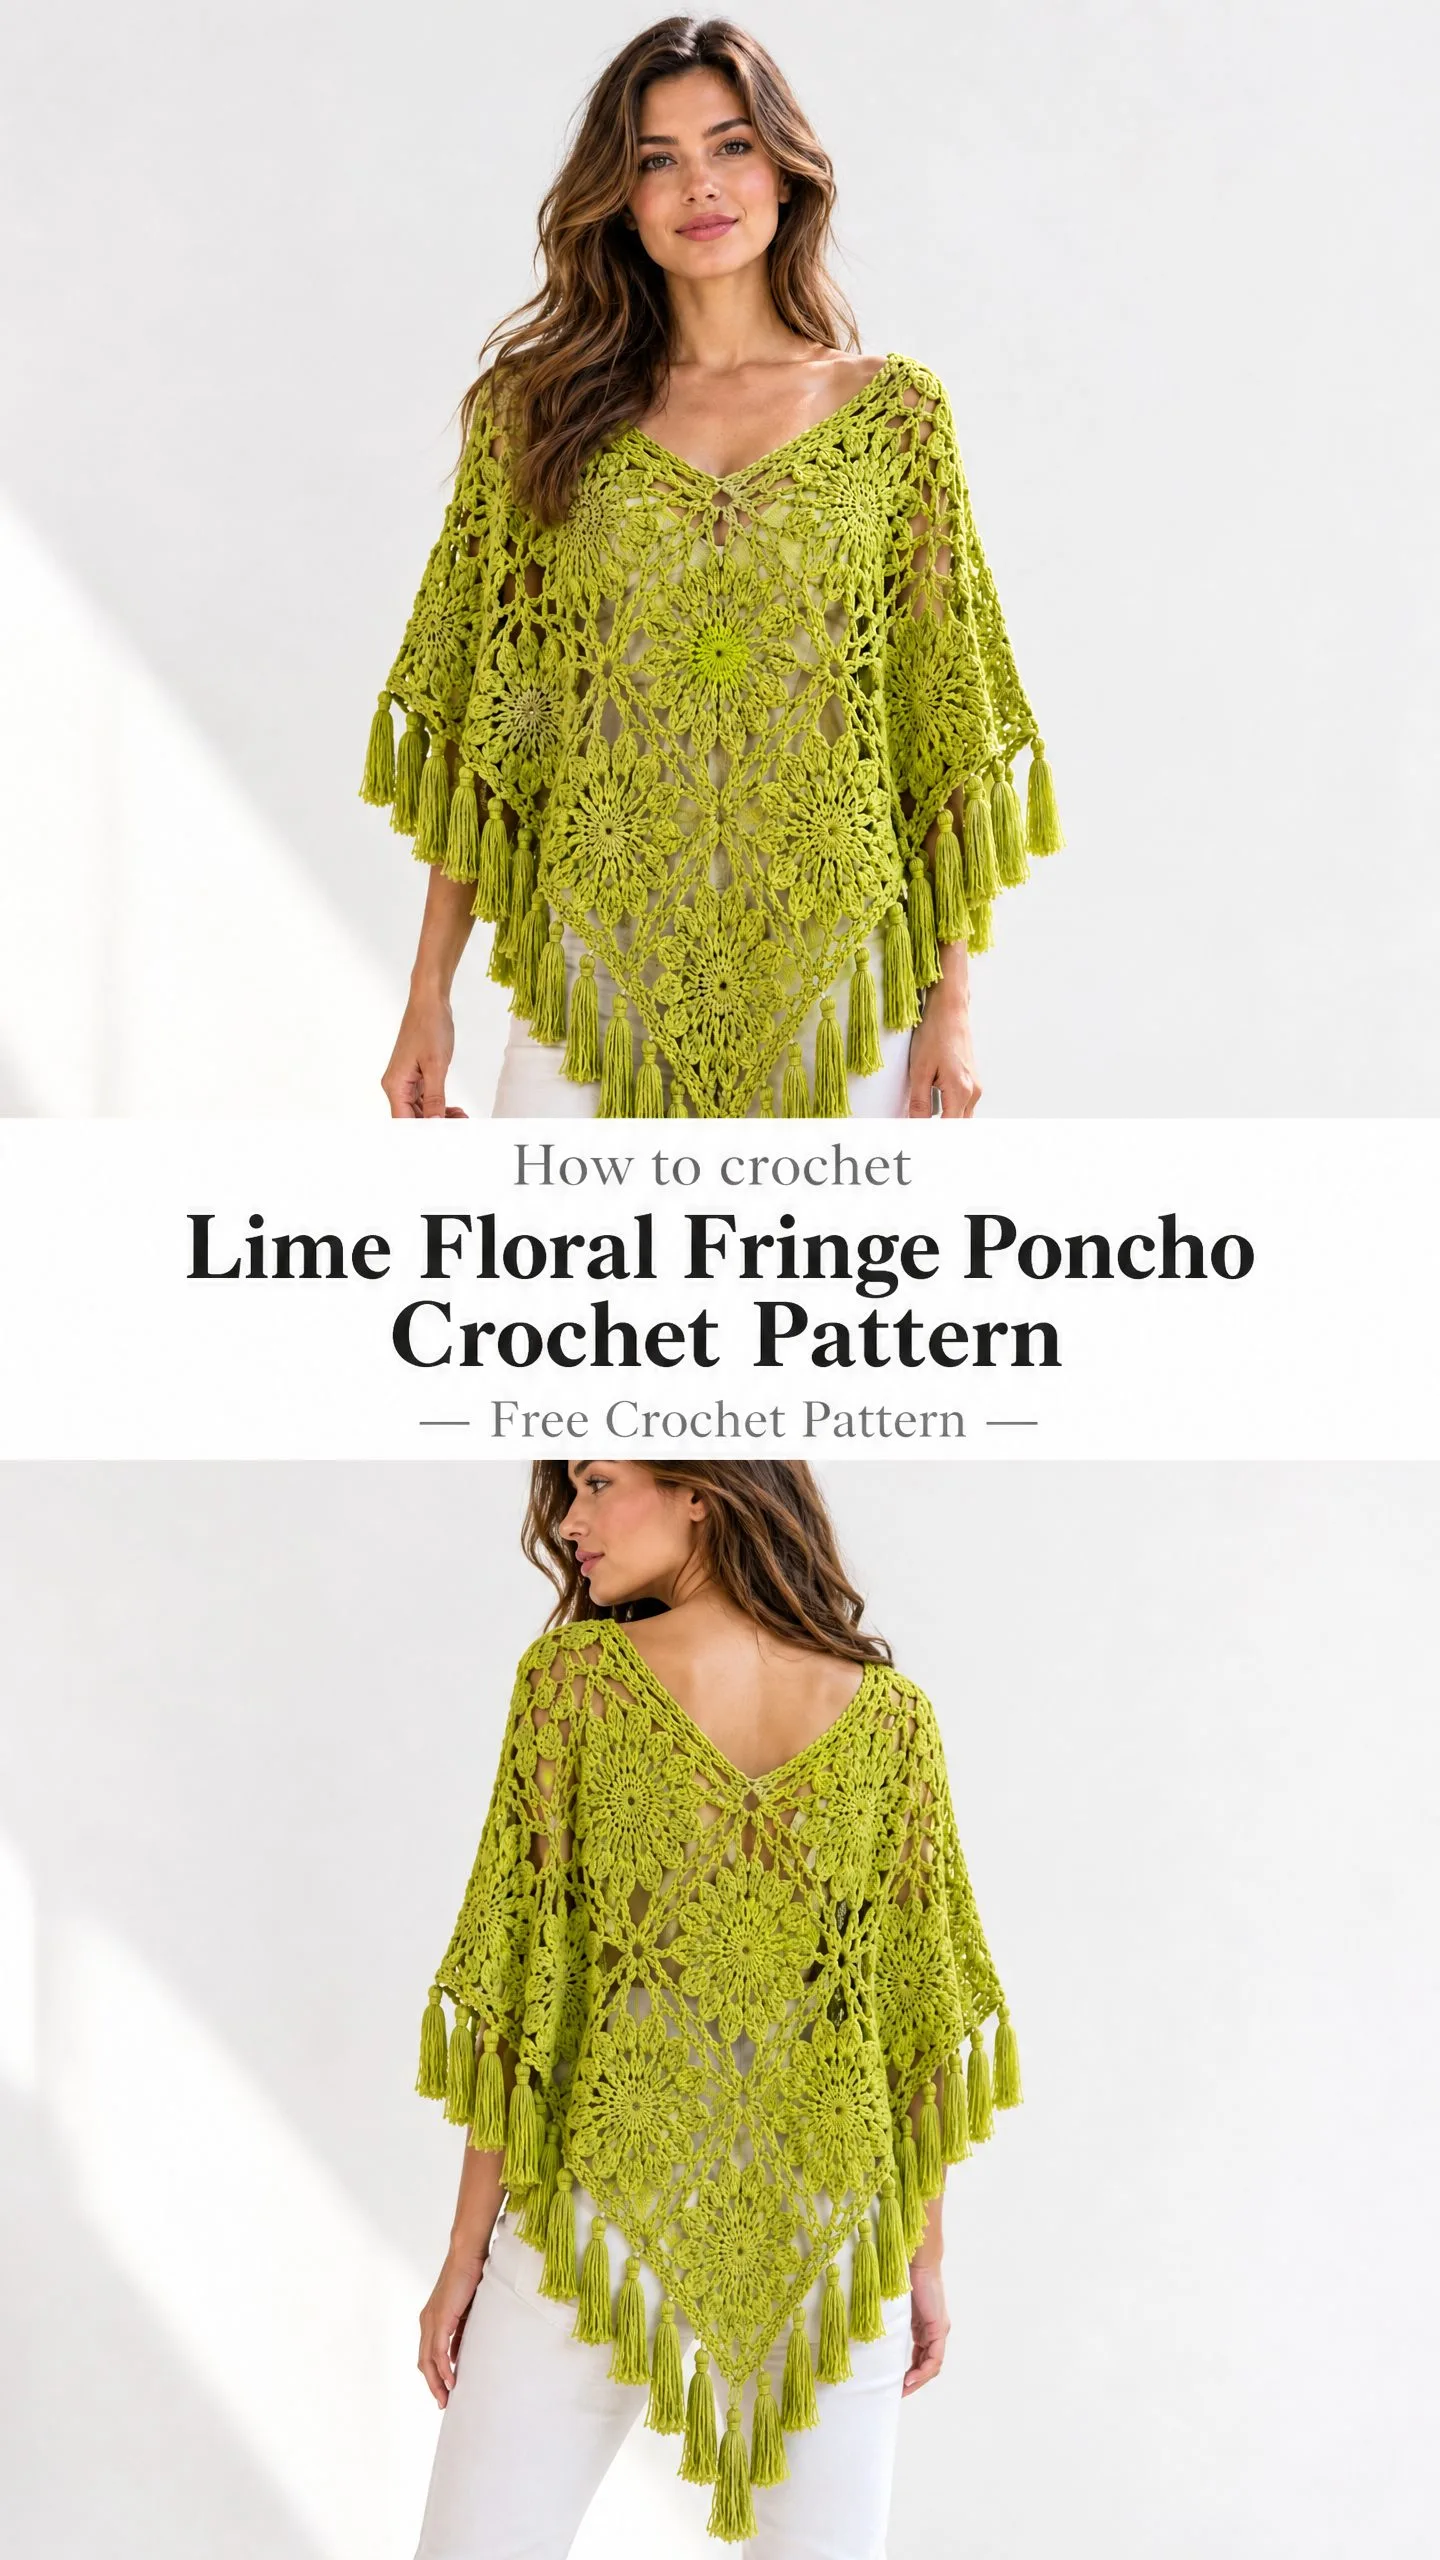
This Lime Floral Fringe Poncho is exactly that kind of effortless piece. It drapes beautifully, has gorgeous floral lace texture, and that fringe? It adds the perfect amount of boho movement. You can throw it on over a tank top in spring or layer it over a long sleeve when fall rolls around.
If you’ve been wanting to try your hand at lace crochet or appliqué flowers, this is a fantastic project to build those skills. The construction is straightforward once you understand the flow, and I’ll walk you through every step.
About This Lime Floral Fringe Poncho Crochet Pattern
This poncho is rated as an intermediate project, and I think that’s accurate. You’ll be working lace stitches, creating raised floral motifs separately, and then assembling everything together. None of it is difficult on its own, but there are a few different techniques happening here that work together beautifully.
The finished size fits Adult Small to Medium, but this pattern is adjustable. You can easily add more rows to make it longer or wider if you need a larger size.
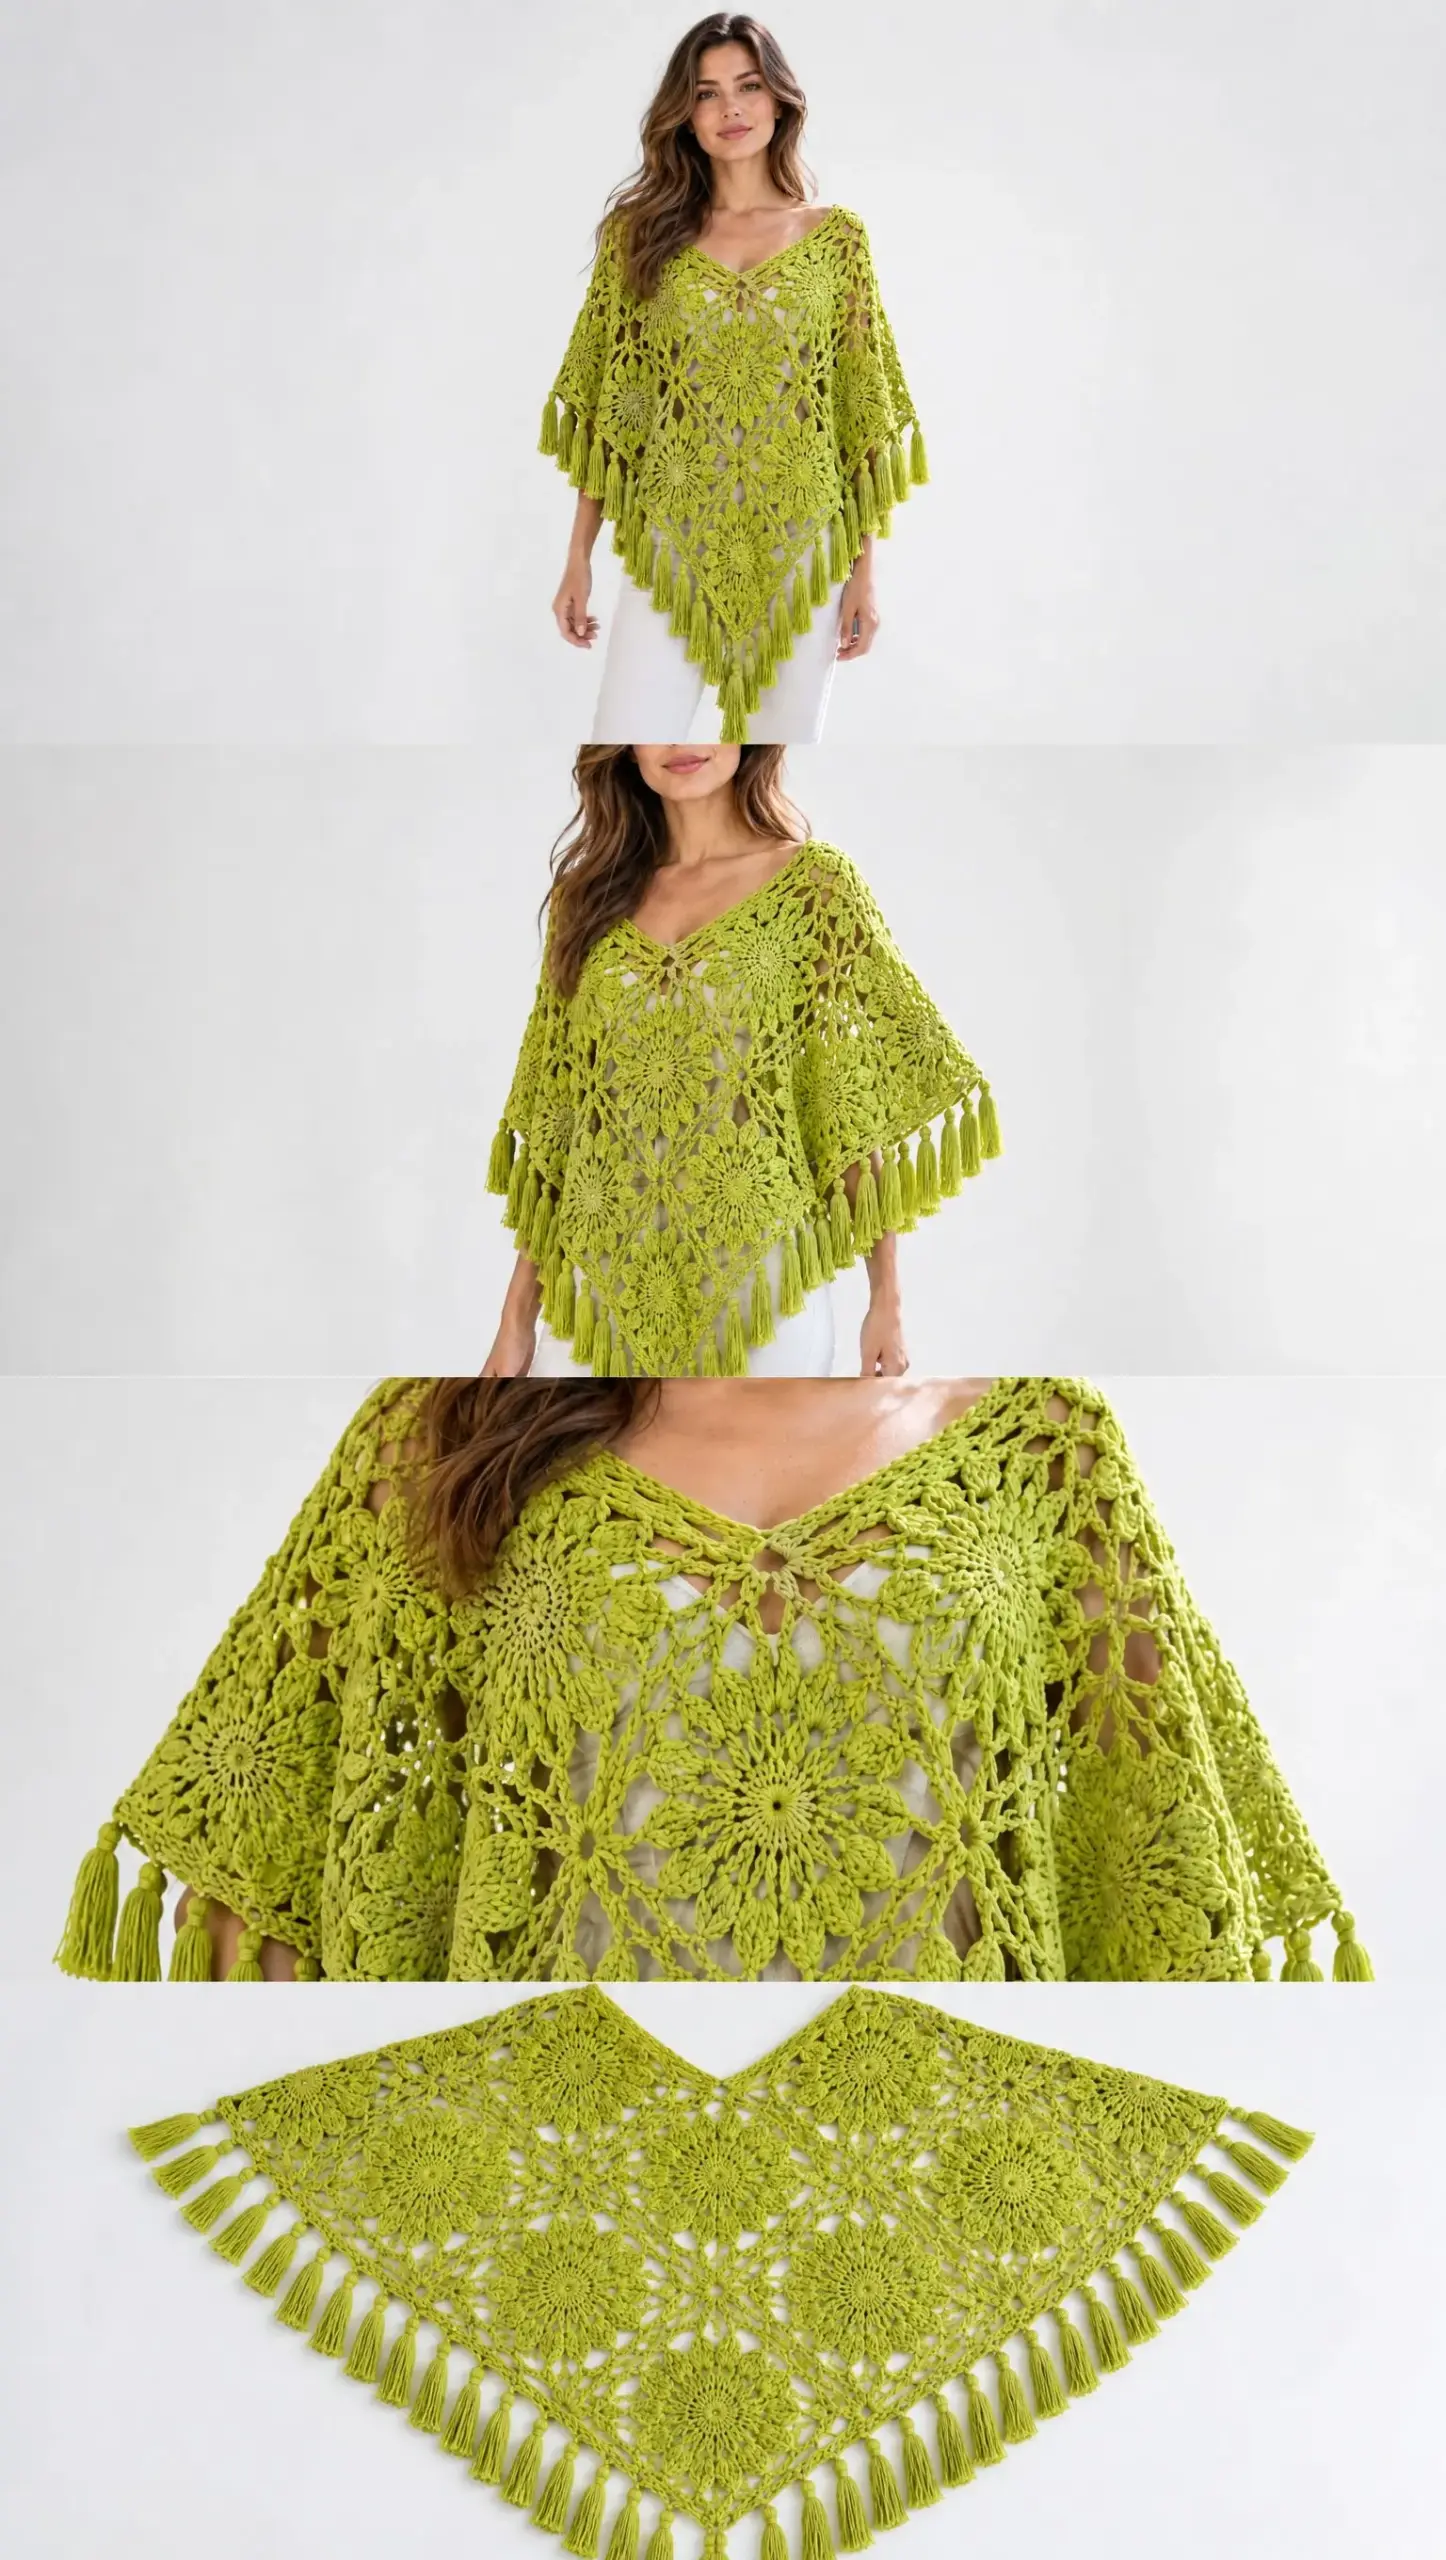
What I love most about this design is the relaxed triangular silhouette with a deep pointed front drape. It’s flattering on so many body types. The open floral lace body keeps it lightweight and breathable, while the raised crochet flower motifs and leaf detailing give it real visual interest. And of course, that full handmade fringe along the lower edges adds movement and texture that photographs beautifully.
Materials You’ll Need
Before you start, gather everything so you’re not hunting for supplies mid-project. Here’s what the pattern calls for:
Yarn:
Tools:
Gauge:
18 double crochet stitches x 10 rows = 10 cm square
I always recommend making a gauge swatch before diving in, especially for wearable projects like this. If your gauge is off, your poncho might end up too small or too large. Adjust your hook size up or down as needed until you hit that gauge.
Abbreviations and Stitch Definitions
Let me define every stitch you’ll encounter in this pattern. If you’re newer to crochet or just need a refresher, this section is for you.
ch: chain – The foundational stitch in crochet. You wrap the yarn over your hook and pull it through the loop on your hook. This creates one chain.
sl st: slip stitch – Insert your hook into a stitch, yarn over, and pull through both the stitch and the loop on your hook in one motion. This stitch adds almost no height and is often used for joining.
sc: single crochet – Insert your hook into a stitch, yarn over and pull up a loop (2 loops on hook), yarn over and pull through both loops. This is a short, tight stitch.
hdc: half double crochet – Yarn over, insert hook into stitch, yarn over and pull up a loop (3 loops on hook), yarn over and pull through all 3 loops. This stitch is between single crochet and double crochet in height.
dc: double crochet – Yarn over, insert hook into stitch, yarn over and pull up a loop (3 loops on hook), yarn over and pull through 2 loops (2 loops remain), yarn over and pull through remaining 2 loops. This is a taller stitch that works up quickly.
tr: treble crochet – Yarn over twice, insert hook into stitch, yarn over and pull up a loop (4 loops on hook), then yarn over and pull through 2 loops three times until one loop remains. This is the tallest basic stitch you’ll use here.
sp: space – Refers to a gap or opening in the fabric, usually created by chain stitches.
sk: skip – Pass over the indicated stitch without working into it.
inc: increase – Add stitches to make the fabric wider. The specific increase method will be described in context.
Construction Overview
Understanding how this poncho comes together will help everything make more sense as you work.
The poncho is created as a large triangular lace panel worked from the top center downward. You’ll start with a small ring at the top and increase outward as you go, creating that beautiful V-shaped drape.
Once your lace body is complete, you’ll crochet the floral motifs separately and sew them onto the finished base. This appliqué technique lets you control exactly where each flower and leaf sits.
Finally, you’ll add the fringe along both diagonal edges to finish the piece.
Step 1: Foundation Triangle
This is where your poncho begins. You’ll create a small foundation and start building outward.
1. Ch 5, join with sl st to form a ring.
2. Round 1: Ch 3, work 2 dc, ch 2, 3 dc, ch 2, join.
3. Round 2: Increase at the center point by placing (2 dc, ch 2, 2 dc) into the center chain space.
4. Continue increasing every row at the center point.
The center point increase is what creates the triangular shape. Each time you work into that center chain space with the (2 dc, ch 2, 2 dc) cluster, you’re adding width to both sides of your triangle evenly.
Step 2: Lace Body Pattern
Now you’ll establish the beautiful open lace texture. This section uses a repeating pattern of rows.
Row 1: Ch 3, dc across, placing 2 dc in each side edge and (2 dc, ch 2, 2 dc) in center point.
Row 2: Ch 4, skip 2 stitches, dc into next stitch, repeat shell spacing across.
Row 3: Work floral lace arches using (dc, ch 2, dc) clusters.
Row 4: Add open diamond spaces while maintaining center increases.
Continue repeating these rows until the poncho reaches your desired shoulder width and length. The pattern is adjustable, so if you want more coverage or a longer drape, simply add more rows.
A helpful tip here: use stitch markers to mark your center point. It’s easy to lose track of where it is, especially as your piece grows larger. A marker saves you from having to count every single row.
Step 3: Floral Motifs
These raised flowers are what give this poncho its name and visual impact. You’ll make them separately and attach them later.
Large Flower:
1. Make a magic ring. (If you’re not familiar with the magic ring, it’s an adjustable starting loop that you can pull tight to close the center hole completely.)
2. Round 1: 12 sc into ring.
3. Round 2: Create petals with repeated (hdc, dc, tr, dc, hdc) groups.
4. Round 3: Add an ivory edging around each petal.
5. Stitch a yellow center.
Make 7 to 9 flowers depending on your placement preference. I’d suggest making 7 first, laying them out on your poncho body, and then deciding if you want to add more.
Step 4: Leaf Motifs
The leaves add that botanical detail that makes the flowers look intentional and designed rather than just stuck on.
1. Ch 10.
2. Work sc, hdc, dc, tr, dc, hdc, sc along the chain.
3. Add a second row for a raised leaf vein.
4. Attach leaves beside flowers.
The leaf shape naturally forms as you work taller stitches in the middle and shorter stitches at the ends. It’s a quick little motif that makes a big visual difference.
Step 5: Assembly
This is where your poncho really comes to life.
Arrange your flowers diagonally from one shoulder toward the lower point. Lay everything out before you start sewing so you can see how the placement looks. Take a photo with your phone if it helps you remember where everything goes.
Sew motifs securely using matching yarn. I recommend using your yarn needle and weaving through several stitches on both the motif and the poncho body to make sure nothing shifts or comes loose with wear.
Hide all yarn ends inside stitches. Nobody wants to see loose tails peeking out from their beautiful flowers.
Step 6: Fringe Border
The fringe is the finishing touch that gives this poncho movement and that boho feel.
Cut lime yarn strands approximately 25 cm long. You’ll need quite a few, so I recommend cutting a big batch at once. Wrapping yarn around a book or piece of cardboard that’s about 12.5 cm wide makes this faster.
Attach fringe evenly along both diagonal edges. To attach each fringe, fold a strand in half, insert your hook through the edge stitch, pull the folded loop through, then pull the cut ends through the loop and tighten.
Trim ends evenly once all fringe is attached. Lay your poncho flat and use sharp scissors to even everything out.
Optional: Add small ivory knots to fringe tips for extra detail.
Finishing Your Poncho
Almost done! These final steps make a real difference in how professional your finished piece looks.
Block the poncho gently to open the lace pattern. Blocking relaxes the stitches and lets the lace design show properly. For cotton blend yarn, wet blocking works well. Soak the poncho in cool water, gently squeeze out excess water (don’t wring), and lay flat on a blocking mat or clean towels. Pin into shape and let dry completely.
Steam lightly if needed after blocking. This can help smooth out any stubborn areas.
Check all joins and reinforce flower attachments. Give each flower a gentle tug to make sure it’s secure. It’s much easier to fix a loose attachment now than after you’ve worn it a few times.
Care Instructions
Taking good care of your handmade poncho will keep it looking beautiful for years.
Pattern Notes and Tips
This pattern is designed to be adjustable. Here are some ways you can customize it:
For a longer poncho, increase the number of lace rows before you stop working the body. Just keep that center increase consistent.
For a fuller botanical design, add additional floral motifs. You could cluster more flowers together or scatter smaller ones around the existing clusters.
If you want to size up, continue working the lace body until you reach the width and length you need. The triangular construction naturally accommodates this.
Color variations are another fun way to make this pattern your own. While the lime green is stunning and fresh, you could easily substitute any main color that speaks to you. Imagine this in dusty rose with cream flowers, or navy with white accents.
Why This Poncho Works So Well
There’s something about the combination of open lace, dimensional flowers, and flowing fringe that just works. Each element complements the others without competing for attention.
The lace body keeps the poncho lightweight and breathable, perfect for transitional seasons. The flowers add texture and visual interest without adding bulk. And the fringe gives movement that catches the eye and makes the whole piece feel alive.
It’s the kind of project that looks impressive but is actually very achievable once you break it down into steps. Work the triangle, make the flowers, attach everything, add fringe. One thing at a time.
Final Thoughts on This Crochet Tutorial
I hope this step by step breakdown has made the Lime Floral Fringe Poncho feel approachable and exciting rather than overwhelming. It’s truly a beautiful piece to create and wear.
If you’re newer to lace work or floral motifs, this is a wonderful project to practice those skills because you get to see how they all come together into something wearable and gorgeous. And if you’re already comfortable with these techniques, you’ll probably fly through this pattern and love every minute of it.
Thank you so much for choosing this pattern. I genuinely love hearing when someone brings one of these designs to life.
If you make this poncho, I would absolutely love to see it! Tag me on Instagram or share a photo in my Facebook group. Seeing your finished projects honestly makes my whole day.
If you loved this Lime Floral Fringe Poncho crochet pattern, don’t forget to save it to your Pinterest boards so you can find it easily when you’re ready to start. And please drop a comment below if you make one. I’d love to hear how it turns out and see which colors you choose!
Want a Quick & Easy Printable Version?
Get a clean, beautifully formatted PDF of this pattern — easy to follow step by step, ready to print or save on any device. No scrolling, no distractions, just the pattern.
Get the Printable PDF →